Using the dashboard wizard to set up your first Simplified Checkout instance
In this guide, we'll go through the setup of your first custom checkout instance in Simplified Checkout.
We'll start with the setup wizard to help you understand the process. After your first checkout is live, this widget will no longer be needed and removed from your dashboard.
You must have your CRM (Sticky.io** or Vrio or CheckoutChamp) ready and set up**. Please visit Sticky.io or Vrio to acquire an account if you haven't done so already.
If you need help with setting up your CRM, please follow these guides:
Once ready, you can proceed with the setup wizard in Simplified Checkout.
New User Dashboard
You'll be presented with the following dashboard the first time you log into Simplified Checkout.

Click Get Started under the Launching Your First Instance dashboard widget.
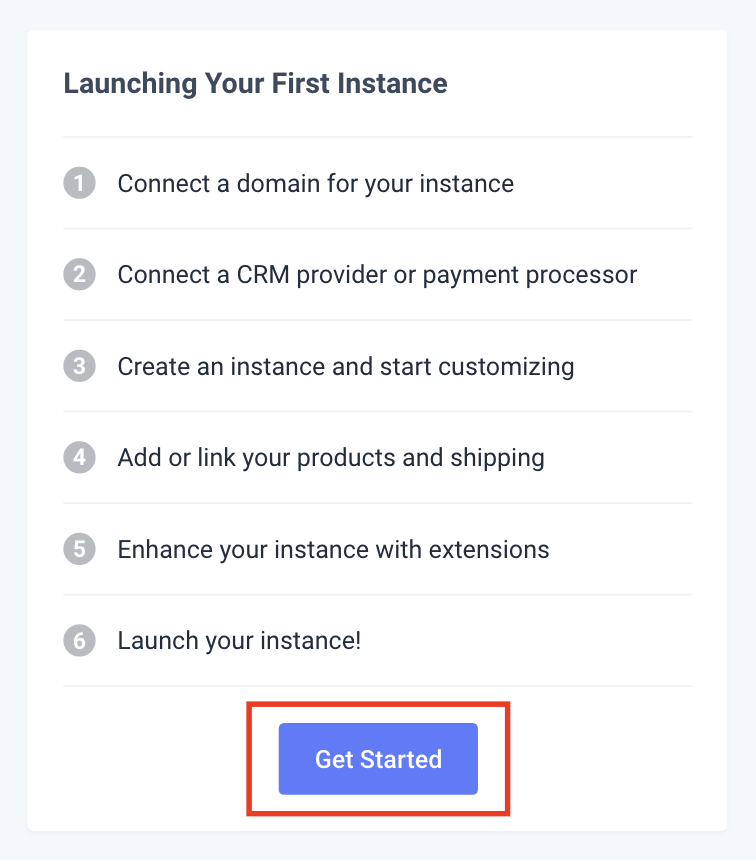
Starting the Step-By-Step Wizard
The wizard is split into three sections leading to the main instance settings and customization area.
-
Connecting your domain
-
Integrating your CRM provider or payment processor
-
Configuring your instance with Sh*pify

Step 1: Domain
Enter the domain you want to use for your instance in the Domain Name field.
You must enter a domain that is not currently in use.
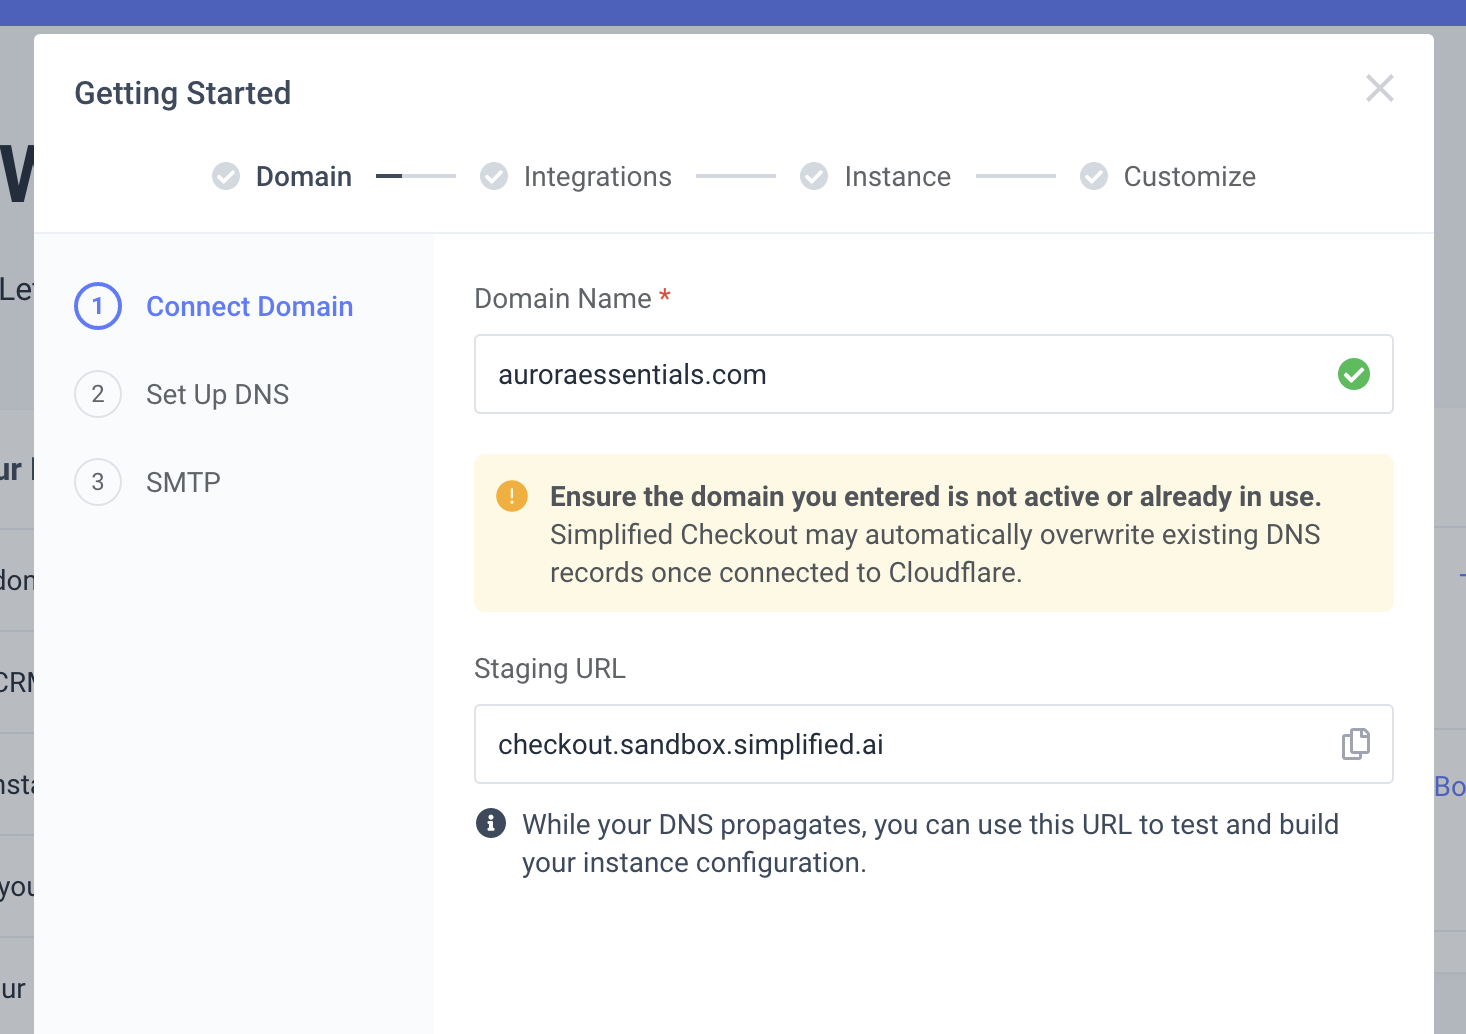
A staging URL will be automatically generated for you to test your instance with while your DNS propagates (if you choose to do so).
Additional domains can be added from System > Domains
In this important step, you'll need to configure your DNS so Simplified Checkout can connect with your domain and deploy your checkout.
-
Cloudflare (Recommended): We will automatically configure your DNS with Cloudflare (unless the "Do Not Update DNS Records" option is checked)
-
Manual: You'll need to add the following DNS record in your preferred DNS provider (Namecheap, Google Cloud DNS, AWS Cloudfront, etc.)
Type: CNAME
Value: sandbox-lb-917002419.us-east-1.elb.amazonaws.com
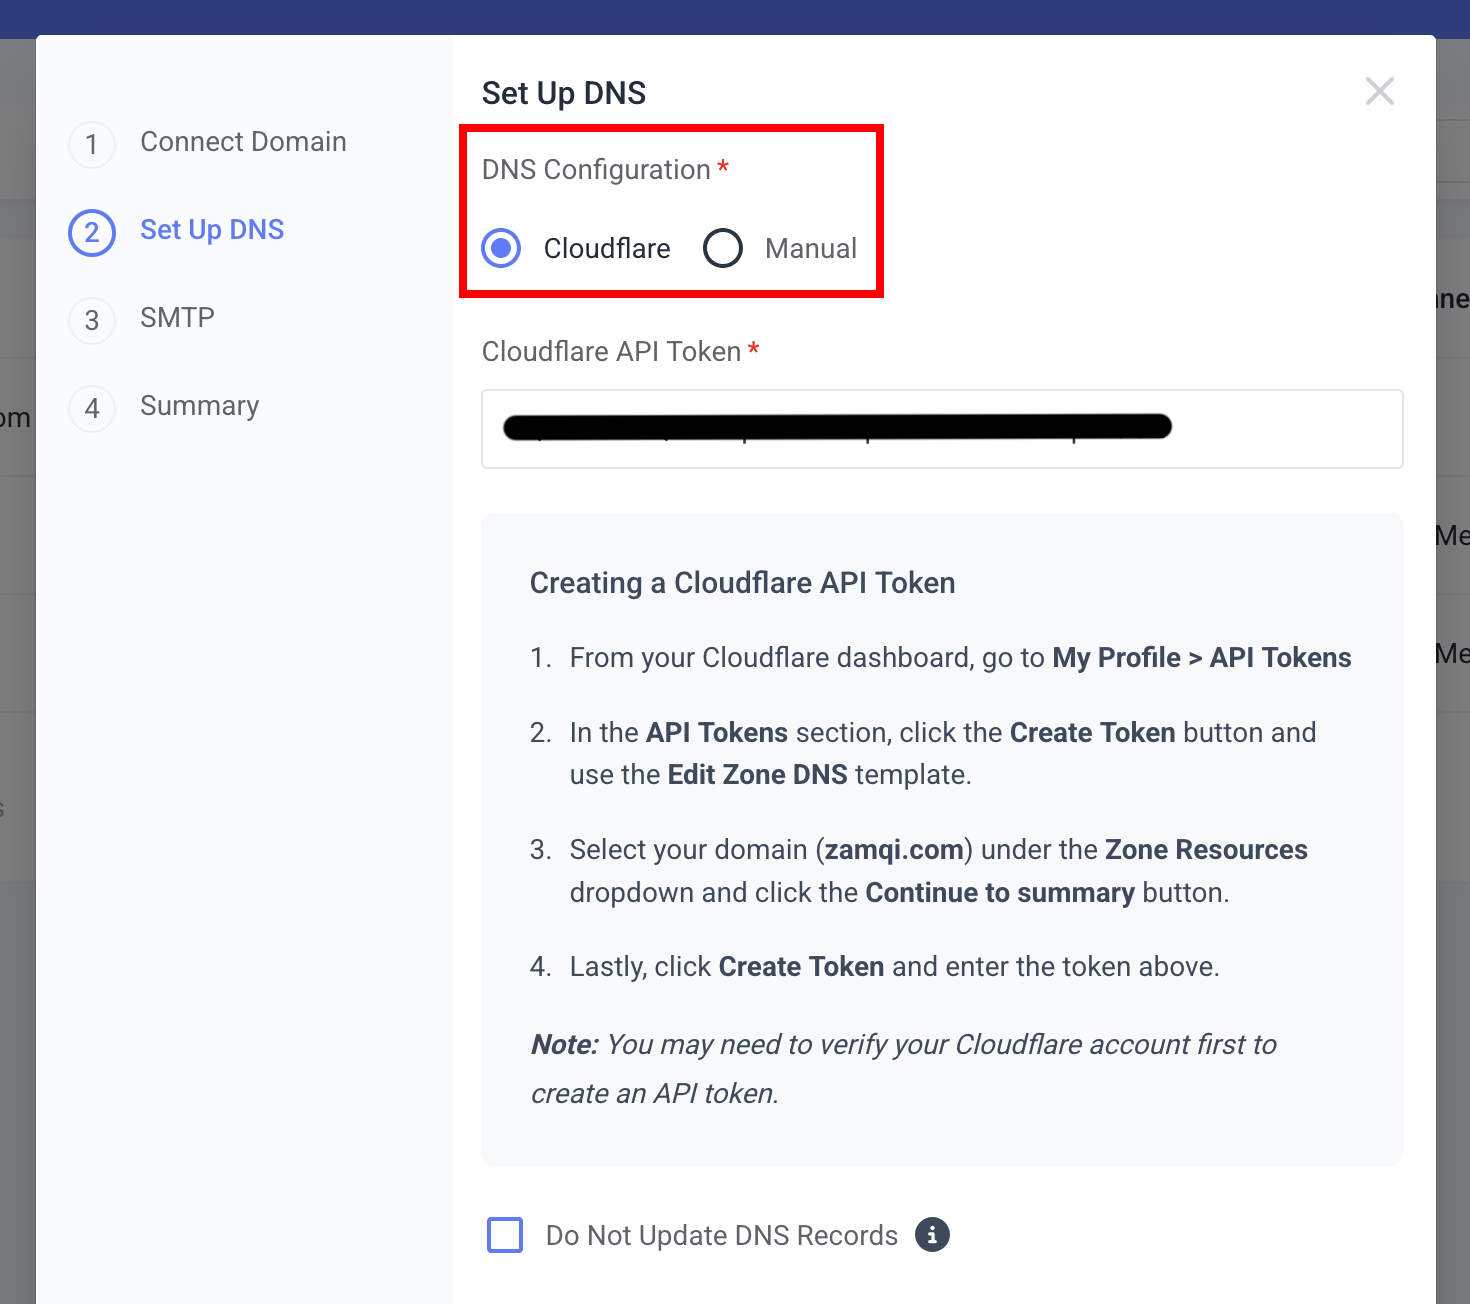
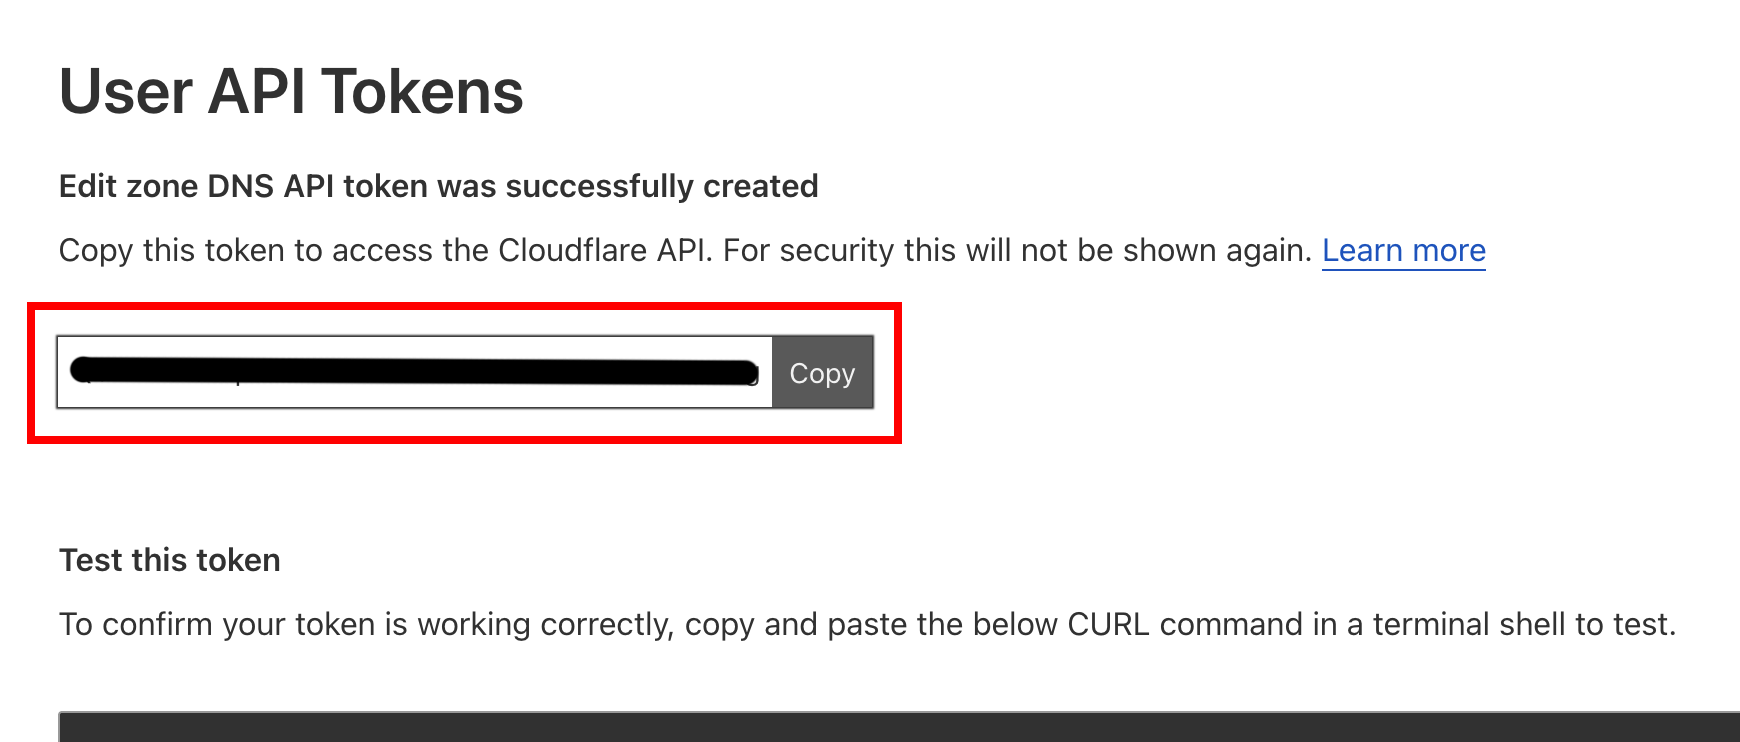
If you've chosen Cloudflare, you'll need to add your Cloudflare API Token.
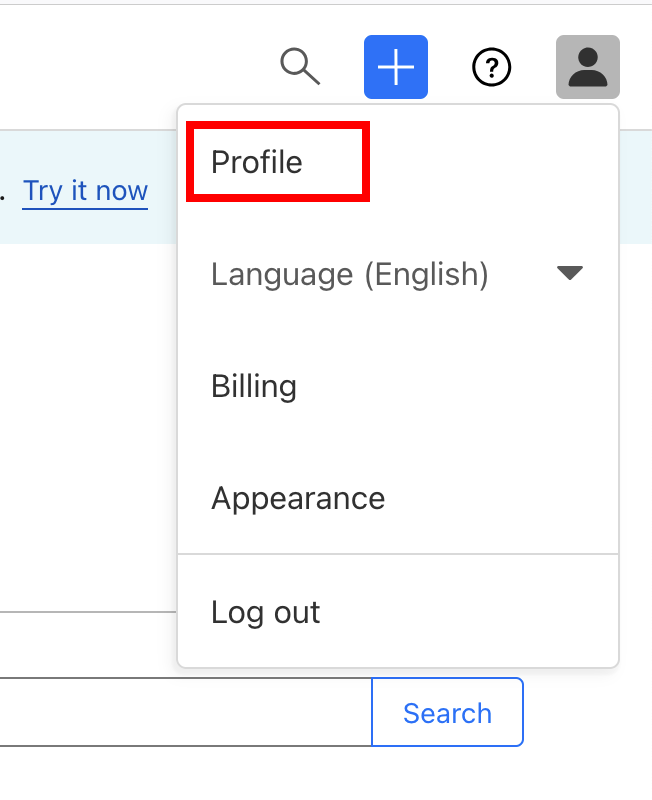
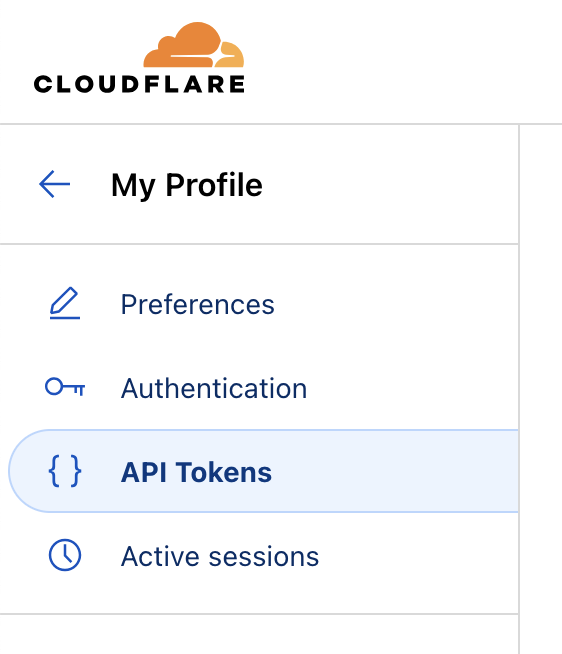
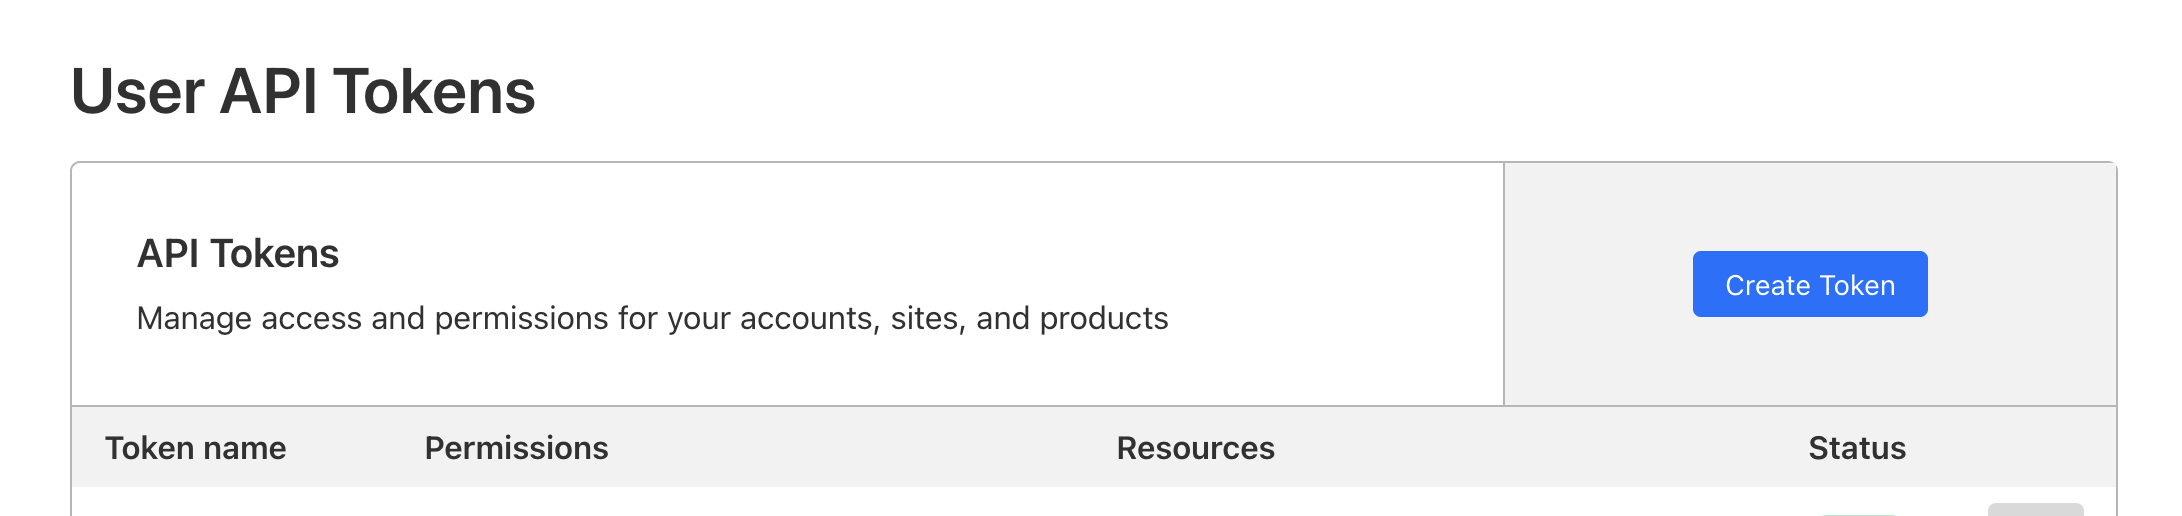
You can find/create an API Token from Cloudflare by going to My Profile > API Tokens.
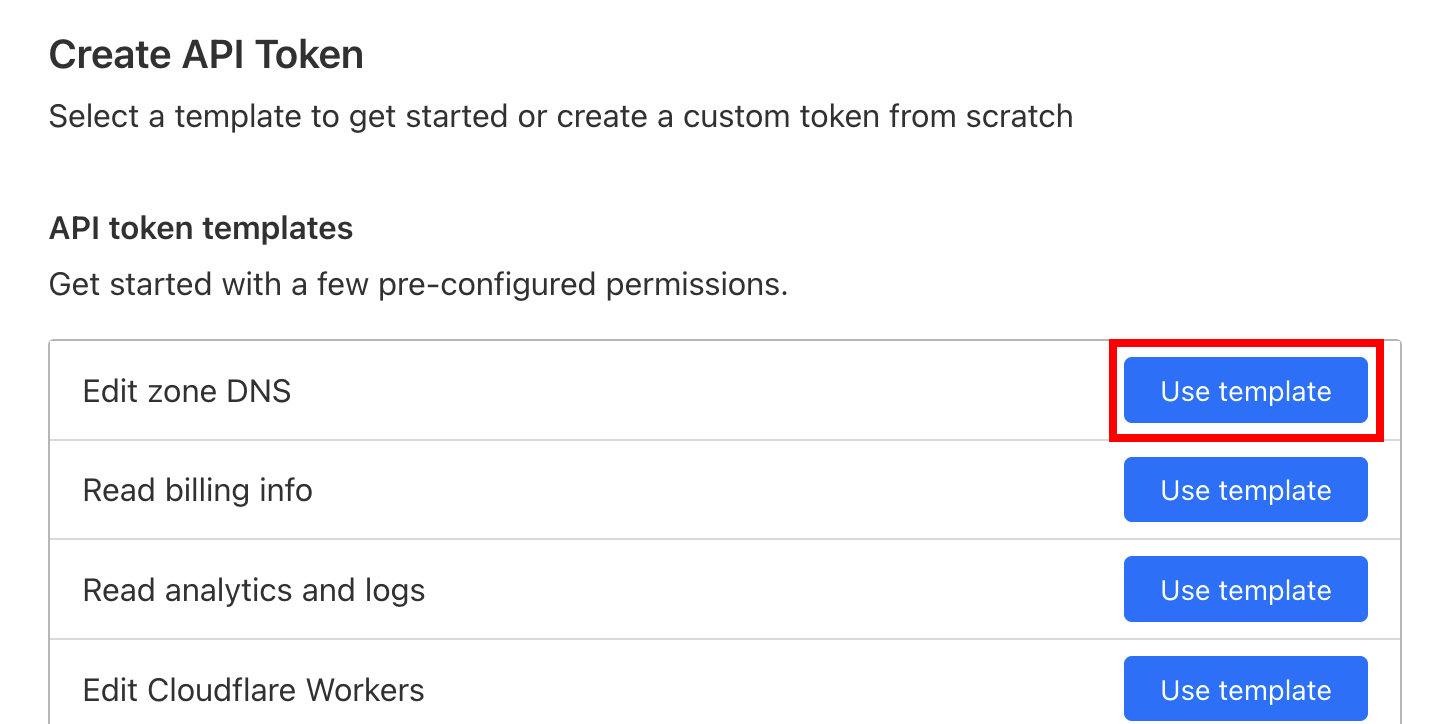
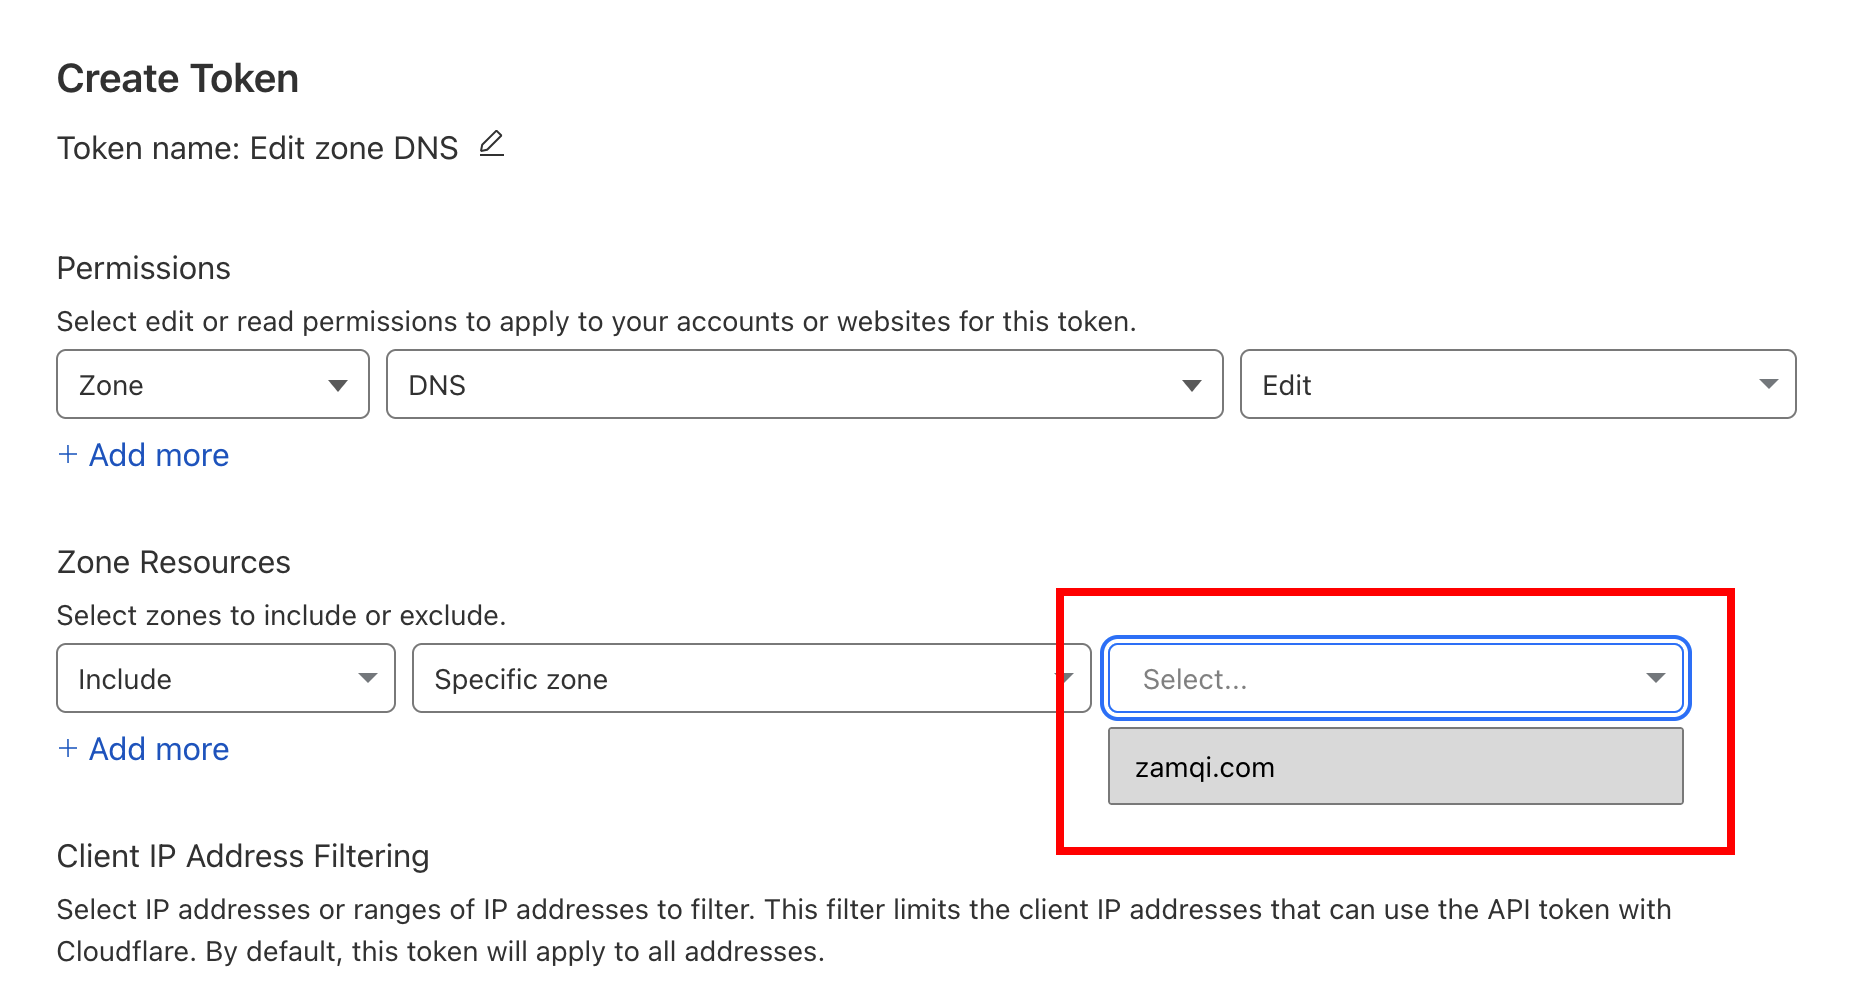
Click Create Token and use the Edit Zone DNS template.
Under Zone Resources select the domain you're connecting with Simplified Checkout. Then click the Continue to summary button.
Click Create Token and copy your API Token into Simplified Checkout.
Now you've added your API Token, you have the option to check Do Not Update DNS Records if you do not want our system to automatically point your domain's DNS to our servers.
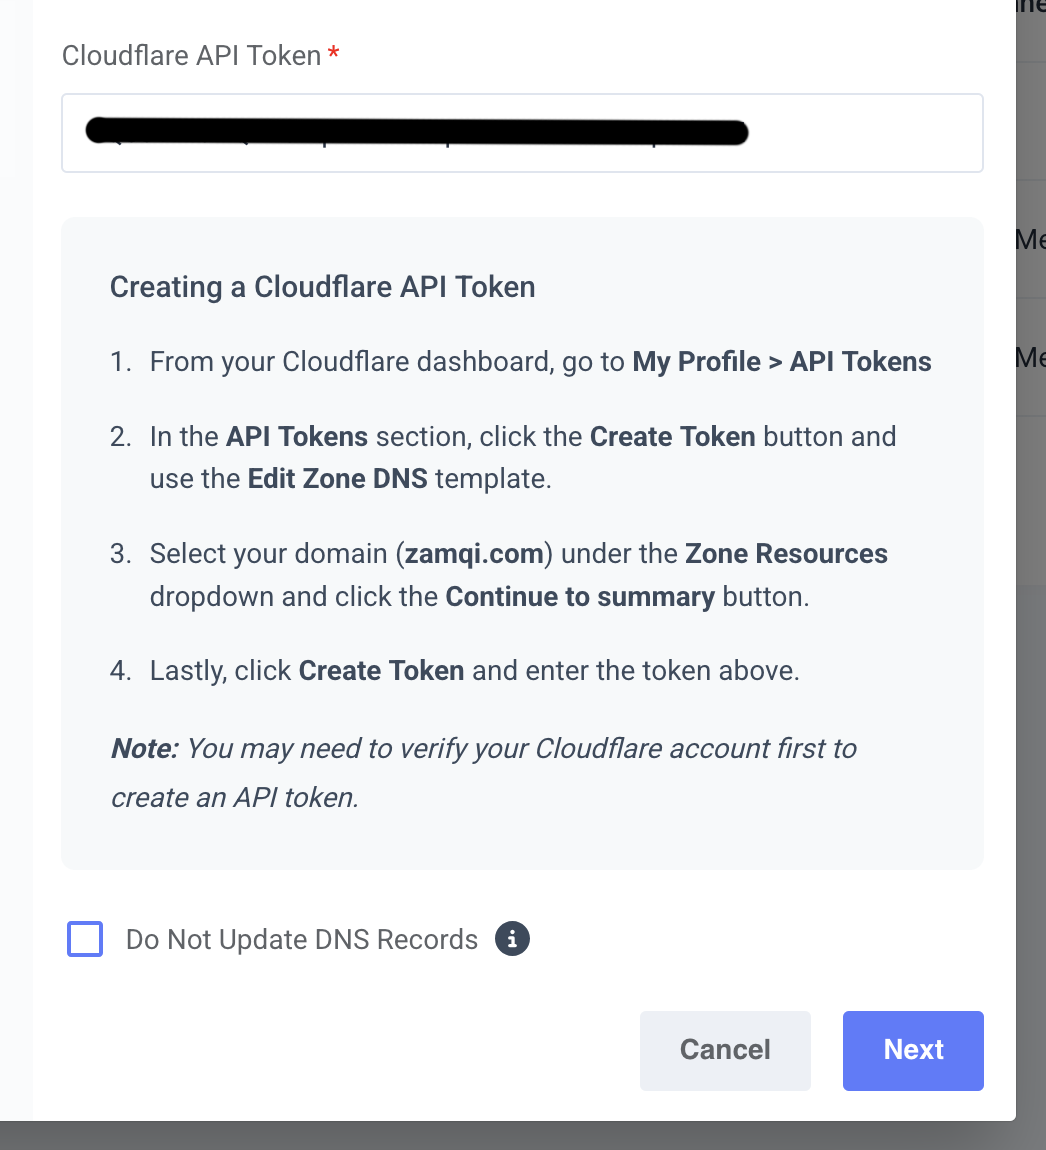
When you're ready to launch your checkout, uncheck this to proceed with DNS pointing or manually add the record yourself.
If you're having trouble adding a domain to Cloudflare, please follow this guide.
Next, you can choose whether you want to use our built-in SMTP or your own. By default, we activate our built-in SMTP.
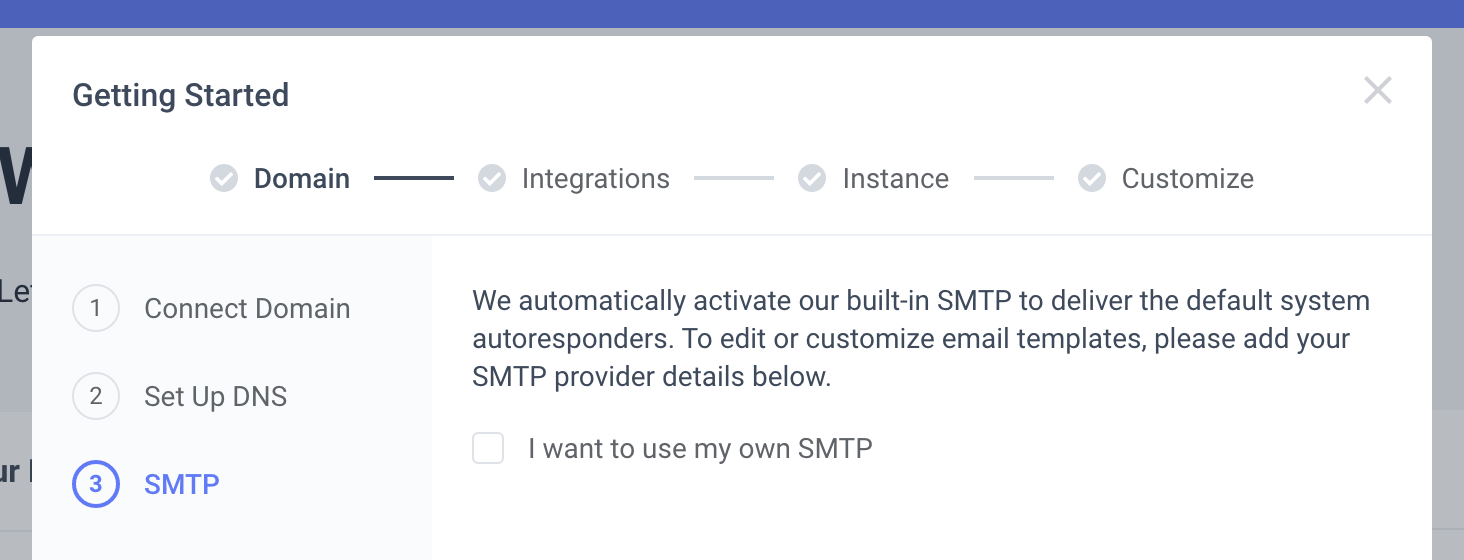
You’ll need to set up your own SMTP to use custom autoresponders in Simplified Checkout, rather than CRM autoresponders.
Click Continue to Integrations once you're done.
Step 2: Integrations
Select the main integration you want to connect with your first checkout.
Additional integrations can be added from System > Integrations.
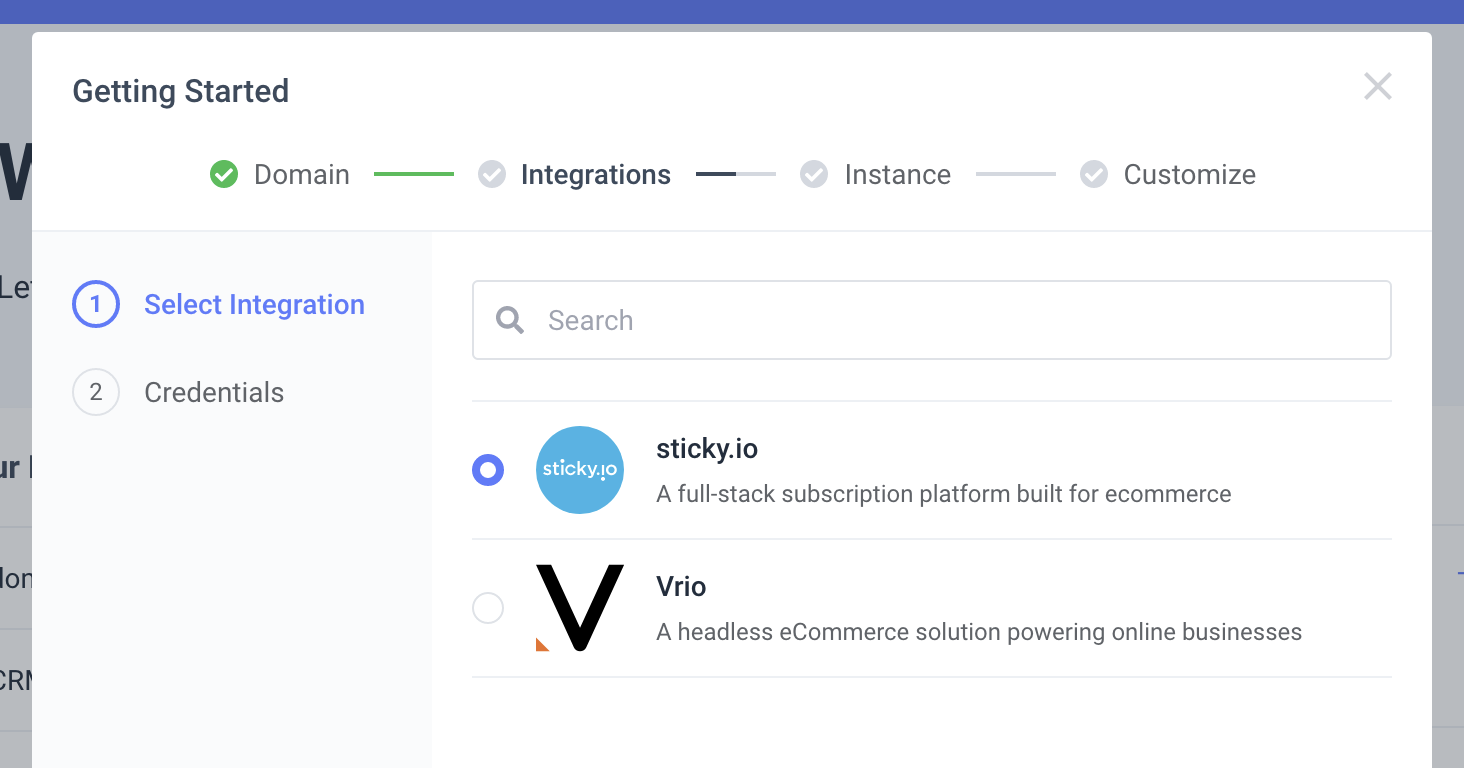
Integrations require an account with the chosen provider. Please visit Sticky.io or Vrio or CheckoutChamp to acquire an account if you haven't done so already.

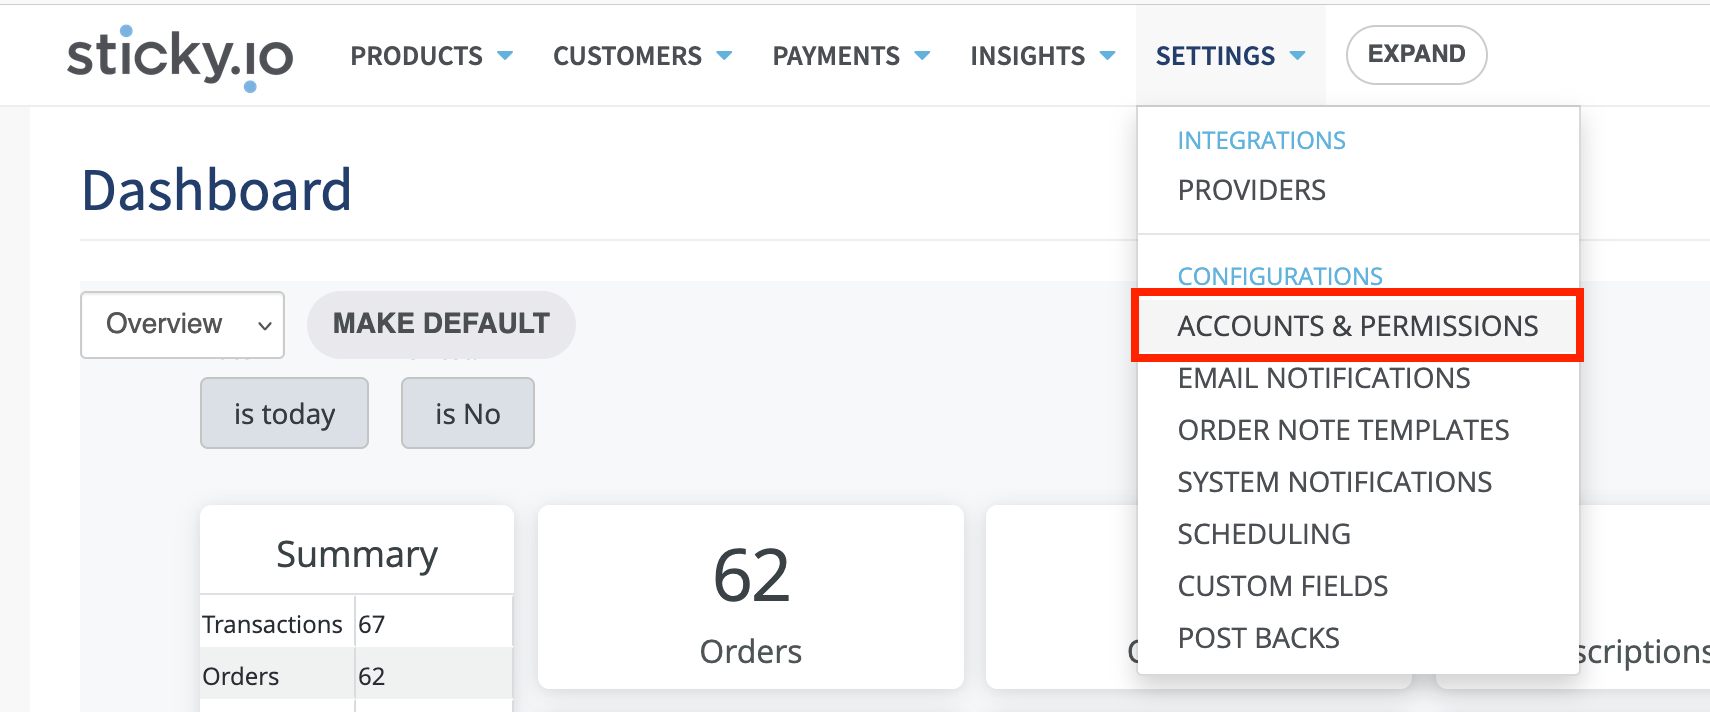
To get your Sticky.io API credentials, go to Settings > Accounts & Permissions from your Sticky.io dashboard.
Then click on the API Accounts tab, and under Action select Add API User. Once you fill out the form and save it.
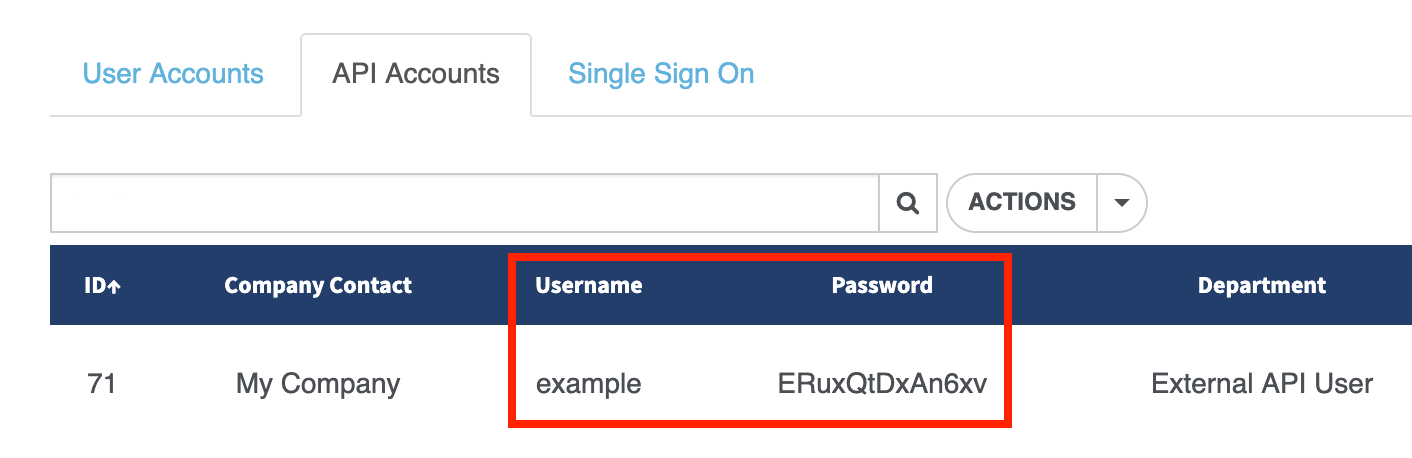
Copy and paste your API Username and Password into Simplified Checkout.
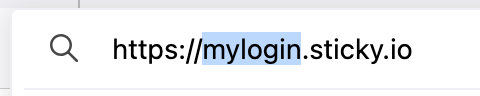
The API Endpoint is your login Sticky.io account login URL.
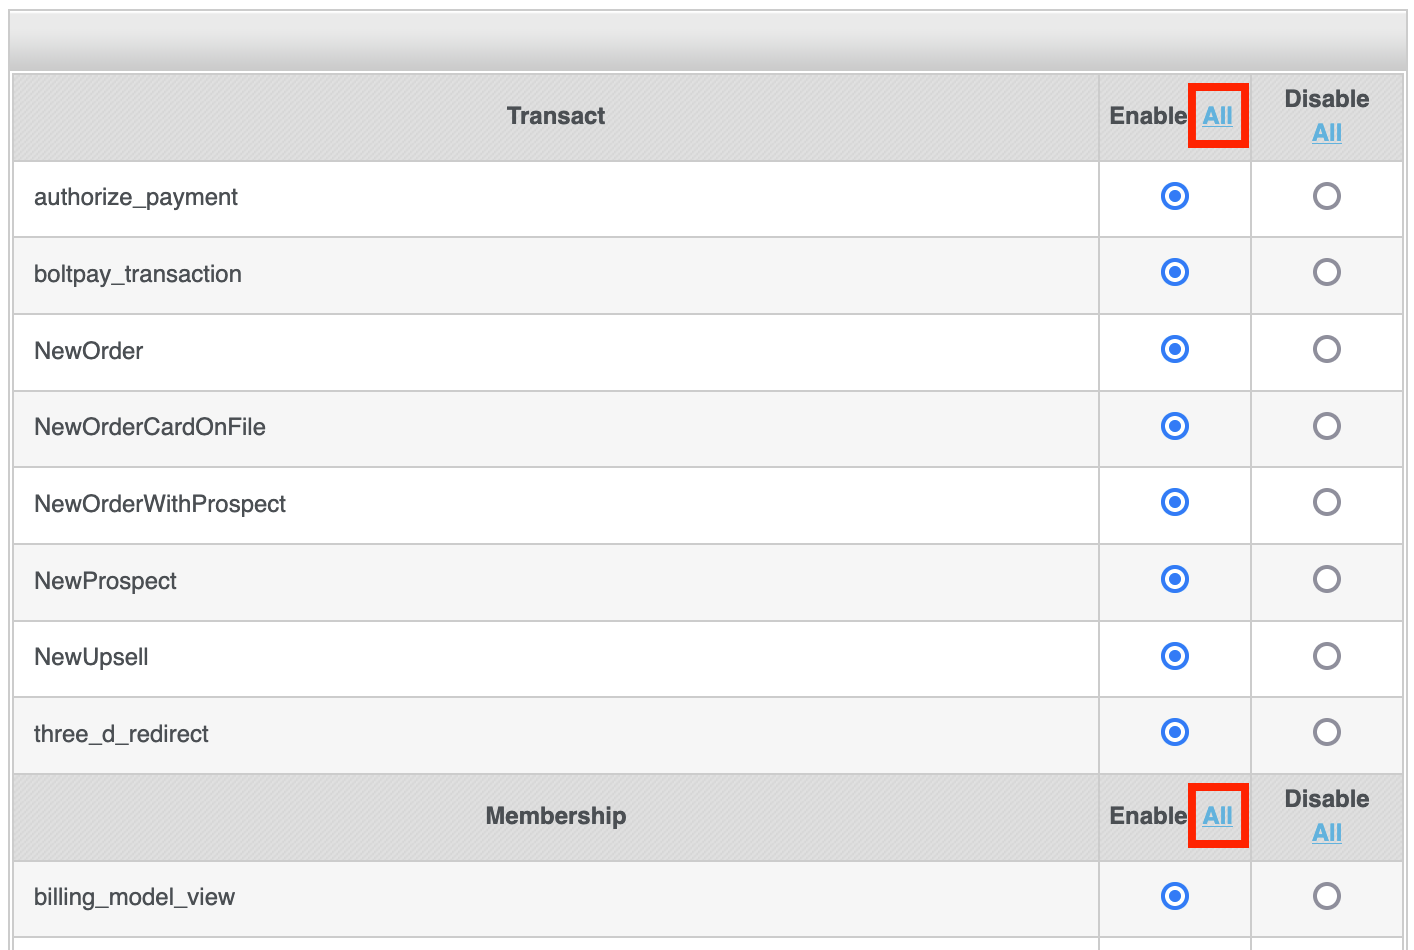
To ensure Simplified Checkout has proper access to Sticky.io, click the Permissions icon.
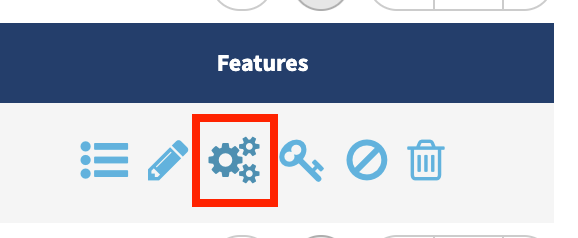
Then select Enable All permissions in each section.
Now you can go back to Simplified Checkout and click Next.
Integrating with Vrio

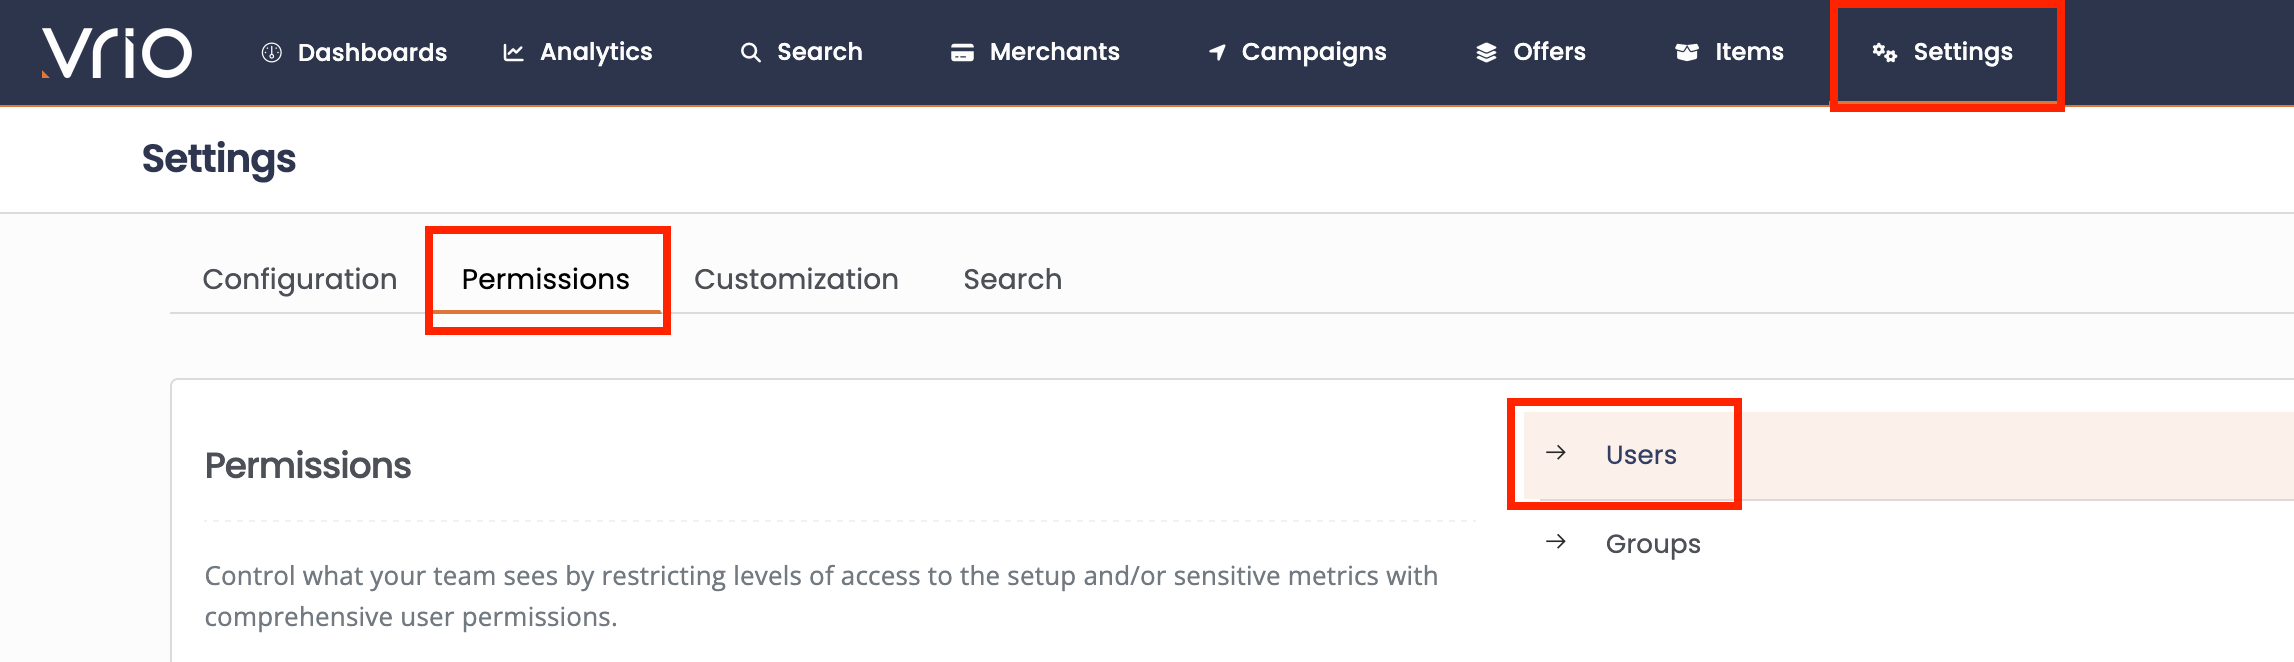
To get your Vrio API credentials, go to Settings from your Vrio dashboard, then click on Permissions > Users.
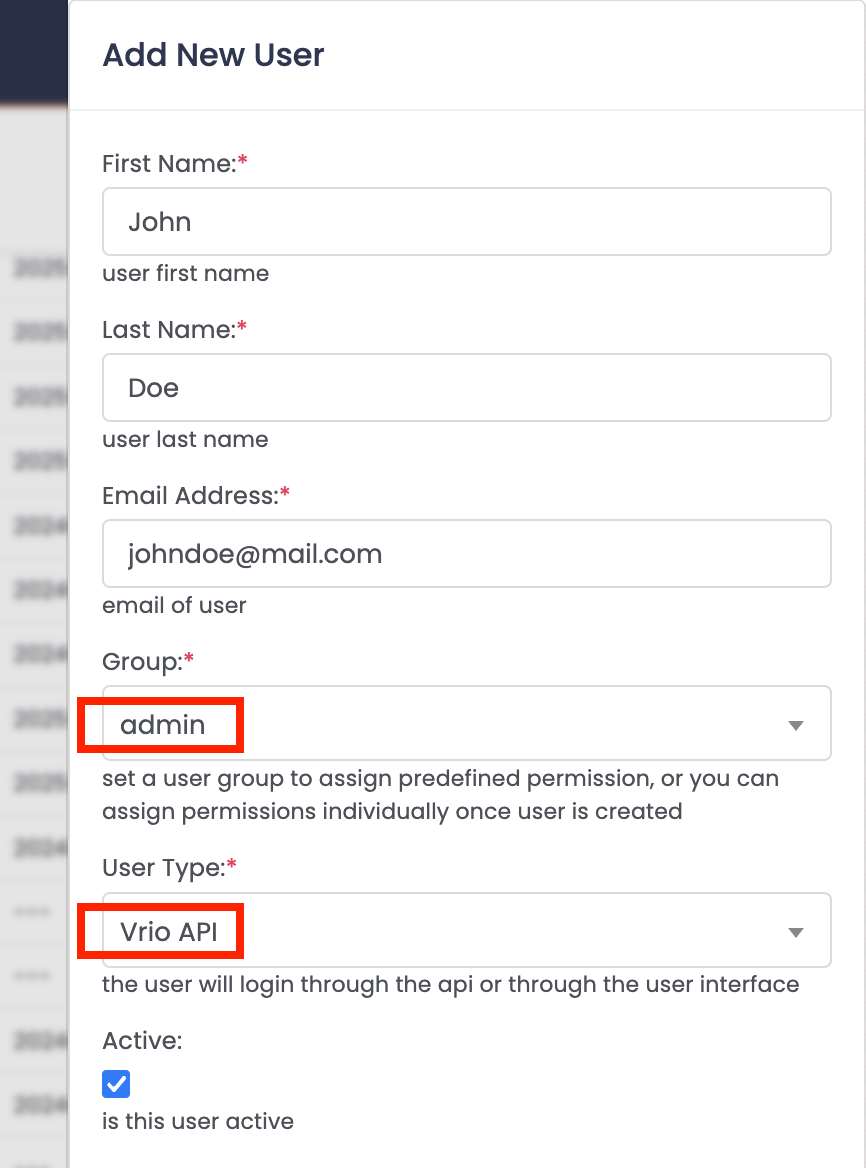
From the top right corner, click Add User and fill out the form.
In the "Group" field make sure to select Admin.
In the "User Type" field select Vrio API.
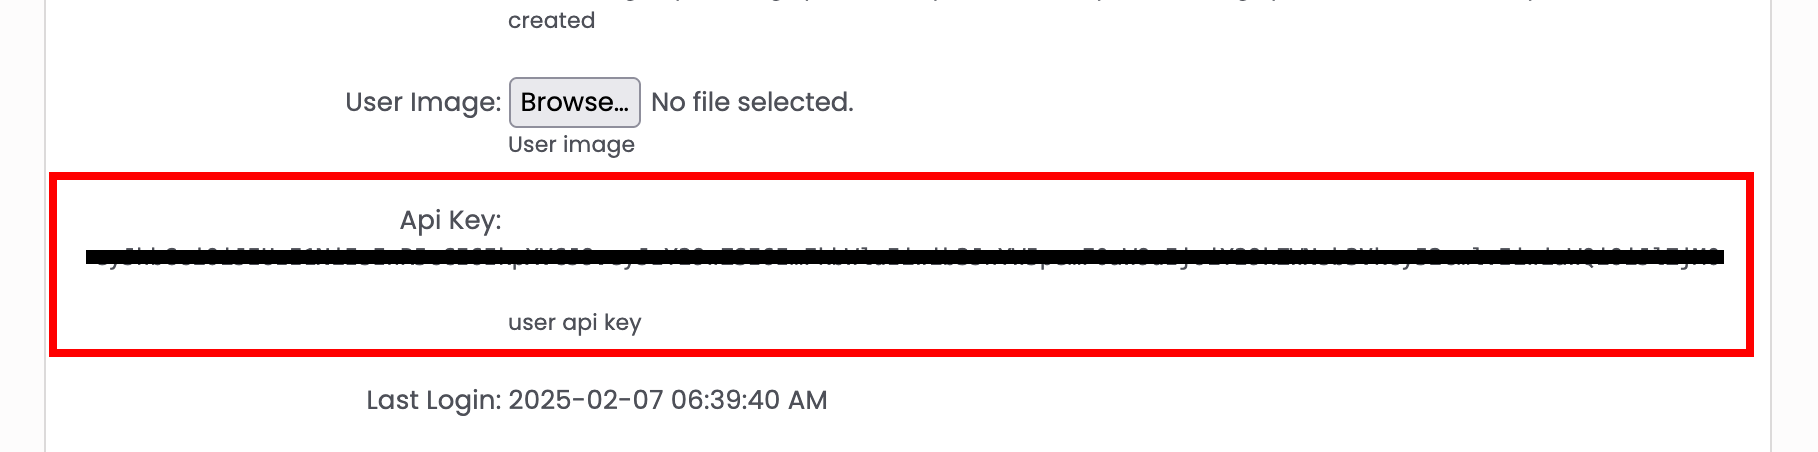
Once you're done, click Submit and select your newly created user from the list.

Double-click to select and copy the long API Key into Simplified Checkout.
Your Connection ID should be set to 1.
If you want to see your Connection ID in Vrio, go to Settings > Configuration

Scroll down to the bottom and click View All.
From the Simplified Checkout wizard, click Next to continue to the next section.
Integrating with CheckoutChamp:

To get your CheckoutChamp API credentials, go to Admin > Users from your CheckoutChamp dashboard.

Then click on the Add Users button

Then the user needs to fill the form and enable Select All under Allowed API Endpoints. Also the user has to select the Access Level as Api User and note the credentials added in the form for further use.

Once the user has created the account. Then the user needs to wait until the duration displayed in the CRM, for the changes to take effect.
Then the User can fill in the credentials in the Integration pop-up and continue with the same.
Step 3: Instance
Next, select the Instance Type. Currently, only Standard Checkout is available.
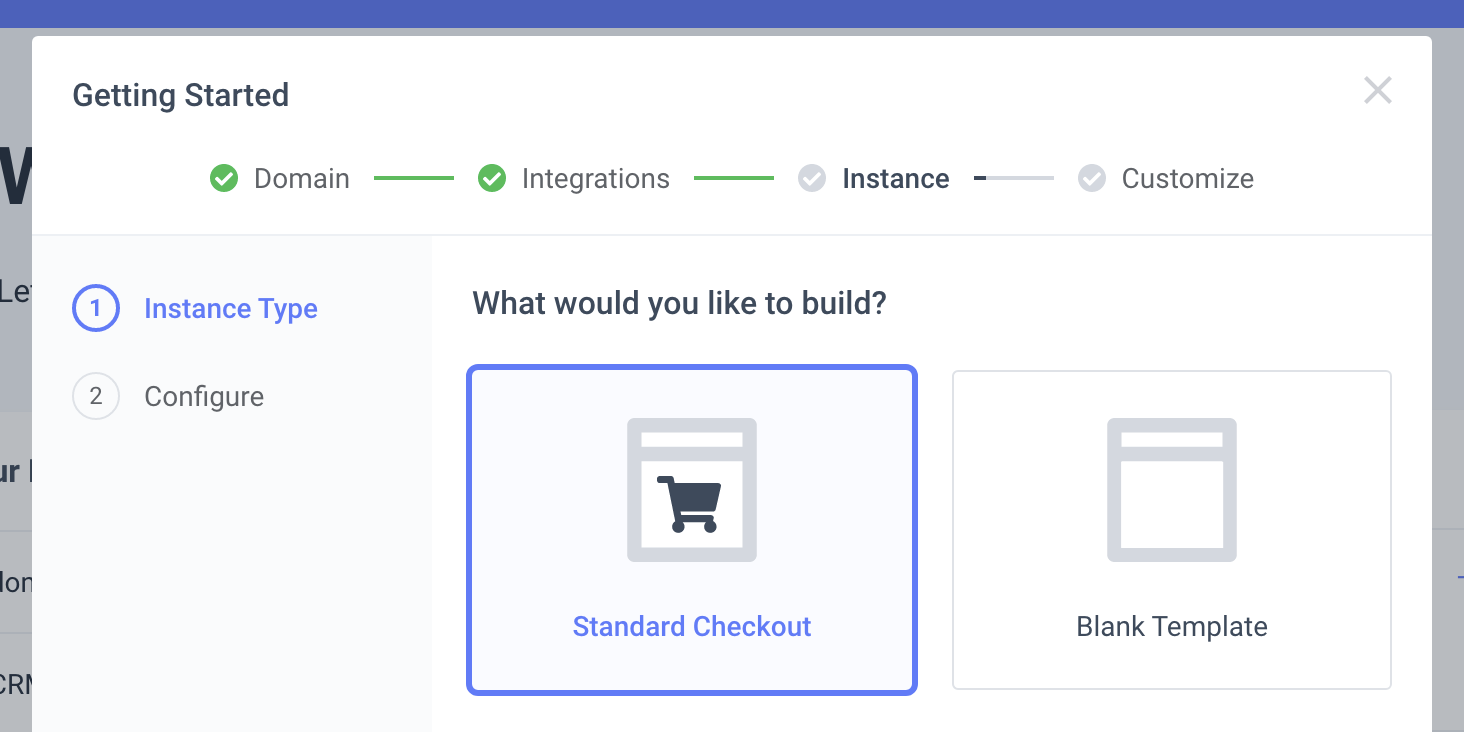
If you want early access to our upcoming features, sign up from our website
On the next page, select your Traffic Source. This is the platform your customers will start from before checking out via Simplified Checkout.
You also have the option to send processed orders to an external order fulfillment platform. (Coming soon!)
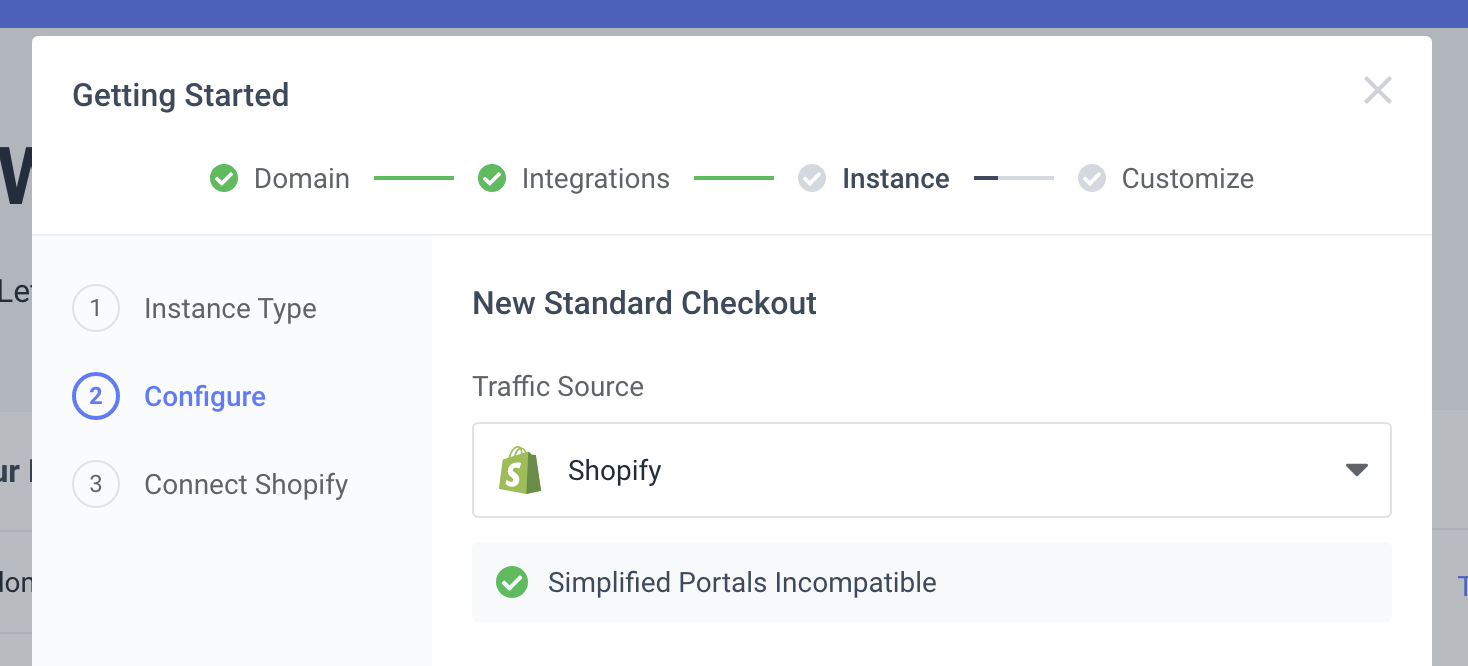
Simplified Checkout currently supports Sh*pify stores only. We will be adding support for WooCommerce, BigCommerce, and very soon!
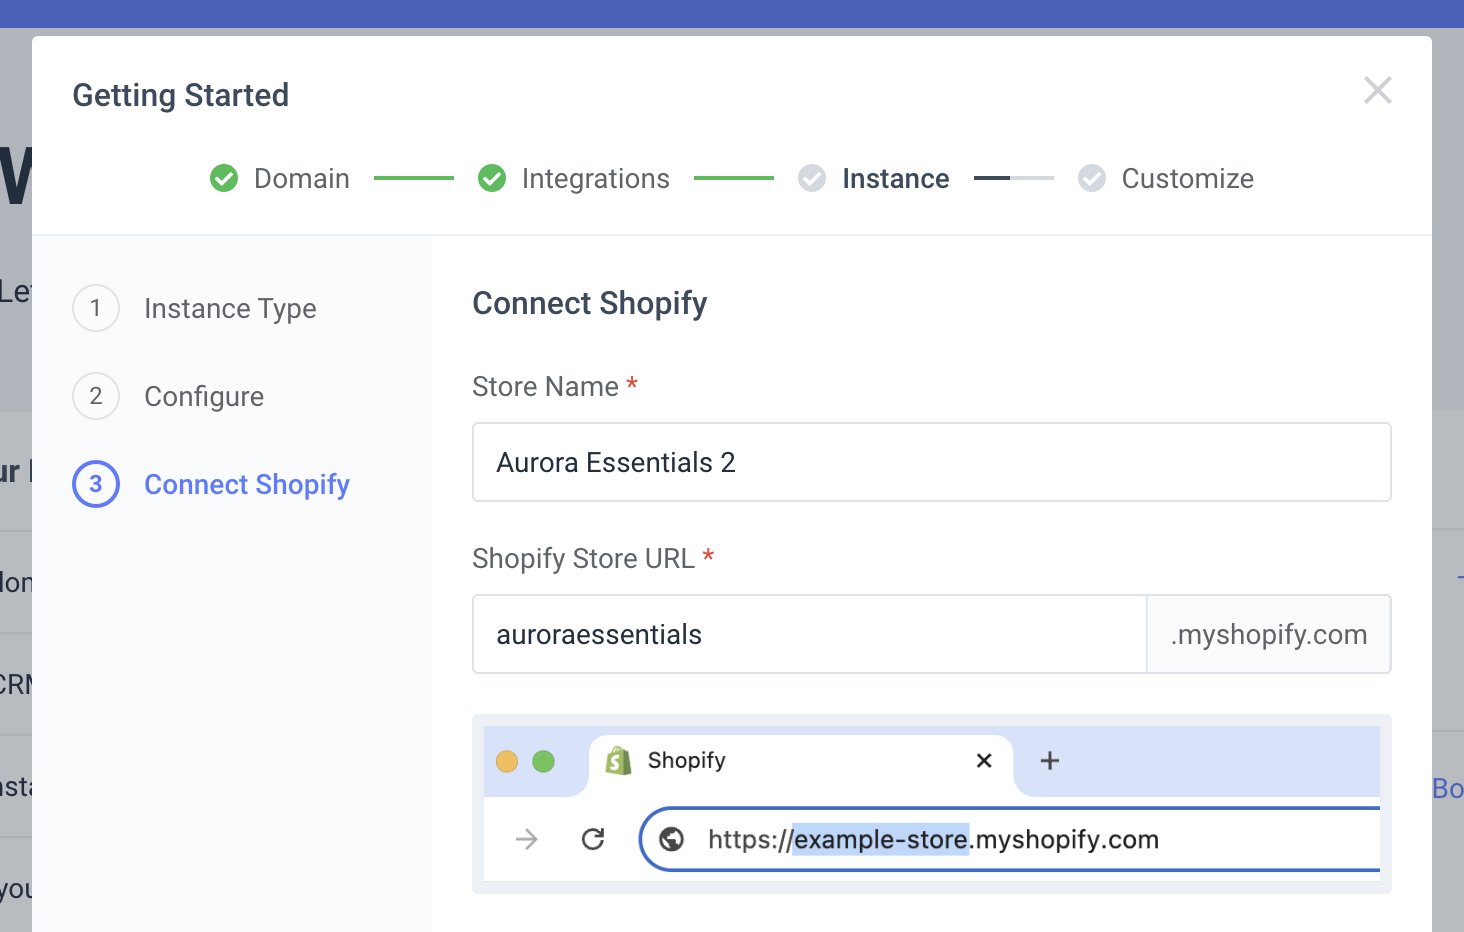
Connecting Your Ecommerce Store
Enter your Sh*pify Store Name and Store URL.
If you have changed your Sh*pify store URL, please enter the default URL from when you first created your store!
You can find this under Settings > Domains in your Sh*pify admin.
For Inventory Management choose how you want to handle Sh*pify's inventory policies.
-
Bypass: Does not update inventory
-
Decrement Ignoring Policy: Updates the stock in Shopify, and ignore the product settings.
-
Decrement Obeying Policy: Update the stock in Shopify, only when the product settings permit.
For Price Management choose whether to follow your store or CRM pricing.

Creating a custom app
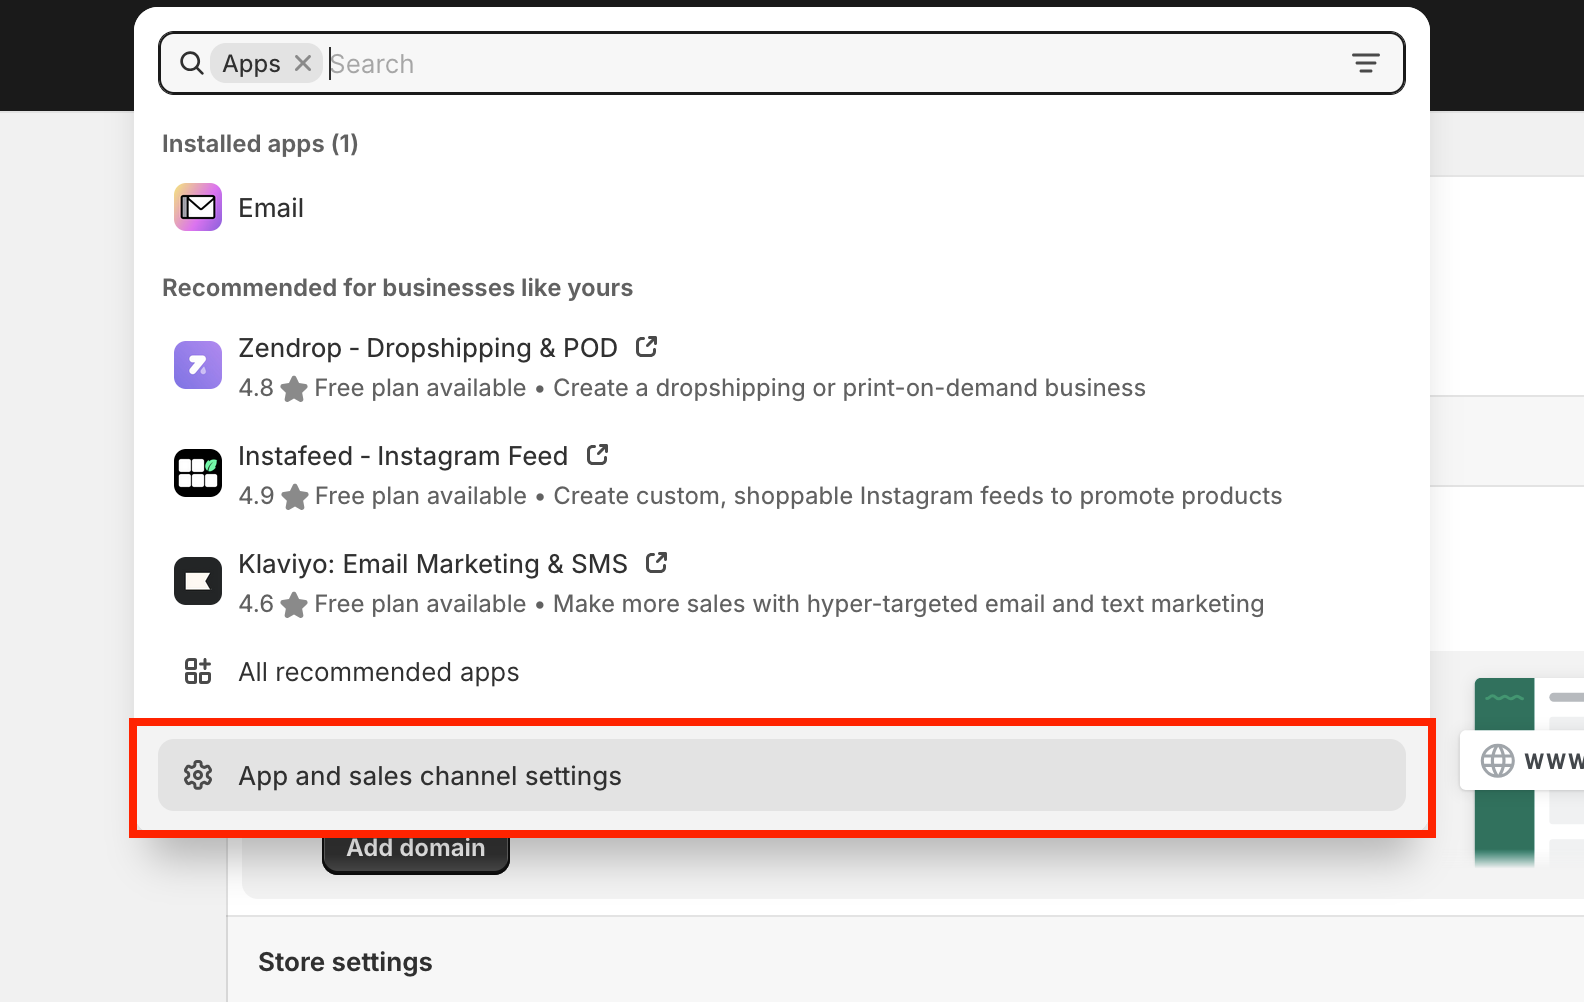
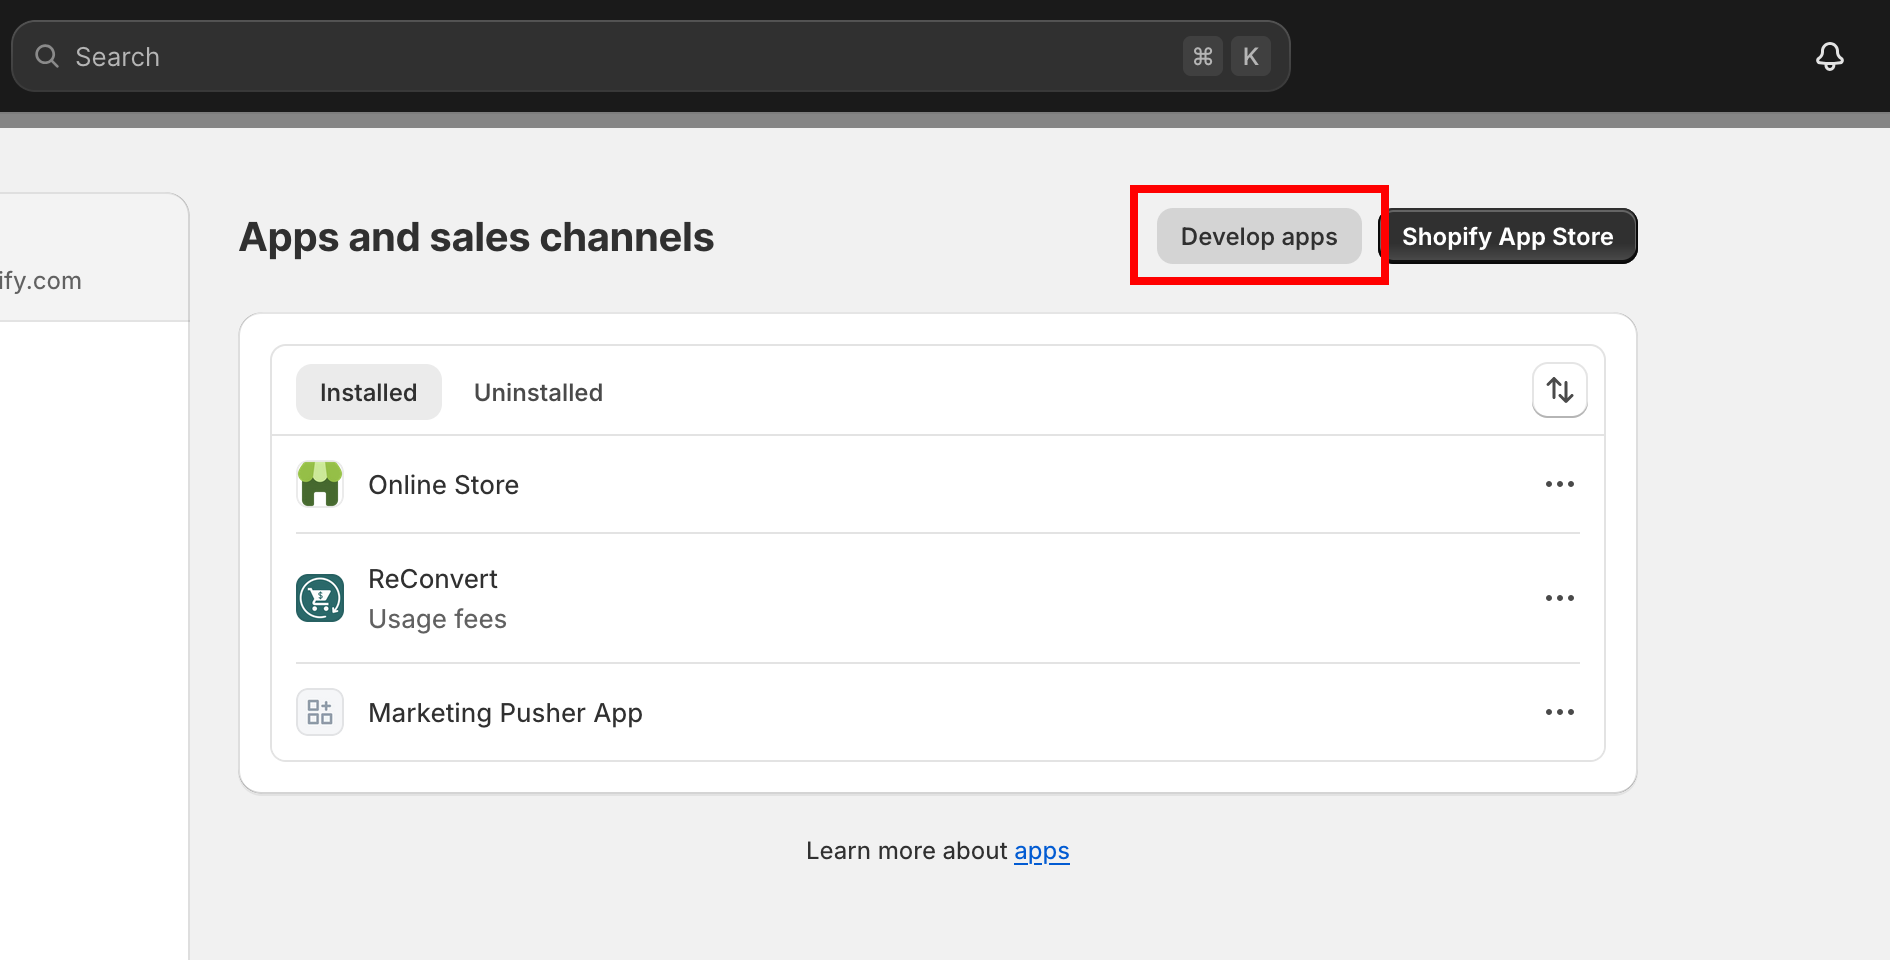
To connect Simplified Checkout with your Sh*pify store, you'll need to create a custom app.
Starting from your Sh*pify Admin dashboard, navigate to Apps > App and sales channel settings > Develop apps
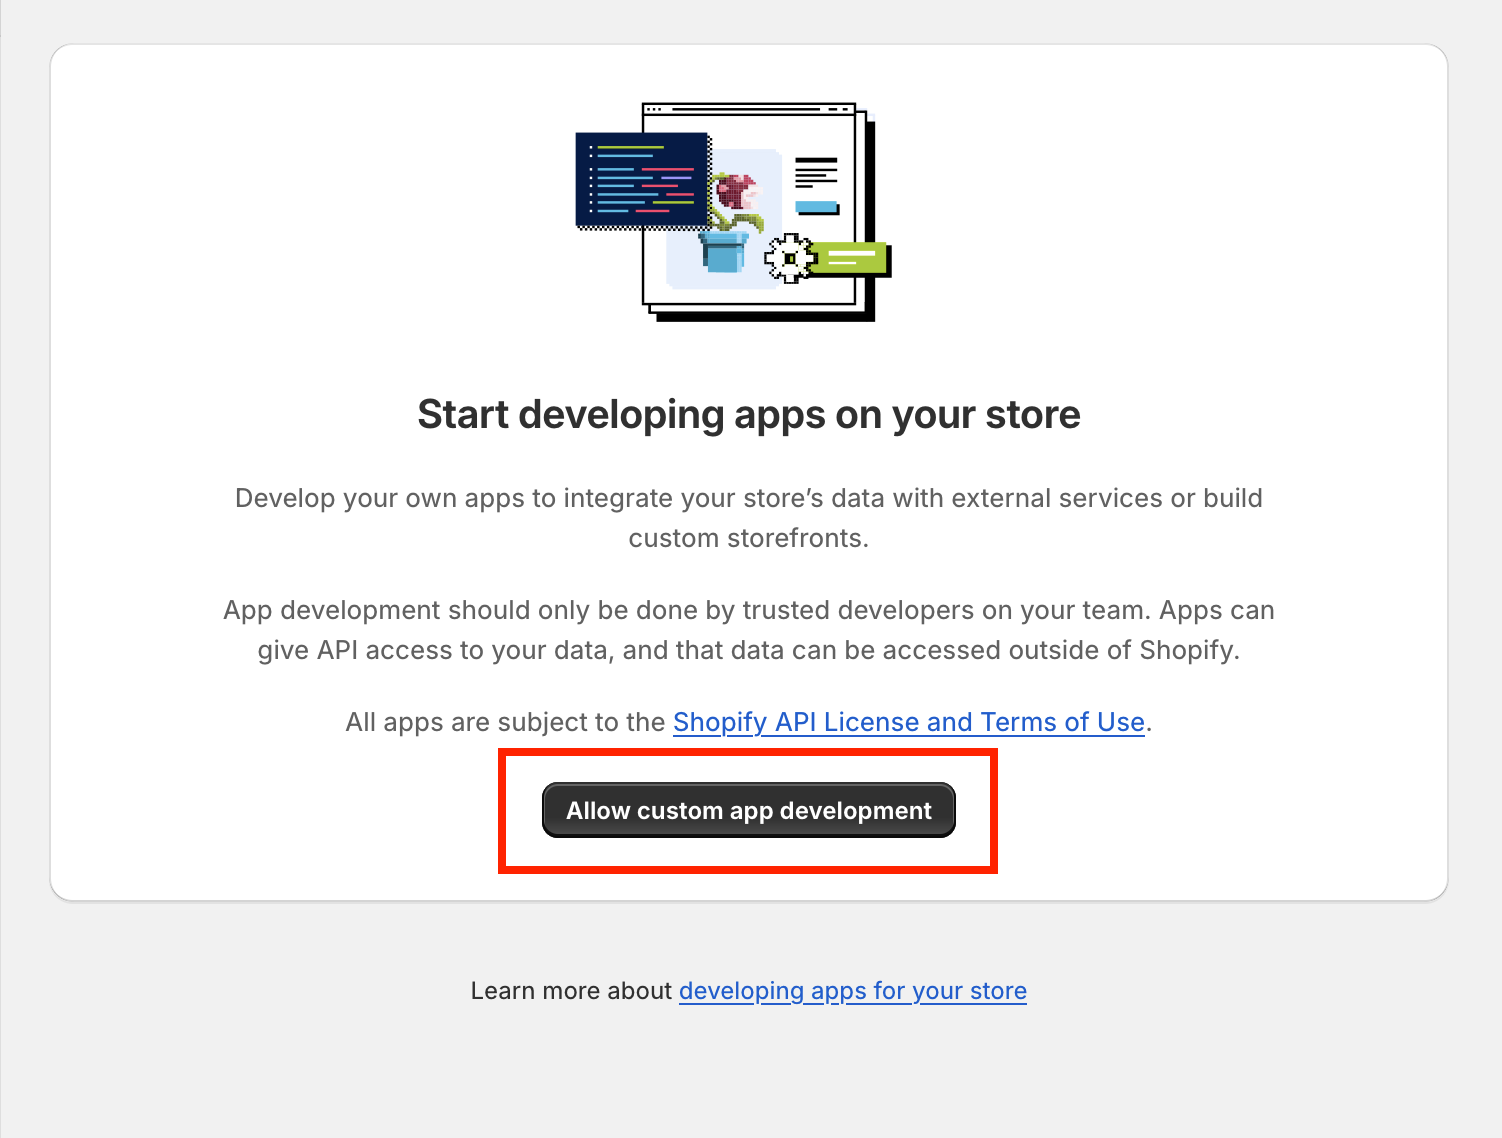
You will need to click Allow custom app development
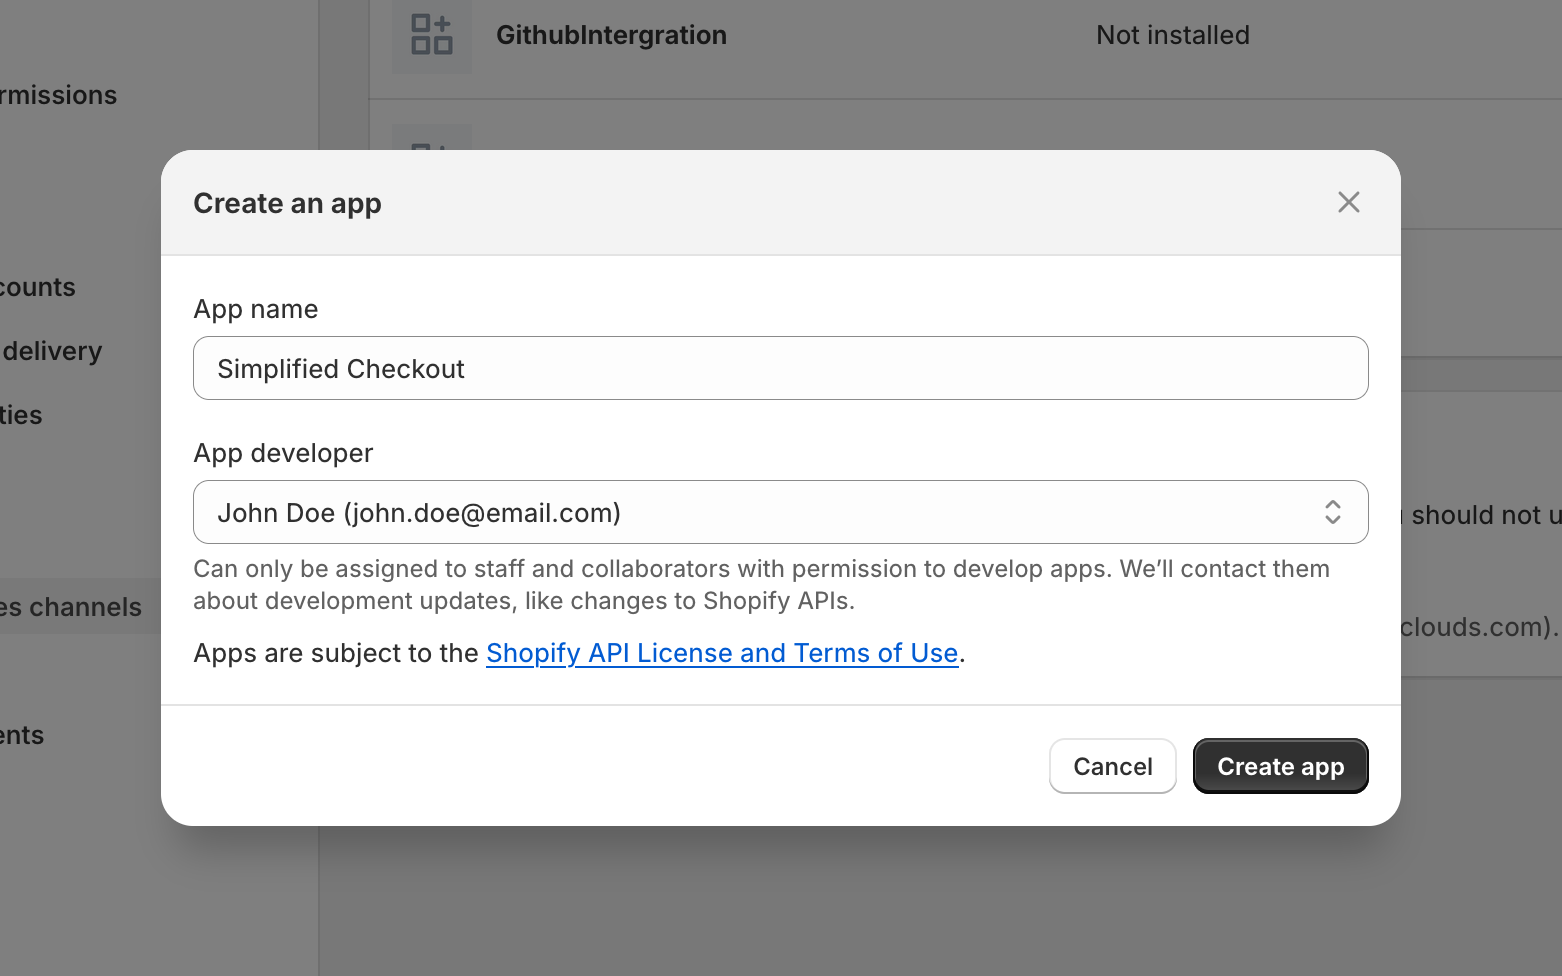
Then click Create an app and fill out the popup with the following information:
Continue to Getting started - Part 2