The Asset Register module is a comprehensive paid feature that enables organizations to create, track, and maintain asset records throughout their lifecycle. This guide covers both the module configuration and day-to-day asset management operations.
Prerequisites
-
Admin permissions: You must have either the Admin role or custom permissions granted via the Roles and Permissions module
-
Module activation: The Asset Register module must be enabled for your organization
-
Basic understanding: Familiarity with your organization's asset management workflow
Module Configuration
Accessing Module Settings
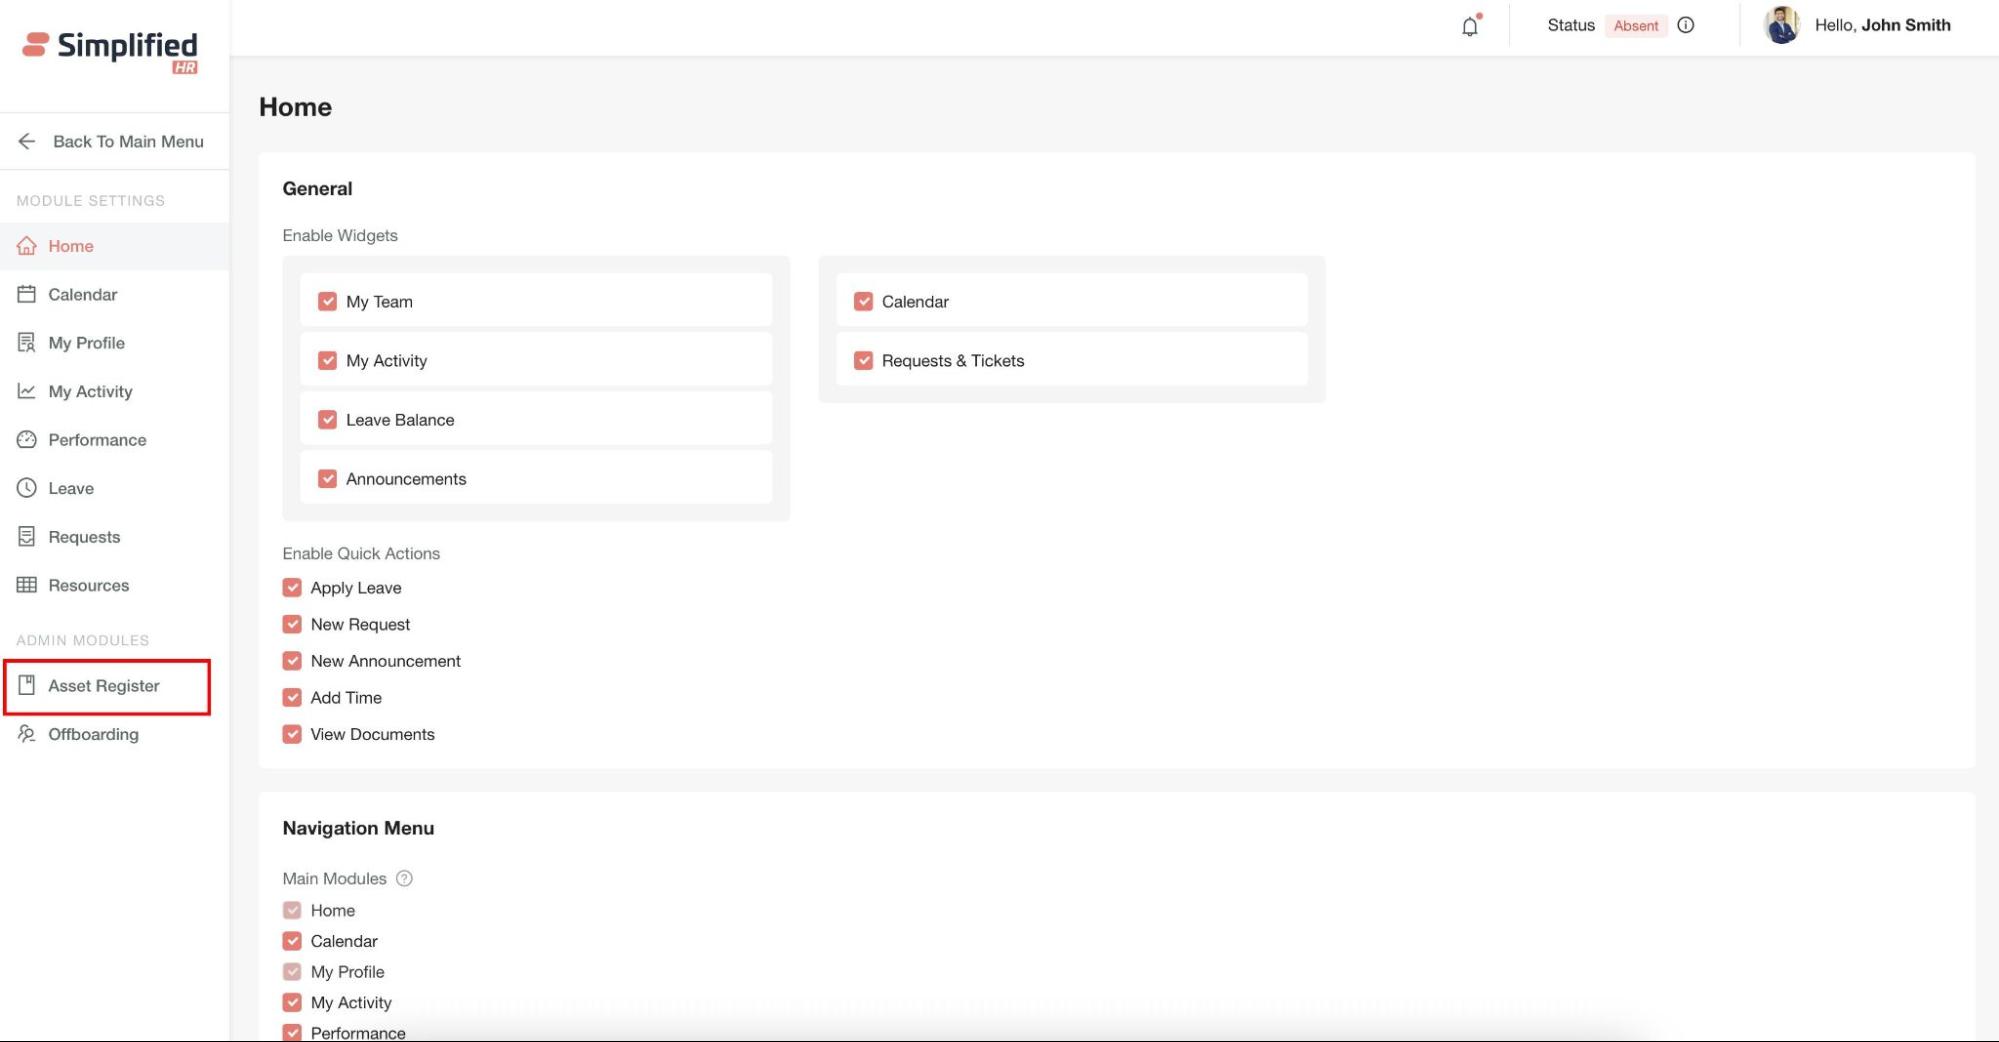
To configure the Asset Register module:
- Navigate to System > Module Settings > Asset Register
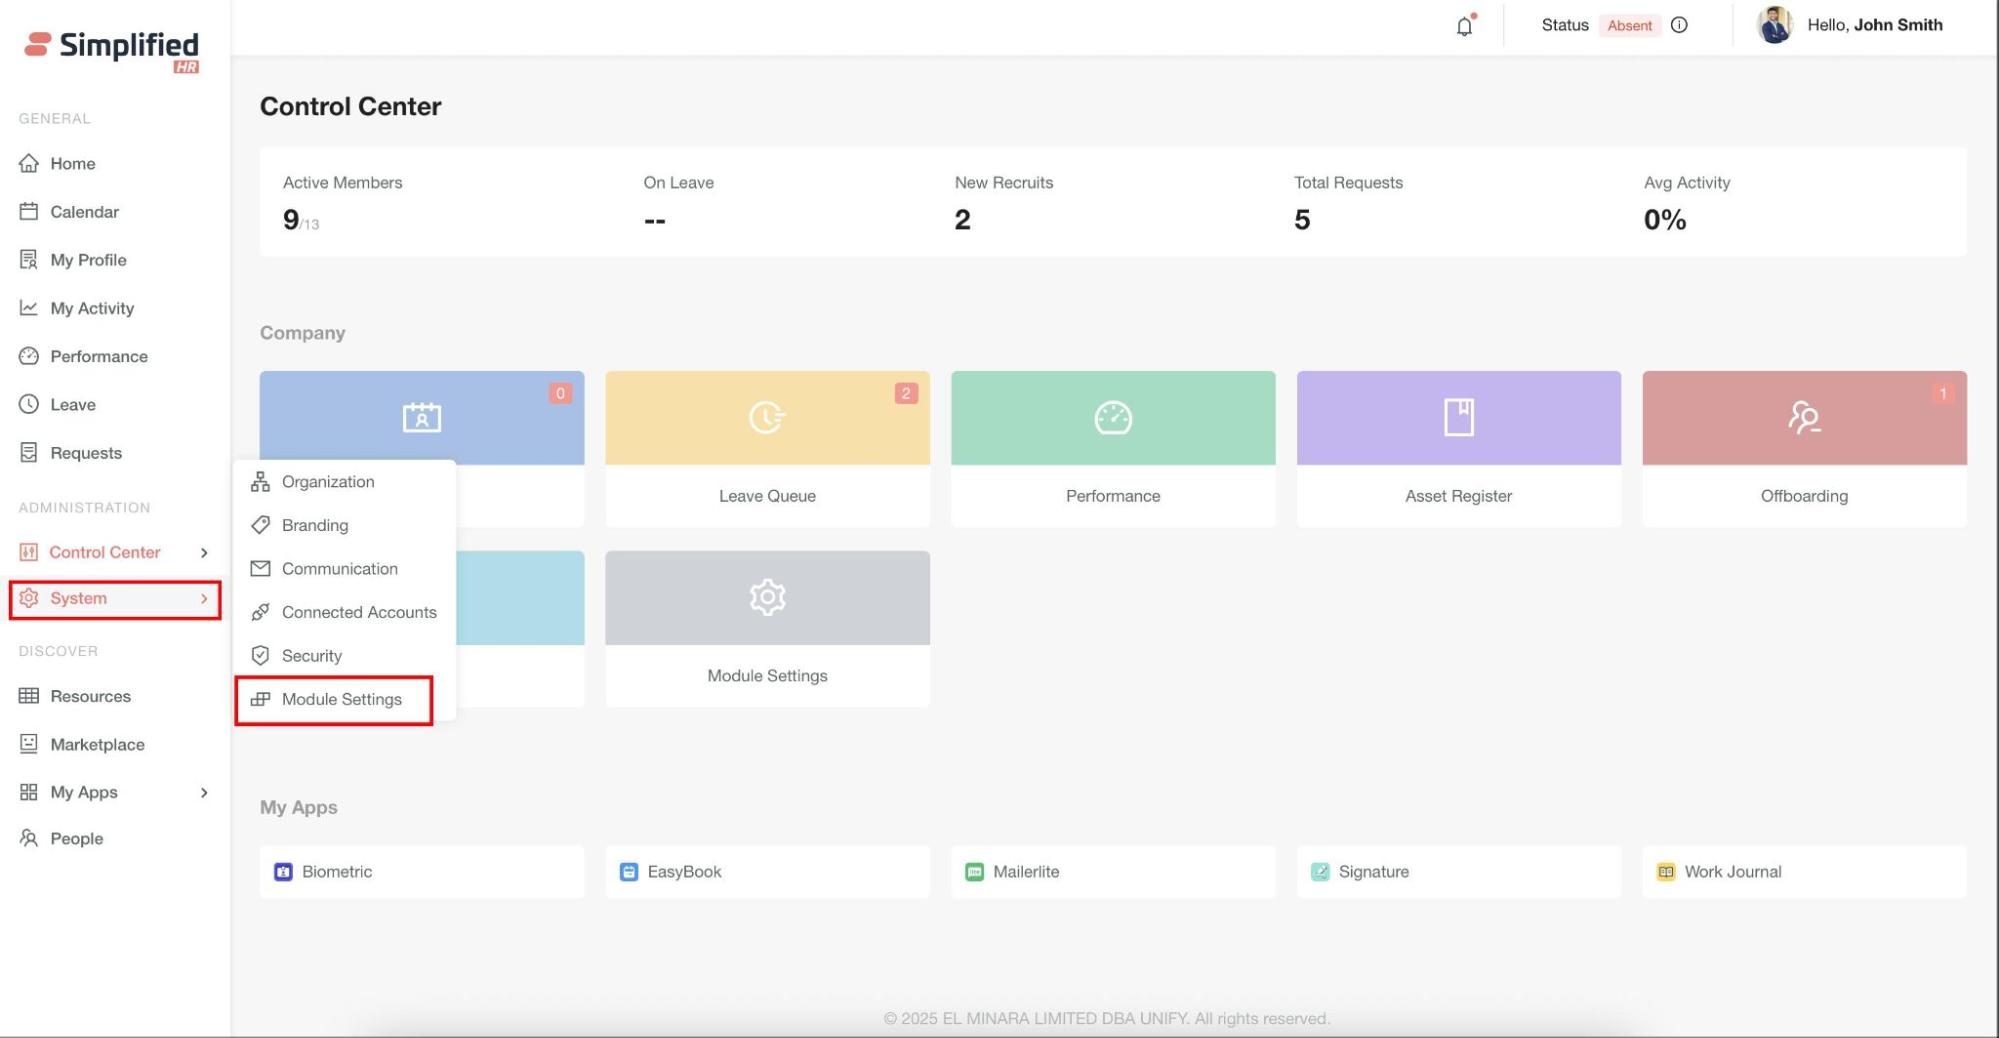
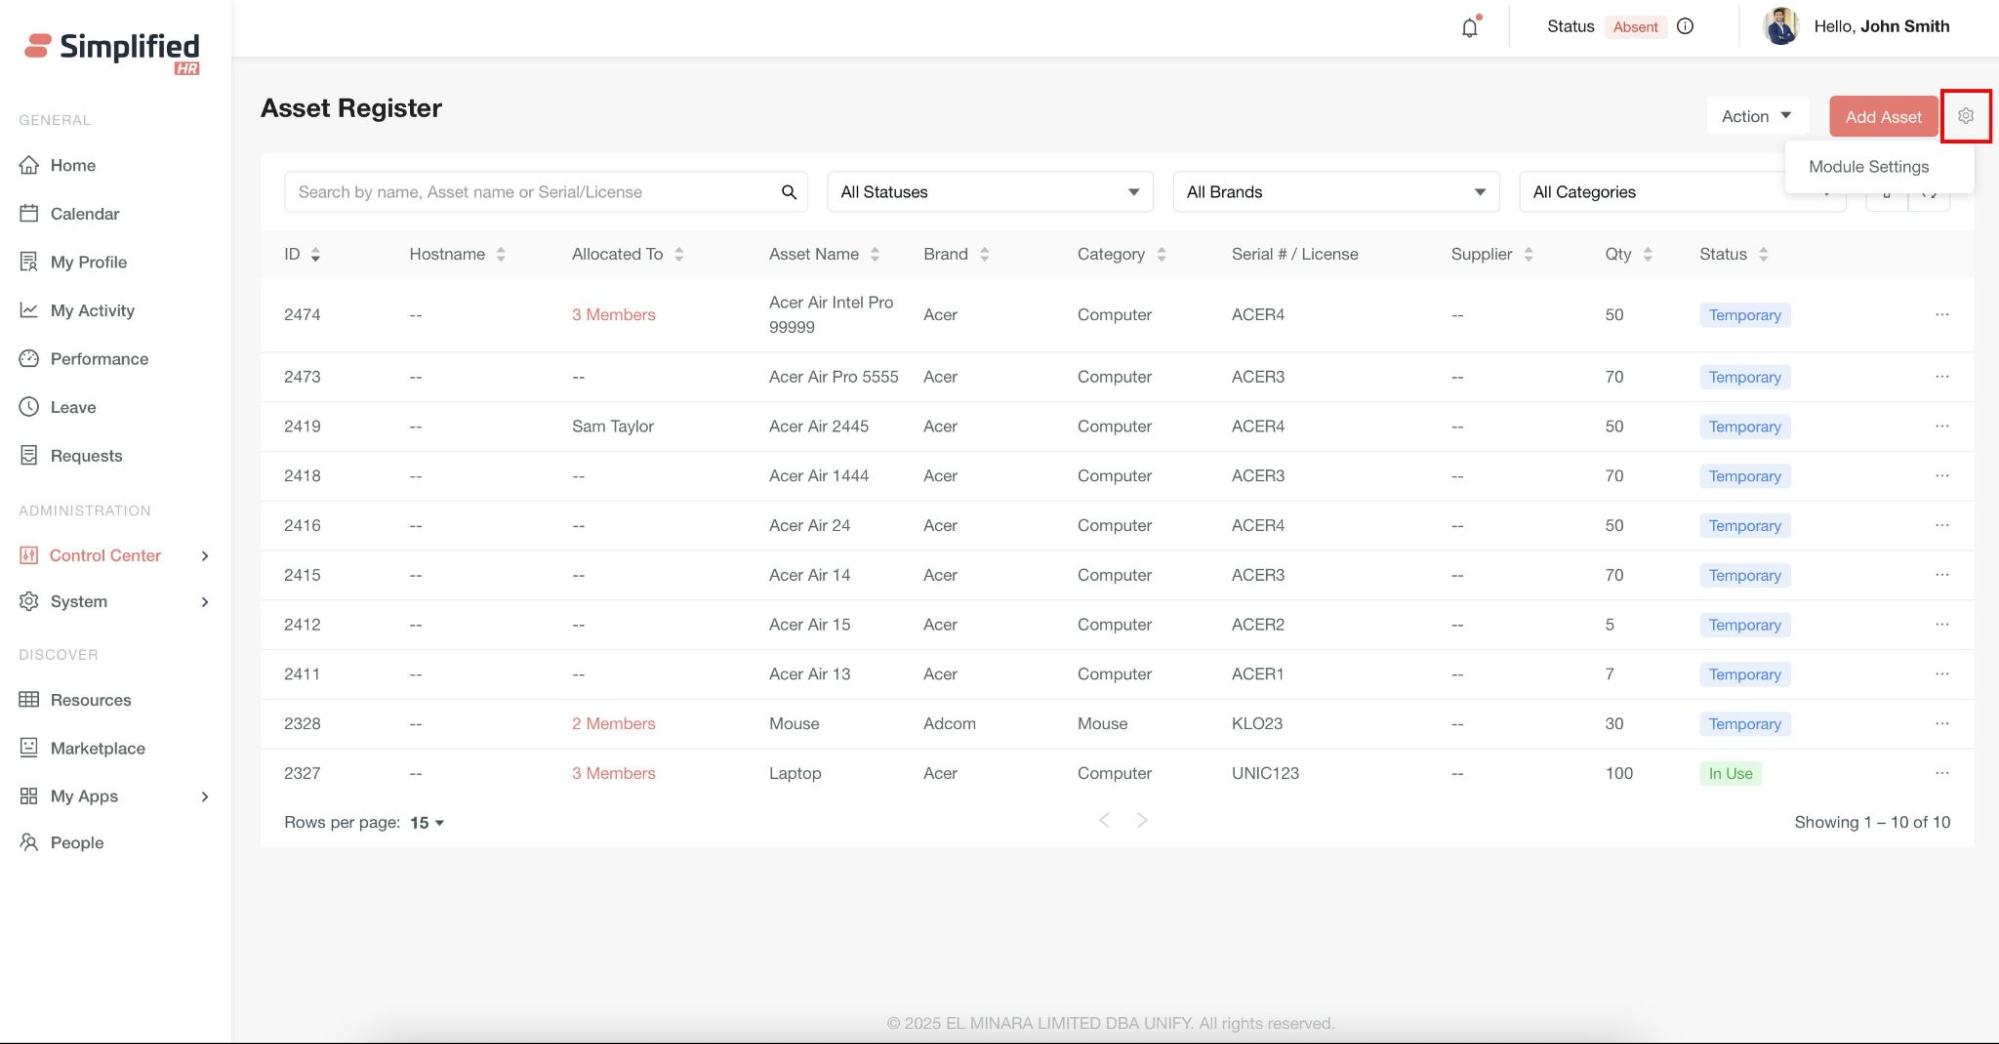
- Click the Settings icon on the Asset Register module page
General Settings
Configure notification preferences to automate maintenance reminders:
-
In the General section, locate the Maintenance Reminder option
-
Select or clear the checkbox to enable or disable automatic device maintenance reminders
-
When enabled, the system automatically sends maintenance reminders to assigned users
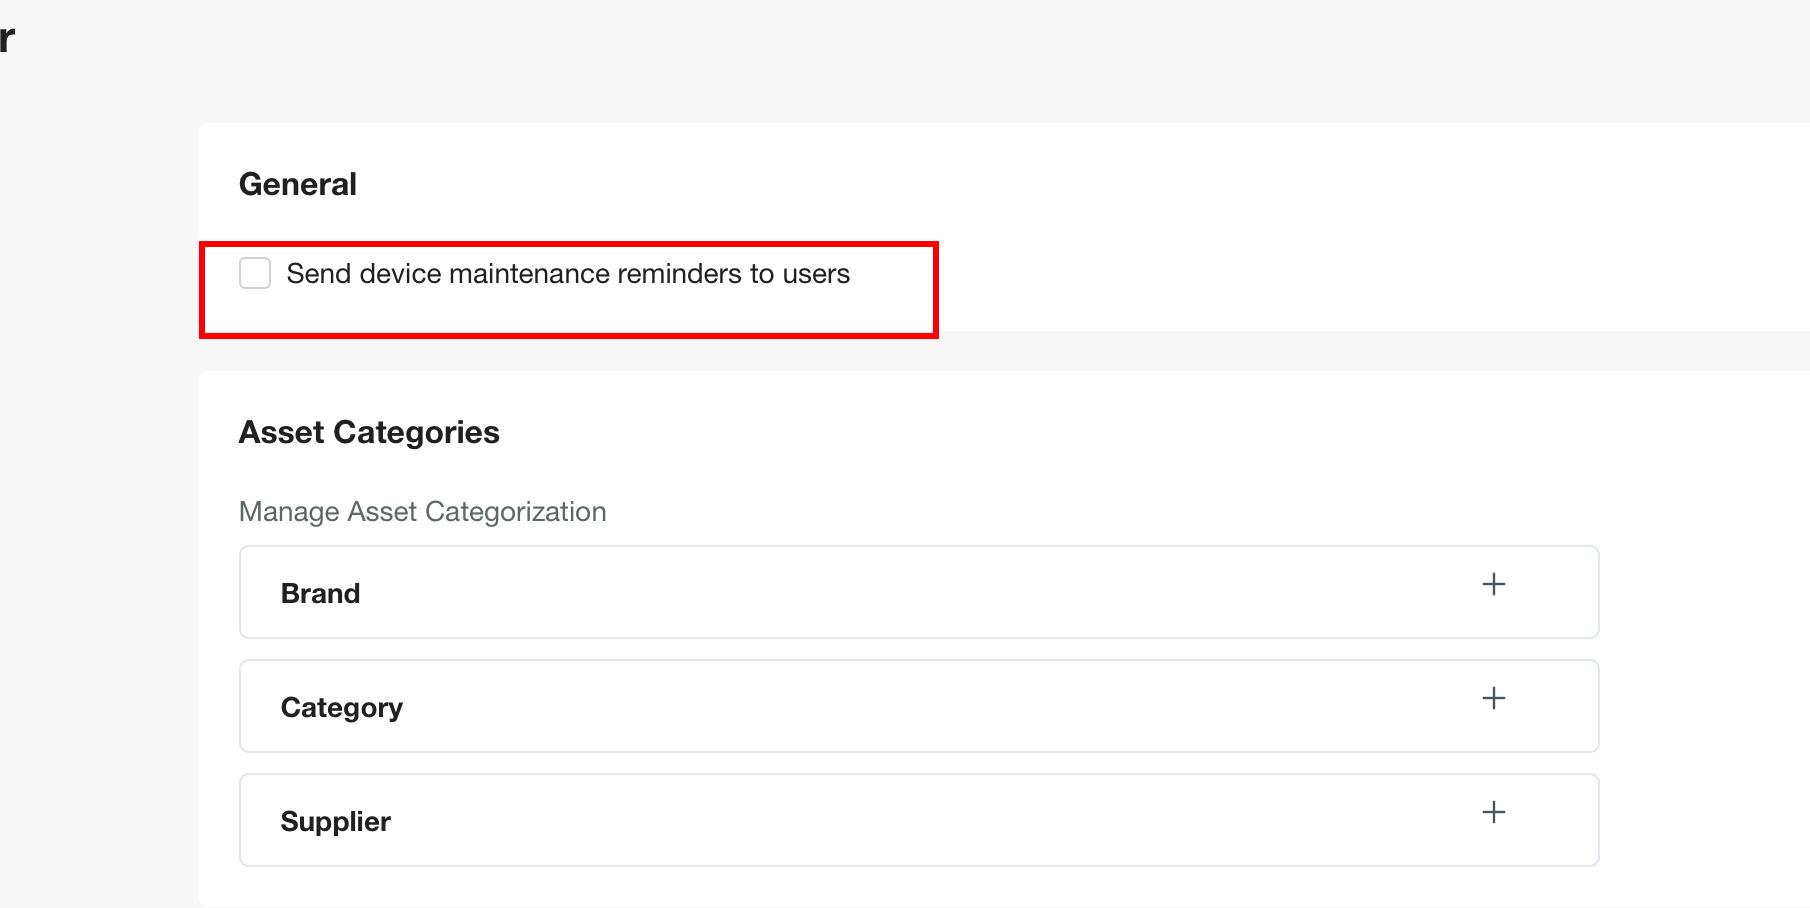
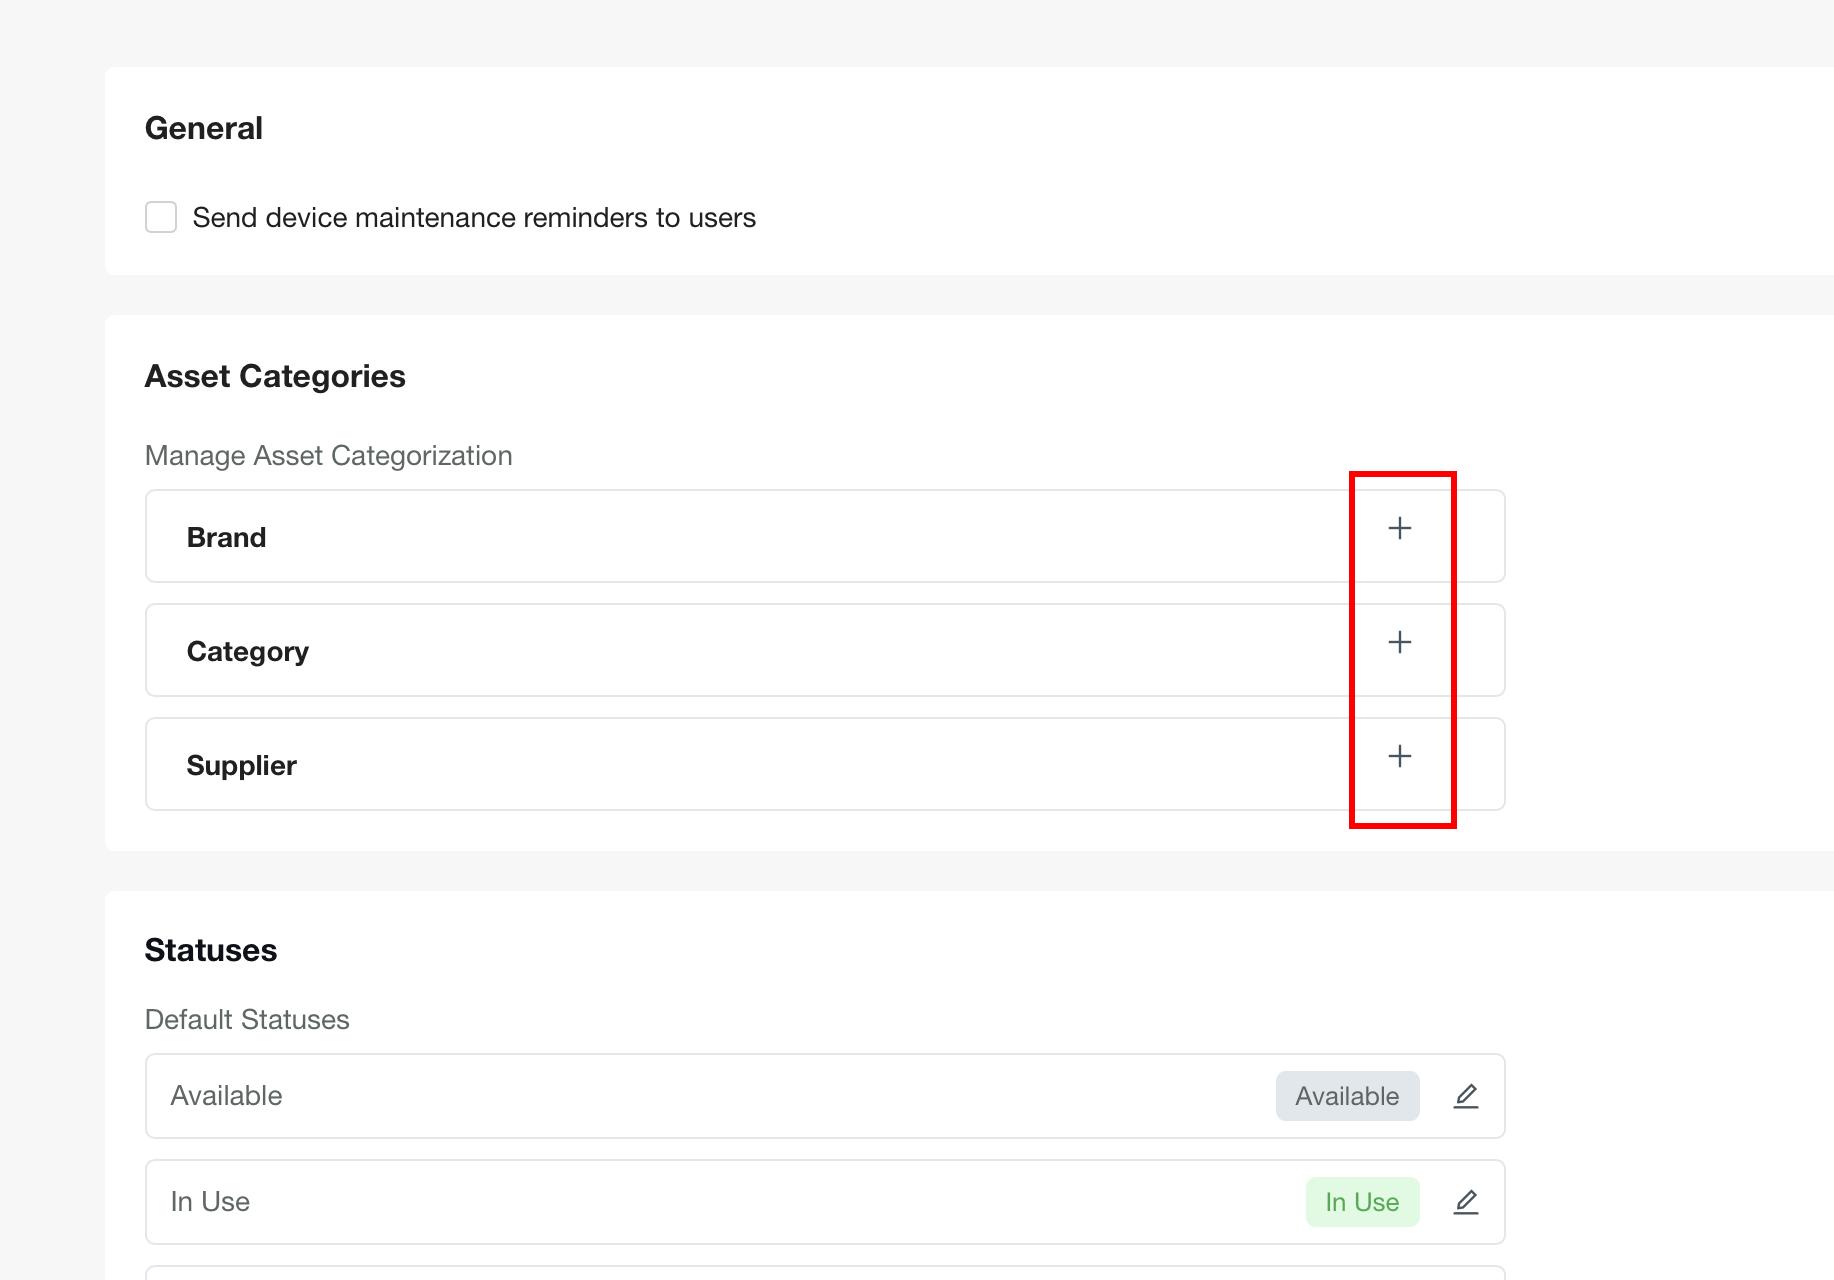
Asset Categories
Organize your assets by configuring three key classification types:
-
Brand: Manufacturer or brand names (e.g., Apple, Dell, HP)
-
Category: Asset types (e.g., Laptop, Desktop, Mobile)
-
Supplier: Vendor or supplier information
Managing Categories
For each classification type, you can:
Add New Entries
-
Click the + (Add) button next to the desired category type
-
Enter the new category name
-
Save your changes
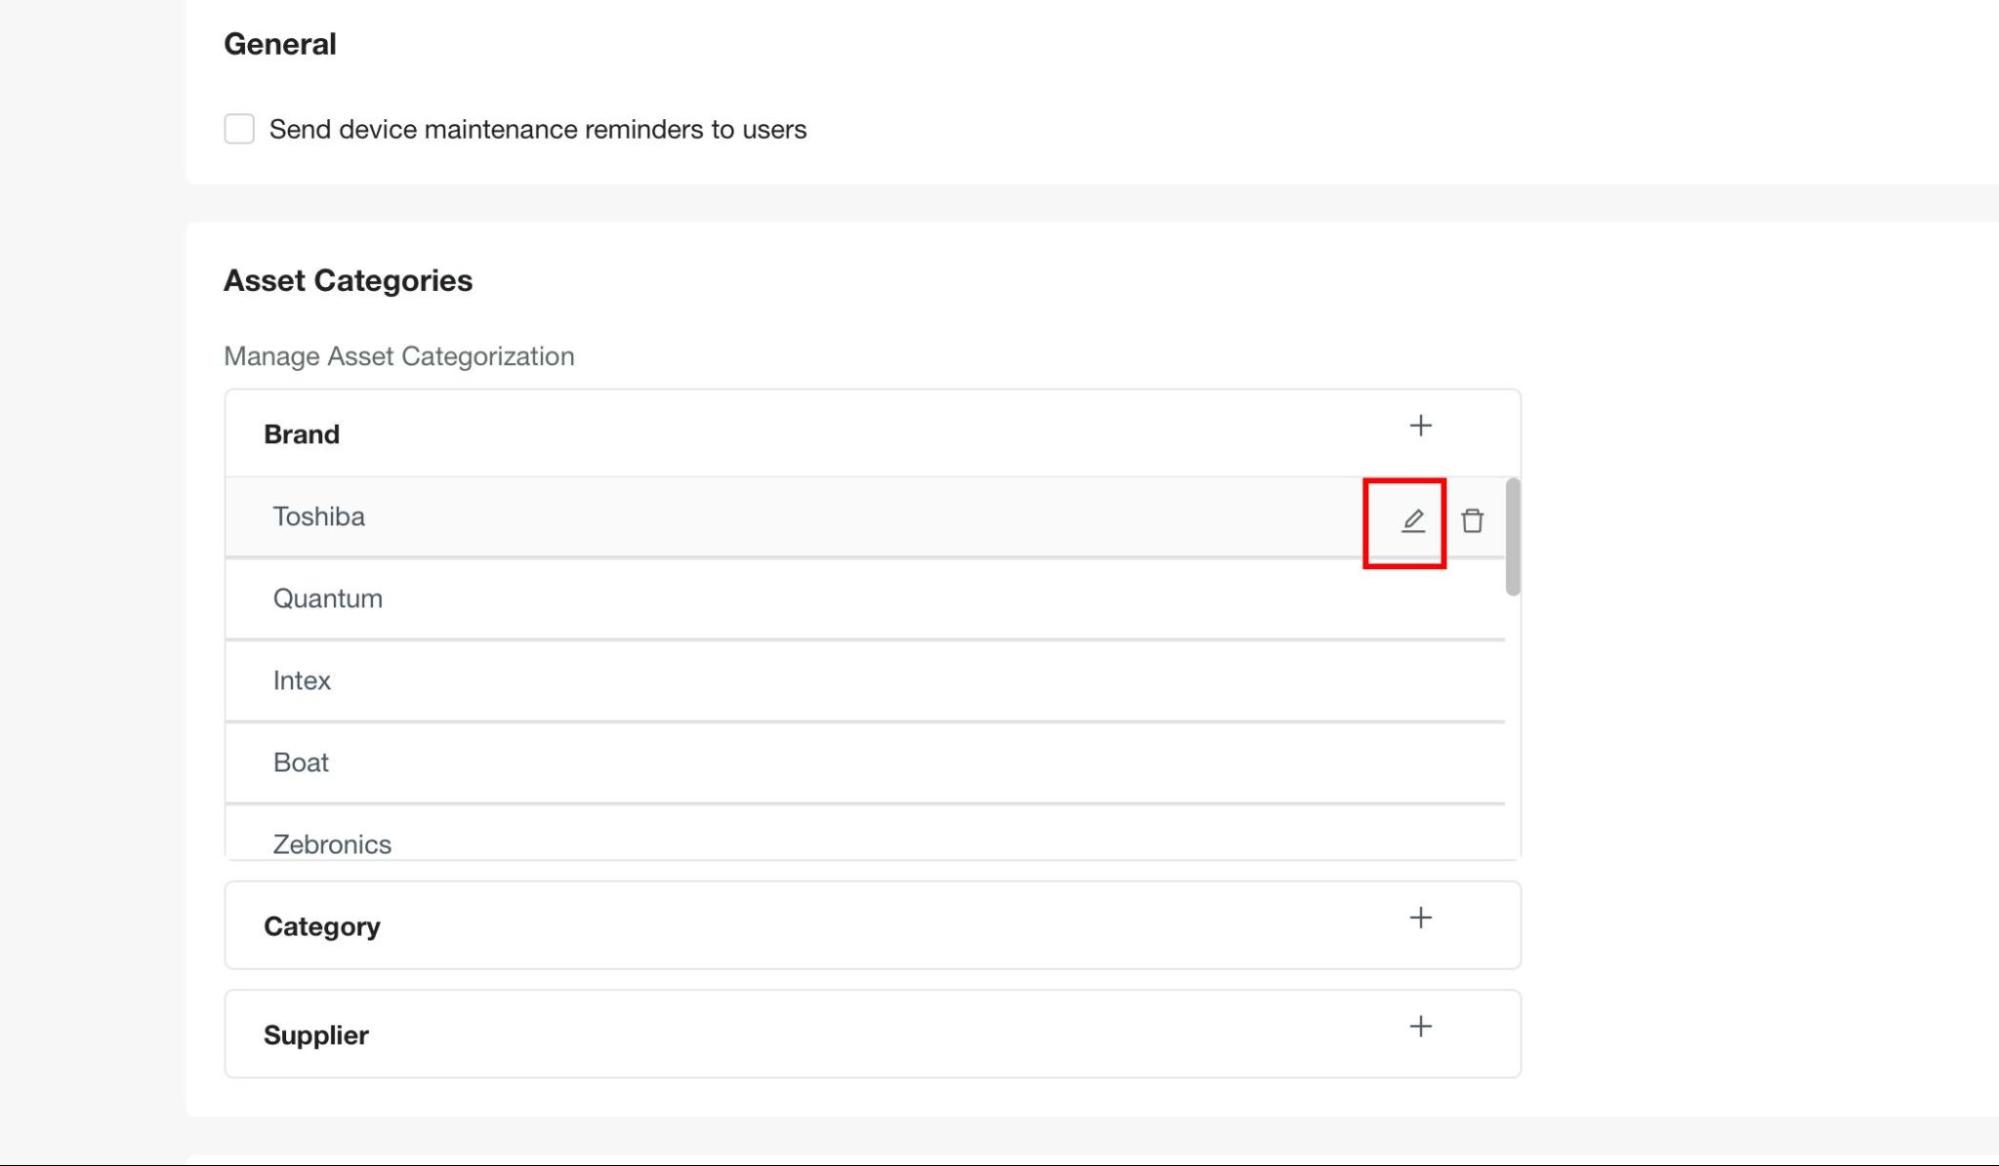
Edit Existing Entries
-
Select the Edit option next to any existing entry
-
Modify the details as needed
-
Save your changes
Delete Entries
-
Select the Delete option next to the entry you want to remove
-
Confirm the deletion
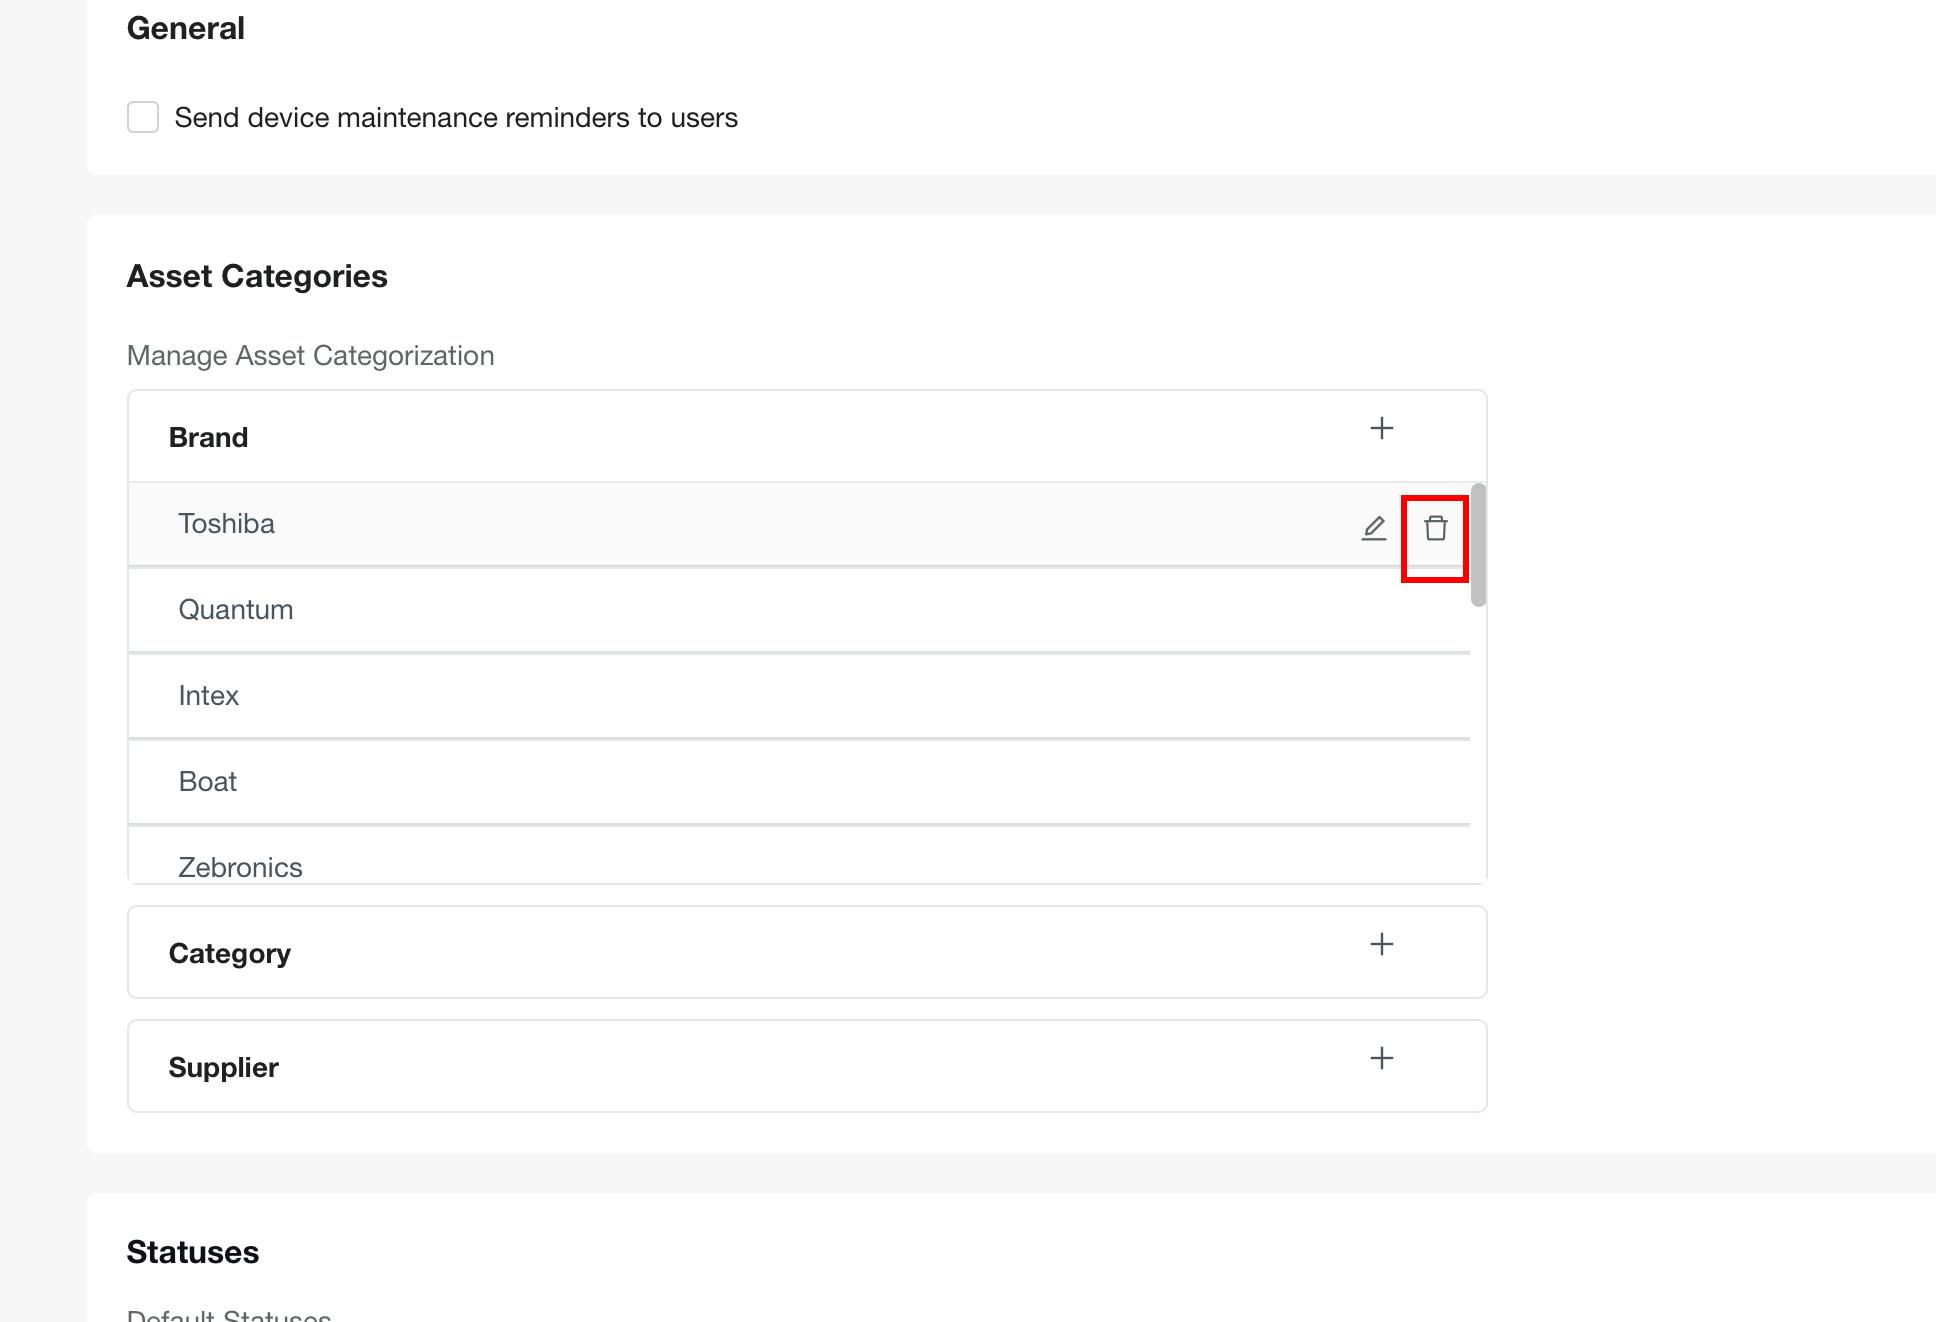
Important: Deleting categories may impact assets already linked to them. Review dependencies carefully before deletion.
Status Management
Asset statuses help track the current state and lifecycle stage of your assets.
Default Statuses
The system includes predefined statuses:
-
Available: Asset is ready for assignment
-
In Use: Asset is currently assigned to a user
-
Closed: Asset is no longer in service
-
Maintenance: Asset is undergoing maintenance
-
Temporary: Asset is temporarily assigned
-
Under Repair: Asset is being repaired
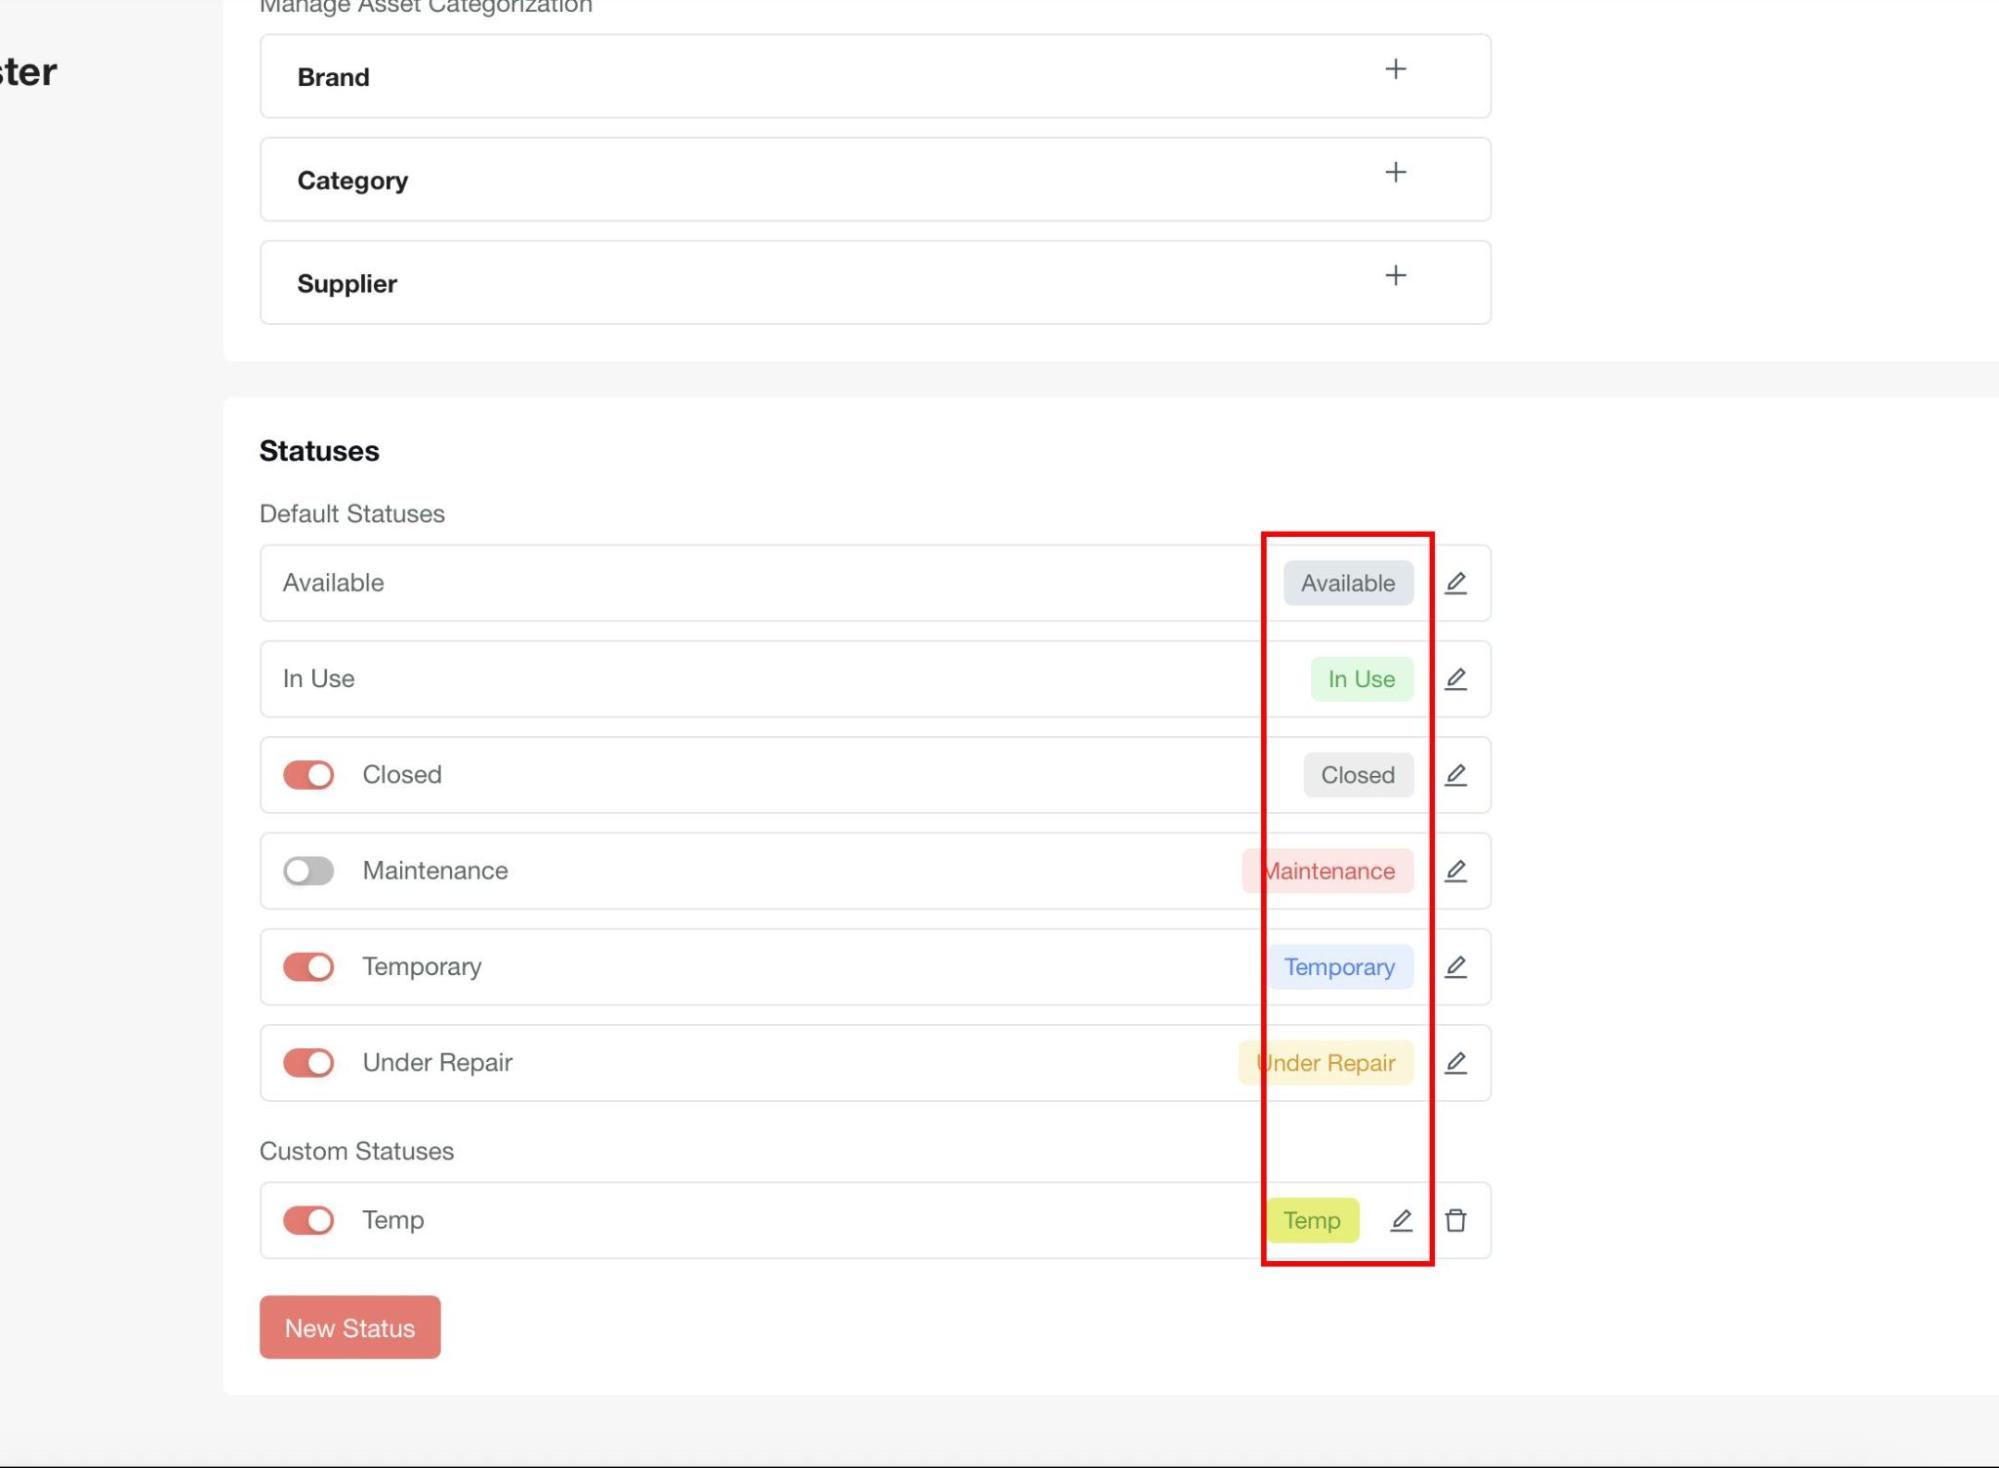
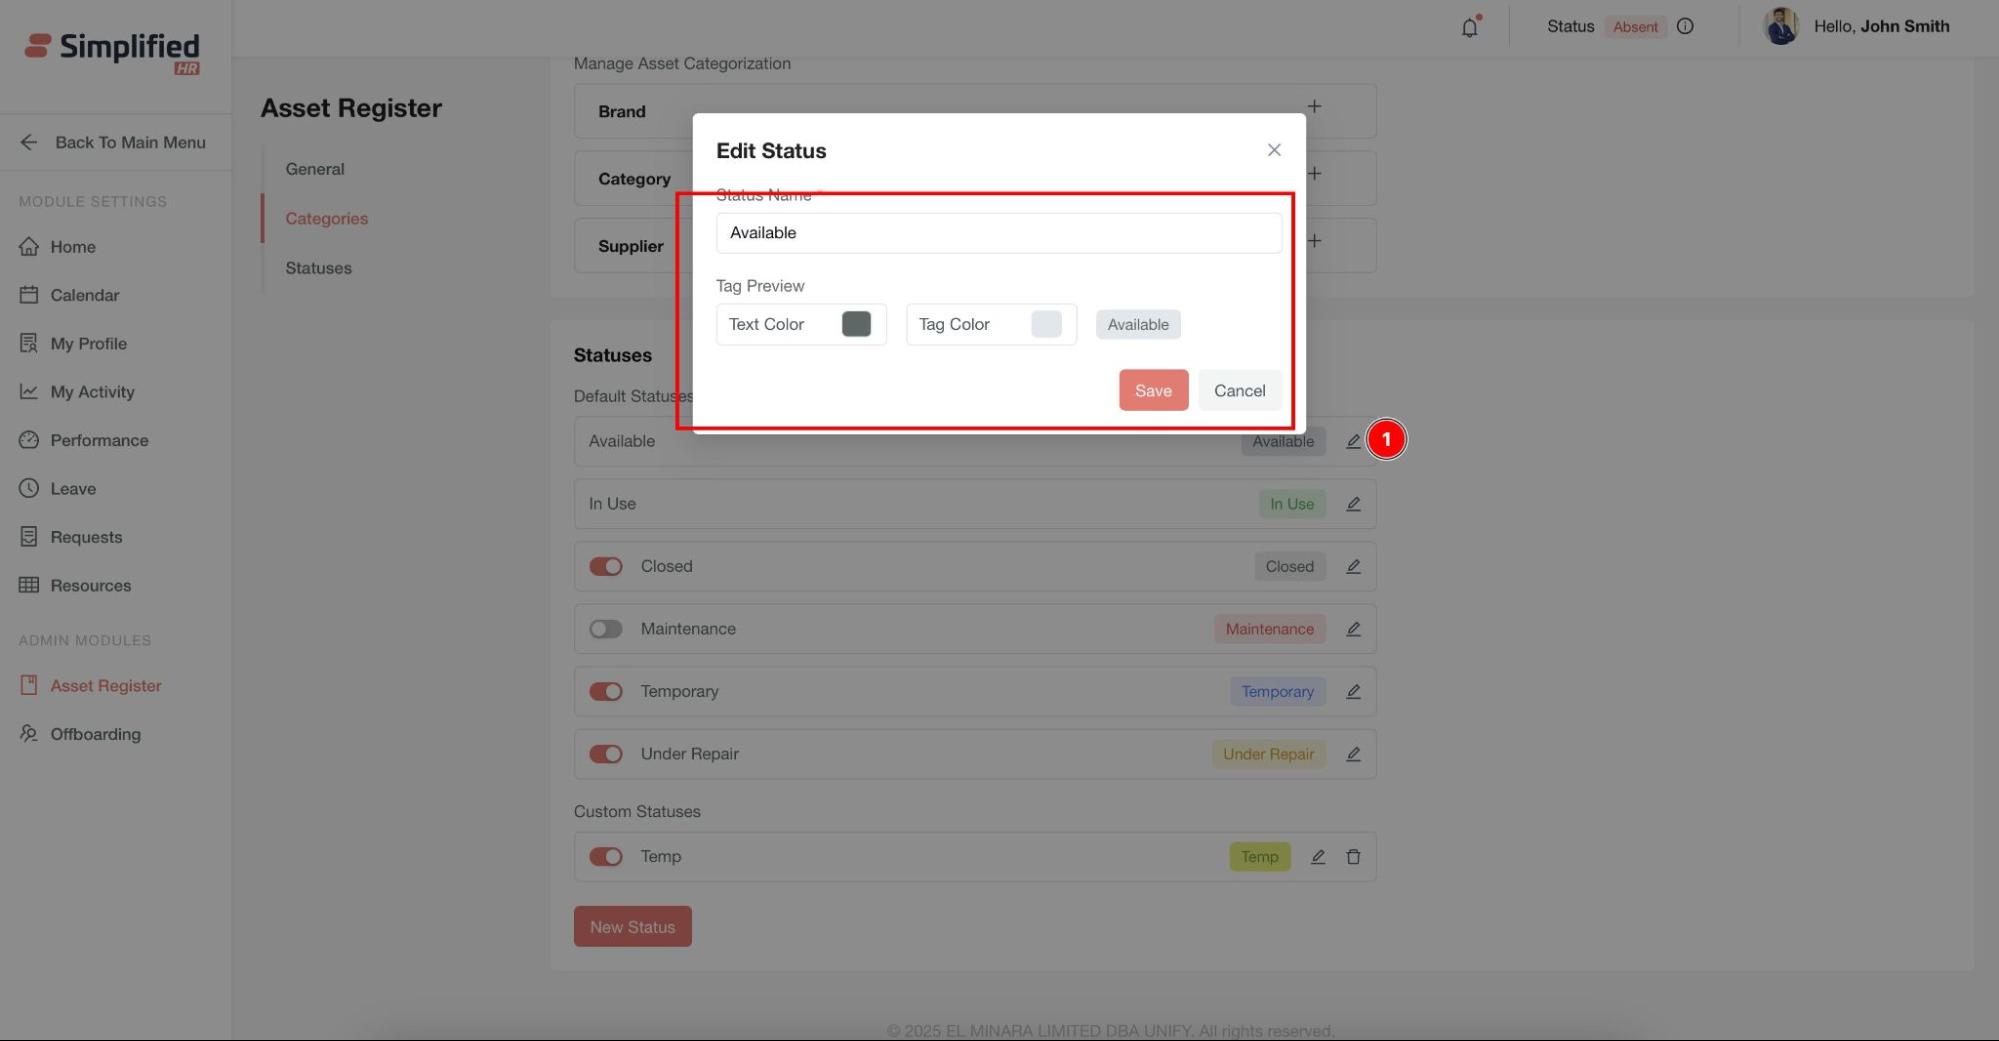
Customizing Statuses
Edit Existing Statuses
-
Click on any predefined status
-
Modify the status text, tag color, or text color
-
Save your changes
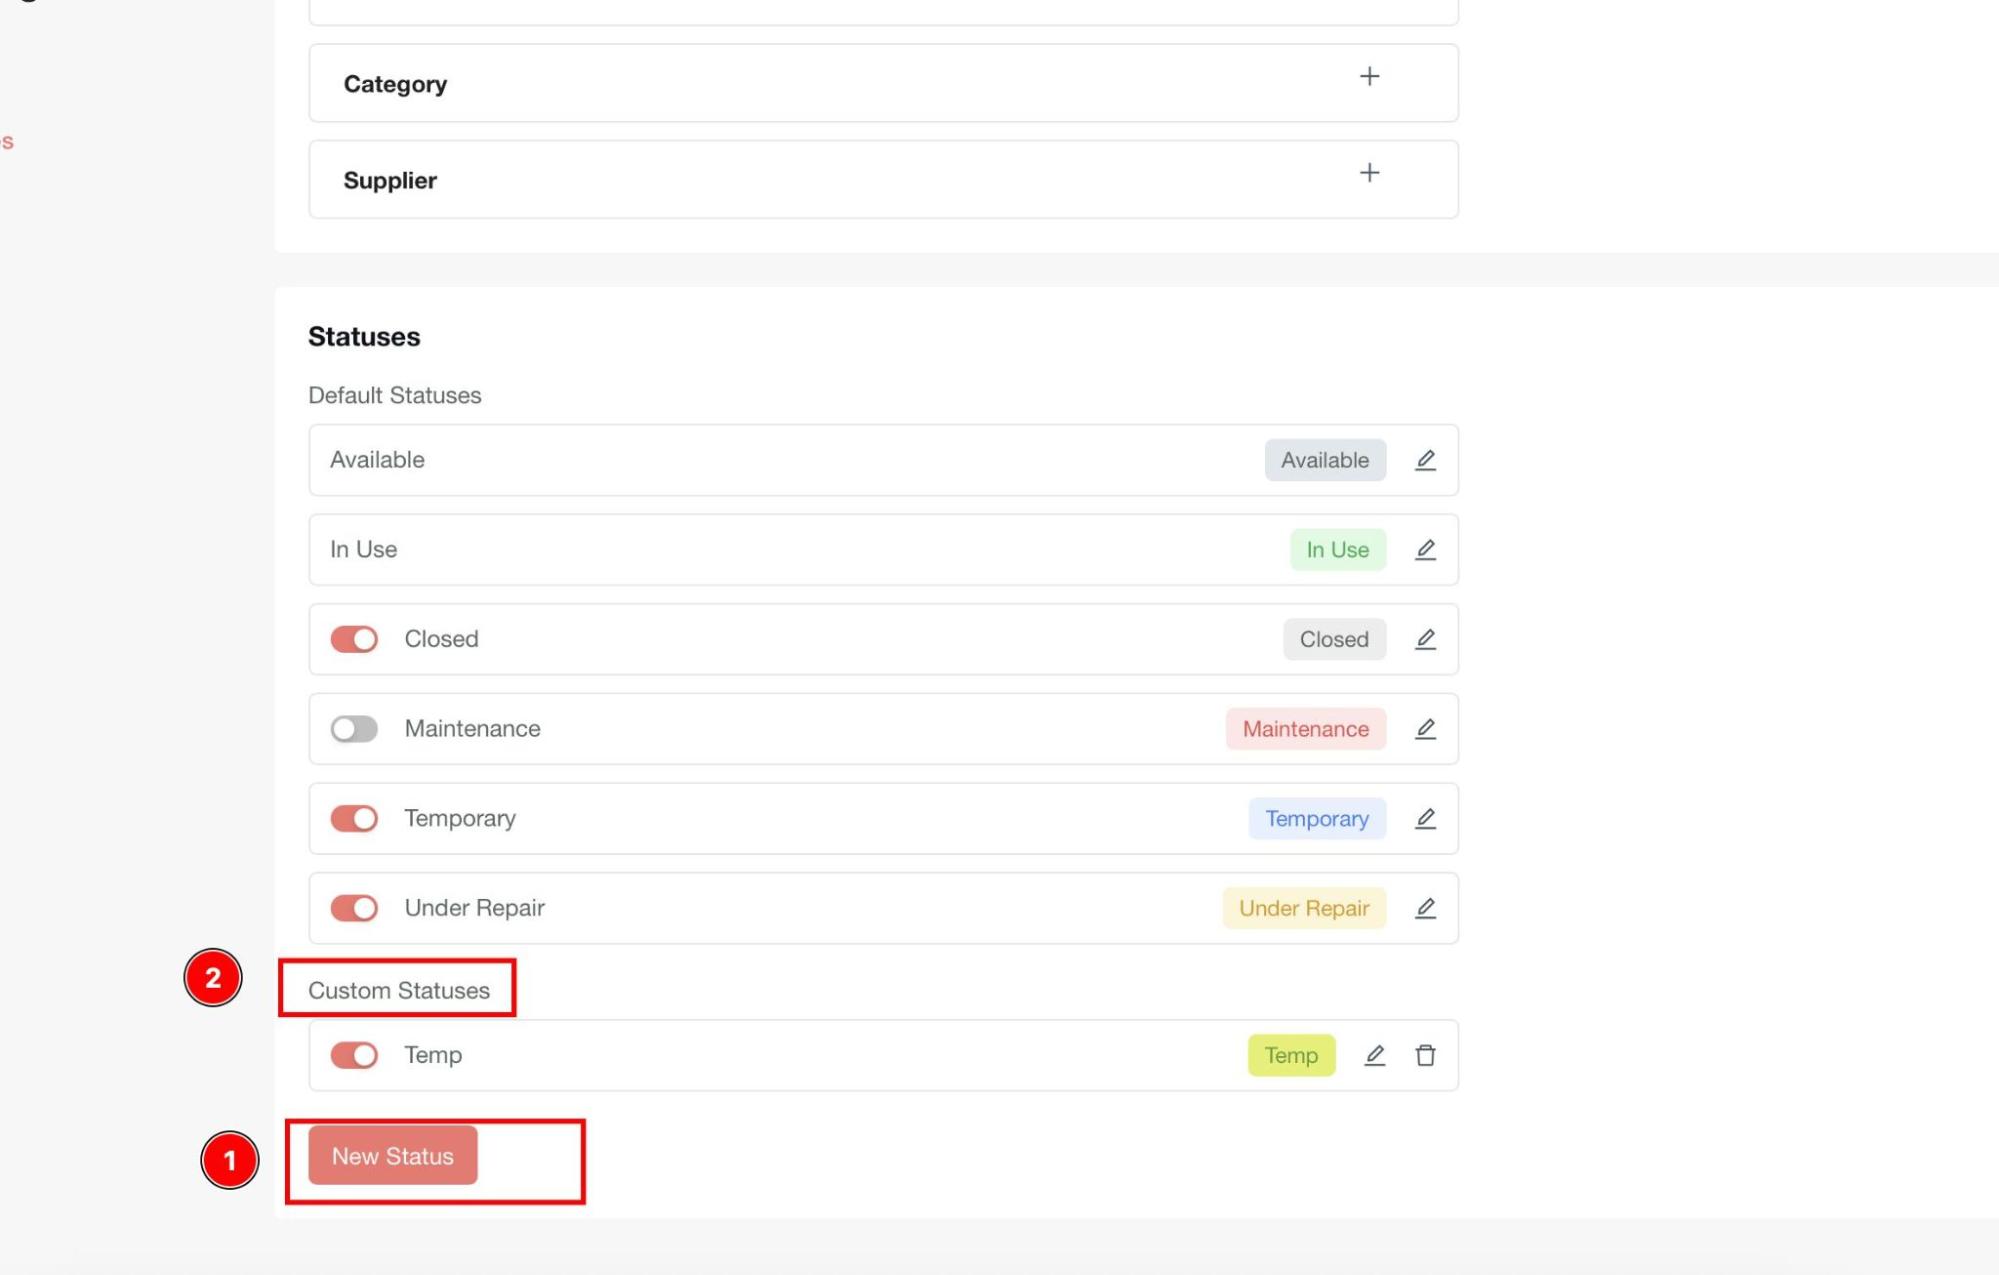
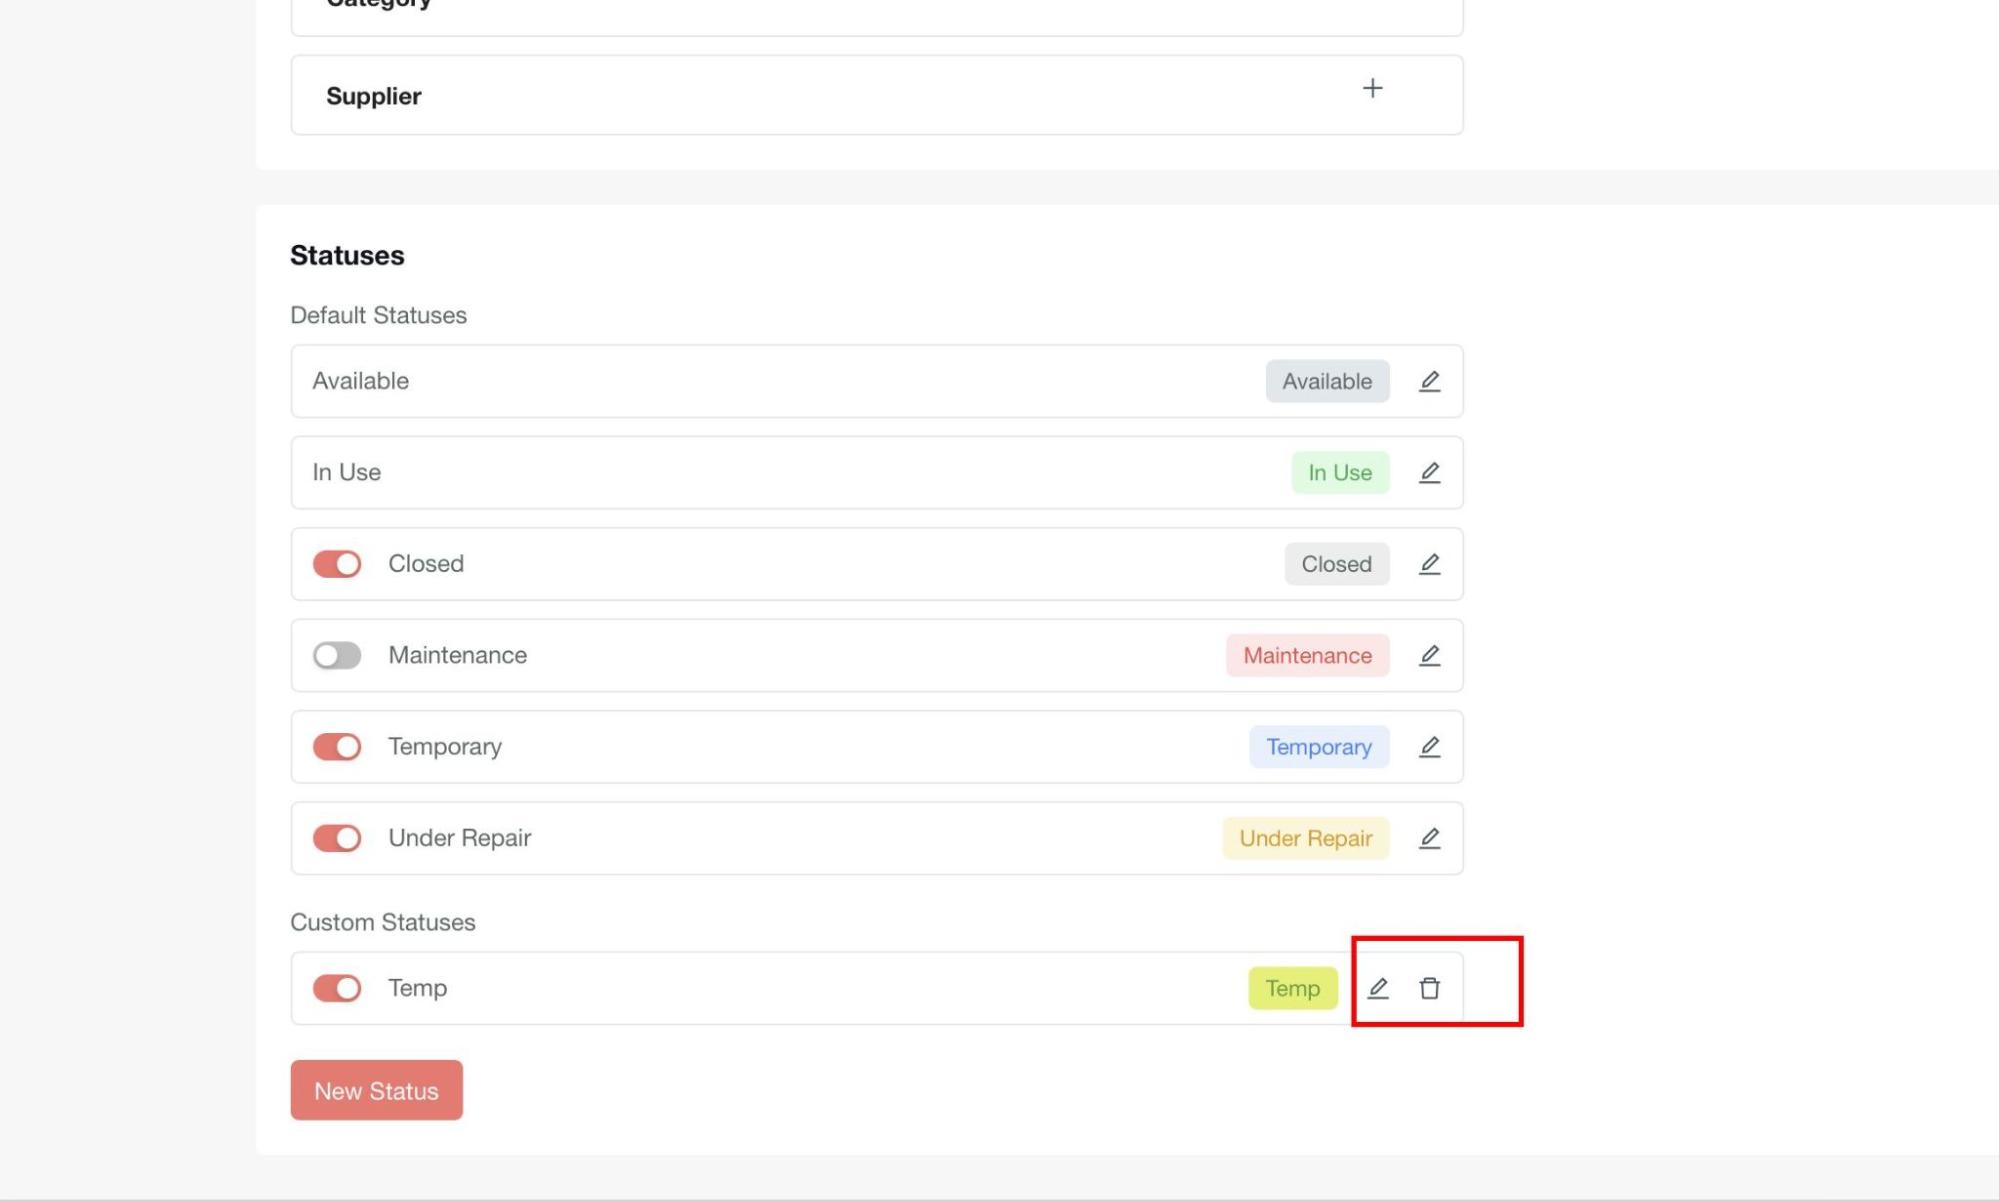
Create Custom Statuses
- Add new statuses that will appear under Custom Status
-
Configure text and color preferences
-
Delete custom statuses when no longer needed
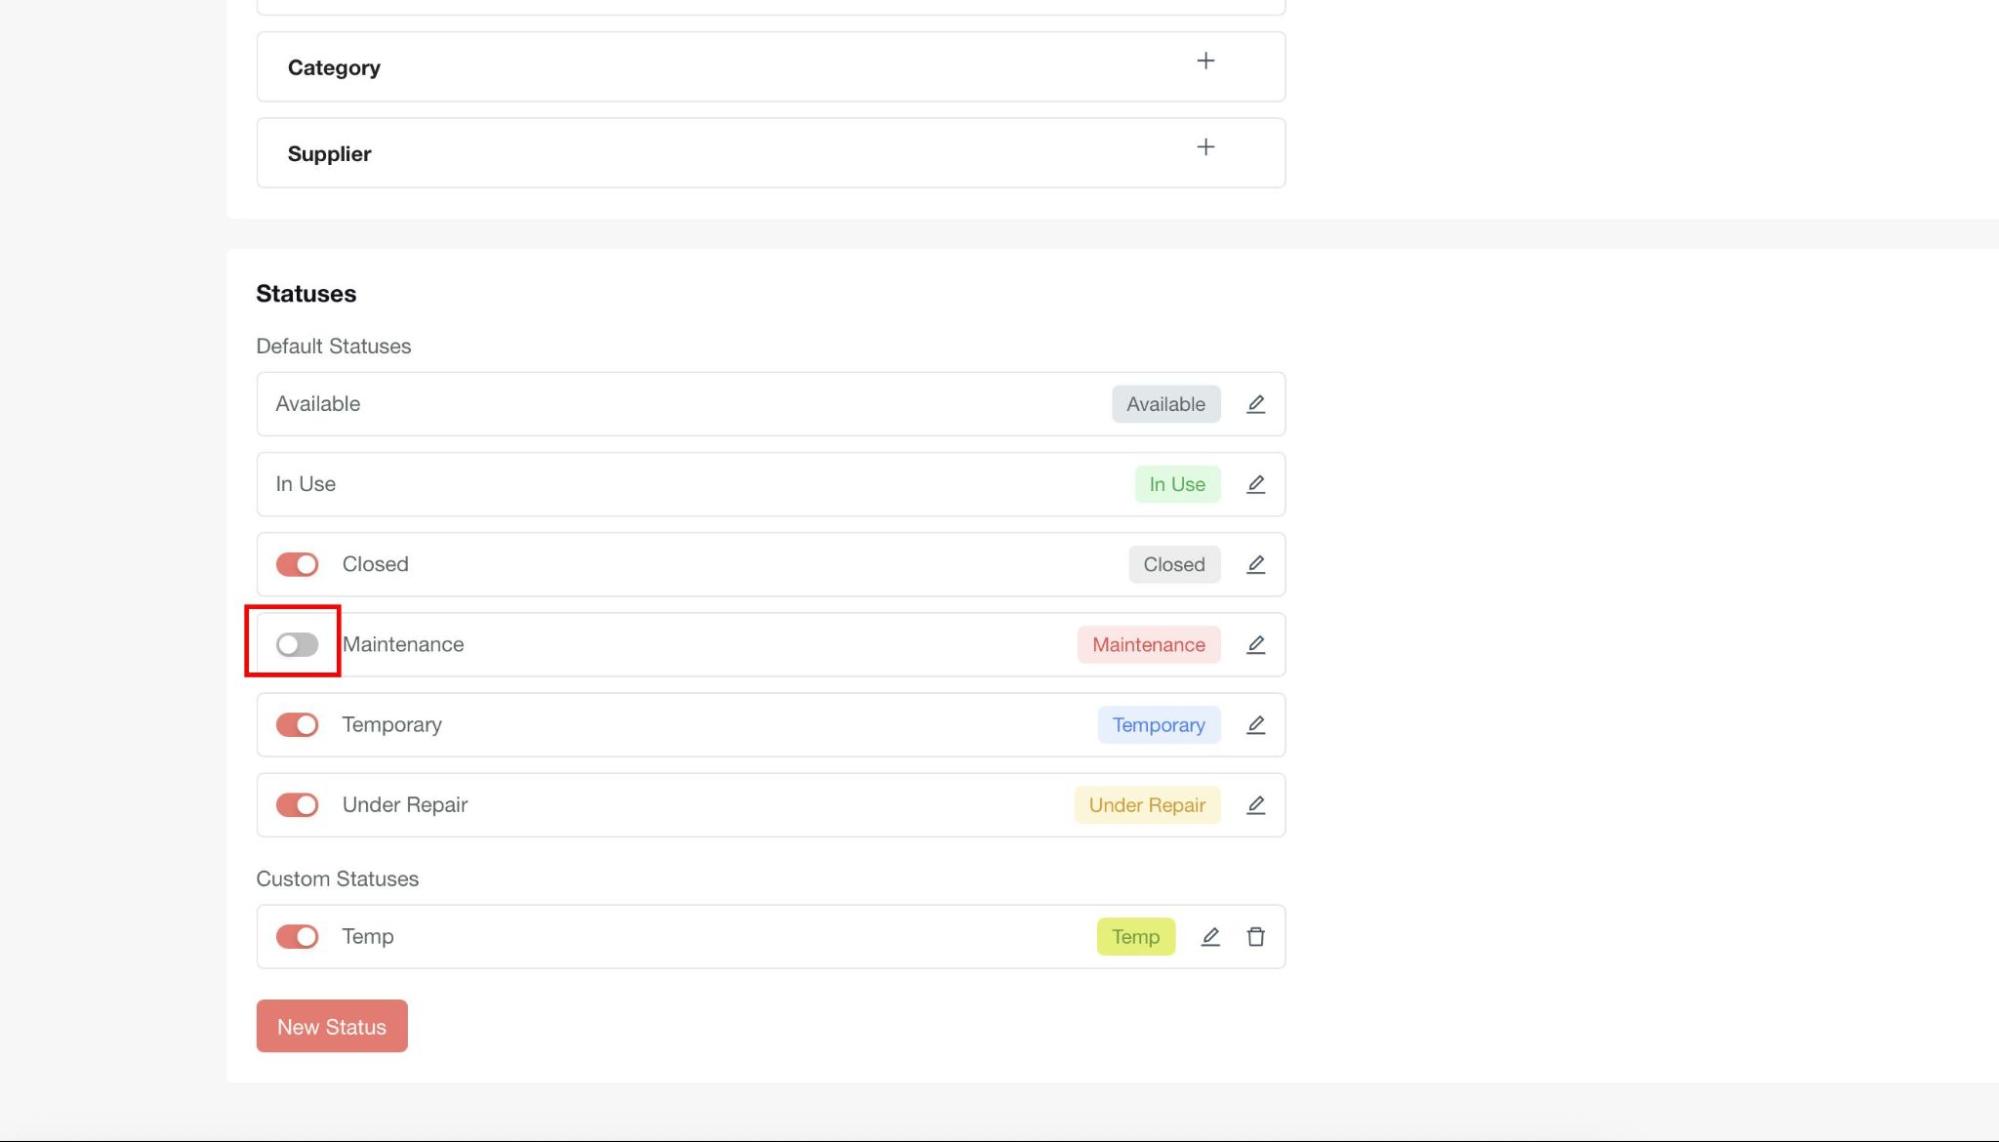
Managing Status Visibility
Control which statuses appear in your Asset Register:
-
Use the toggle button next to each status to enable or disable visibility
-
Disabled statuses will hide assets with that status from the main Asset Register view
-
Re-enable toggles anytime to restore visibility
Asset Management
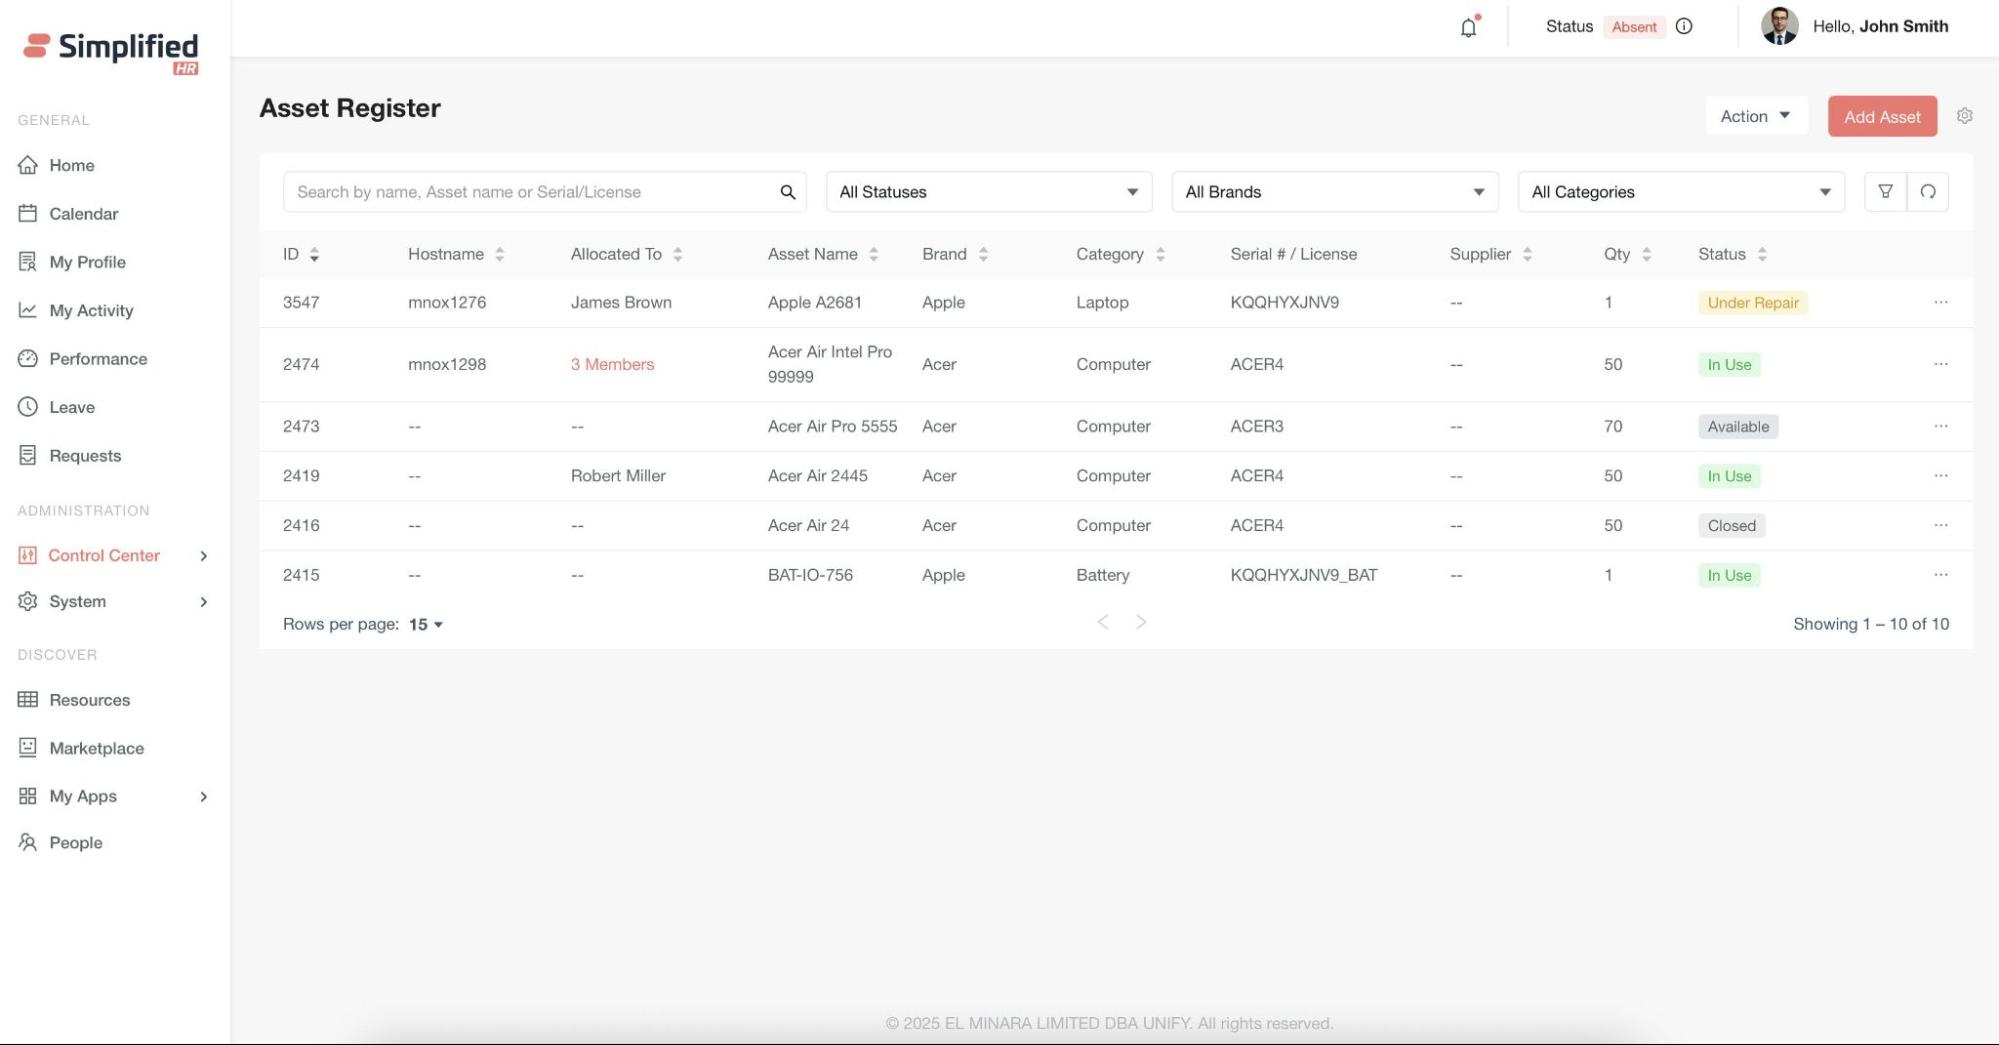
Accessing the Asset Register
- Navigate to Control Center > Asset Register
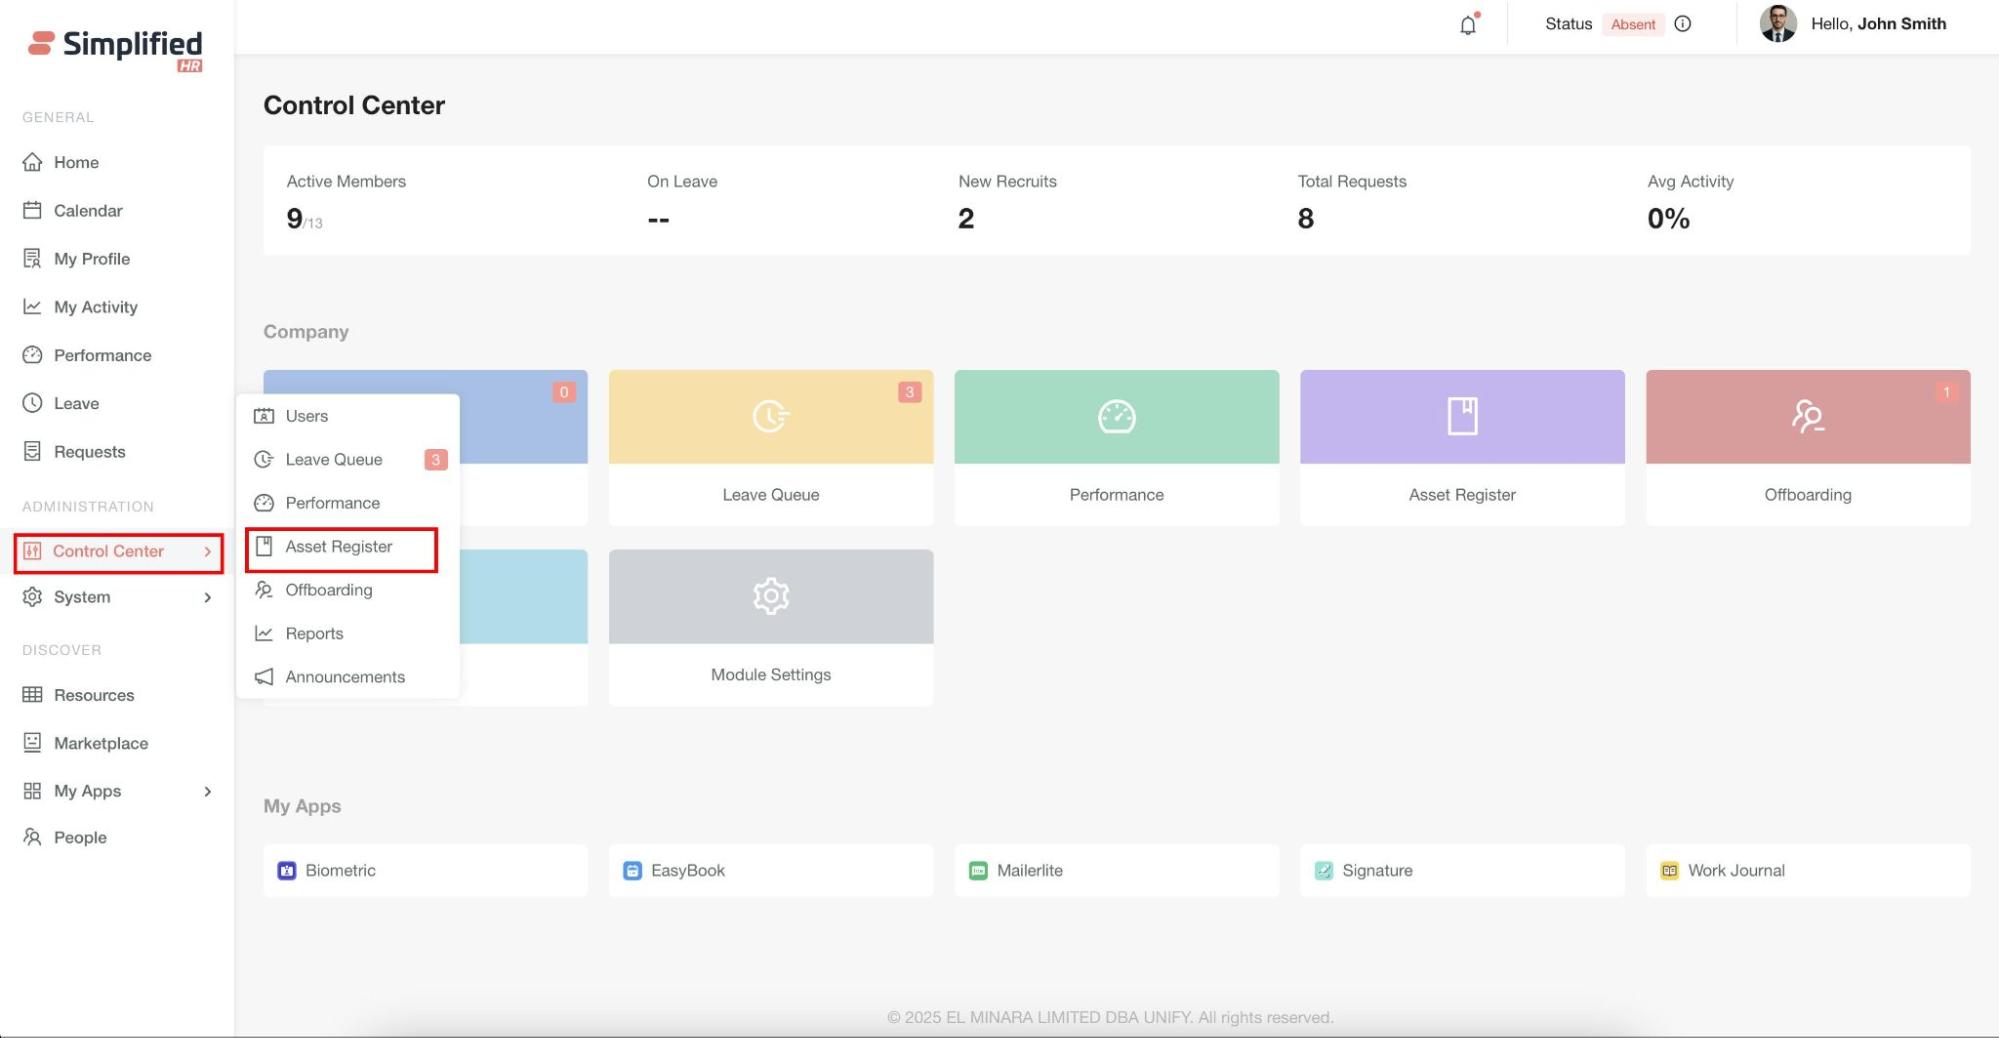
- The dashboard displays all existing assets with their current status and allocation details
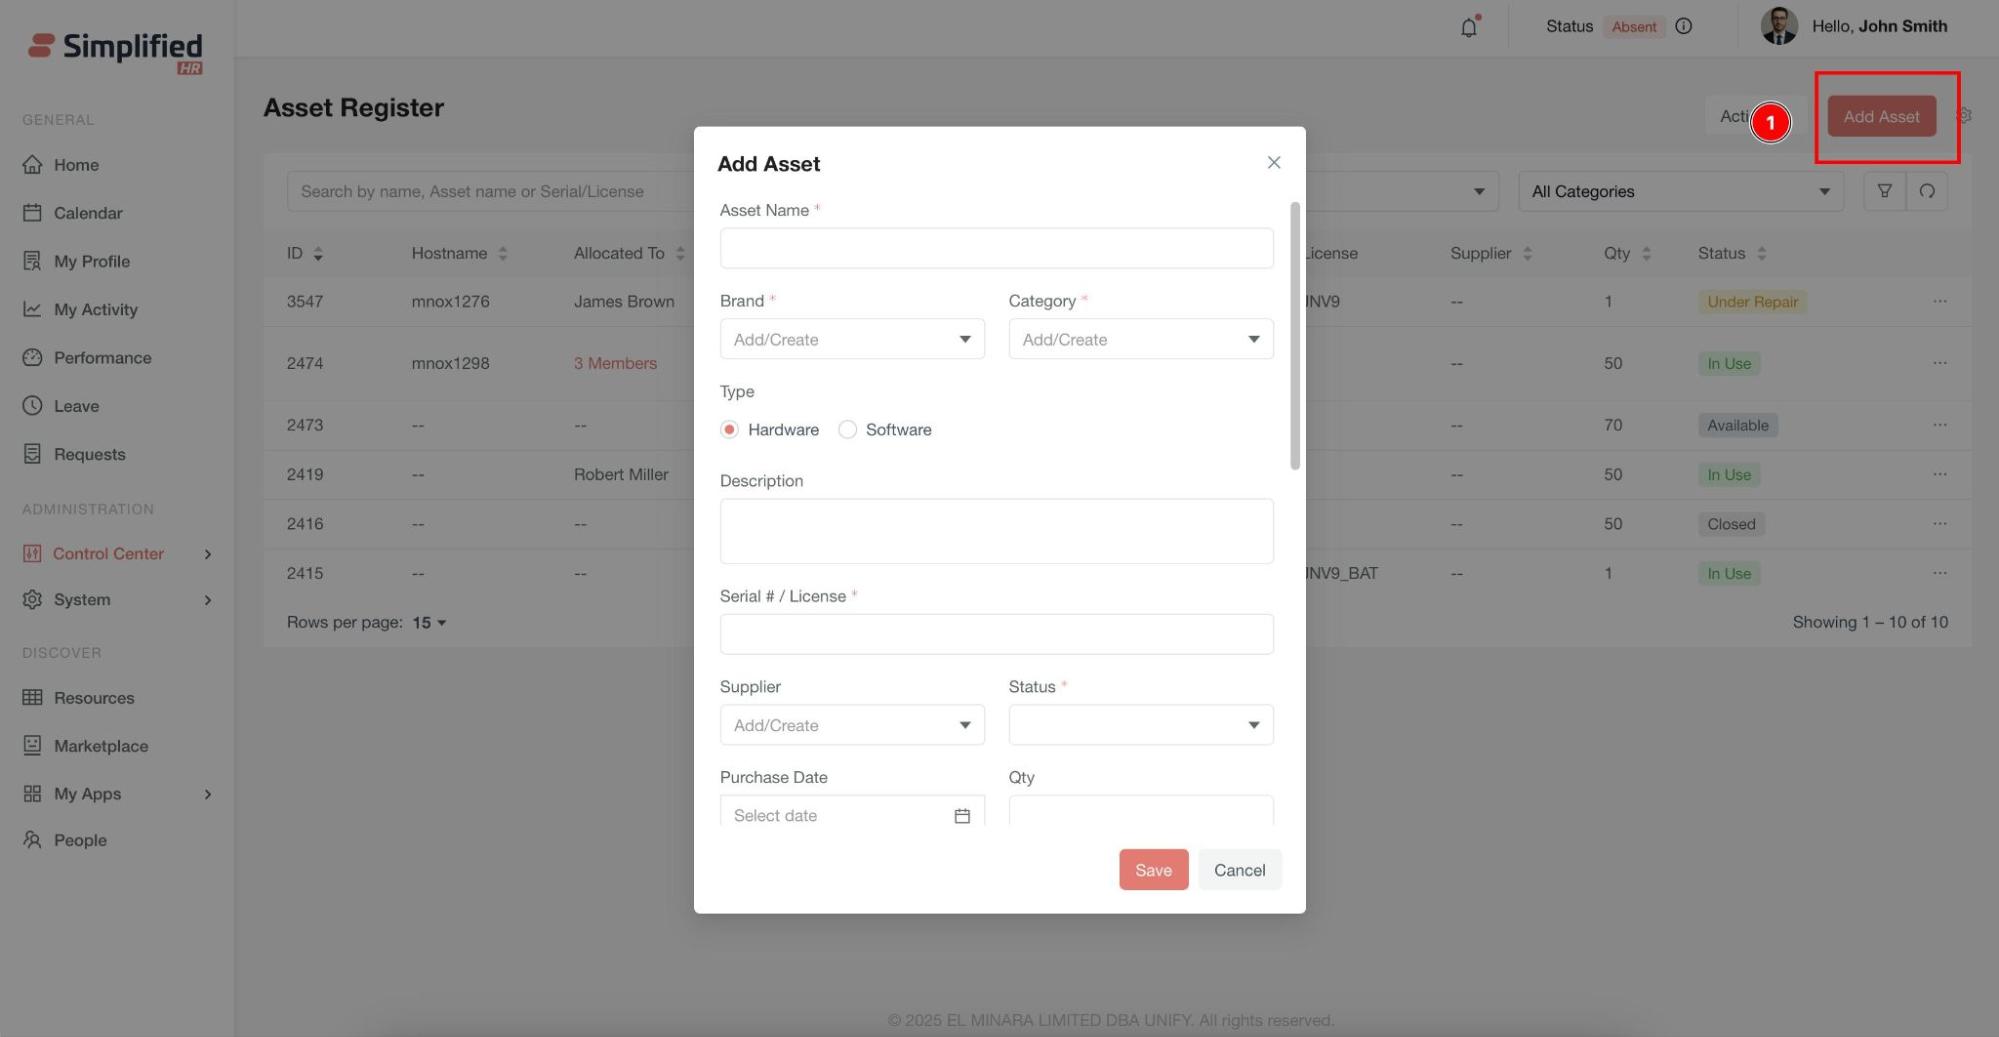
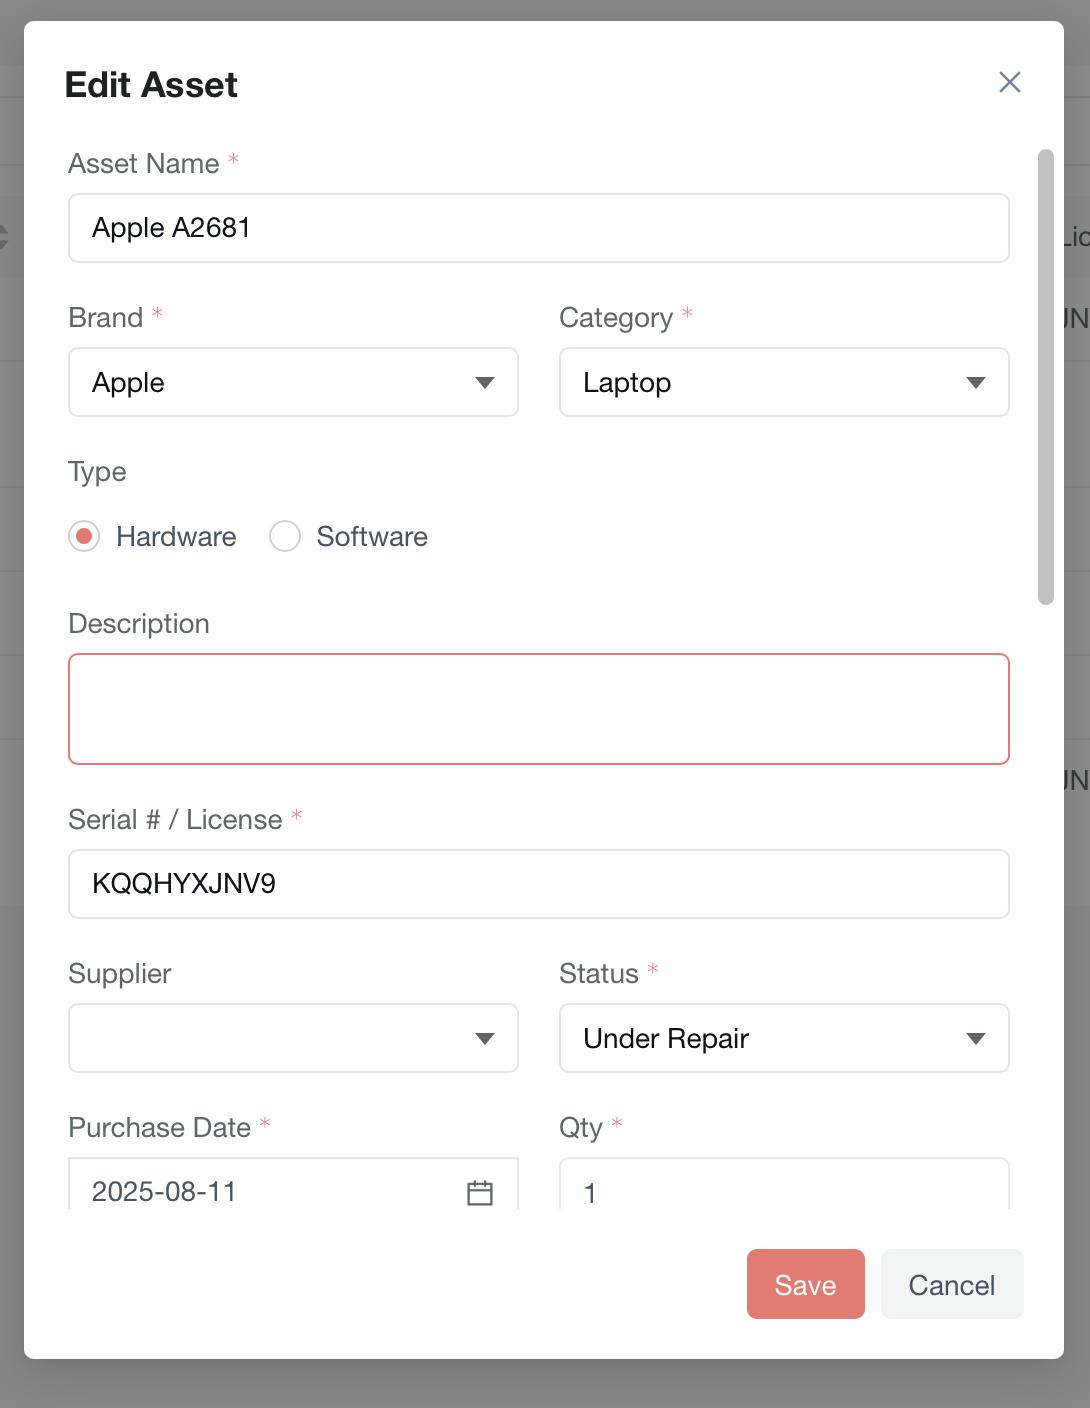
Creating New Assets
To add a new asset to your register:
-
Click the Add Asset button in the Asset Register module
-
Complete the required asset information:
-
Brand: Select from configured brands
-
Category: Choose the appropriate asset category
-
Asset Type: Specify hardware or software
-
Serial Number: Enter unique identifier
-
Description: Add relevant details
-
Supplier: Select the vendor
-
Status: Set initial status
-
Purchase Date: Record acquisition date
-
Quantity: Specify number of units
-
Optional: Attach supporting documents such as:
-
Purchase invoices
-
Warranty cards
-
User manuals
-
Click Save to create the asset
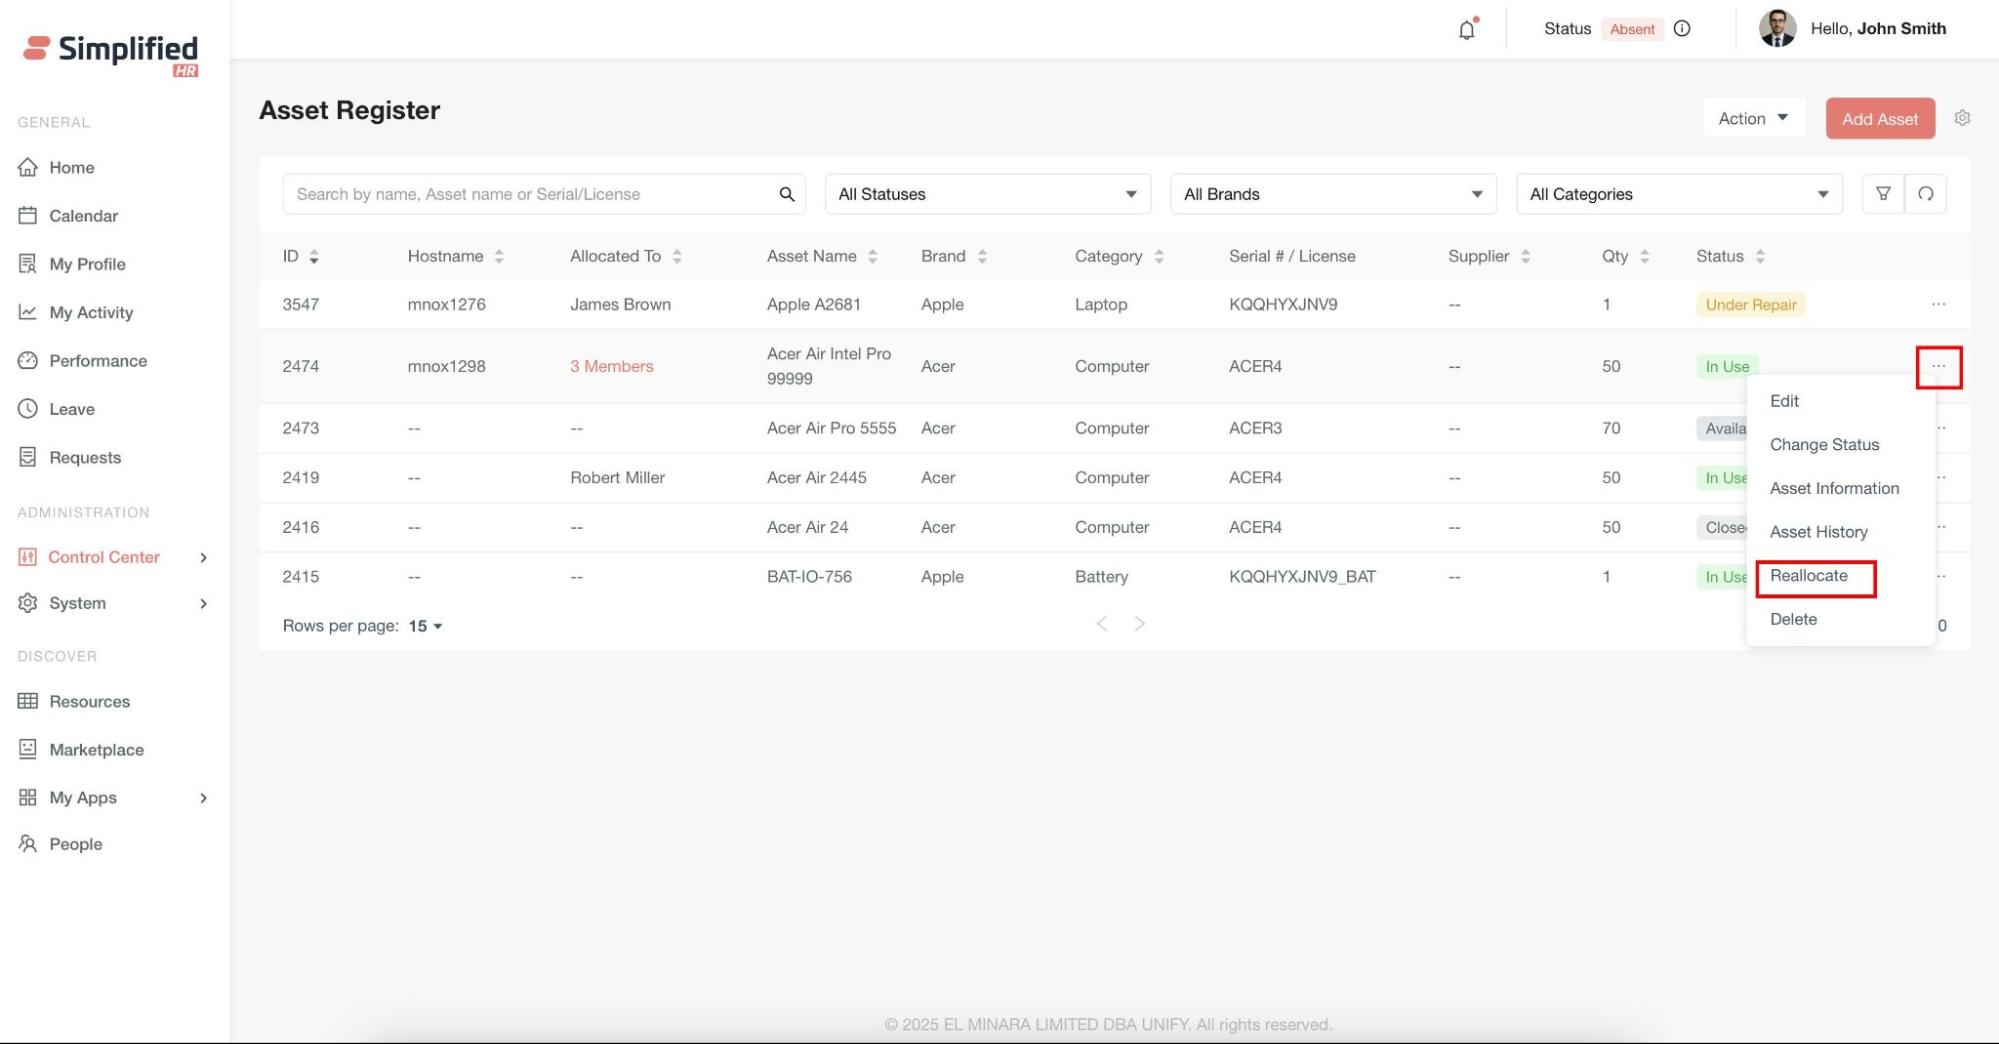
Managing Existing Assets
The Asset Register dashboard provides comprehensive asset information and management options:
Edit Asset Details
-
Locate the asset in the dashboard
-
Click Edit from the action menu
-
Update any asset information as needed
-
Reassign the asset to different users
-
Add multiple assignees if quantity allows
-
Save your changes
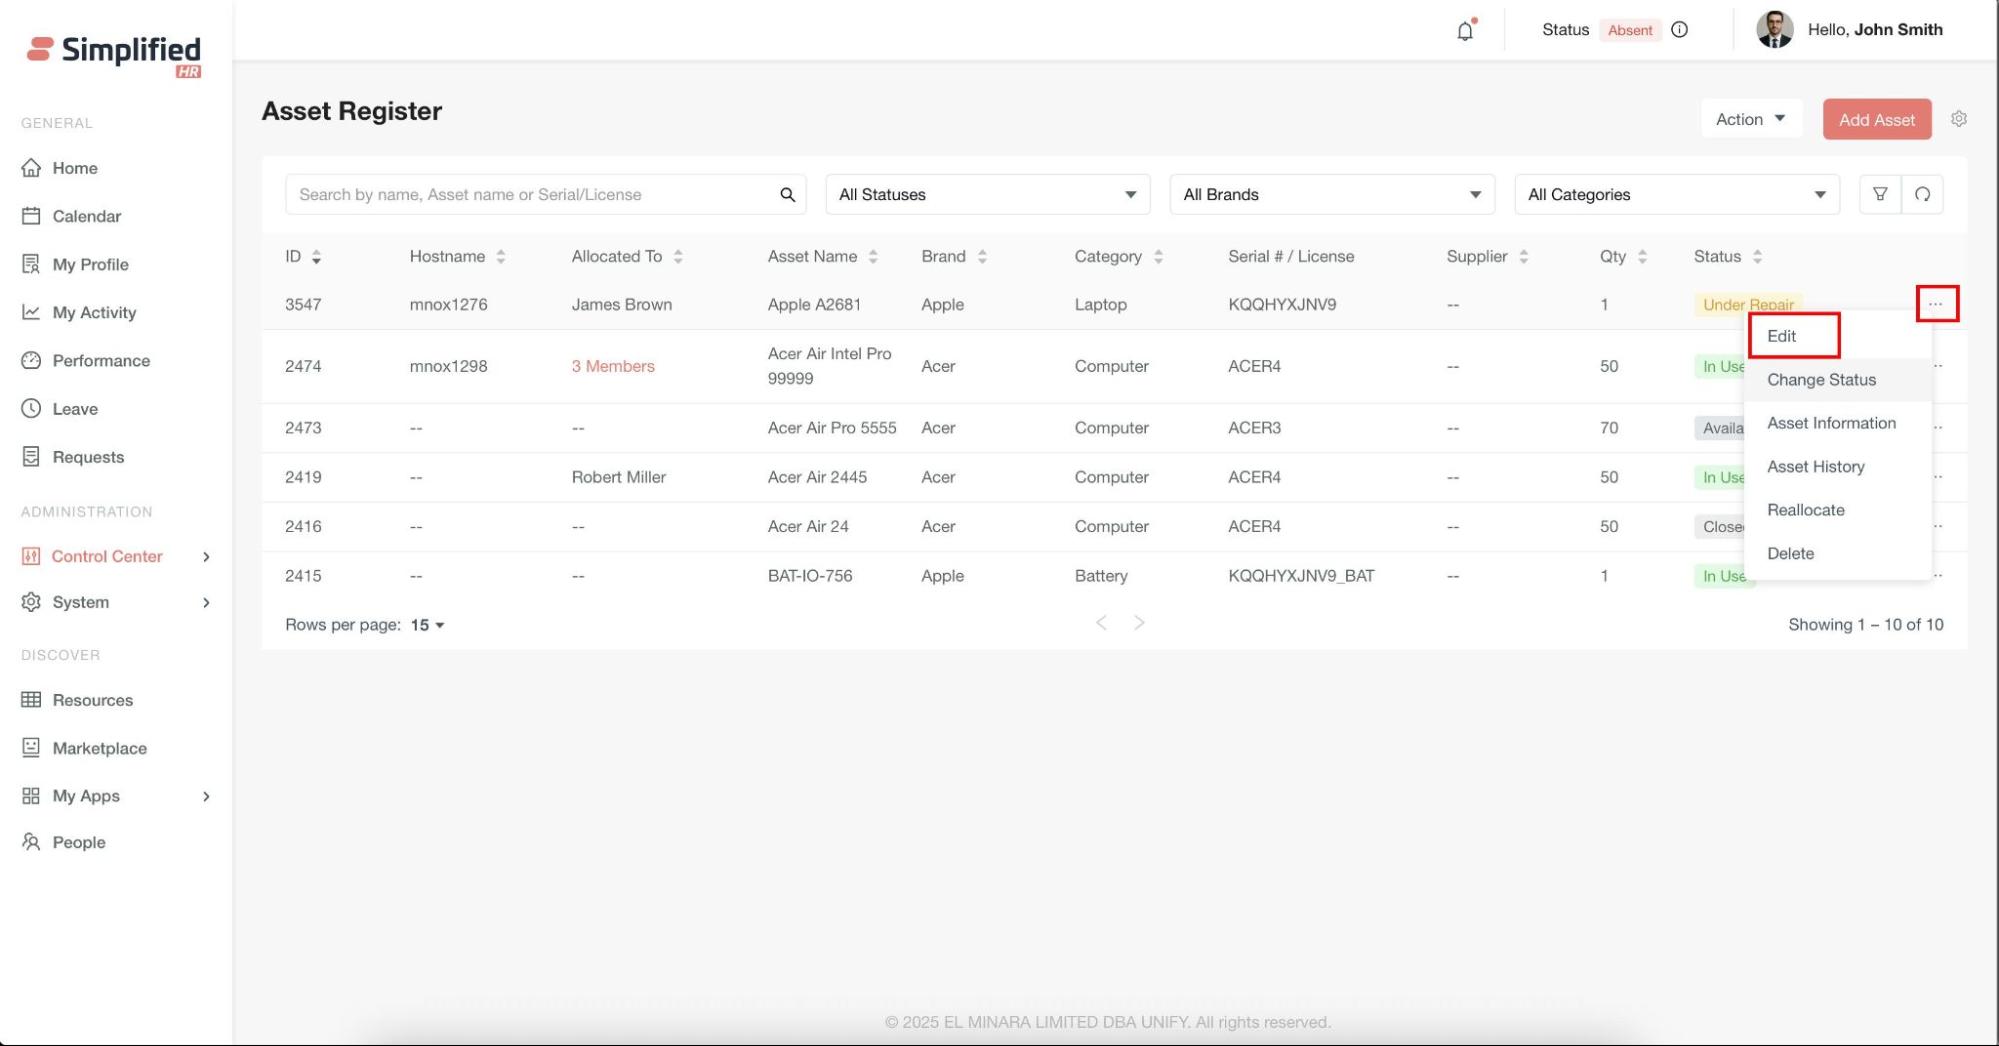
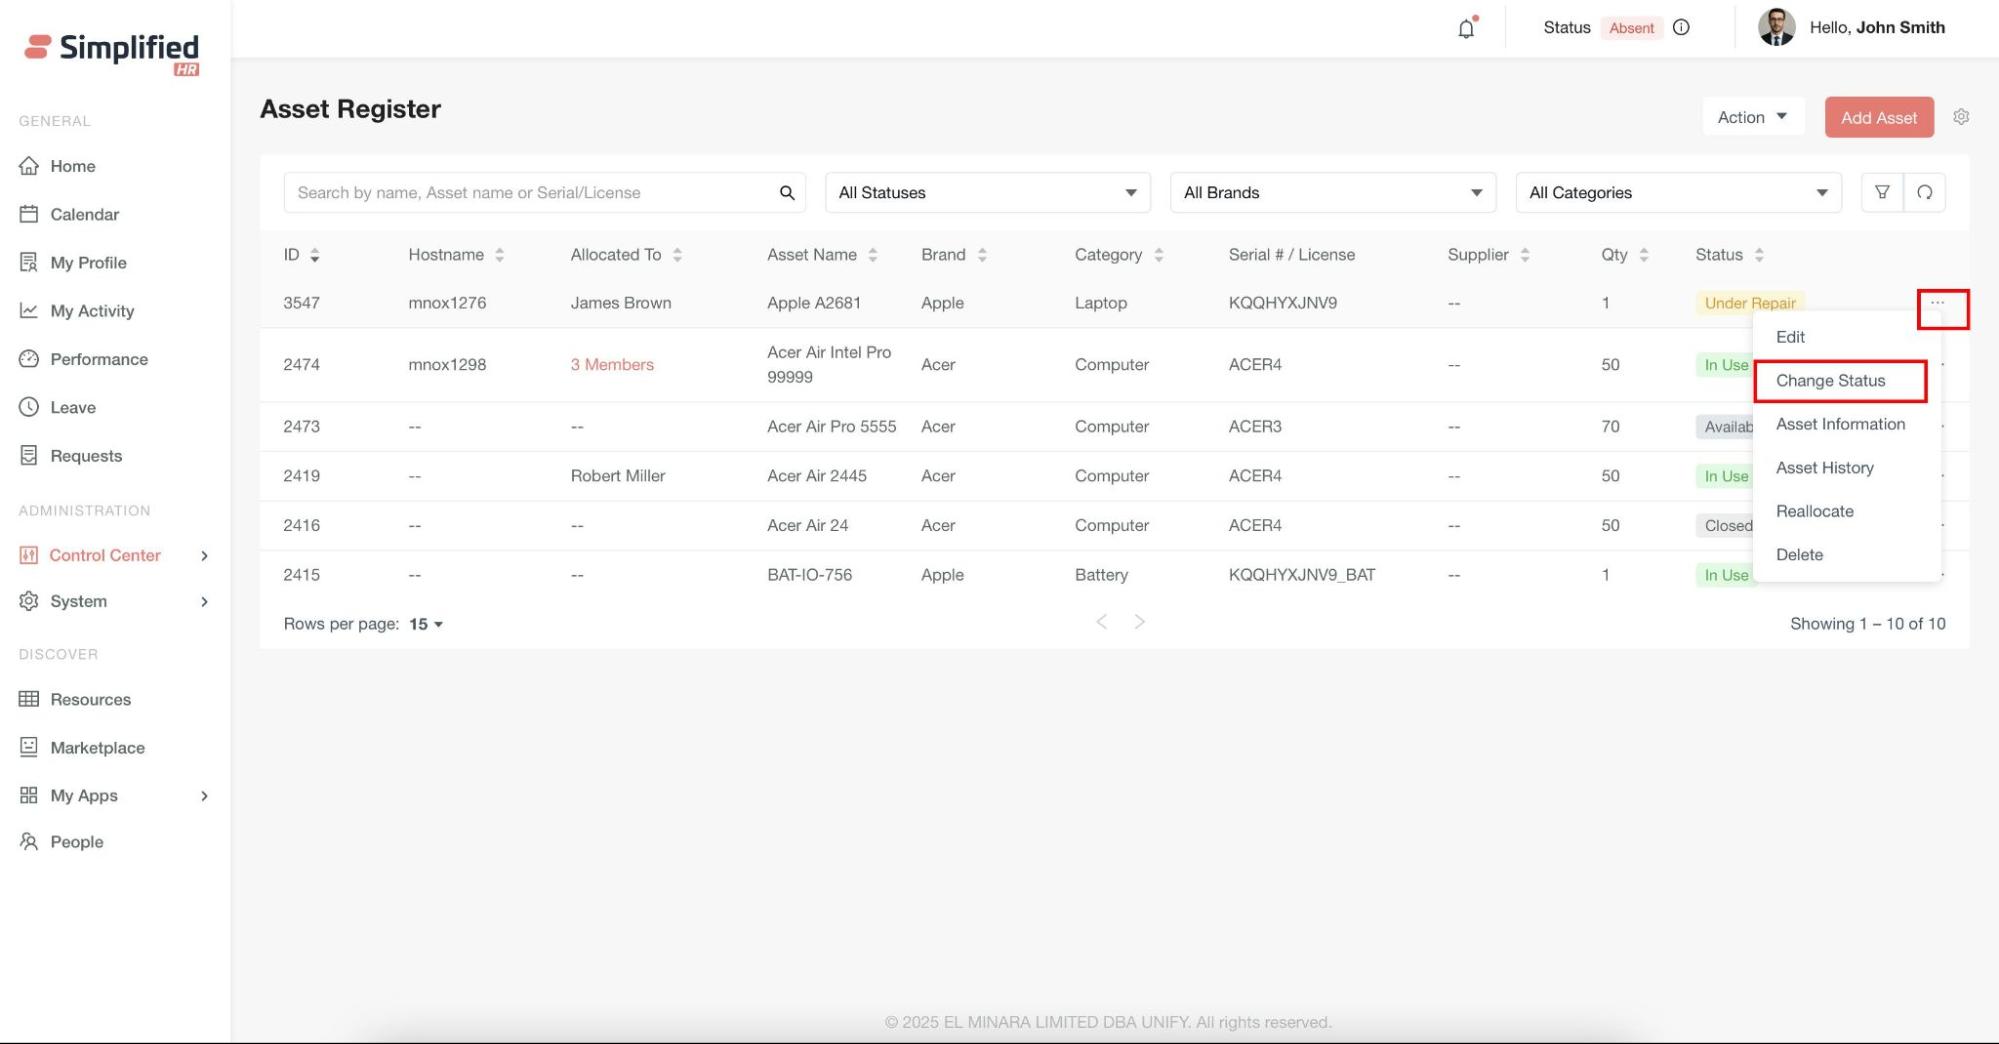
Change Asset Status
Update asset status to reflect current lifecycle stage:
-
Select Change Status from the asset's action menu
-
Choose the new status from the dropdown
-
Click Update to confirm the change

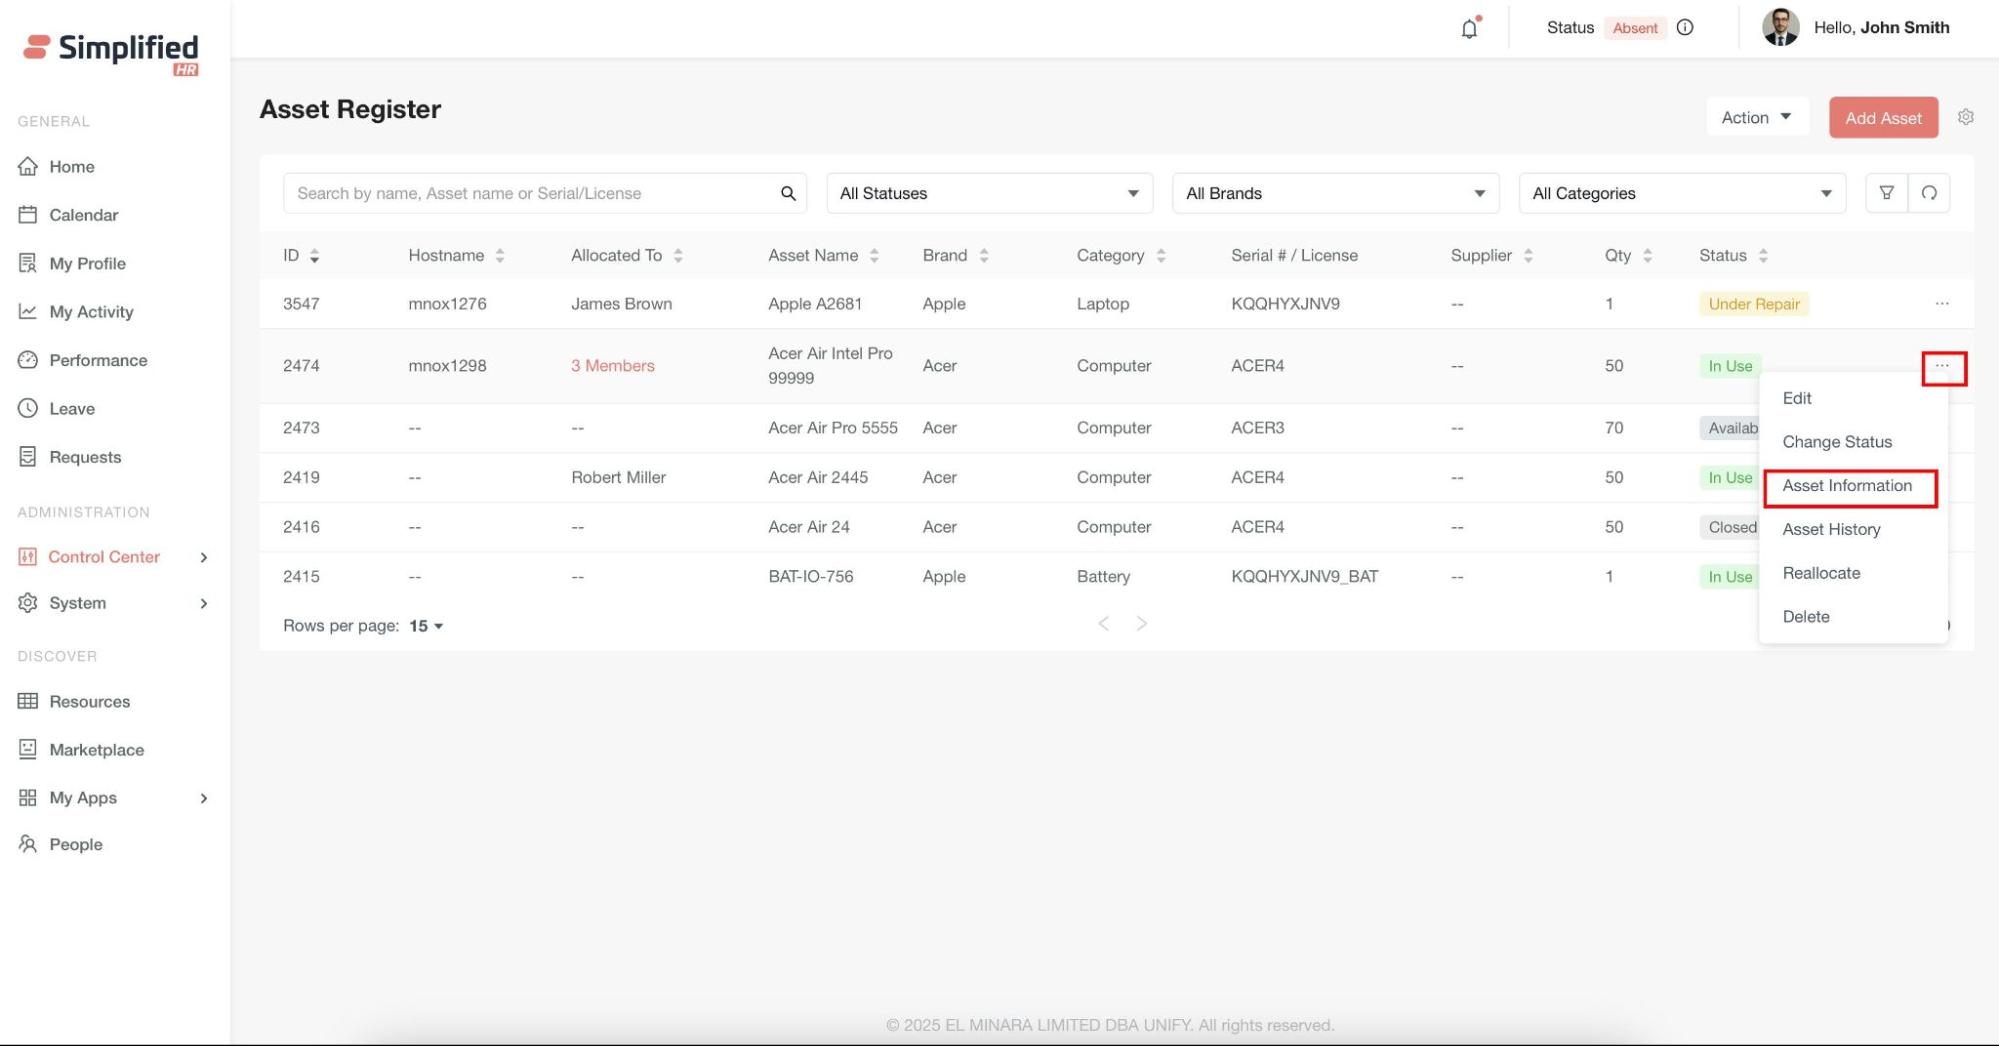
View Asset Information
Access comprehensive asset details:
-
Click Asset Information from the action menu
-
Review complete asset details including:
-
Brand, category, and type information
-
Serial number and allocation details
-
Attached documents and purchase information
-
Current status and assigned users

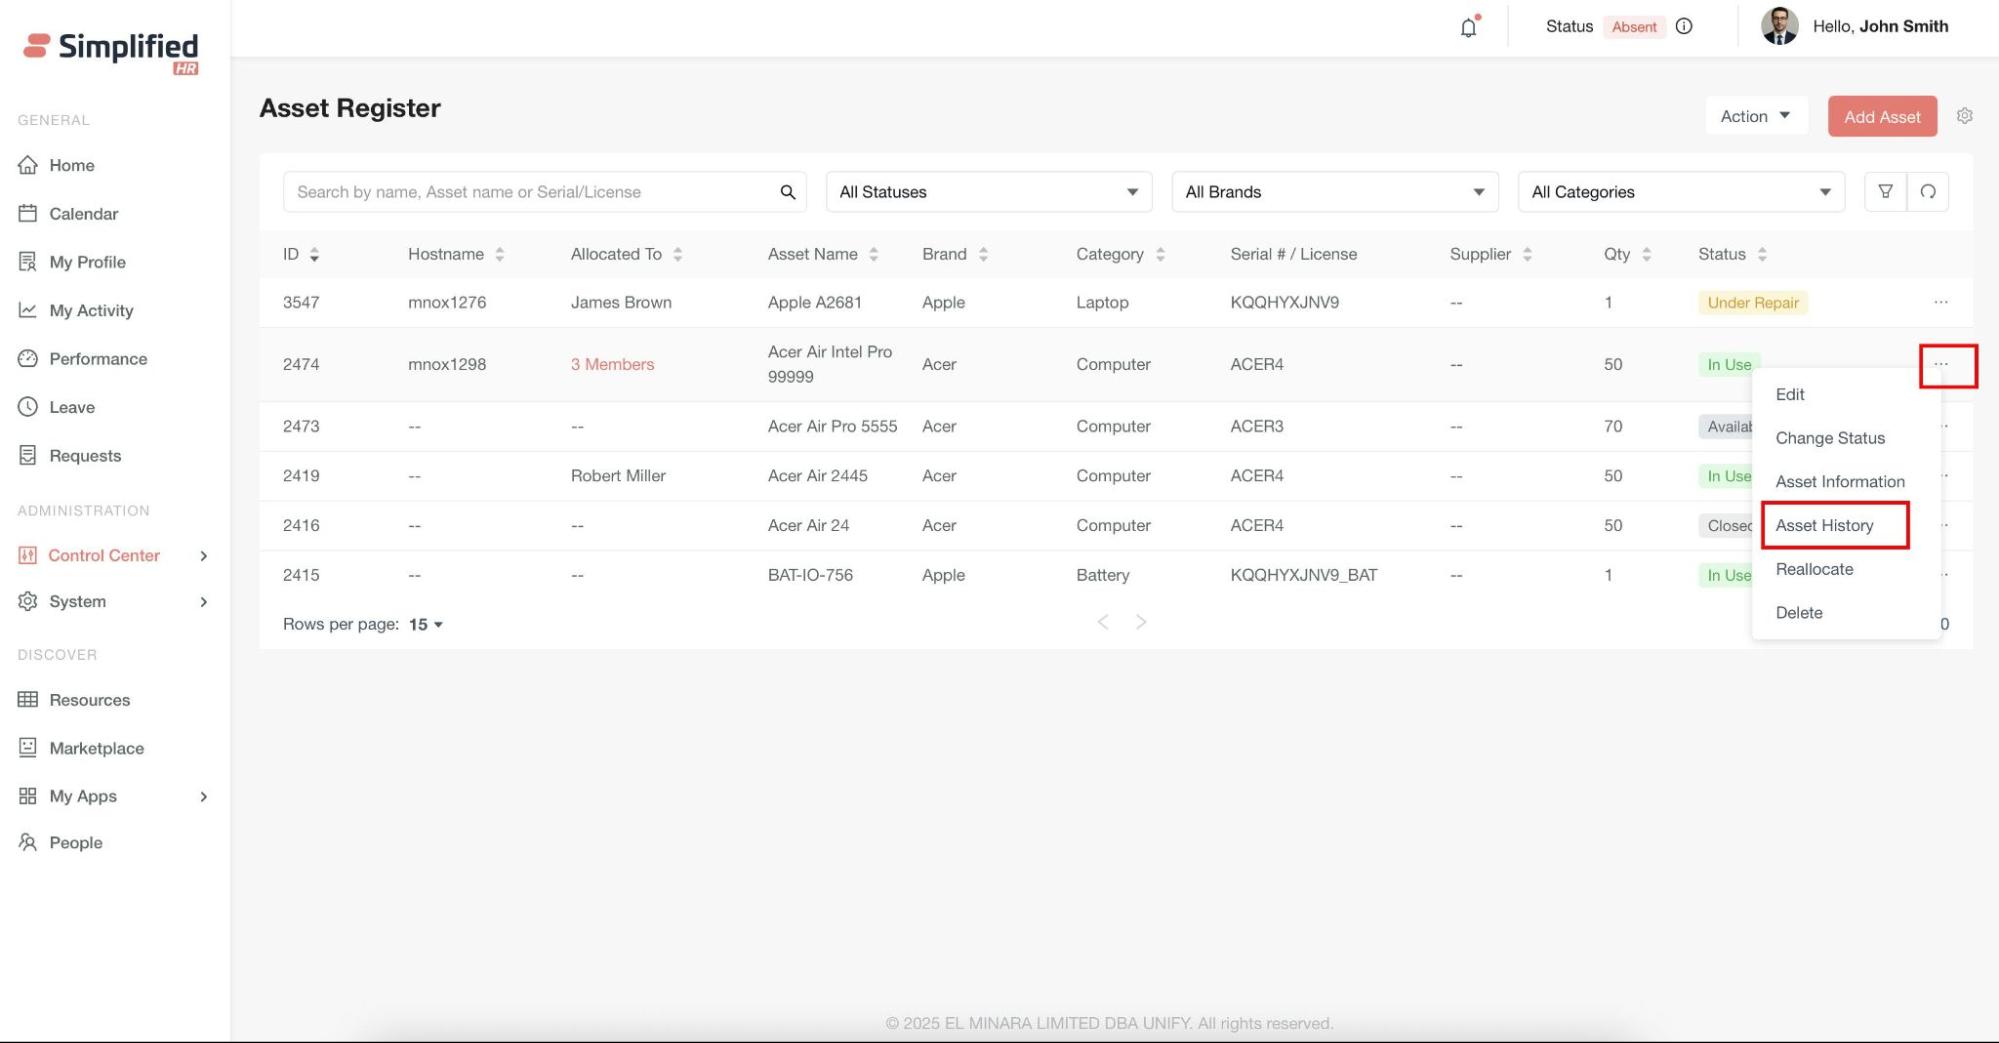
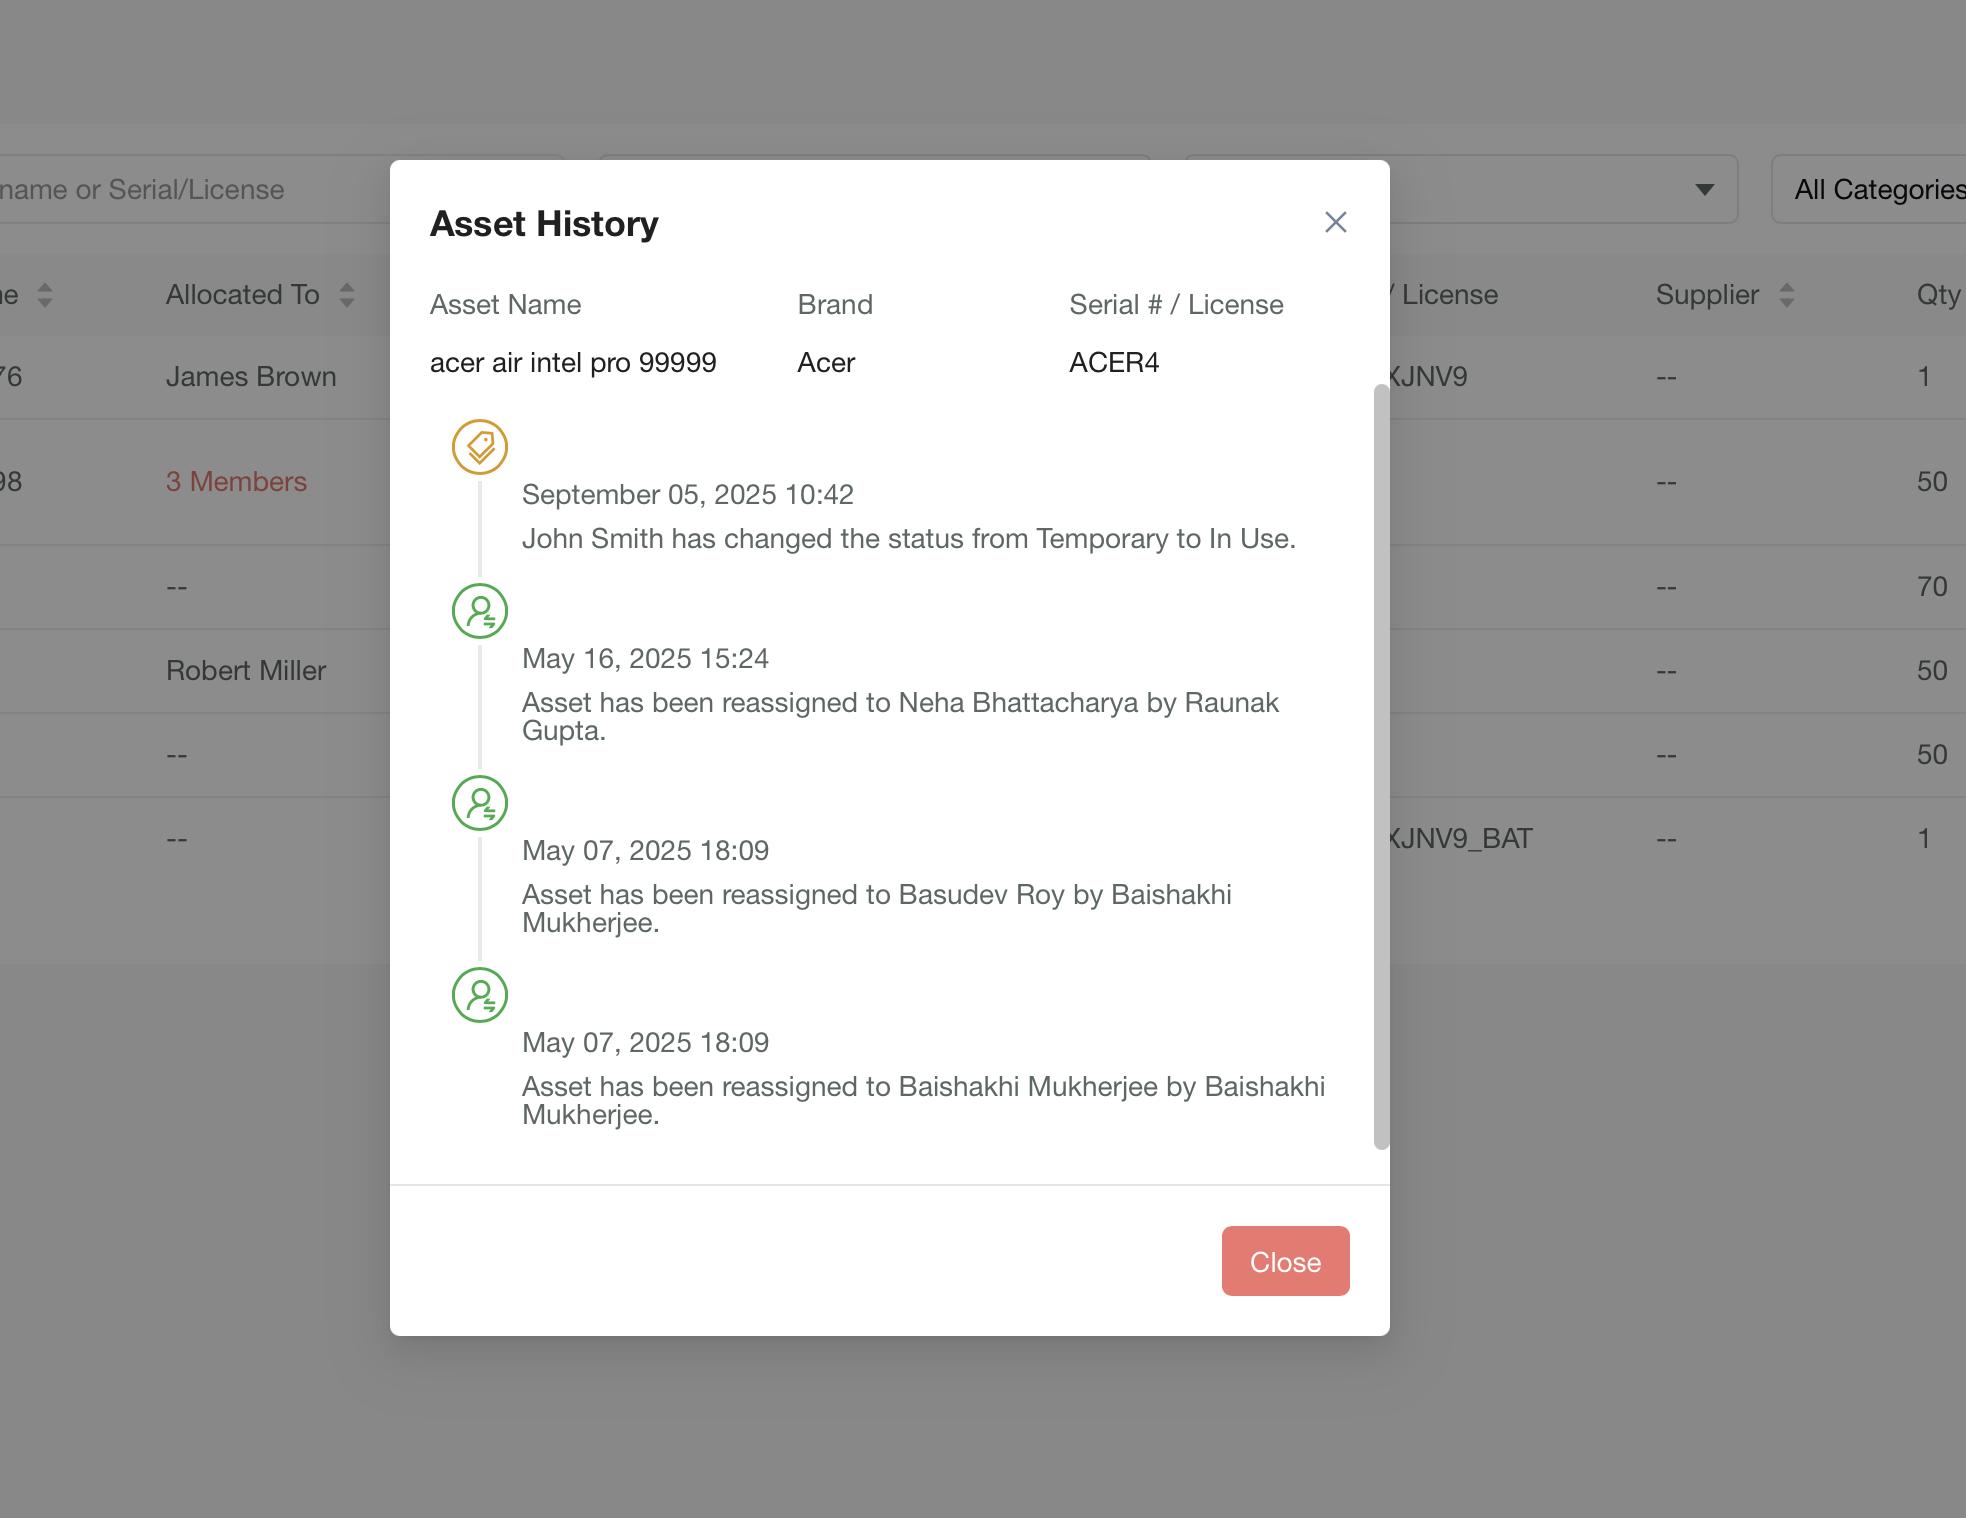
Track Asset History
Monitor complete asset lifecycle:
-
Select Asset History from the asset's action menu
-
View chronological activity log including:
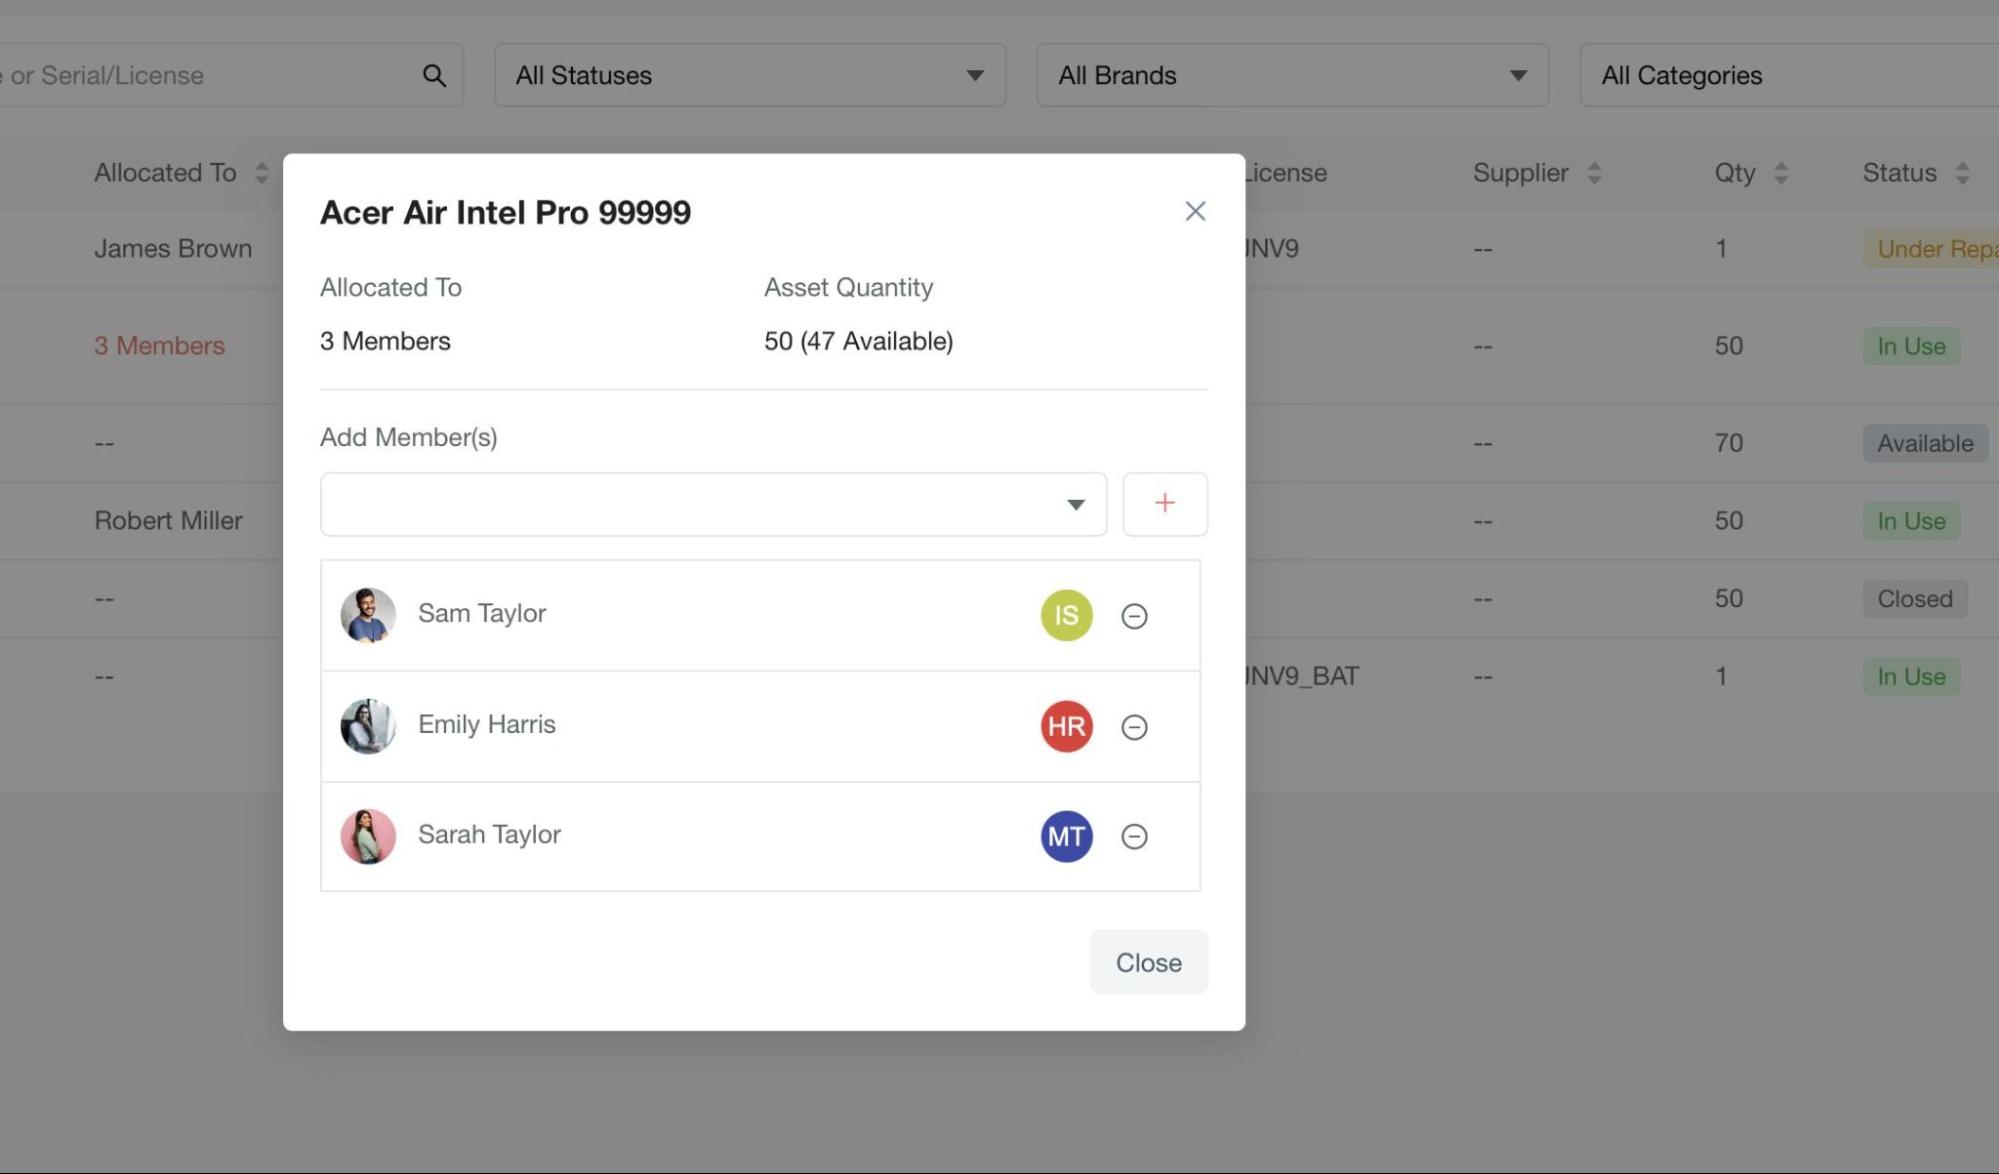
Reallocate Assets
Transfer assets between users:
-
Click Reallocate from the asset's action menu
-
Select new assignees from available users
-
Configure allocation based on asset quantity
-
Confirm the reallocation
All reallocation activities are automatically tracked in the asset history.
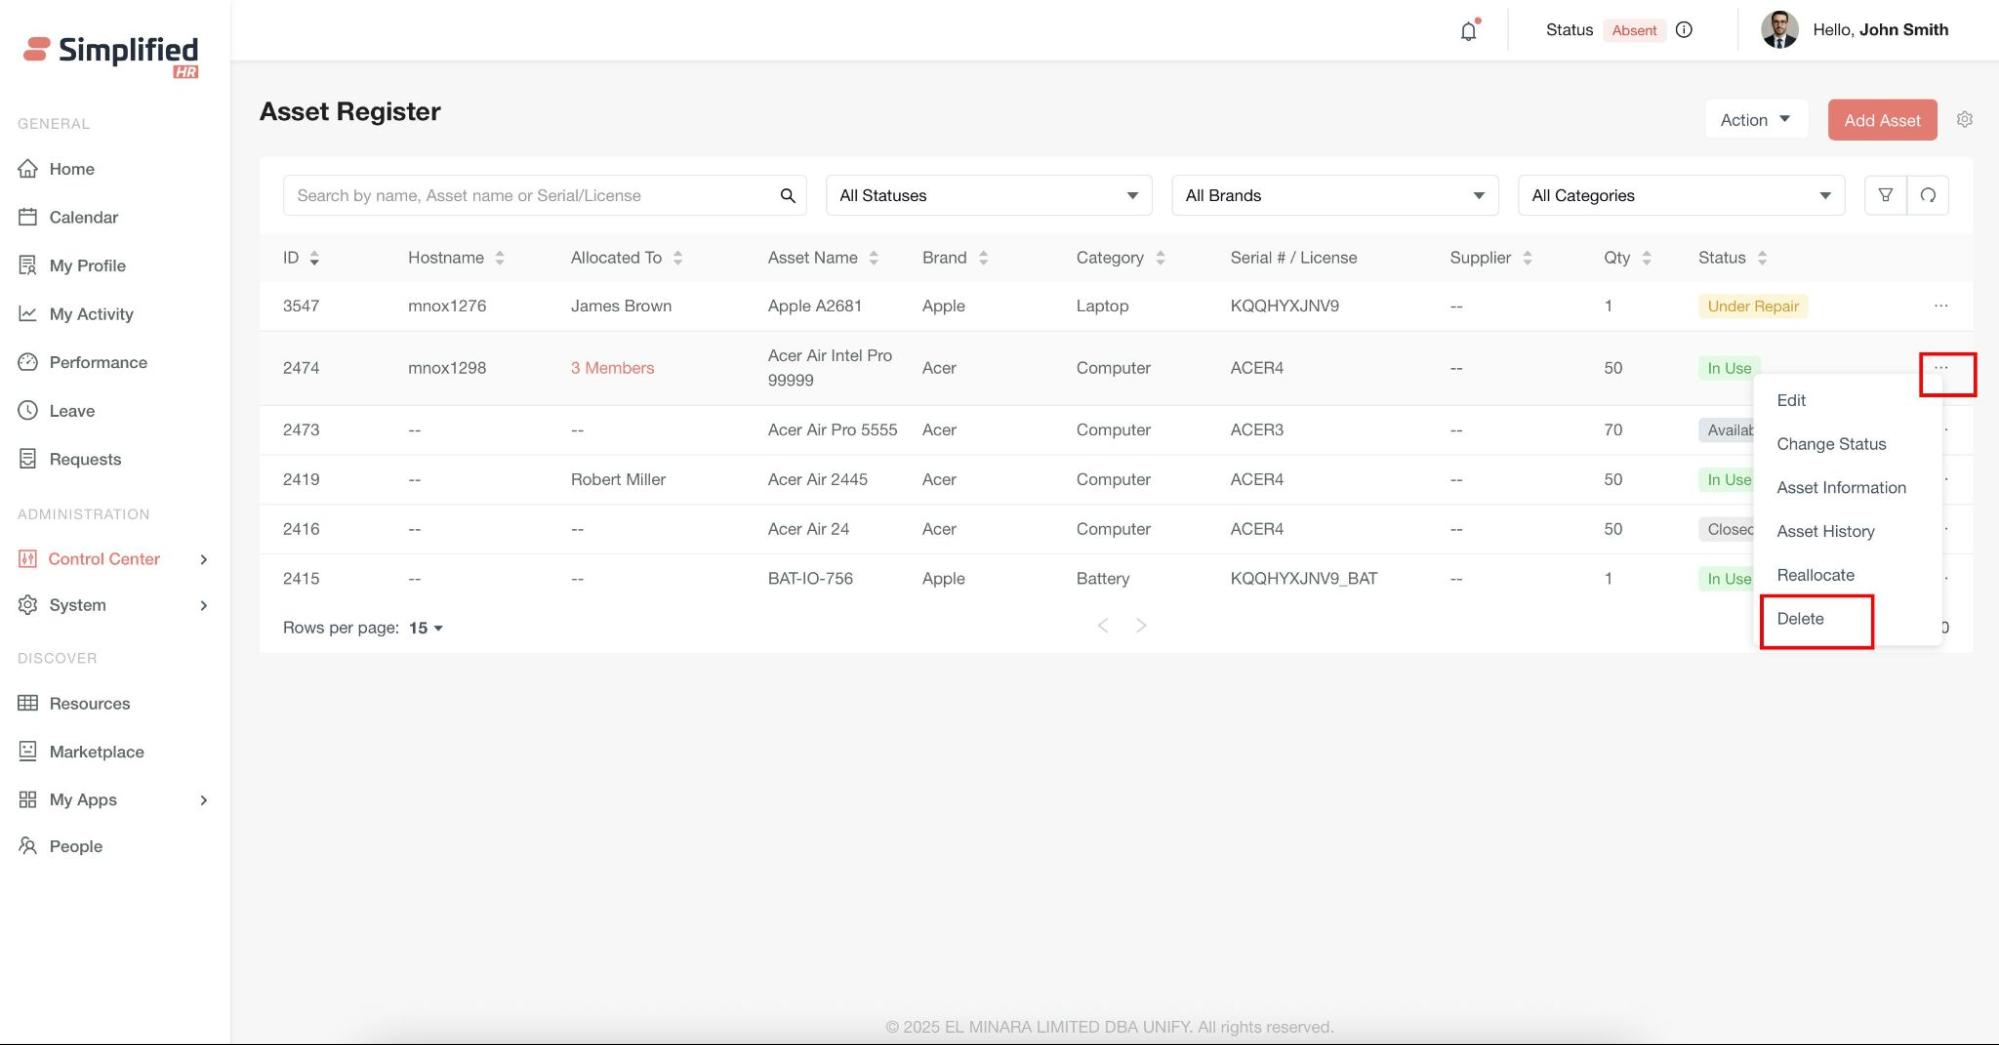
Delete Assets
Remove assets that are no longer required:
-
Select Delete from the asset's action menu
-
Confirm the deletion when prompted
-
The asset will be permanently removed from the register
Filtering and Searching
Efficiently locate and organize asset data using multiple filter options:
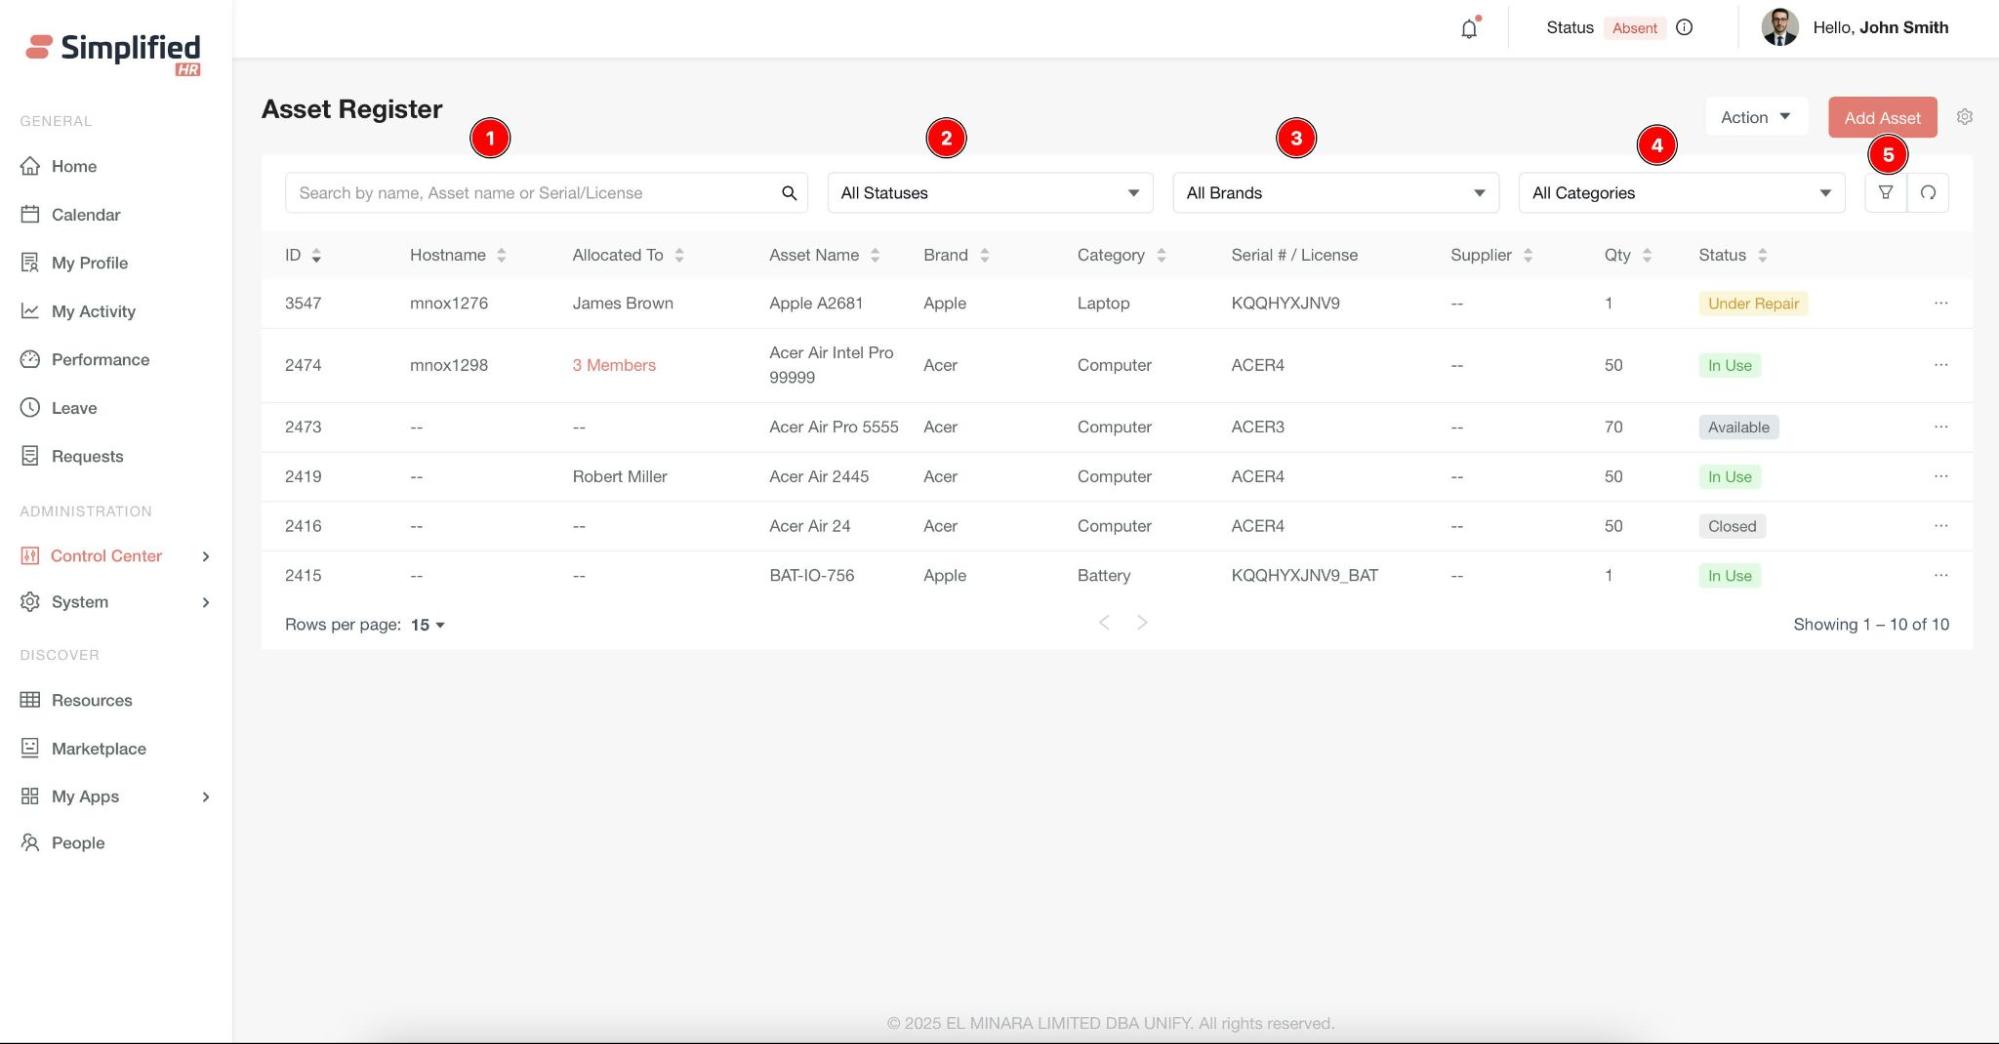
Search Functionality
Use the search box to find assets by name, serial number, or other details
Filter Options
-
Status: View assets by lifecycle status
-
Brand: Filter by manufacturer or brand
-
Category: Filter by asset type
-
Advanced filters: Use additional criteria for precise data refinement
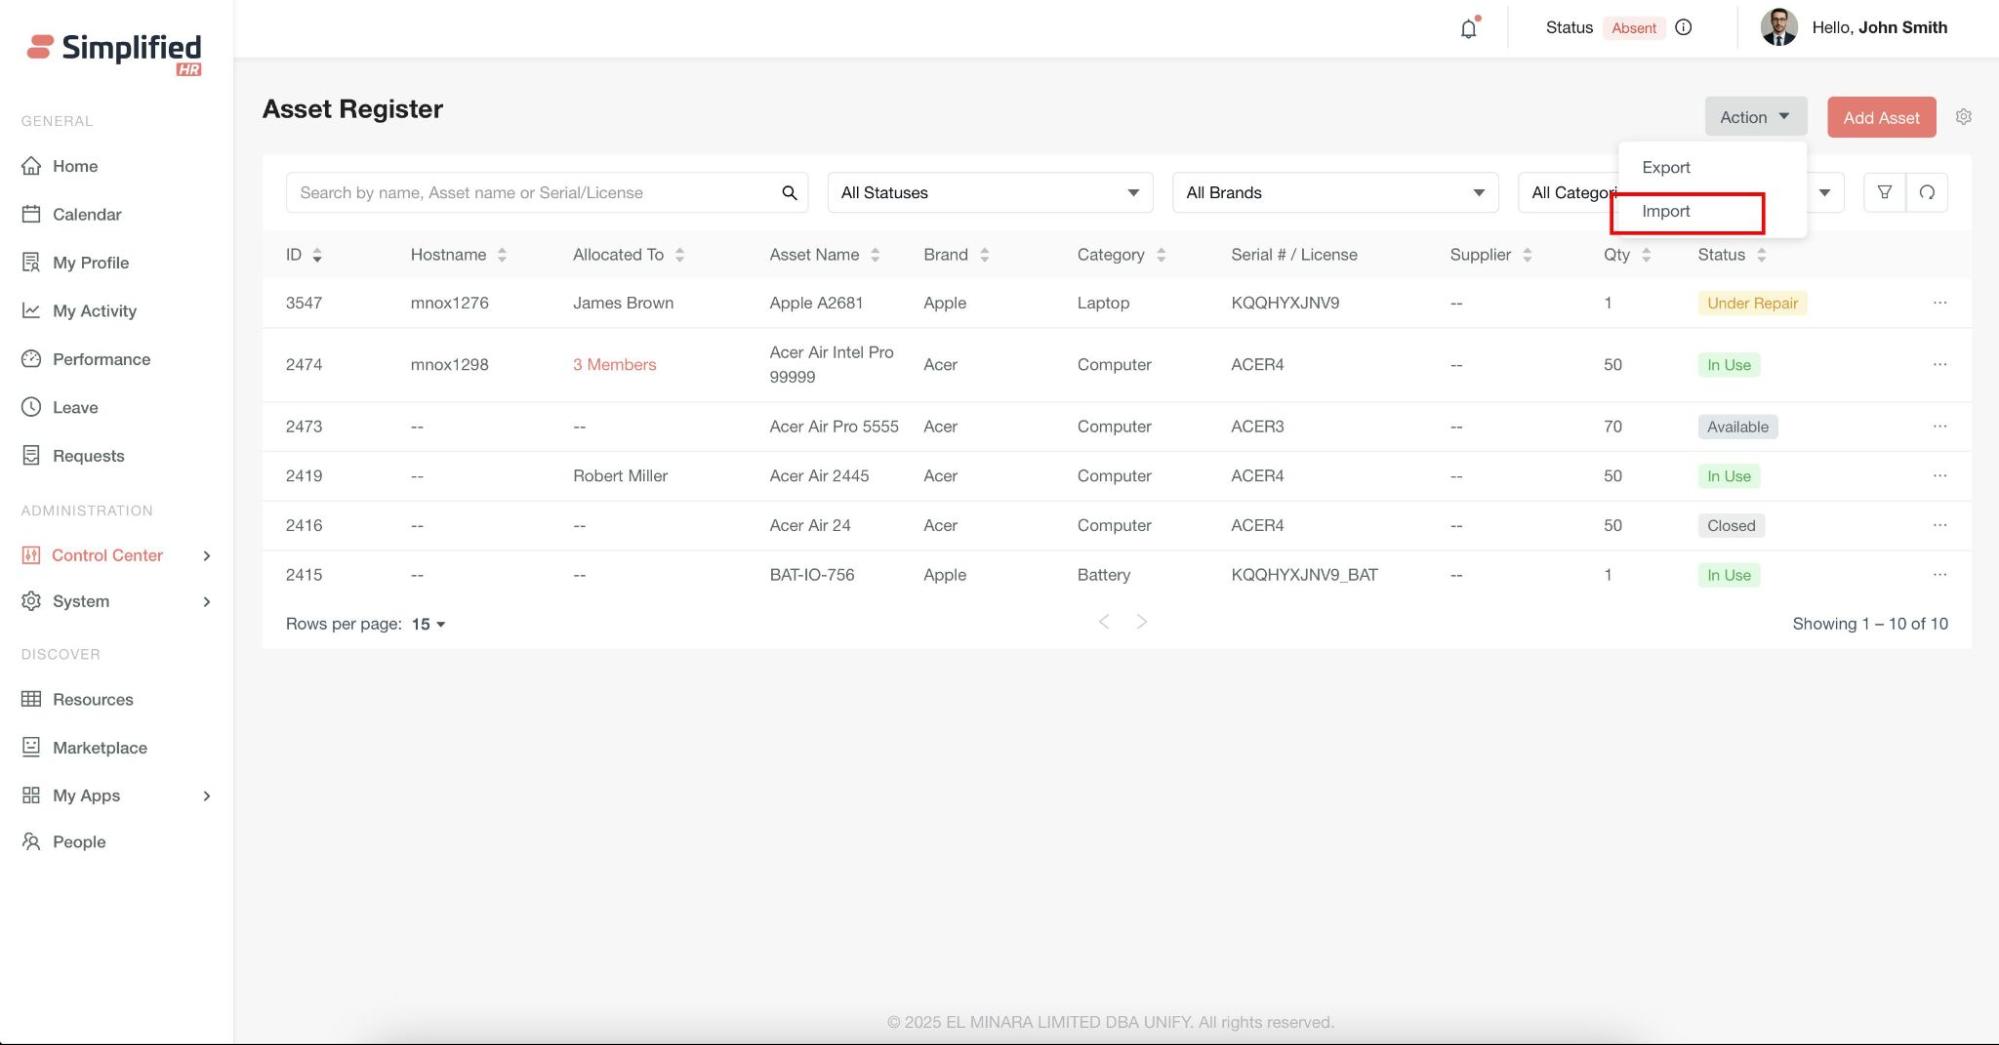
Data Management
Importing Asset Data
Bulk import existing asset data instead of adding assets individually:
- Go to Actions > Import
-
Download the Sample Template to ensure correct data format
-
Prepare your asset data following the template structure
-
Supported file formats:
-
Upload your prepared file and click Import
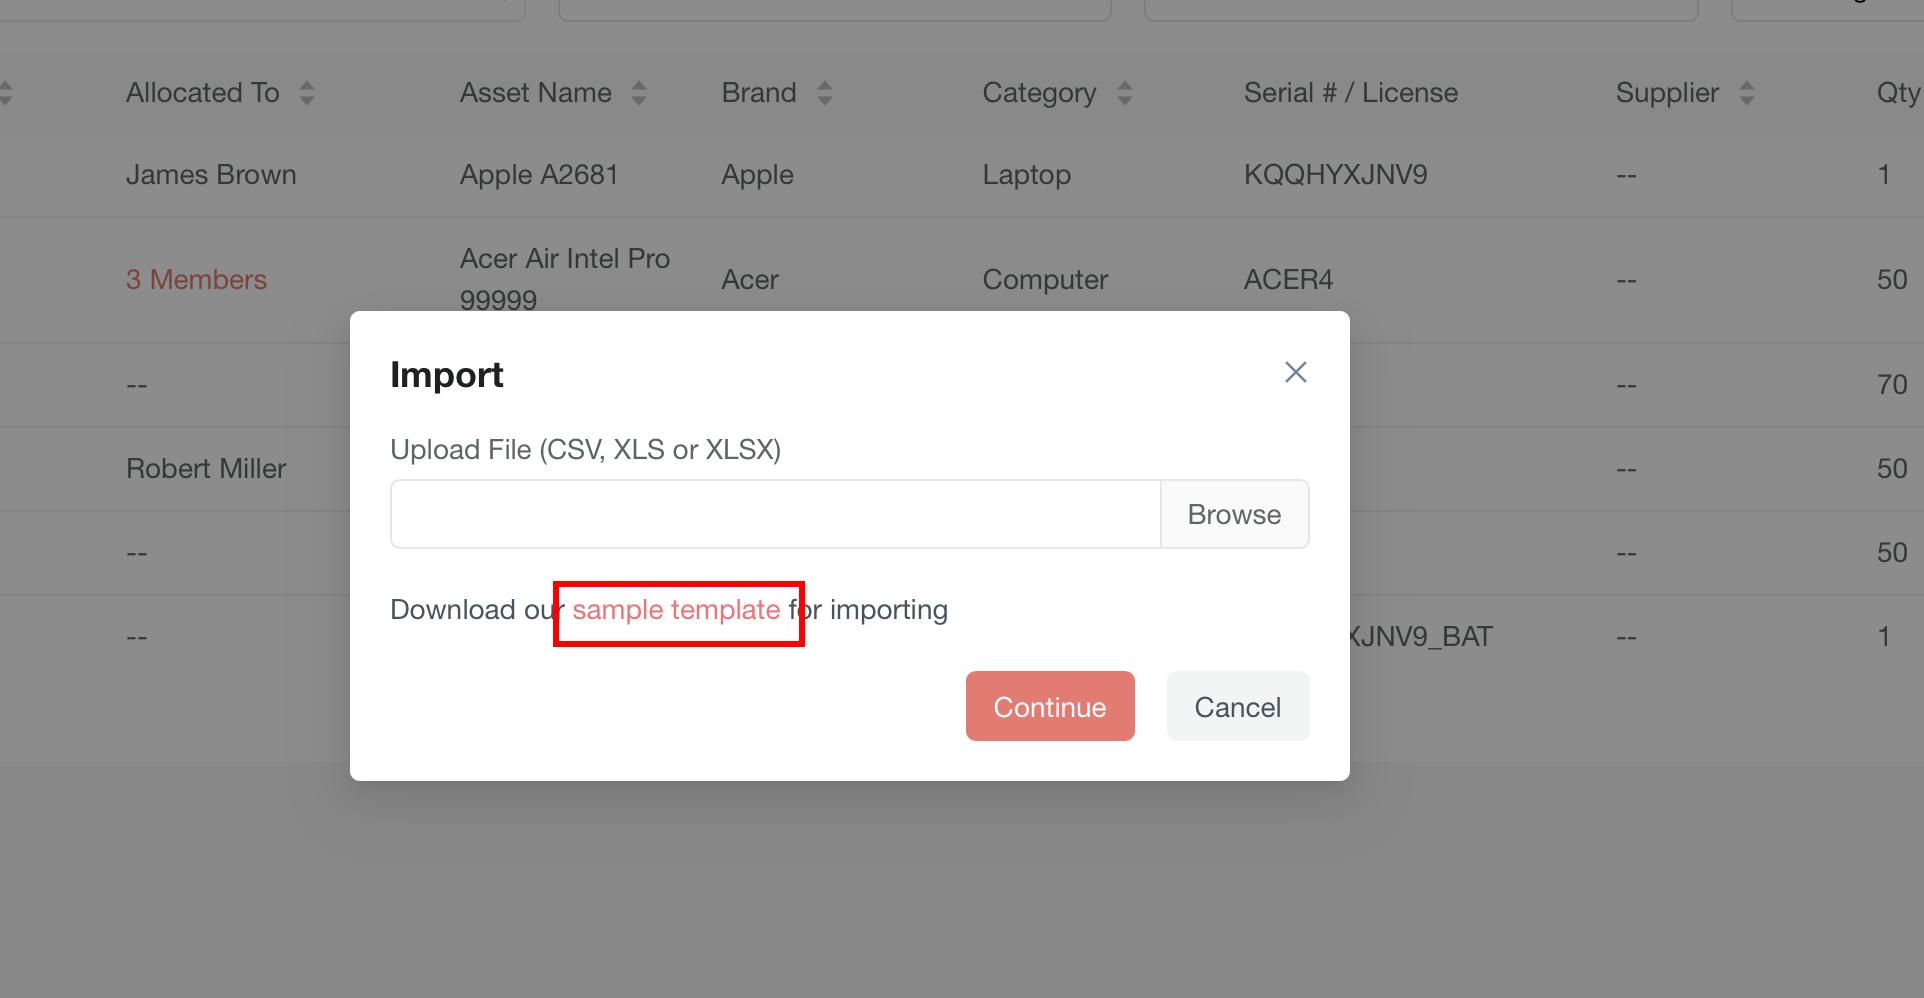
Important: Files must strictly follow the sample template format, otherwise the import will fail.
Exporting Asset Data
Generate reports and maintain records by exporting asset data:
-
Navigate to the Export option in the Asset Register module
-
Configure export settings:
-
Export Type:
-
Recipients: Add email addresses for automatic delivery
-
Time Zone: Set appropriate timezone
-
Schedule: Configure automated export intervals
-
Format: Choose from CSV, XLS, or XLSX
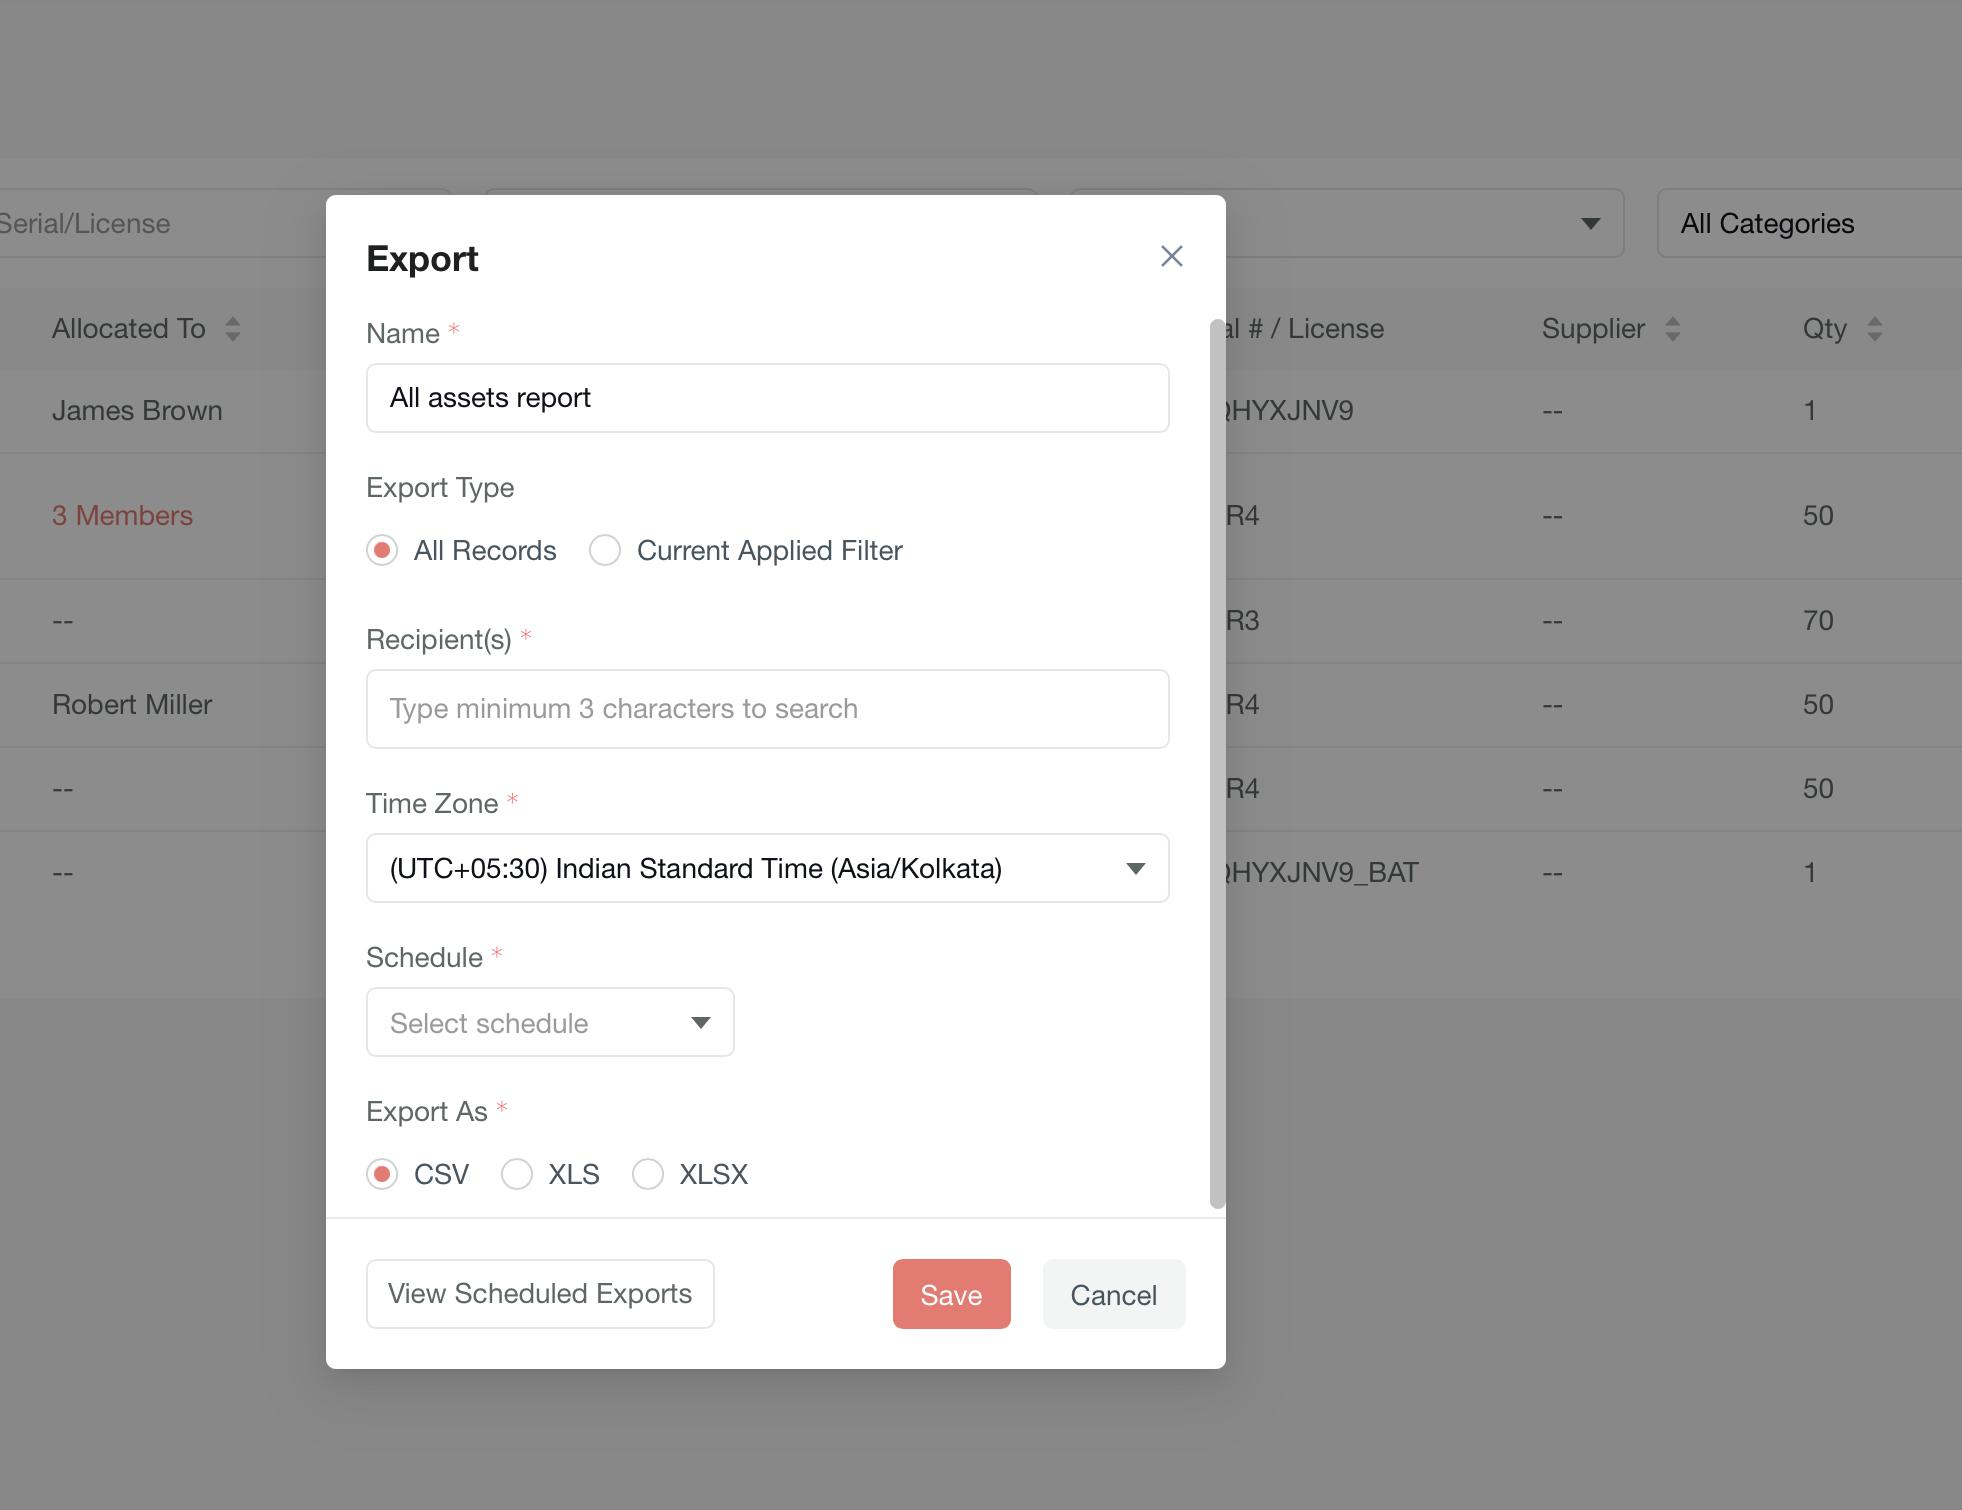
- Click Save to process the export
Scheduled Exports
-
View all scheduled exports in the Scheduled Export list
-
Delete scheduled exports when no longer required
-
Modify export parameters as needed
User Asset View
Viewing Assigned Assets
Users can easily track their allocated assets:
-
Navigate to My Profile > Asset Section
-
Review assigned assets including:
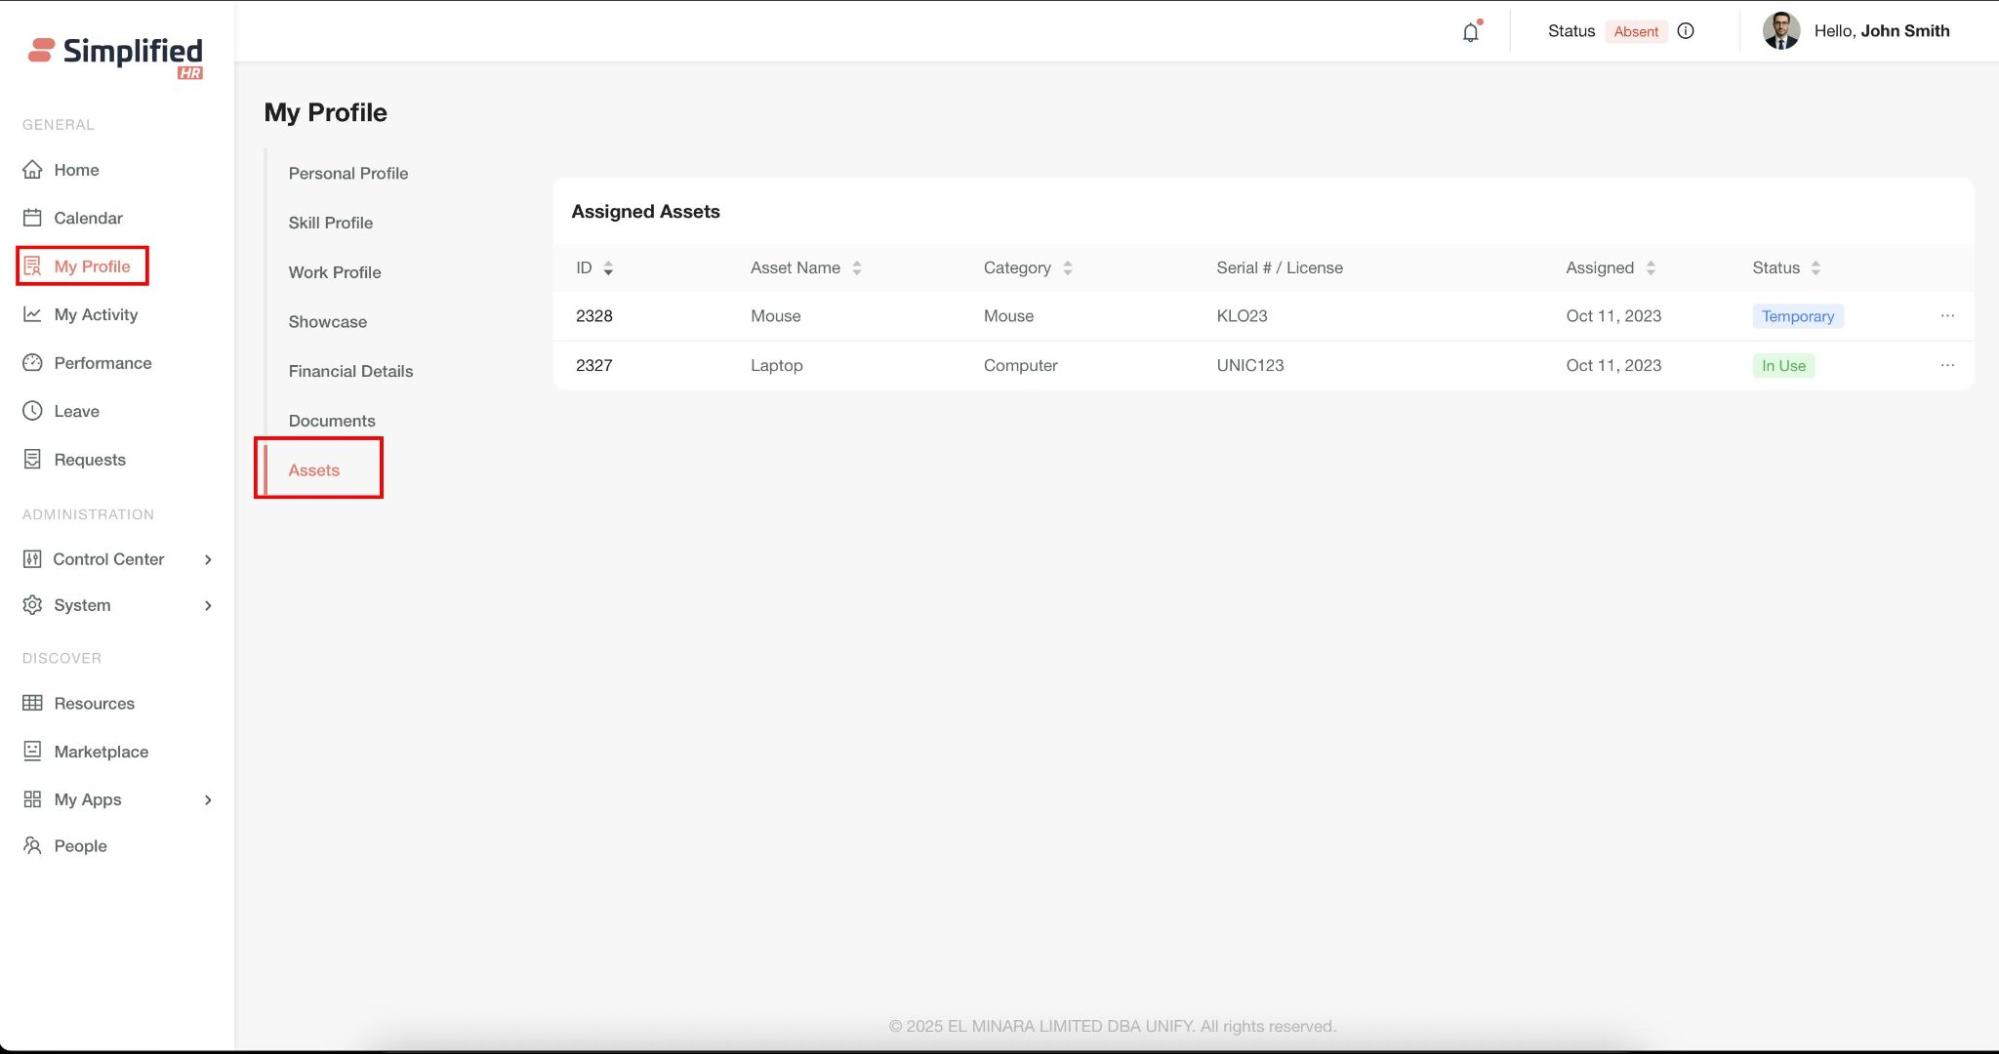
This personal view helps users maintain awareness of their asset responsibilities and current allocations.
Best Practices
-
Regular maintenance: Use maintenance reminders to ensure asset longevity
-
Accurate categorization: Maintain consistent brand, category, and supplier classifications
-
Status updates: Keep asset statuses current to reflect actual conditions
-
Documentation: Attach relevant documents during asset creation
-
History tracking: Regularly review asset history for lifecycle insights
-
Export scheduling: Set up automated exports for regular reporting
Troubleshooting
Import Failures
-
Verify your data file matches the sample template format exactly
-
Check that all required fields are populated
-
Ensure file format is supported (.csv, .xls, .xlsx)
Missing Assets in Dashboard
-
Check status visibility toggles in module settings
-
Verify applied filters aren't hiding assets
-
Confirm user permissions for asset access
Assignment Issues
-
Verify asset quantity allows additional assignments
-
Check user permissions for asset reallocation
-
Ensure target users have active accounts
Next Steps
-
Advanced reporting: Explore export options for detailed asset analytics
-
Integration setup: Configure maintenance reminder notifications
-
User training: Share asset management workflows with your team
-
Regular audits: Schedule periodic asset status reviews and updates
For additional support with asset management workflows, consult your system administrator or refer to the user permissions documentation.