This guide explains how to manage teams within your organization using the Teams feature. You will learn how to create, edit, rename, and delete teams, as well as efficiently manage team members.
Accessing Teams
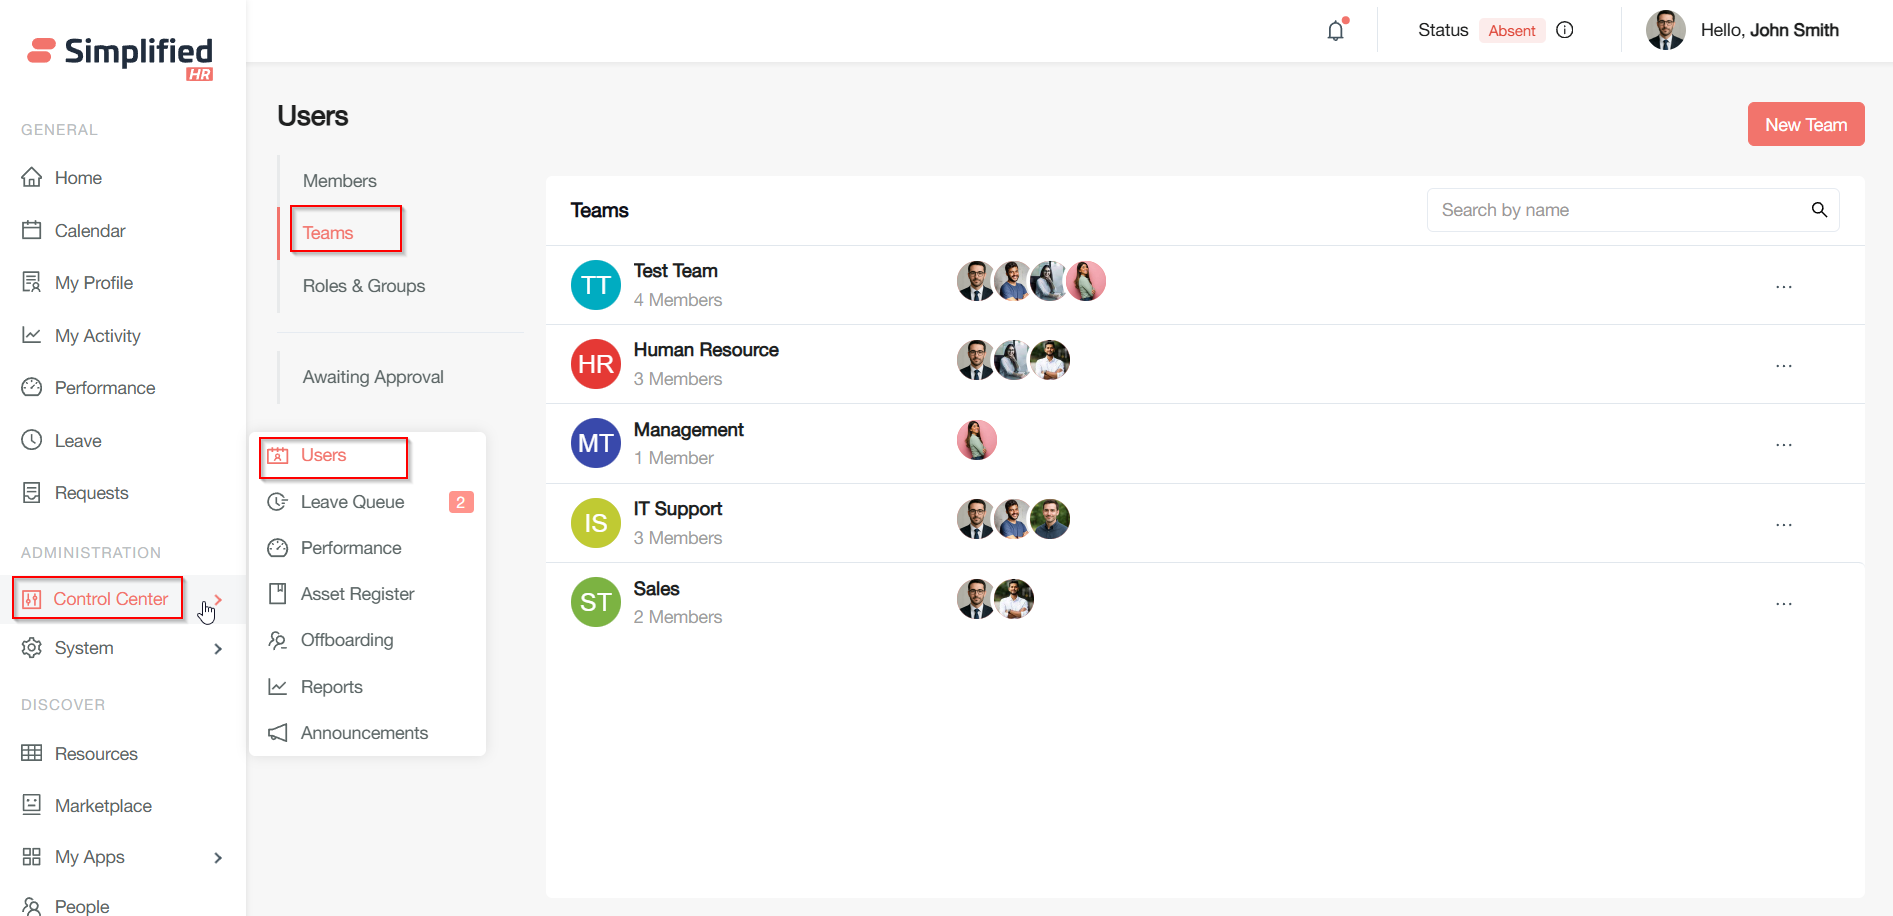
Navigate to Control Center > Users > Teams to access the Teams feature.
Creating a New Team
-
Click the New team button
-
A pop-up dialog opens where you enter the team details
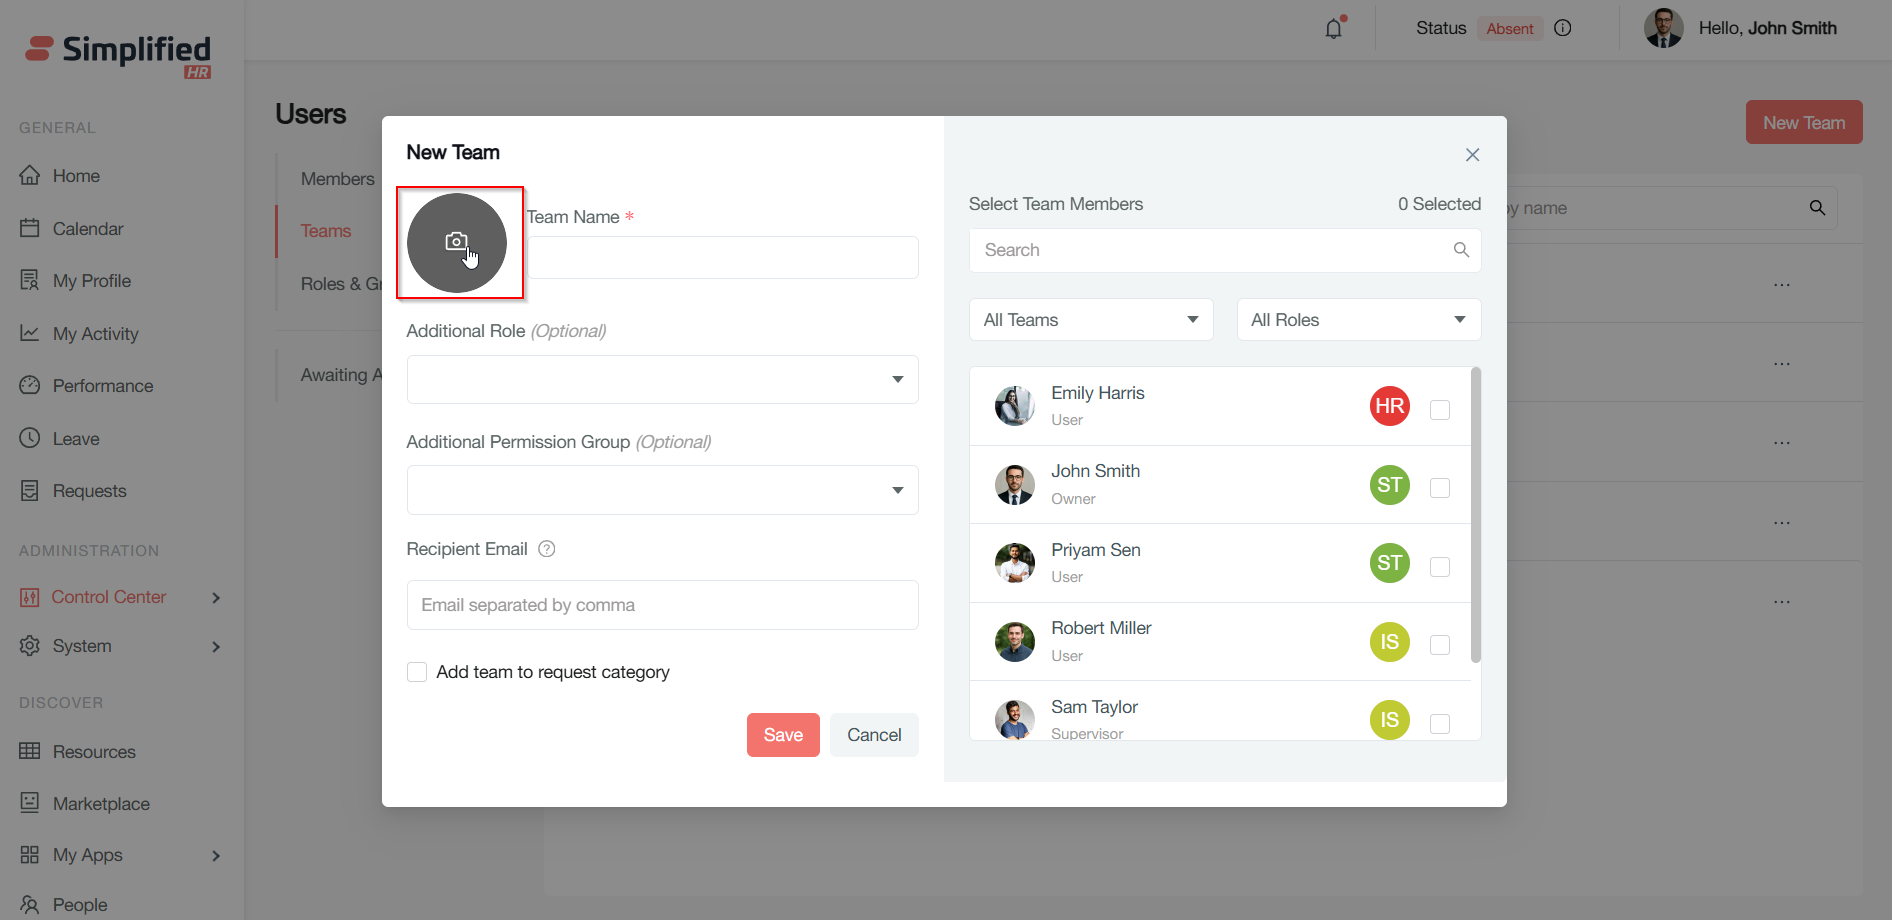
New Team Dialog Fields
Profile Placeholder
A circular placeholder with an image icon represents the team avatar. You can add or change the team profile picture by following these steps:
-
Hover over the camera icon in the profile placeholder circle during team creation
-
Click the camera icon to open the file chooser dialog
-
Select a PNG or JPG image file from your computer
-
Click Open to proceed
-
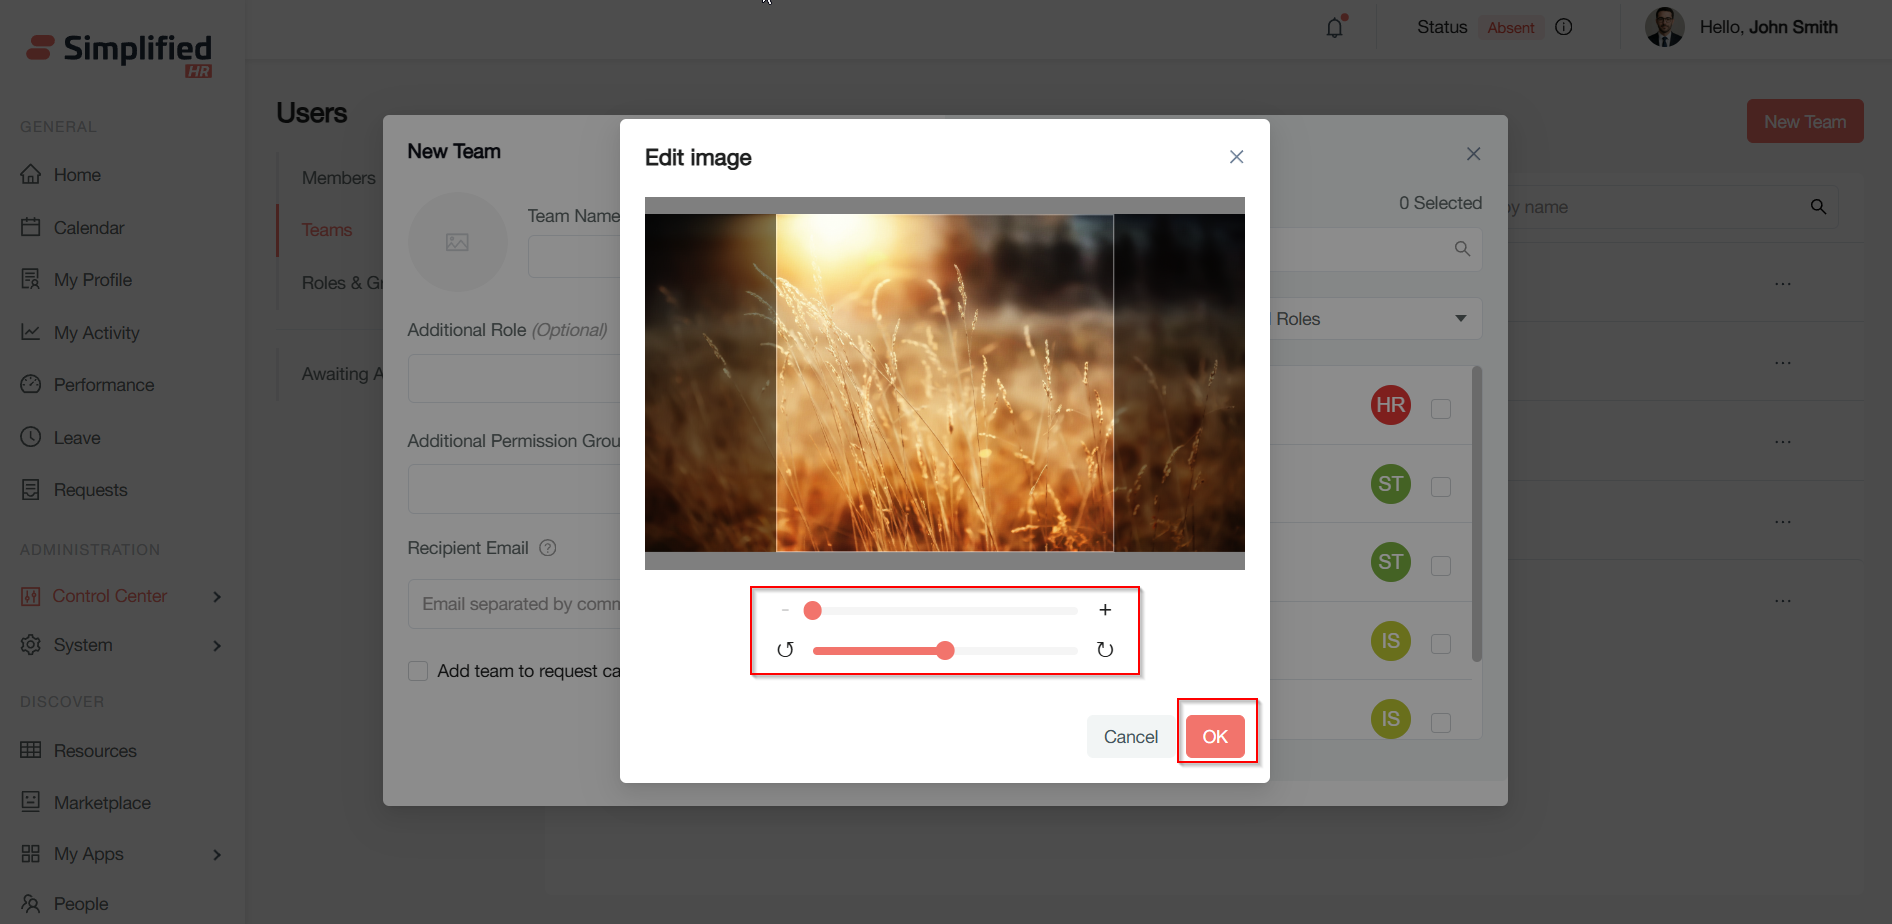
Adjust the size and crop the image to fit the circle in the editing pop-up window
-
Click OK to save the changes
-
The selected image replaces the placeholder circle as the team avatar
Team Name (Required)
Enter a unique and descriptive team name (e.g., "Marketing Team" or "QA Automation"). This field is mandatory and cannot be left blank.
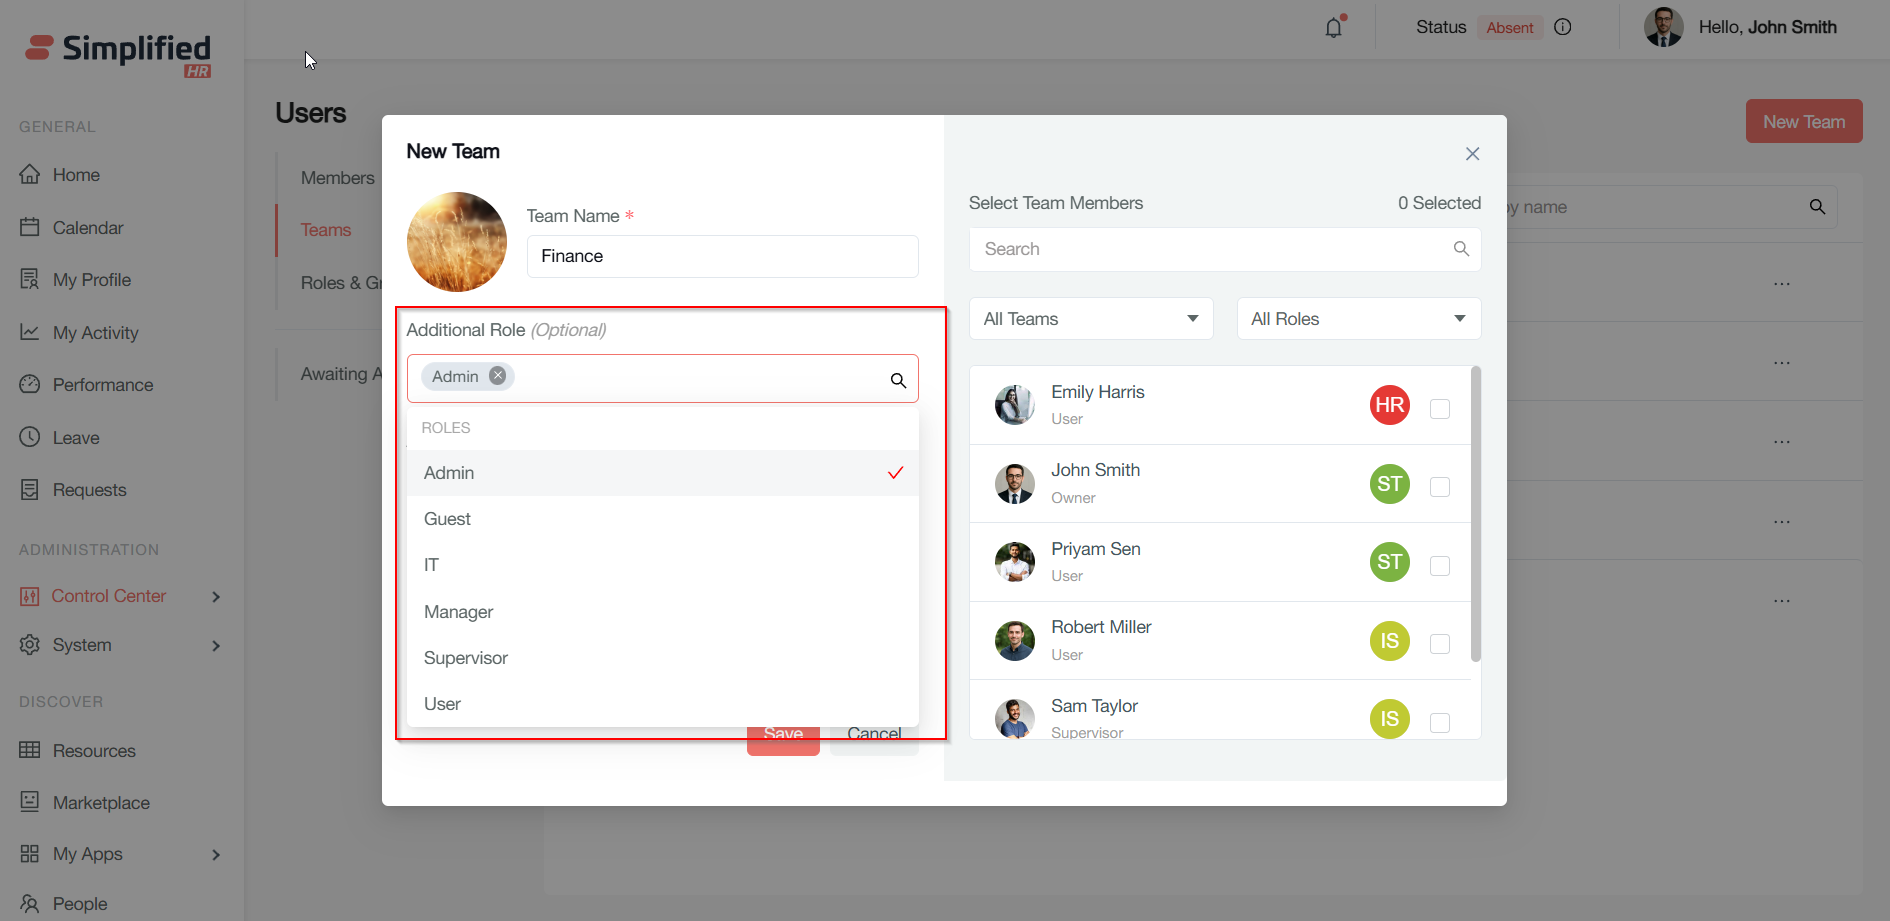
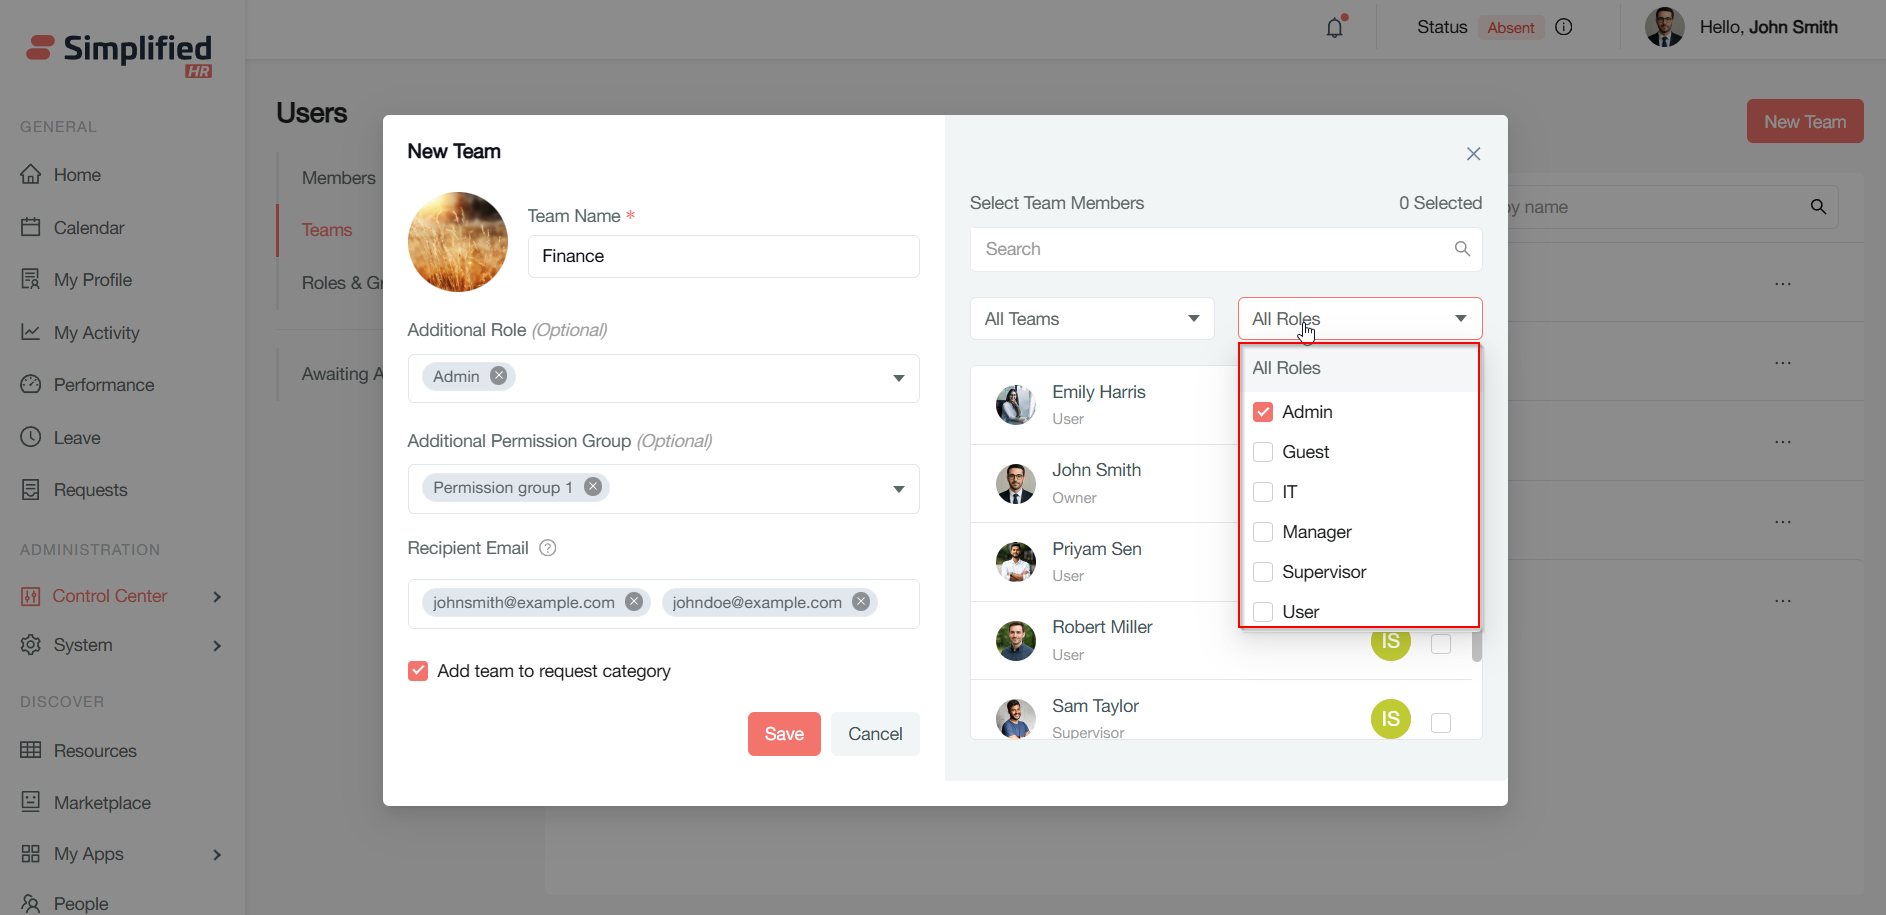
Additional Role (Optional)
Assign an additional role to the team beyond the default roles. Select from the dropdown or leave empty if not needed. For example, assign "Admin" privileges to all team members.
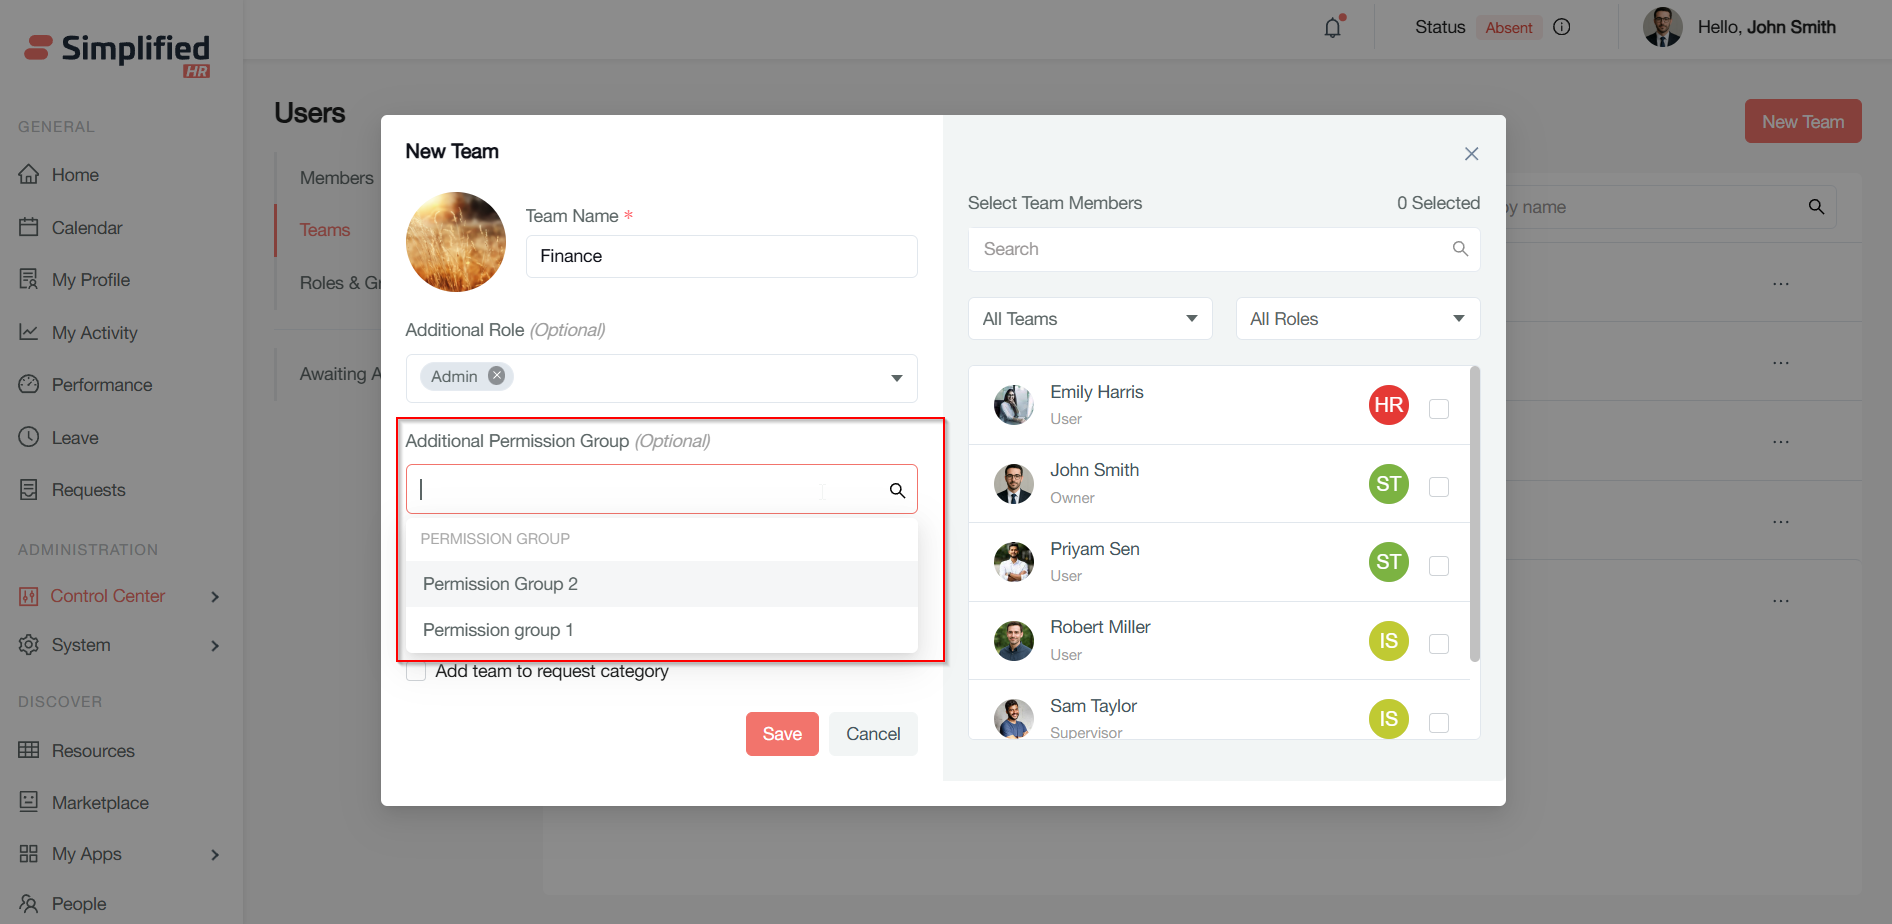
Additional Permission Group (Optional)
Choose a permission group to grant extra access to the team. Leave empty for default permissions. For example, grant access to "Reports" sections.
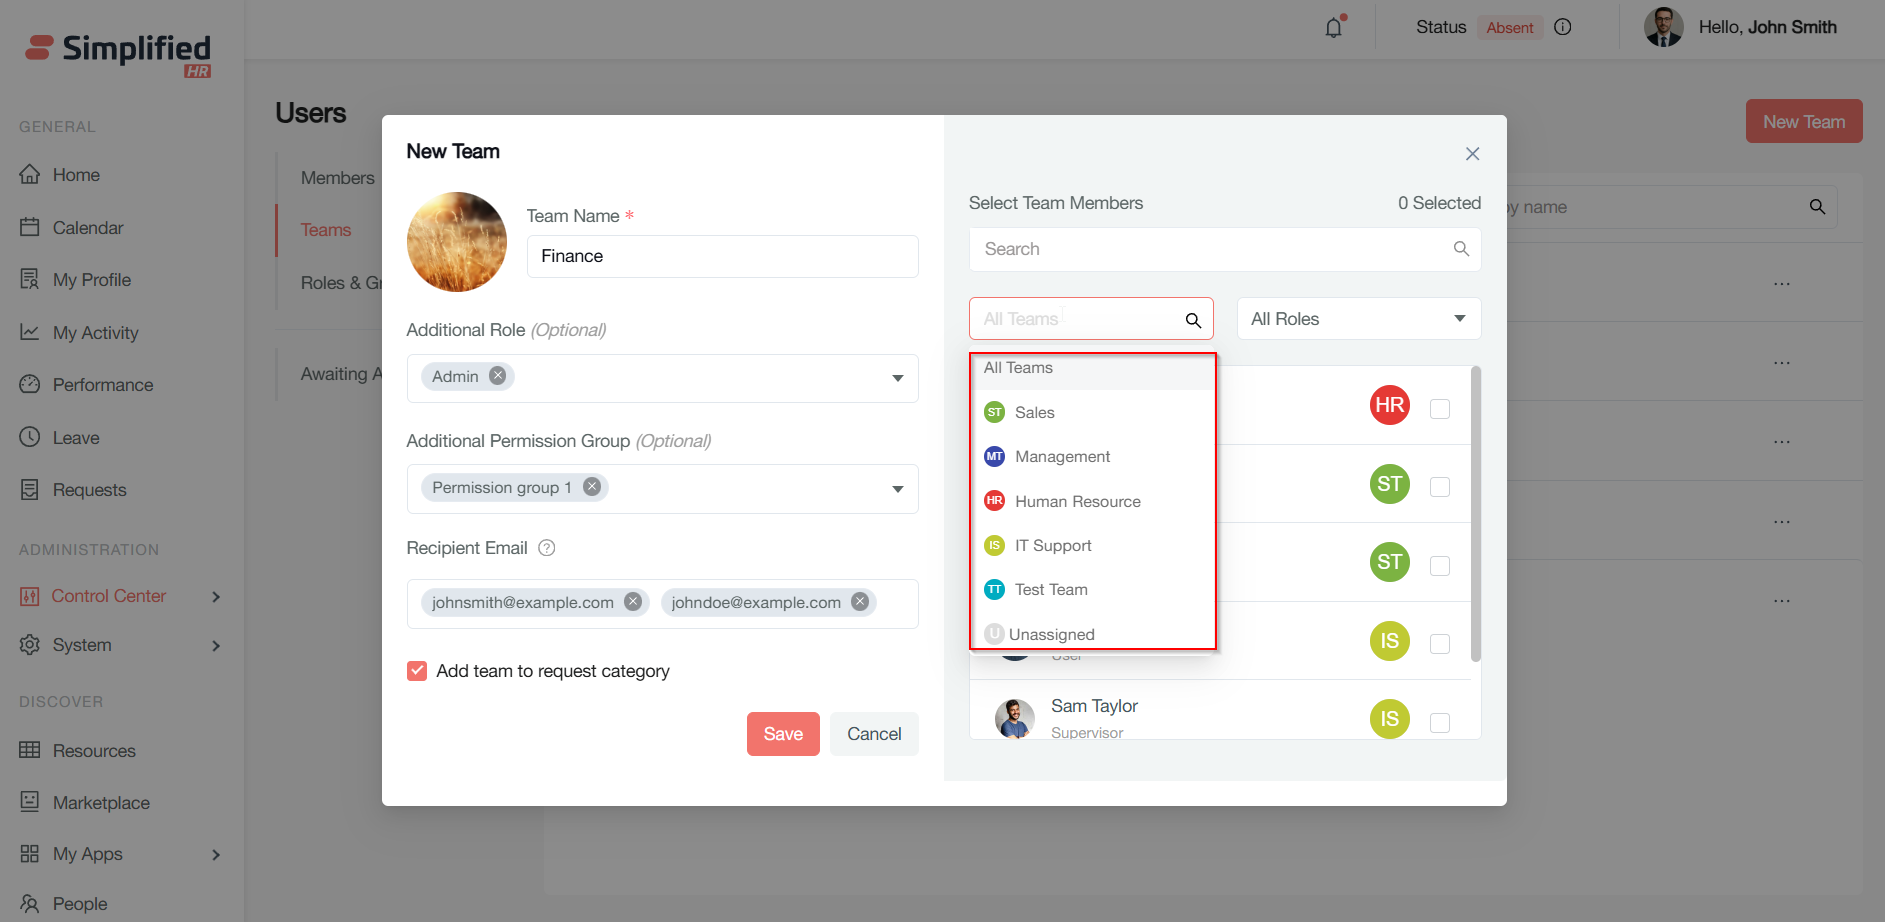
Recipient Email (Optional)
Enter one or more email addresses separated by commas to notify or invite users regarding the team. Recipients will be notified if the team is added to request categories or leave notifications.
Hover over the "?" icon for formatting help.
Add Team to Request Category (Checkbox)
Check this box to make the team a selectable category when submitting internal requests or tickets.
Team Member Selection
Use the search bar to find members by name or email.
Filter members using:
-
All Teams dropdown: filter by existing teams
-
All Roles dropdown: filter by roles such as User, Owner, Supervisor
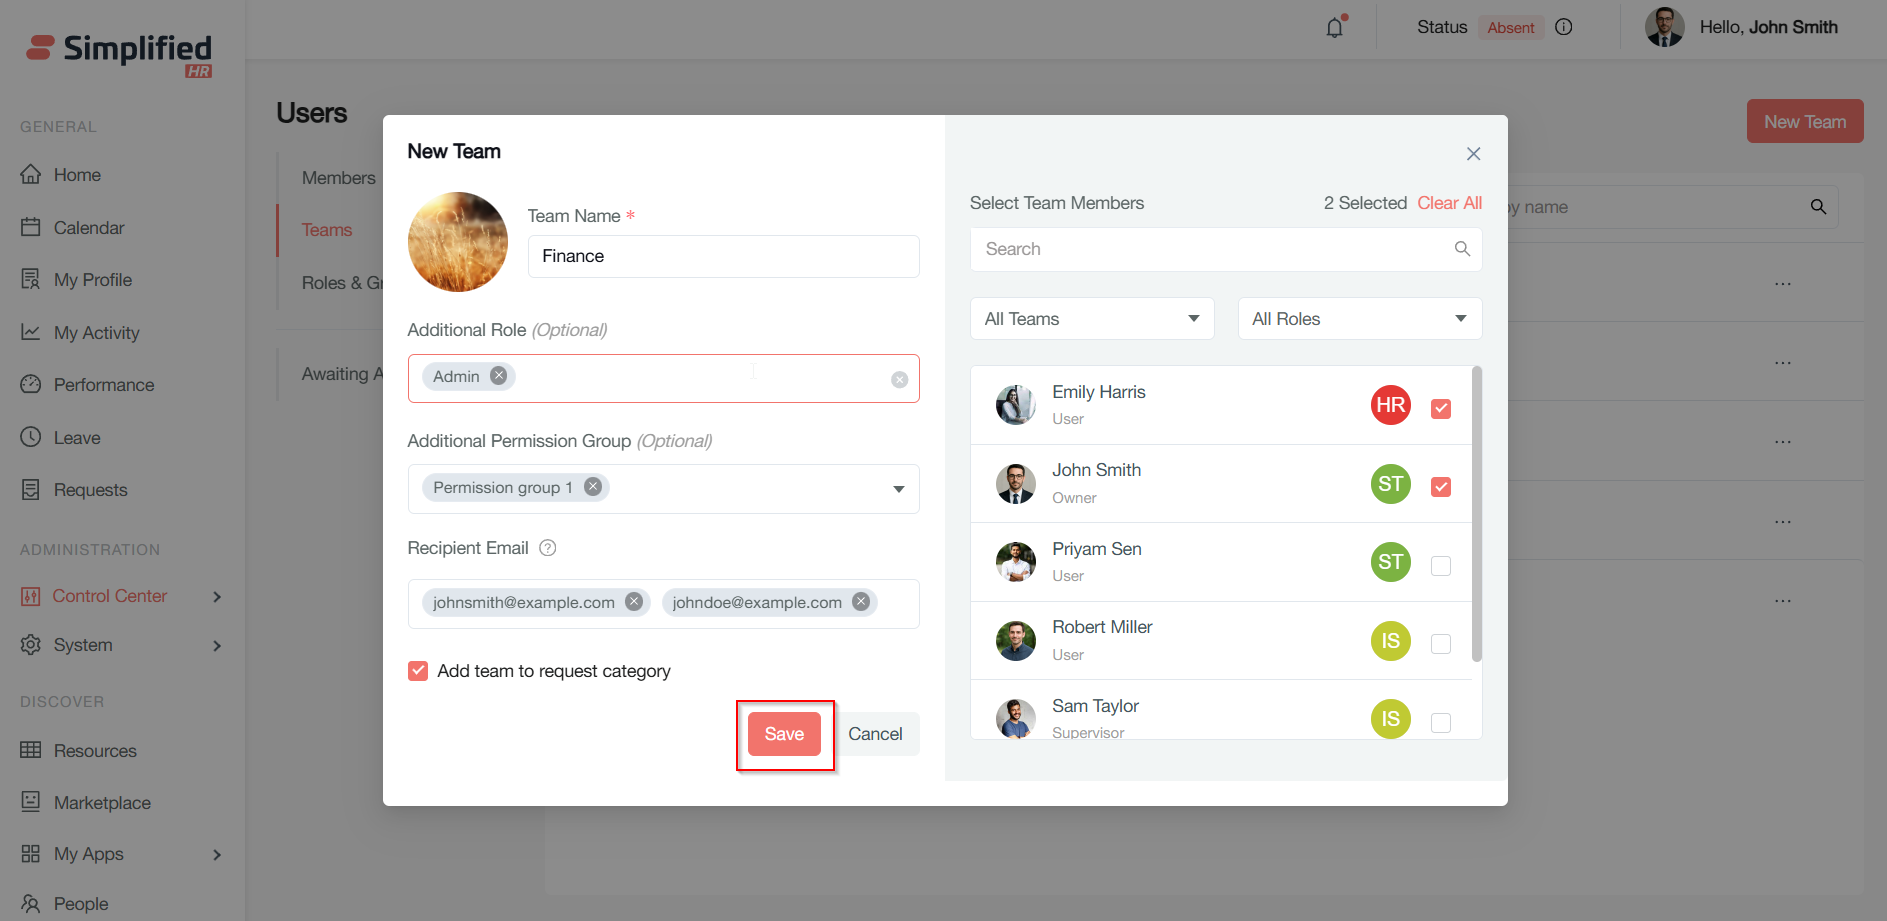
Role badges display colored circles with initials representing members' current teams if no avatar is added (e.g., HR, ST, IS).
The member list shows user photos (if available), names, roles, and checkboxes to select members.
Check the box beside each member's name to include them in the team.
Save and Cancel Buttons
Note: For help with roles and groups, please refer to the "Roles and Permission groups" article.
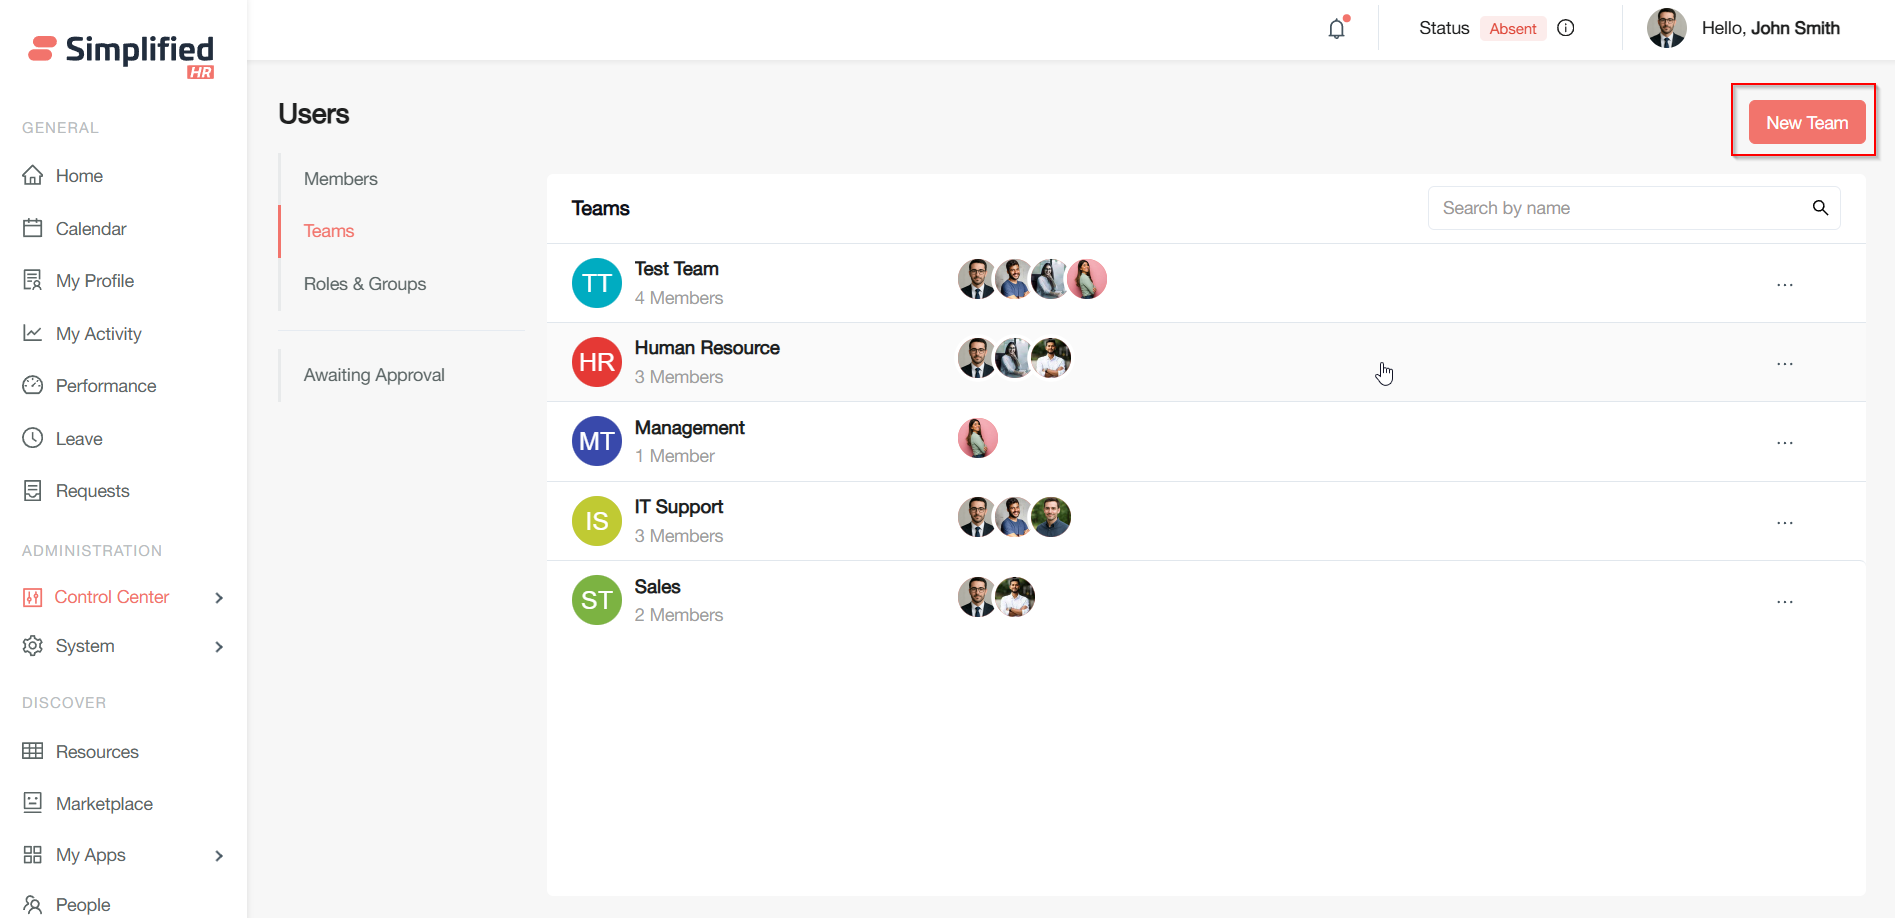
Managing Teams
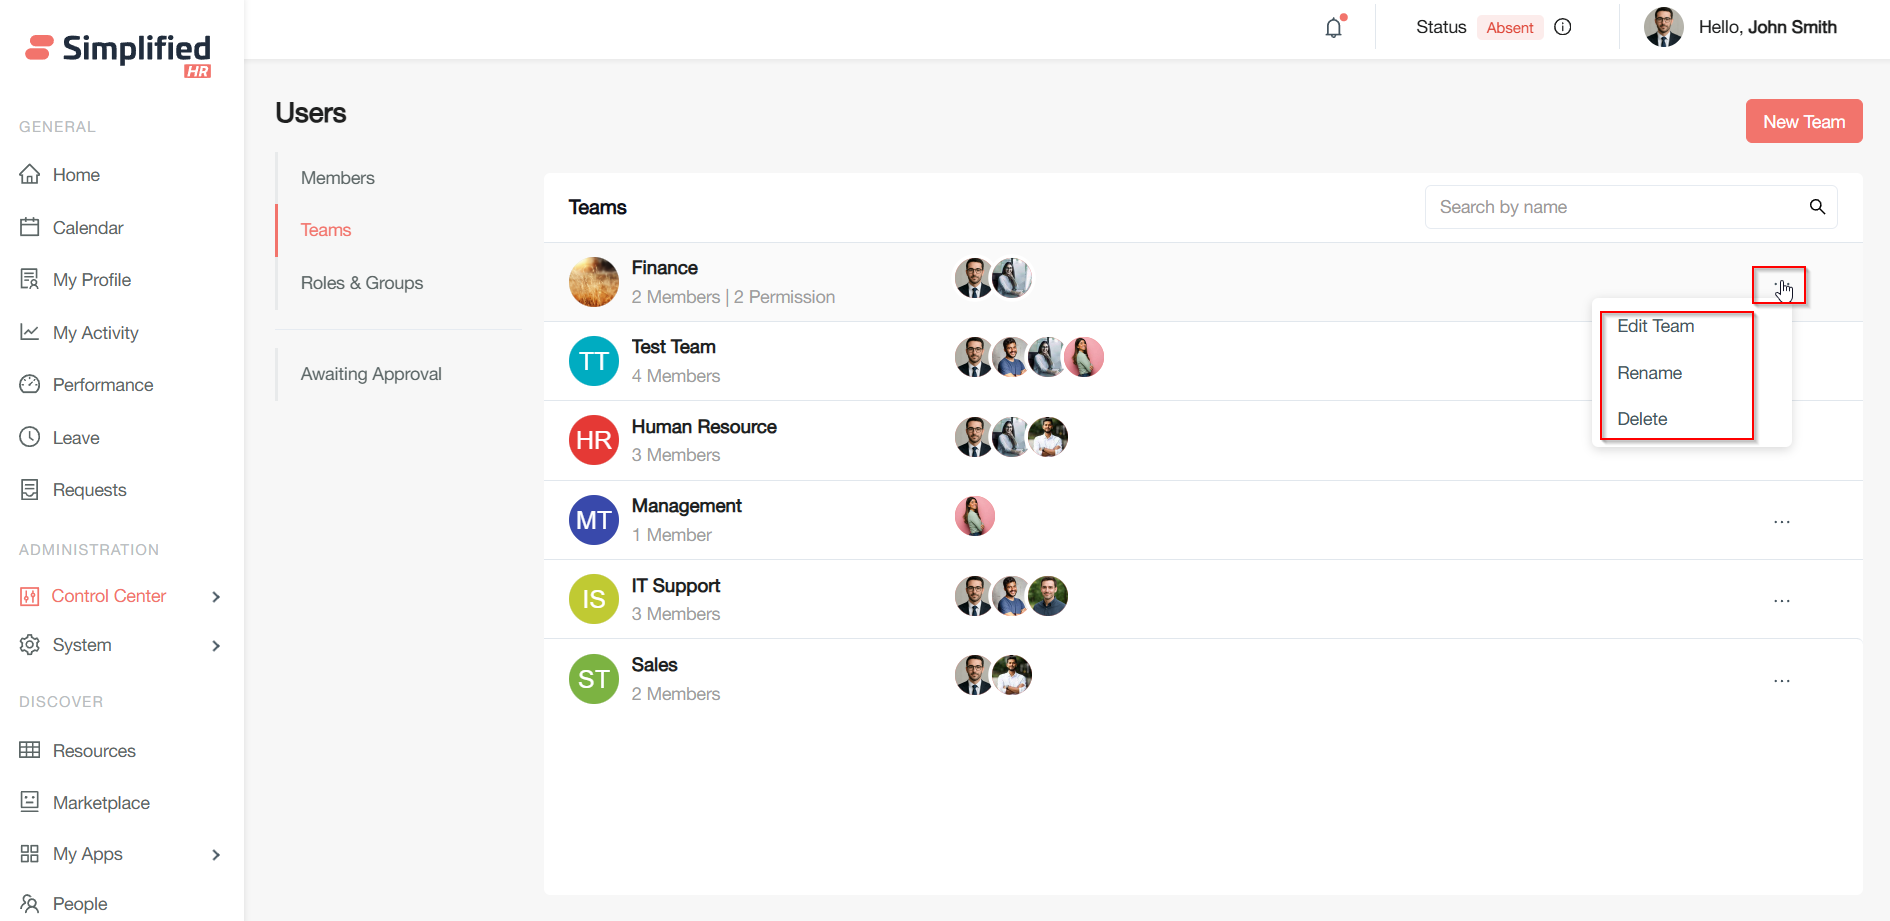
Team Listing Overview
Teams are displayed with:
-
Team name (e.g., Test Team, Human Resources)
-
Team code icon (e.g., TT, HR)
-
Member count (e.g., 4 Members)
-
Profile photos of team members
-
The vertical ellipsis ("...") menu offers management options: Edit, Rename, Delete
Use the search bar at the top right to filter teams by name with real-time results.
Click the New team button (top right, red) to open the new team creation dialog.
Team Options Menu Actions
Click the vertical ellipsis ("...") next to any team to select one of the following:
-
Edit team: Update members, details, or avatar
-
Rename: Change the team name
-
Delete: Remove the team from the list
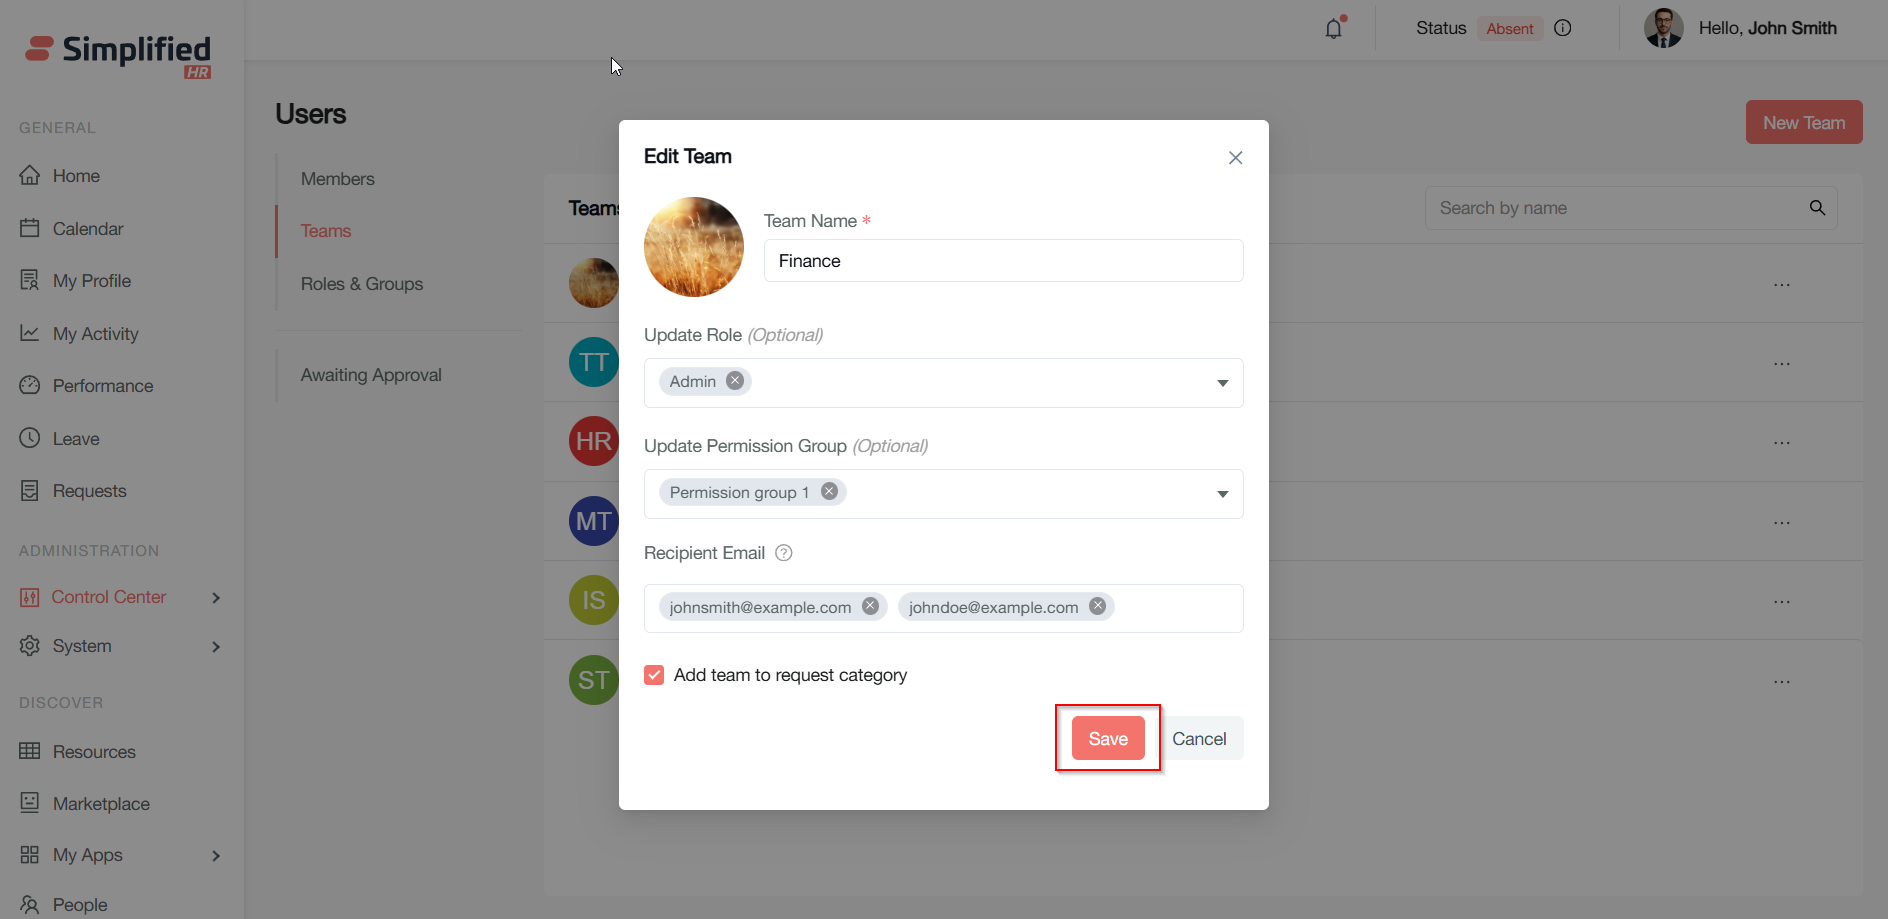
Editing a Team
-
Select the Edit team from the options menu
-
Modify the fields as needed:
-
Team name (required)
-
Avatar (add or update)
-
Role (optional, select from dropdown)
-
Permission group (optional, select from dropdown)
-
Recipient email(s) (enter as comma-separated emails)
-
Add to request category (checkbox)
-
Click Save to apply changes or Cancel to discard
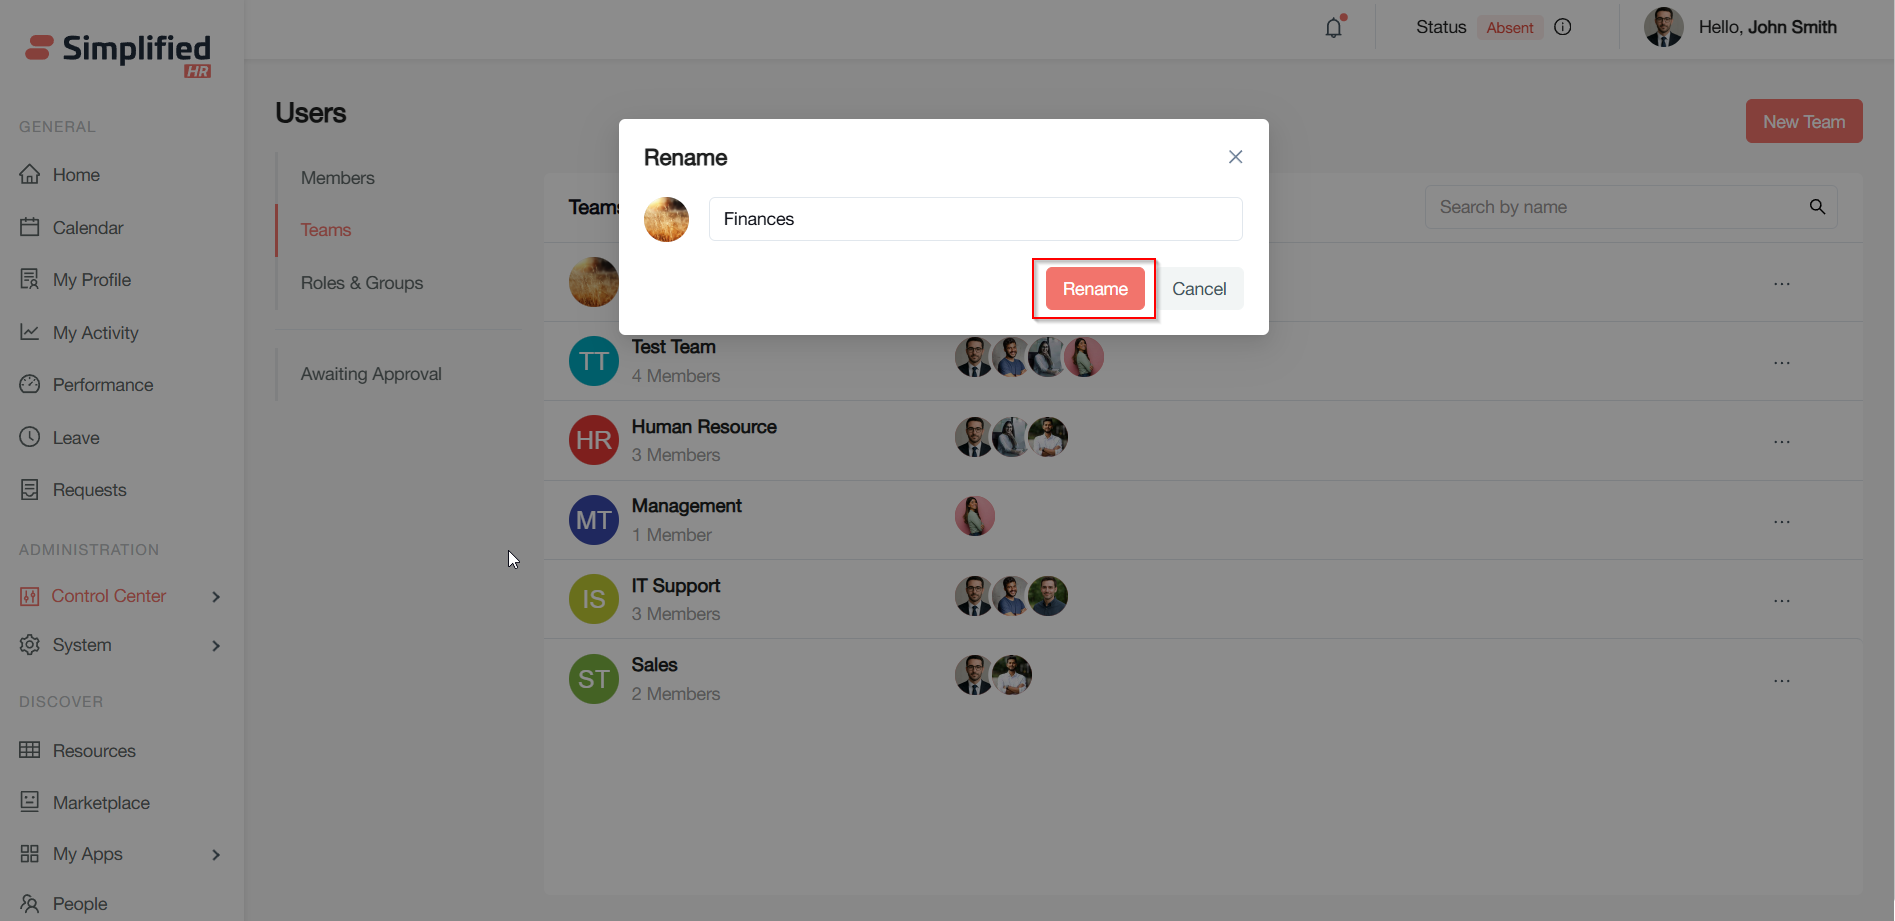
Renaming a Team
-
Select Rename from the team options
-
Enter the new team name
-
Click Rename to apply or Cancel to abort
Deleting a Team
-
Select Delete from the team options
-
Confirm that deleting the team will leave members unassigned unless reassigned
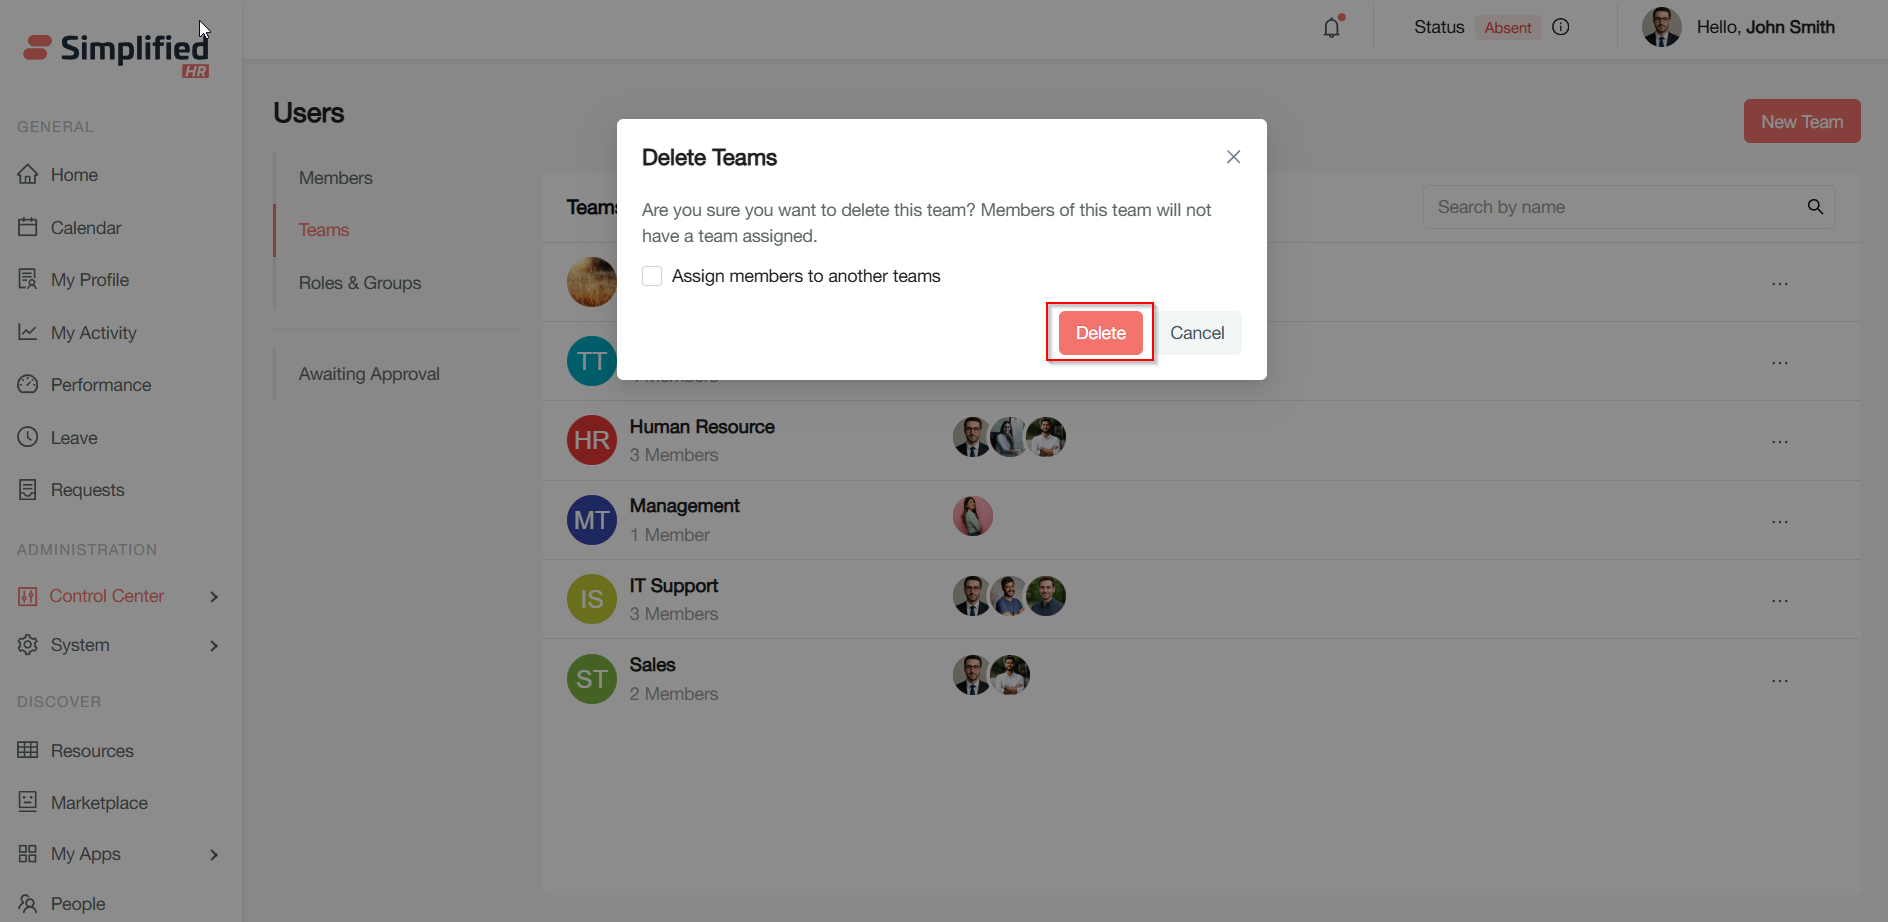
To Reassign Members
-
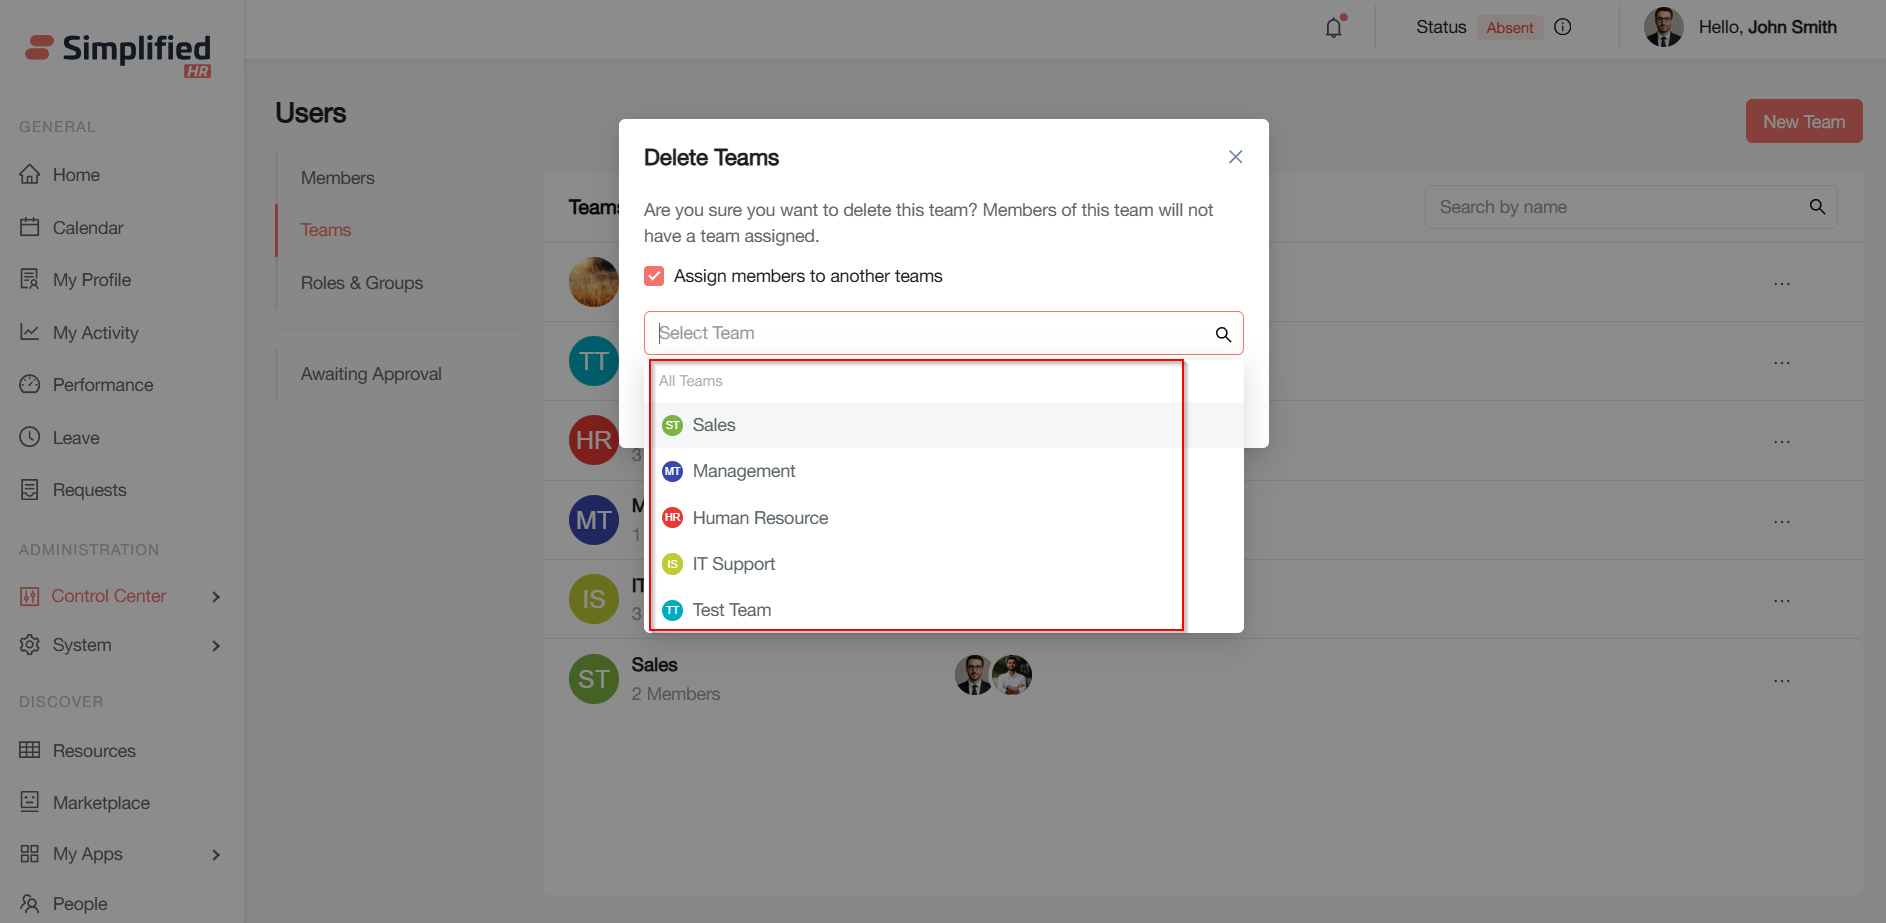
Check Assign members to another team
-
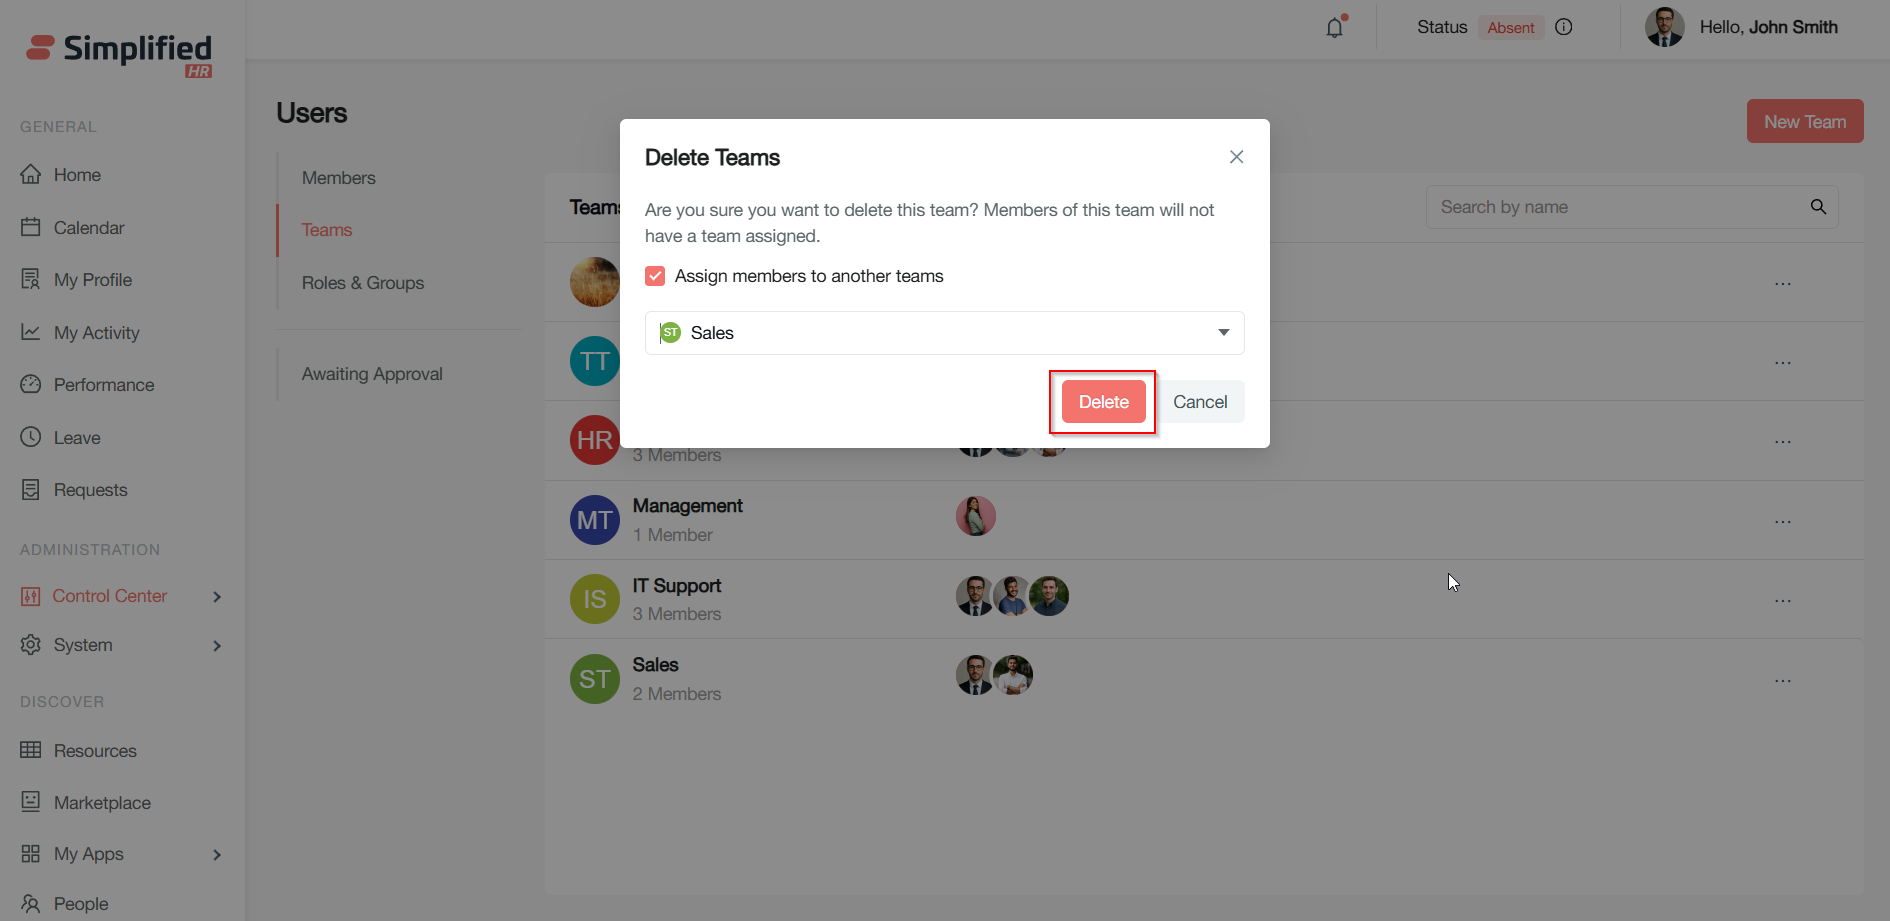
Select the target team from the dropdown
- Click Delete to remove the team or Cancel to exit without changes
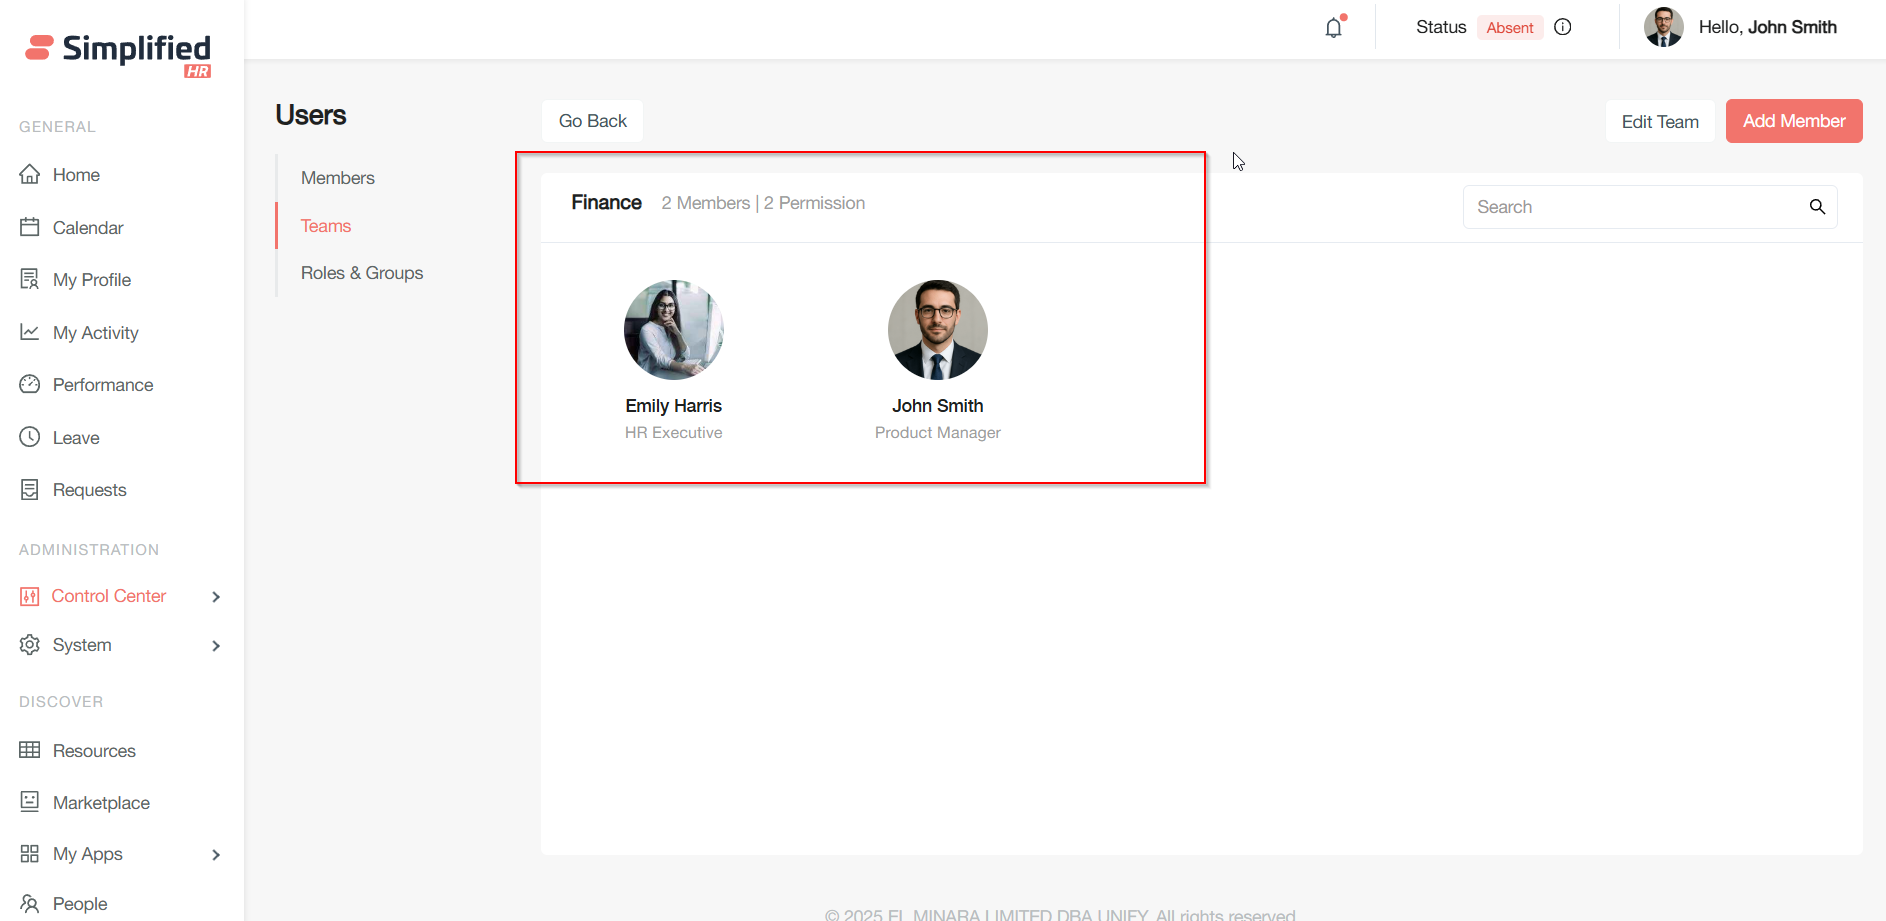
Team Details and Member Management
Team Details Page
Click a team name to view its details.

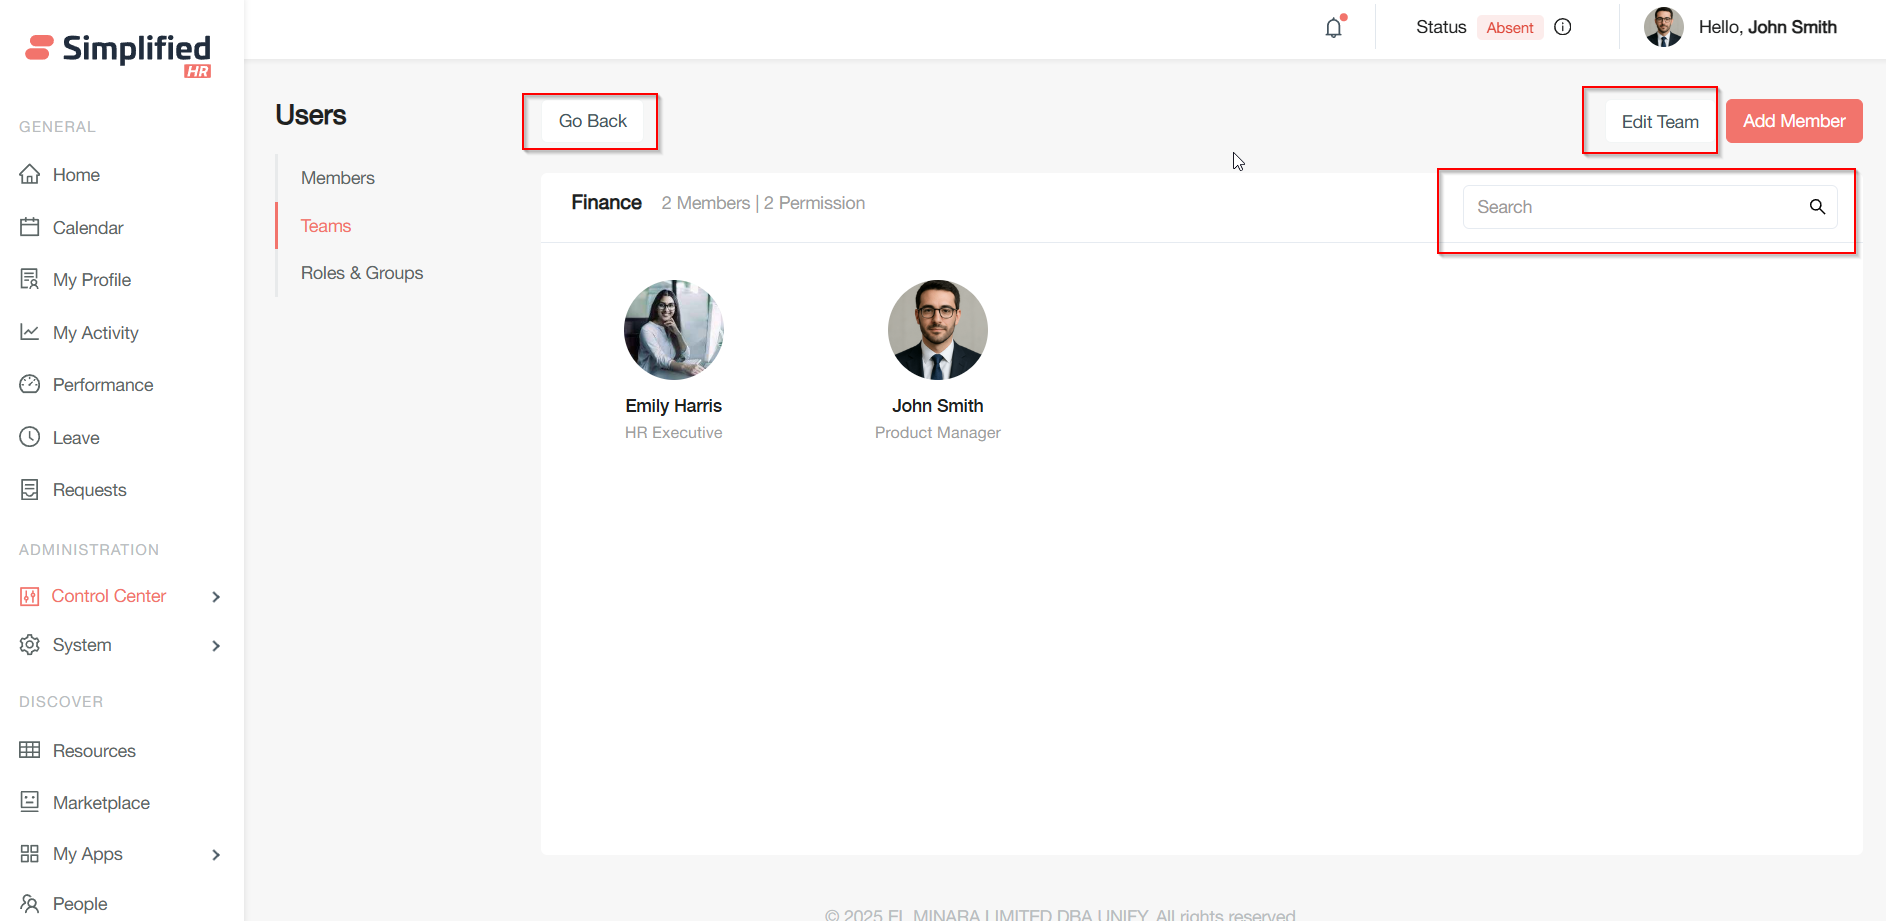
Navigation and Controls
-
Go back: Returns to the teams list
-
Edit team: Opens the team edit pop-up to modify fields as needed
-
Search bar: Filter members by name or role
-
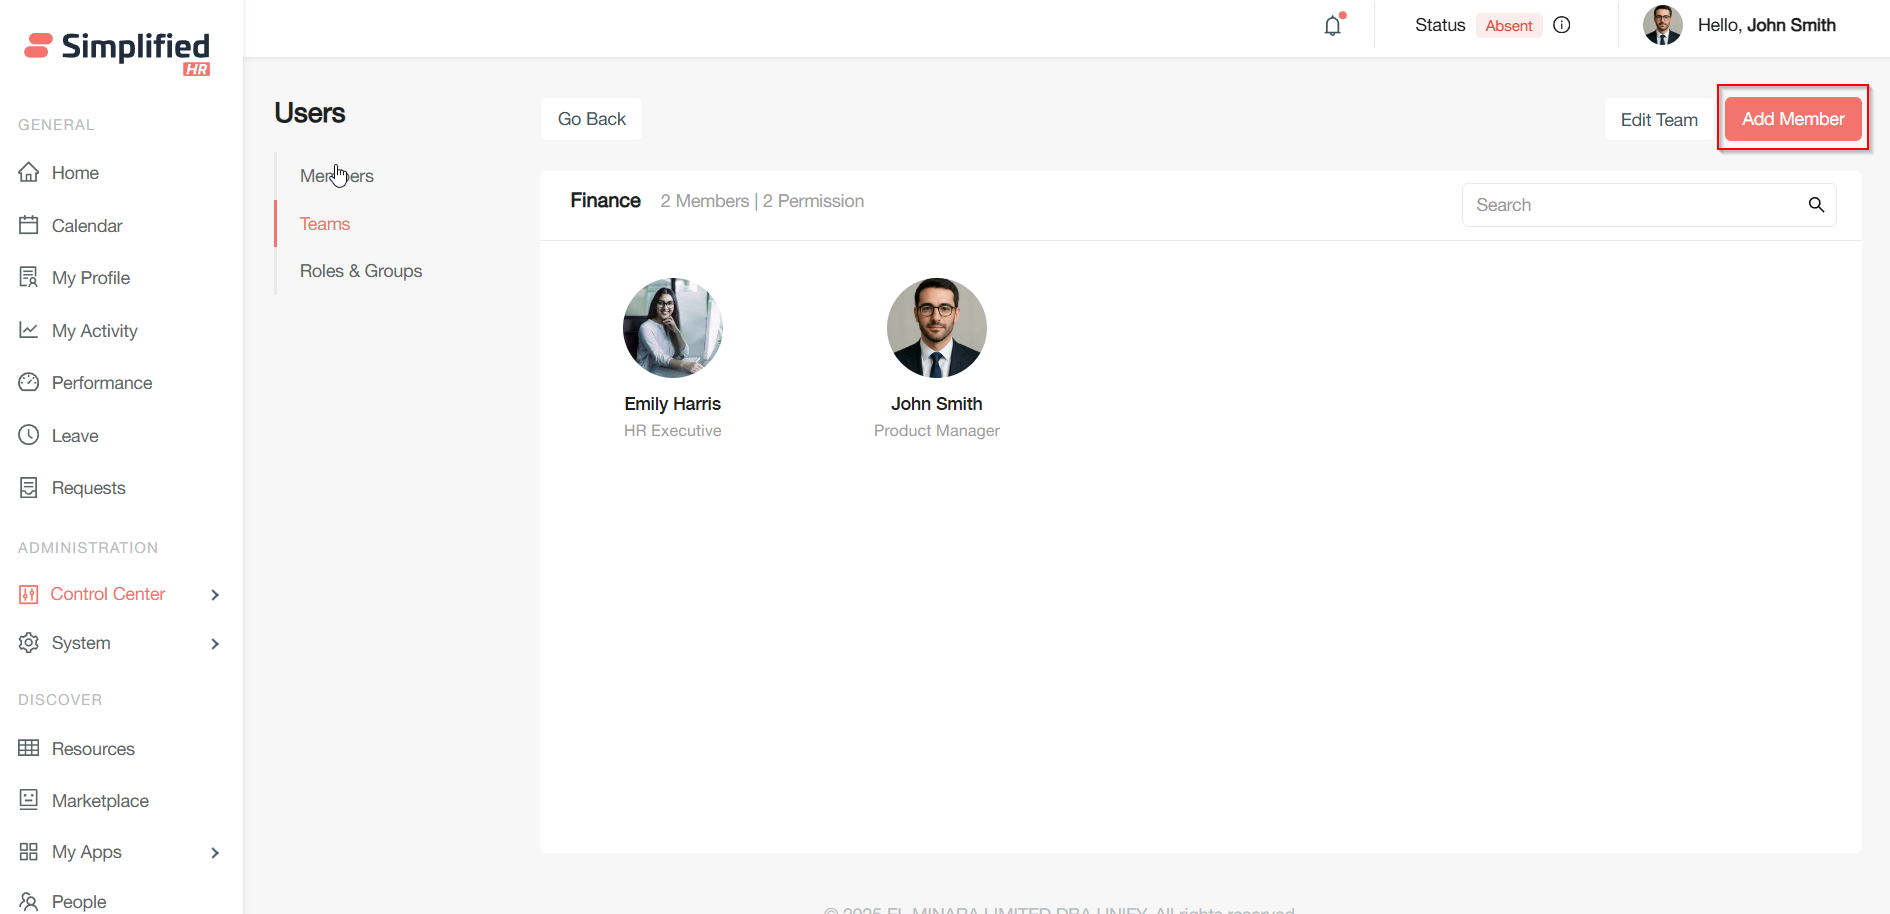
Add member: Opens a dialog to add new members
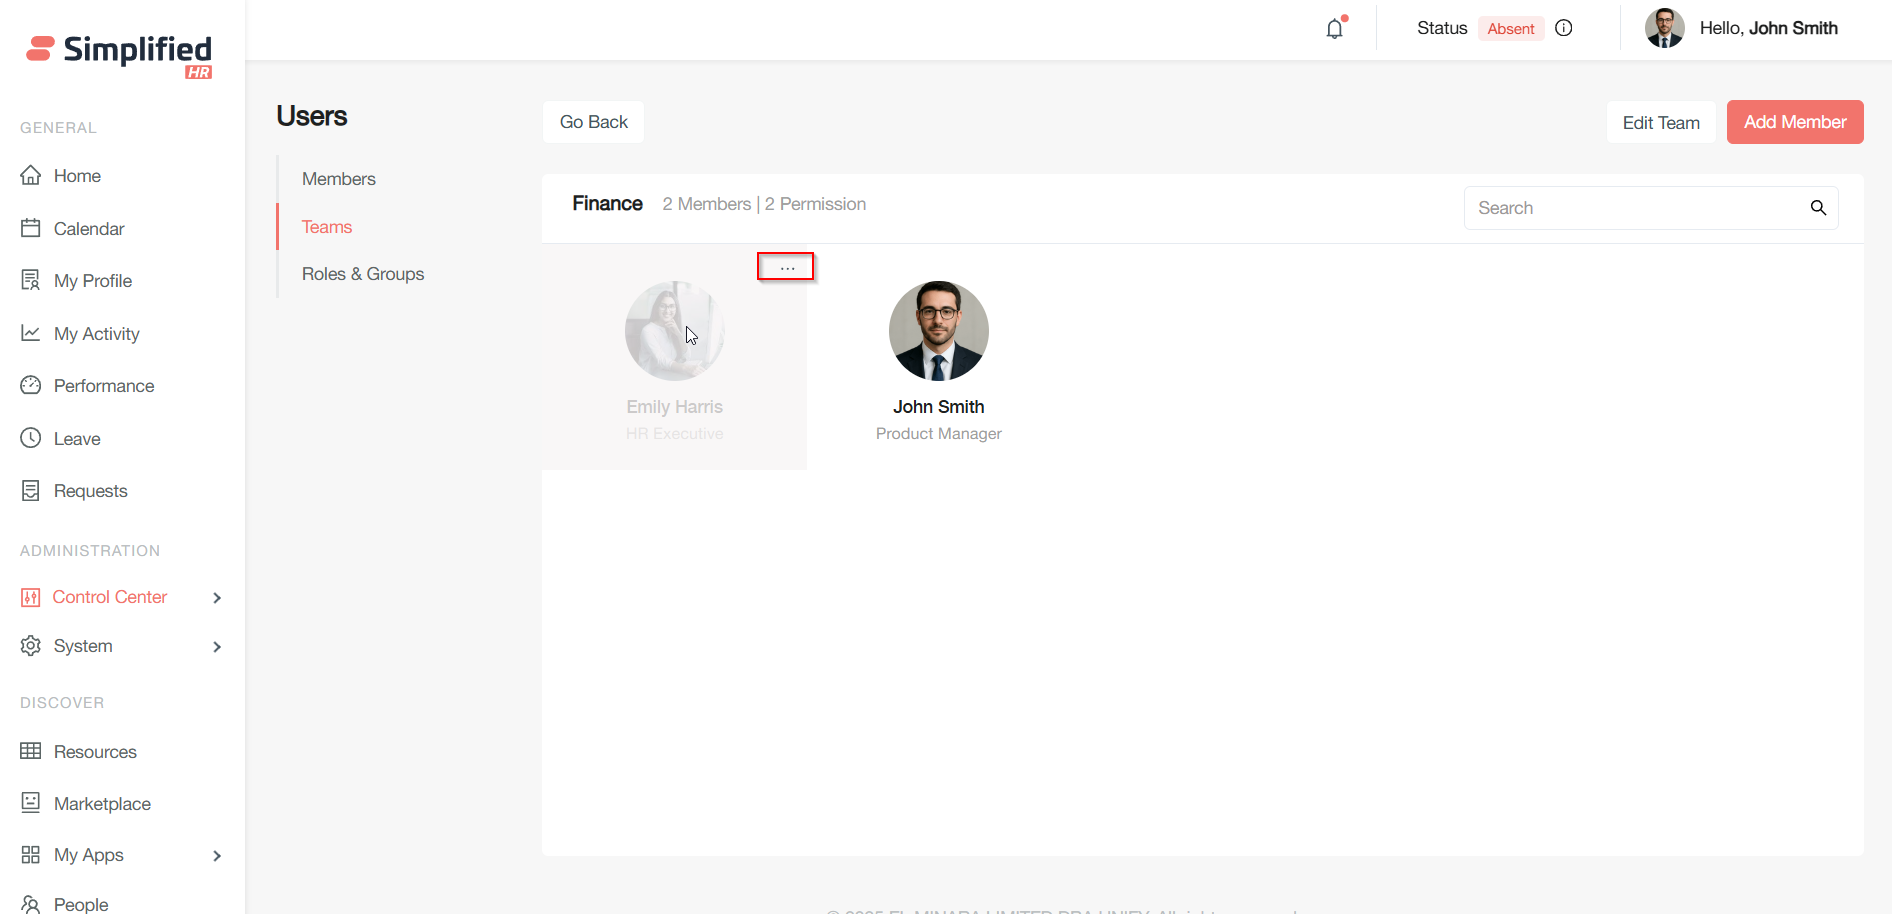
Managing Team Members via Member Options Menu
Hovering over any team member shows a vertical ellipsis ("...") menu with these options:
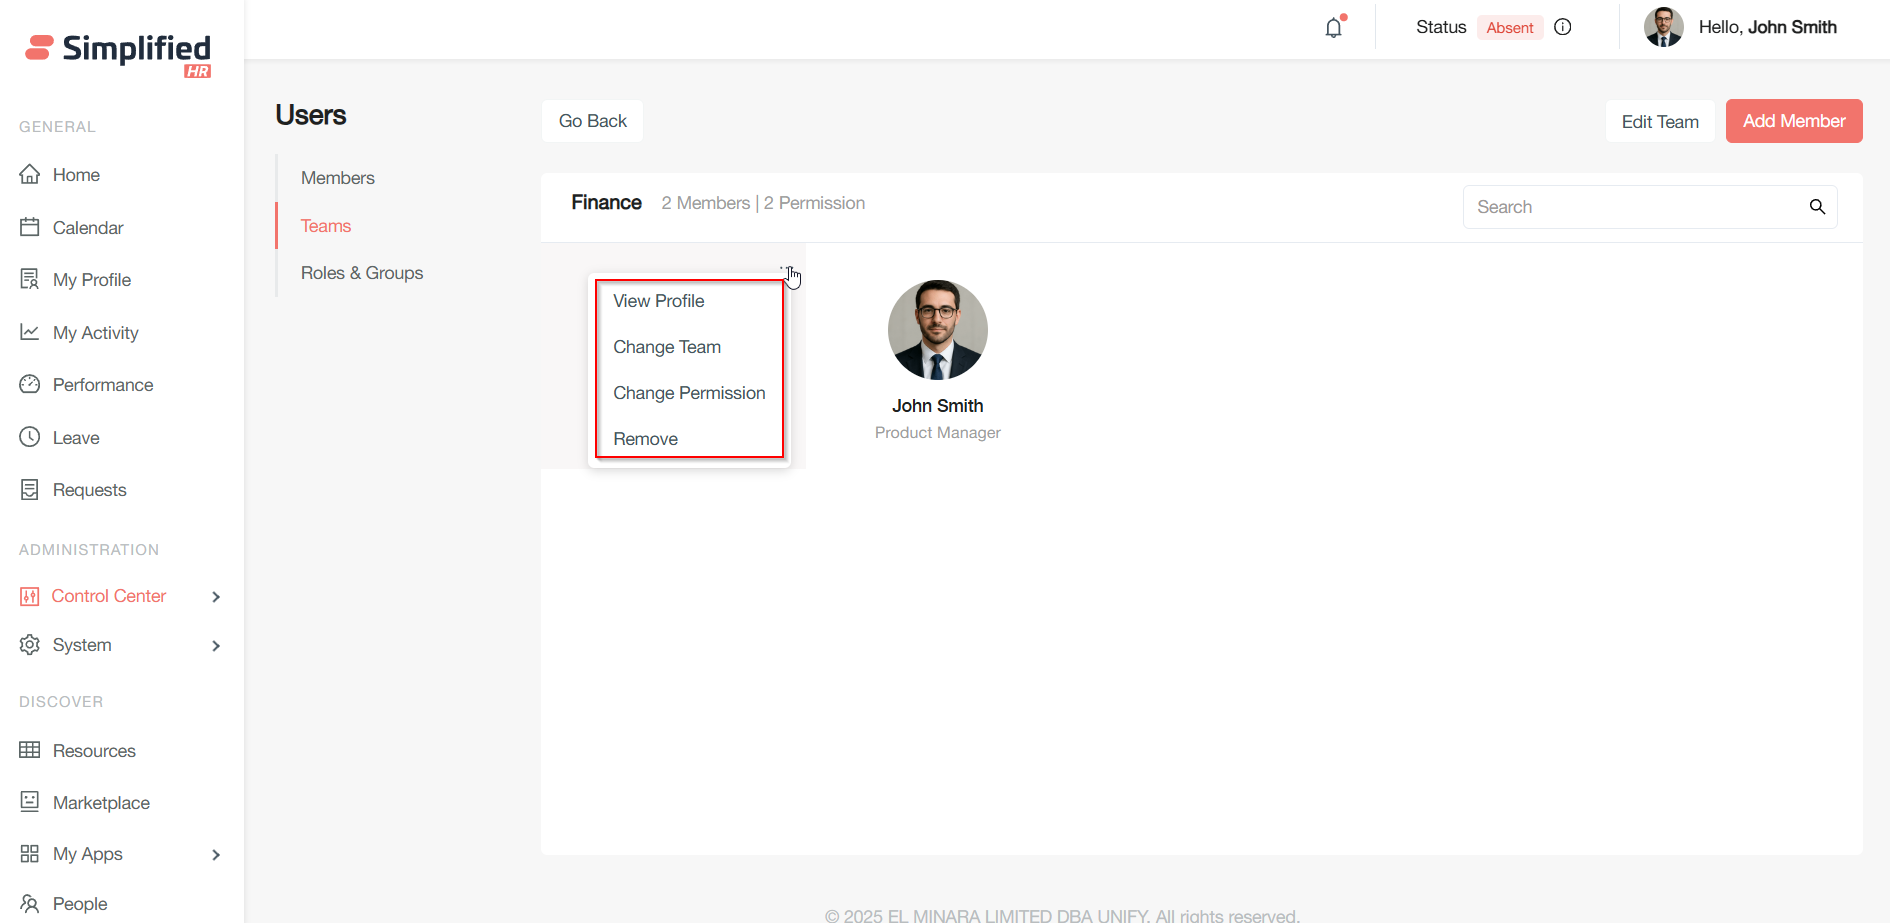
View Profile
Opens the user profile detail page.
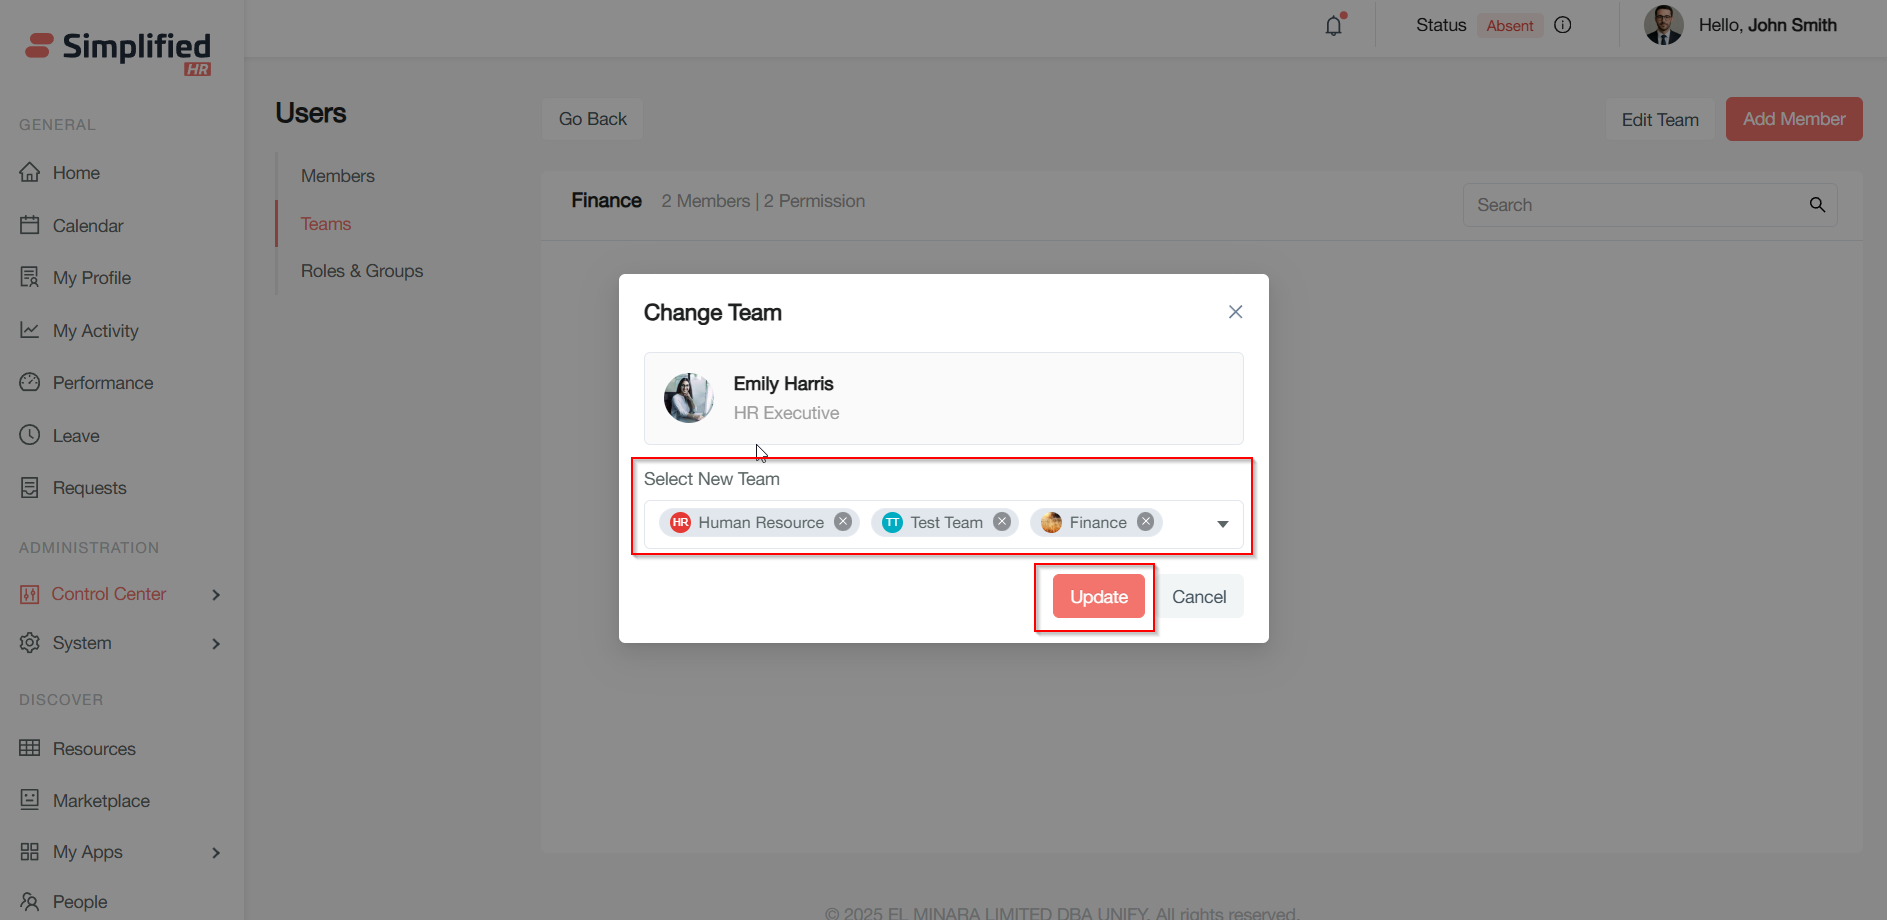
Change Team
Move a member to a different team:
-
Select a new team from the list
-
Remove the member from their existing team if needed by deselecting it
-
Click Update to apply changes
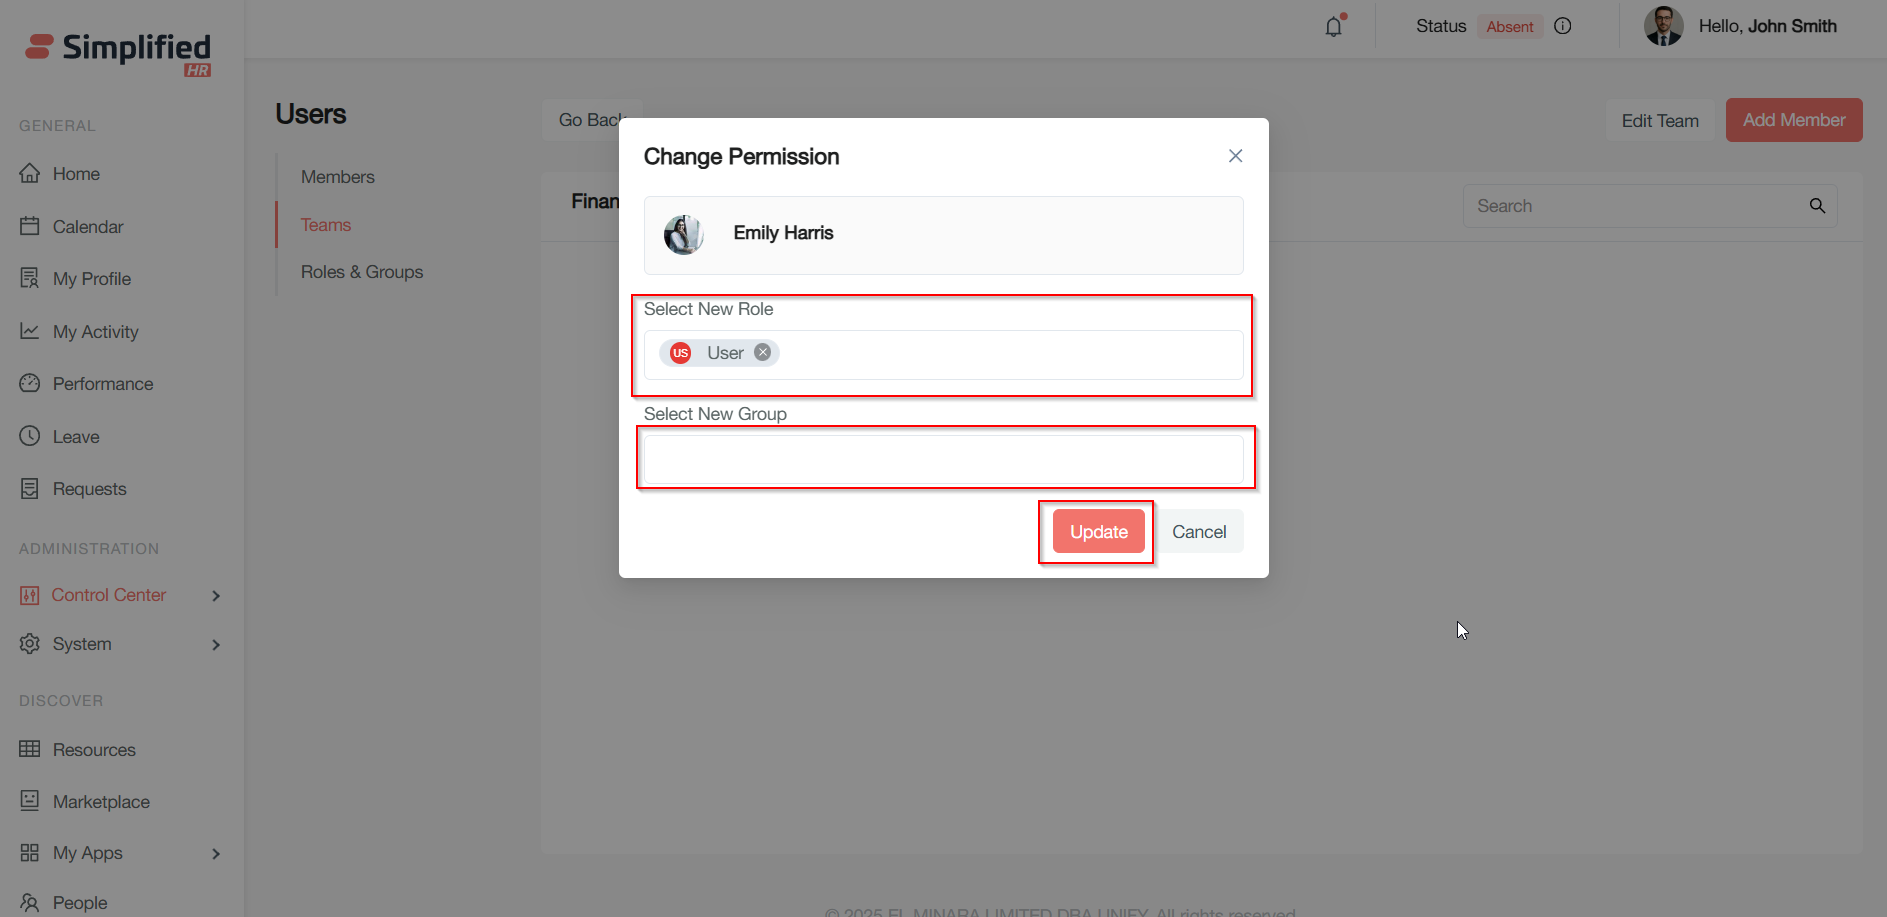
Change Permission
Update the role by selecting a new role from the dropdown. Similarly, update the permission group by selecting a new permission group from the dropdown. Click Update to save the changes.
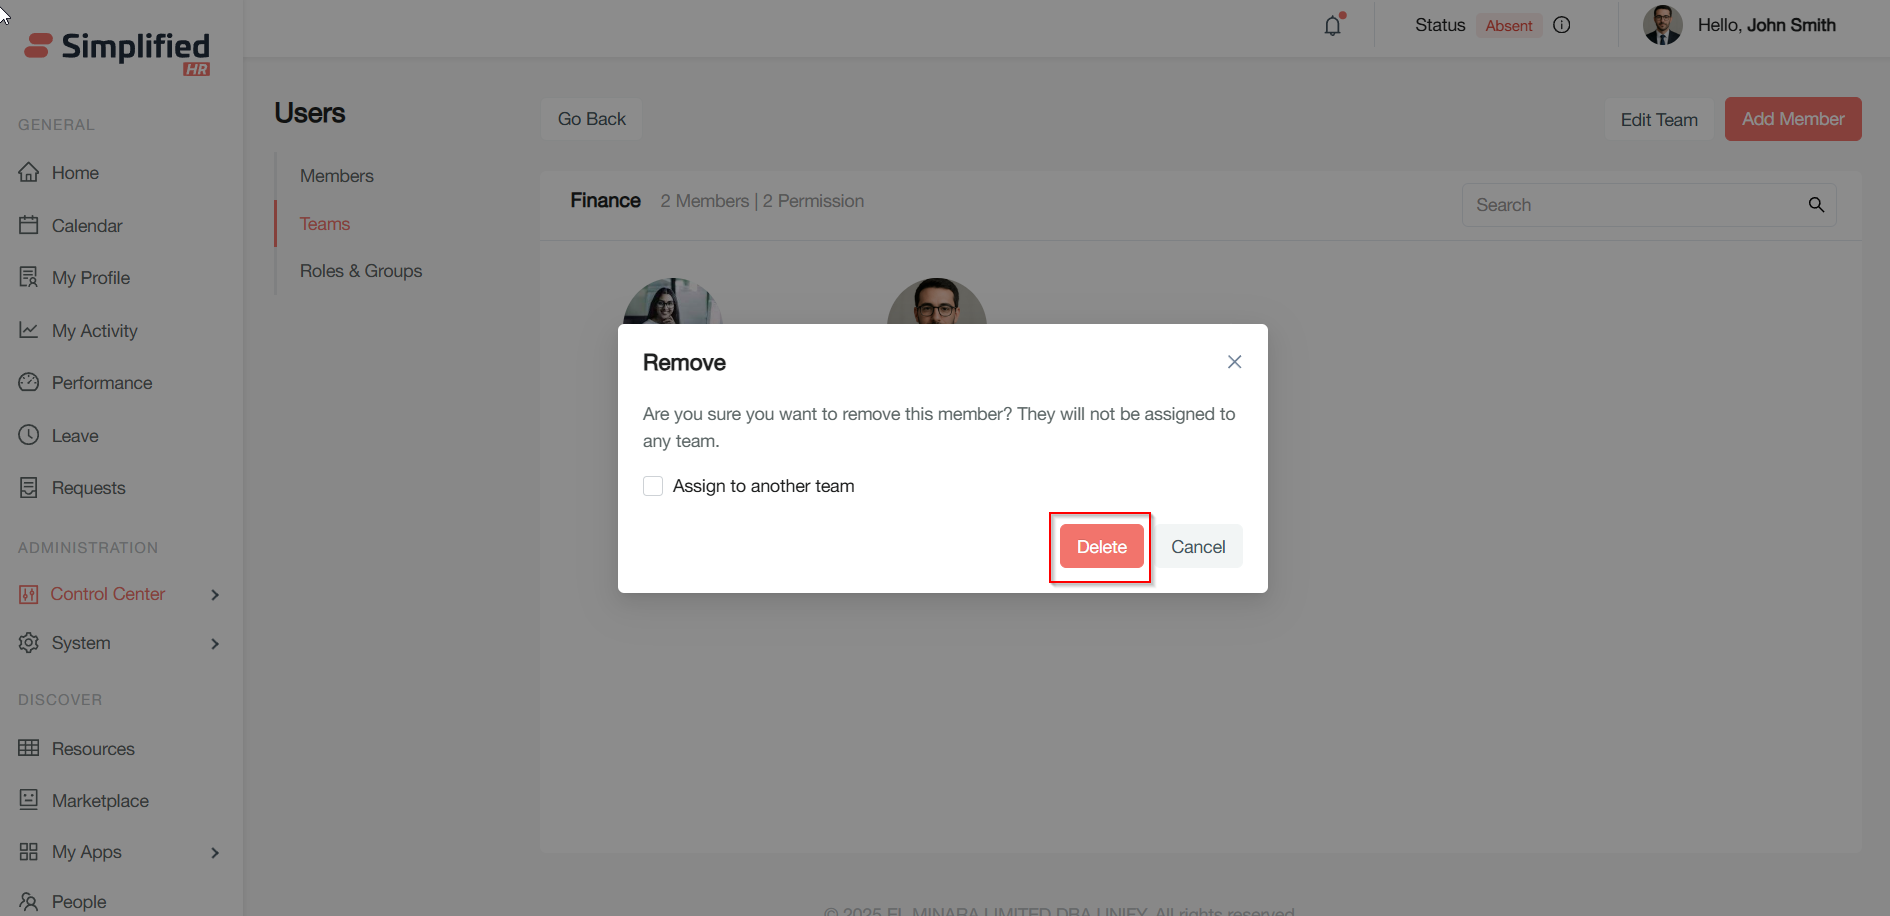
Remove
-
Click Remove and confirm removal in the pop-up
-
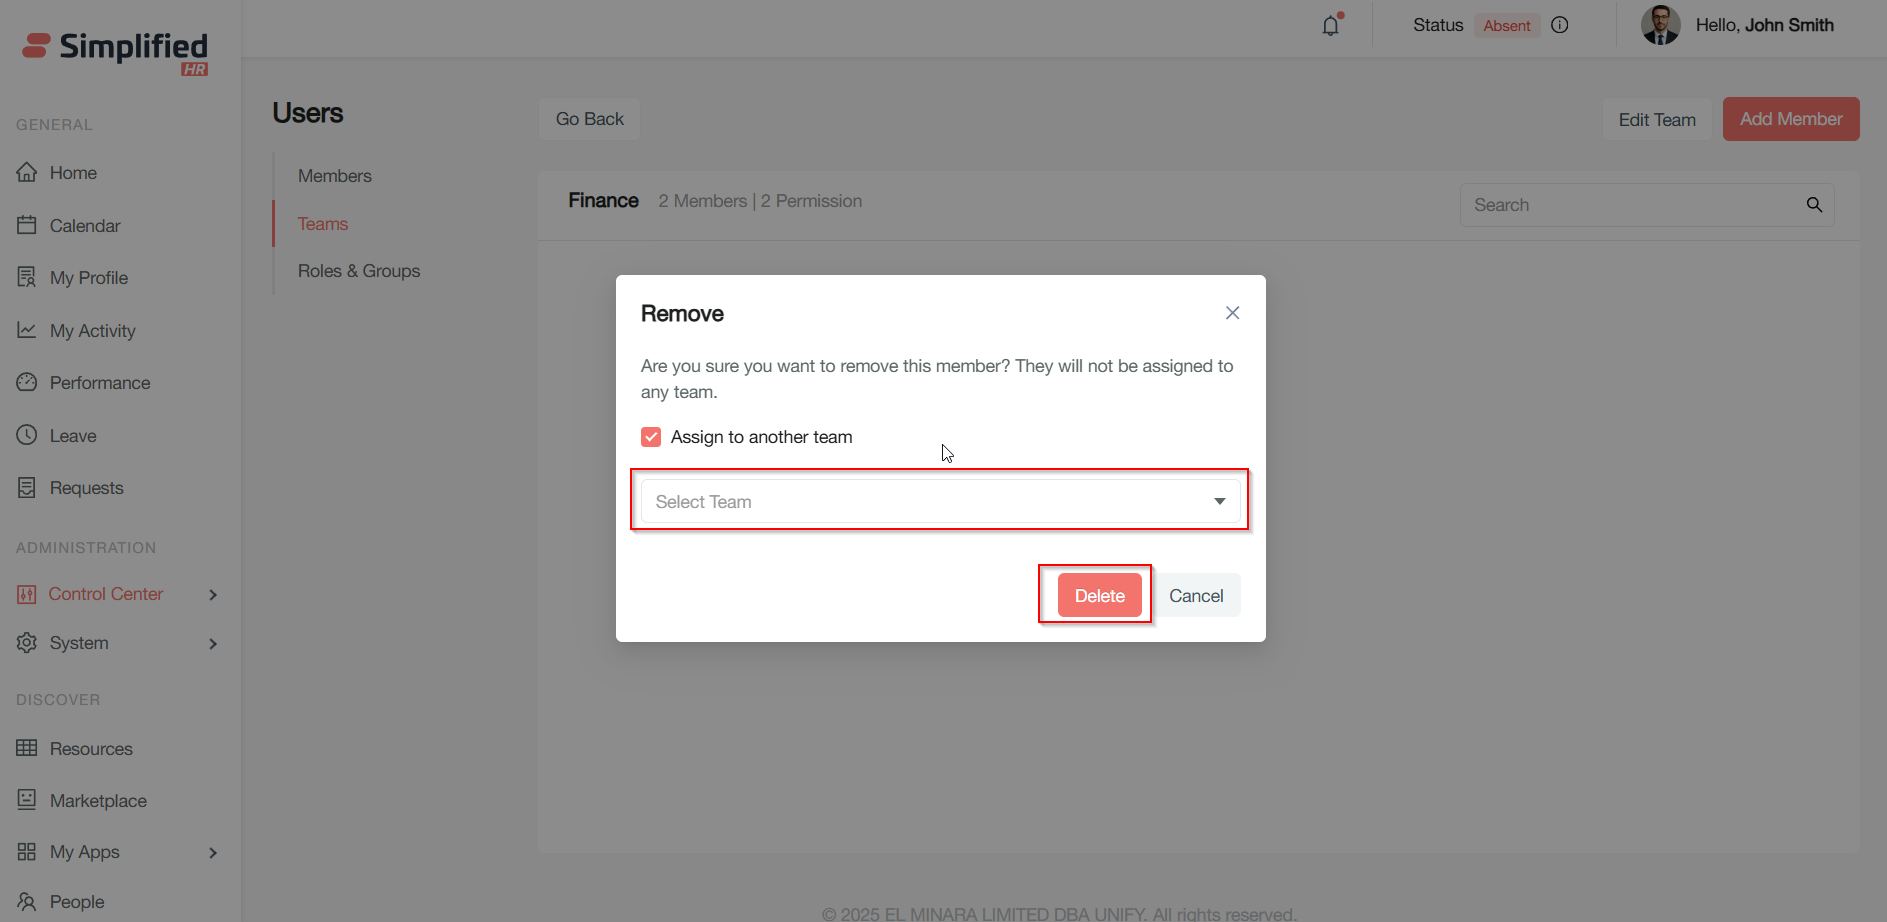
Optionally assign the member to a different team by checking Assign to another team and selecting the team
-
Click Delete to confirm or Cancel to abort
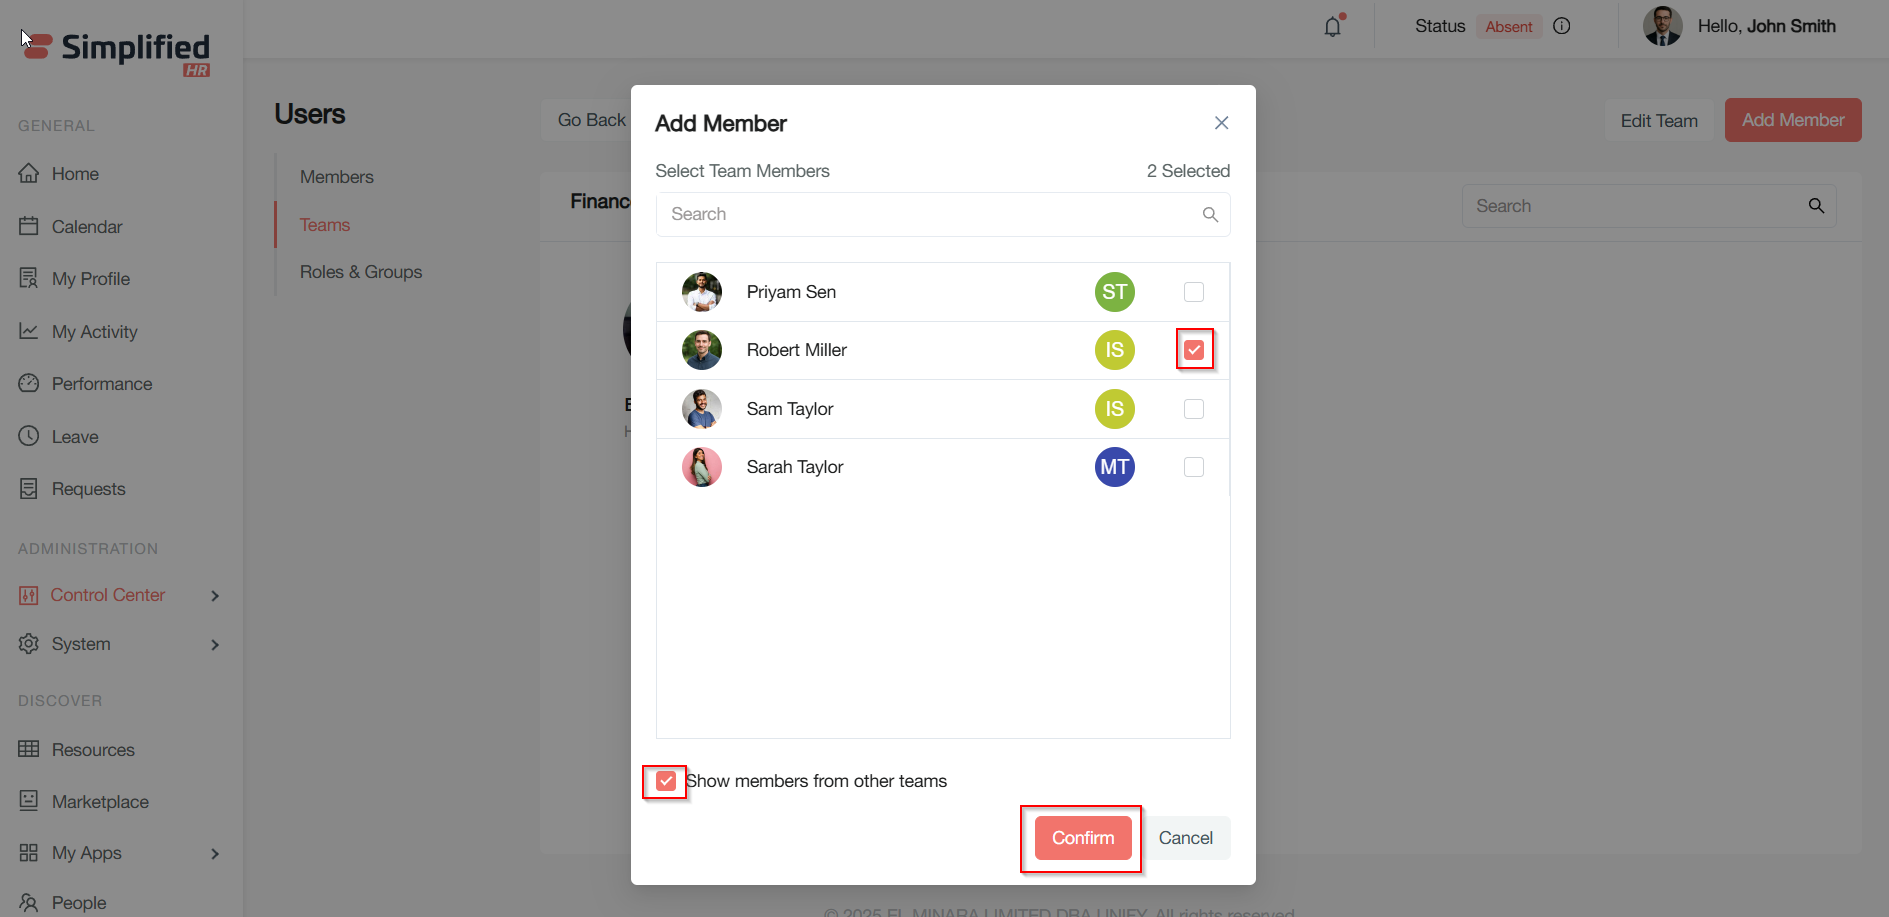
Adding Members to a Team
- Click Add member on the team details page
-
Use the search box to filter users quickly by name
-
Select one or more members by ticking their checkboxes
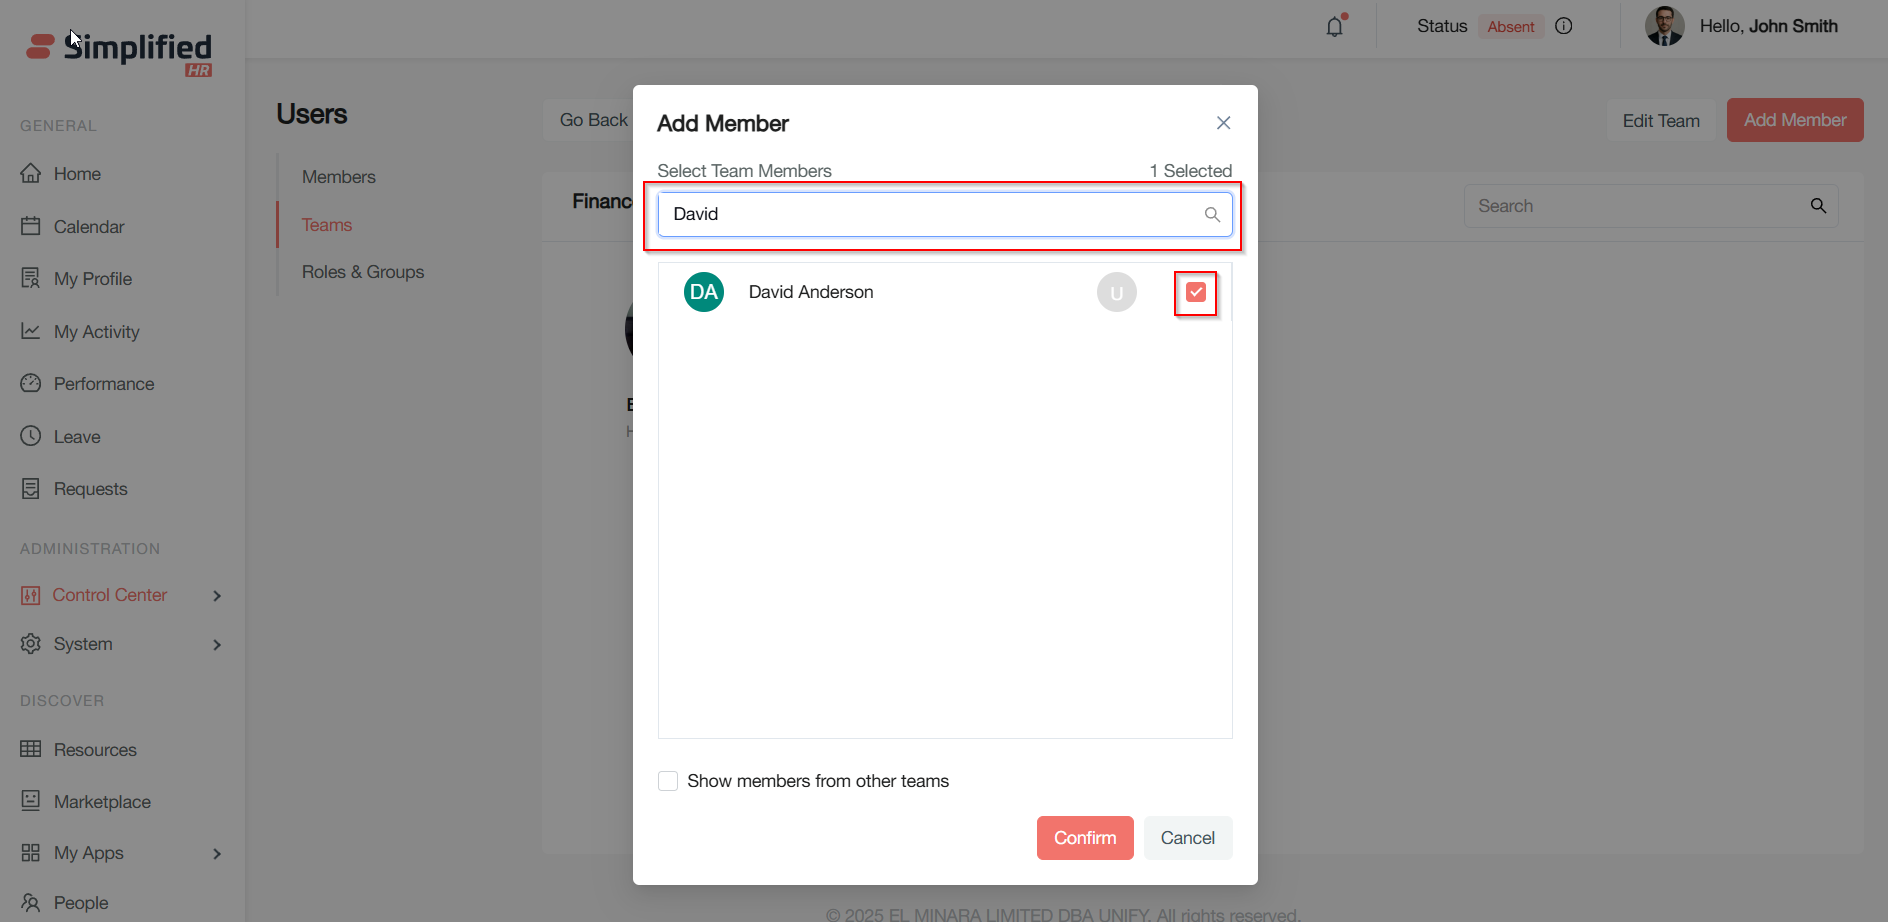
-
(Optional) Tick Show members from other teams to include users from other teams. If it is unchecked then only members who do not belong to any team will be shown
-
Click Confirm to add members or Cancel to discard