Employee → Activity Management
Accessing My Activity
-
Ensure the Activity Module is enabled in System > Module Settings.
-
From the sidebar, click on My Activity to open the module.
-
The dashboard displays the user's personal activity summary, including time logs, activity %, and attendance.
Note: The Activity Module is a paid feature and requires a PRO subscription of the Simplified HR application. It must also be enabled, and the user must have appropriate permissions for their role.
View Average Activity
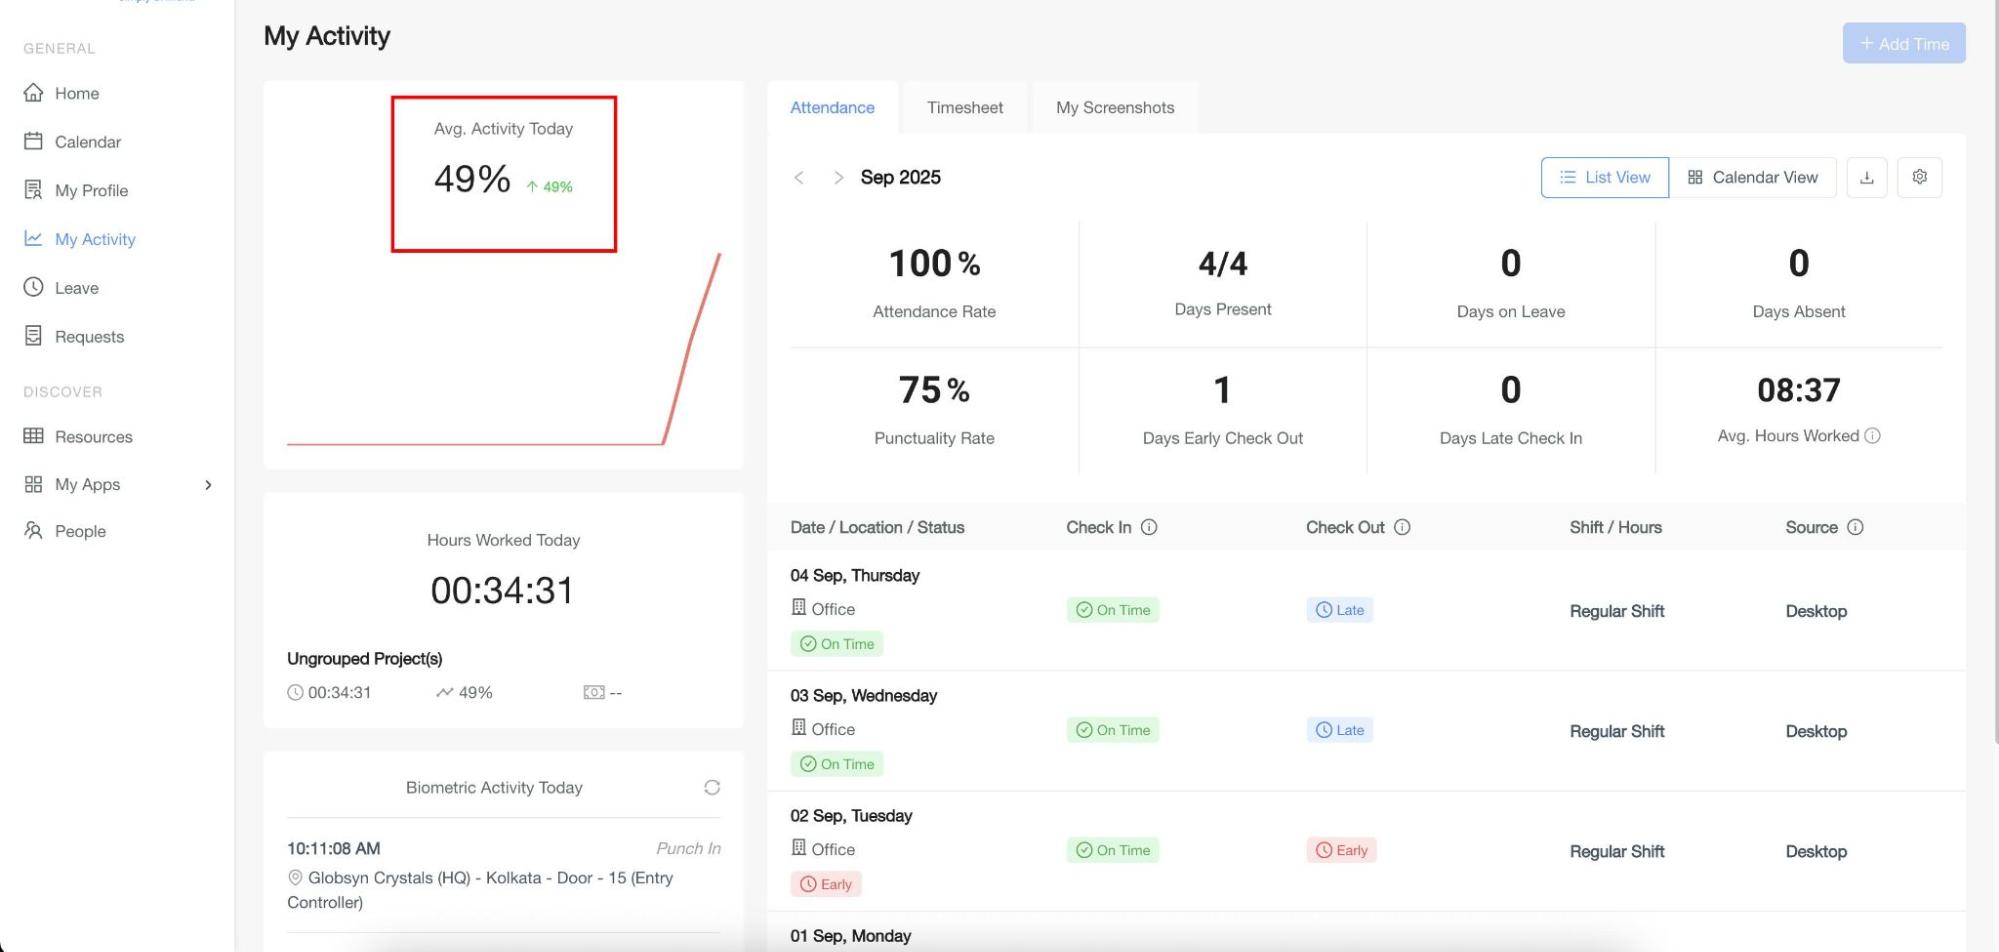
Average Activity Today displays the average activity percentage (%) for the current day (if the user is tracking time from the Desktop App).
A comparison indicator is shown against the previous day's activity:
View Hours Worked
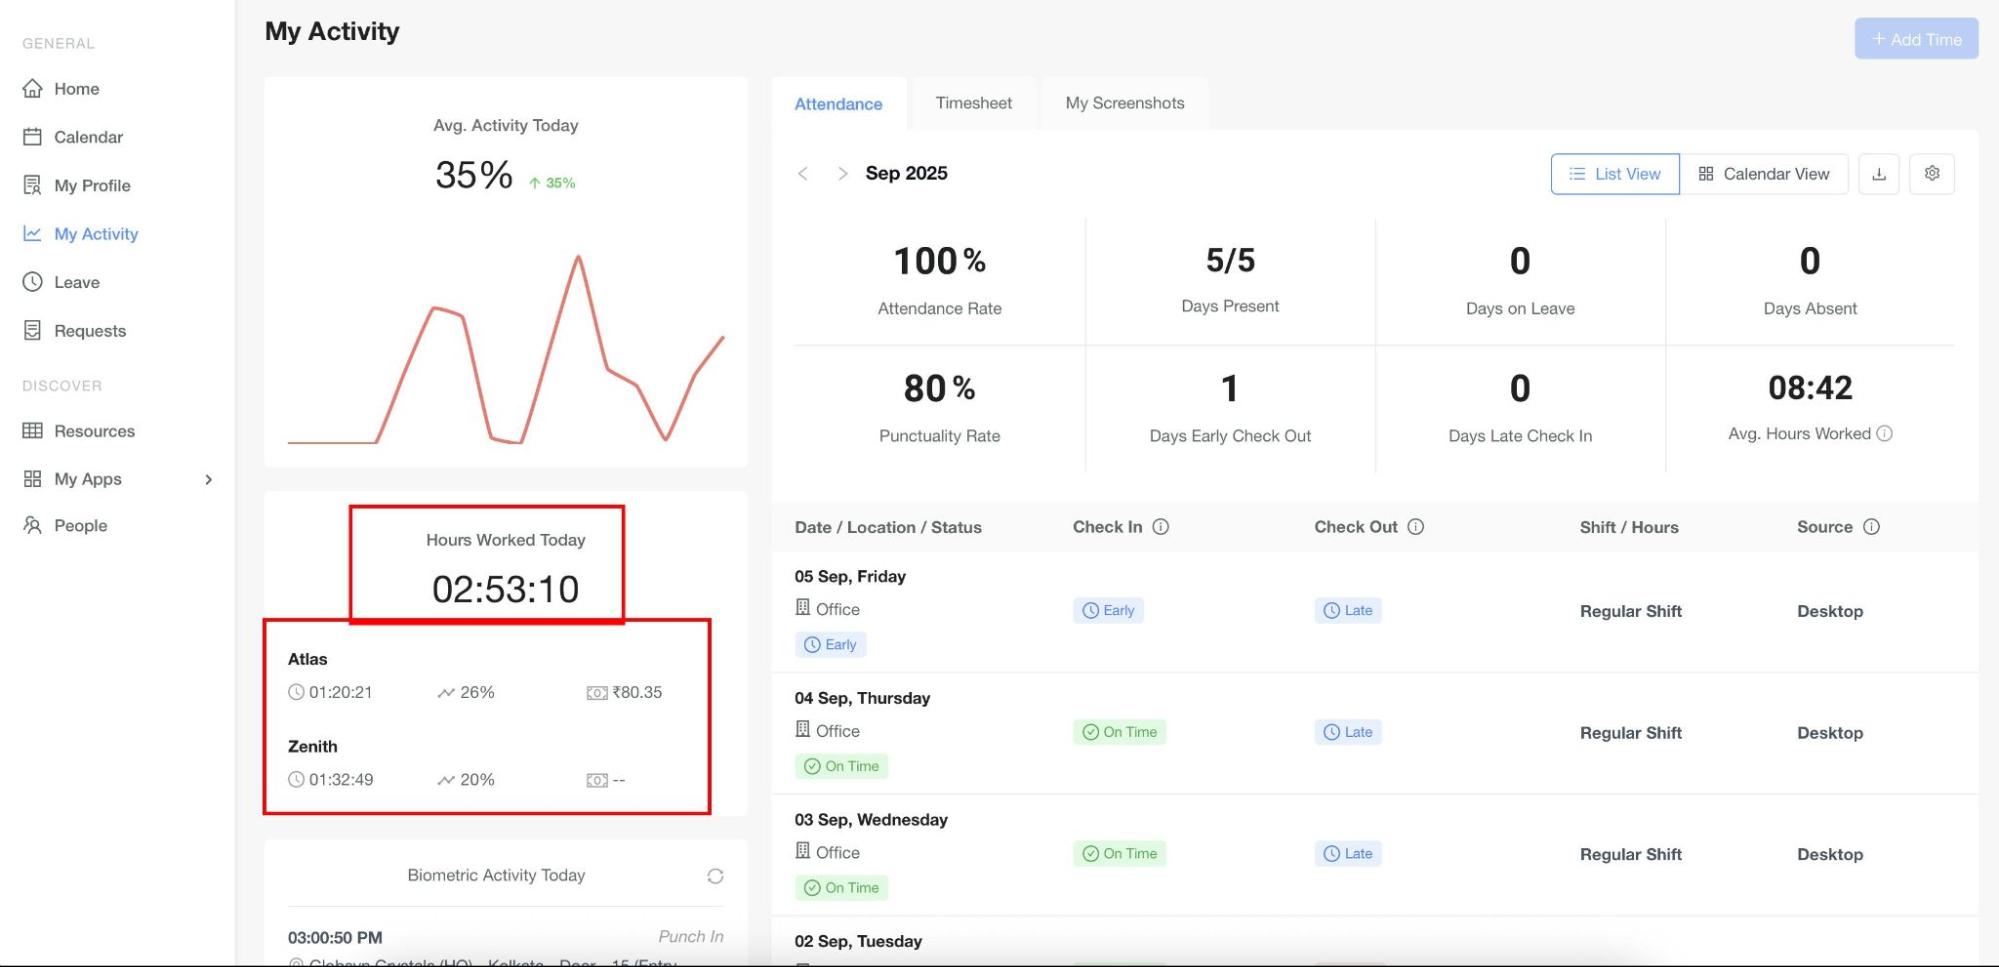
Hours Worked Today shows the total tracked time for the current day, with a project-wise breakdown including:
-
Activity % for each tracked project.
-
Billable amount (if the project is configured as billable).
-
If billable, the calculated bill amount is displayed.
-
If non-billable, a hyphen (-) is shown instead of an amount.
View Biometric Activity
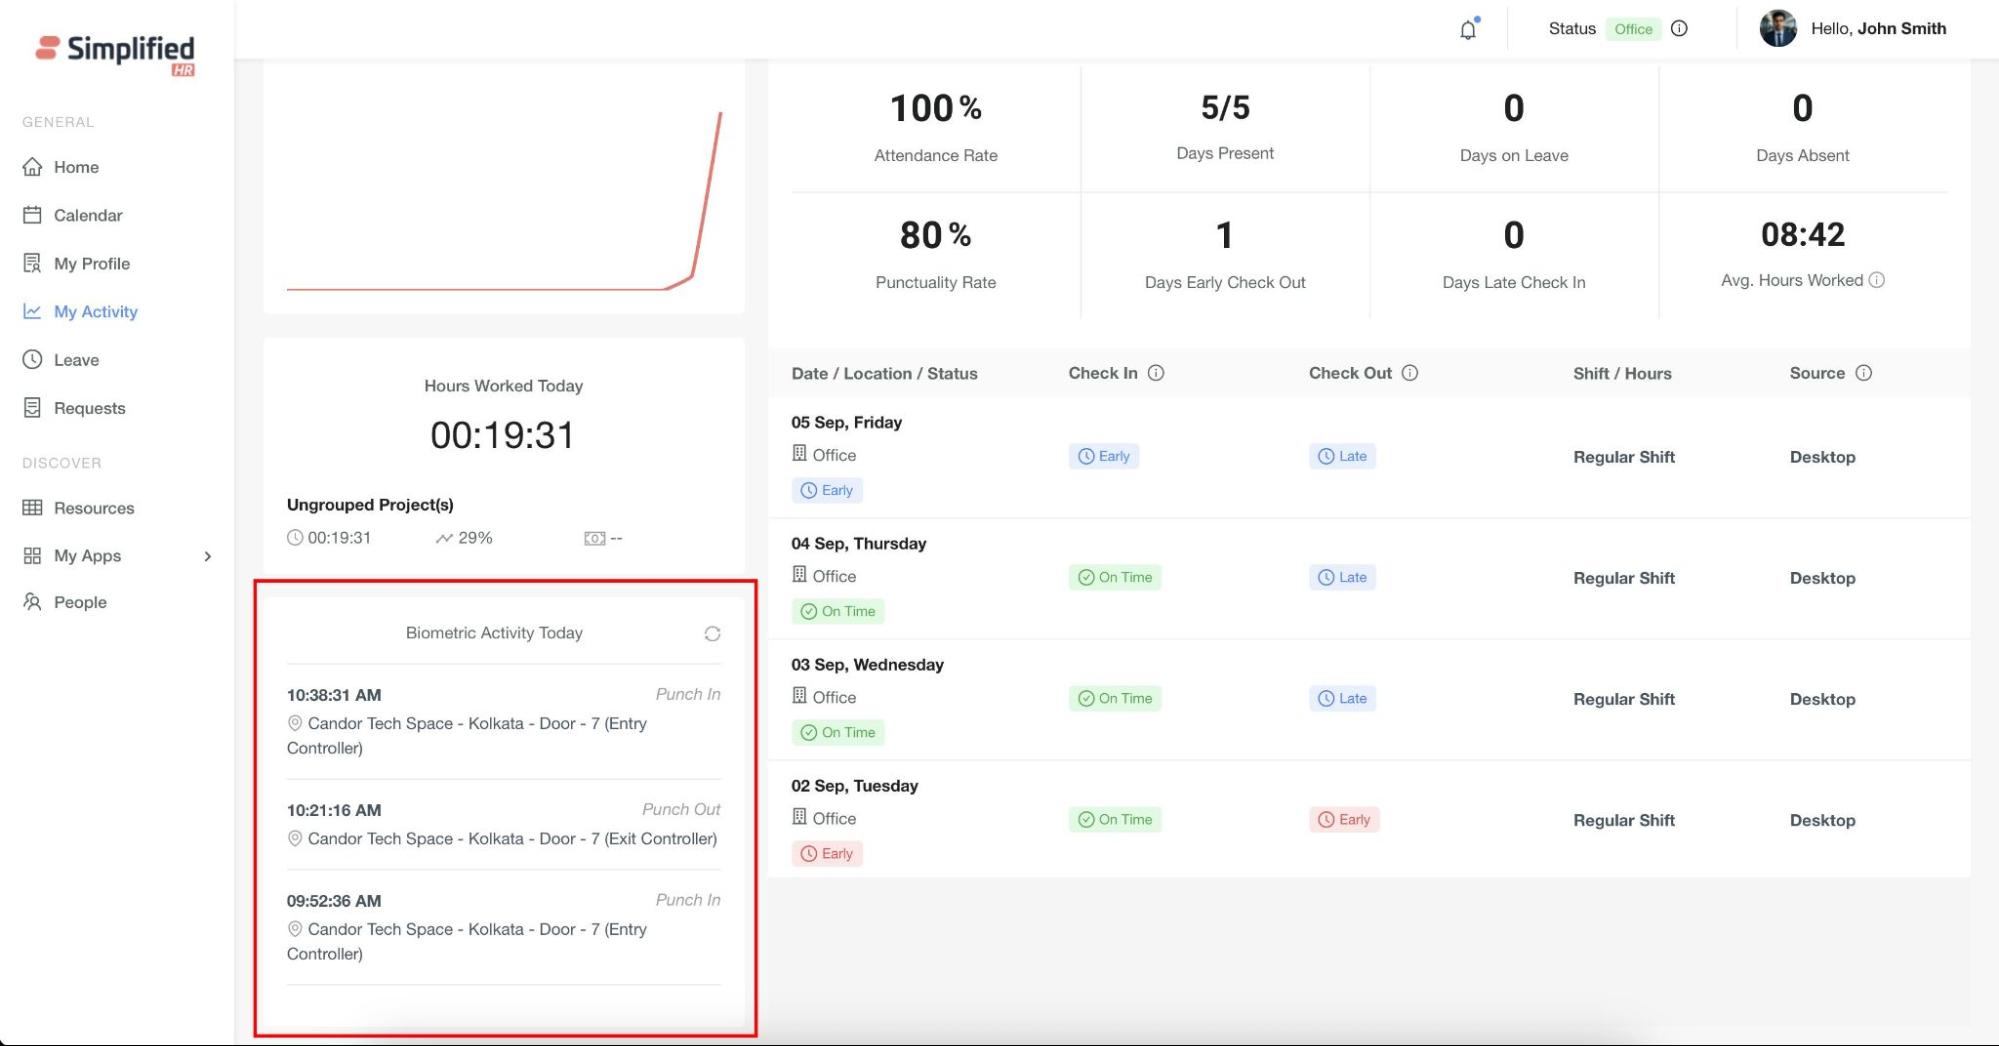
The Biometric Activity Today card displays the user's punch-in and punch-out events for the current day.
Note: This card is visible only if the biometric source is enabled in the Attendance Module settings.
Each biometric event is shown with:
-
Time of the event.
-
Location of the punch.
Users can fetch the latest biometric data at any time by clicking the Refresh button.
Timesheet Section Overview
The Timesheet area within My Activity features several tabs, which are visible based on the specific configurations established in the My Activity Module Settings.
The available tabs consist of:
-
Attendance
-
Timesheet
-
My Screenshots
-
App Usage
-
URL Tracking
-
Projects
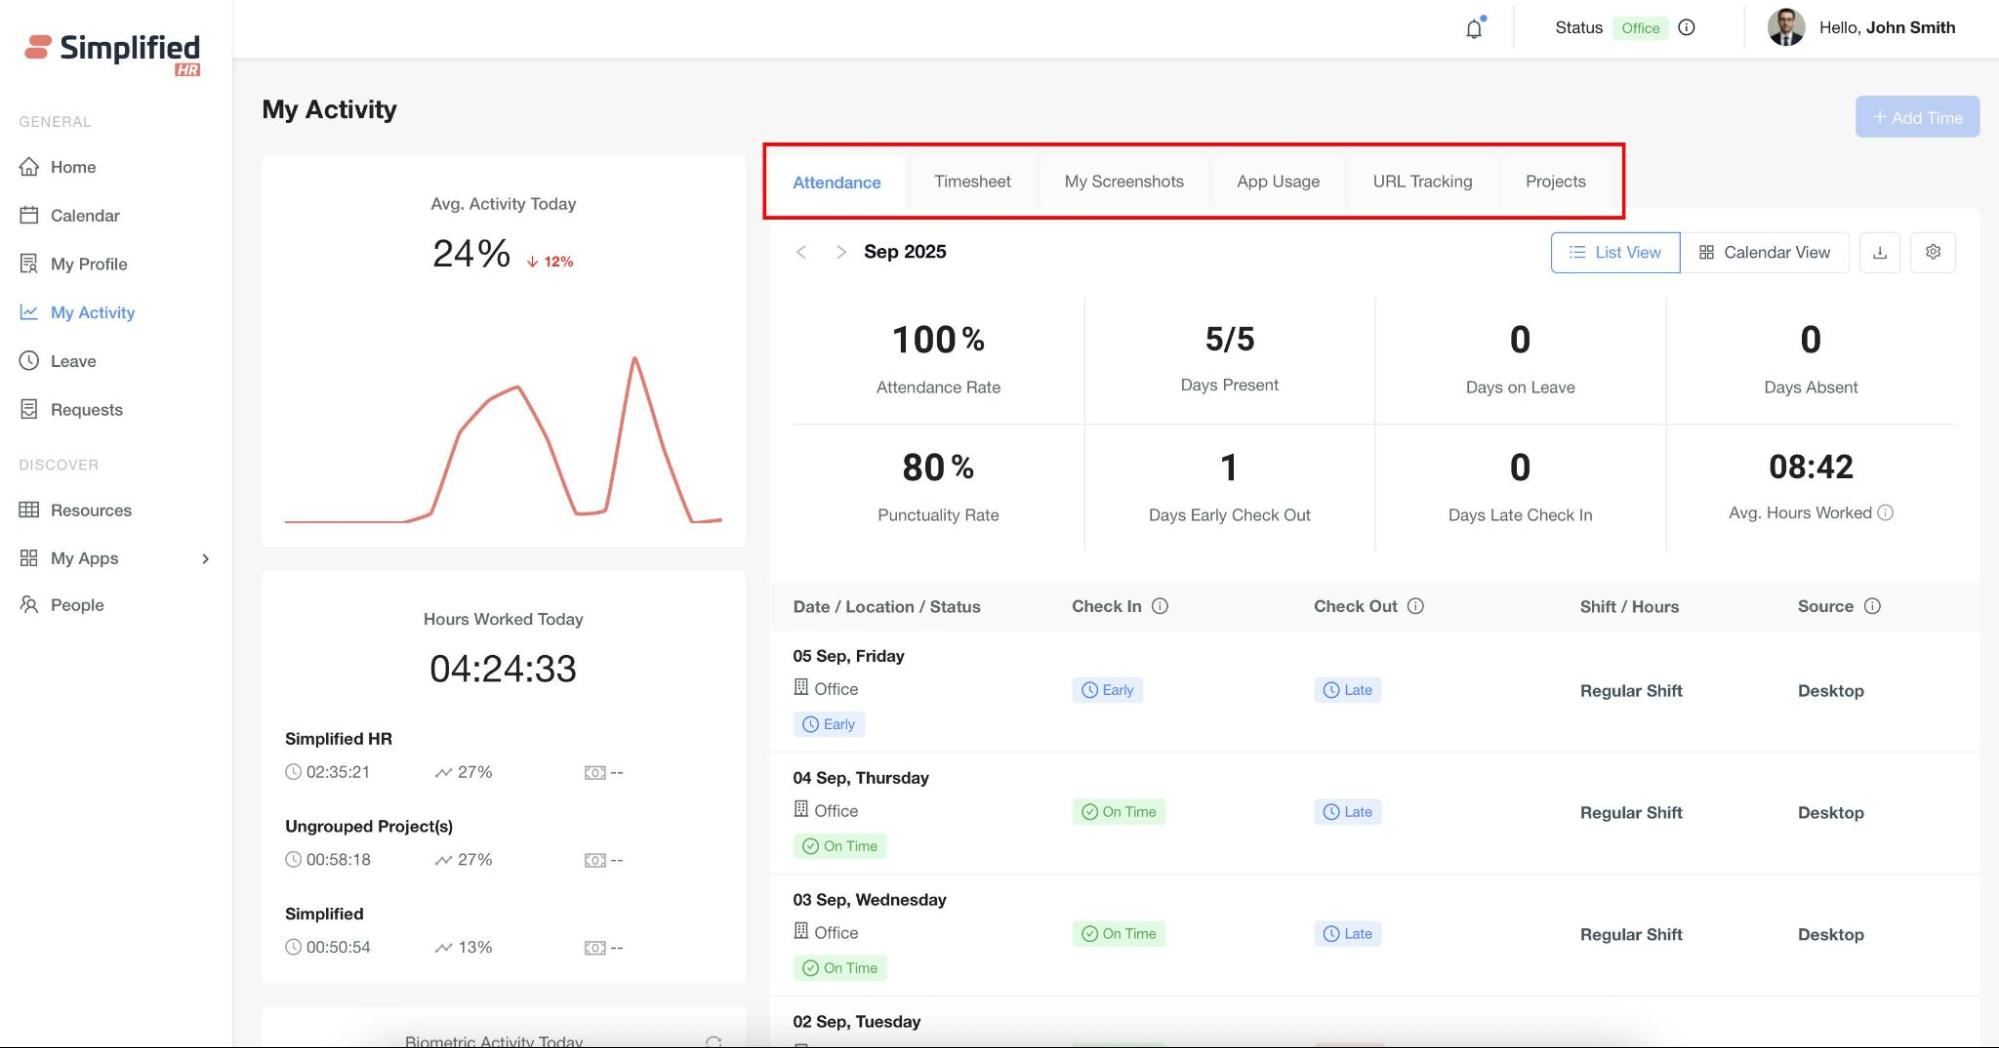
Every tab offers distinct information and tools designed to assist users in managing their professional productivity with greater efficiency.
View Attendance
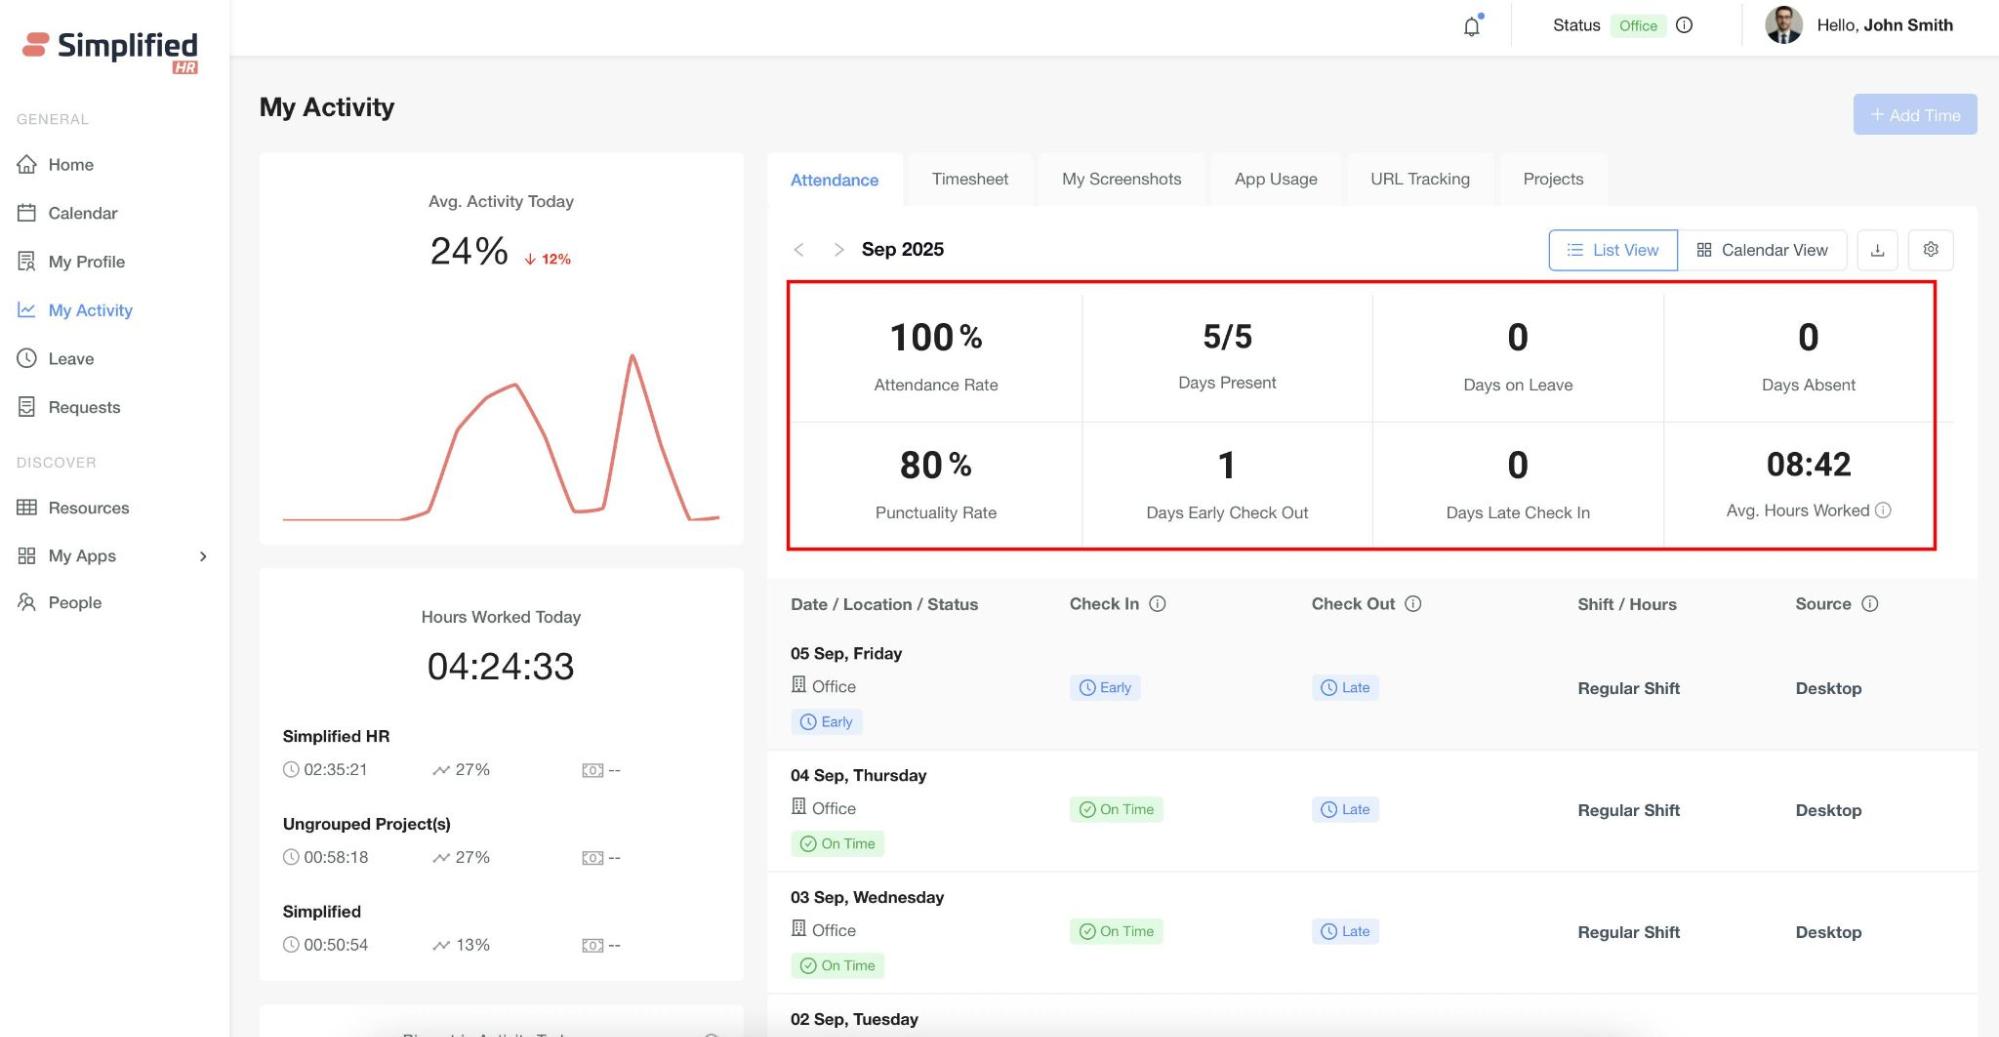
The Attendance tab provides users with a detailed view of their attendance records. By default, it shows the current month, but users can also switch to view data from previous months.
The Overview section displays the user's overall attendance statistics for the selected month, including:
-
Attendance rate (%)
-
Total days present
-
Leave days
-
Absent days
-
Punctuality rate
-
Early checkout days
-
Late check-in days
-
Average hours worked
View Attendance Summary
The Summary section shows a date-wise breakdown of attendance, including:
-
Check-in and check-out times.
-
Daily attendance status (Early, Late, Absent, etc.).
-
Work location (Office, Remote).
-
User's Assigned Shift — if the user has a single shift, hovering over the shift text shows "Regular Shift." If the user has multiple shifts, hovering shows "Multiple Shifts." In both cases, detailed shift information can be viewed on hover.
-
Attendance source (configured under Module Settings > My Activity).
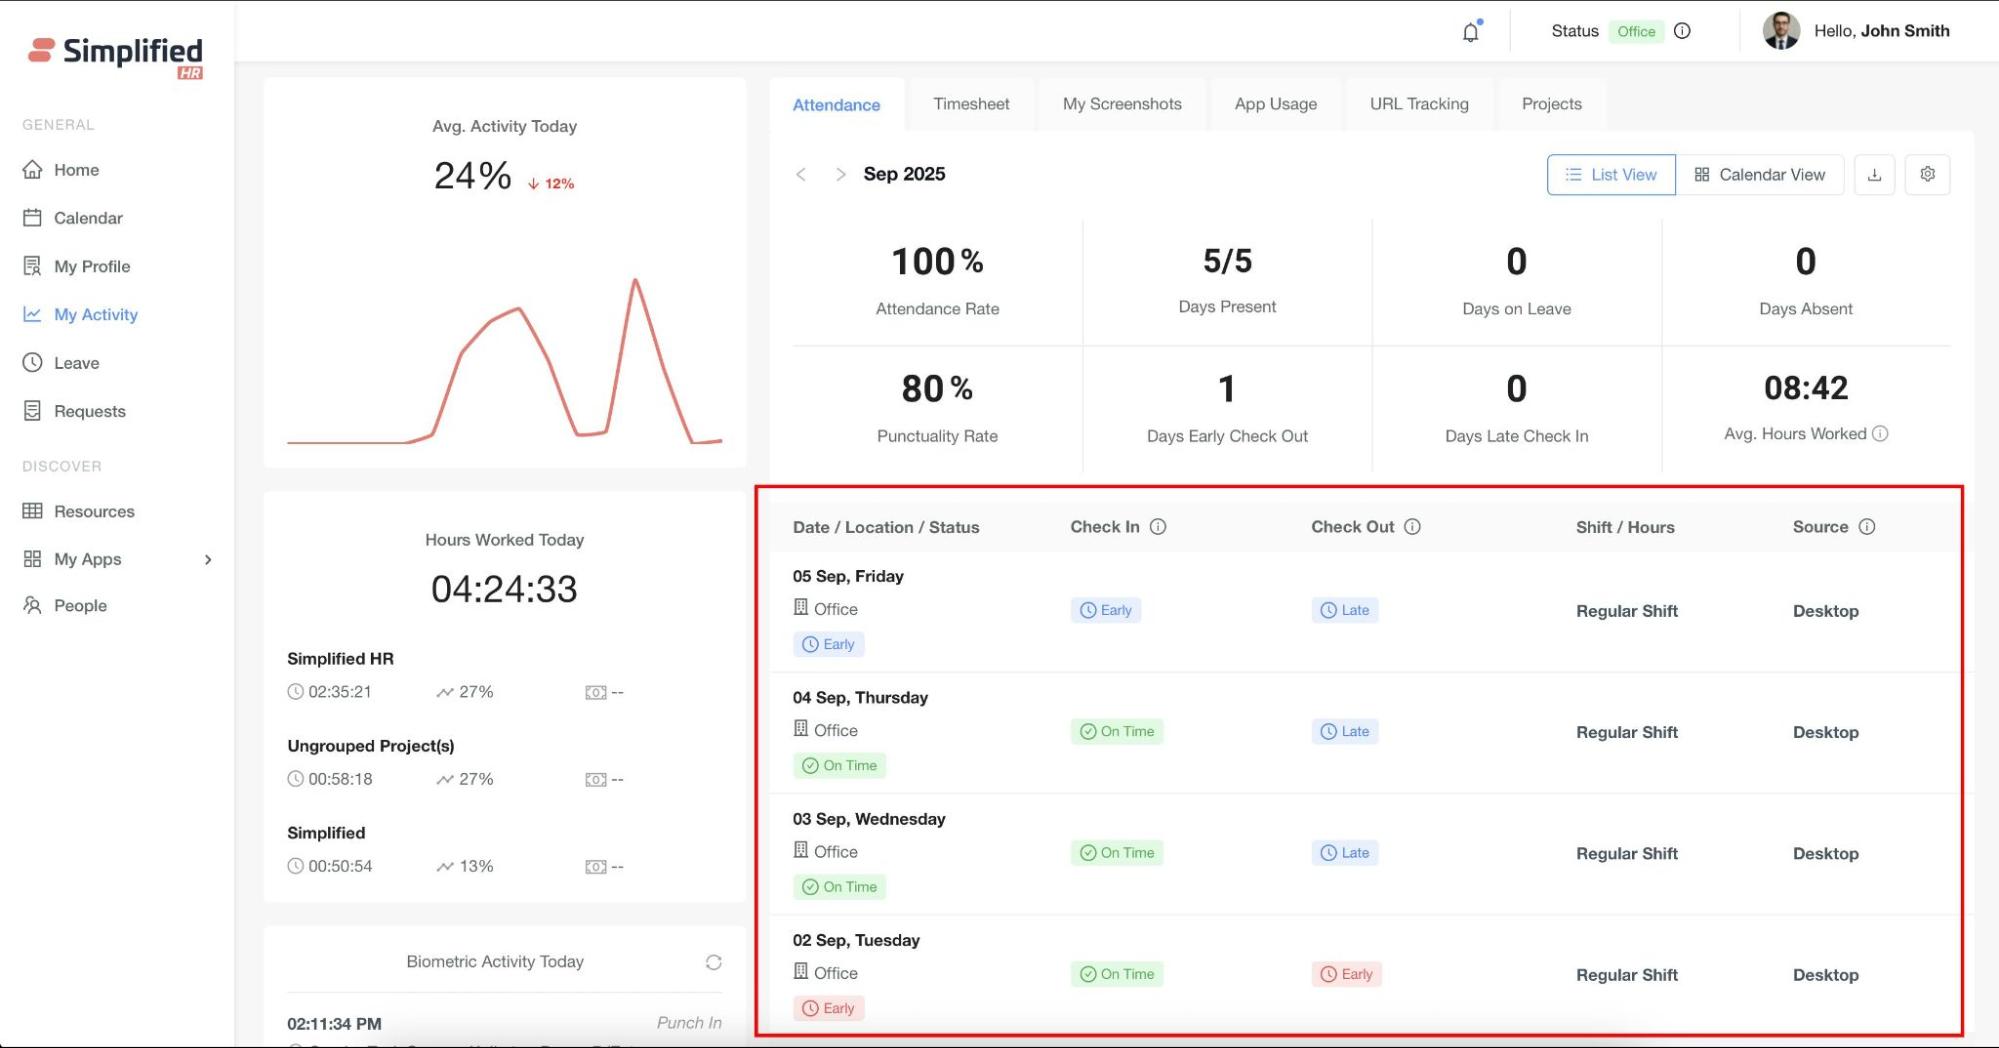
View Attendance in List View
List View (Default): Displays attendance details in a table format.
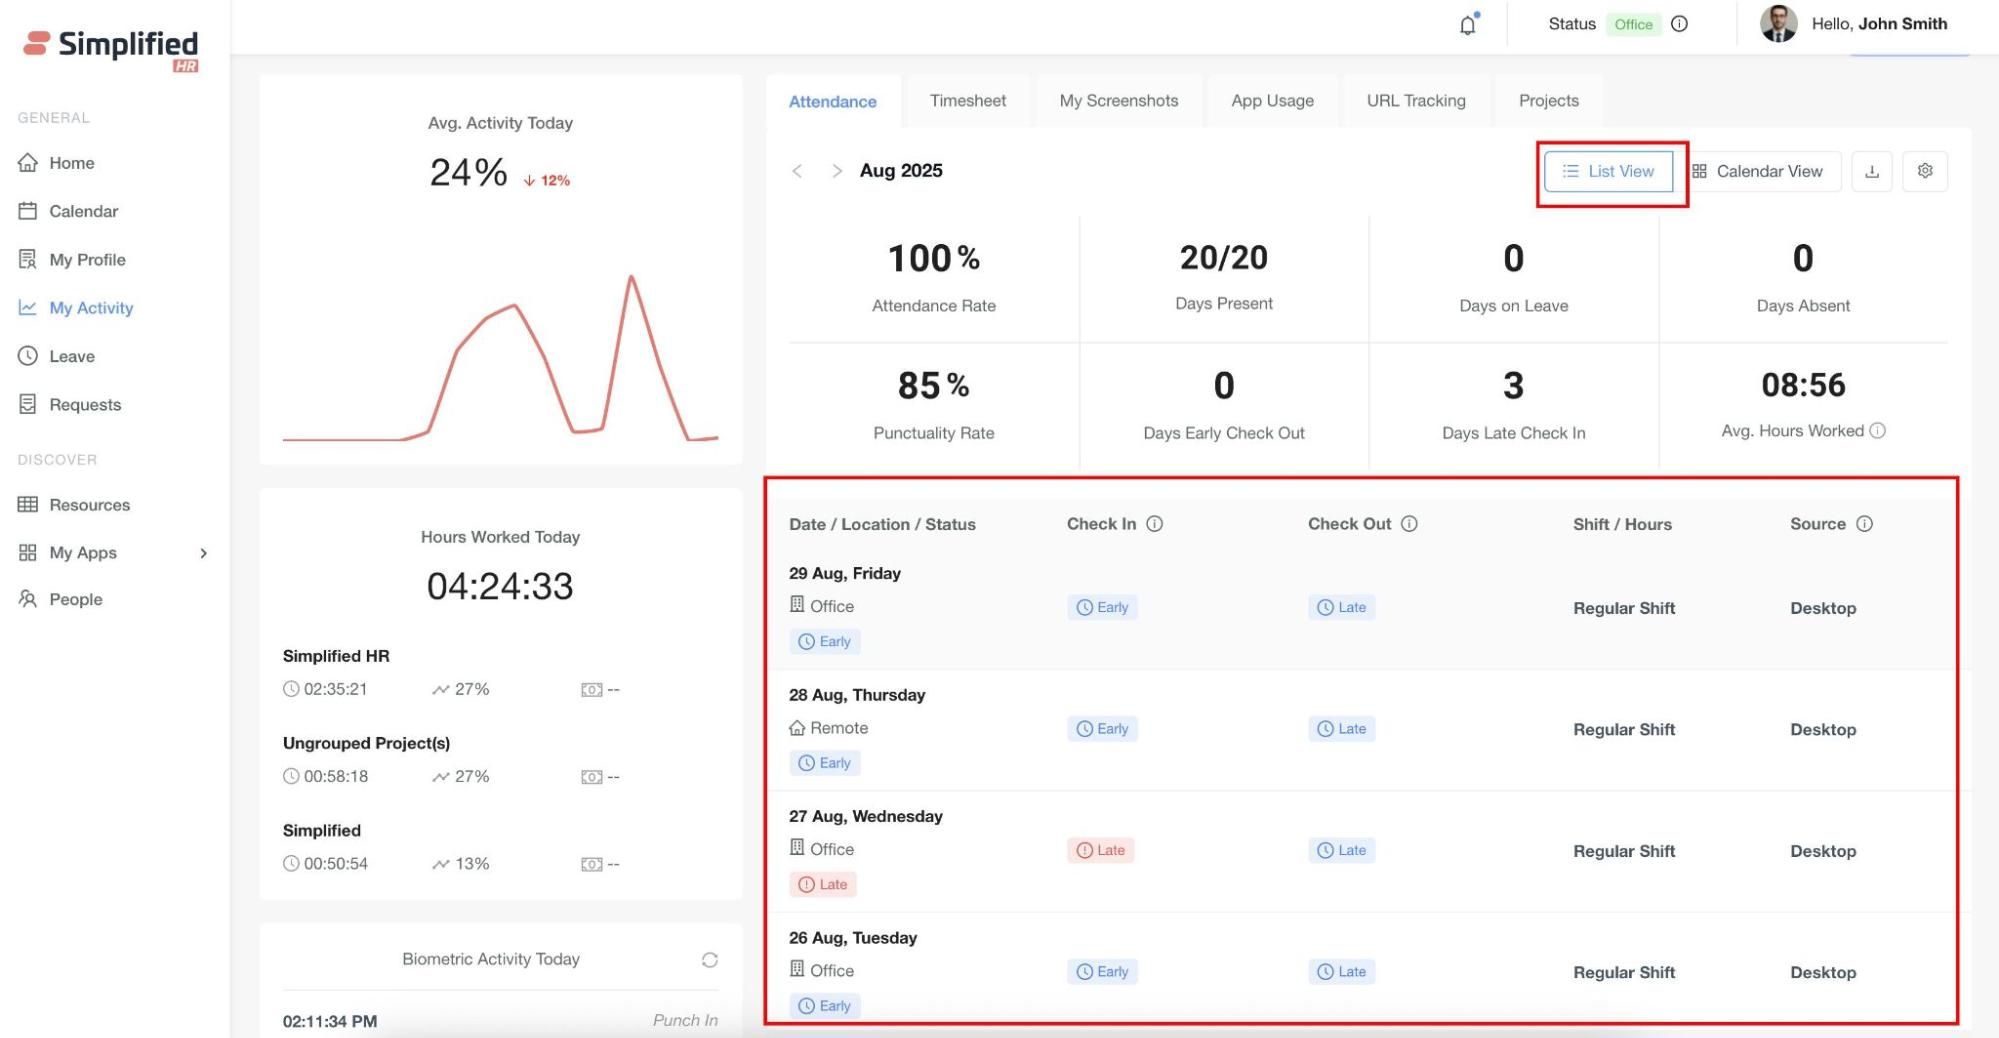
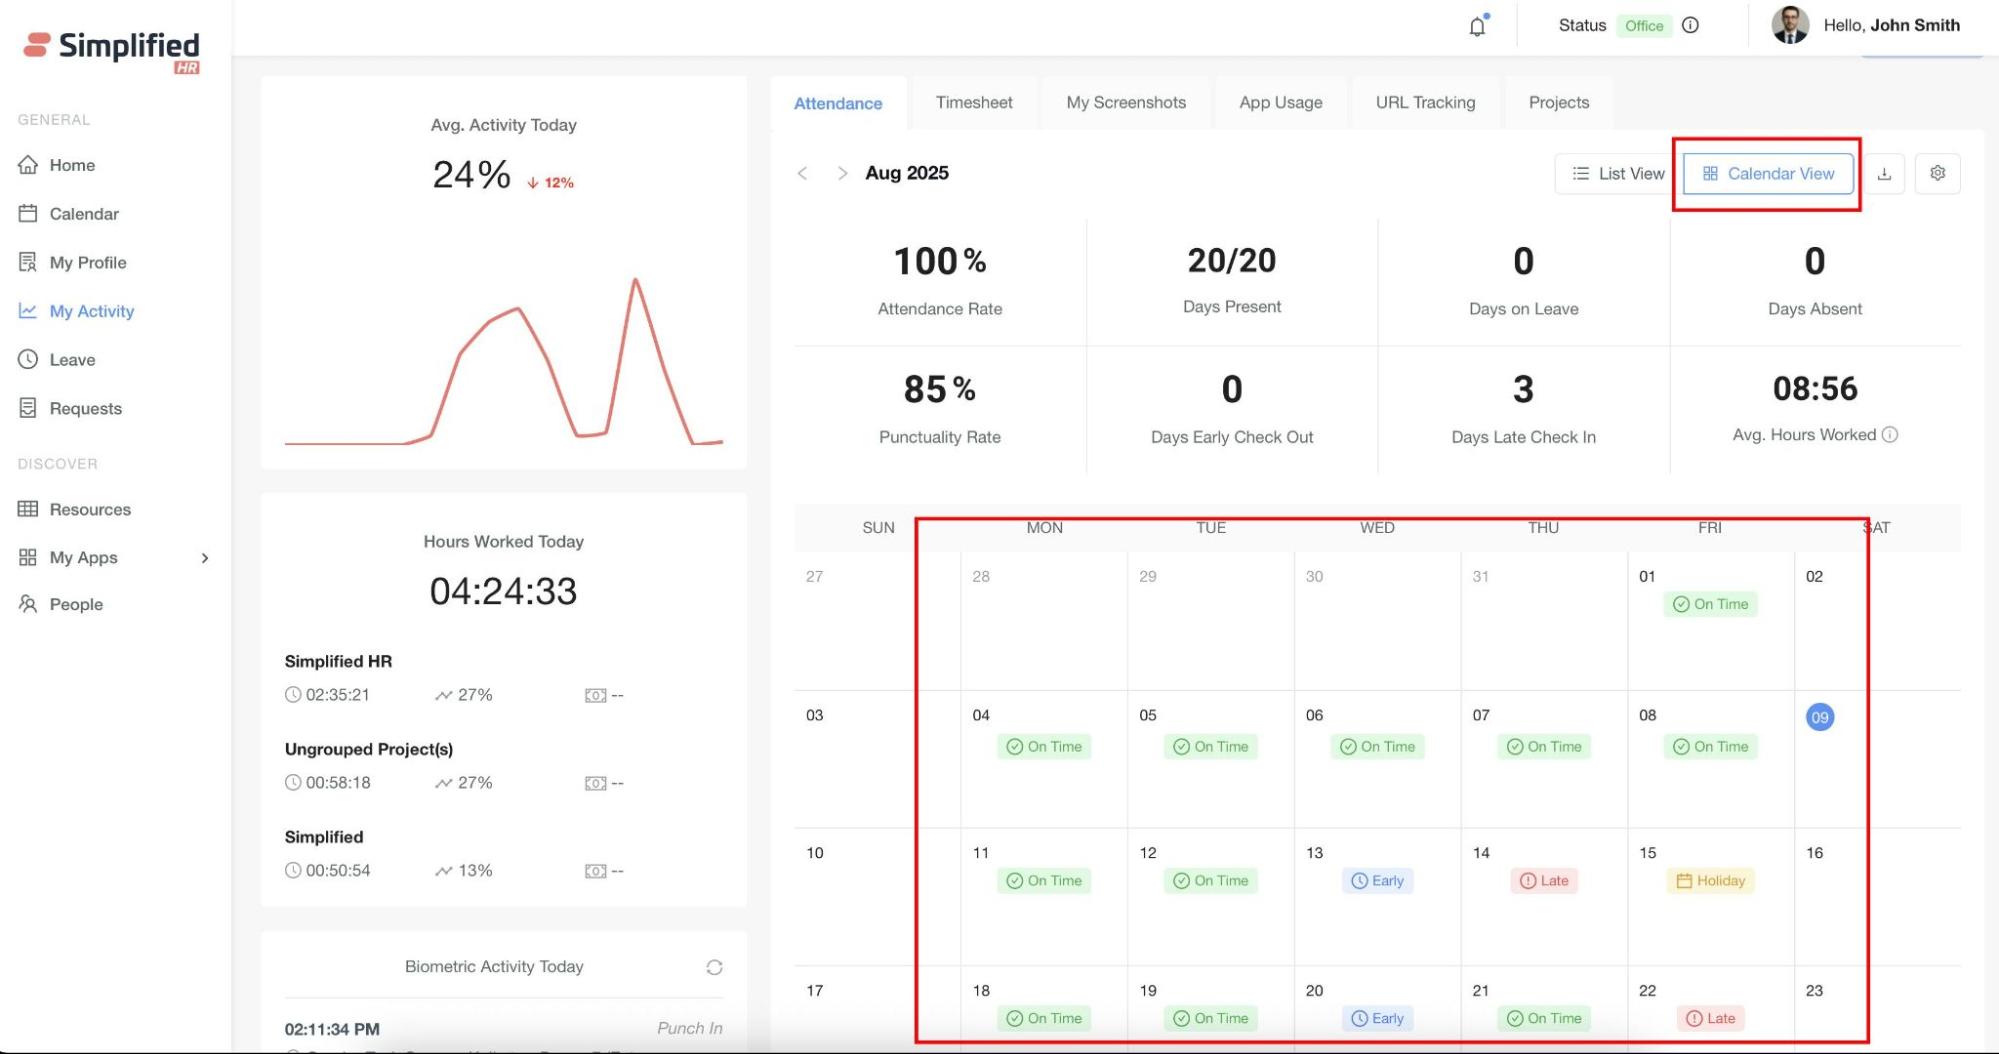
View Attendance in Calendar View
Calendar View: Provides a visual day-wise status of the user.
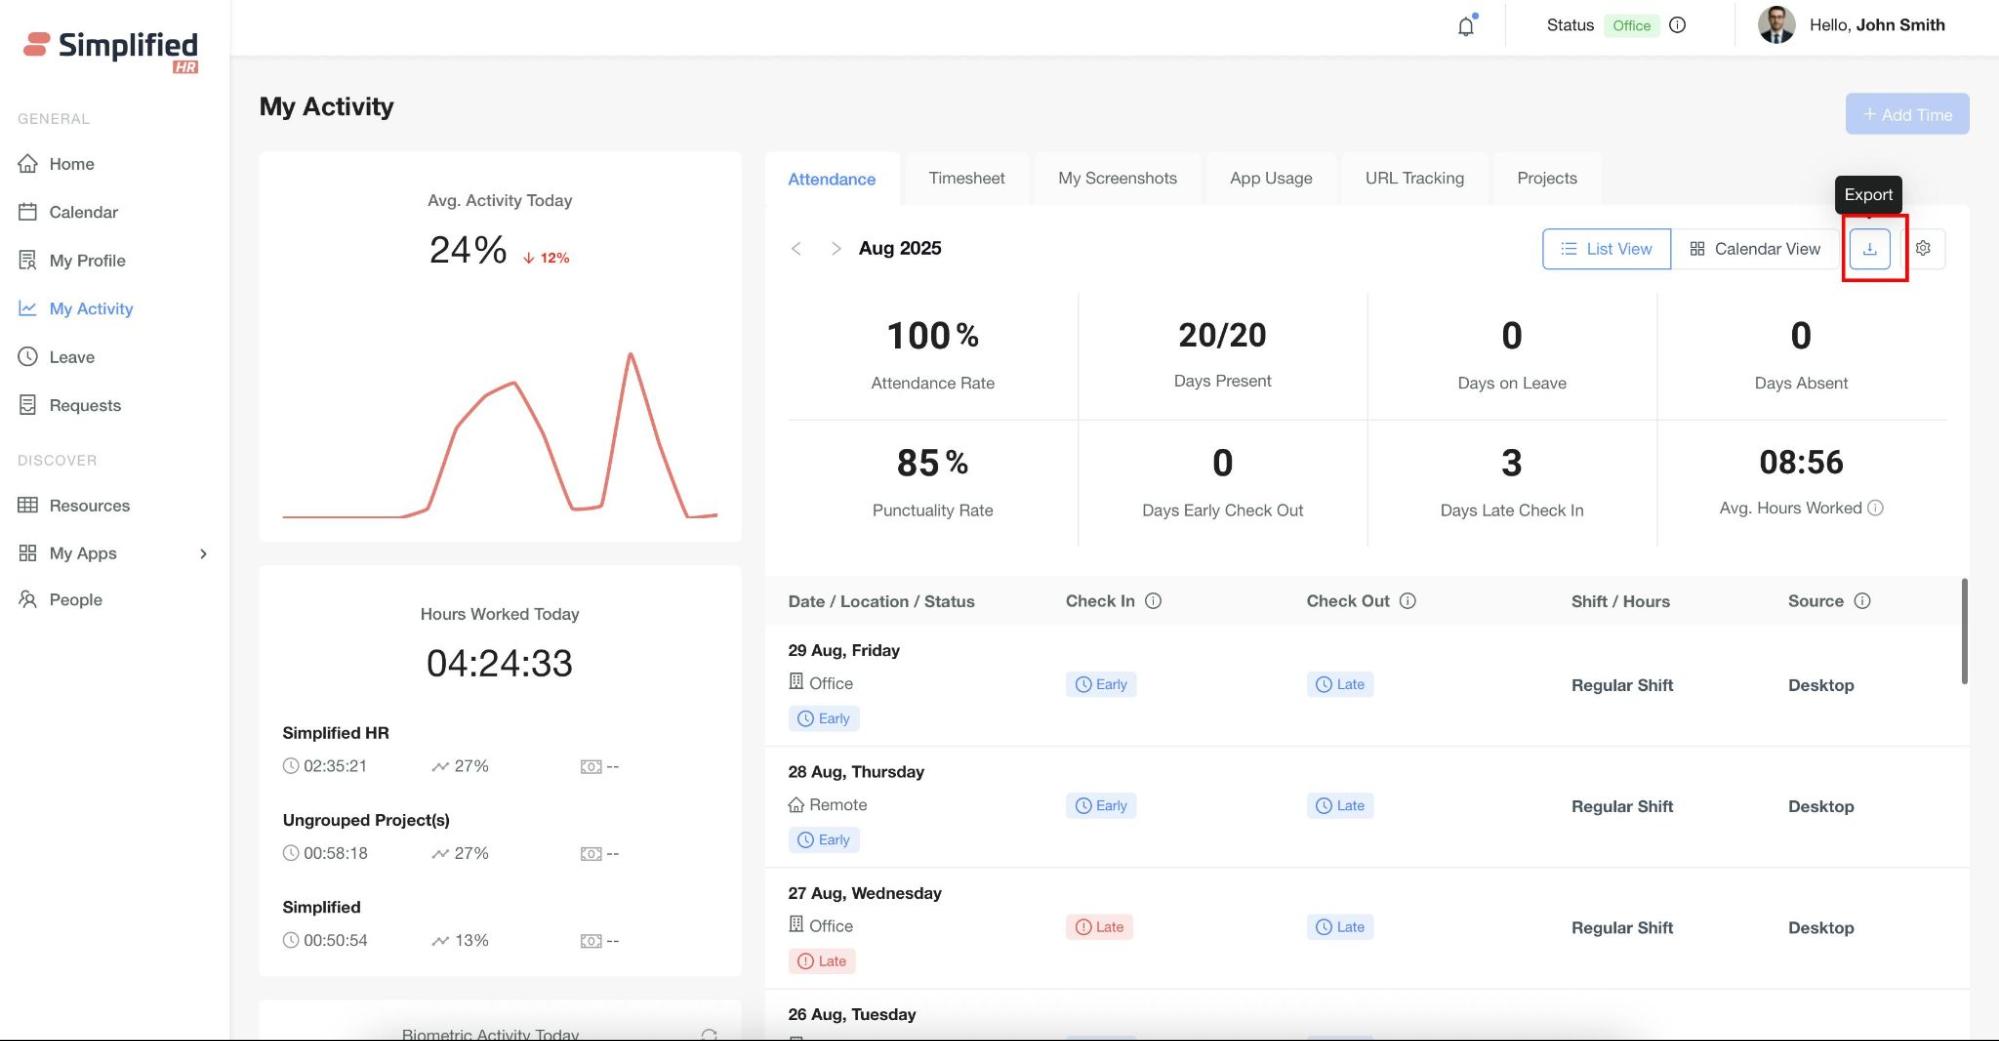
Export Attendance
Users can export their attendance data for reporting purposes using the Export option.
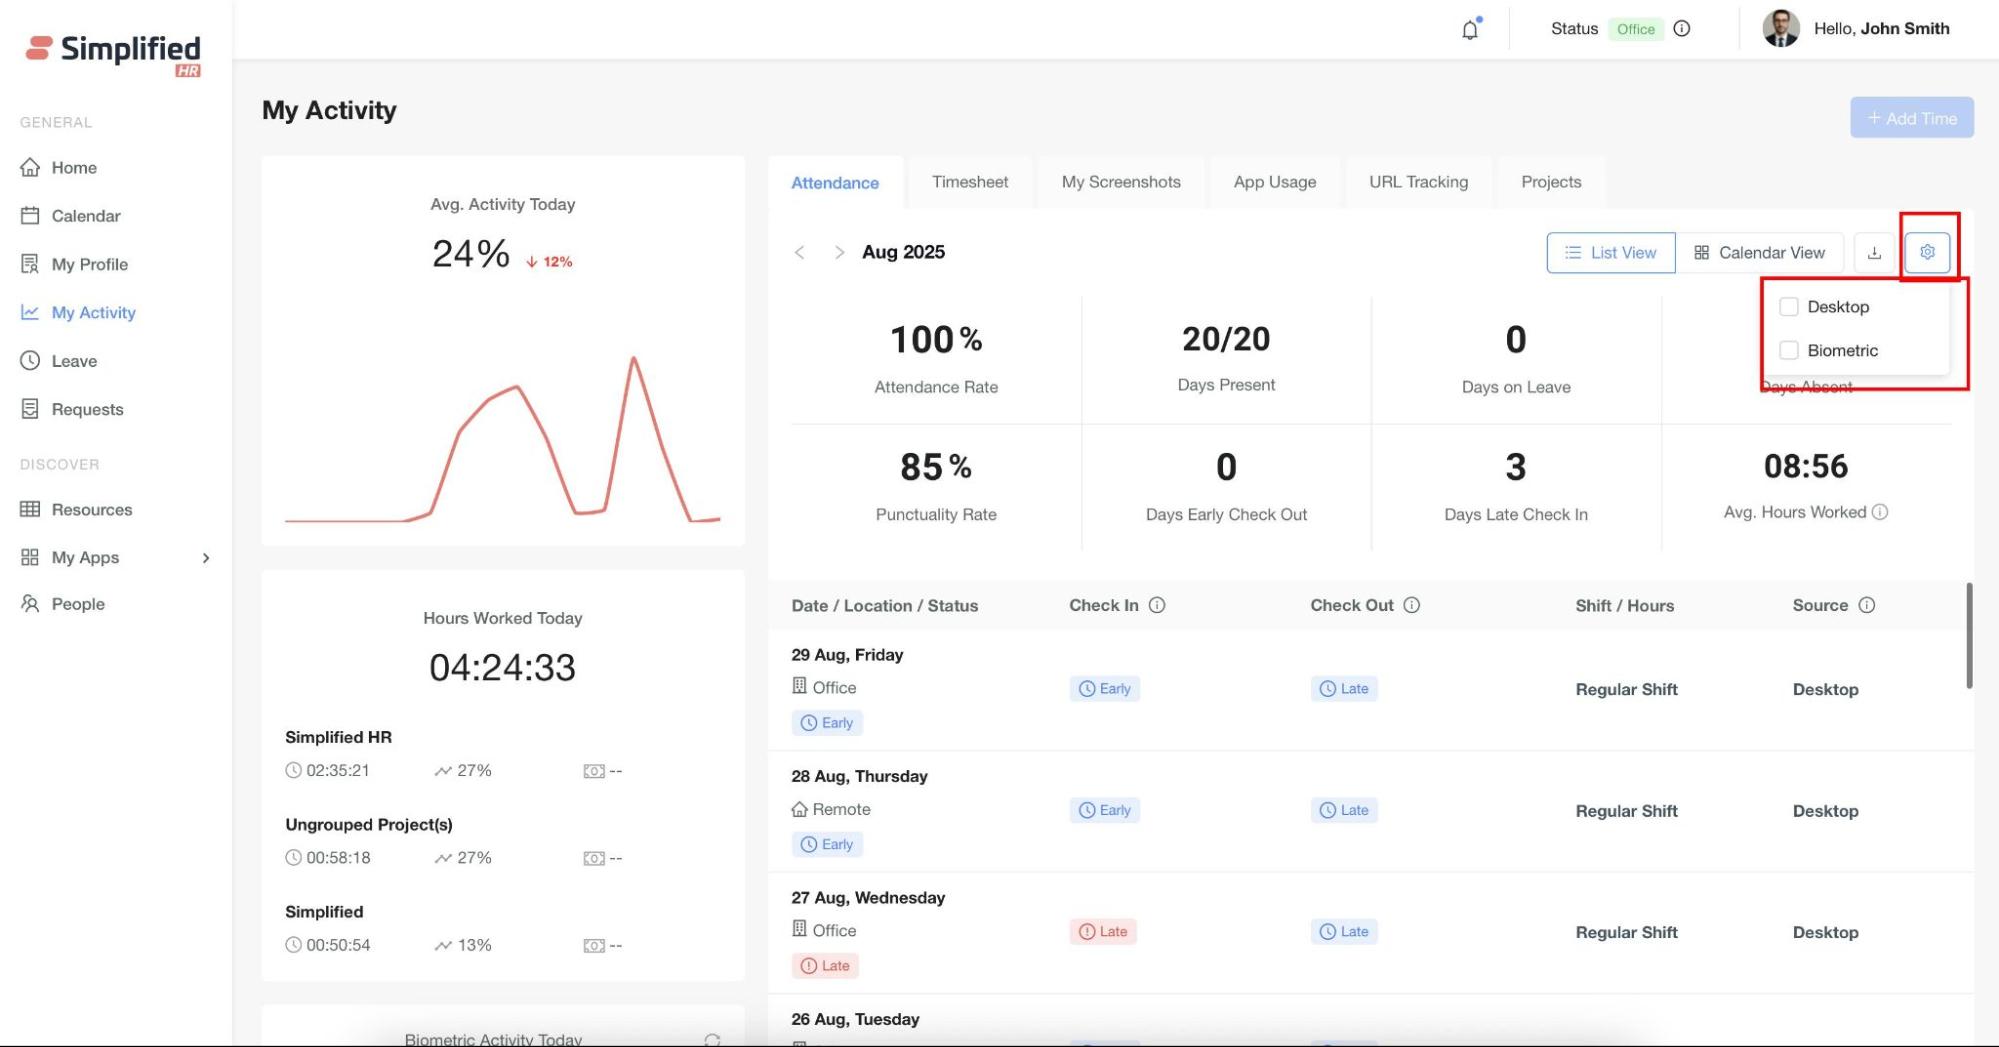
Select Attendance Sources
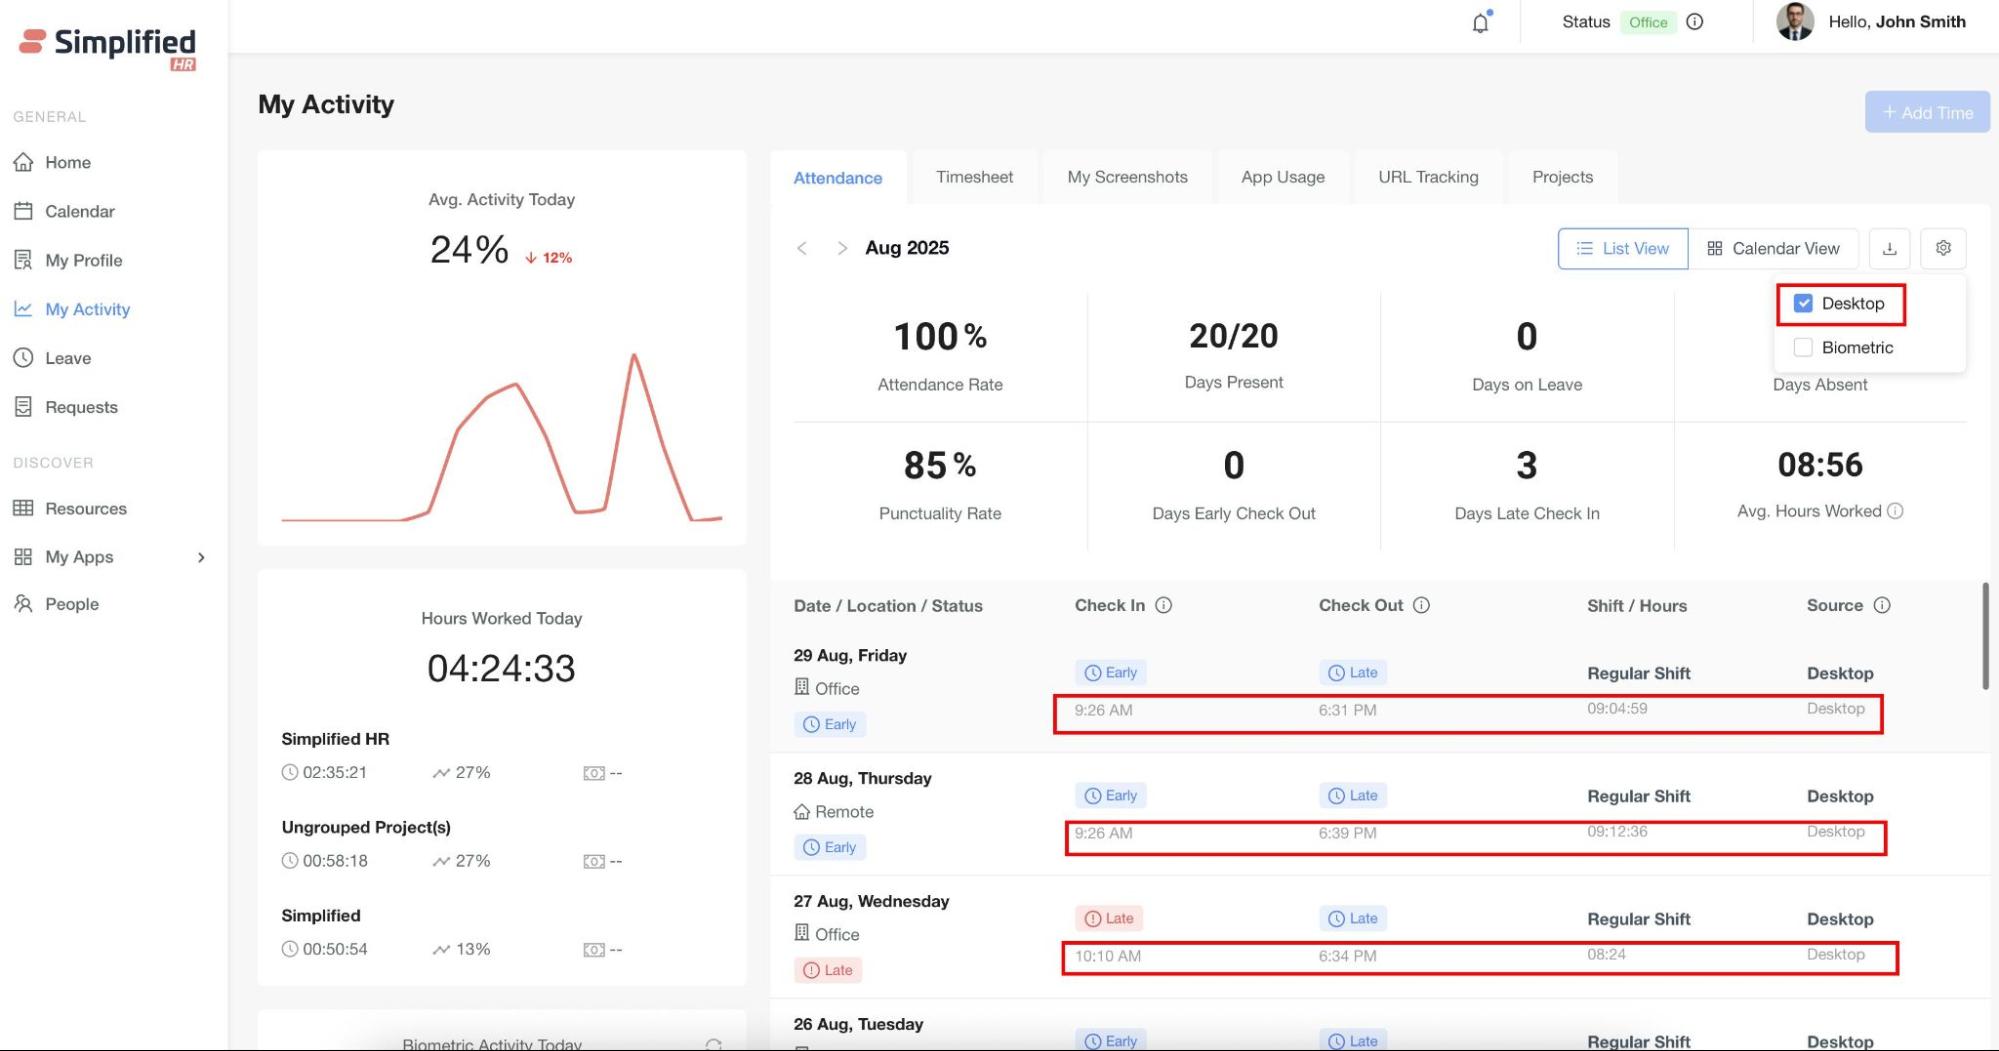
- The Settings icon on the Attendance tab allows users to select/deselect attendance sources.
- Based on the selected source, the system displays the corresponding check-in and check-out times in the daily summary.
Web Check-In
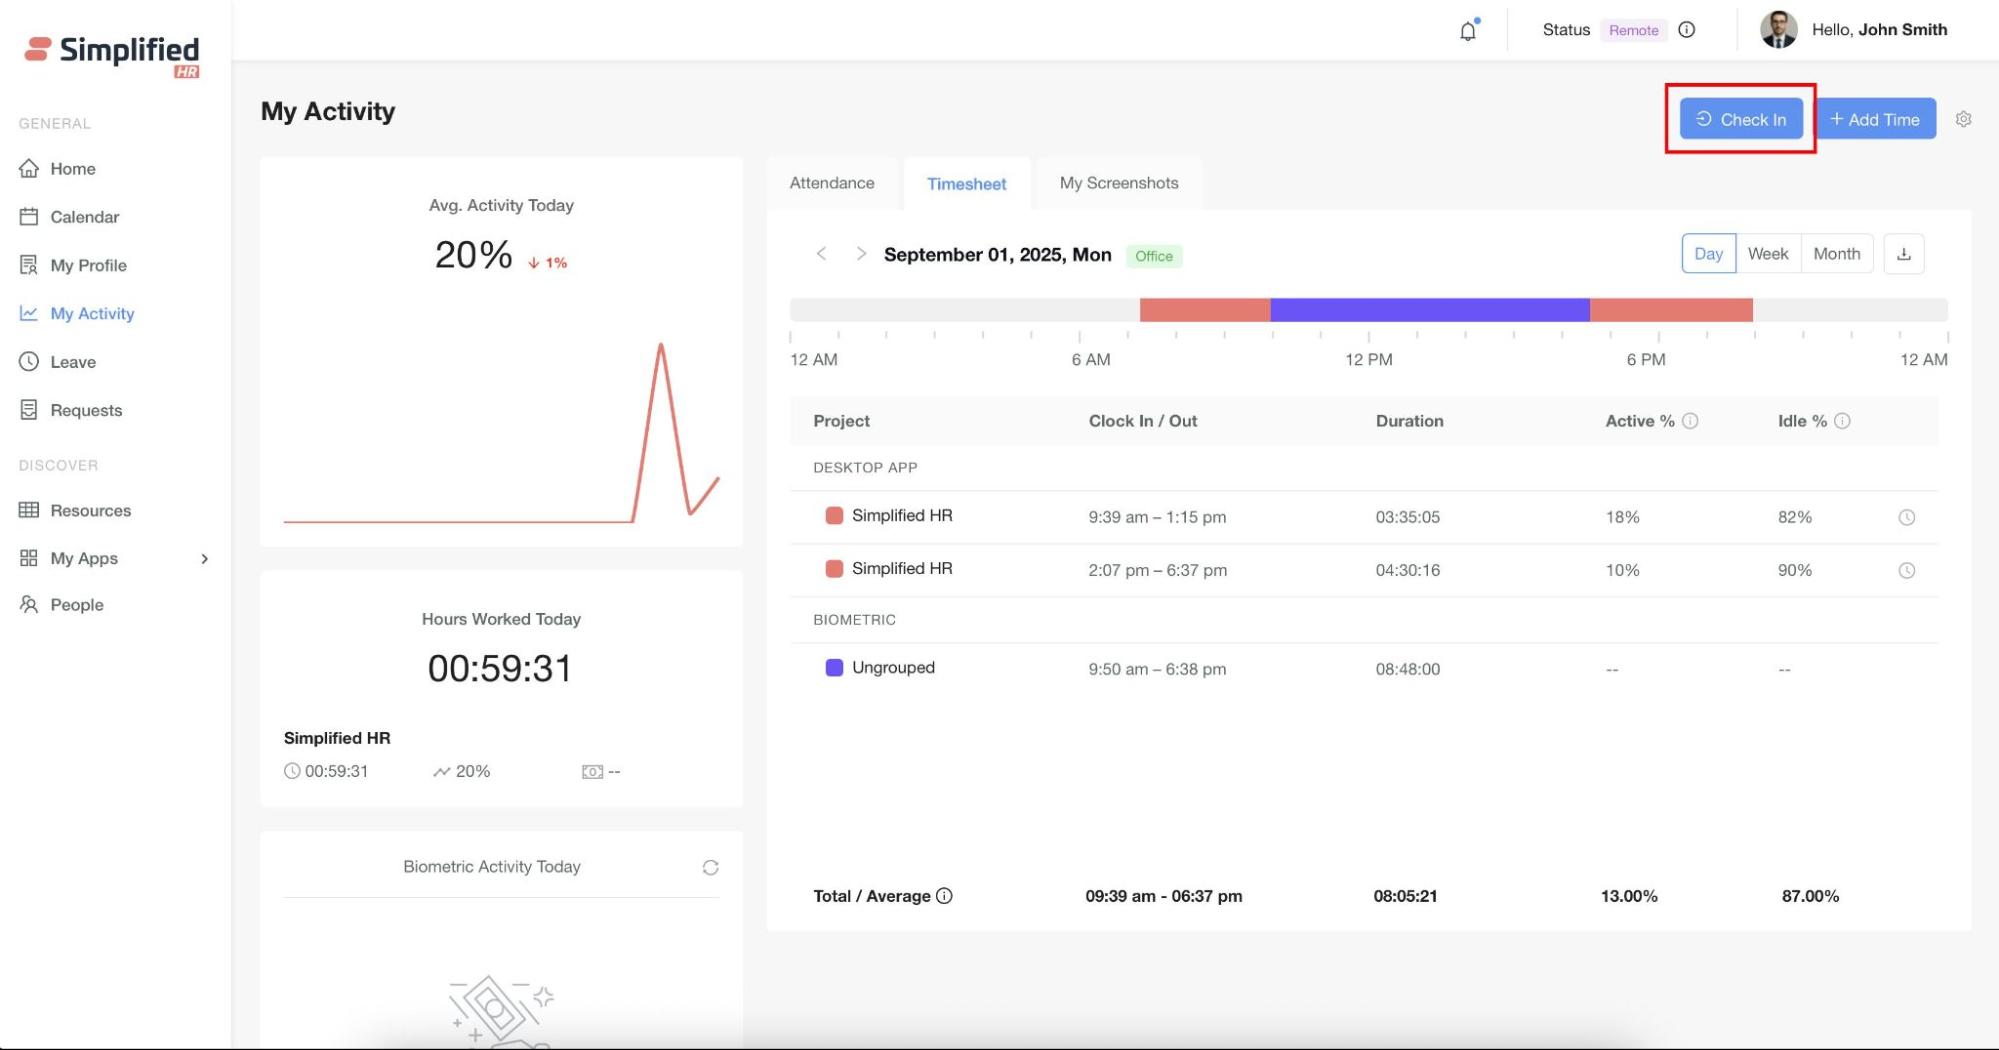
If Web Check-in/out is enabled in Module Settings, users will see a Web Check-in button on the My Activity page.
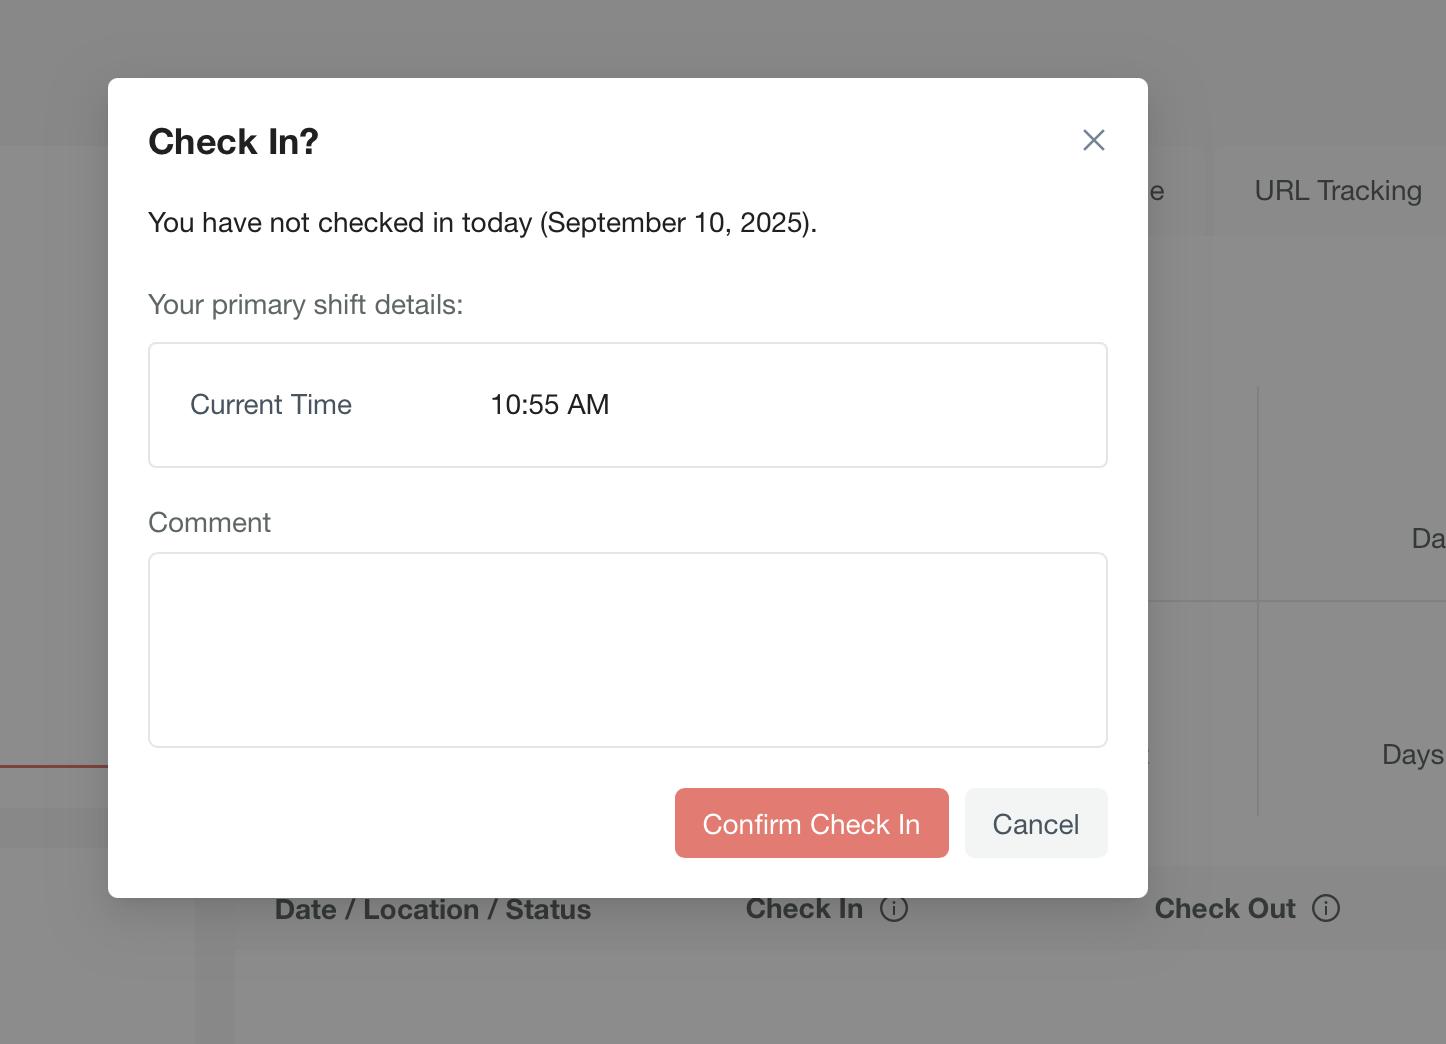
Note: An employee can only check in if they haven't already checked in.
- Click the Check-in button.
- A modal will appear; click Confirm to check in.
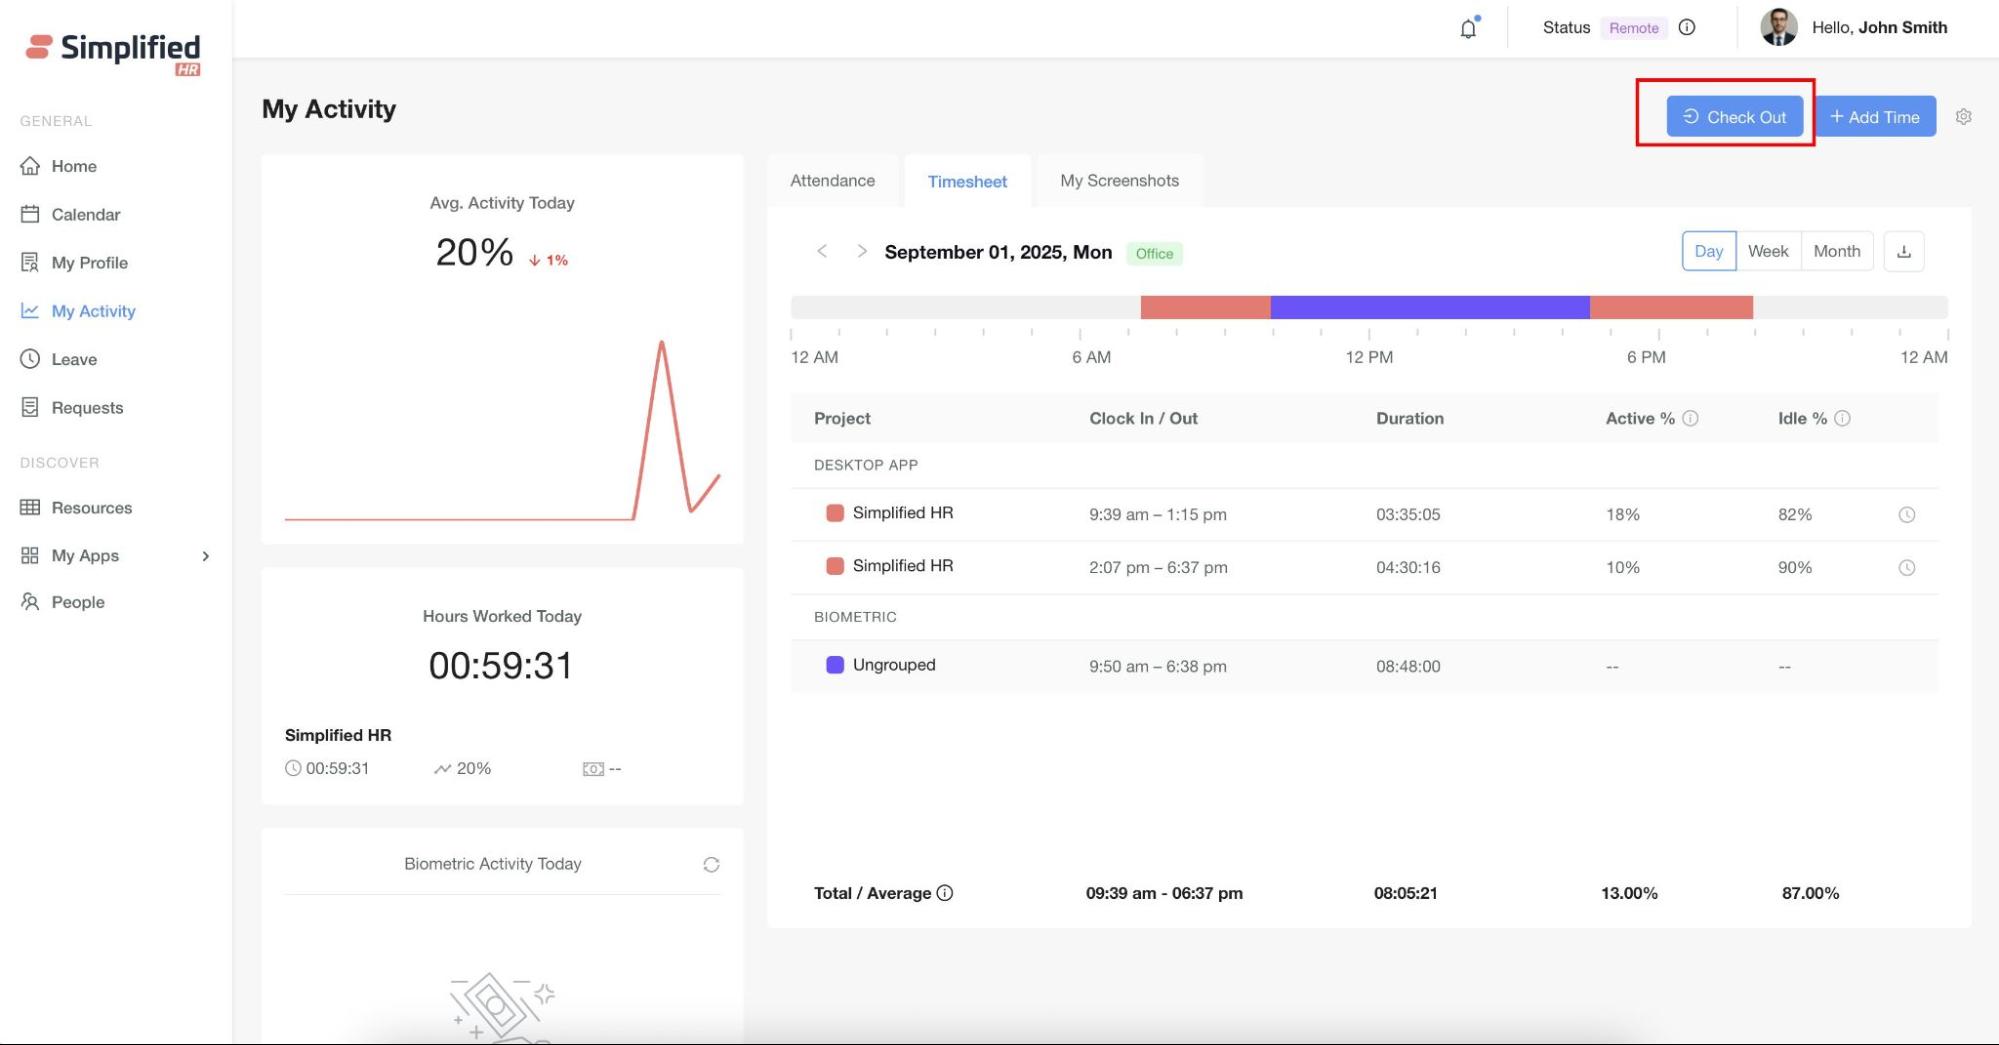
Once checked in, the "Check Out" button becomes visible (and "Check In" disappears).
Web Check-Out
- Click the Check-out button.
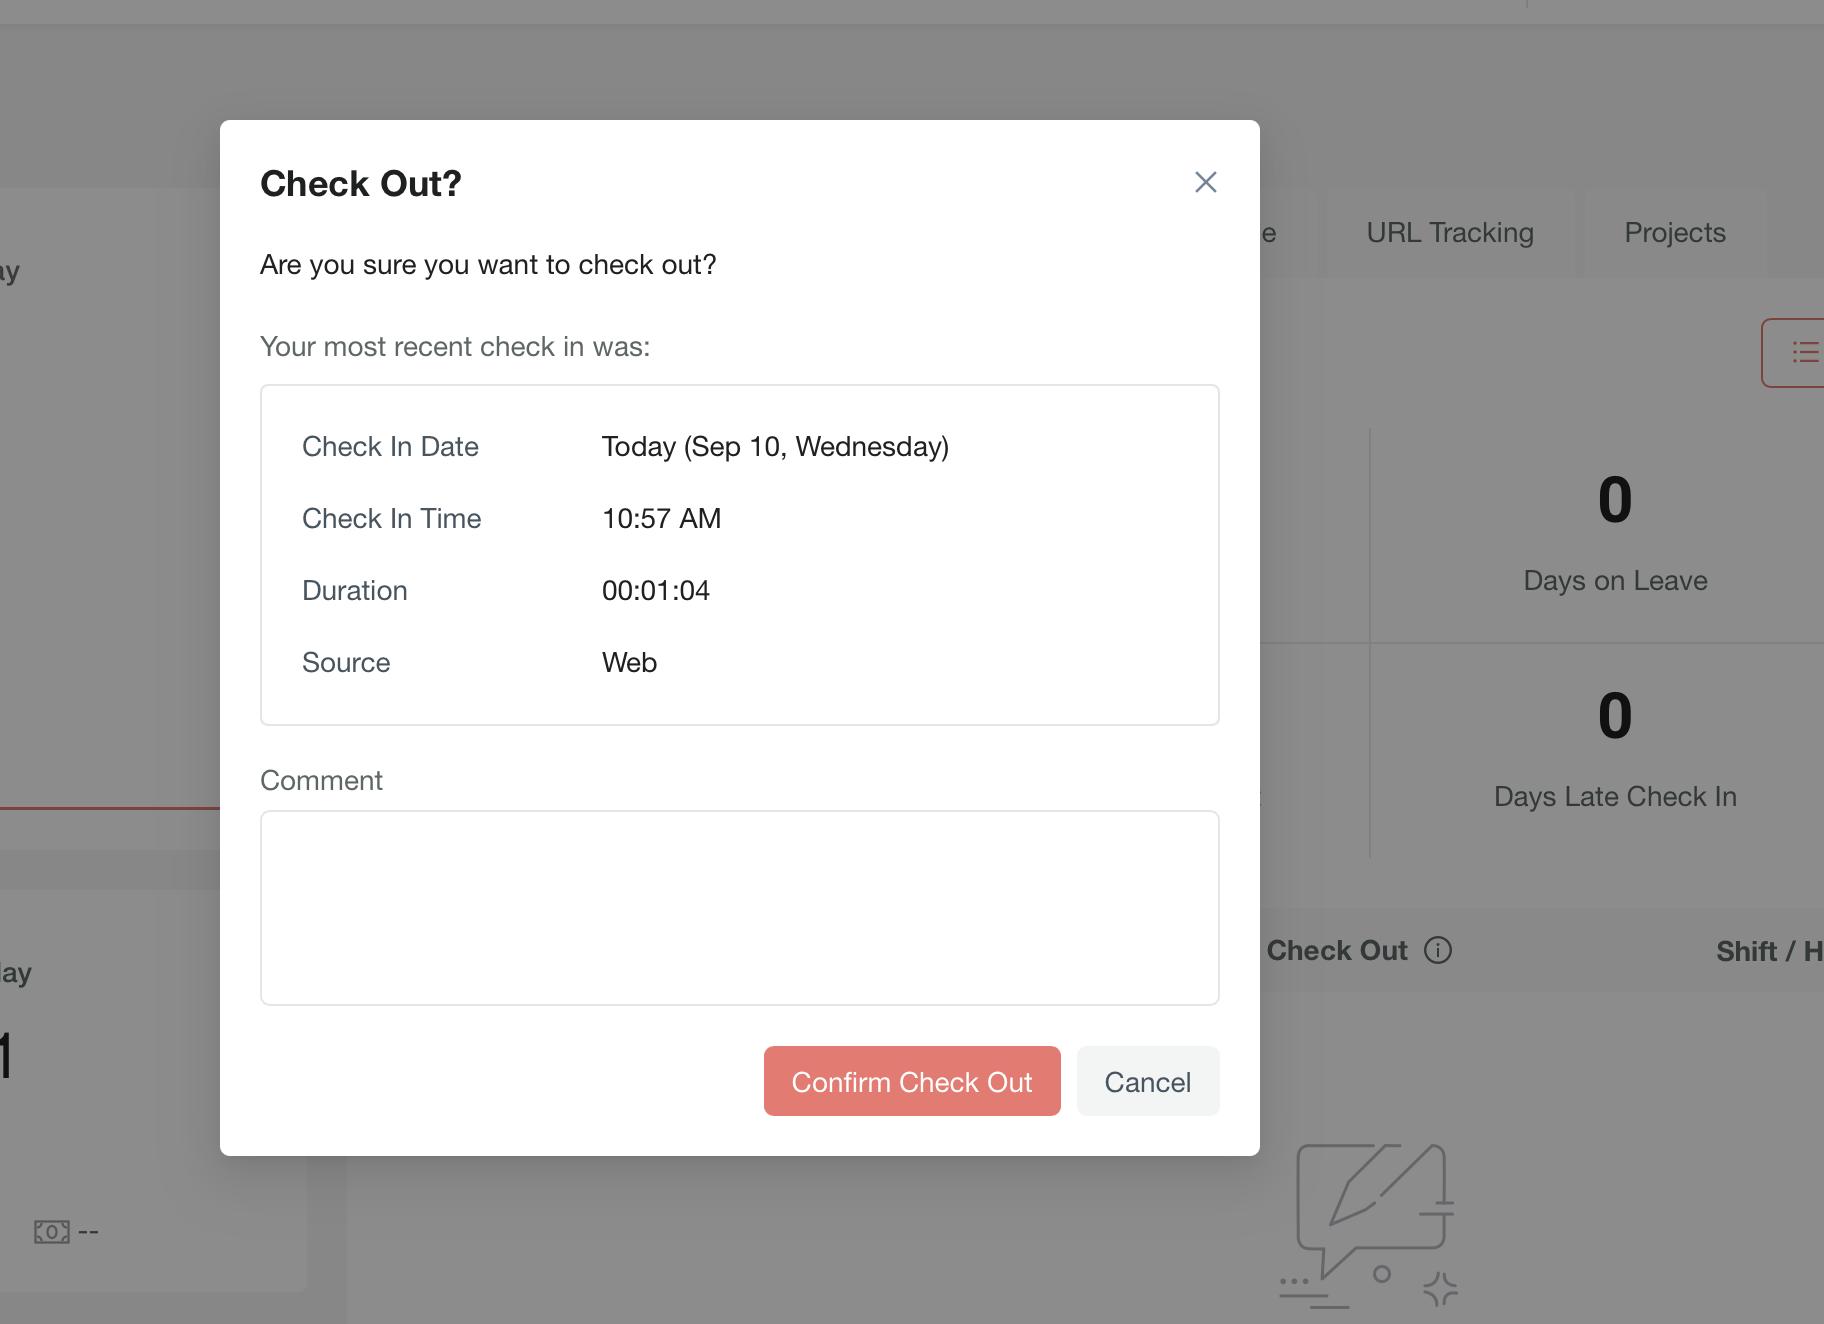
-
The modal displays the check-in time and total duration.
-
Add an optional comment, then click Confirm Check-out to complete.
After checking out, the "Check In" button reappears (and "Check Out" disappears).
Web check-in and check-out data is reflected in the Timesheet Tab under the Web App section.
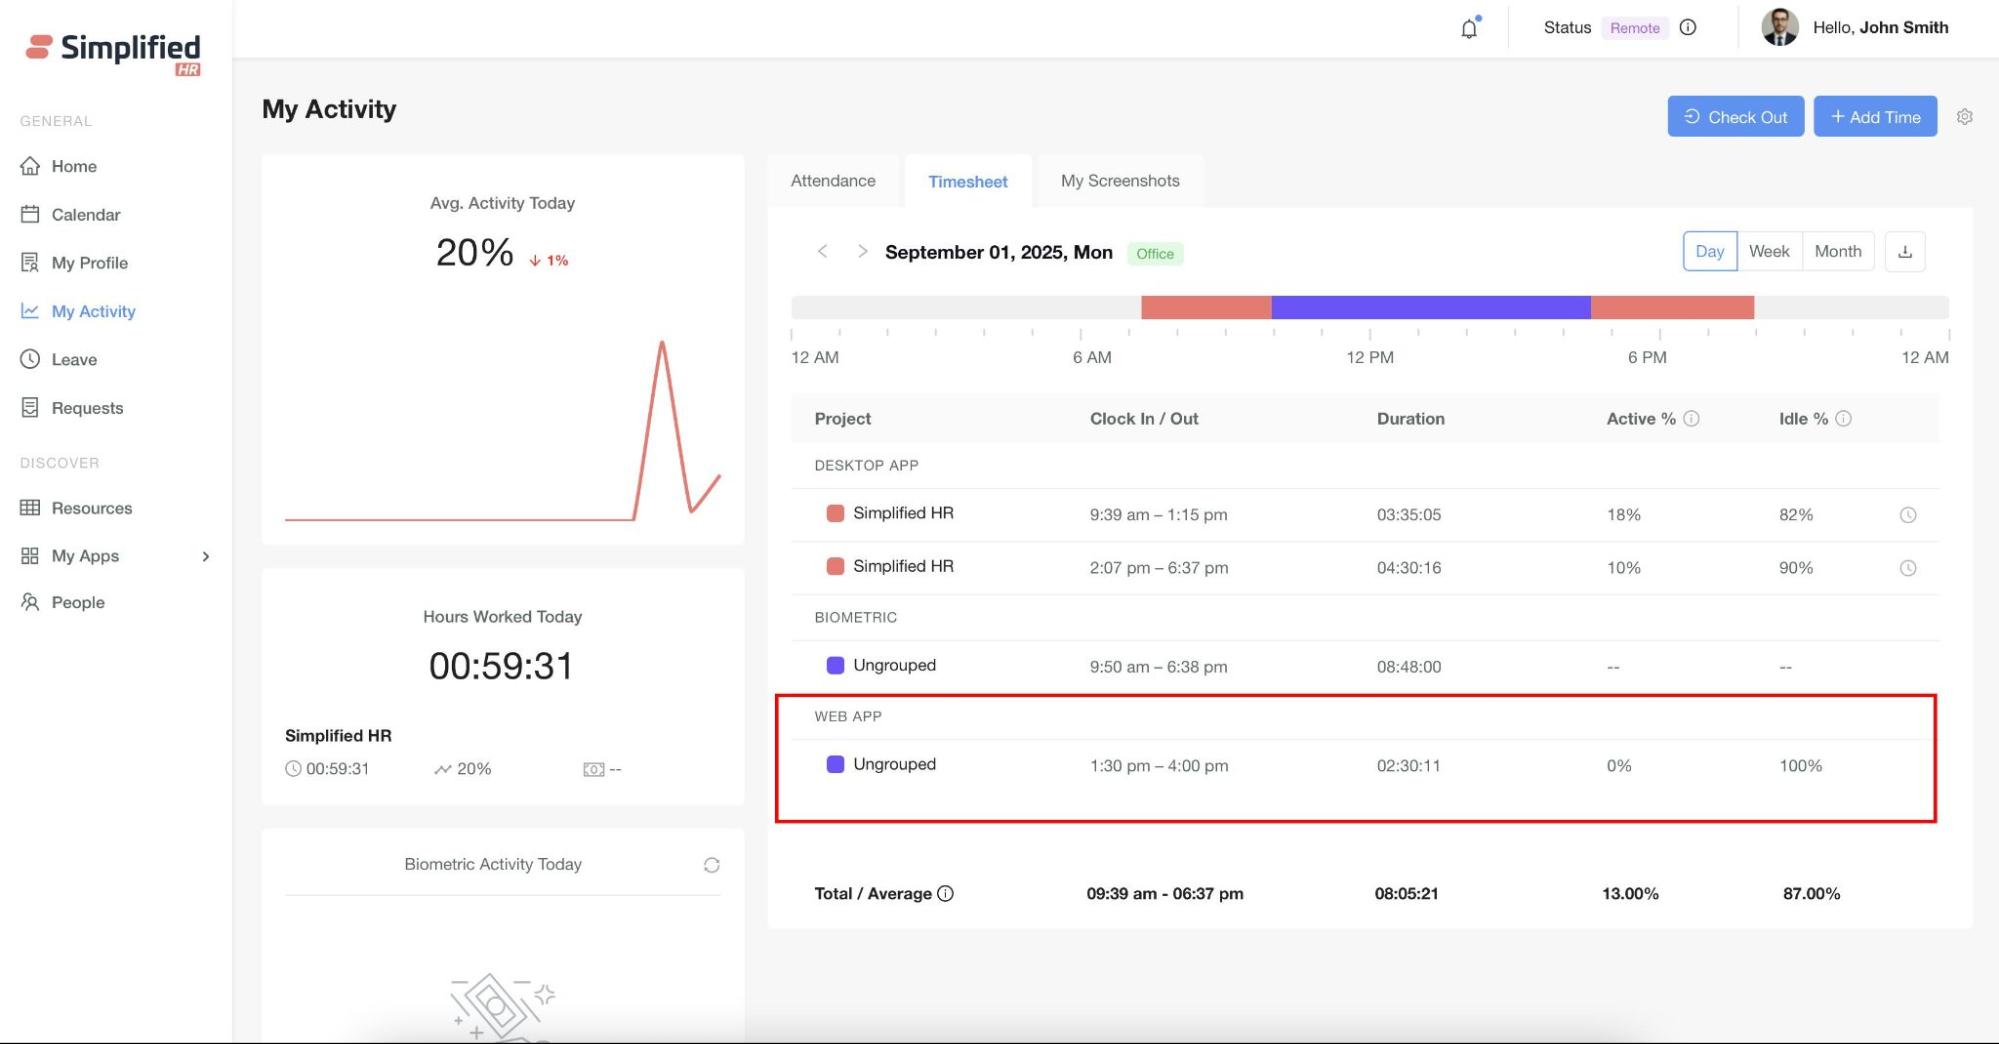
View Timesheet
The Timesheet Tab provides users with a detailed breakdown of their tracked working hours. It consolidates data from all configured activity sources, including:
-
Desktop App
-
Web Check-in
-
Mobile Tracking
-
Biometric Tracking
The data displayed in the Timesheet depends on the configuration of activity sources in the system and the actual usage of those sources by the user.
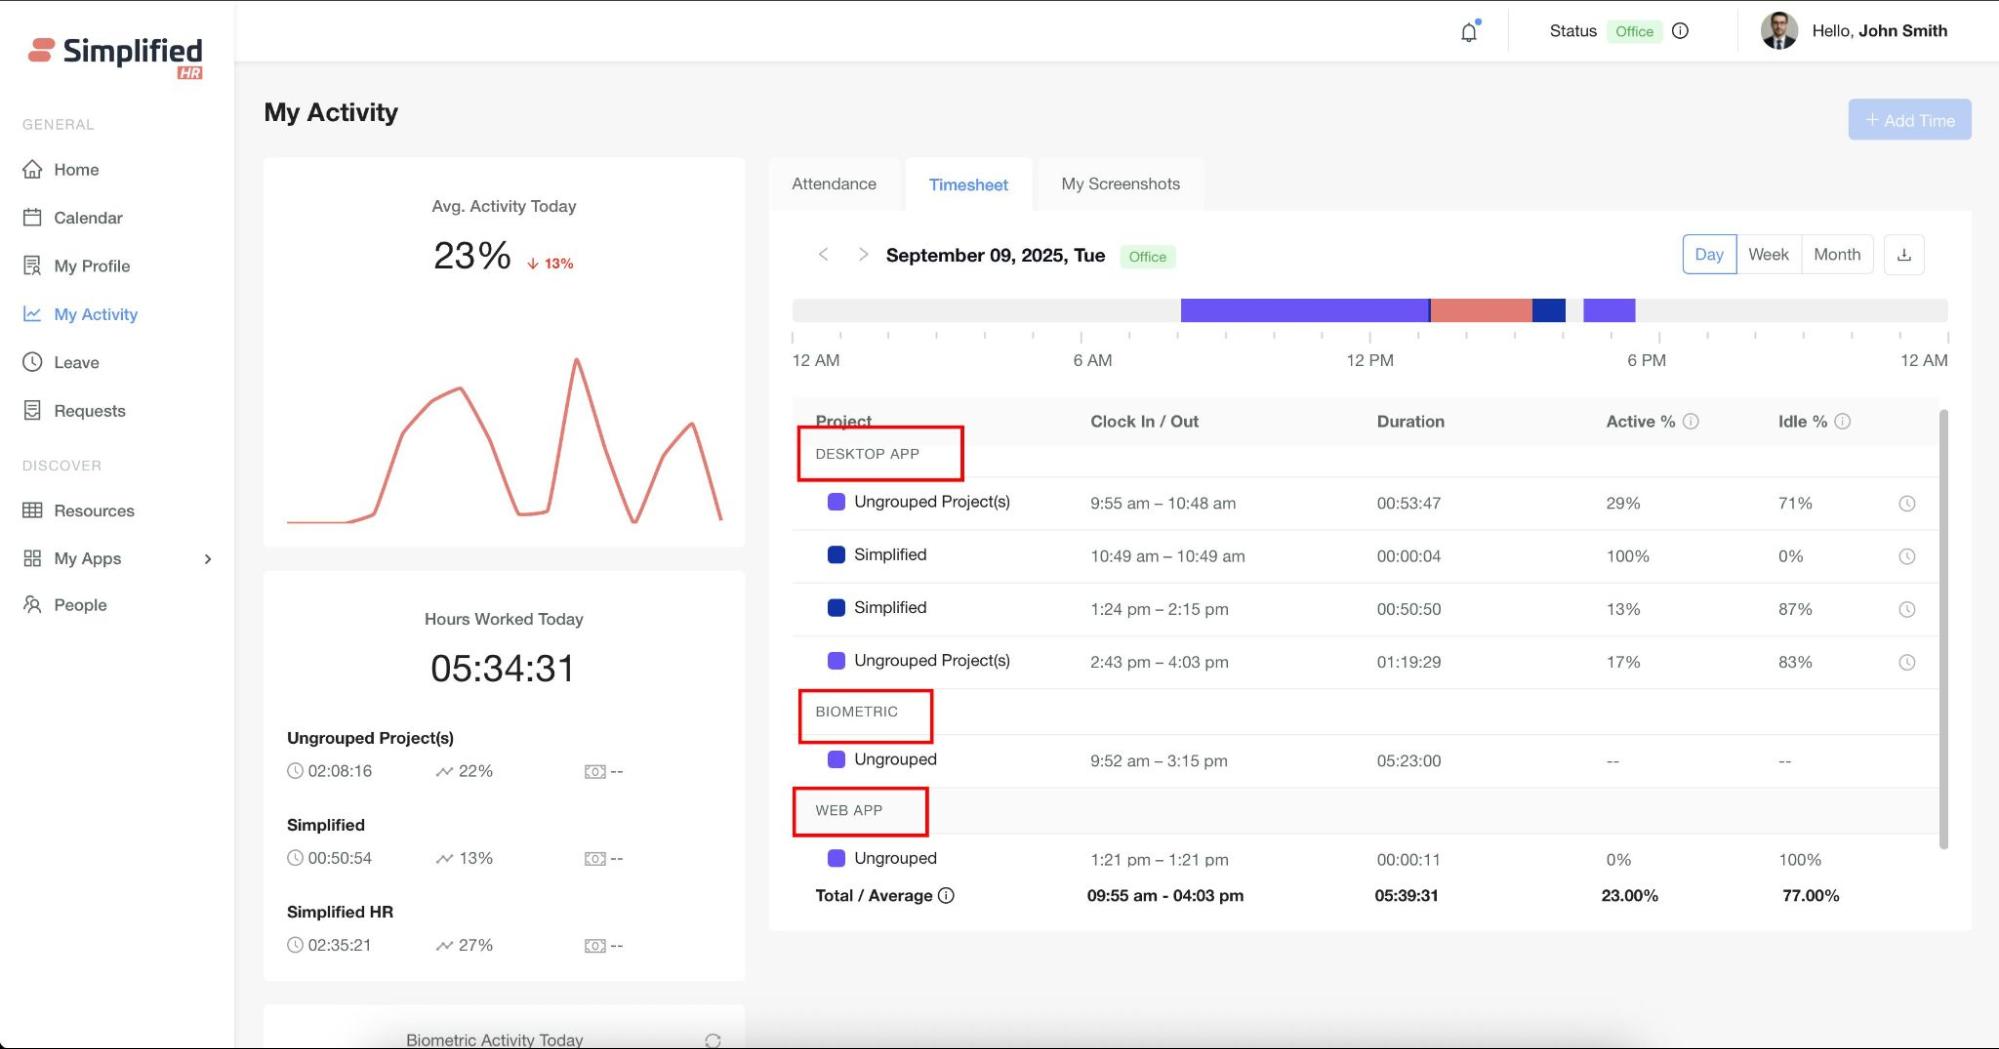
View Desktop App Time Entries
If a user tracks time using the Desktop App, the timesheet displays:
-
Project name associated with the tracked time.
-
Start and Stop time.
-
Duration.
-
Activity % (productive activity level).
-
Idle % (inactive time percentage).
Track Multiple Projects
If a user tracks multiple projects, each project's time logs appear separately in the timesheet with corresponding details.
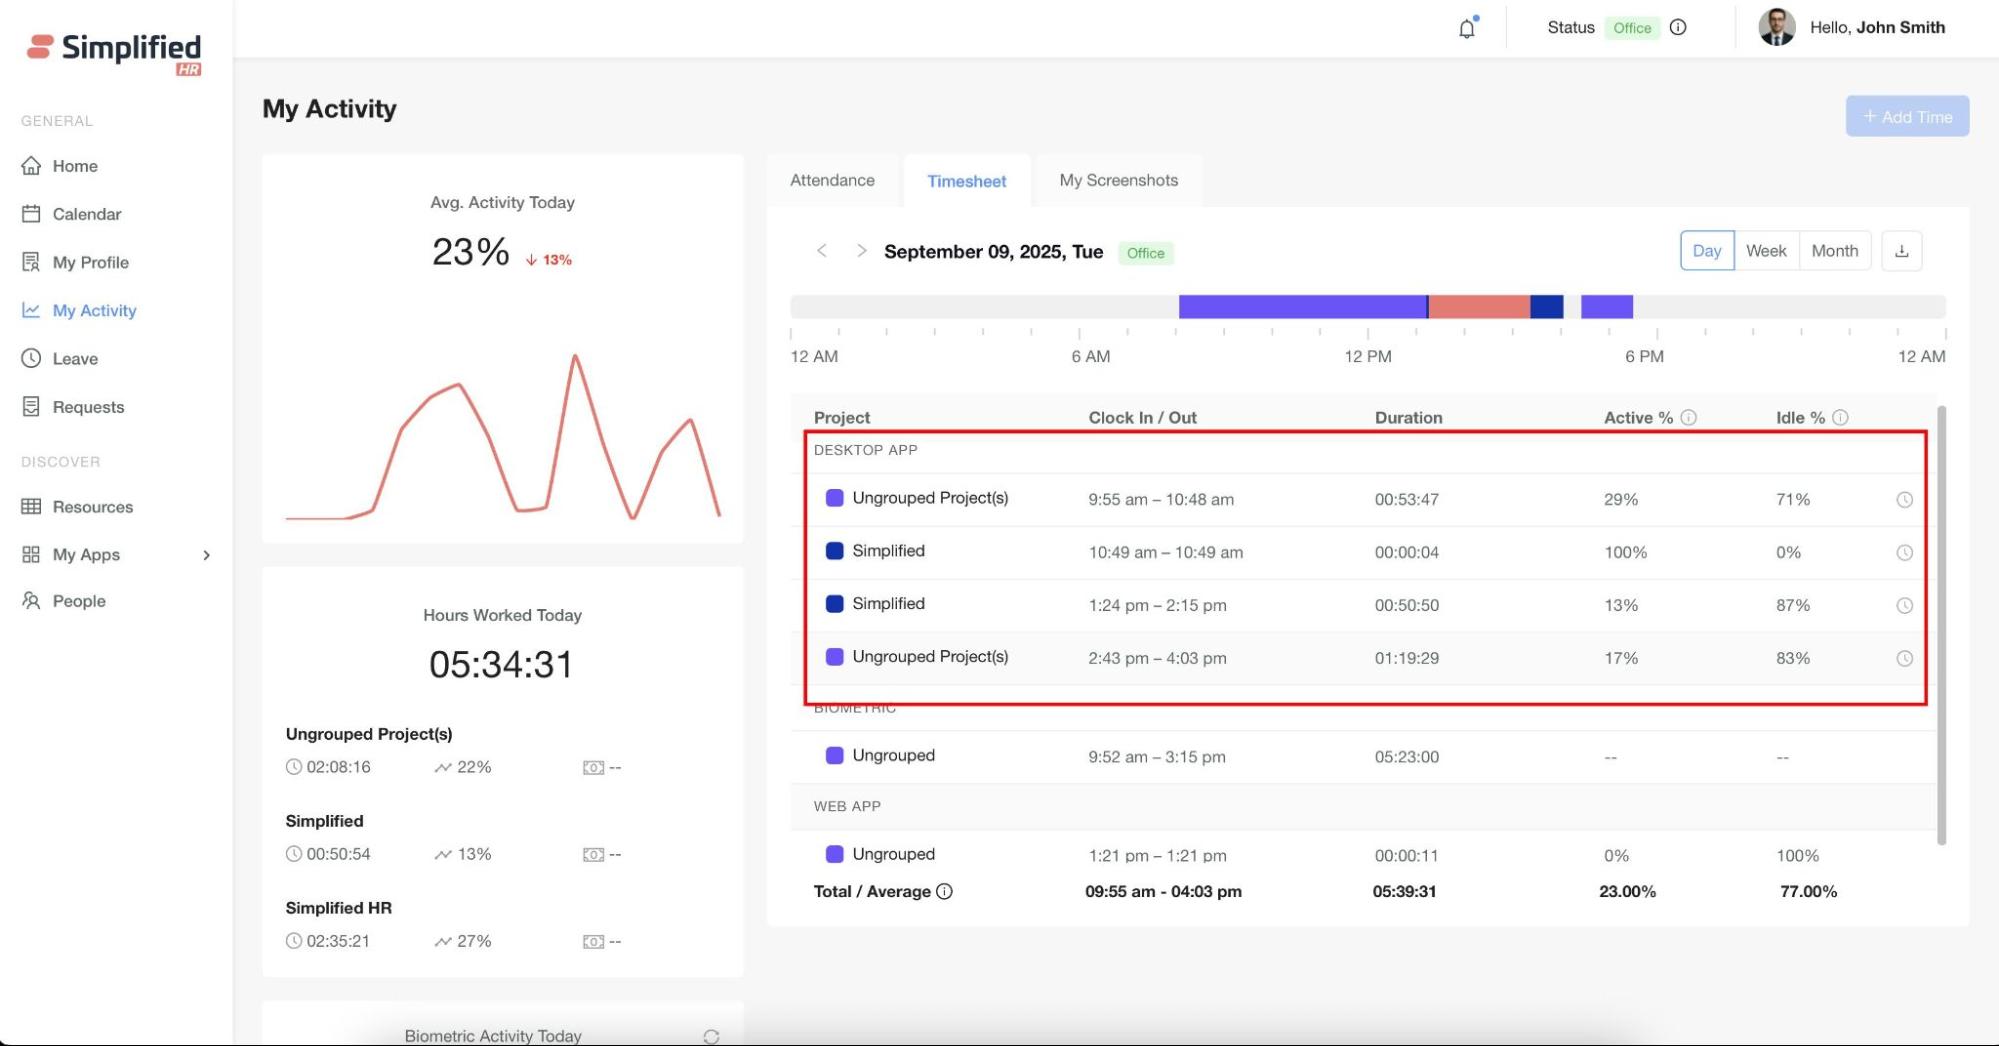
View Tracking Breaks
If tracking is stopped (idle period) or the user switches to another project, the system does not show the non-tracked duration. Instead, the timesheet automatically creates a new row entry starting from the time tracking resumes or when the new project begins.
This ensures continuous tracked time is shown as one row, and any gap or project change creates a new row with its own start and end time.
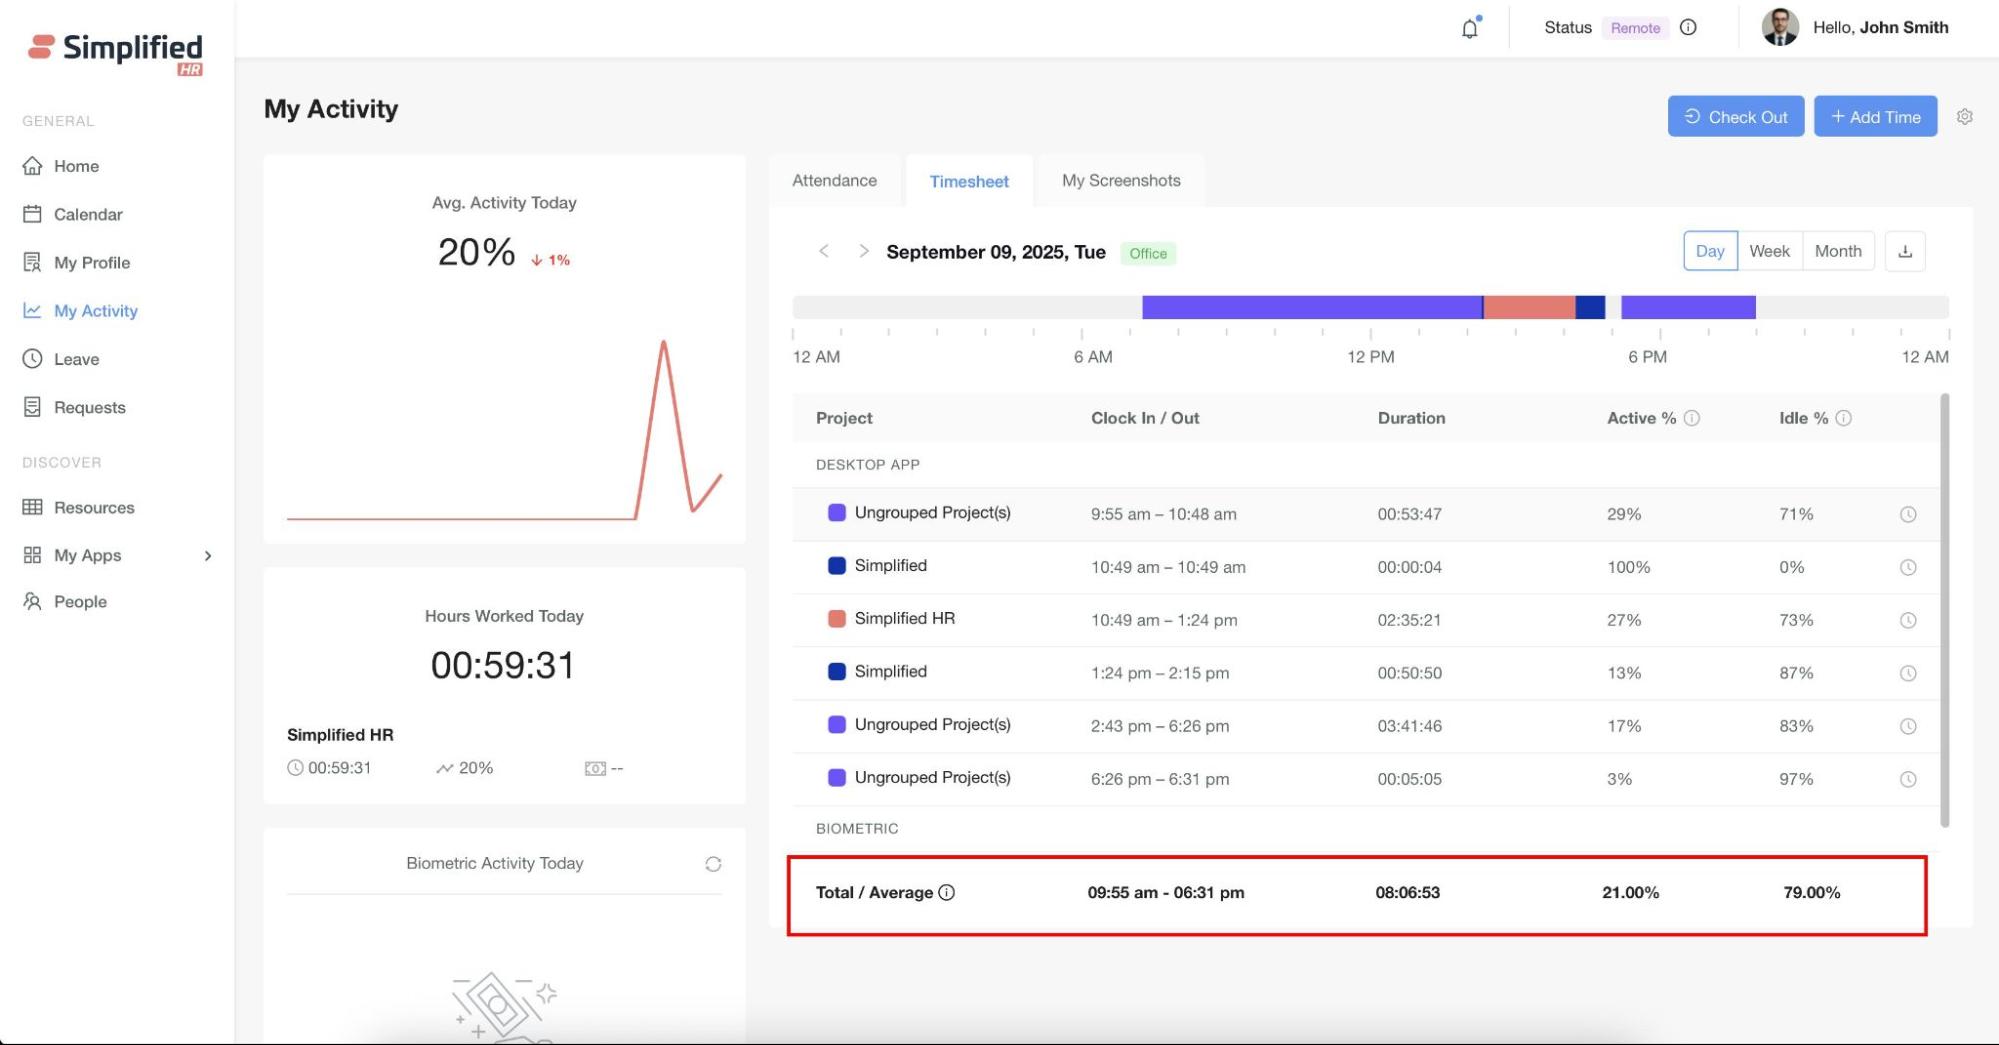
Important: At the bottom of the timesheet, users can view the Total Duration, Average Activity %, and Average Idle % of the day. These totals are calculated only from Desktop App data — time entries from Web Check-in, Mobile, or Biometric sources do not contribute to these averages.
View Mobile Tracking Entries
When the Mobile Activity Tracker is enabled within the My Activity Module Settings, time logs from the mobile application are populated in the Mobile App section of the Timesheet tab.
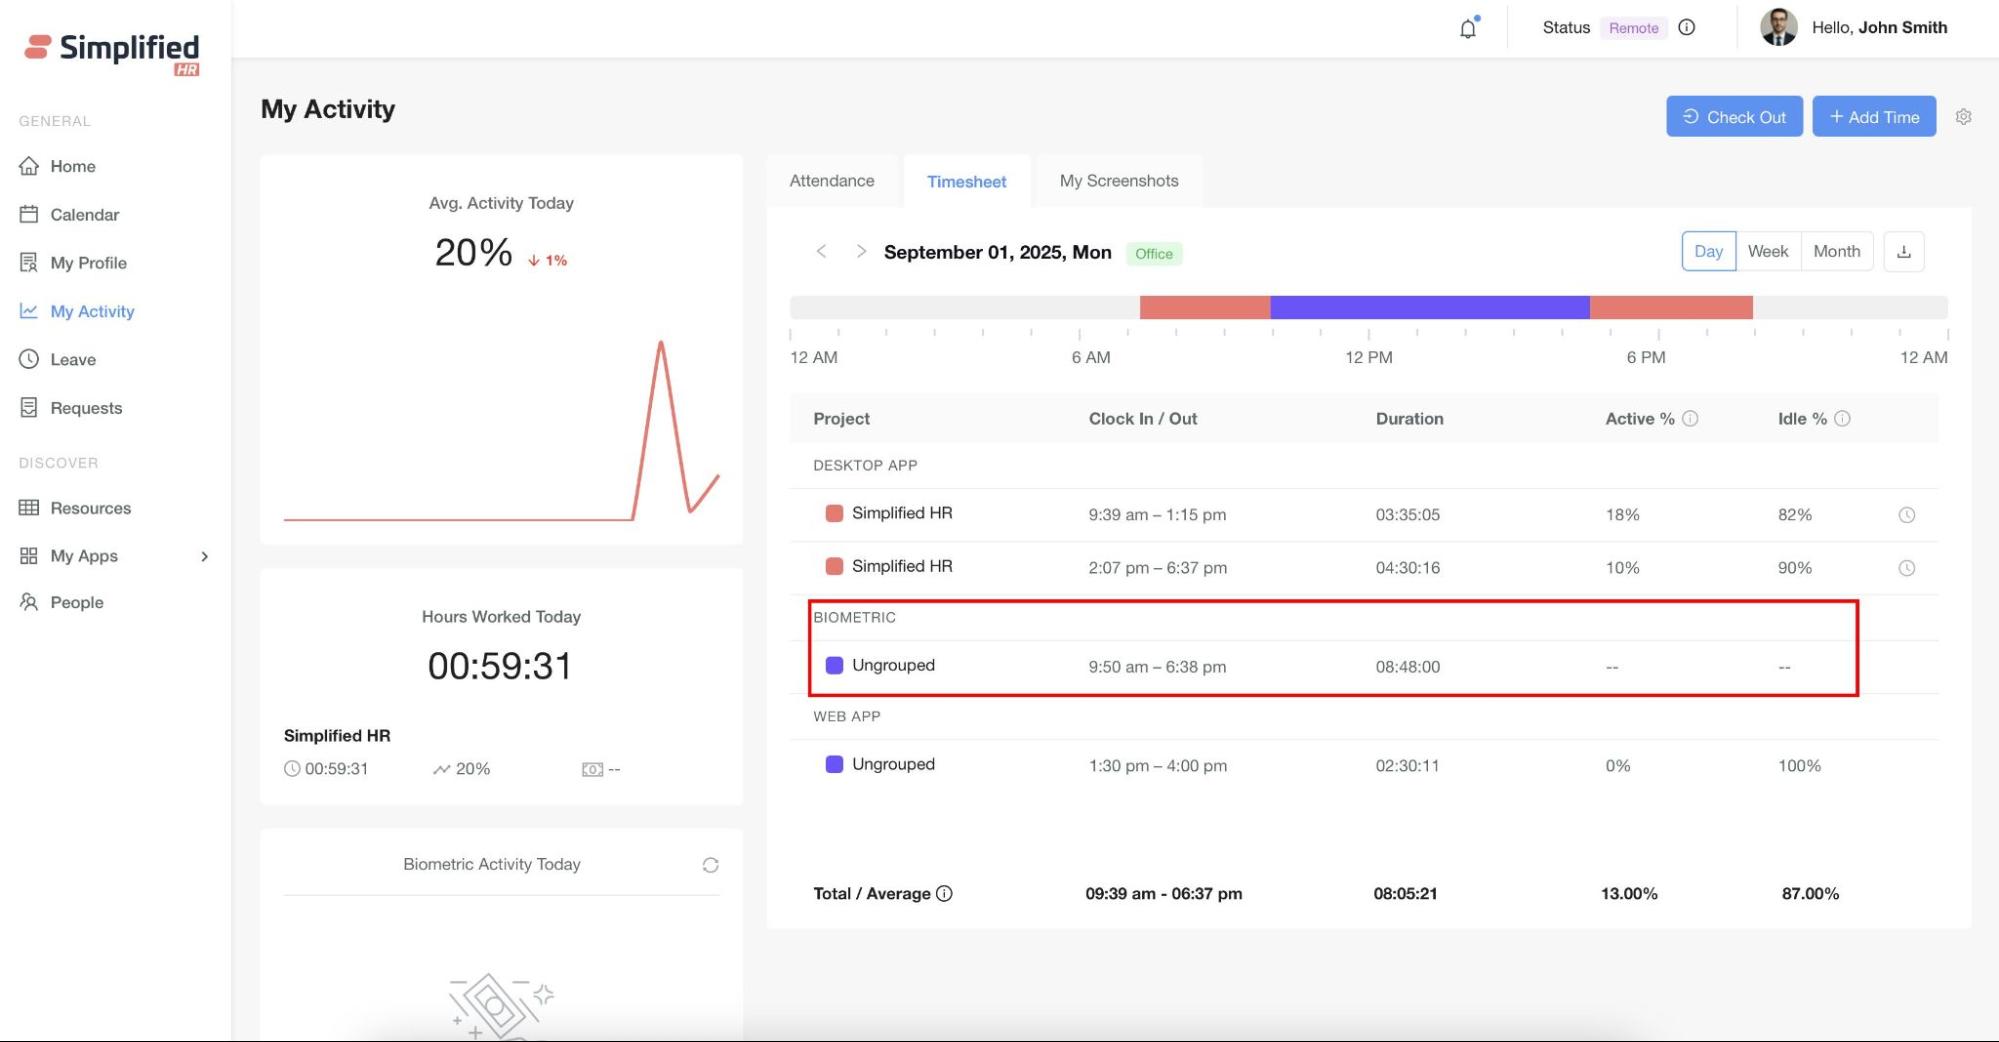
View Biometric Timesheet Entries
Provided that Biometric Tracking is enabled in My Activity Module Settings and integrated via the Biometric Module, the timesheet provides the following details:
-
First punch-in time
-
Last punch-out time
-
Total duration
These records are accessible under the Biometric section of the Timesheet Tab.
View Daily Timesheet
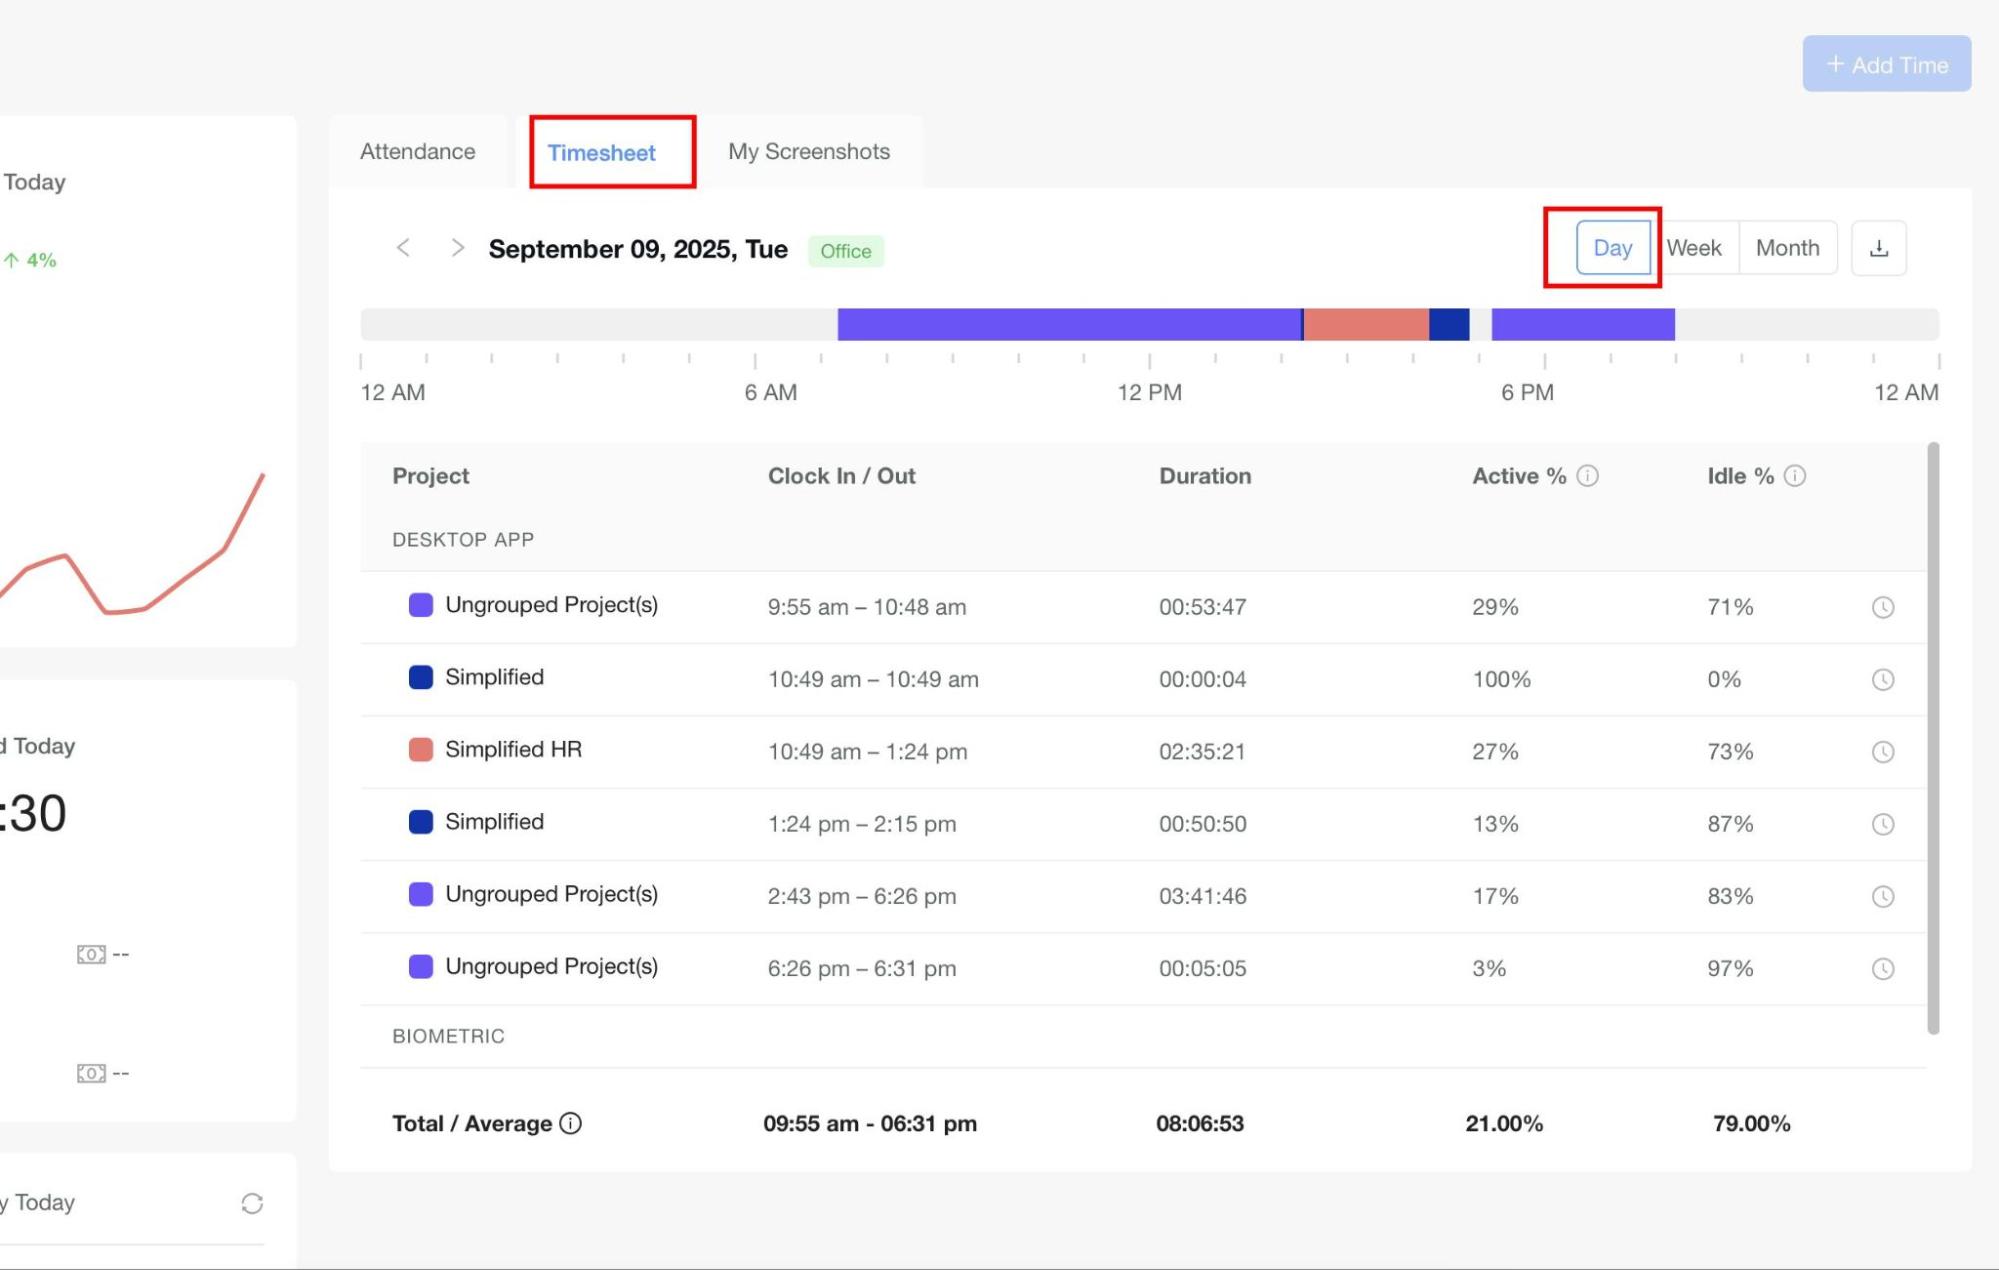
Daily View (Default) displays a detailed breakdown of each tracking entry, showing:
-
Project name (if Desktop App is used).
-
Start and Stop times.
-
Duration.
-
Activity % and Idle % (from Desktop App).
-
Working location status (Office / Remote / Leave / Flexitime).
Breaks in tracking or project changes create new rows to maintain continuity. At the bottom, users can view the total/average duration, activity %, and idle % — calculated only from Desktop App data.
View Weekly Timesheet
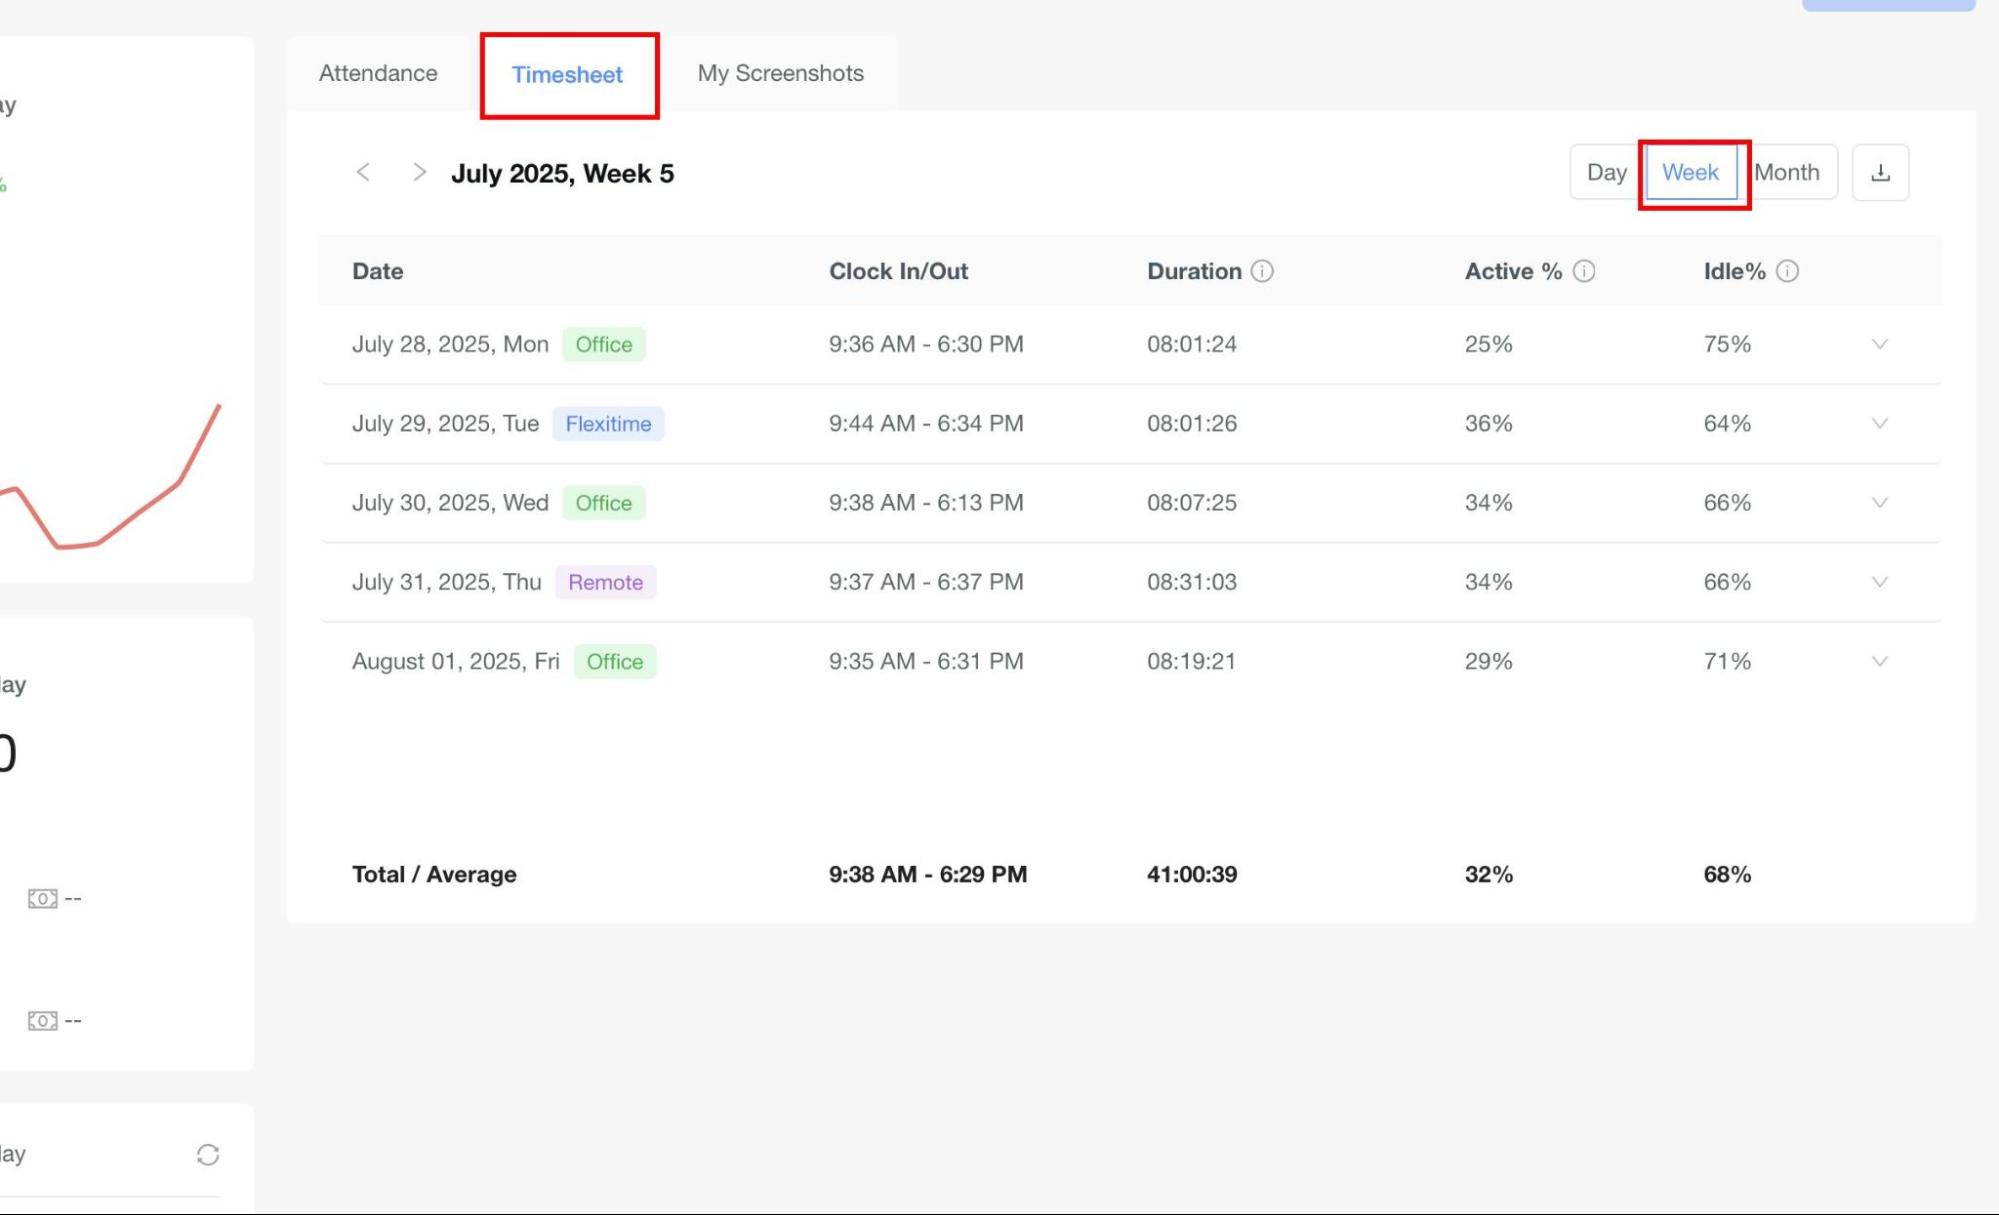
Weekly View displays timesheet data summarized per week. Users can switch weeks using the navigation buttons. For each day of the week, it shows:
The check-in and check-out data comes from the primary attendance source configured in My Activity Settings.
Users can expand each day's row using the down arrow (on the right corner). Expanding opens a collapsible panel showing the detailed timesheet entries for that day.
View Monthly Timesheet
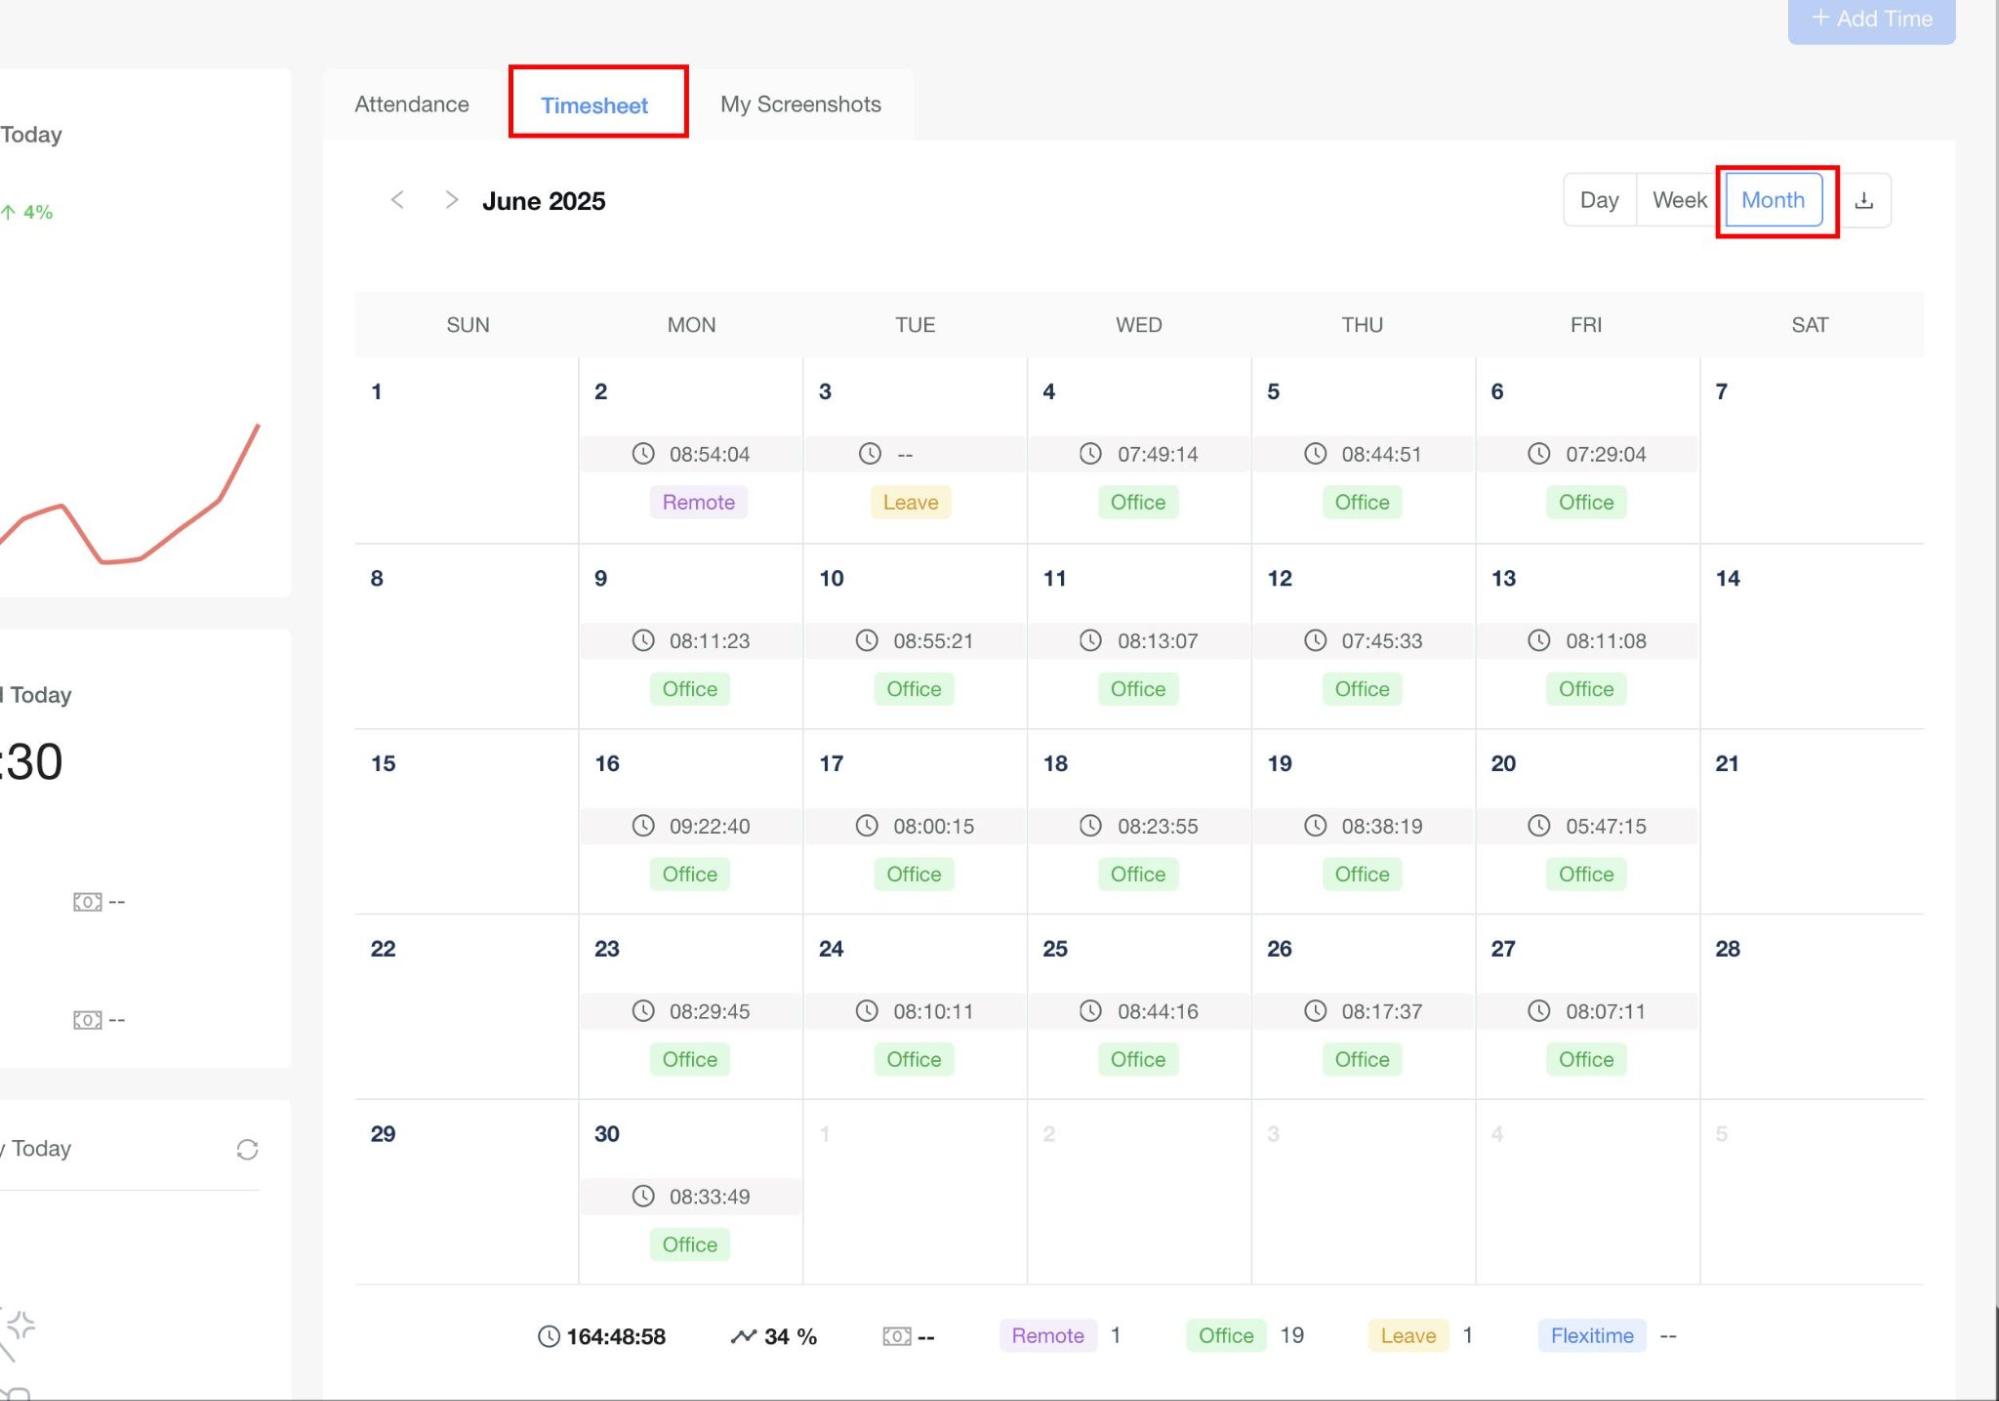
Monthly View displays data in a calendar view. Each working day shows:
At the bottom of the monthly calendar, users can see:
-
Total working hours of the month.
-
Average Activity % (from Desktop App data only).
-
Day counts for: Remote days, Office days, Leave days, Flexitime days.
Add Time
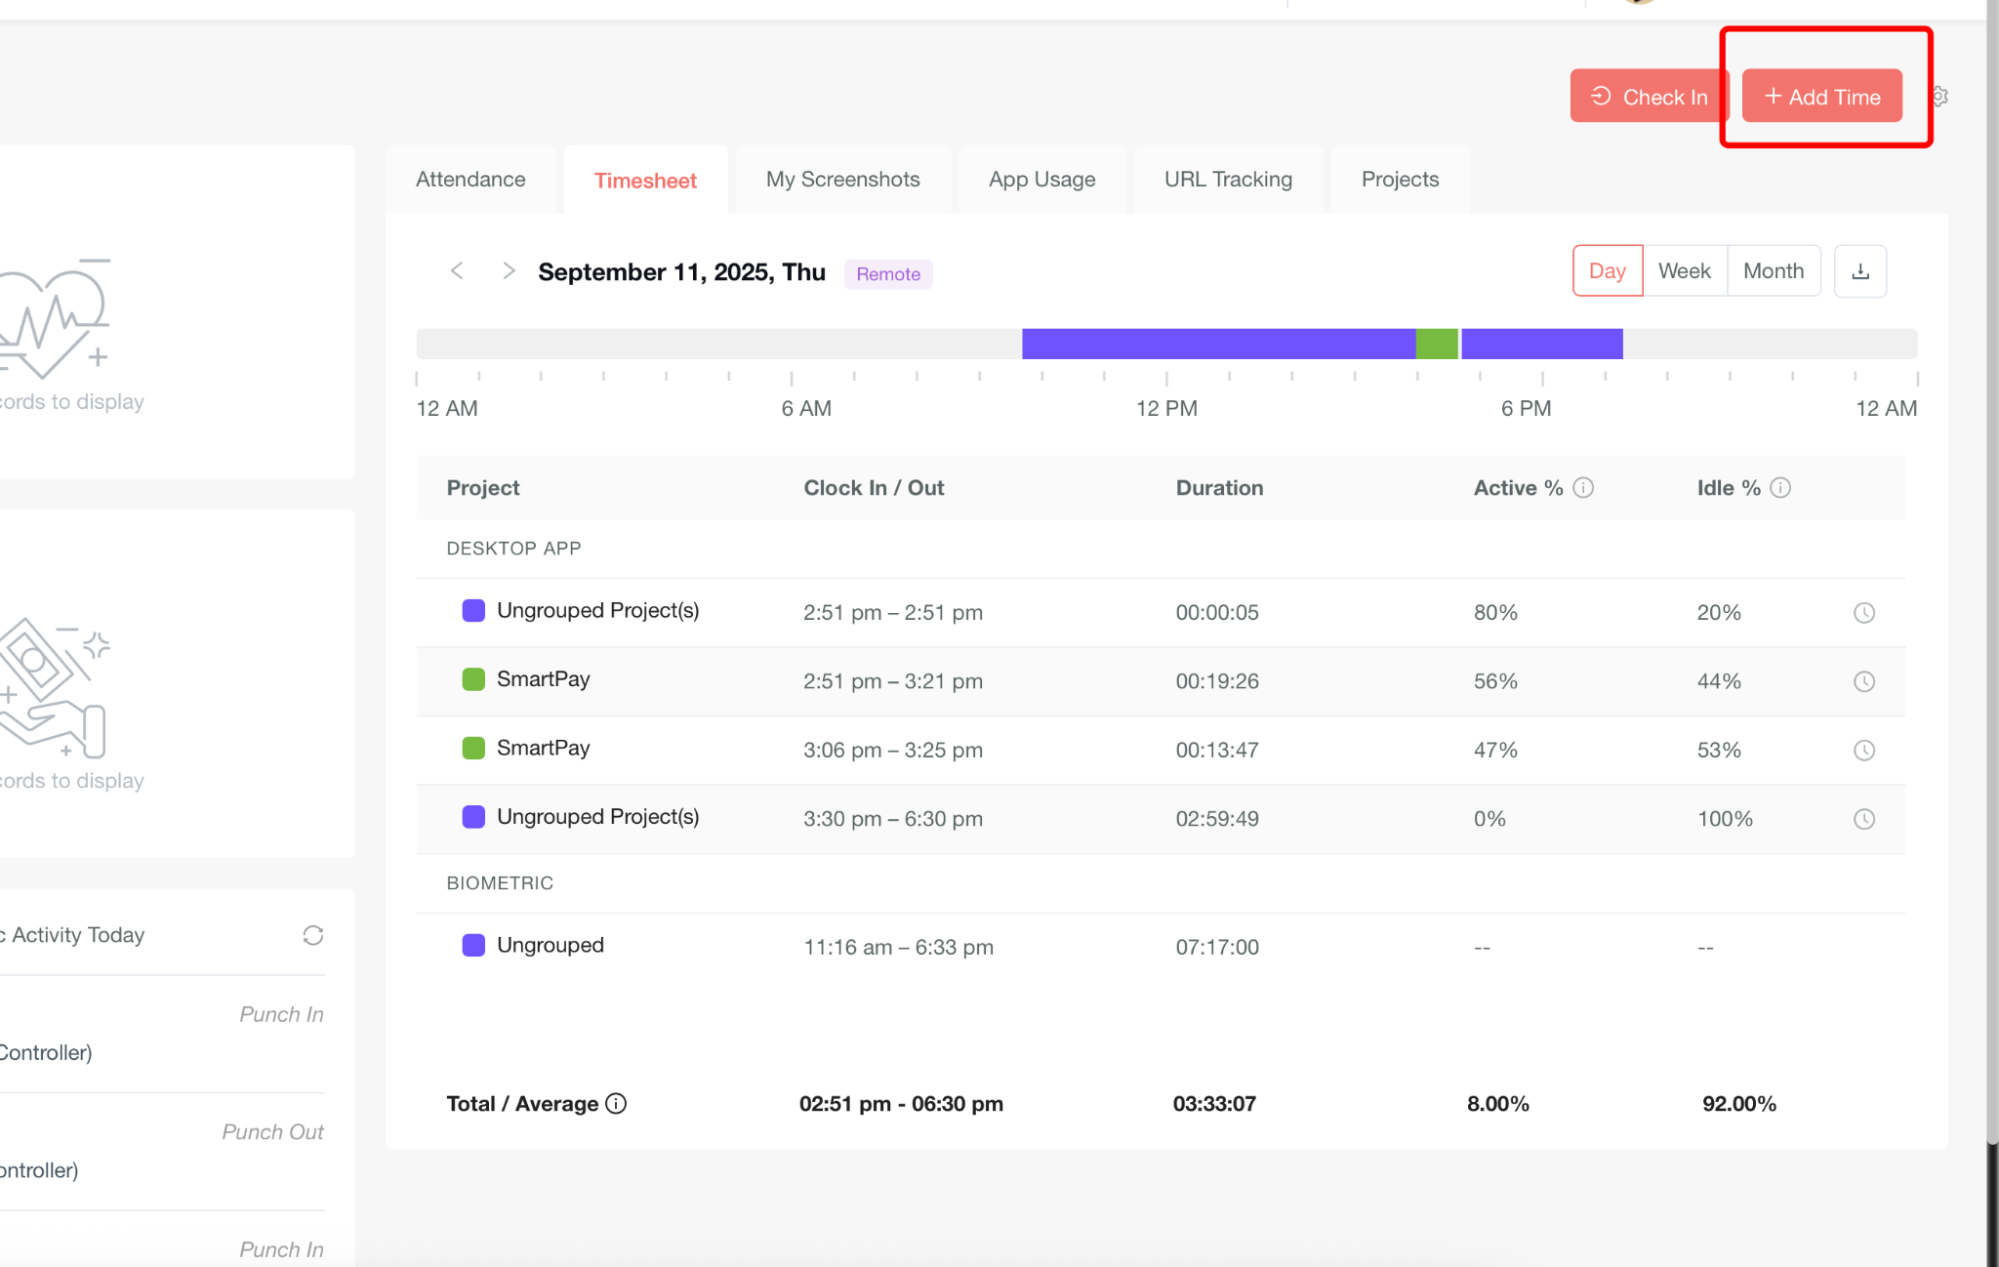
If the user has permission, the Add Time button is enabled, allowing the user to manually add missed time entries. If the user does not have permission, the button will not be visible or clickable.
-
Click on the Add Time button.
-
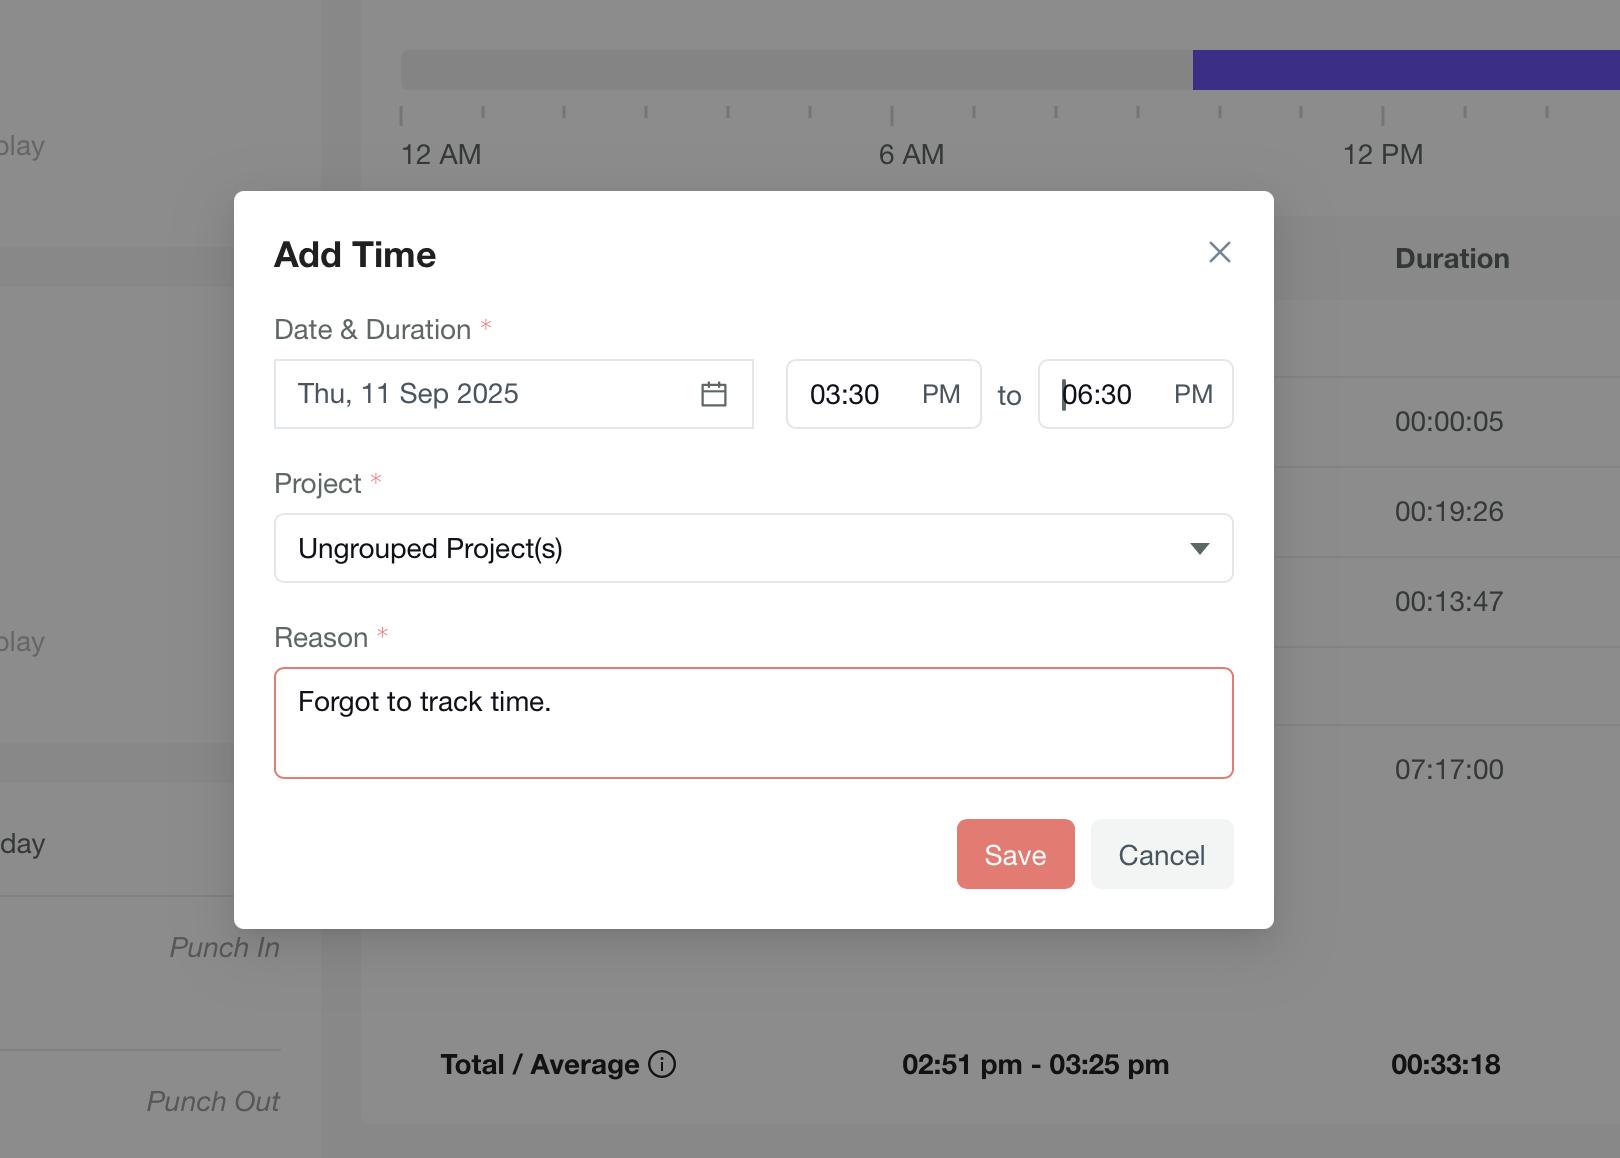
Select the Date of the missed entry.
-
Choose the Time Range.
-
Select the Project associated with the time.
-
Provide a Reason for adding the time.
-
Click on the Save button.
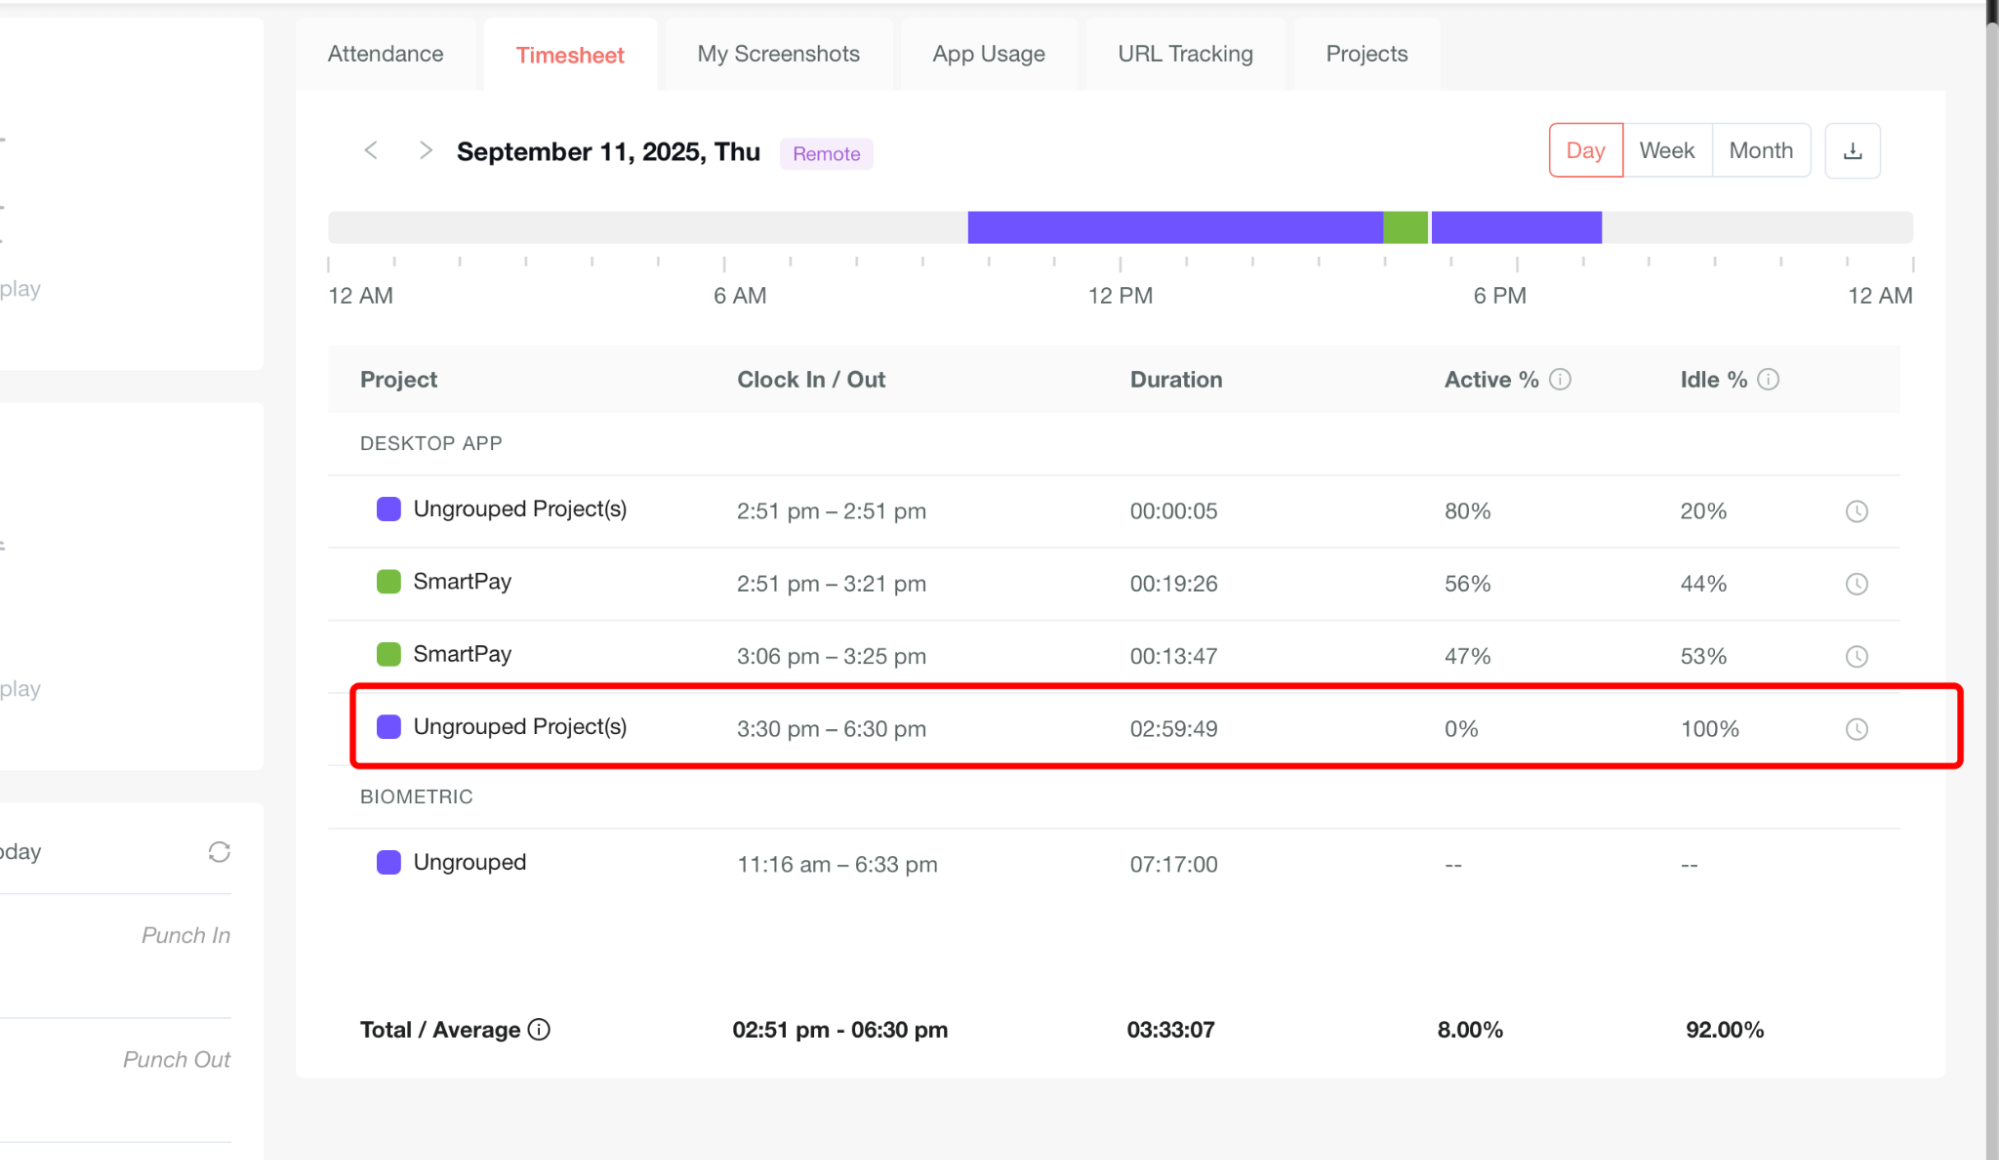
- How It Appears in Timesheet: The manually added time is recorded under the Desktop App section and is displayed with 100% Idle, since no activity was tracked during the manually entered duration.
Export Timesheet
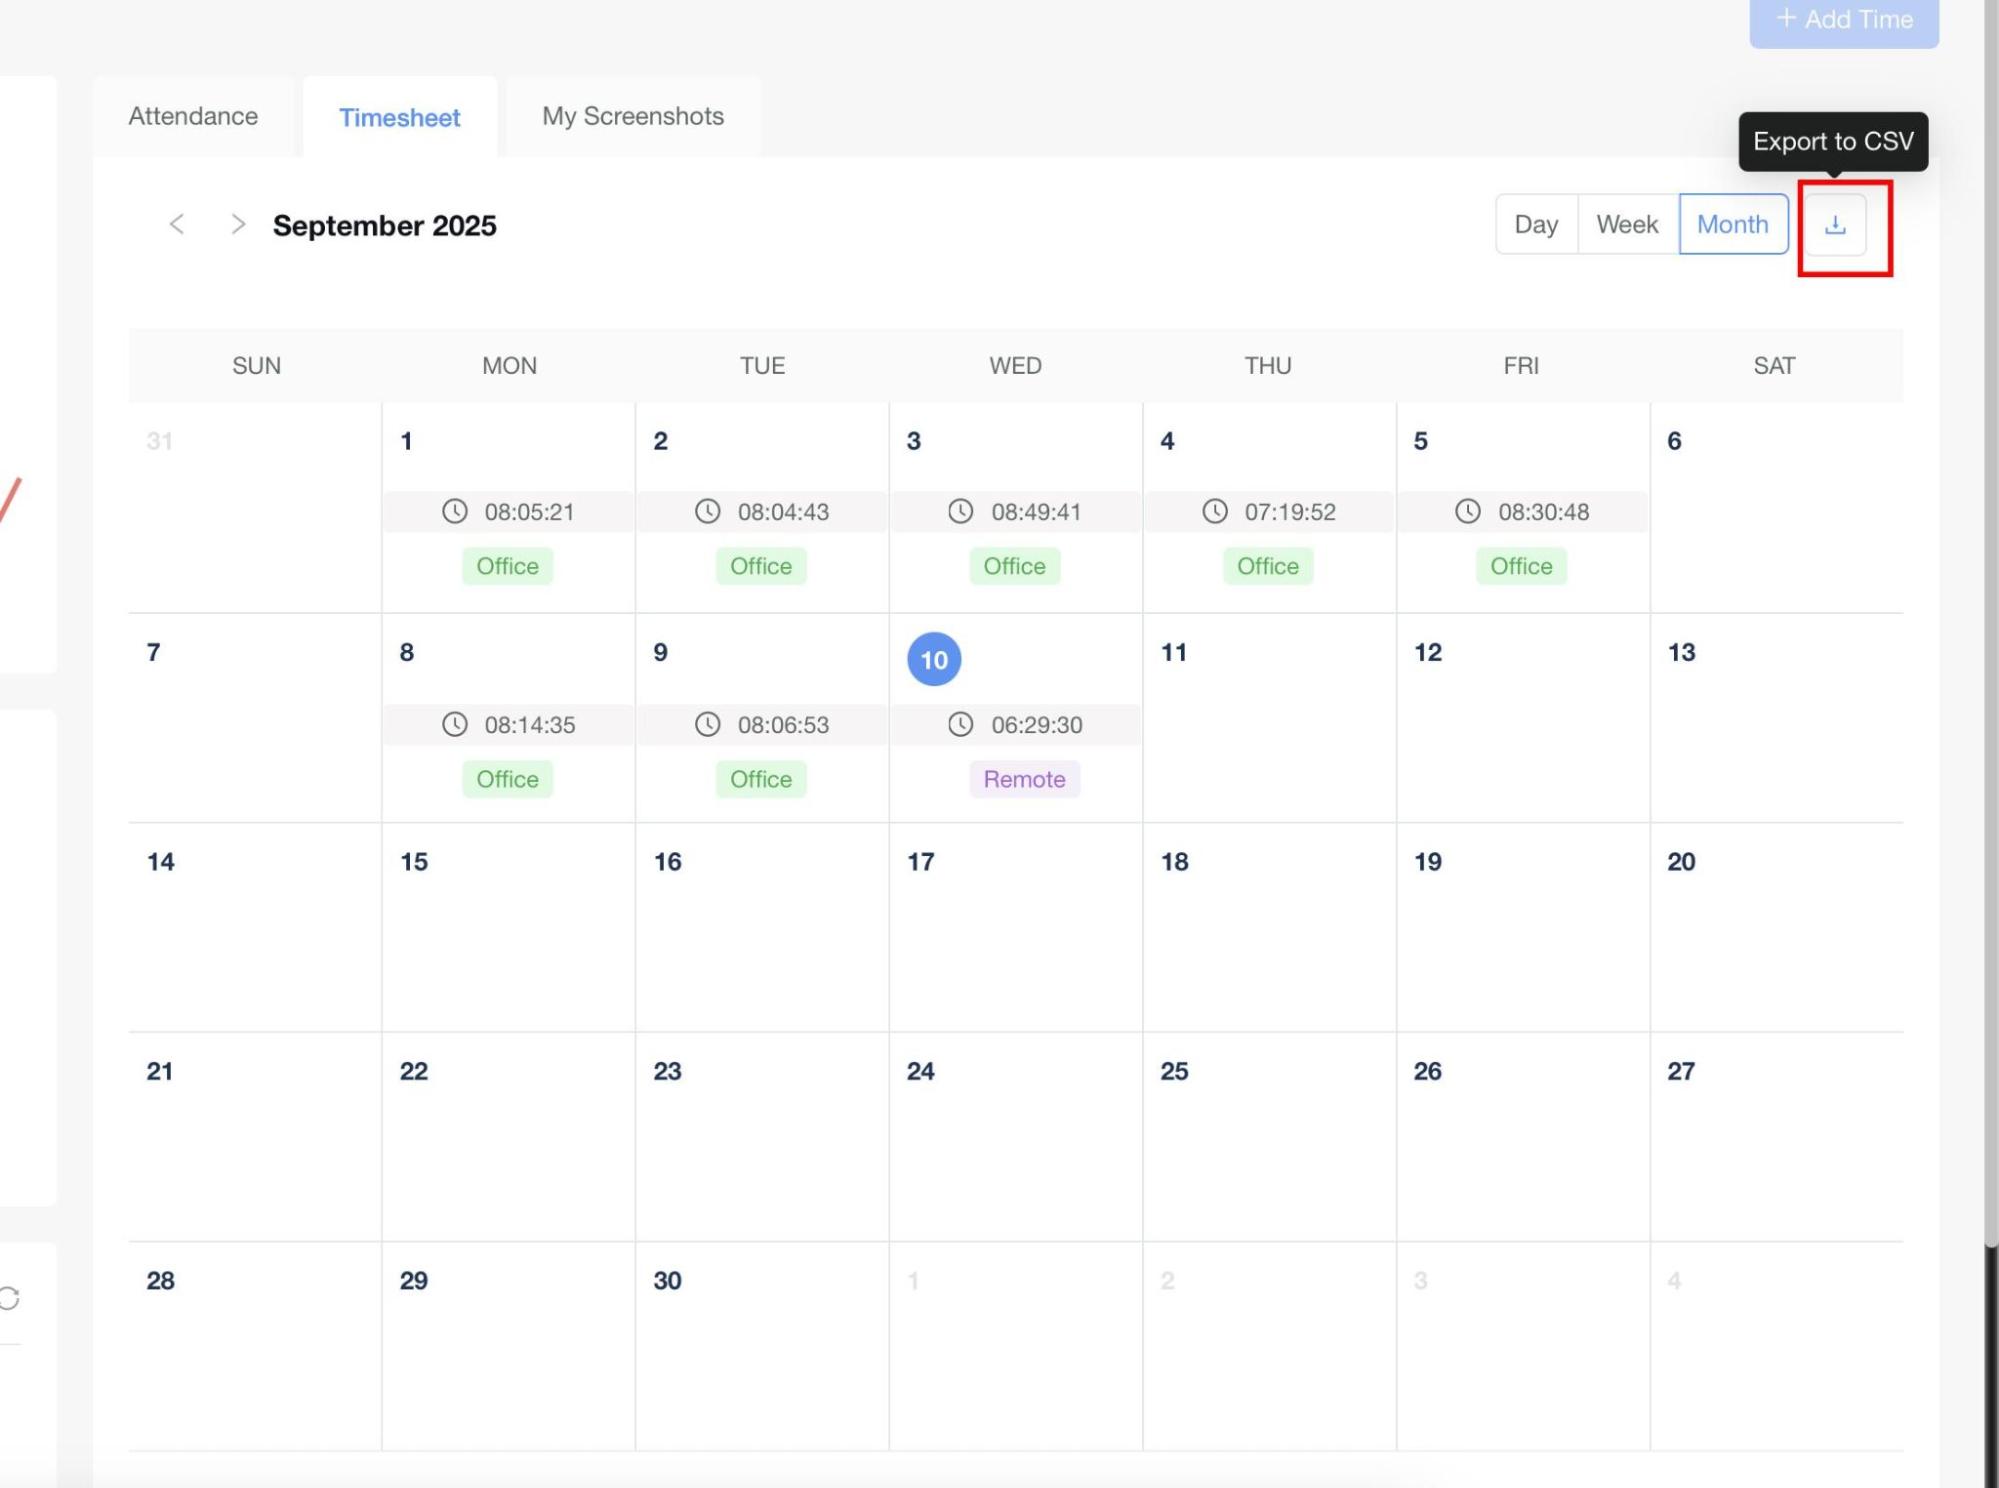
Users can extract their timesheet data by clicking the Download button. The downloaded file includes all timesheet entries as per the selected view (Daily, Weekly, or Monthly).
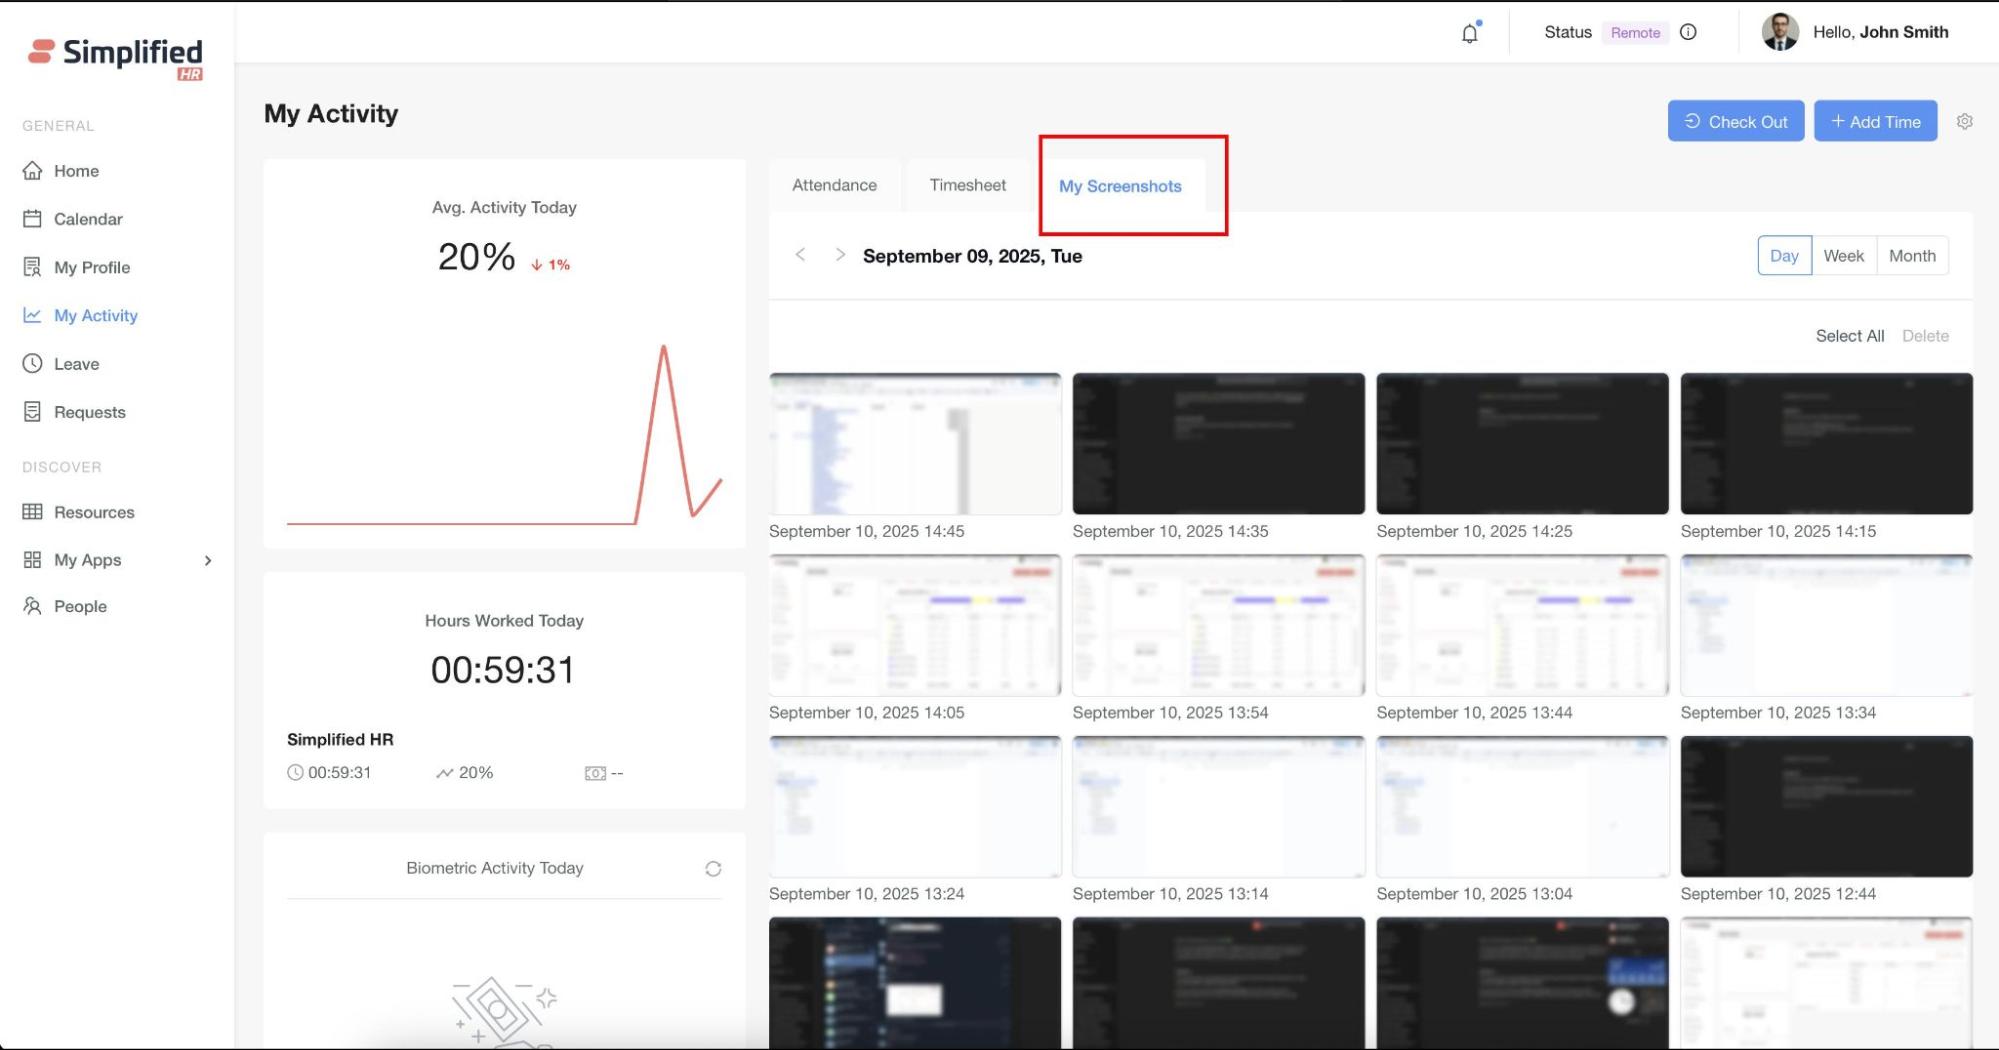
View Screenshots
The Screenshots Tab allows users to view screenshots captured automatically by the Desktop App during tracked working hours.
Views available:
-
Daily View – Displays screenshots captured for the selected day.
-
Weekly View – Groups and displays screenshots for the selected week.
-
Monthly View – Provides an overview of screenshots captured across the selected month.
Screenshots are displayed with timestamps for easier tracking of activities. Users can navigate between days/weeks/months using the provided navigation controls.
Delete Screenshots
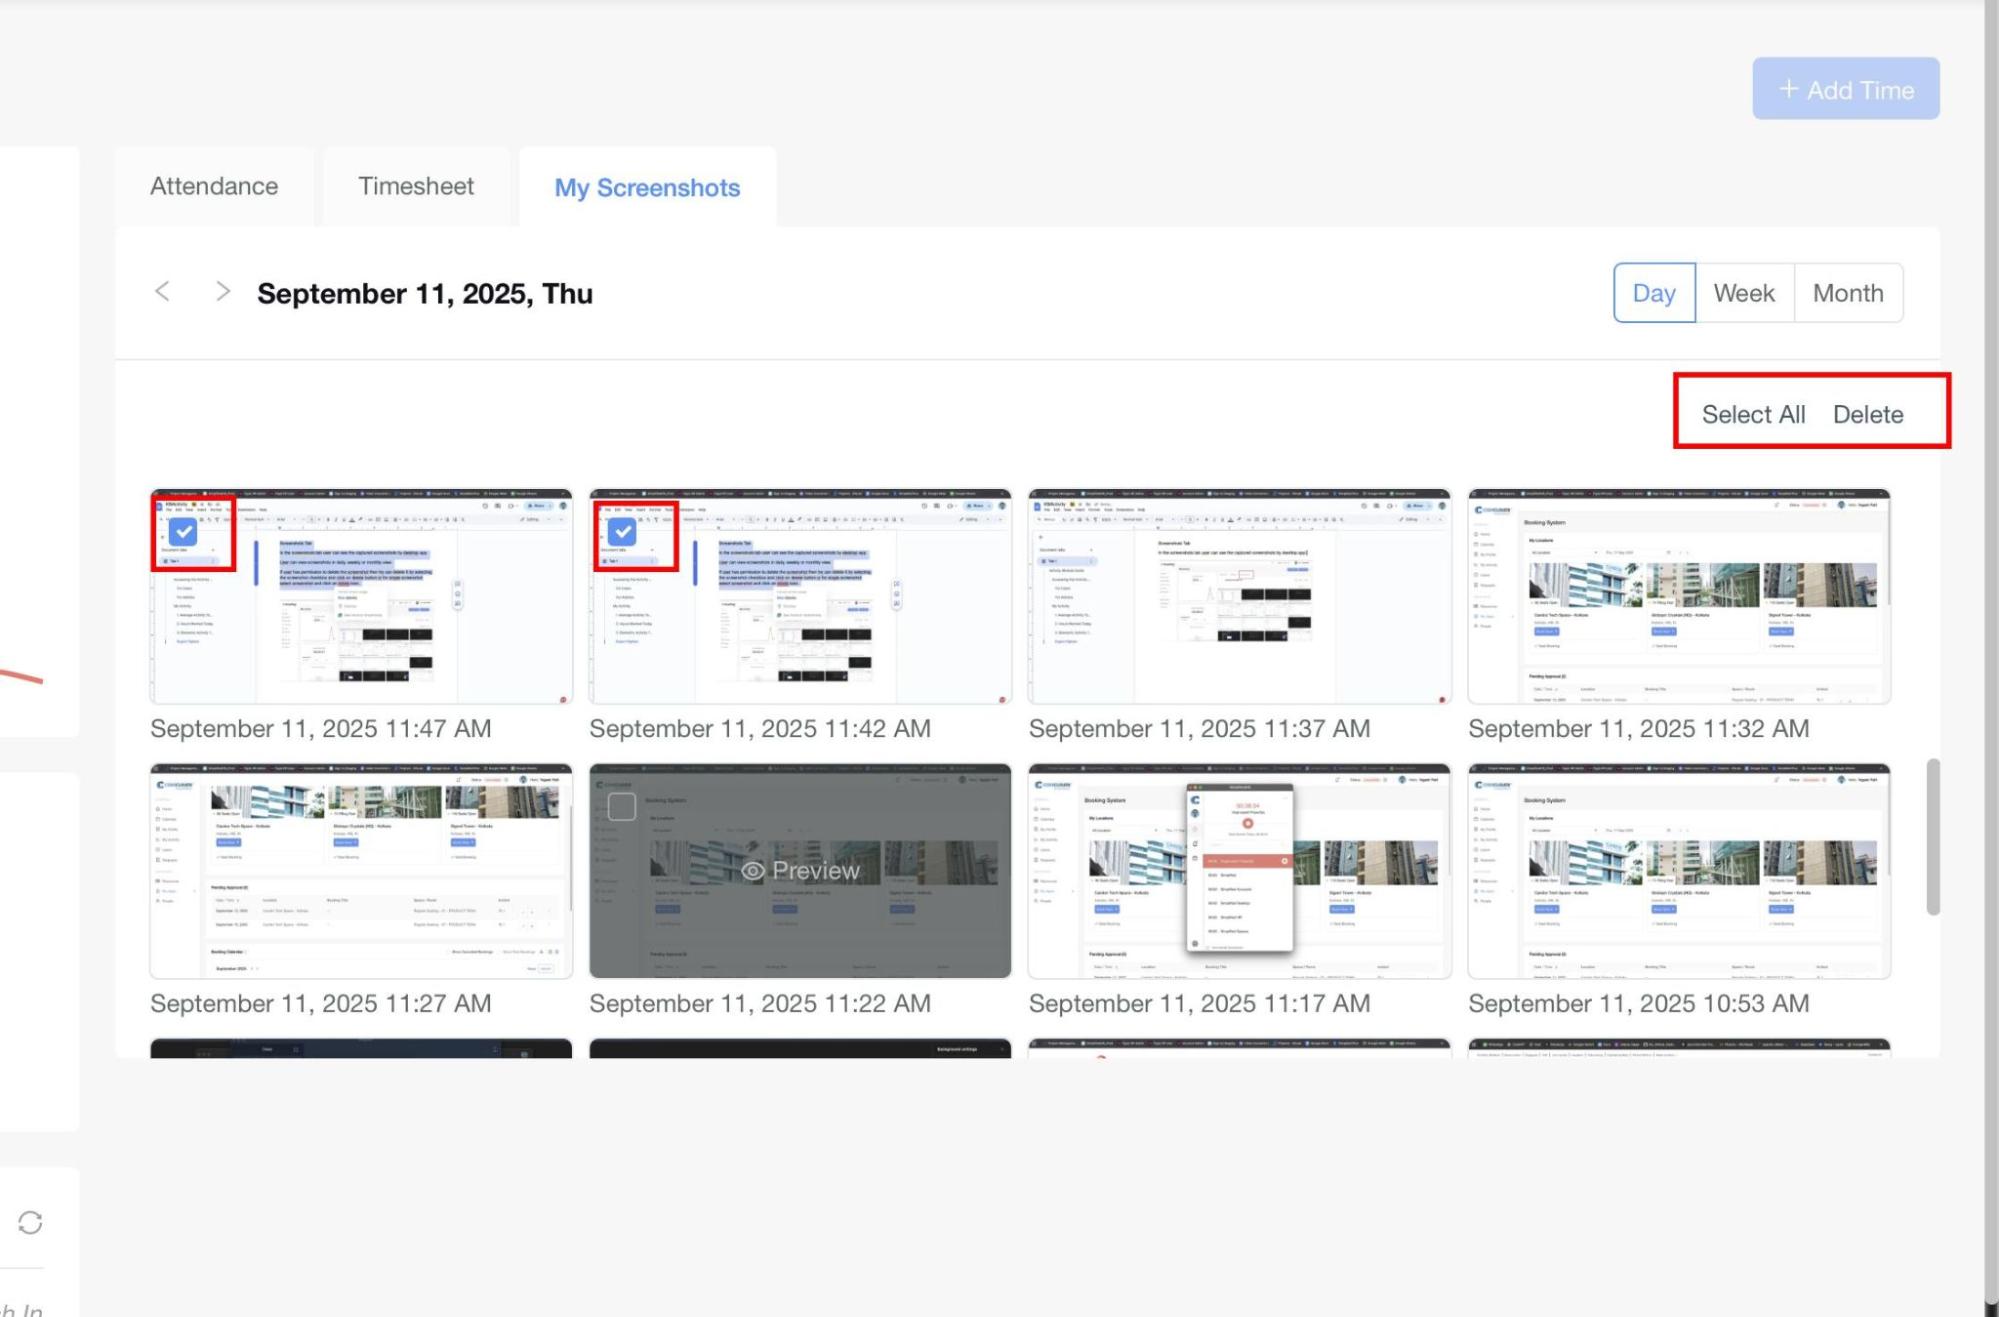
Availability: This feature is available only if the user has permission to delete screenshots.
- Delete Multiple: Select the checkboxes of the required screenshots and click the Delete button.
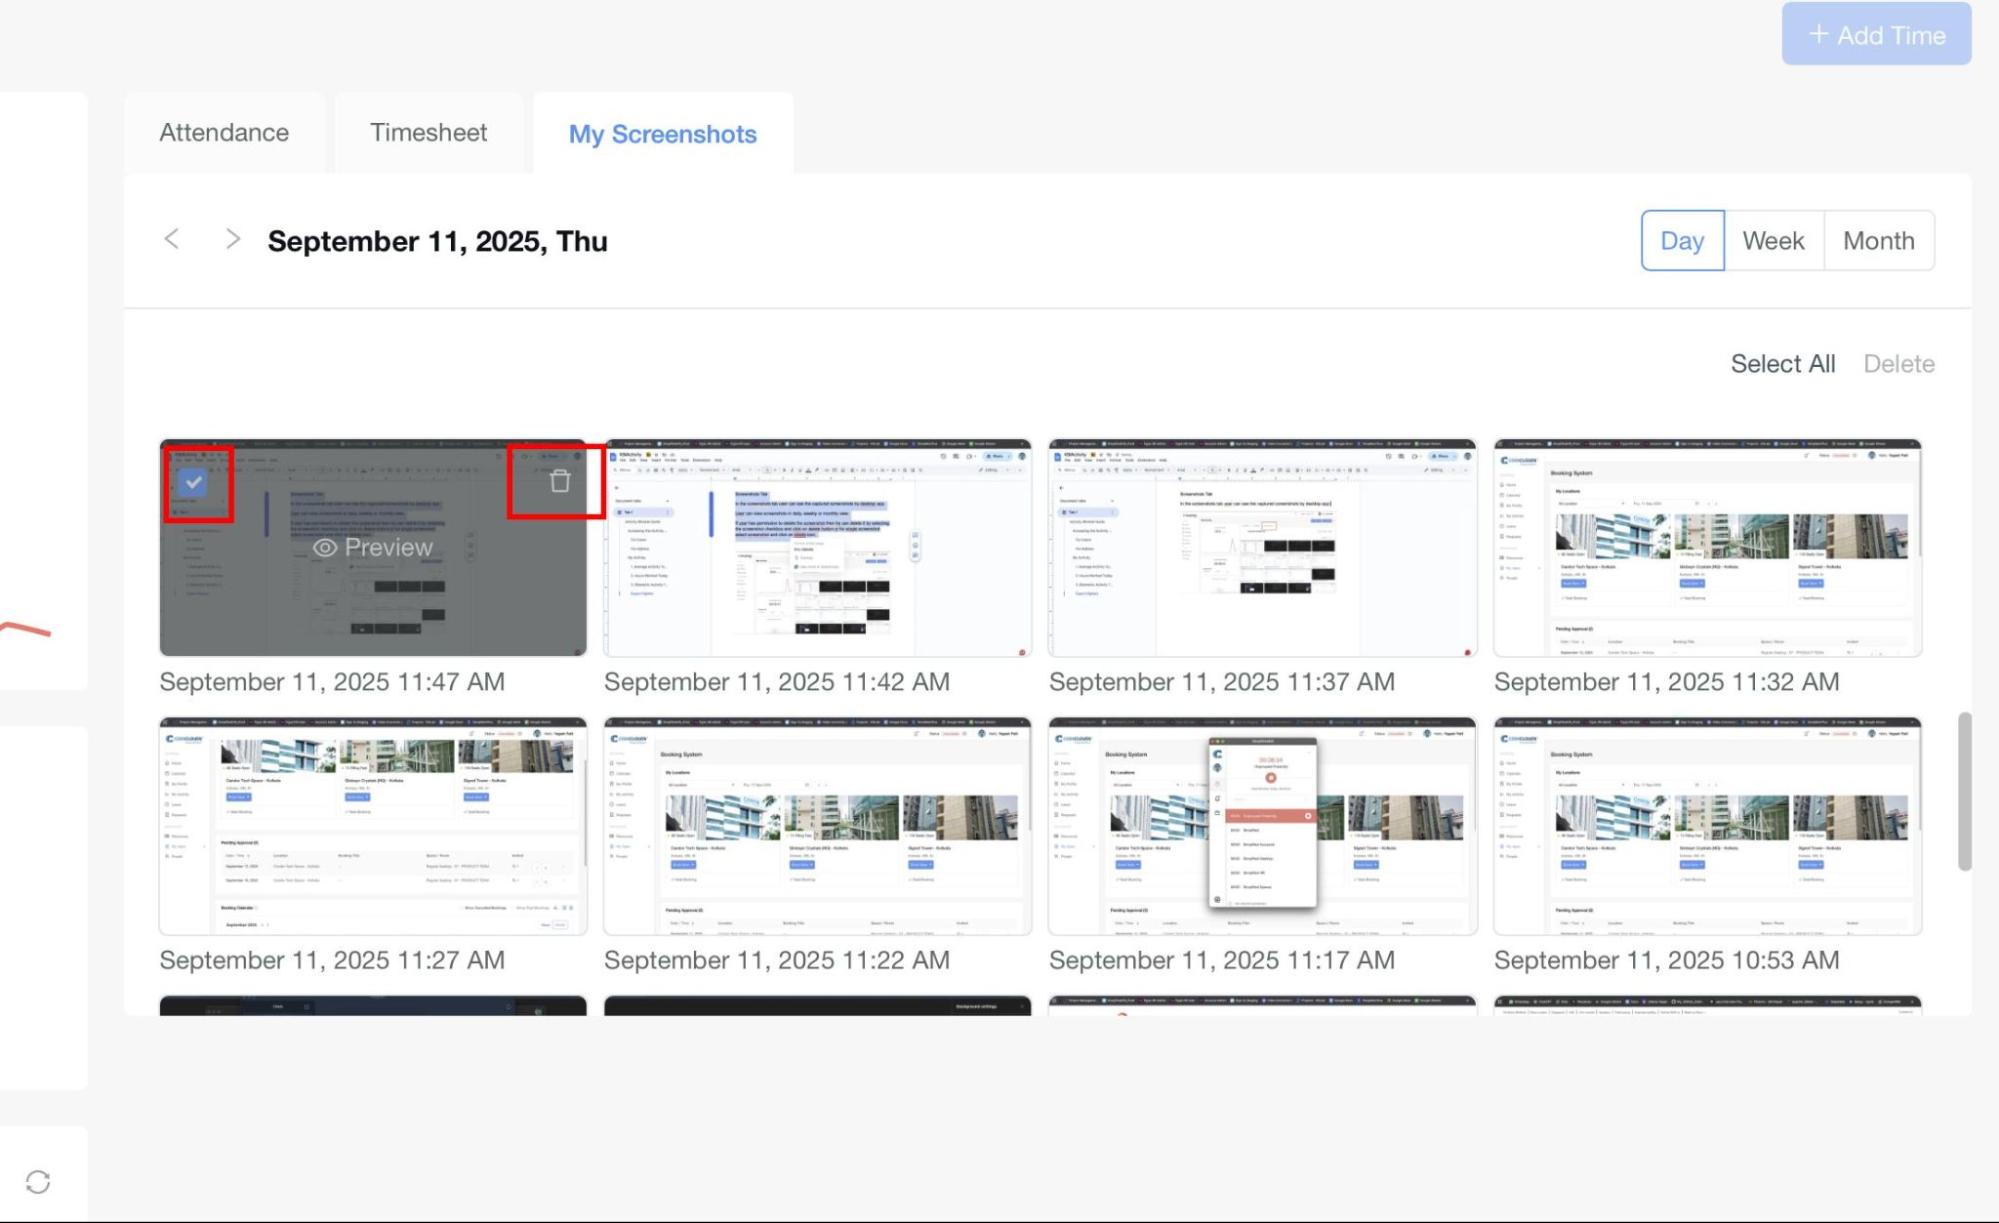
- Delete Single: Select an individual screenshot and click the Delete icon on the screenshot thumbnail.
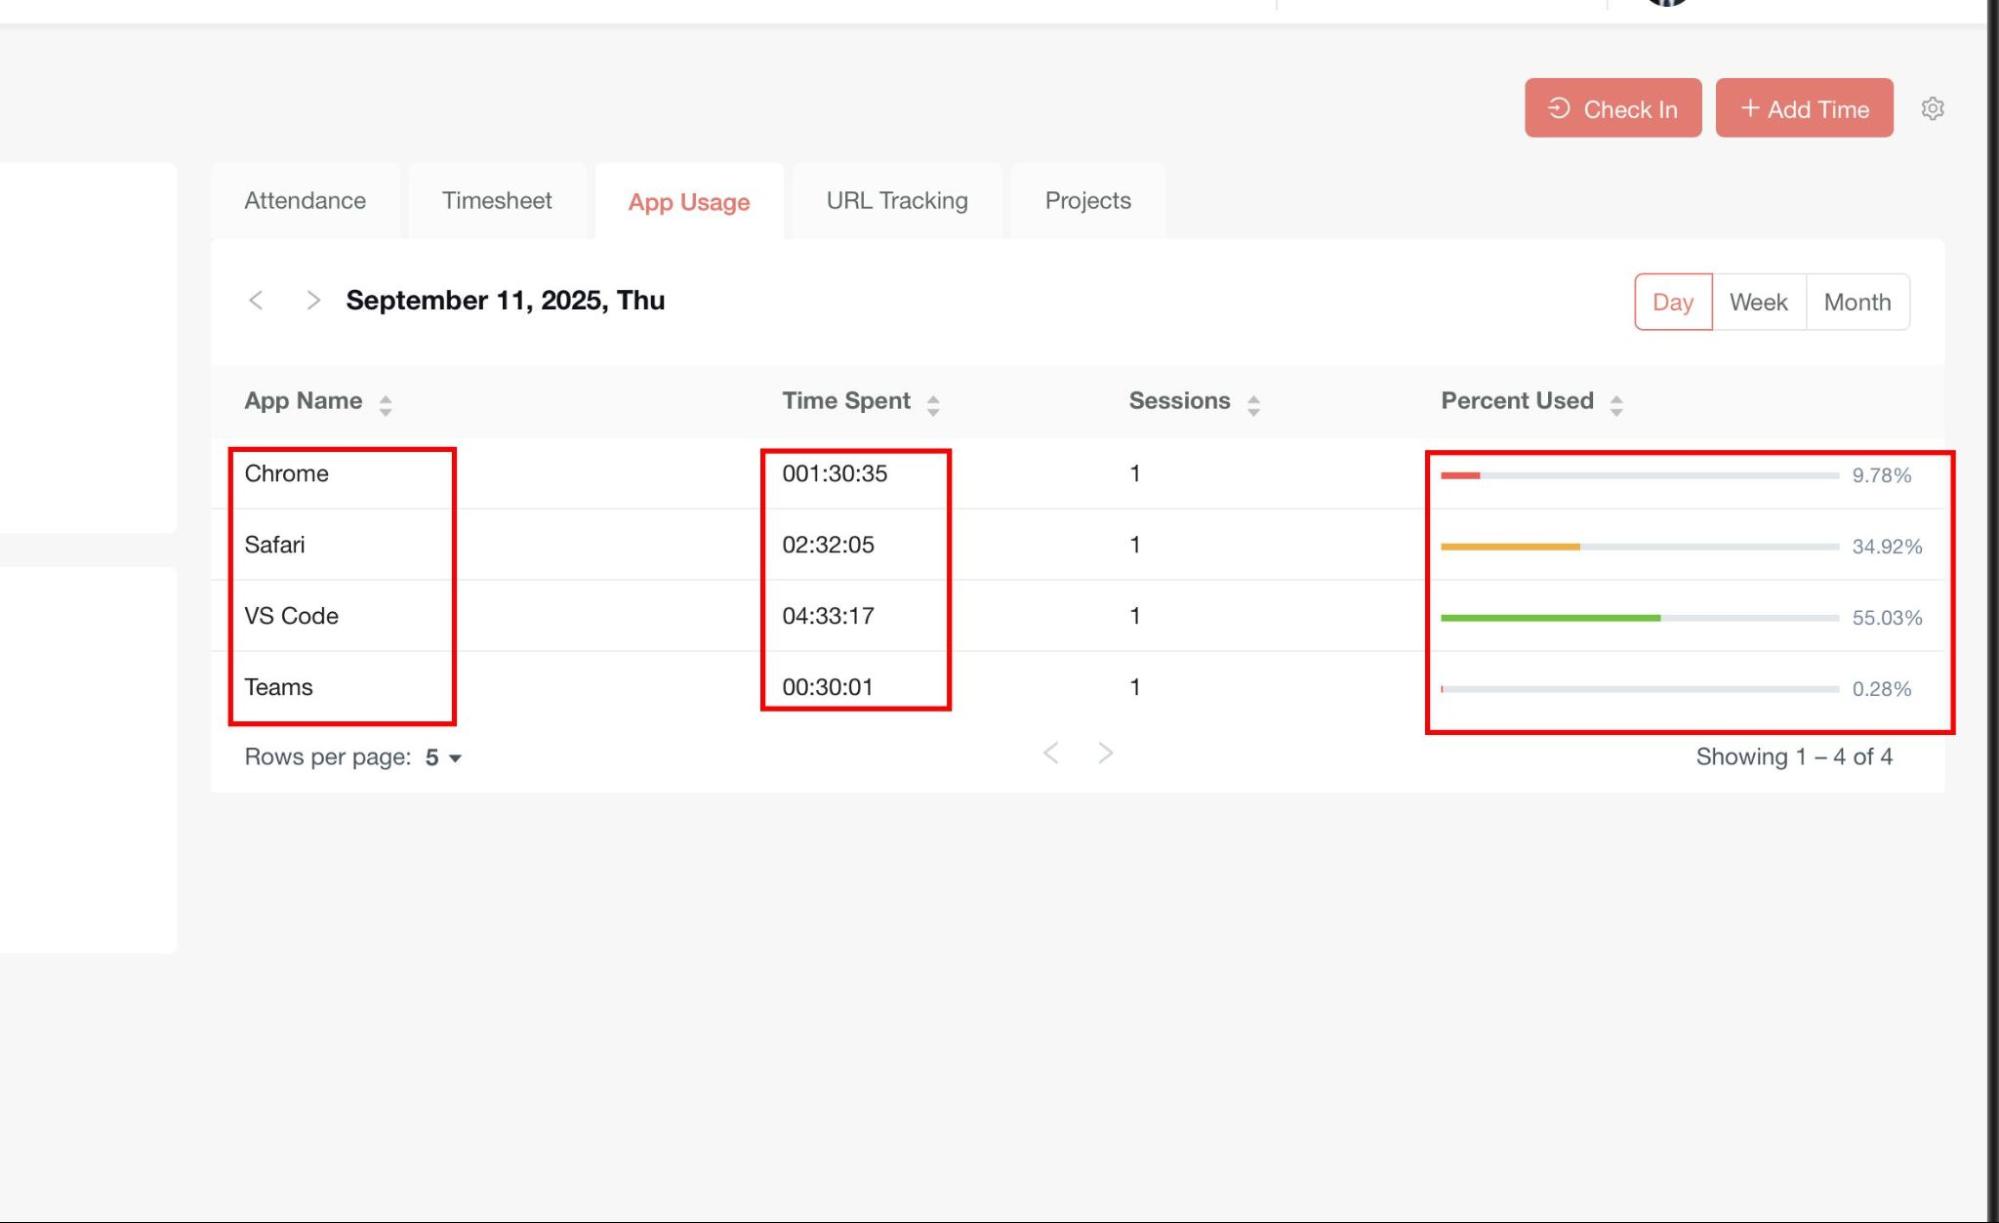
View App Usage
Availability: This tab is only visible if App Usage Tracking is enabled in Module Settings.
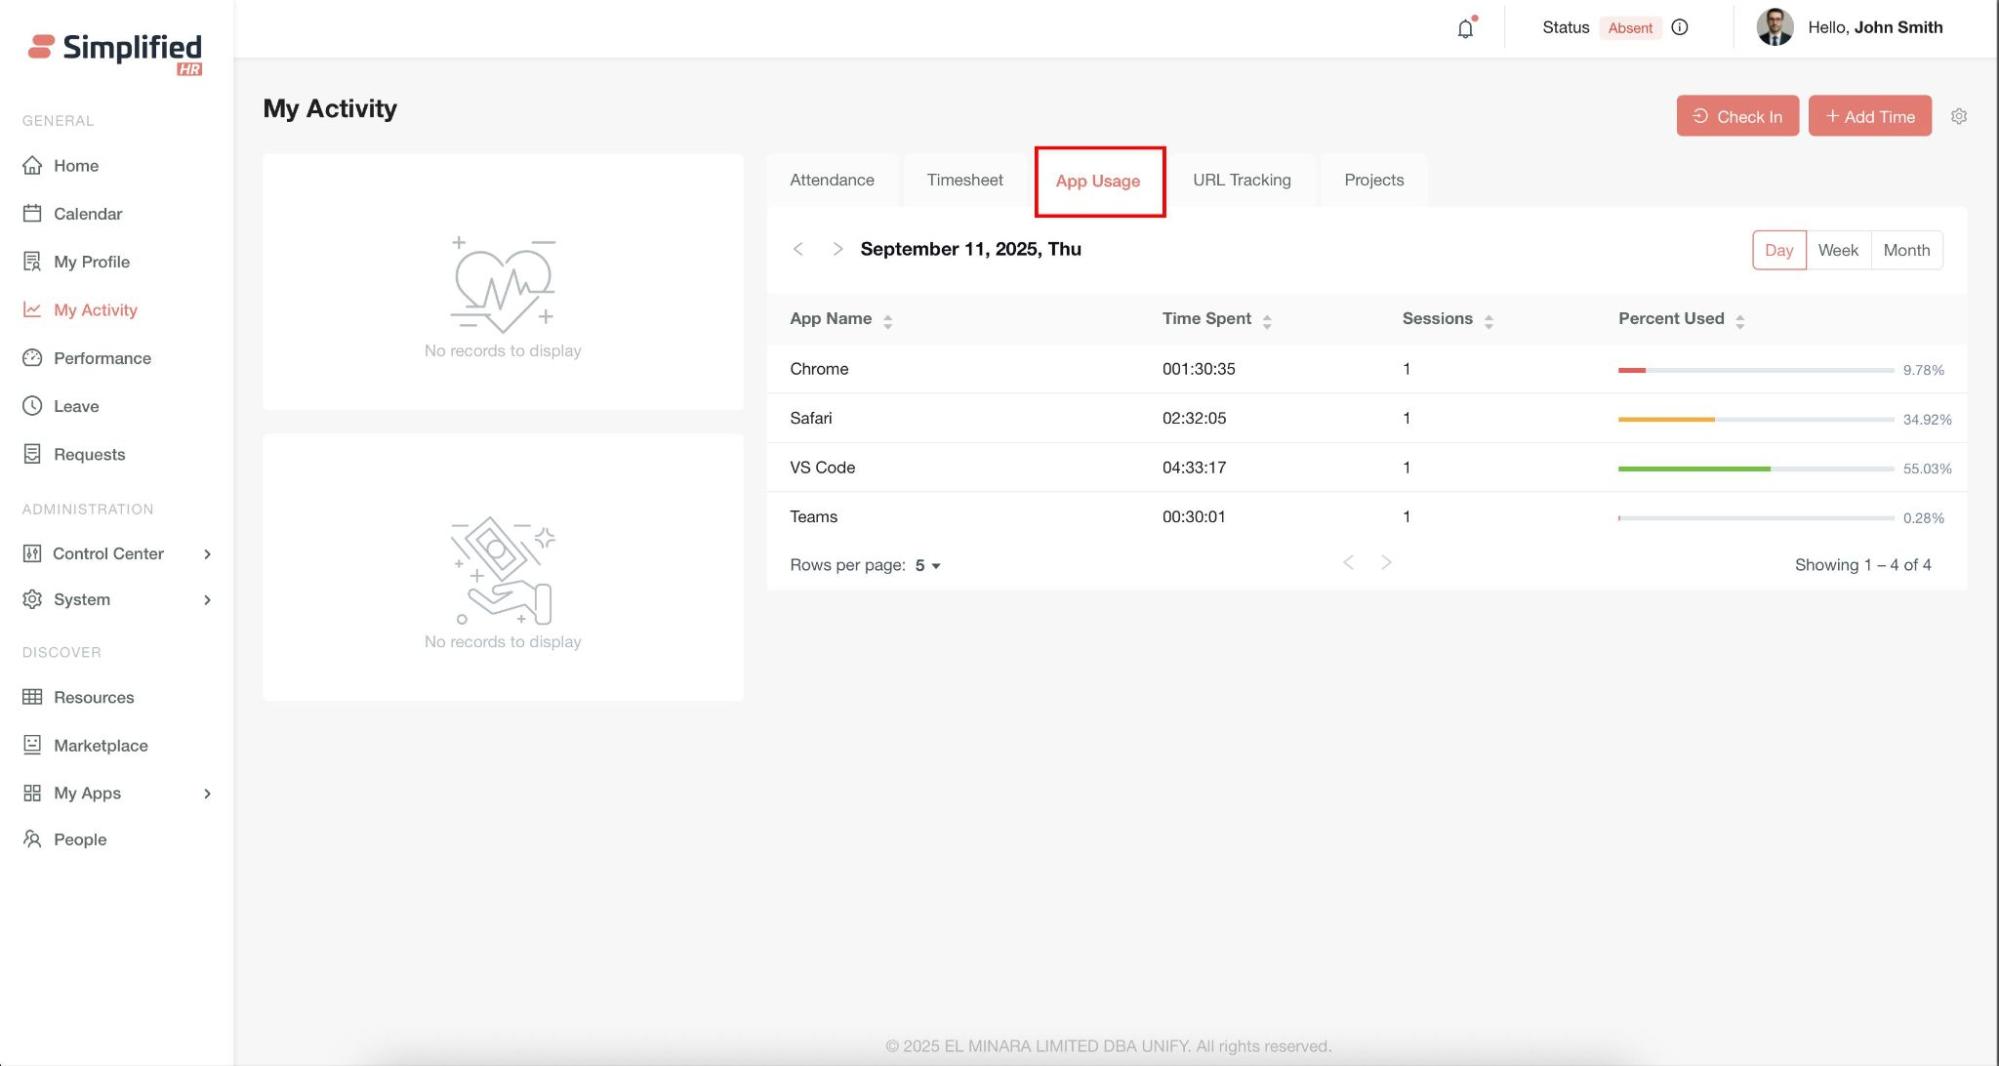
The App Usage Tab provides insights into the applications used by the user during tracked working hours. For each application, the following is shown:
Views available: Daily View, Weekly View, and Monthly View.
Users can switch between Day, Week, and Month views, and select specific dates using the navigation buttons.
View URL Usage
Availability: This tab is only visible if URL Tracking is enabled in Module Settings.
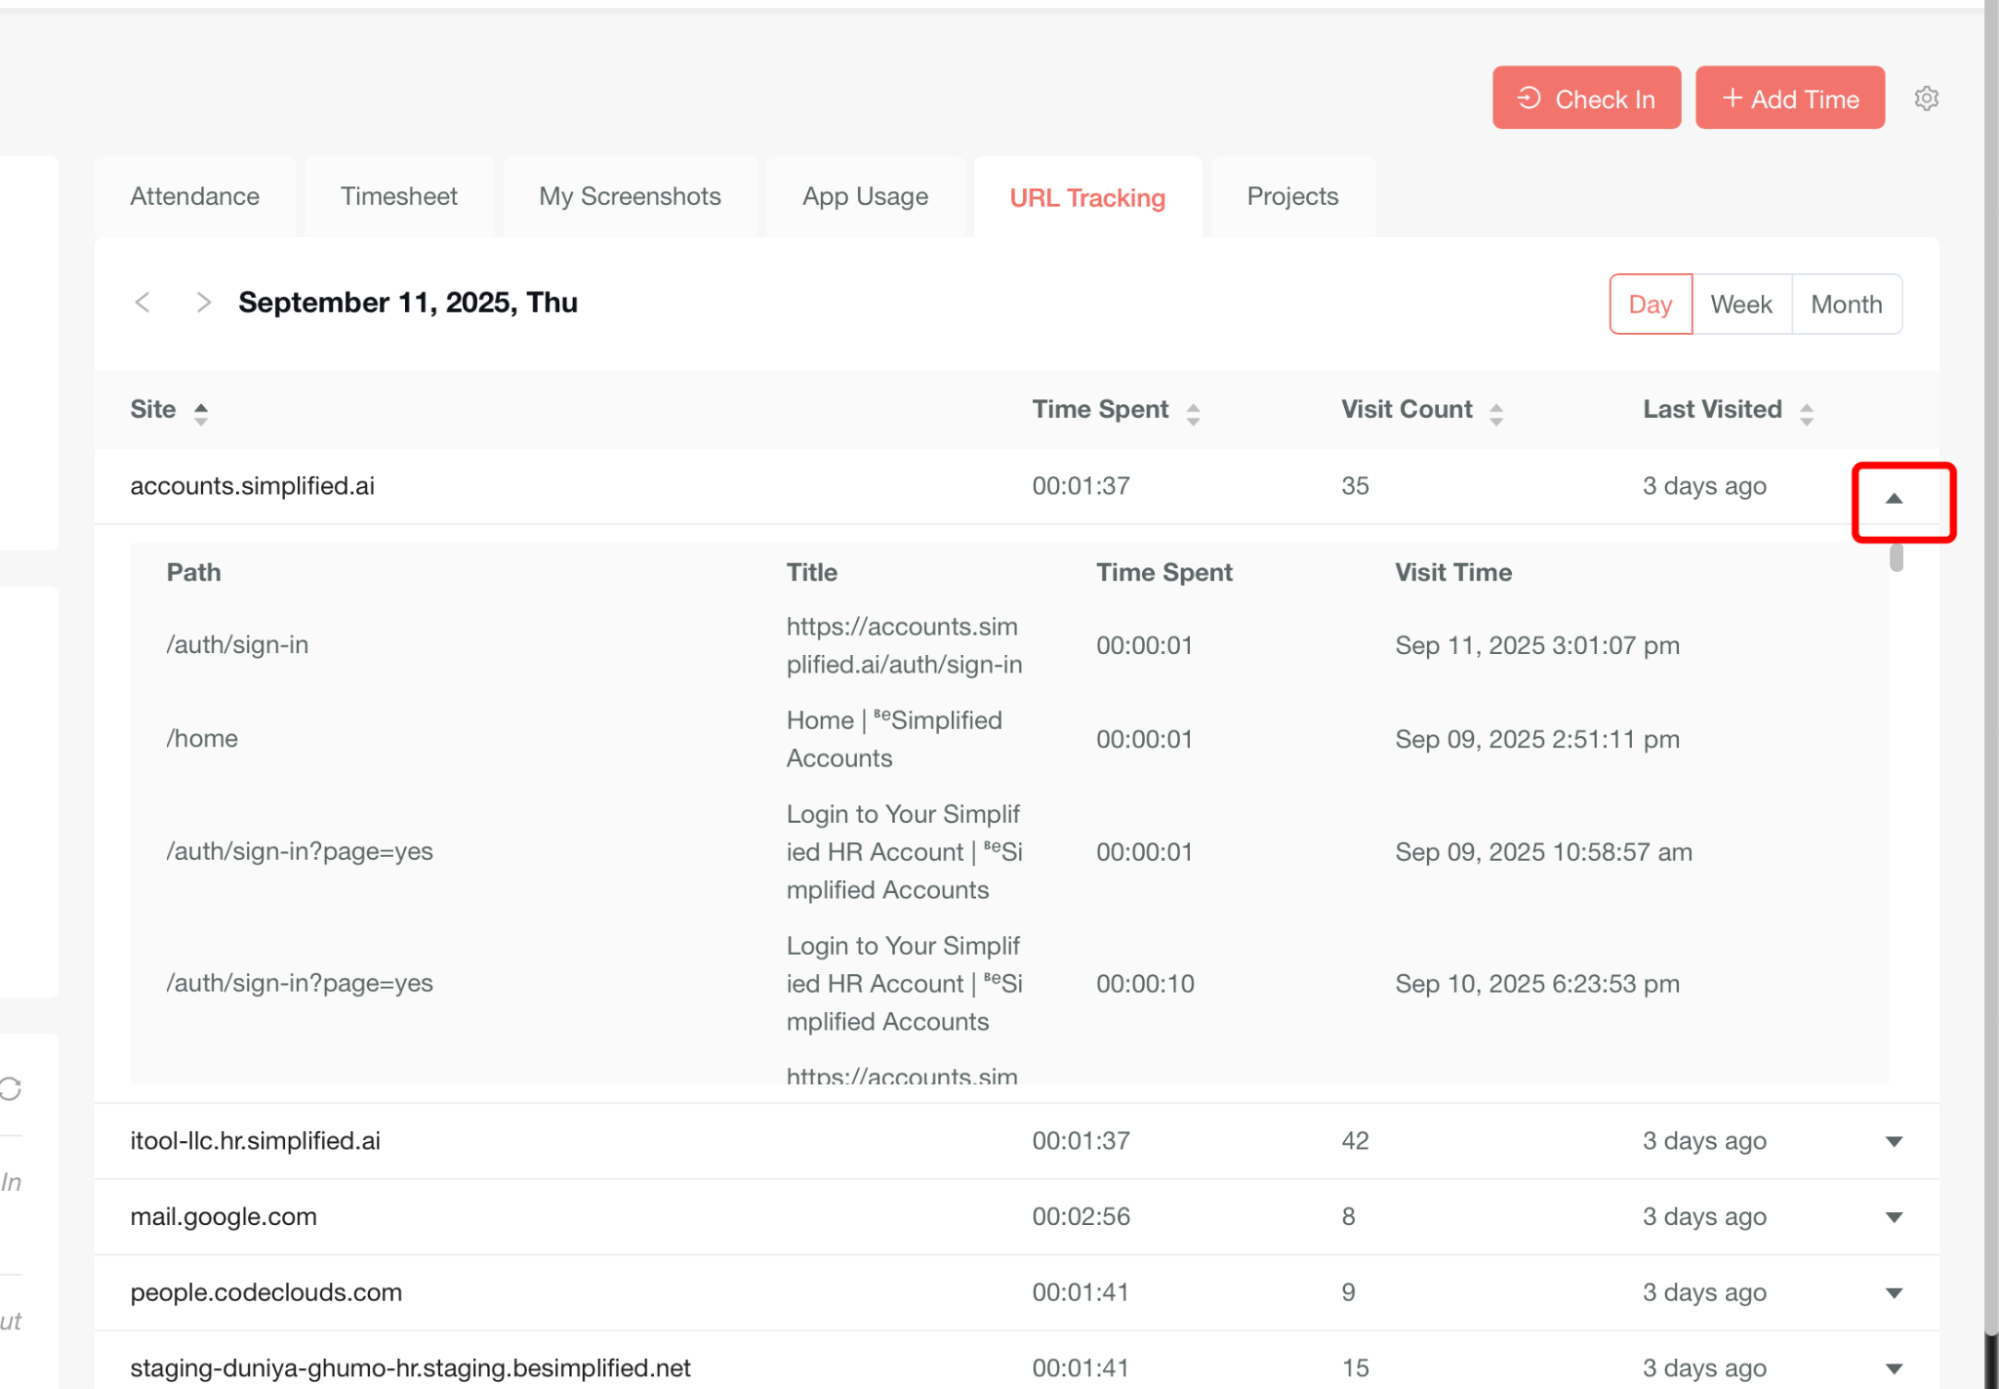
The URL Tracking Tab provides insights into the websites visited by the user during tracked working hours. For each website, the following is shown:
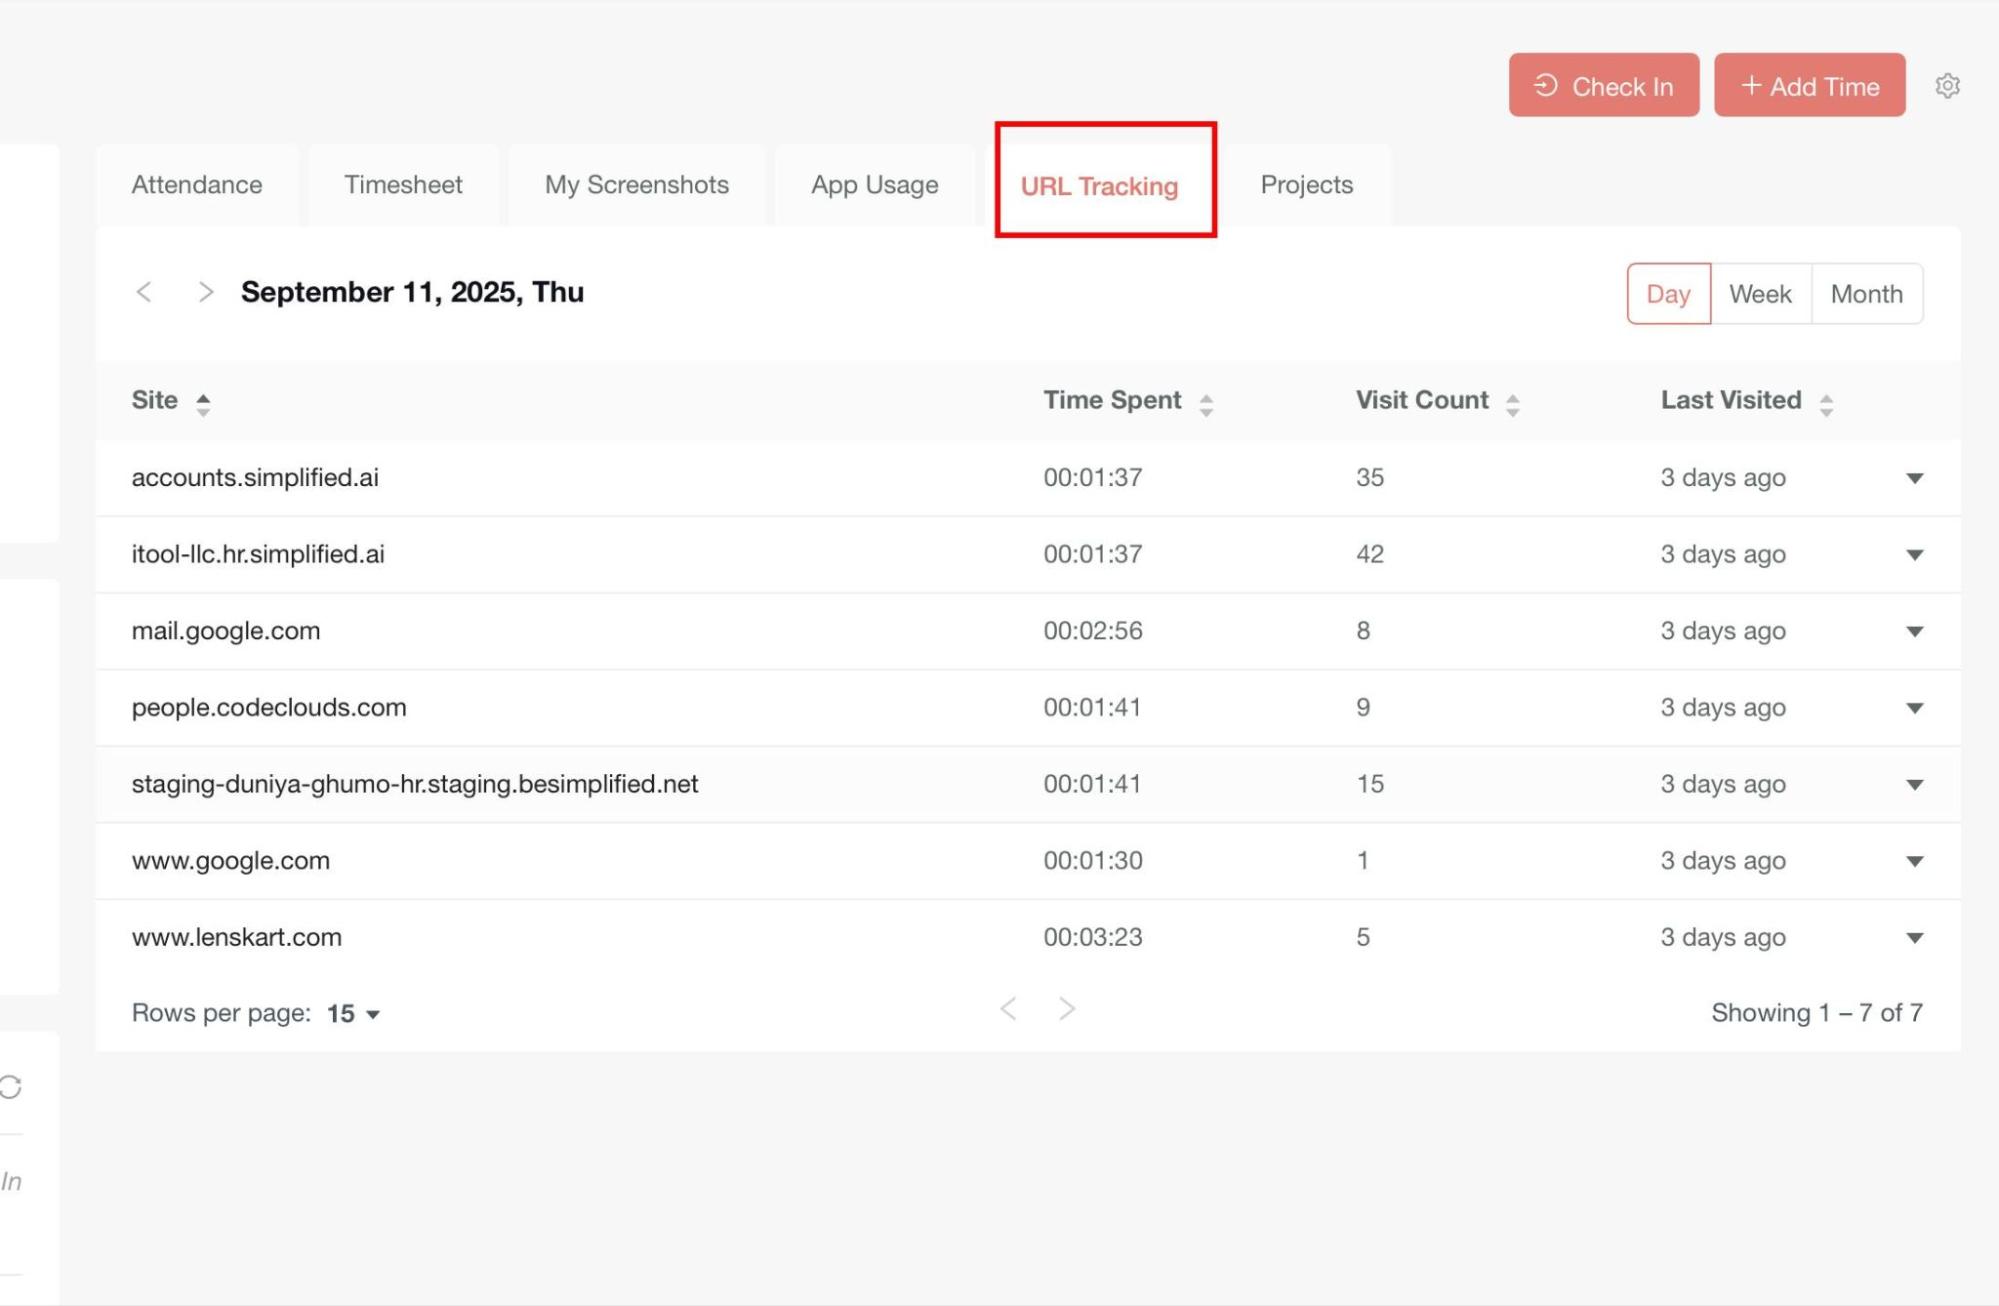
Views available: Daily View, Weekly View, and Monthly View. Users can switch between Day, Week, and Month views, and select specific dates using the navigation buttons to view browsing history.
View URL Session Details
Each website row has a down arrow that can be expanded. Expanding the row opens a panel that shows detailed session-level data, including:
-
Path (specific URL visited).
-
Title (page title of the site).
-
Time Spent (on that session).
-
Visit Time (timestamp of the visit).Employee