Note on Manager Role: The source documentation describes three distinct roles: Employee, Manager, and HR Admin. Because this documentation uses only two top-level sections, Manager/Approver capabilities (approve/reject requests, view team leave reports, apply leave on behalf of team members) are documented under the Admin section, since they involve elevated, approval-level access rather than standard employee self-service. They remain role-restricted to Managers/Approvers/HR Admins in the actual product, not general Employee access.
Admin → Leave Management
Leave Management Overview
An employee leave module automates and streamlines the entire leave management process. This module serves as the central hub for managing employee time-off requests, tracking balances, and ensuring policy compliance across organizations.
View Employee Leave Balance
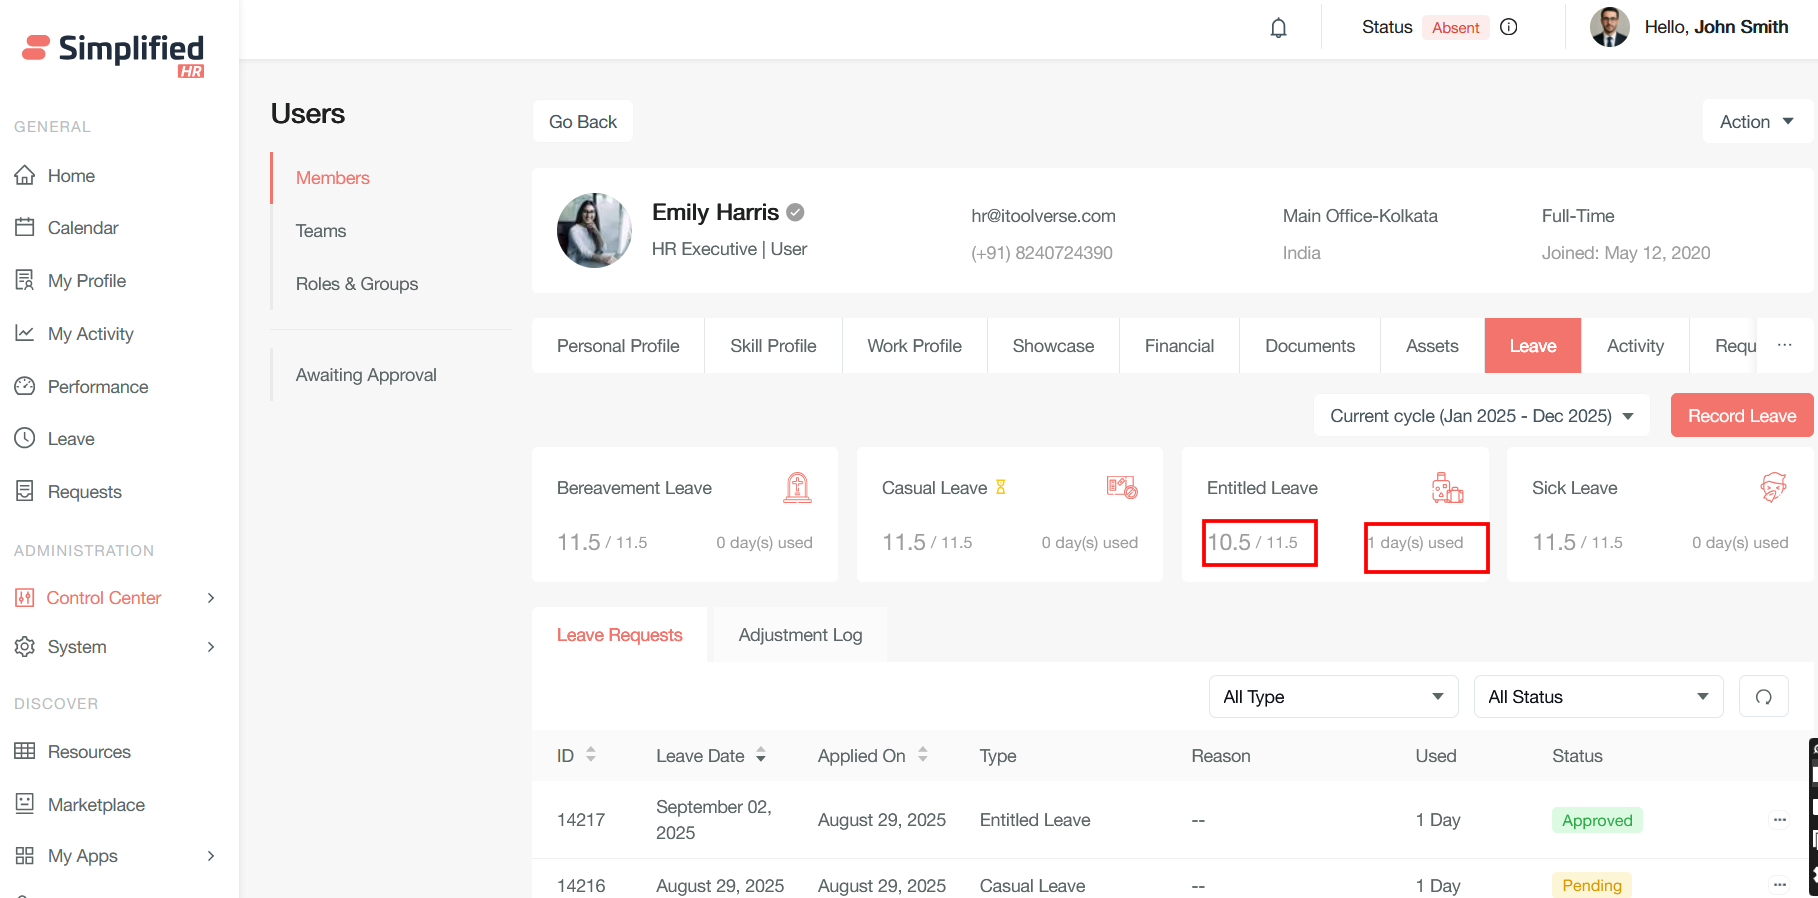
Admin can check the total balance, available balance, and number of days used for the leave type.
Adjust Employee Leave Balance
Admin can adjust the leave balance by clicking the edit button on a leave type.
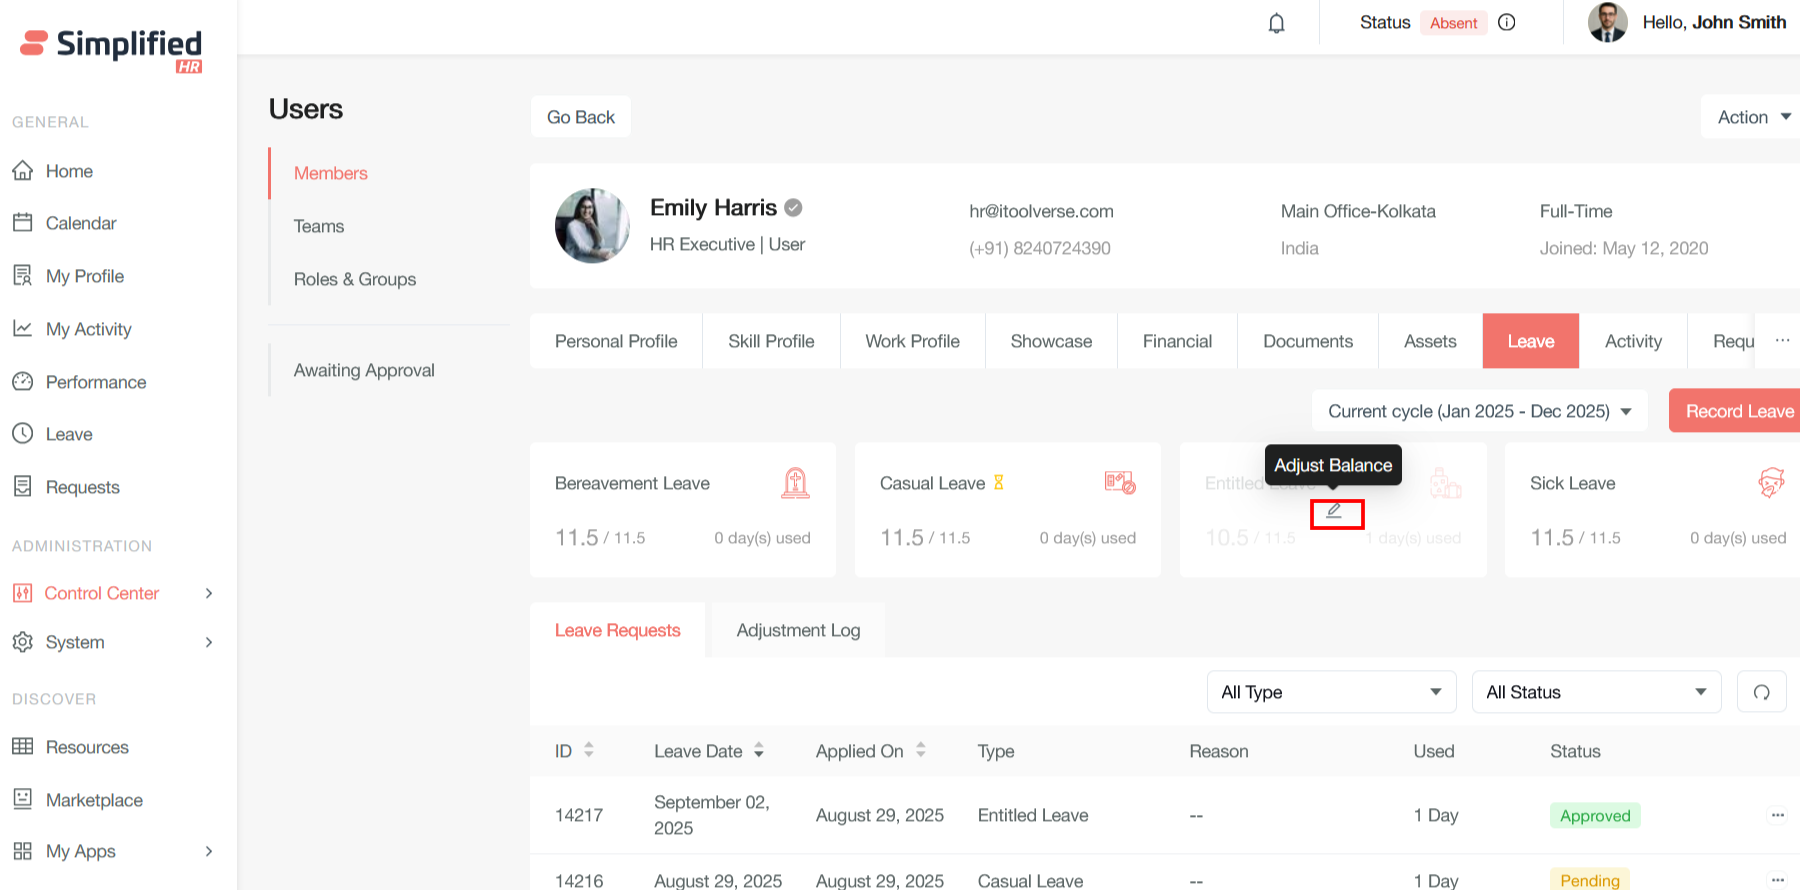
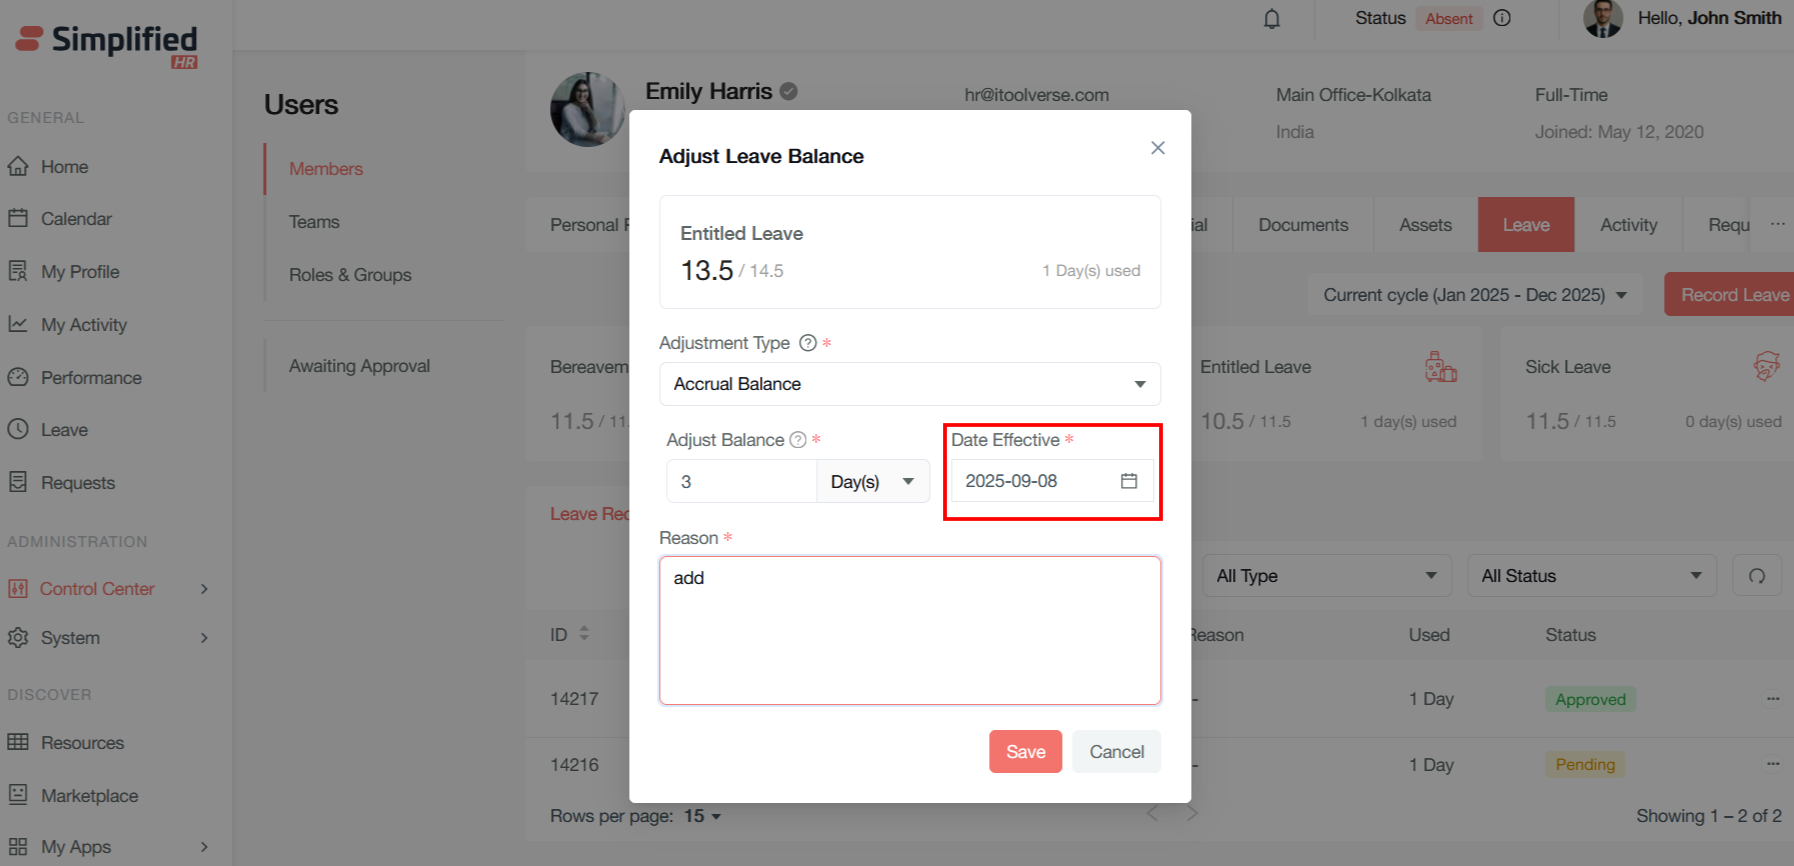
This opens a modal for the adjustment of leave balance.
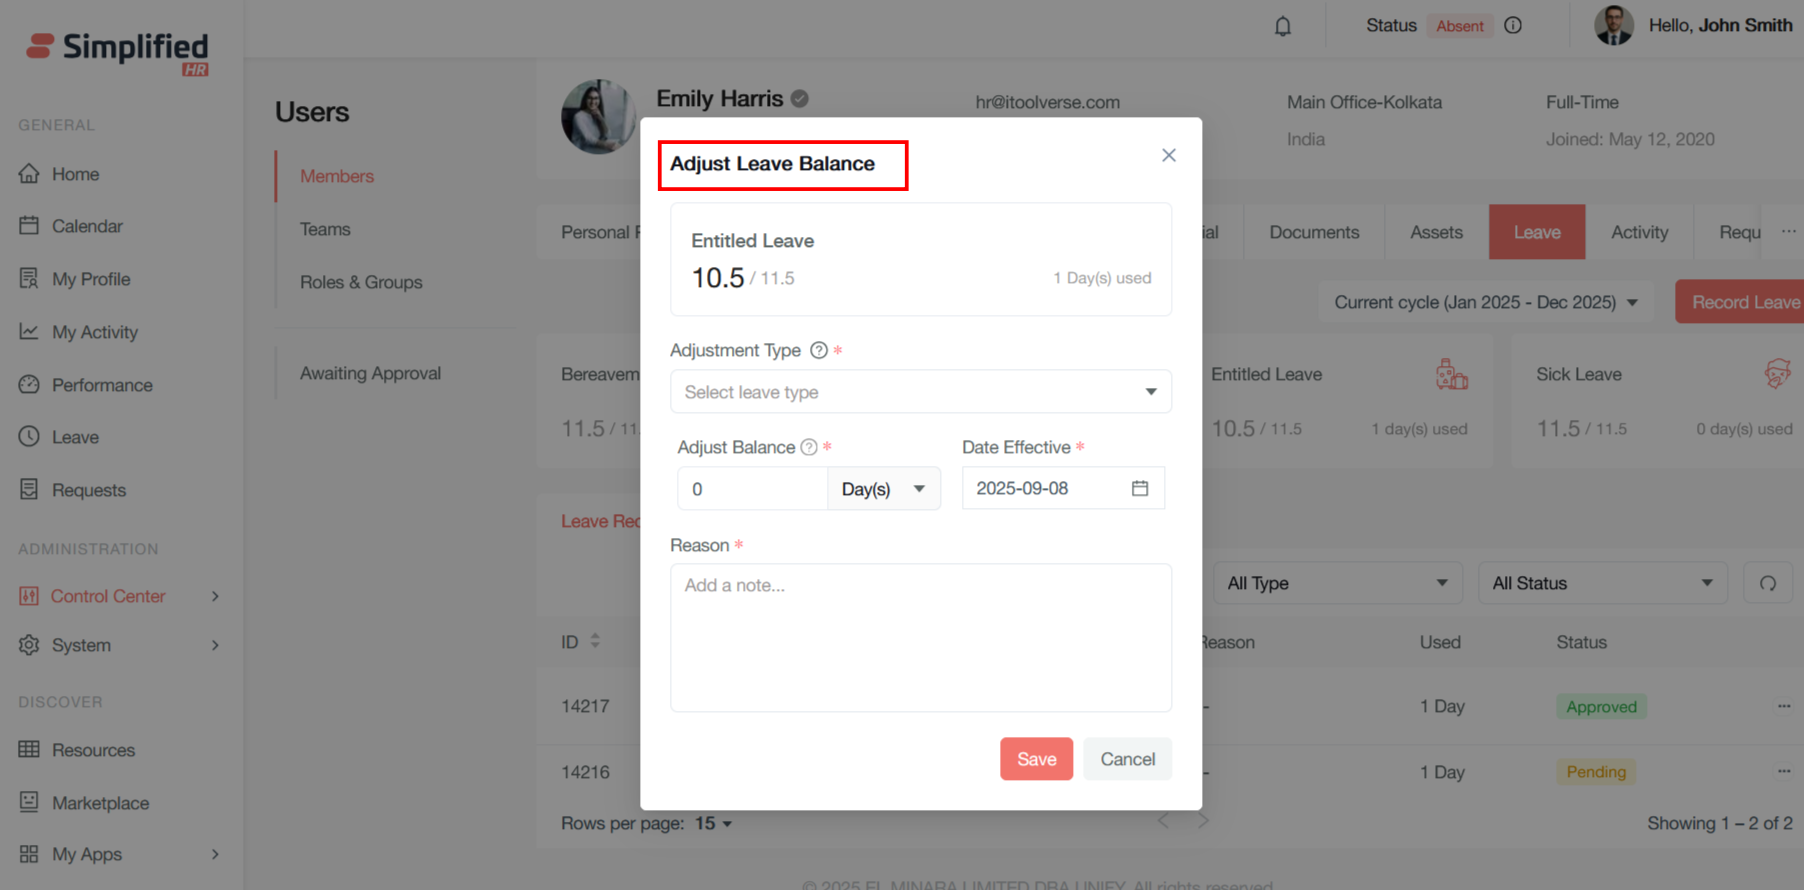
Accrual Balance
-
What it changes: The amount the employee has earned or been credited (credits they accumulated).
-
When to use: Correct credits that came from policy rules, holiday work, extra work, system errors, or policy changes.
-
How to enter values: Enter a positive number to add earned credits (for example, 3) or a negative number to remove earned credits (for example, -1).
Available Balance
-
What it changes: The amount the employee can use immediately (the usable leave pool).
-
When to use: Refund days to the usable pool, correct an incorrectly recorded leave, or remove usable days for policy violations or management decisions.
-
How to enter values: Enter a positive number to refund/add usable days (for example, 2) or a negative number to deduct usable days (for example, -3).
Examples
-
Remove an accidental earned credit of 1 day: choose Accrual Balance, enter -1.
-
Refund 2 days to the employee's usable balance after an incorrect leave charge: choose Available Balance, enter +2.
-
Deduct 3 usable days for a policy violation: choose Available Balance, enter -3.
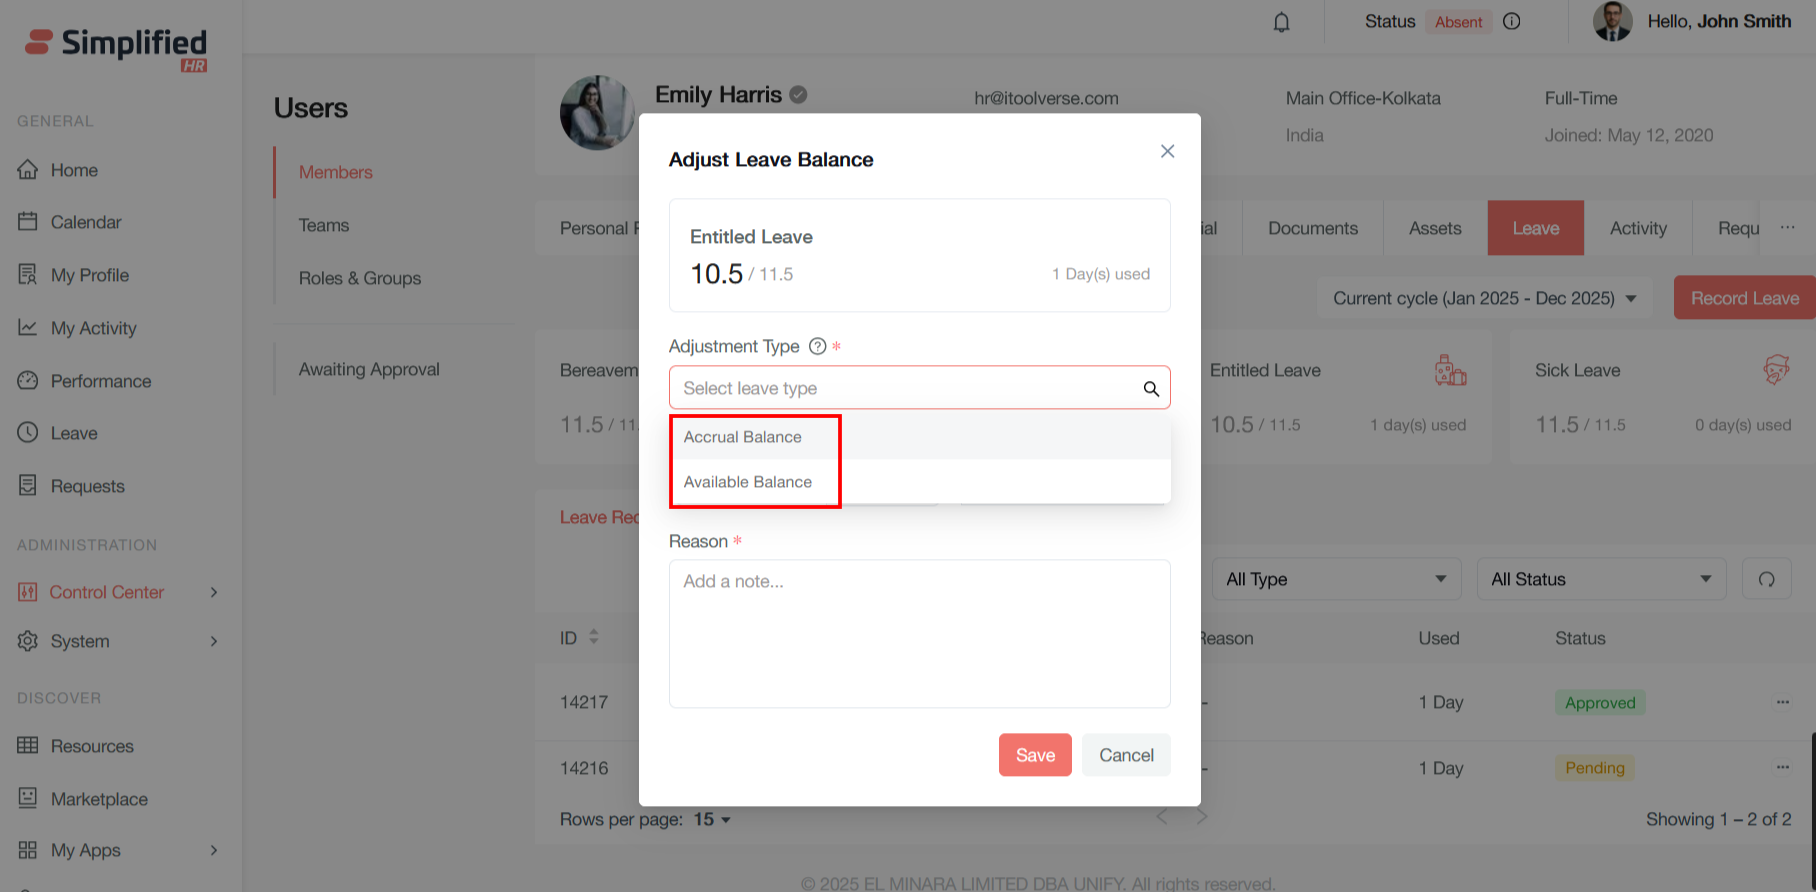
- Provide the balance to adjust and a valid reason. (A minus sign can be used to reduce the balance.)
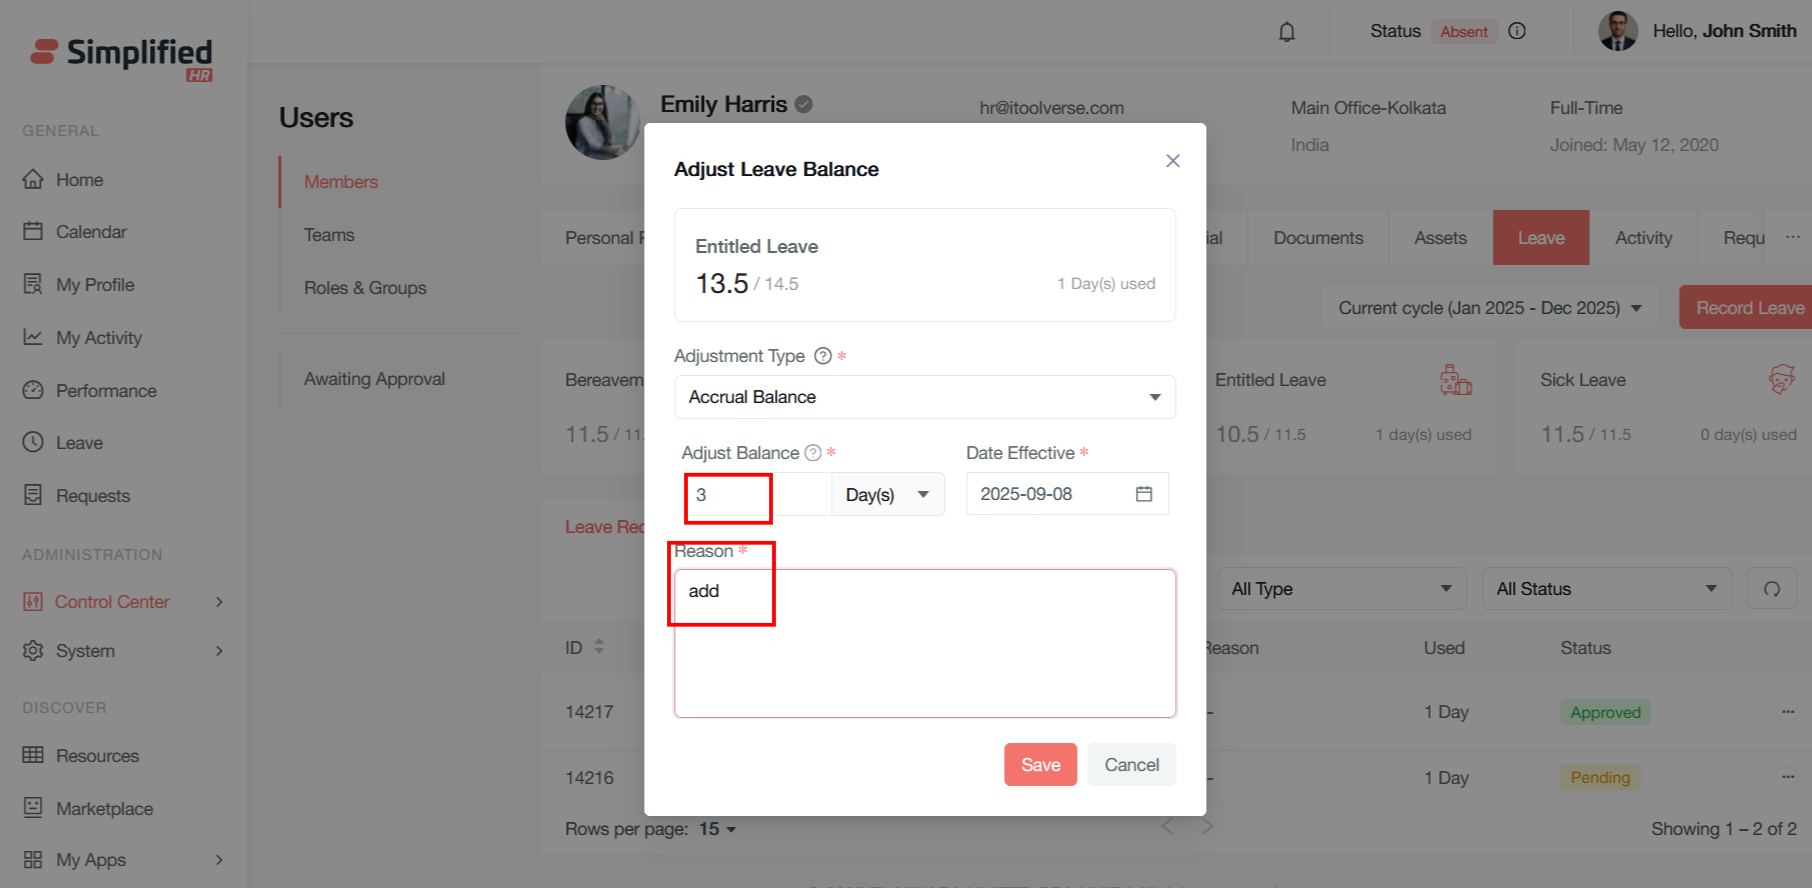
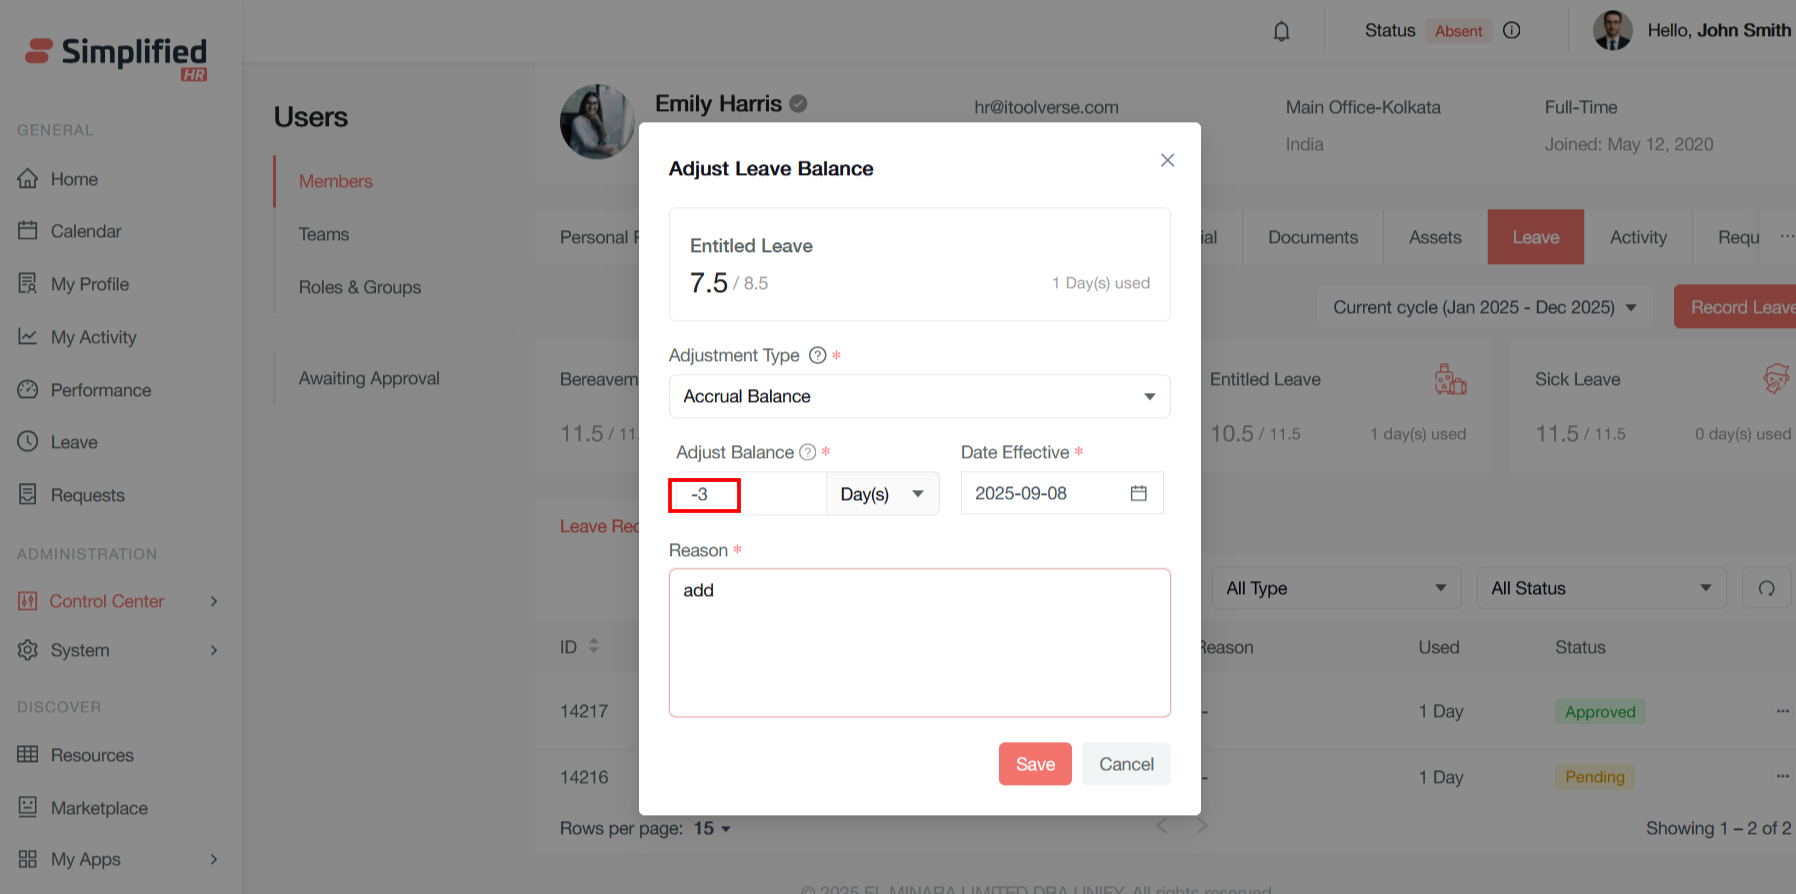
- The effective date is set to the current date by default; it can also be selected as a future date.
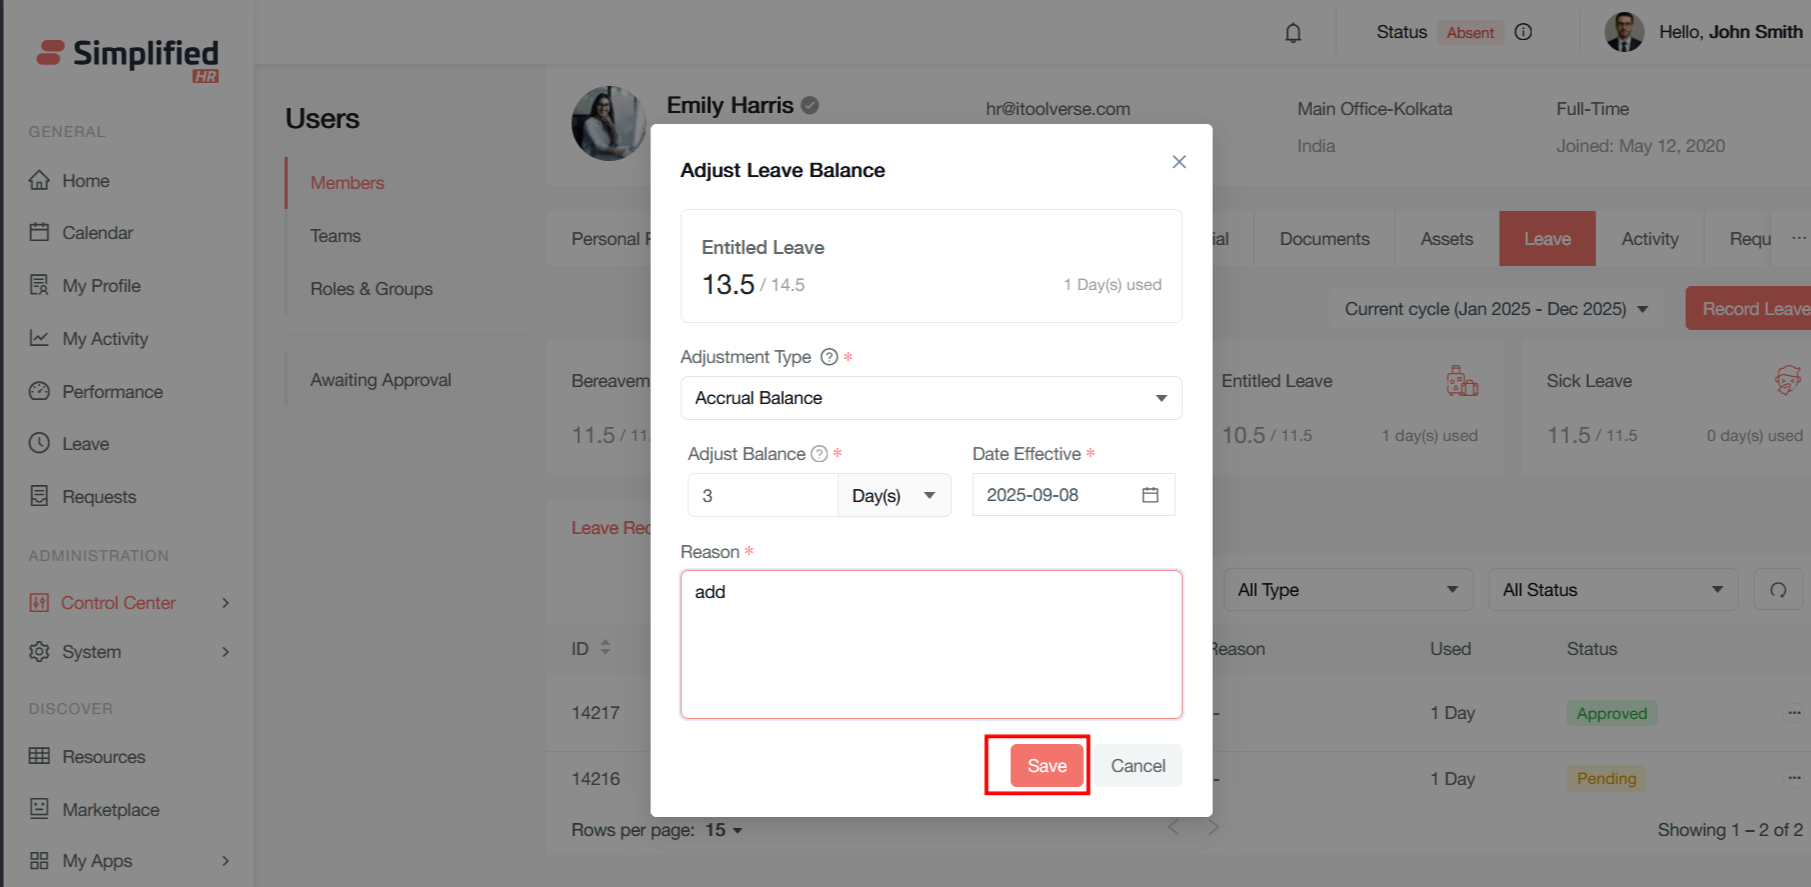
- Click the Save button to adjust the leave balance.
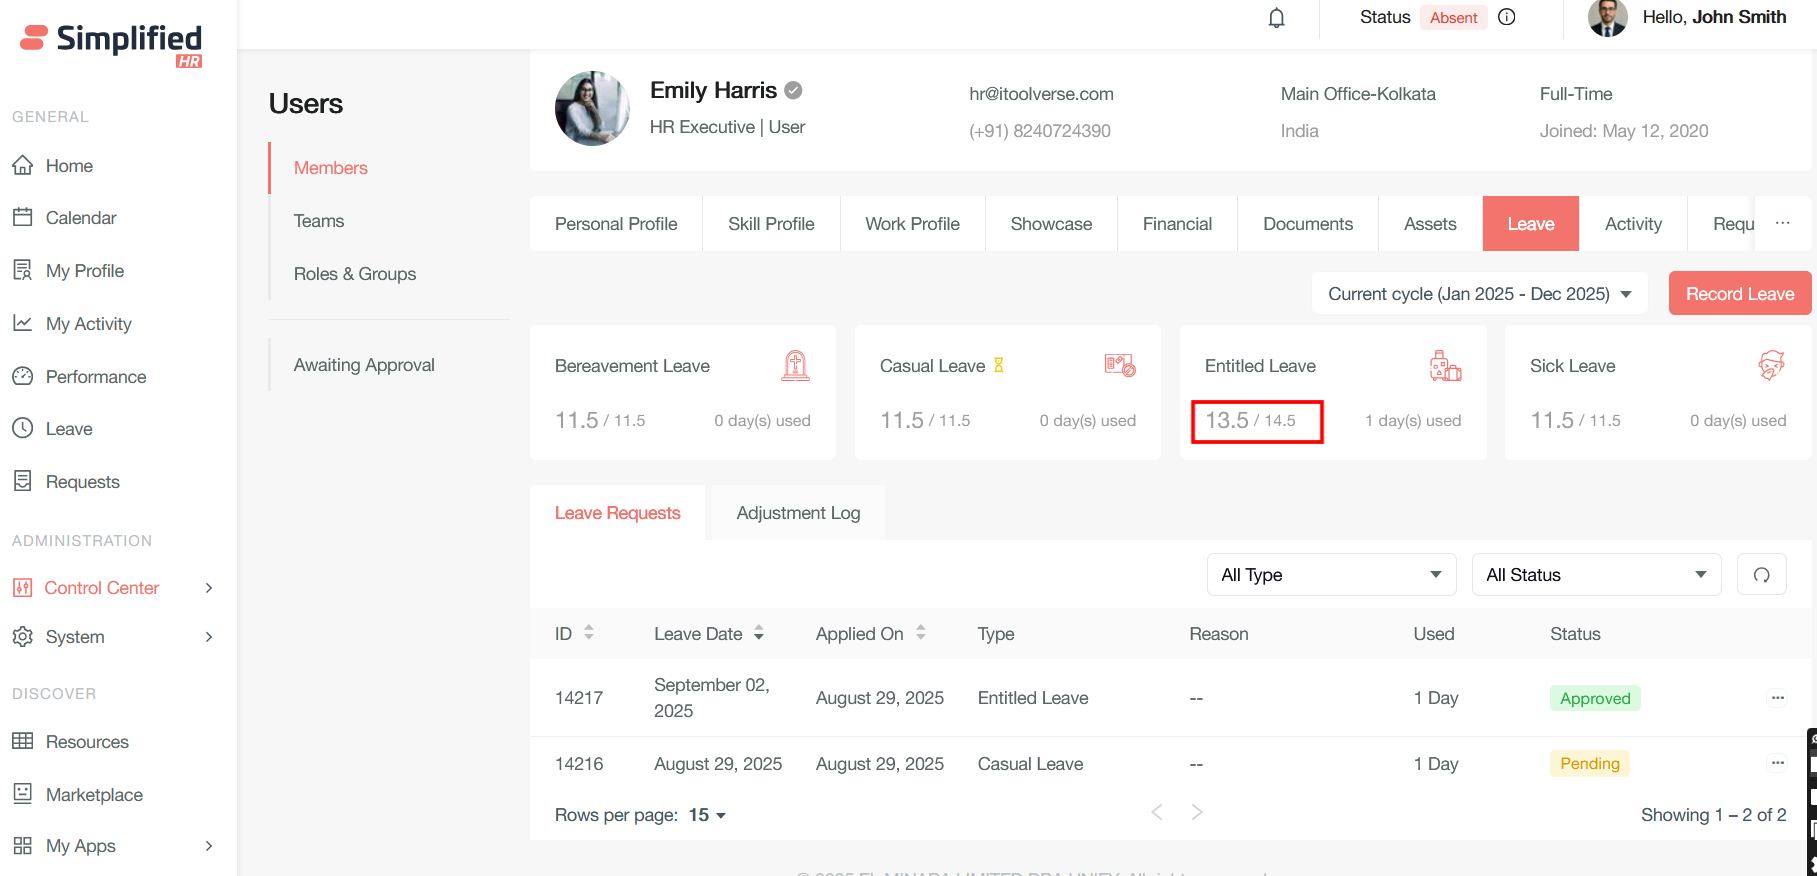
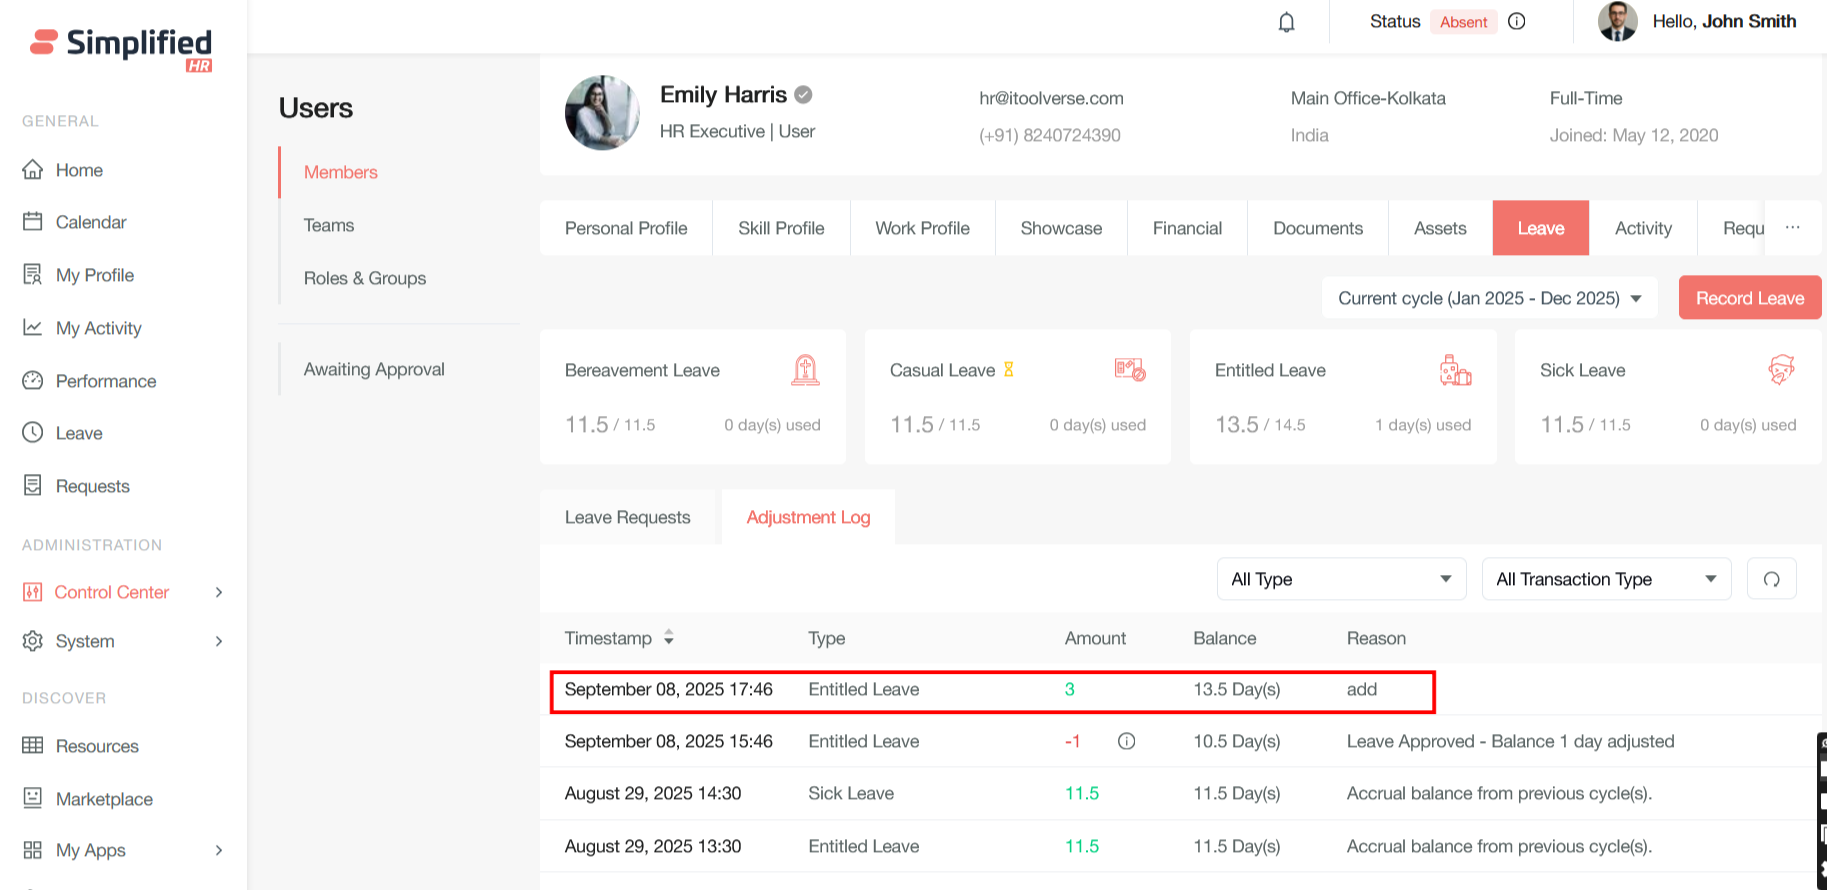
Result: The balance is updated in the leave type, the change is recorded in the Adjustment Log.
View Leave Adjustment Log
The Adjustment Log tab serves as a comprehensive transaction ledger that records and displays all leave balance modifications for employees across different leave types. This tab provides complete visibility into how leave balances are calculated through credits and debits, including:
-
Automatic accruals based on defined leave policies (monthly, quarterly, or yearly credits).
-
Manual credits by HR administrators for corrections or special allocations.
-
Carry-forward leaves from previous periods.
-
Employees taking approved leave days.
Apply Leave on Behalf of Employee
Admin can apply leave on behalf of the user and also check the leave balance and adjust the same.
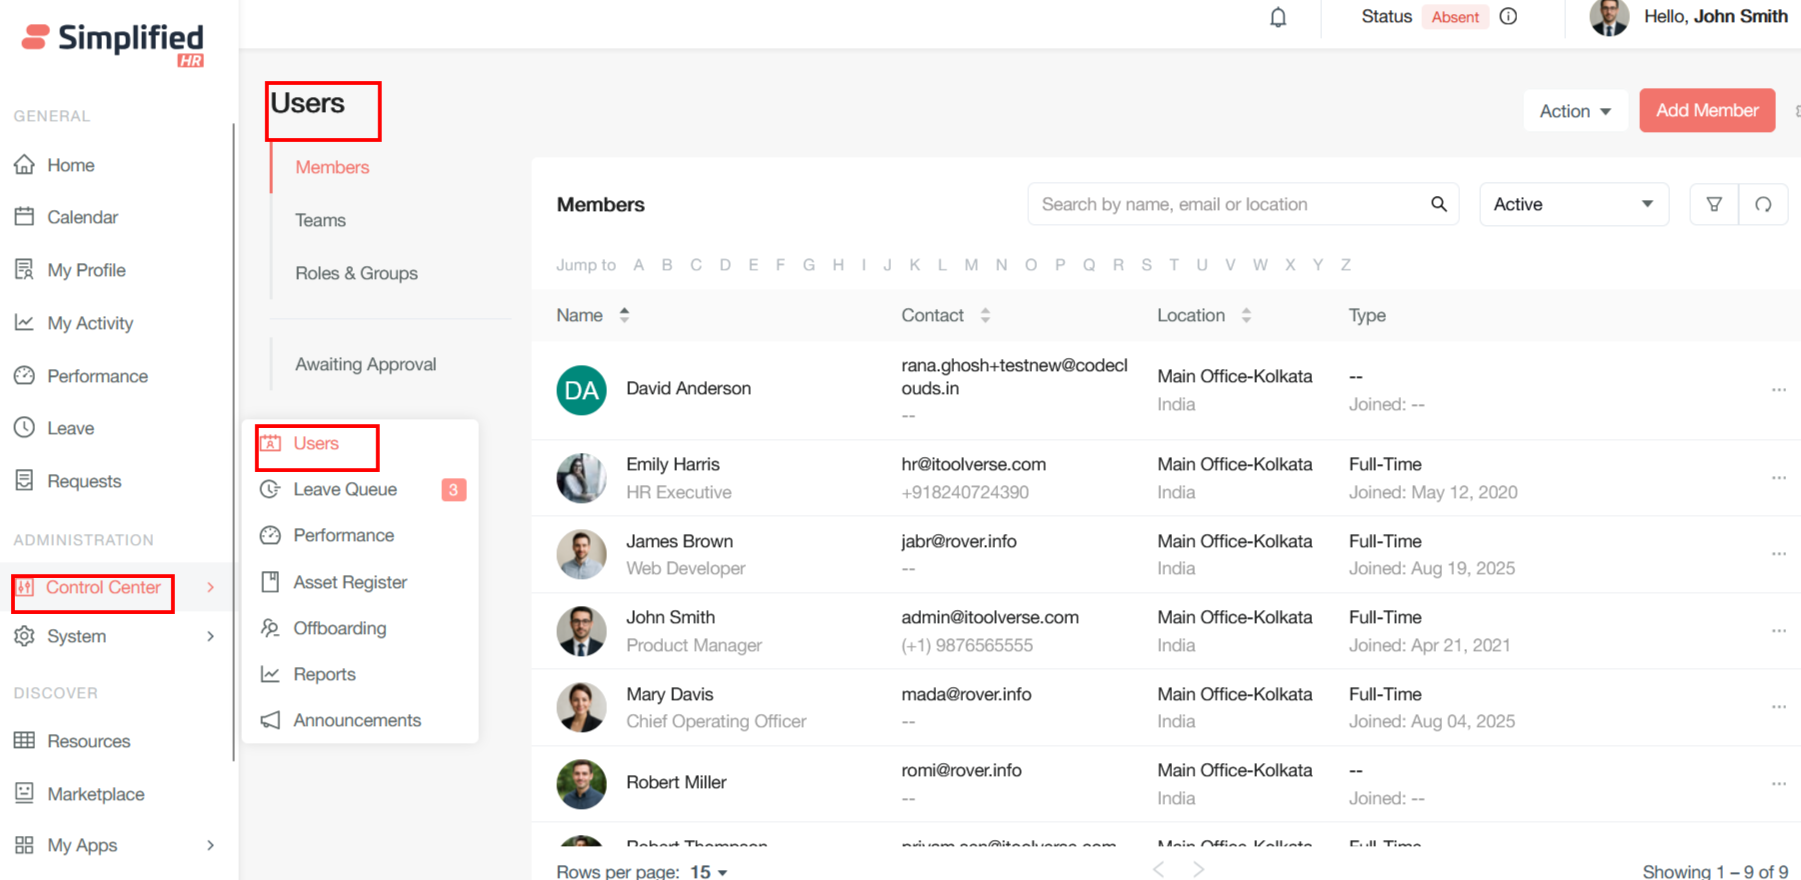
- Navigate to the Control Center Users section and view the user profile.
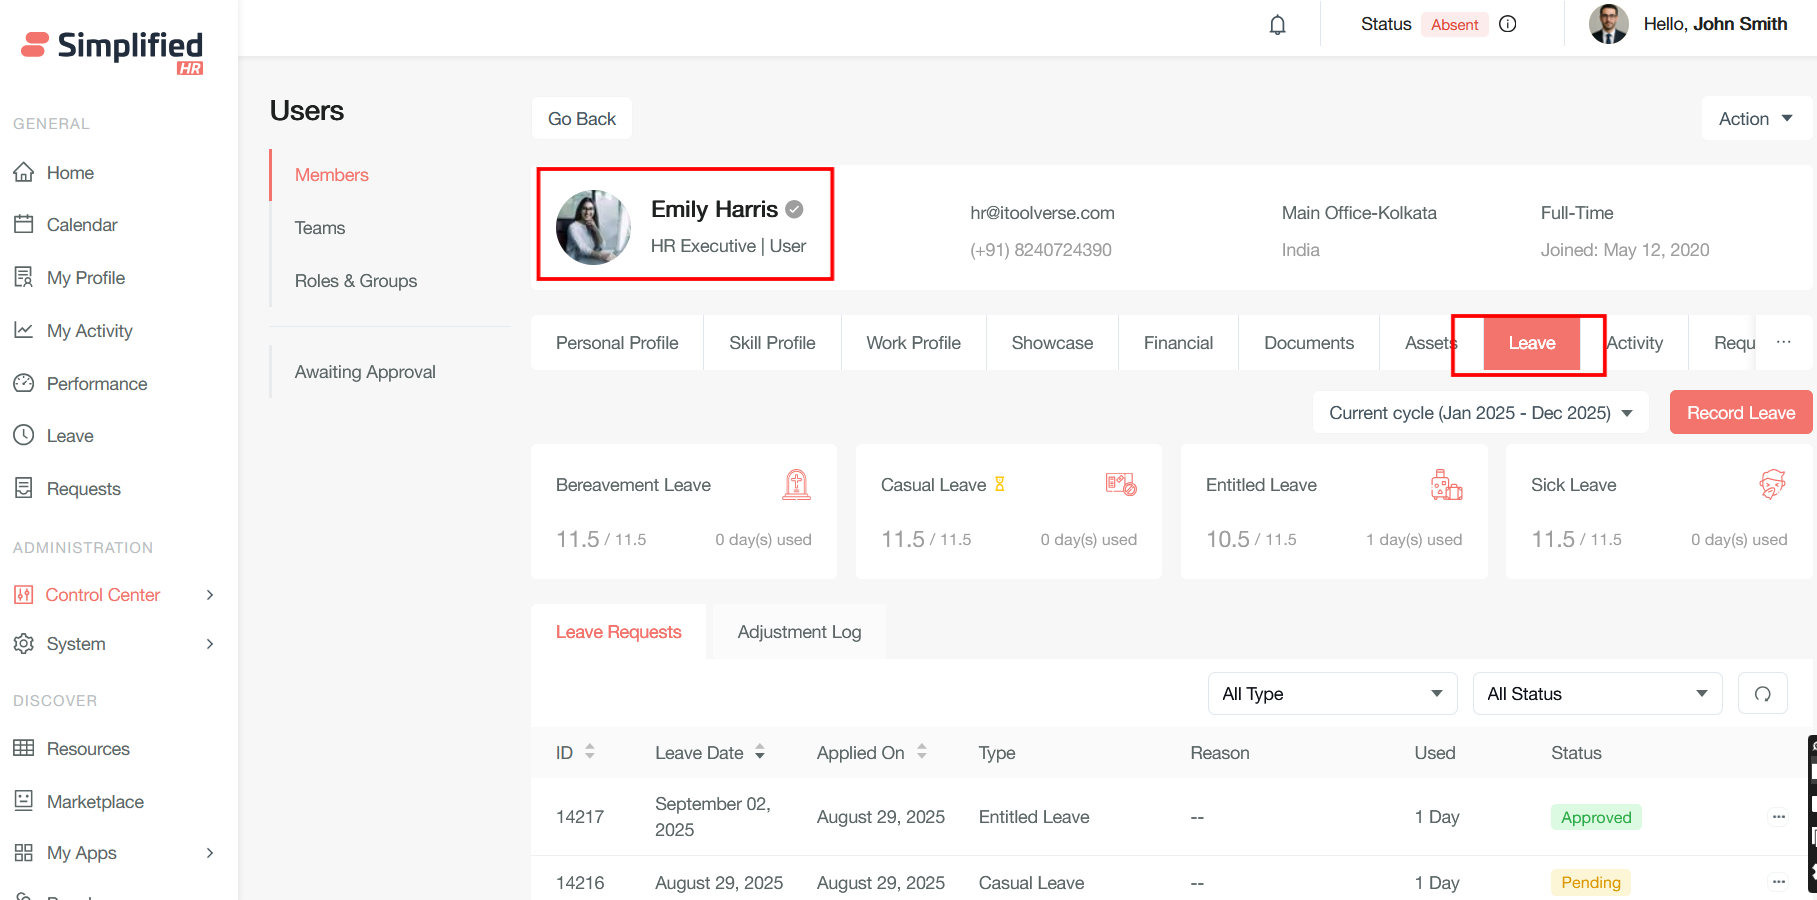
- In the user profile, go to the Leave tab, where all leave types will be displayed.
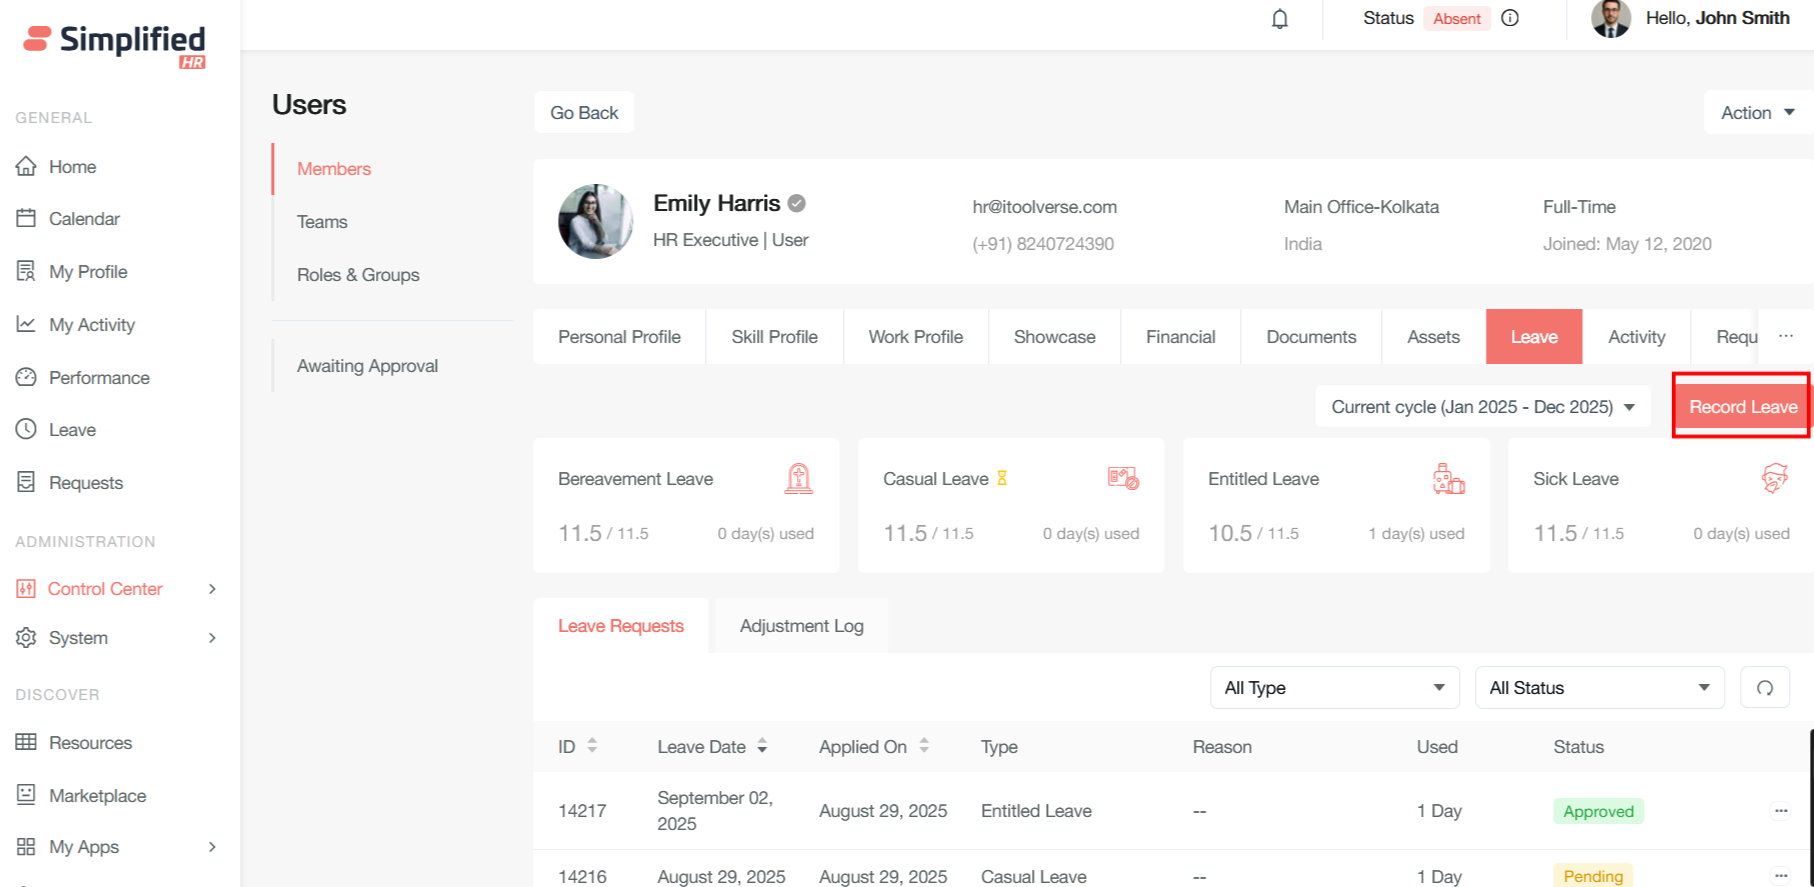
- Click the Record Leave button to apply leave on behalf of the user.
- This opens the same modal for leave apply as in the user dashboard. Follow the same process to apply the leave.
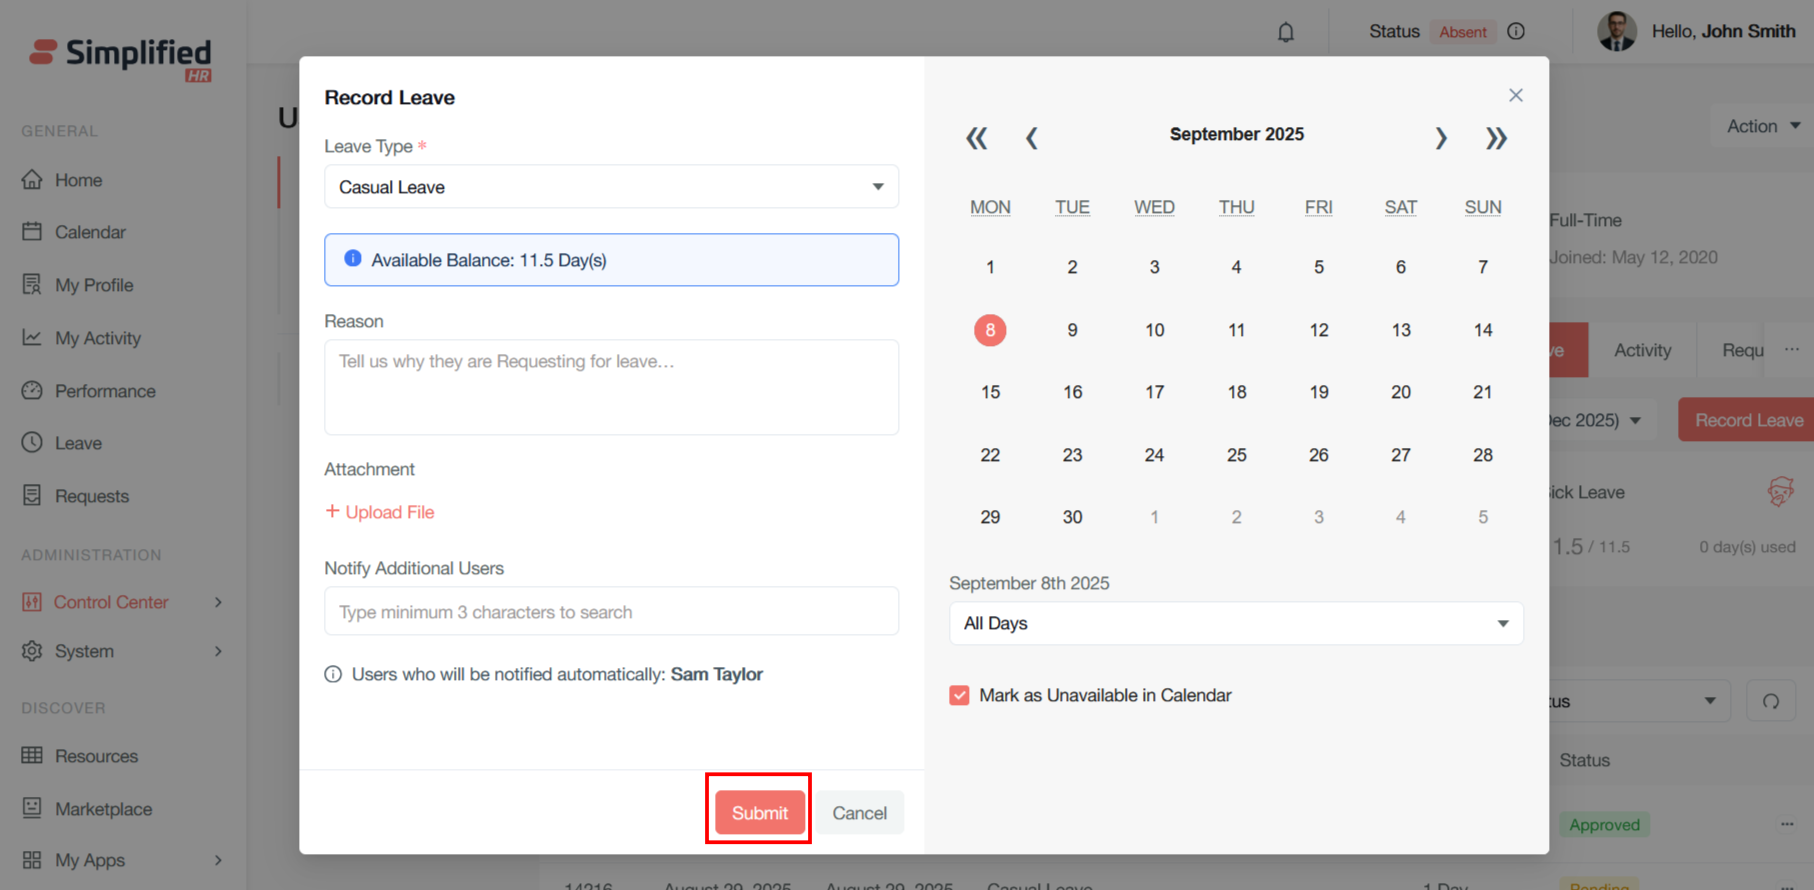
- Click Submit.
View Leave Queue
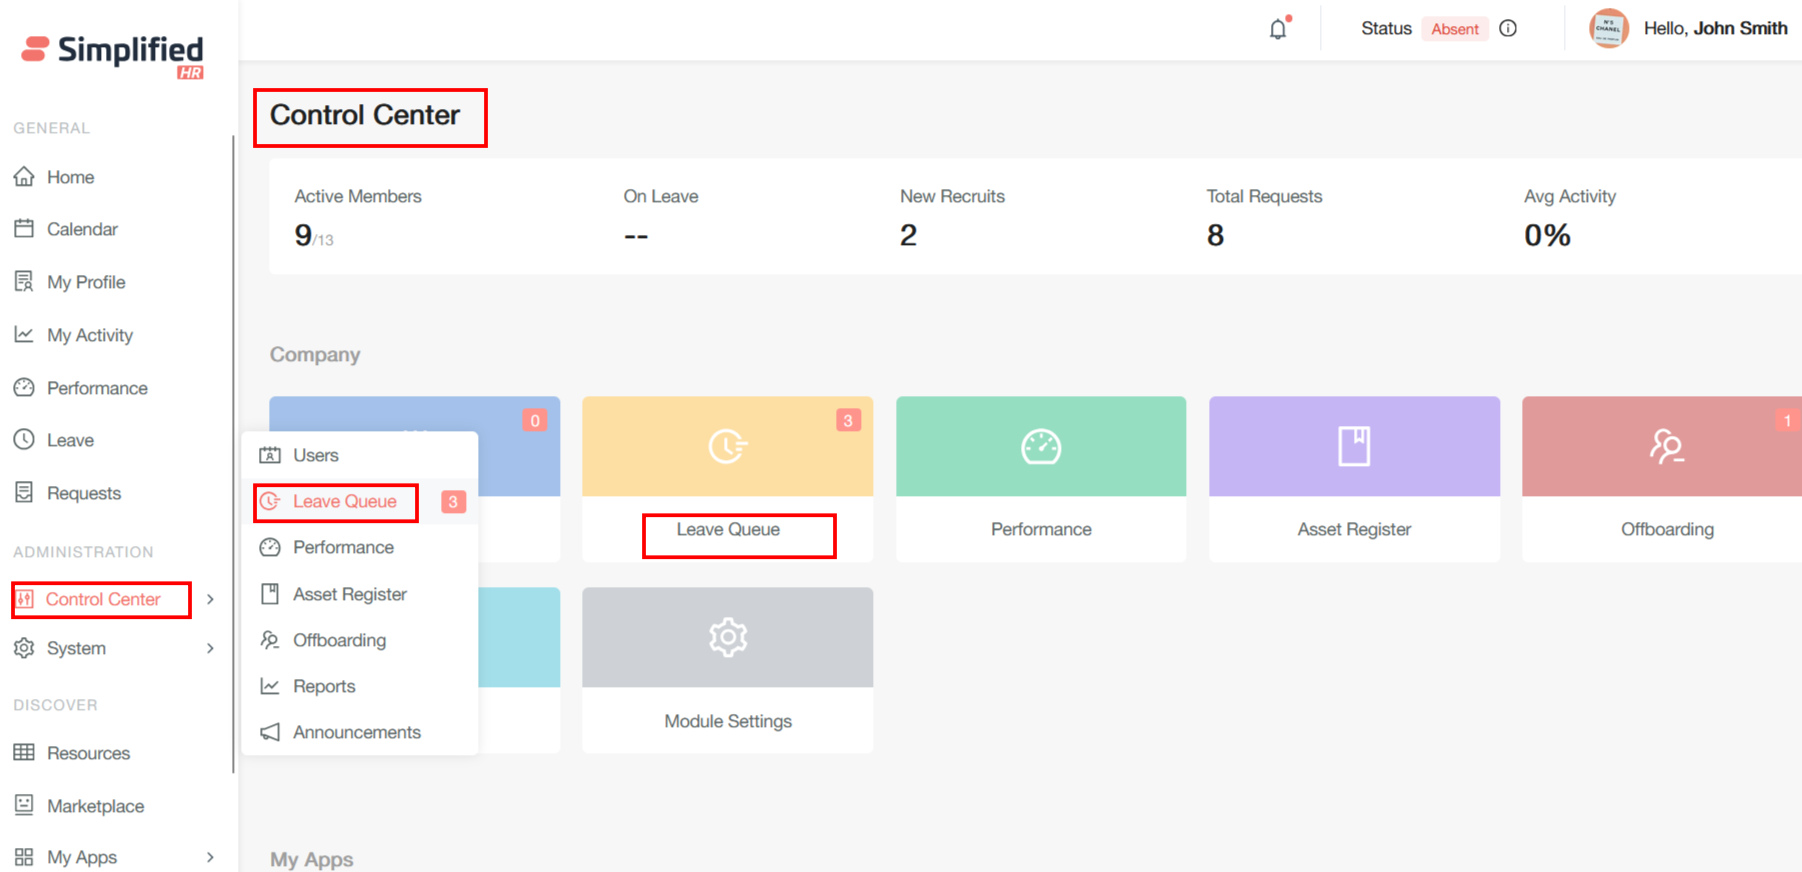
When you receive a leave request, it will show up as a notification in your control center. From the Simplified HR Home Page, navigate to Control Center > Leave Queue. Alternatively, click the Leave Queue tile from the Control Center screen.
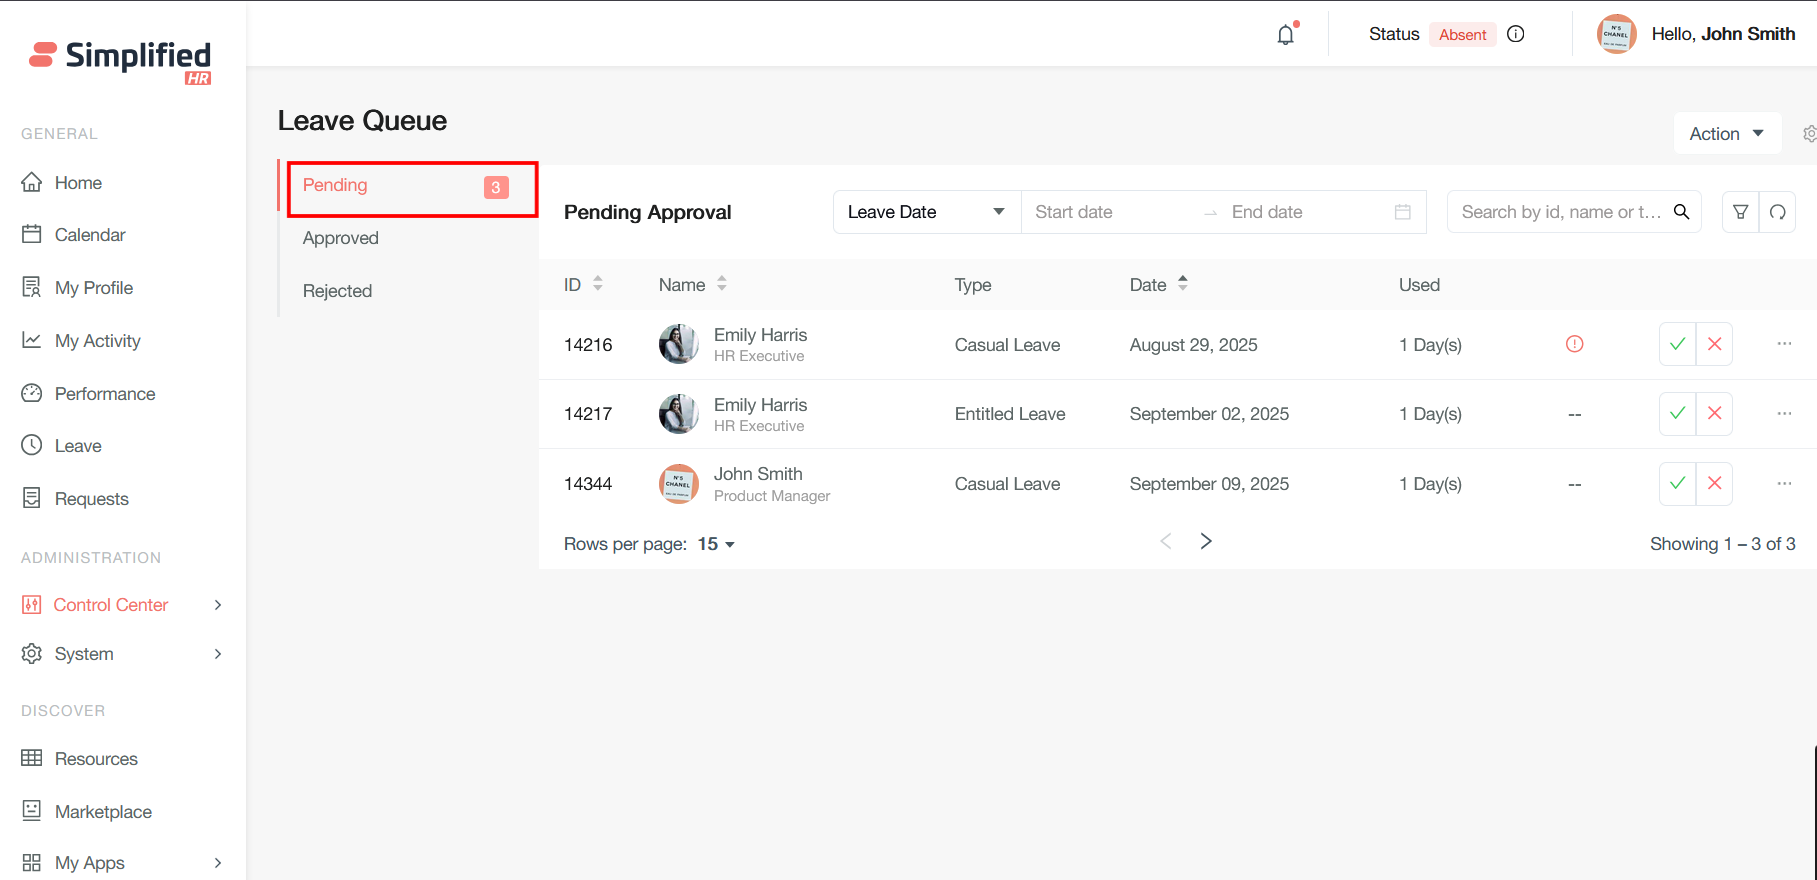
The Leave Queue is where pending leave requests are shown. Approval is only required if a category of leave in a leave policy is set to require approval. Approved and Rejected leave requests are shown in the Approved and Rejected tabs.
Approve Leave Request
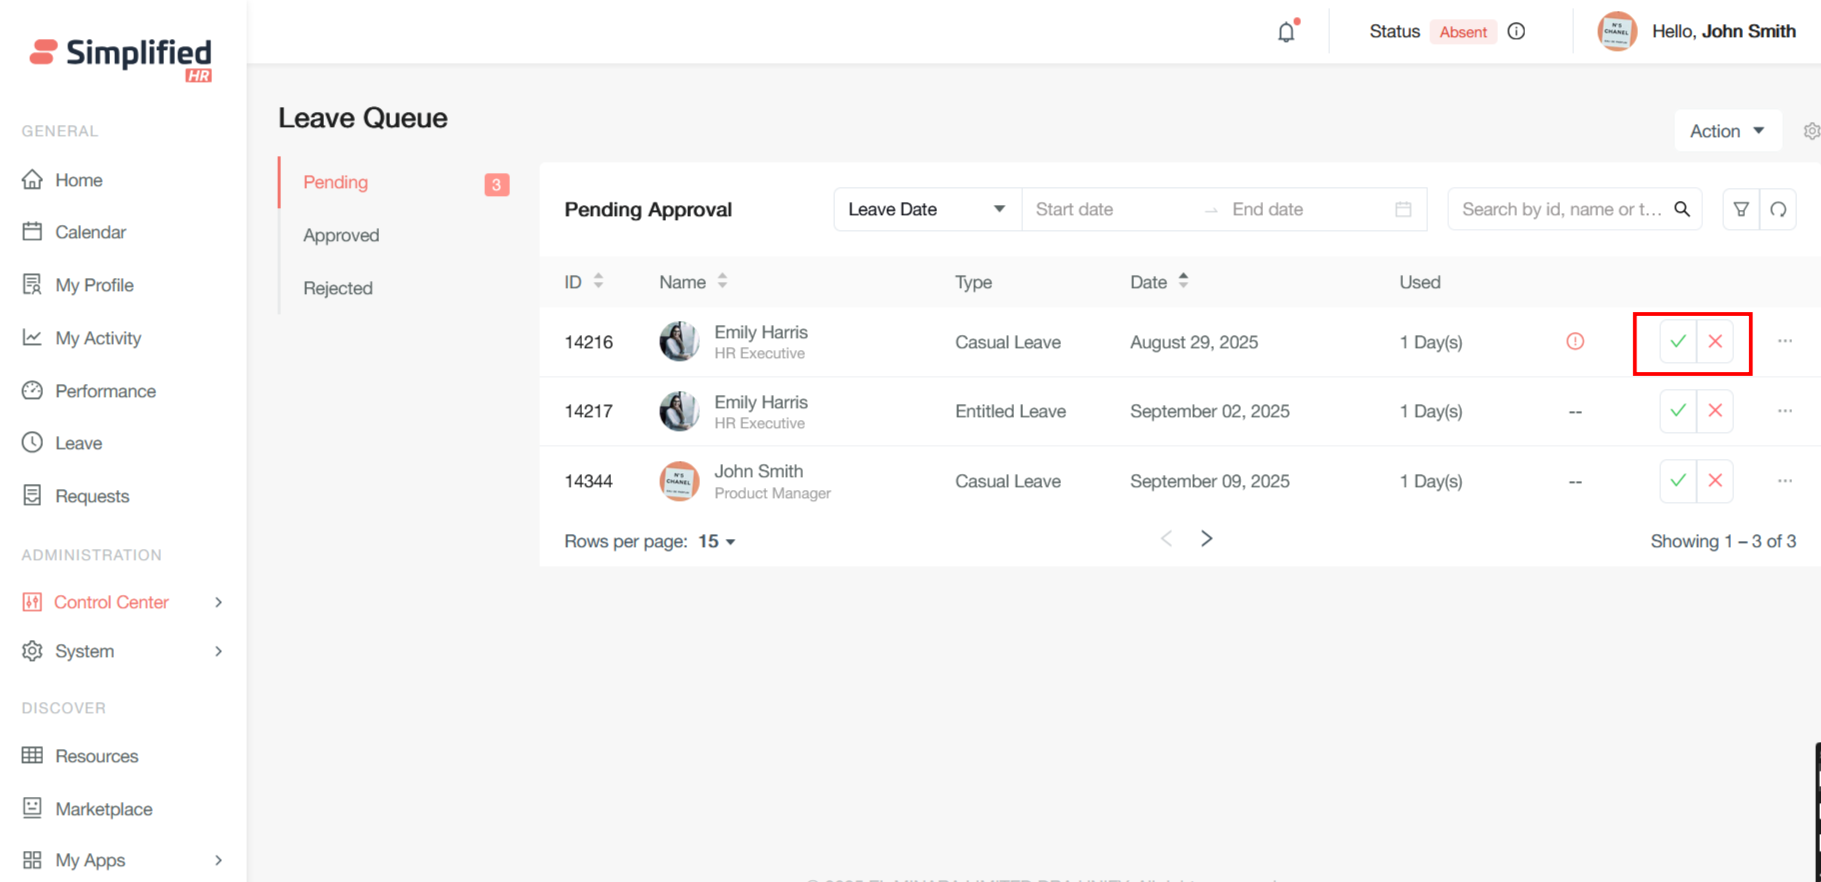
To approve a leave requisition, use the Checkmark button.
Reject Leave Request
To deny a leave requisition, use the X button.
View Leave Request Details
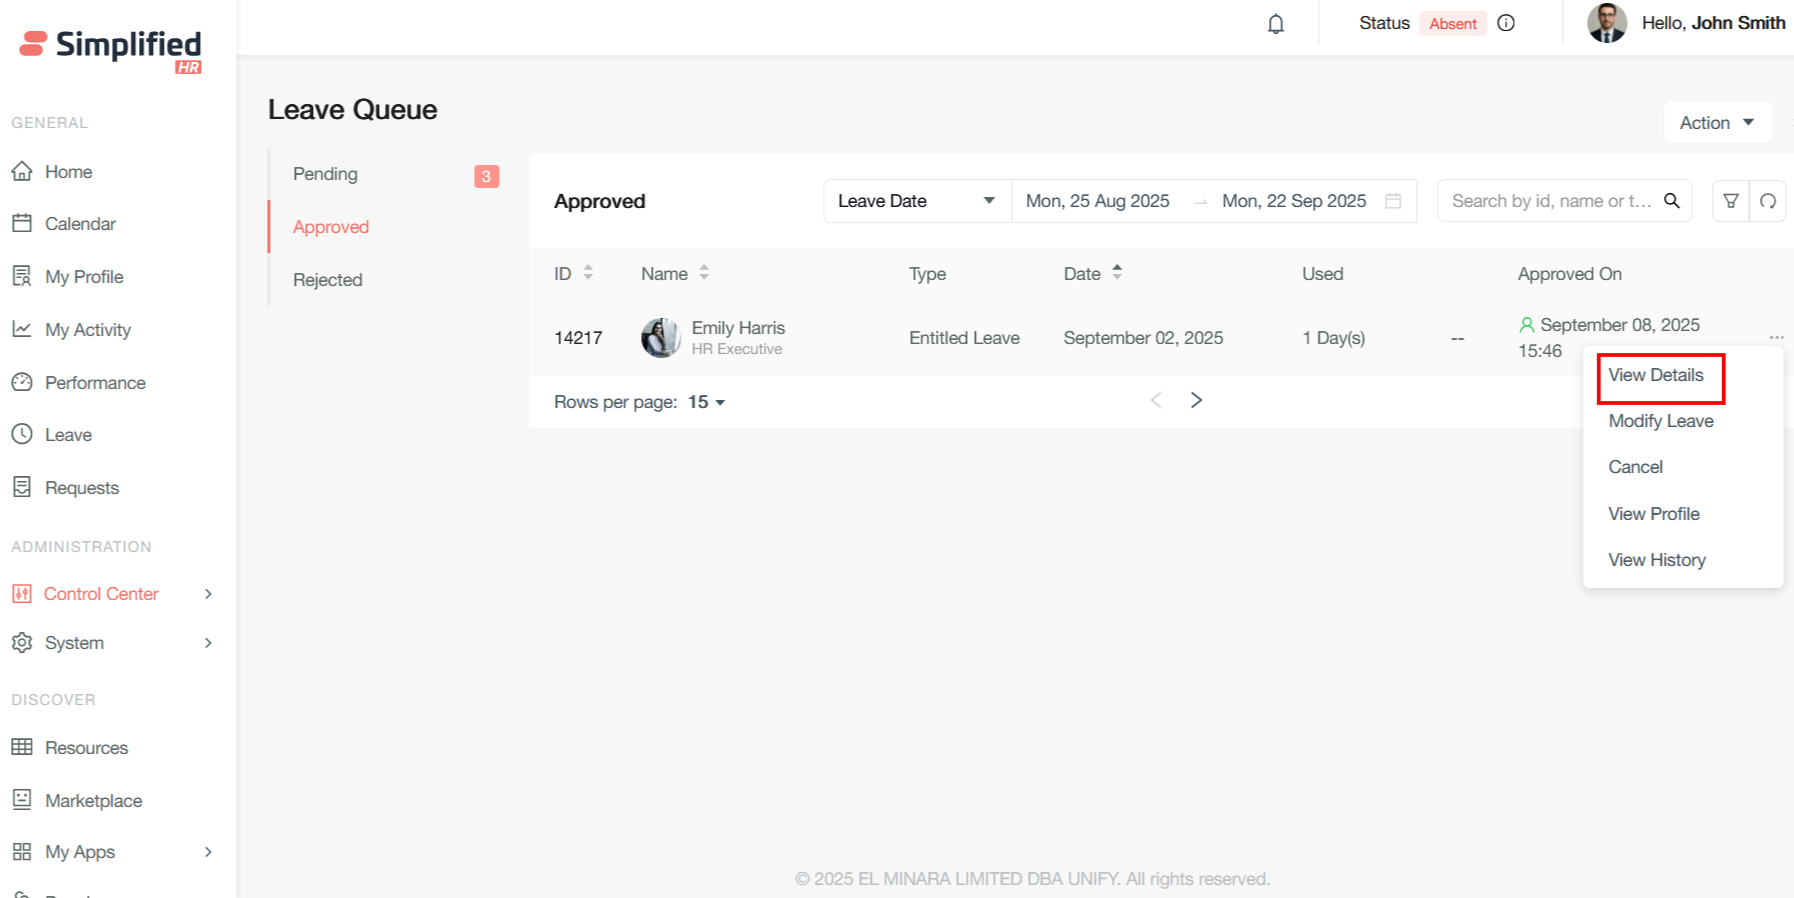
The leave details can be viewed in the view details section.
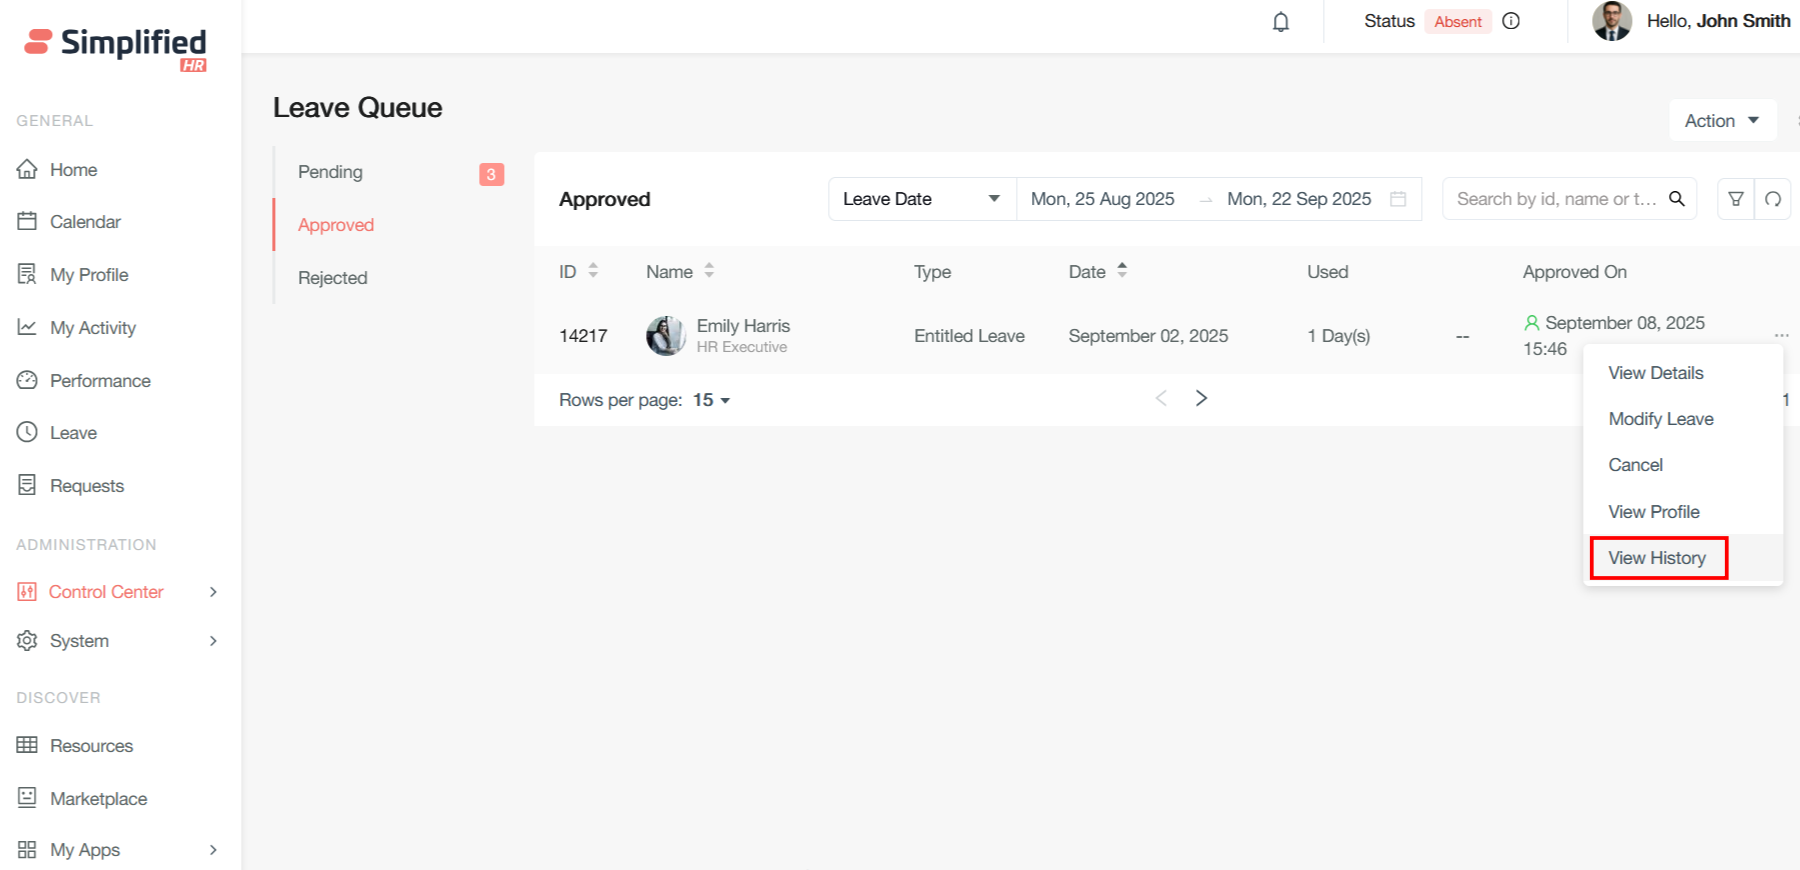
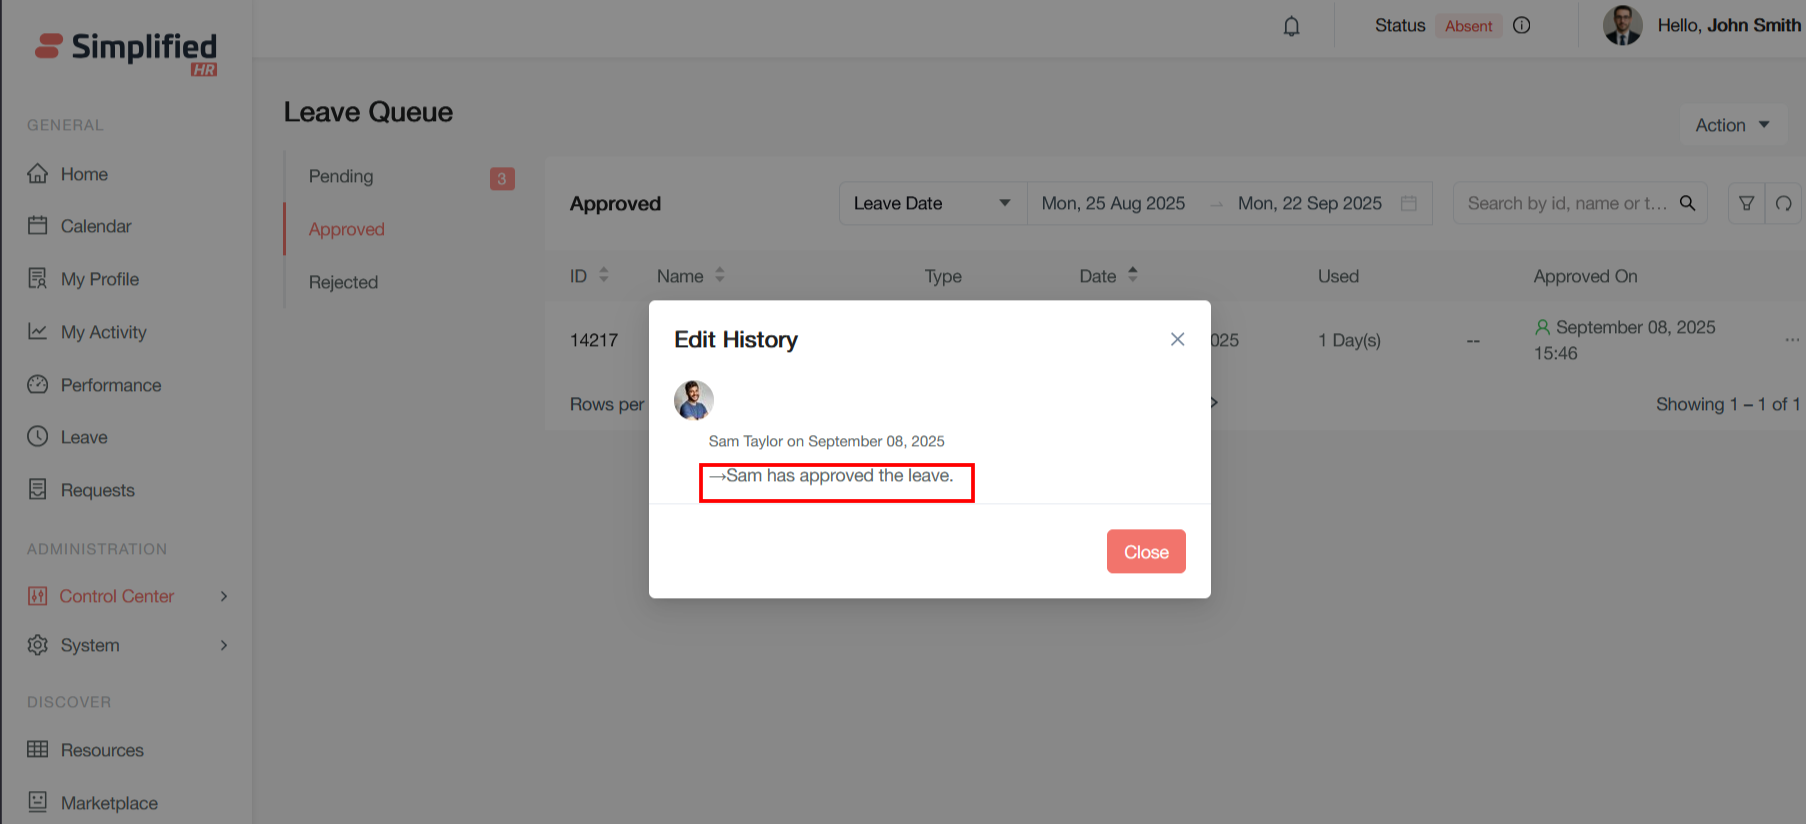
View Leave Approval History
The approver details can be found in the View History option.
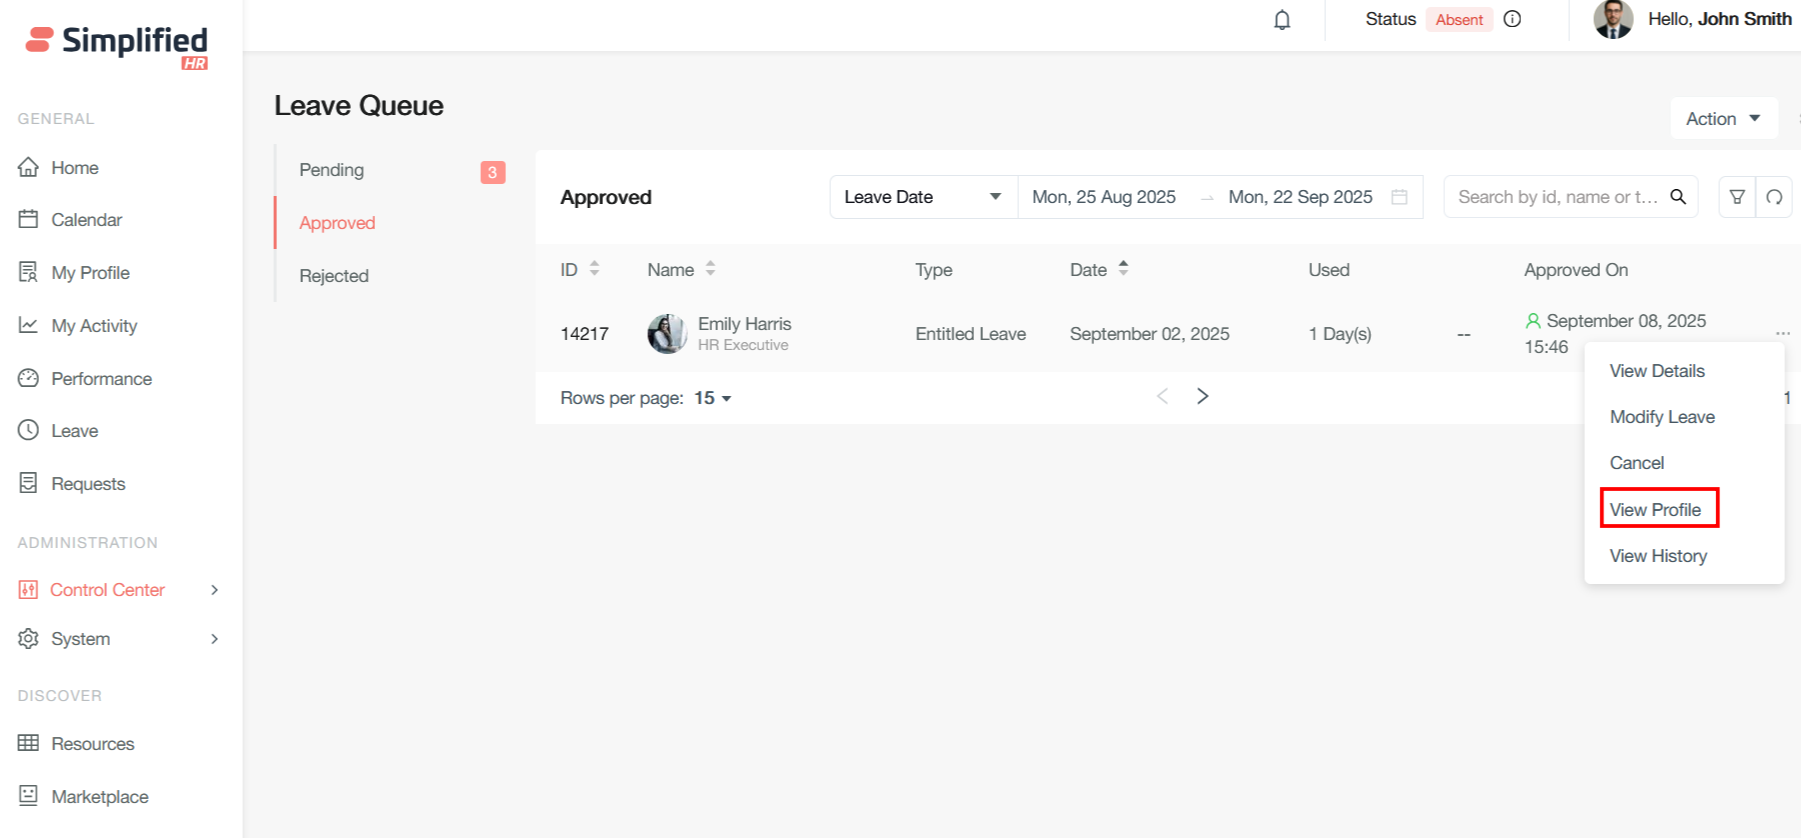
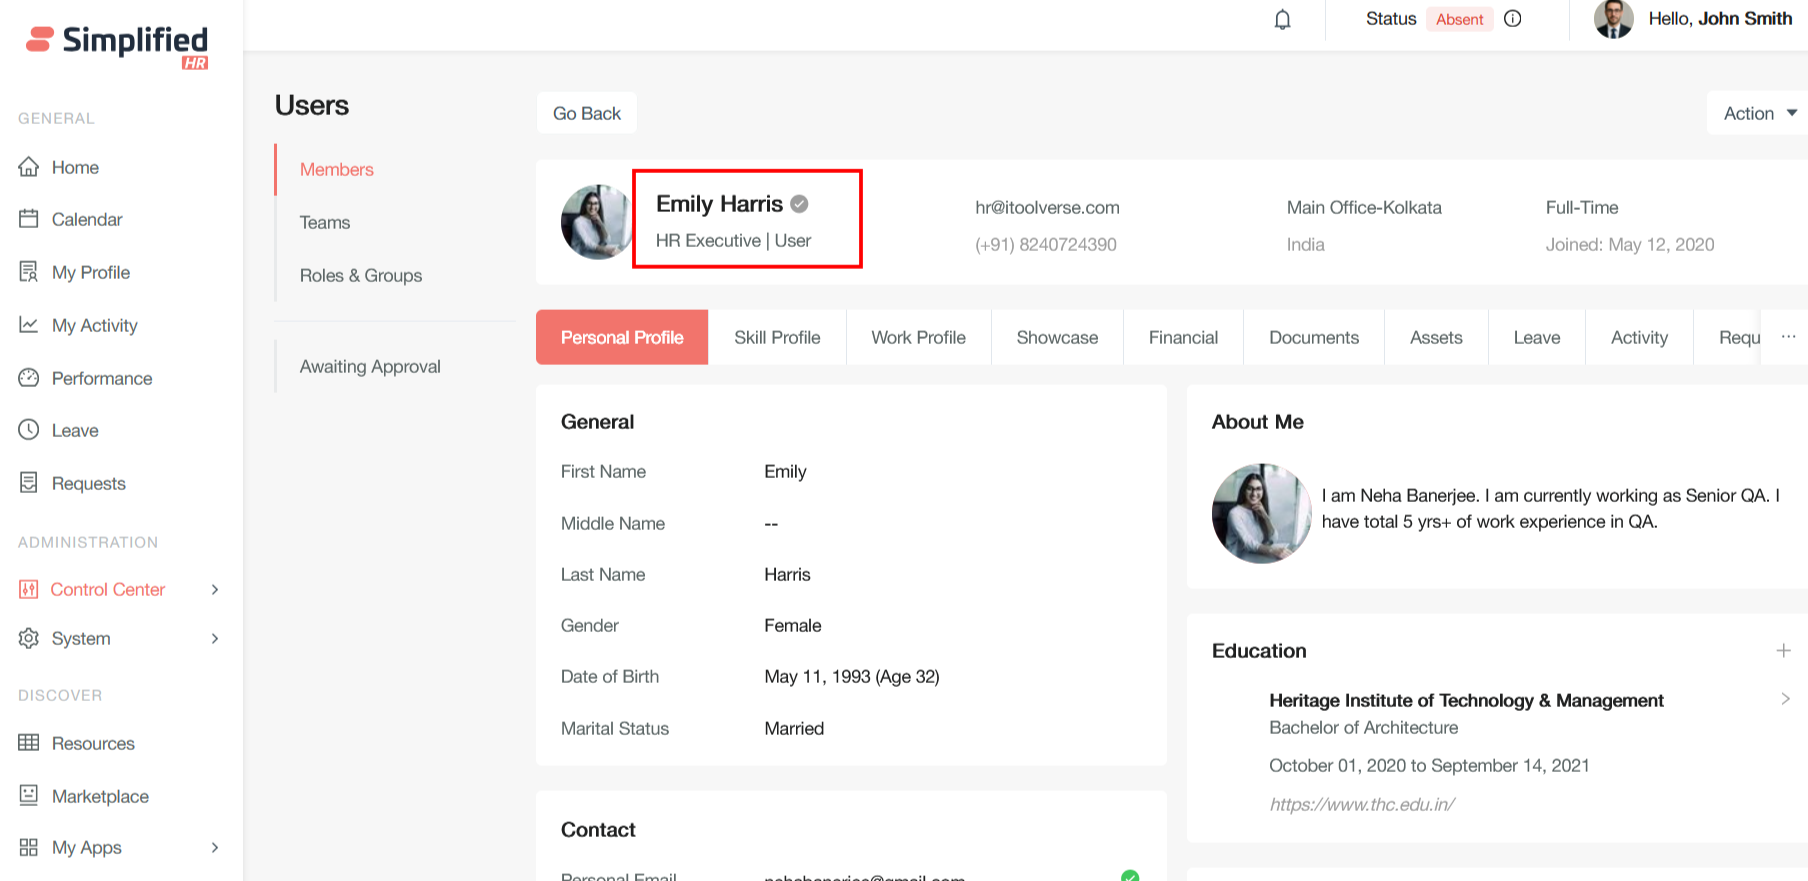
View Applicant Profile
The profile of the applicant can be viewed by clicking the View Profile button. This redirects to the applicant's profile.
Propose Leave Date Change
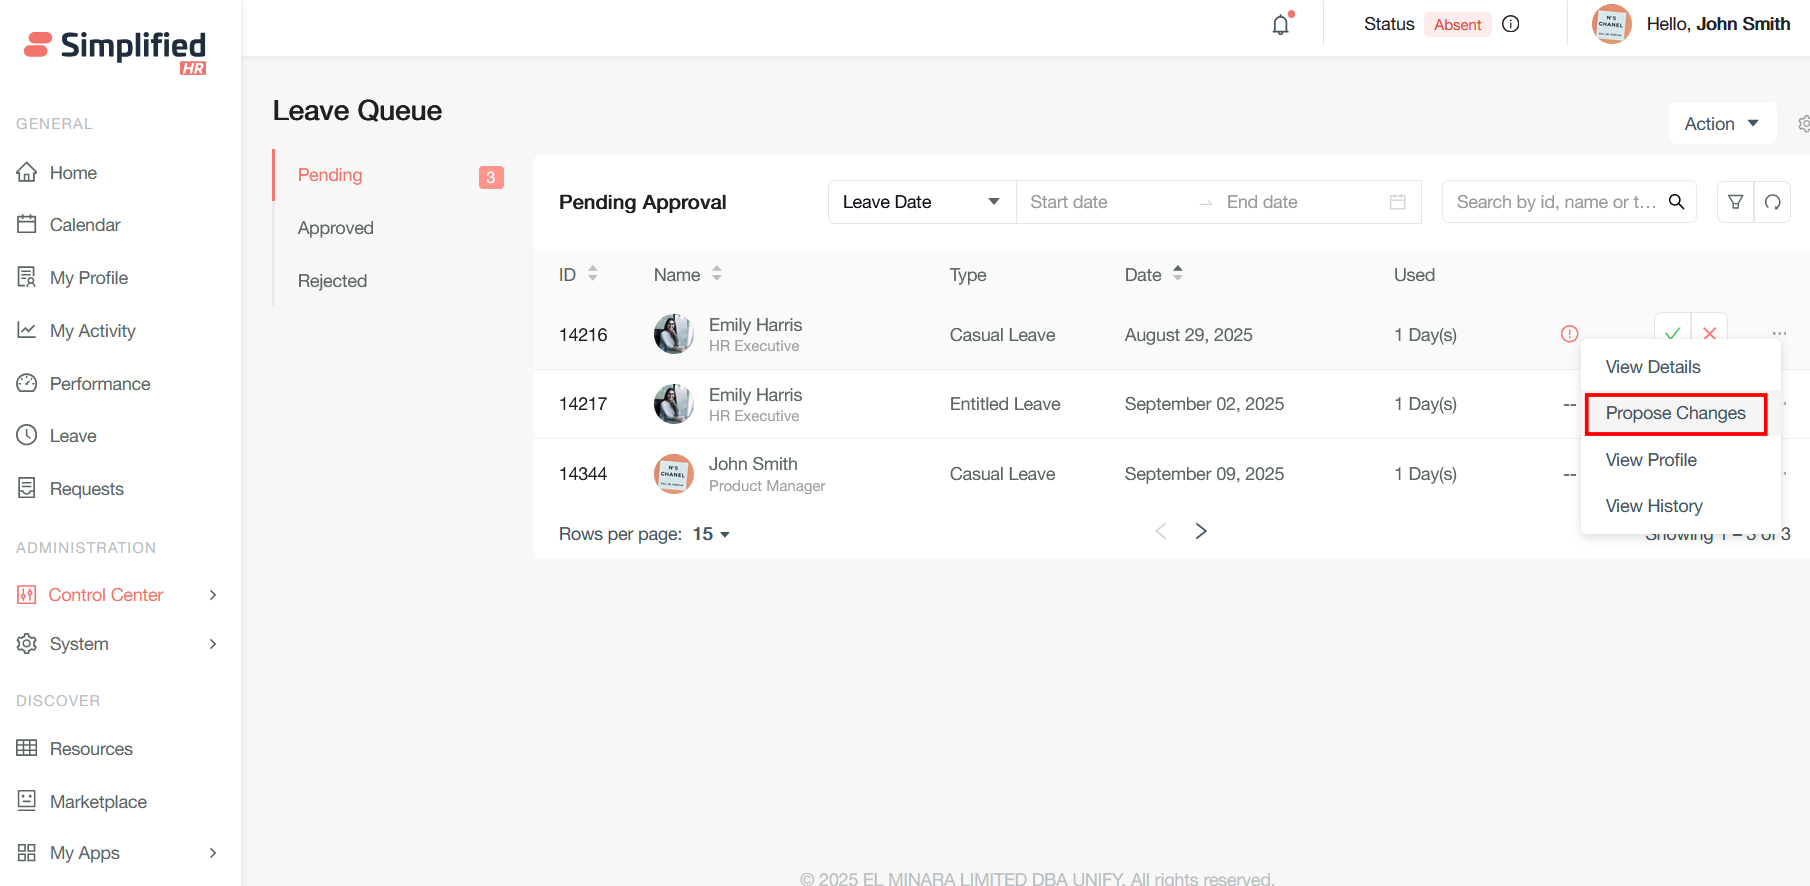
When you need to modify dates for a pending leave request (one that hasn't been approved yet), click the Propose Changes button.
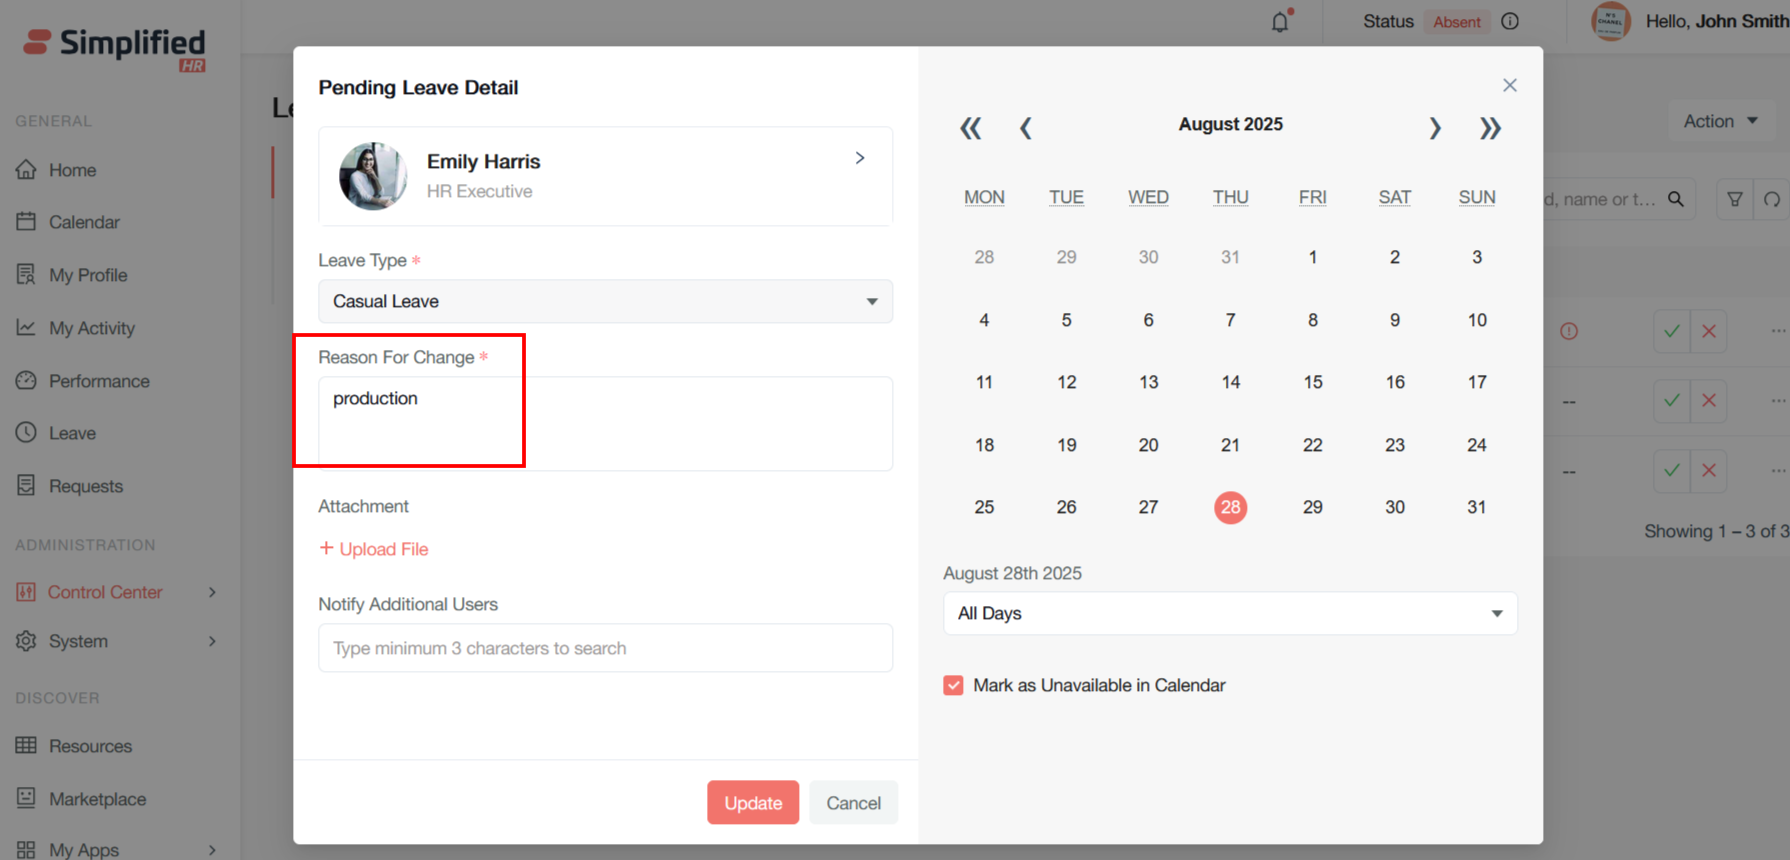
Add a reason for the date change and submit the updated request.
Modify Approved Leave
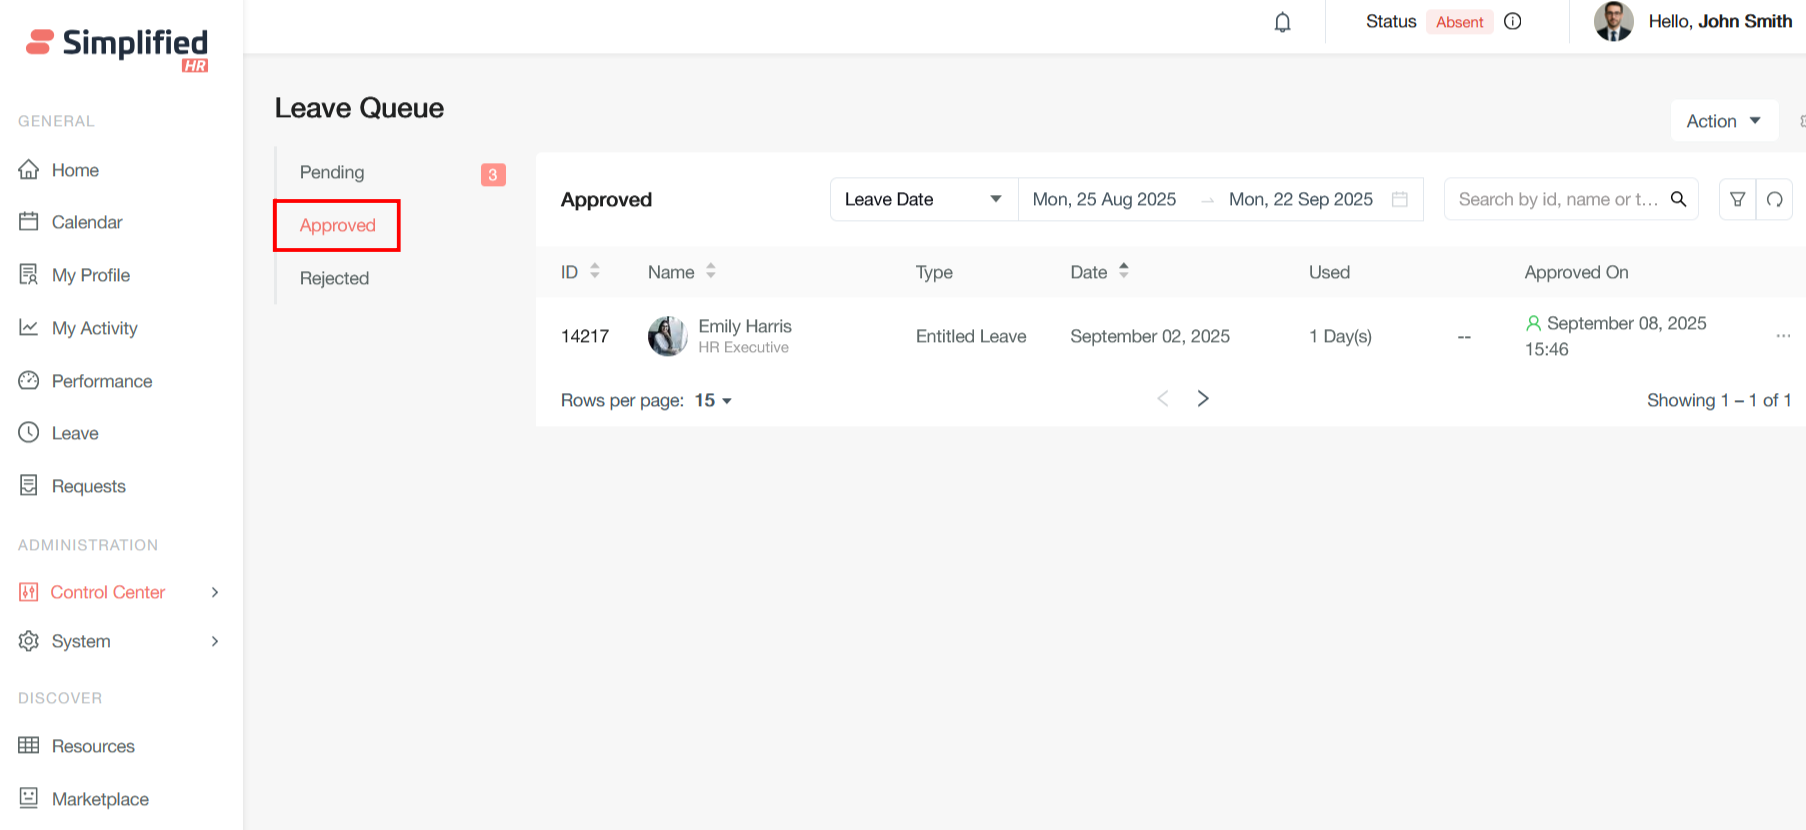
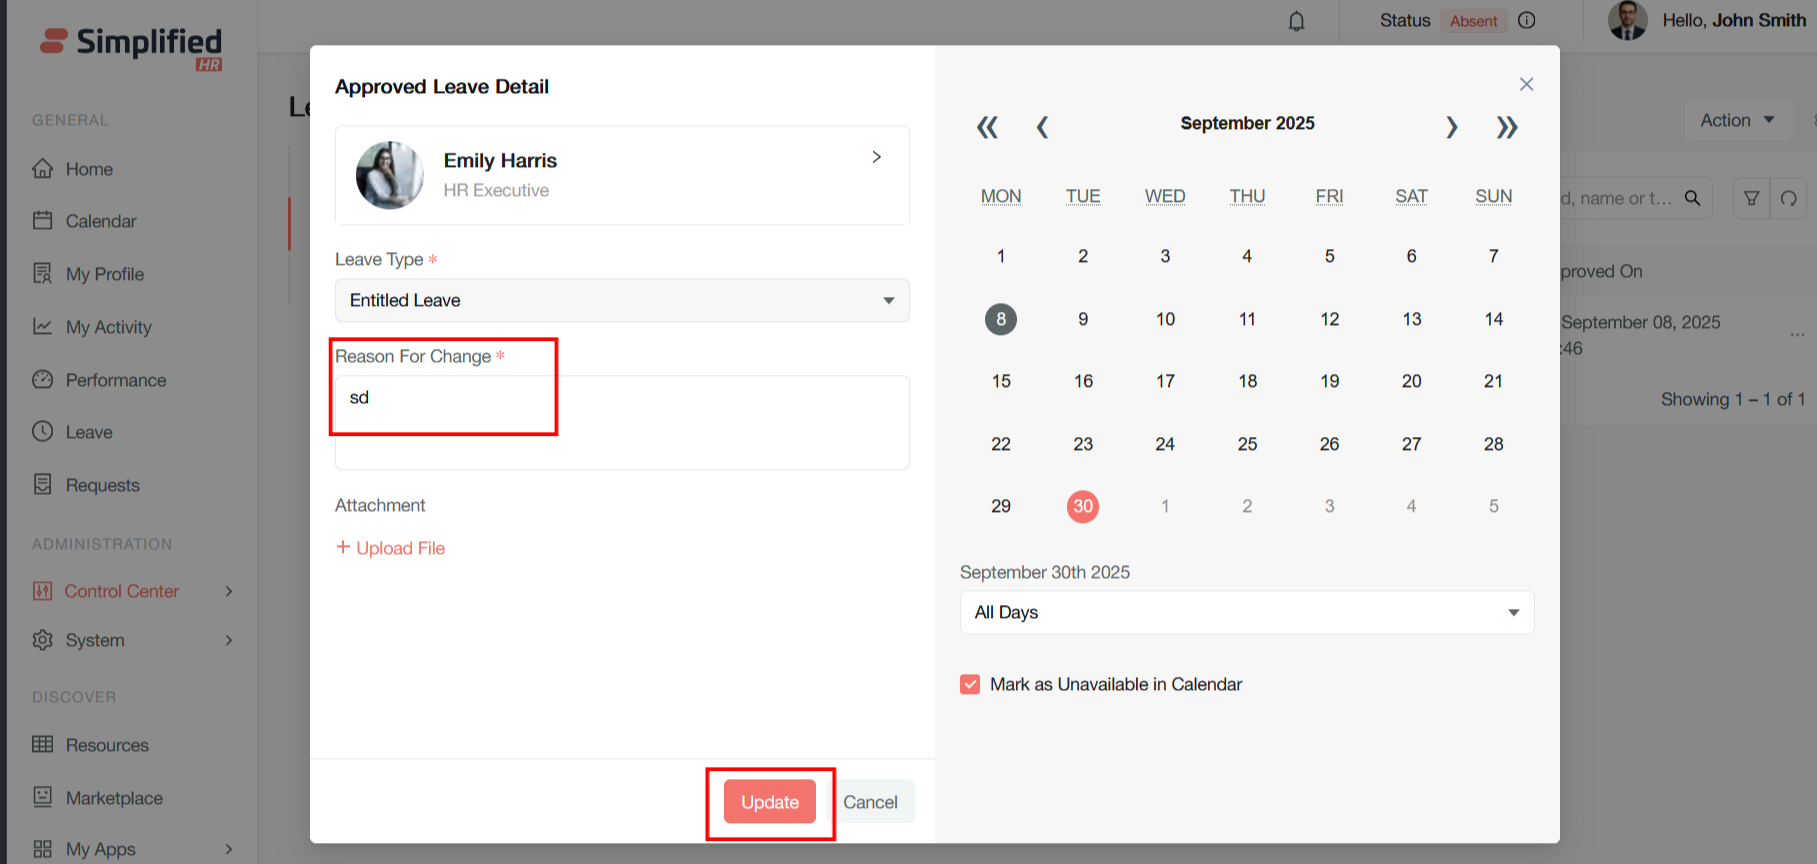
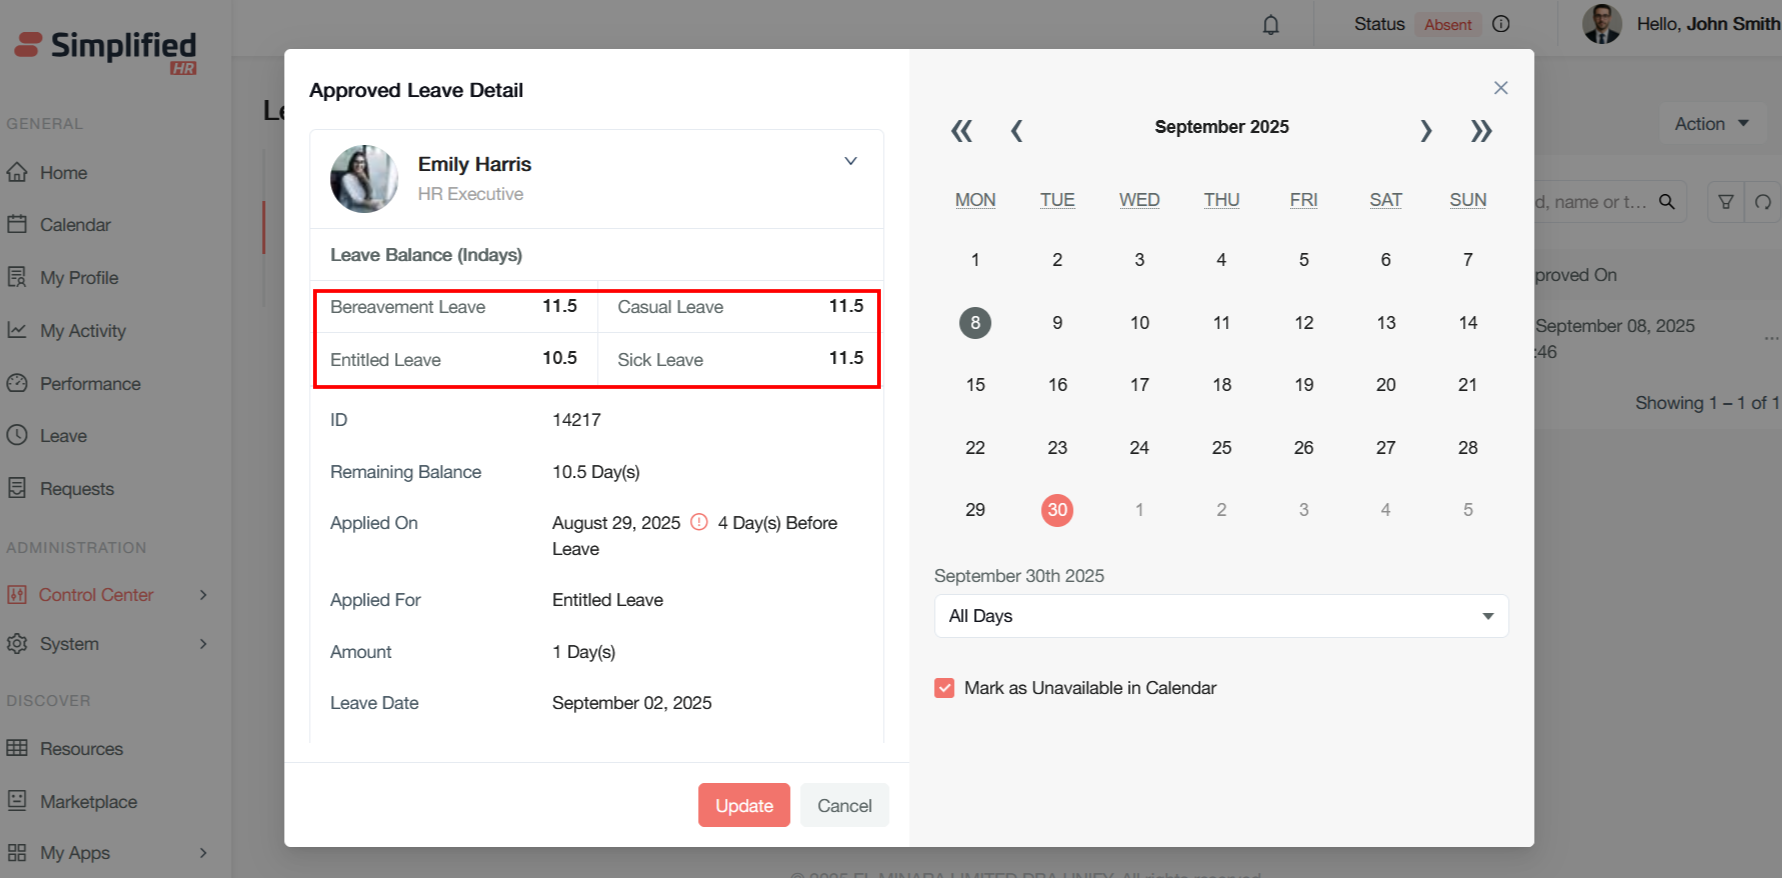
Once leave is approved, the corresponding leave will be shown in the Approved leave queue. From here, the approved leave can be modified by clicking on it.
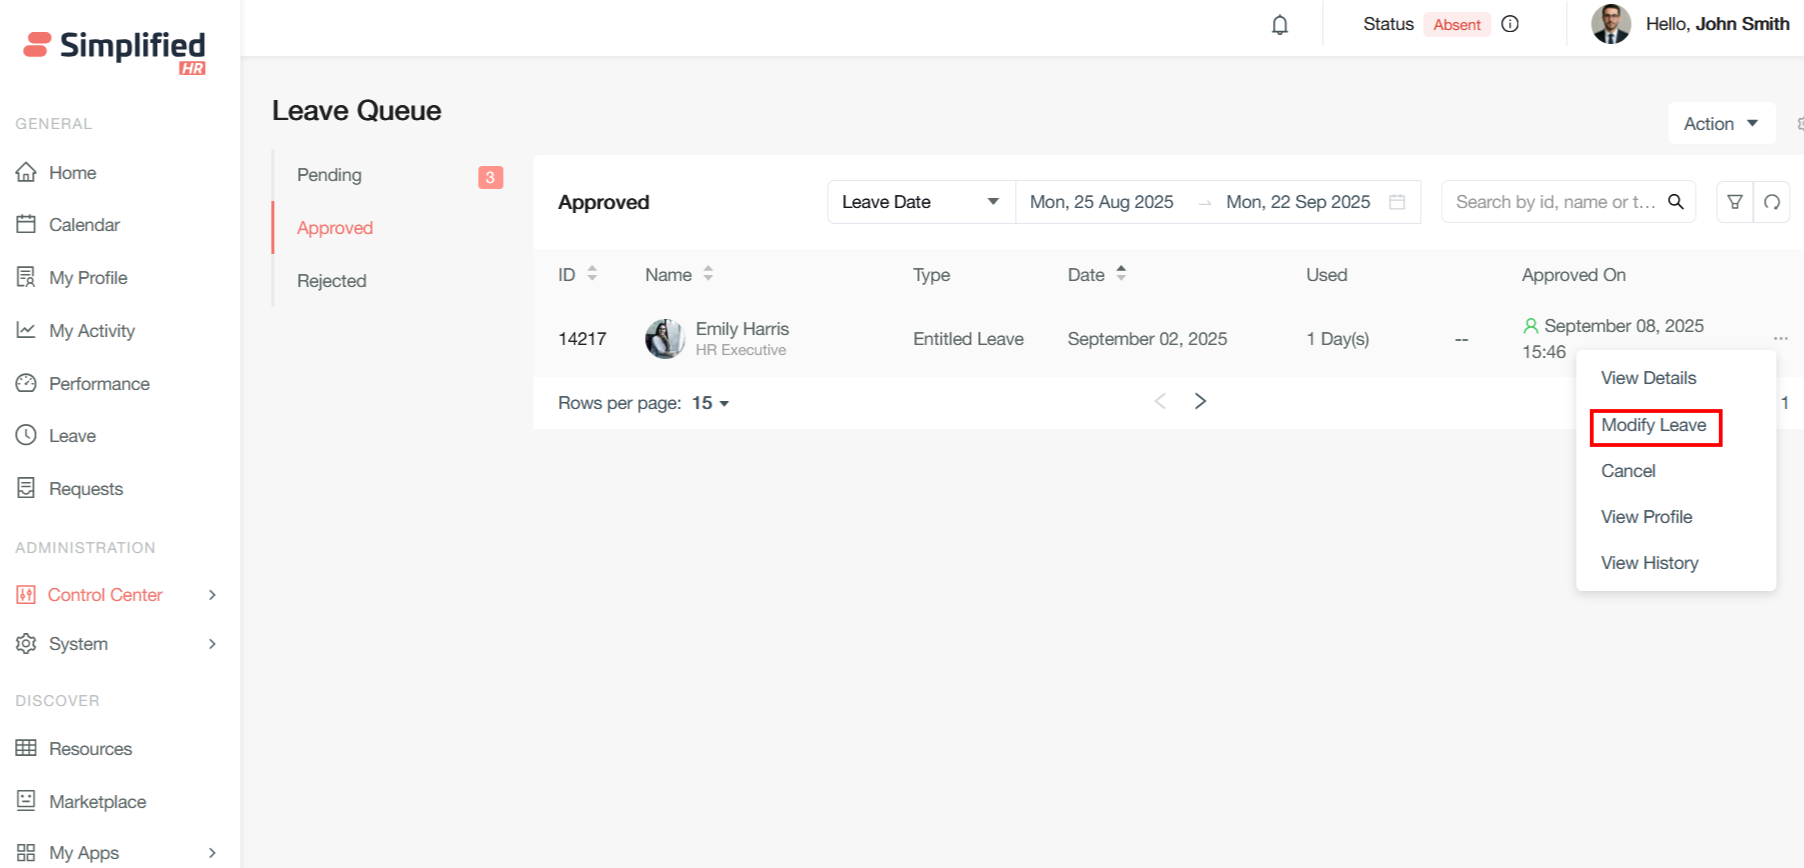
- Provide the reason for the change.
-
Update the leave date.
-
Click the Update button to modify the leave.
The leave balance is also shown here for reference.
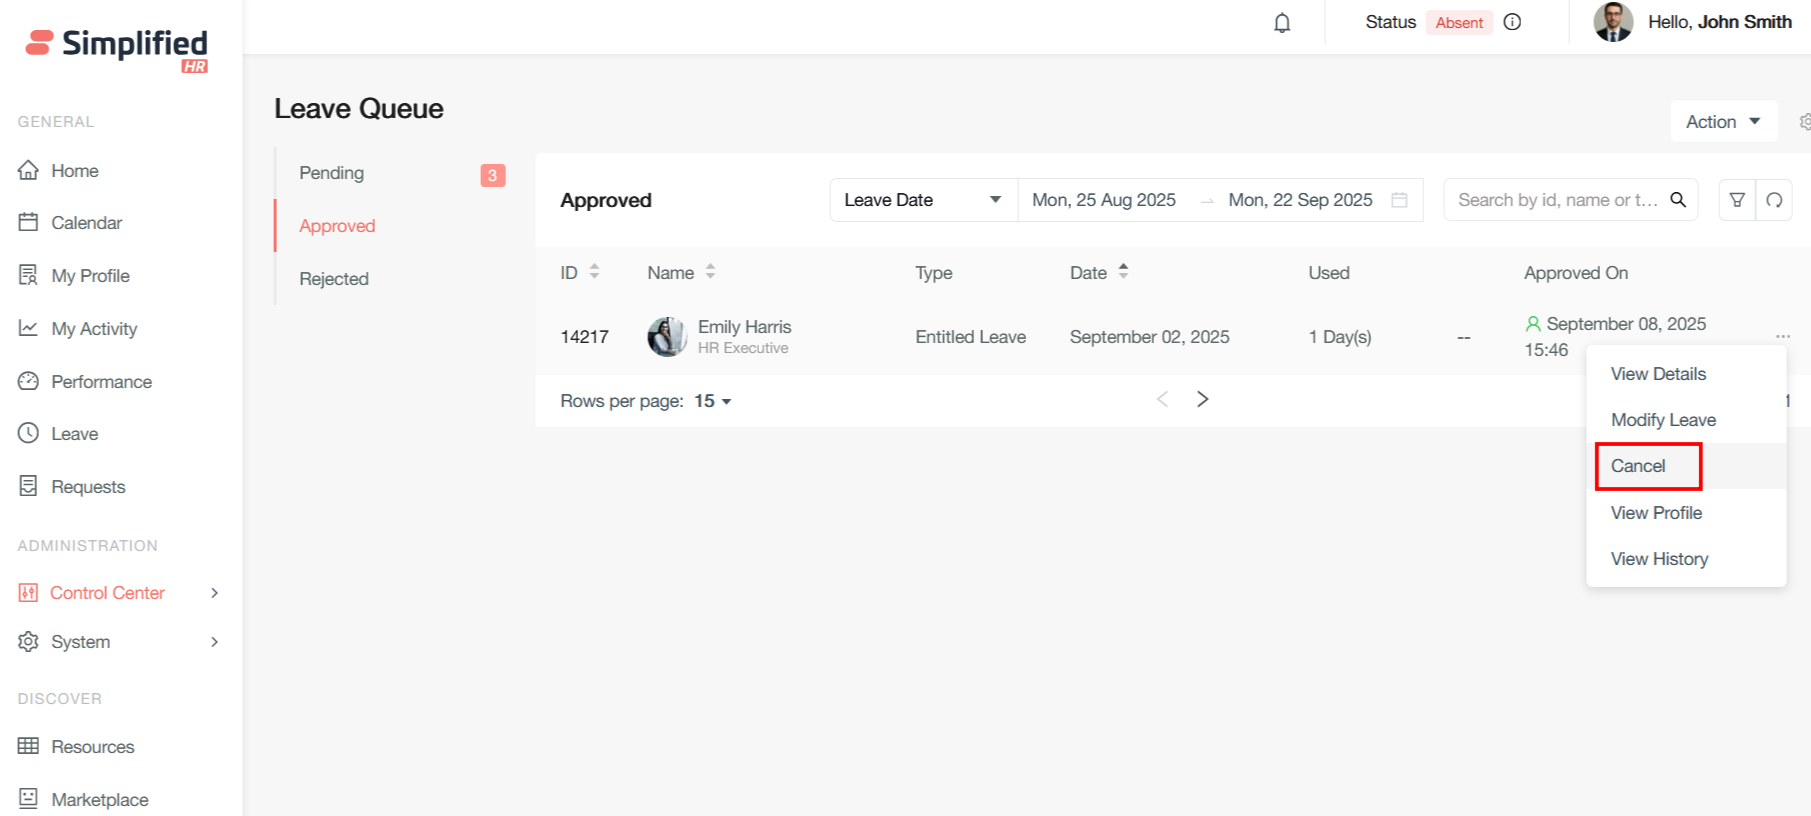
Cancel Approved Leave
The approved leave can be cancelled by clicking the Cancel button.
Search Leave Requests
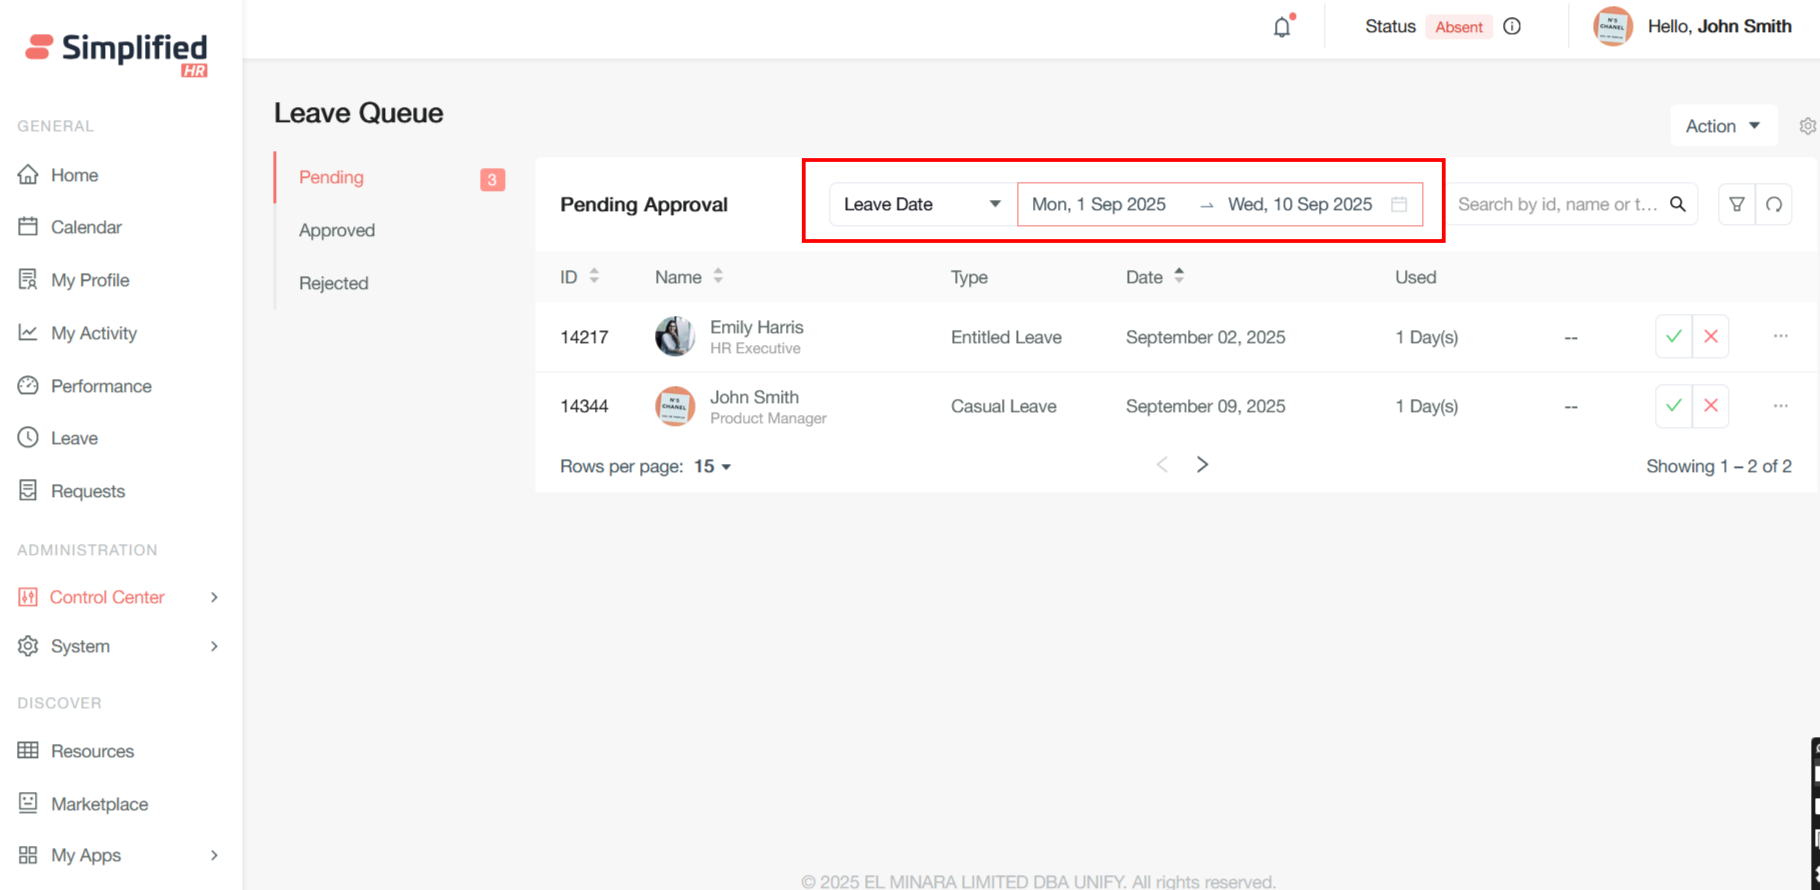
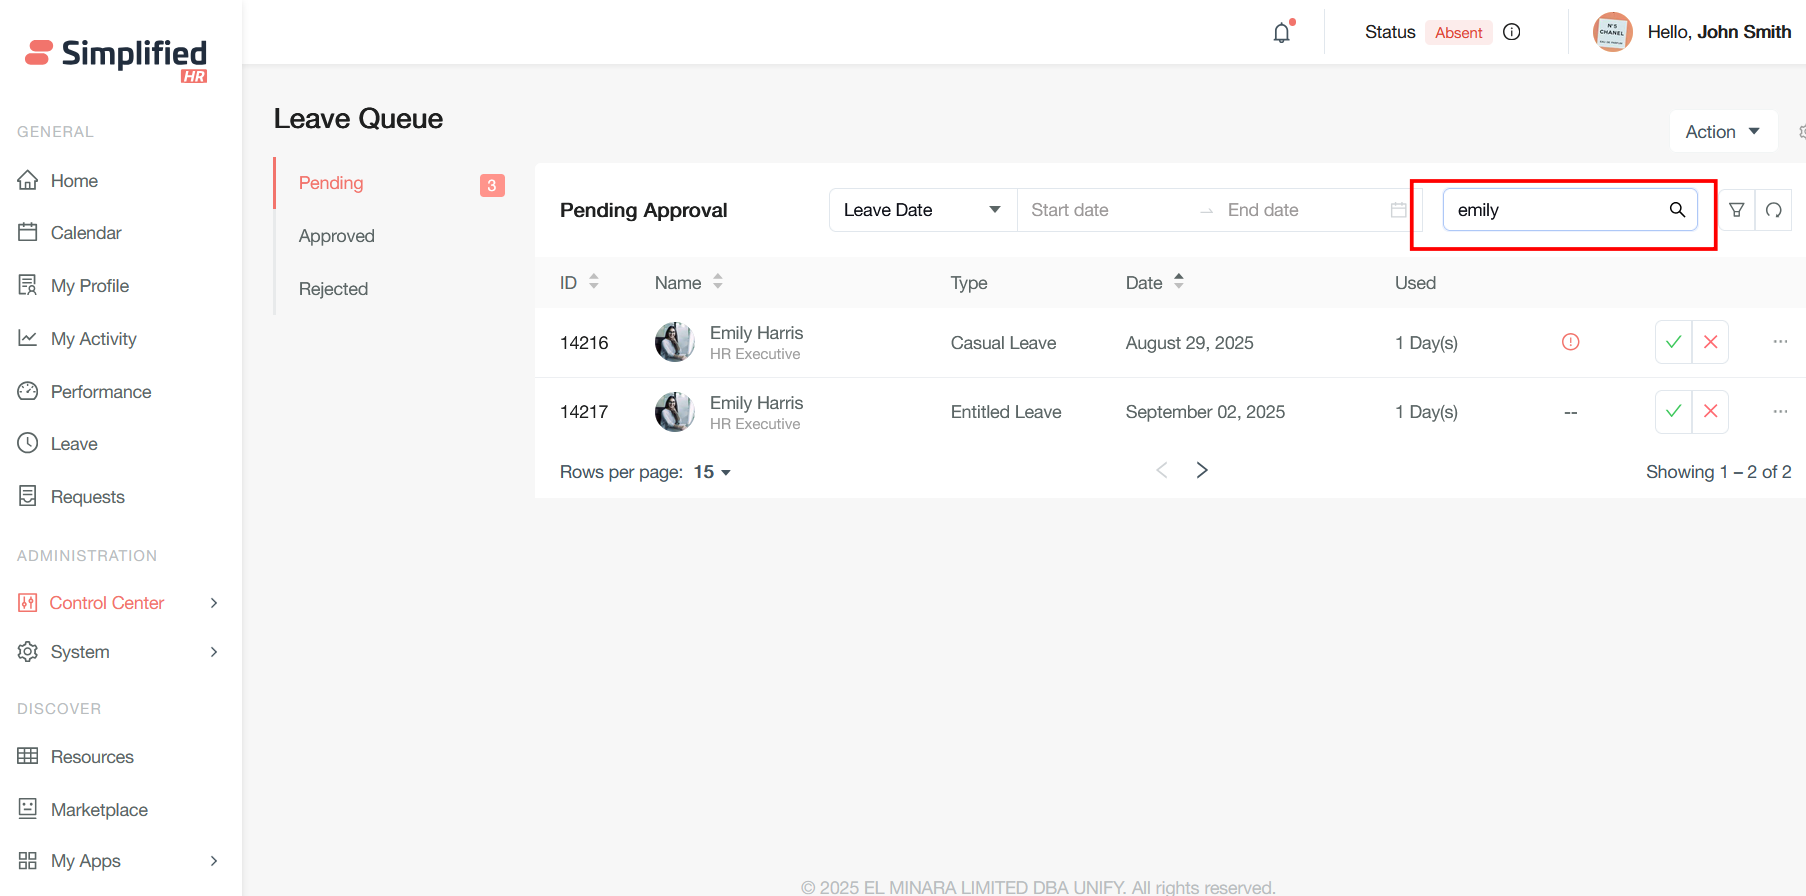
Leave date filters in pending leave queues help managers and HR administrators efficiently sort and manage leave requests awaiting approval based on specific date criteria.
Users can directly search by name, ID, or leave type.
Filter Leave Requests
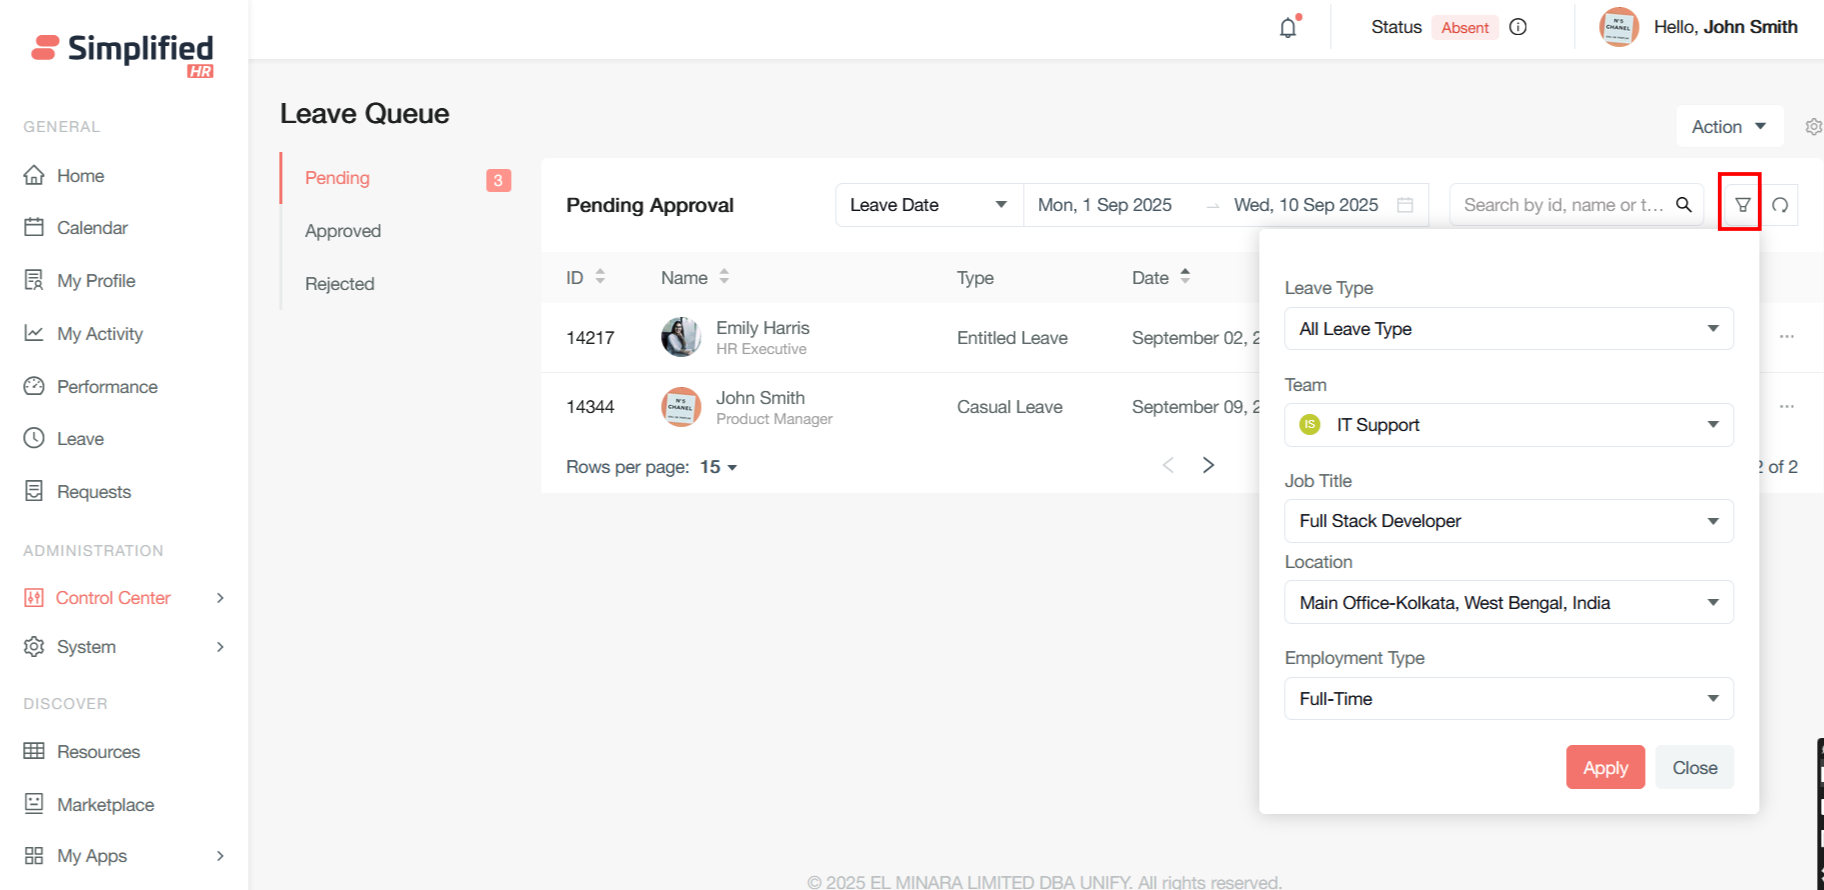
Beyond basic date filtering, comprehensive filtering capabilities help administrators and managers efficiently organize and process leave requests based on multiple organizational criteria:
-
Leave type
-
Team
-
Job title
-
Location
-
Employment type