Admin → Work Journal
Overview
The Work Journal module helps you document daily work activities, maintain productivity records, and track progress over time. This comprehensive guide covers everything from initial setup to advanced reporting features.
Important: Work Journal is a premium feature that requires a Pro subscription.
Prerequisites
Before using the Work Journal module, ensure you have:
-
A Pro subscription to Simplified HR.
-
Administrative access for initial setup and configuration.
-
Proper user permissions assigned through Roles and Permissions.
Install Work Journal
-
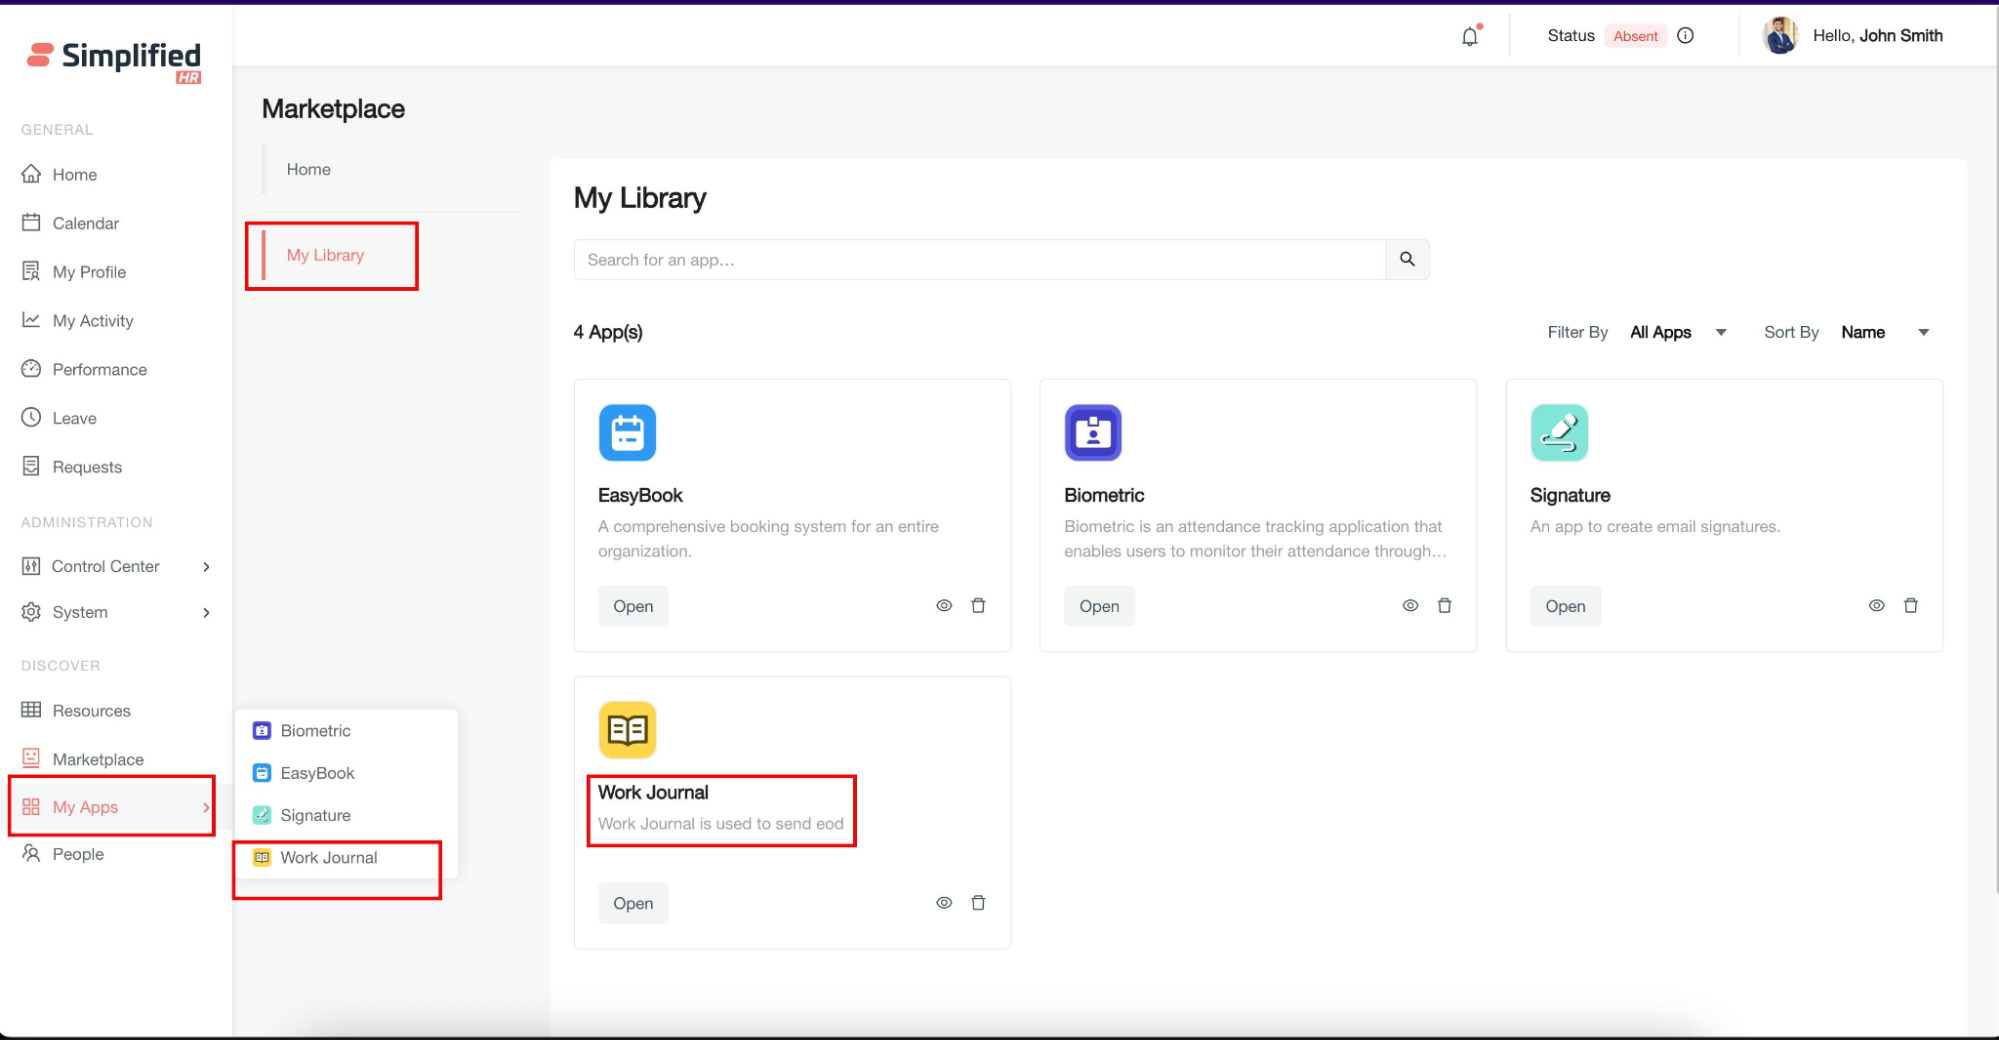
Navigate to the Marketplace in your Simplified HR application.
-
Search for and install the Work Journal plugin.
Important: Refer to the Marketplace Installation Guide (hello.besimplified.com/hc/docs/articles/1756358900-marketplace) for detailed installation instructions.
Access Work Journal
Once installed, you can access Work Journal from:
-
My Library section in the Marketplace.
-
My Apps section of the application.
-
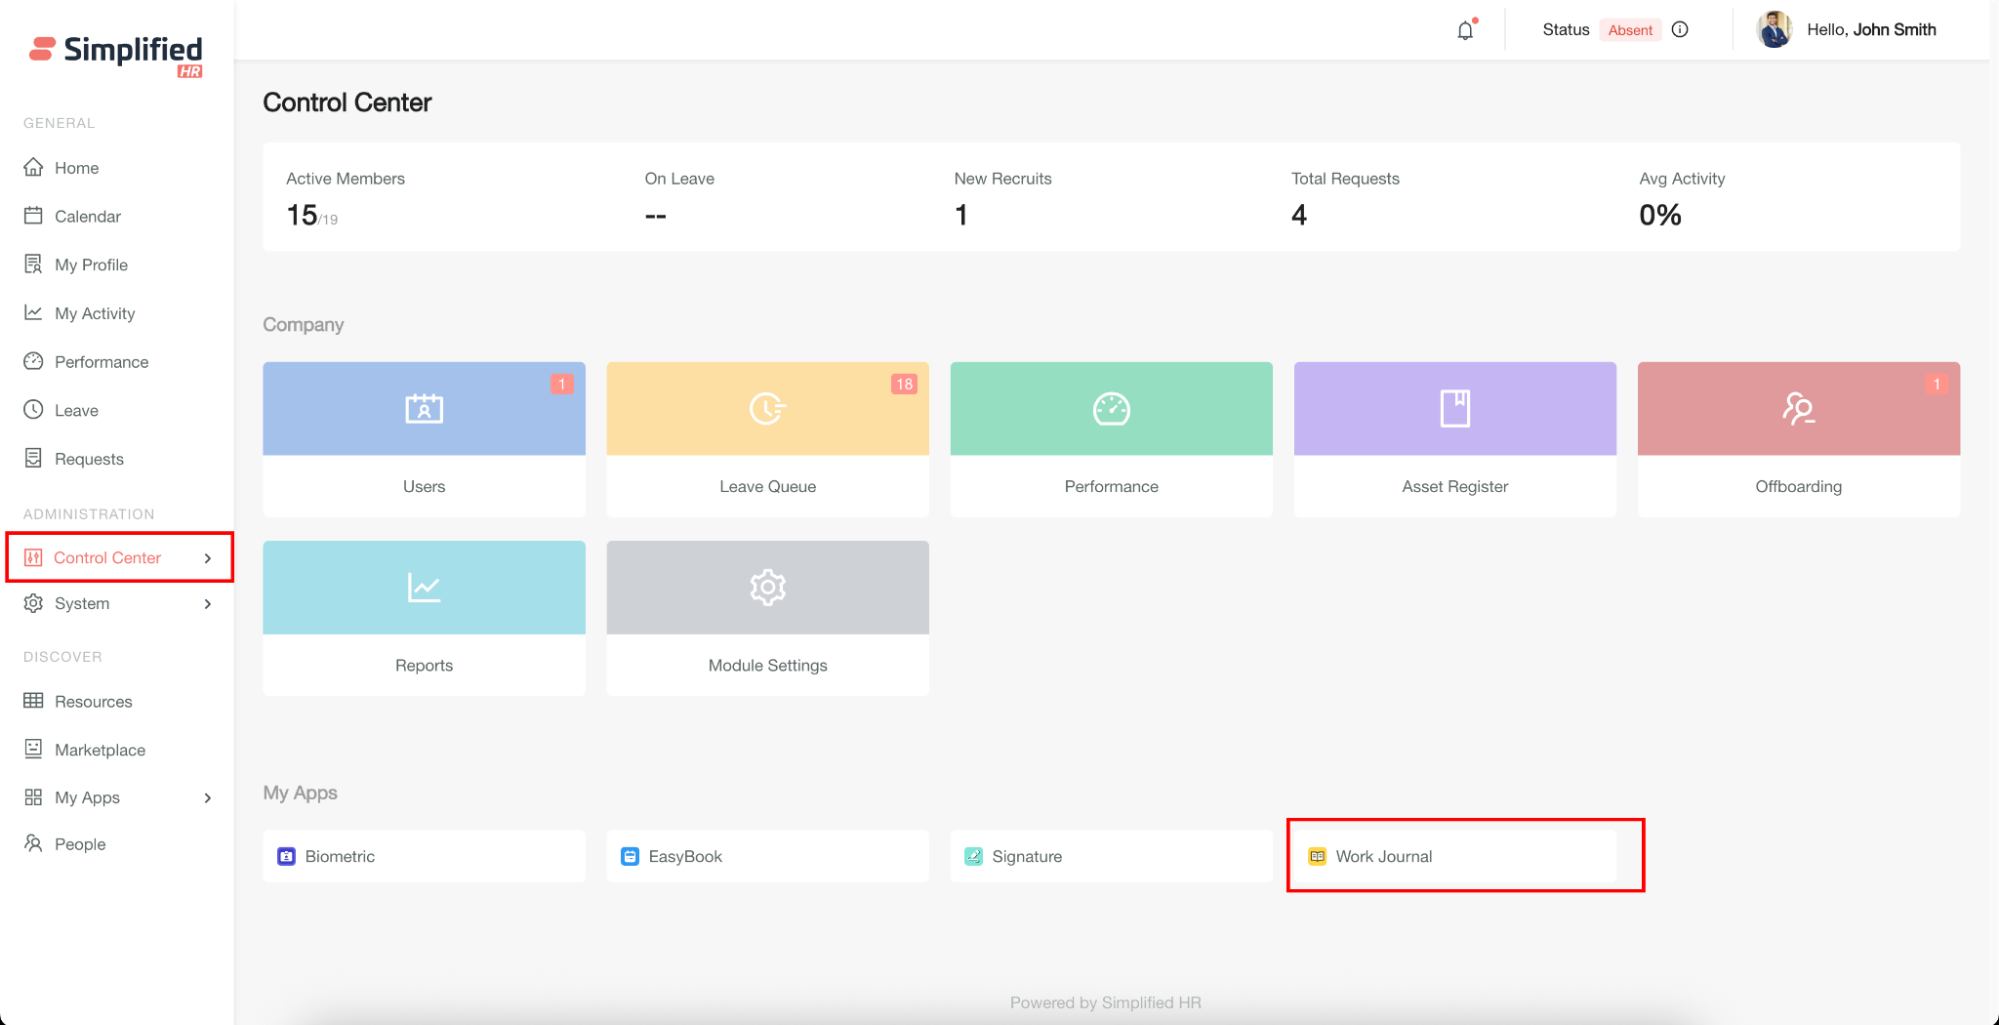
Control Centre page (admin users only).
Configure Work Journal Permissions
Configure user access by assigning appropriate permissions through the Roles and Permissions system.
Important: Work Journal Report is available only to users with appropriate permissions through Roles and Permissions. Users without the required permissions will not see the report section.
Access Configuration Settings
Admin users can customize Work Journal settings to match organizational requirements.
- Navigate to one of the following locations: My Apps > Work Journal, My Library > Work Journal, or Control Centre > Work Journal (admin users).
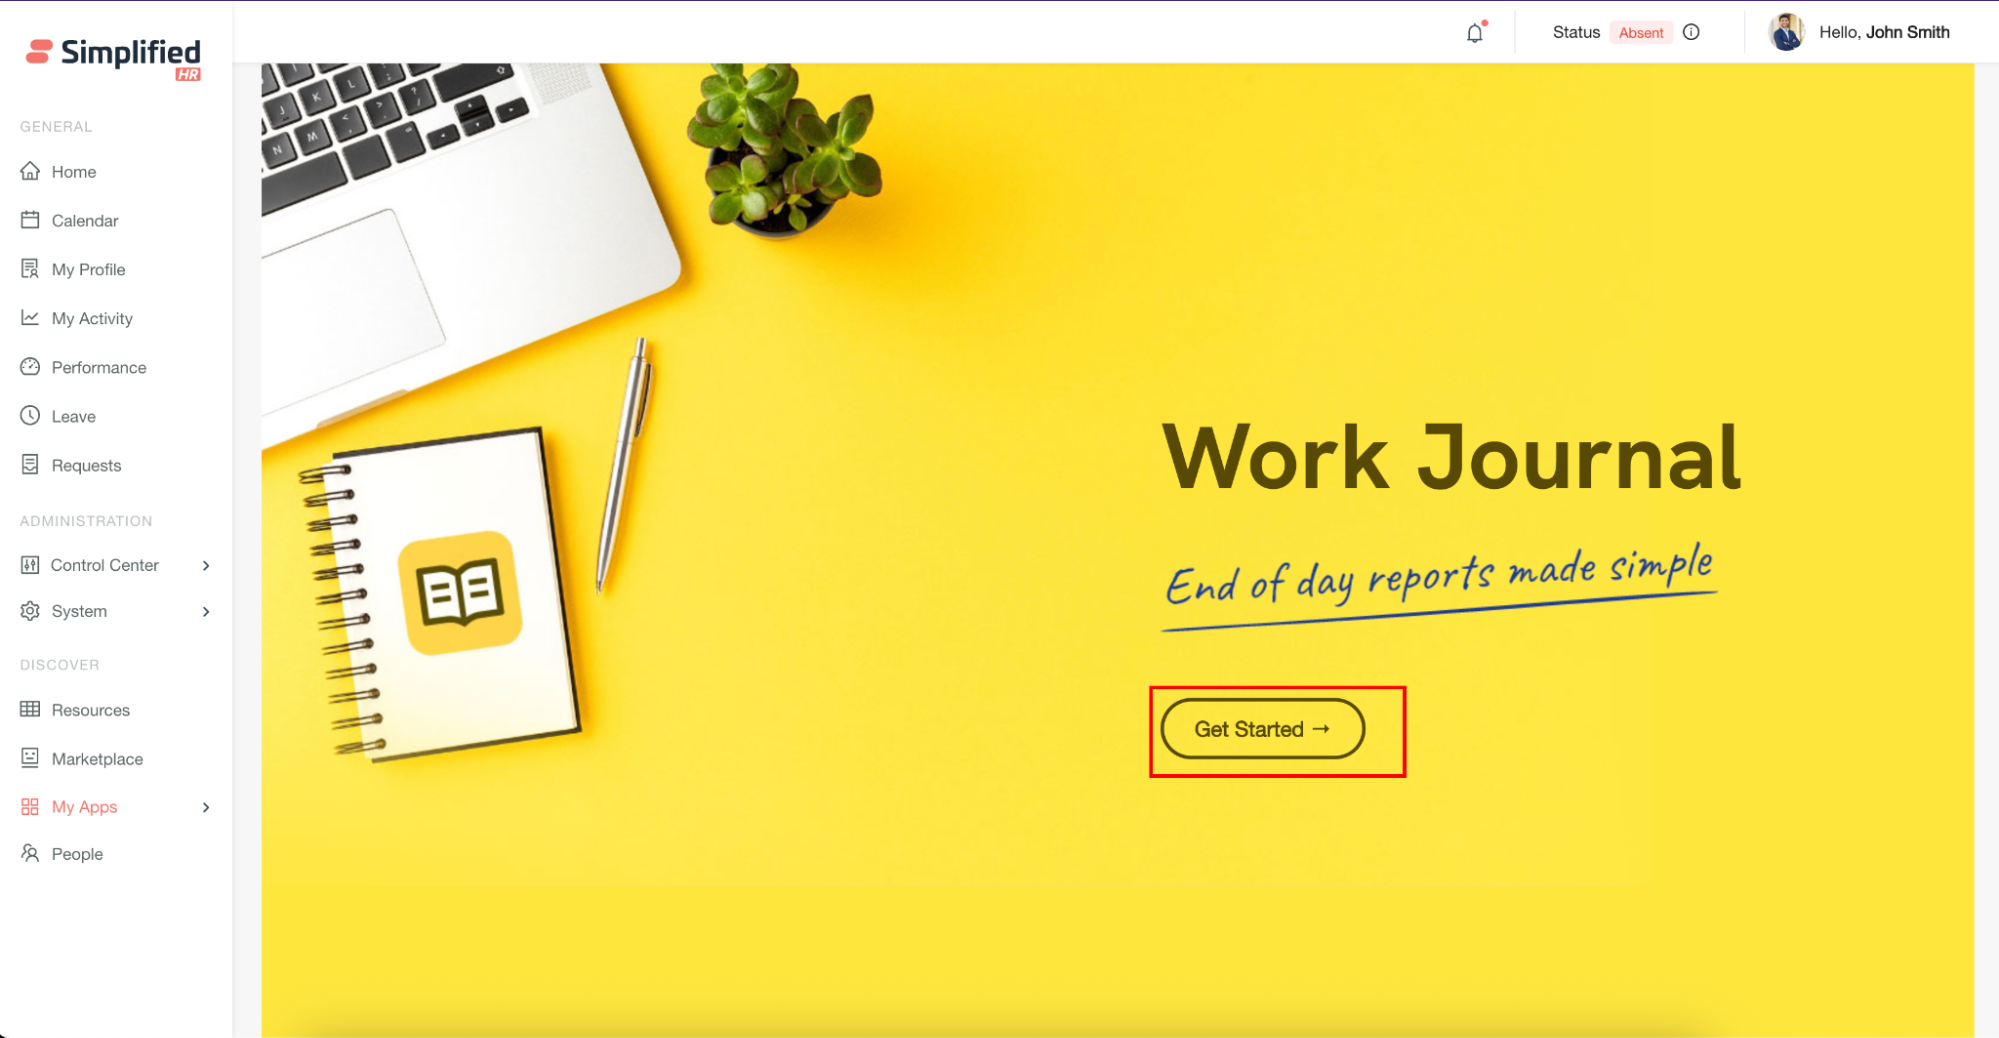
- Click Get Started if accessing for the first time.
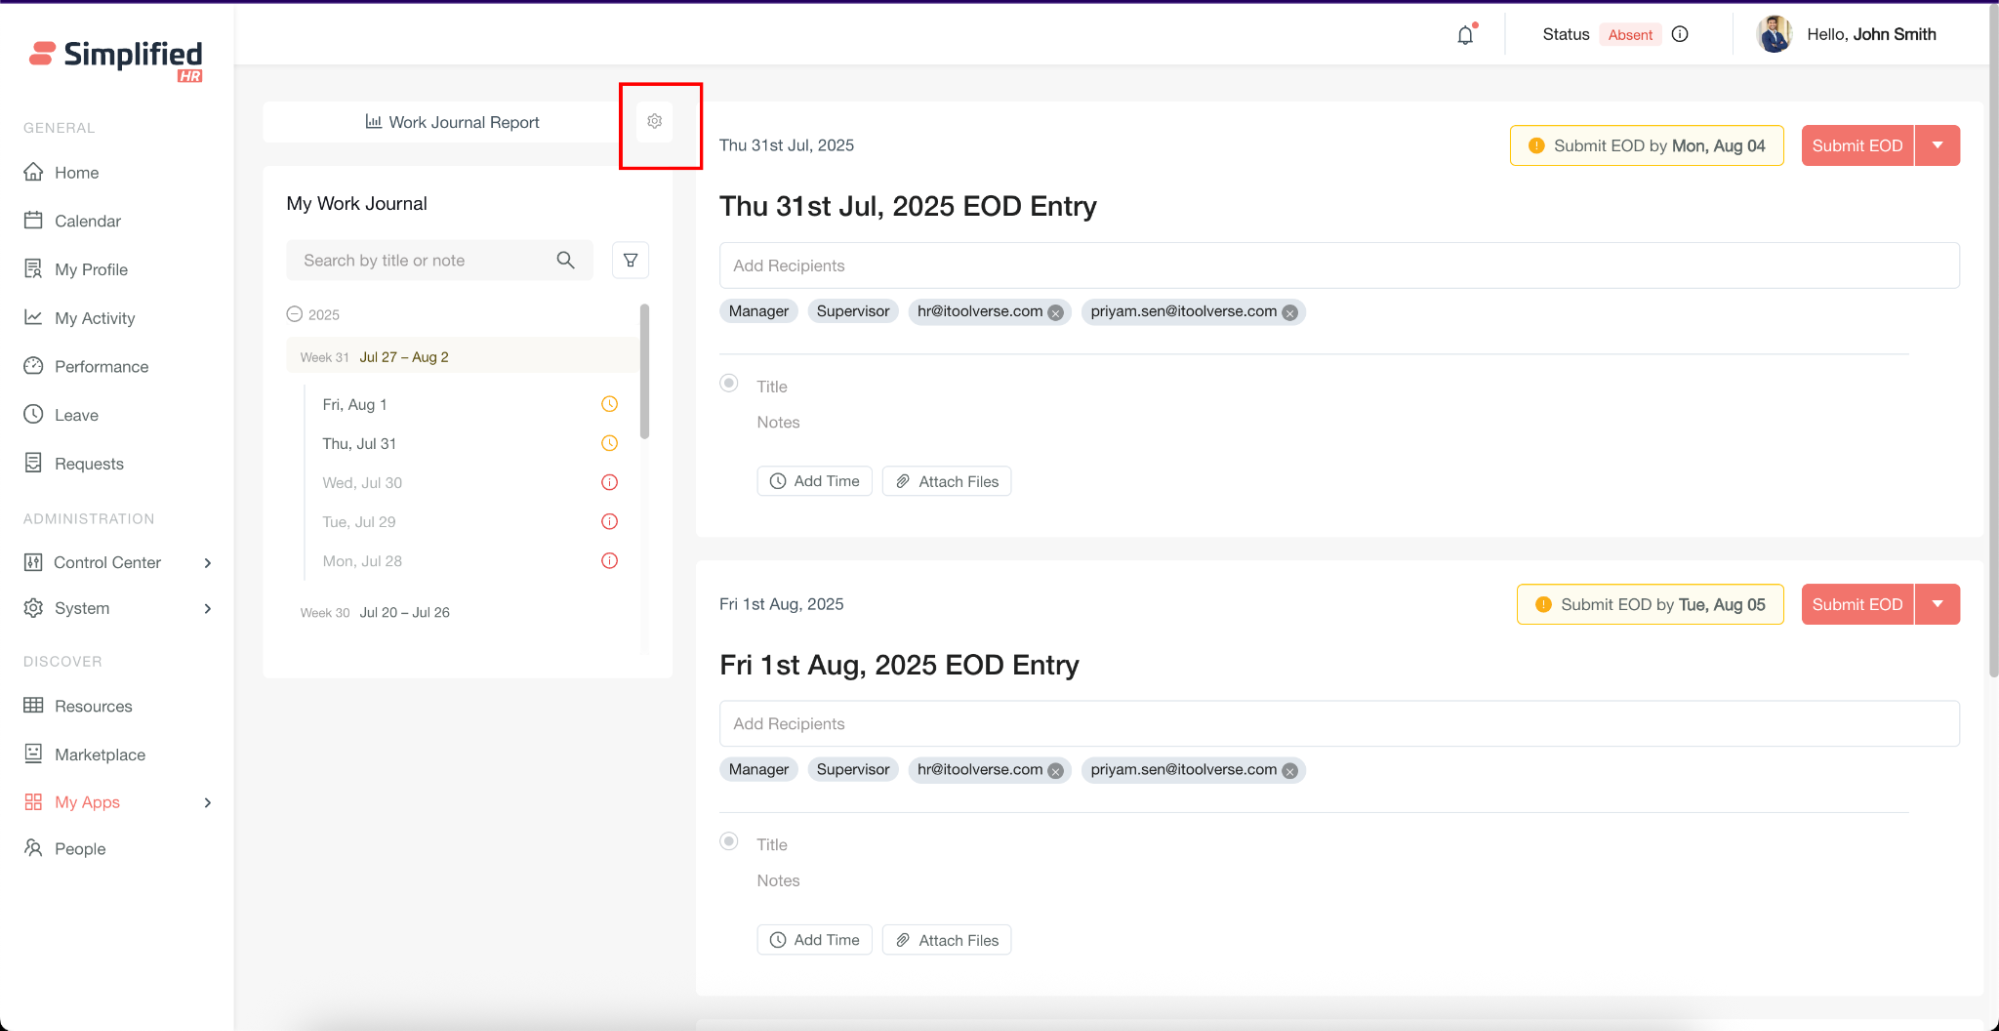
- On the Work Journal page, click the Settings icon.
Configure Journal Settings
Journal Settings control submission and modification windows along with notification preferences.
Configure EOD Submission Window
Set the grace period (in days or weeks) allowed for submitting Work Journal entries after the deadline. For EOD, the grace period starts after the day ends.
Configure EOW Submission Window
For EOW, the grace period starts after the week ends.
Configure EOM Submission Window
For EOM, the grace period starts after the month ends.
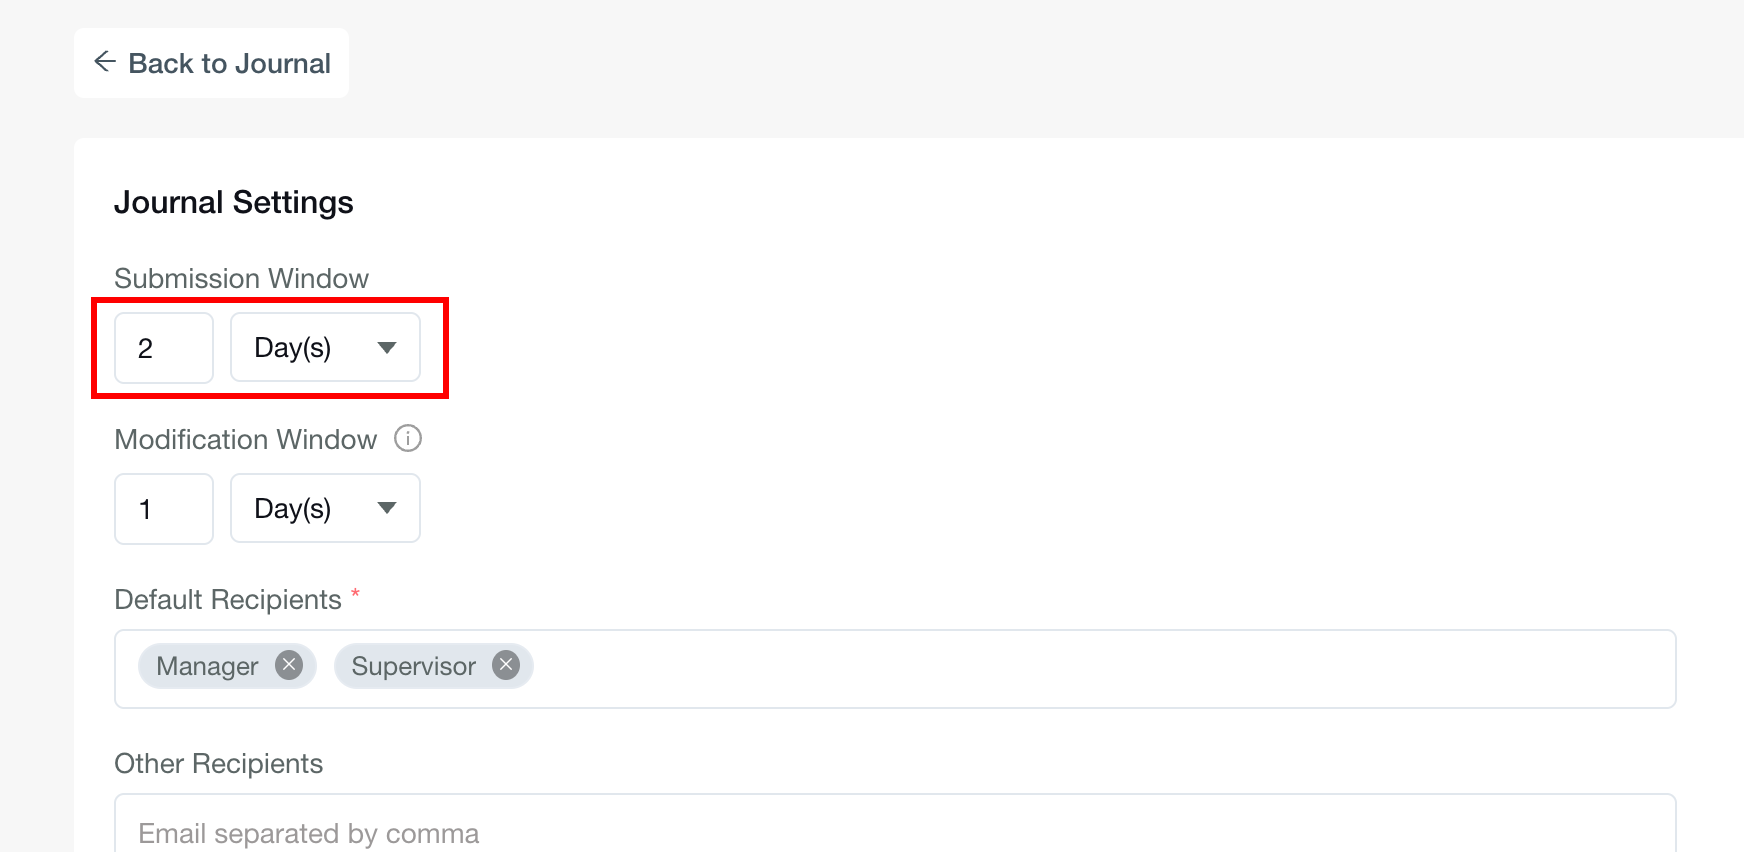
Configure Submission Grace Period
The grace period can be set in days or weeks and controls the allowed window for submitting Work Journal entries after each respective deadline (EOD, EOW, or EOM).
Configure Modification Window
Define how long users can modify and resubmit entries after initial submission. This grace period begins immediately after journal submission.
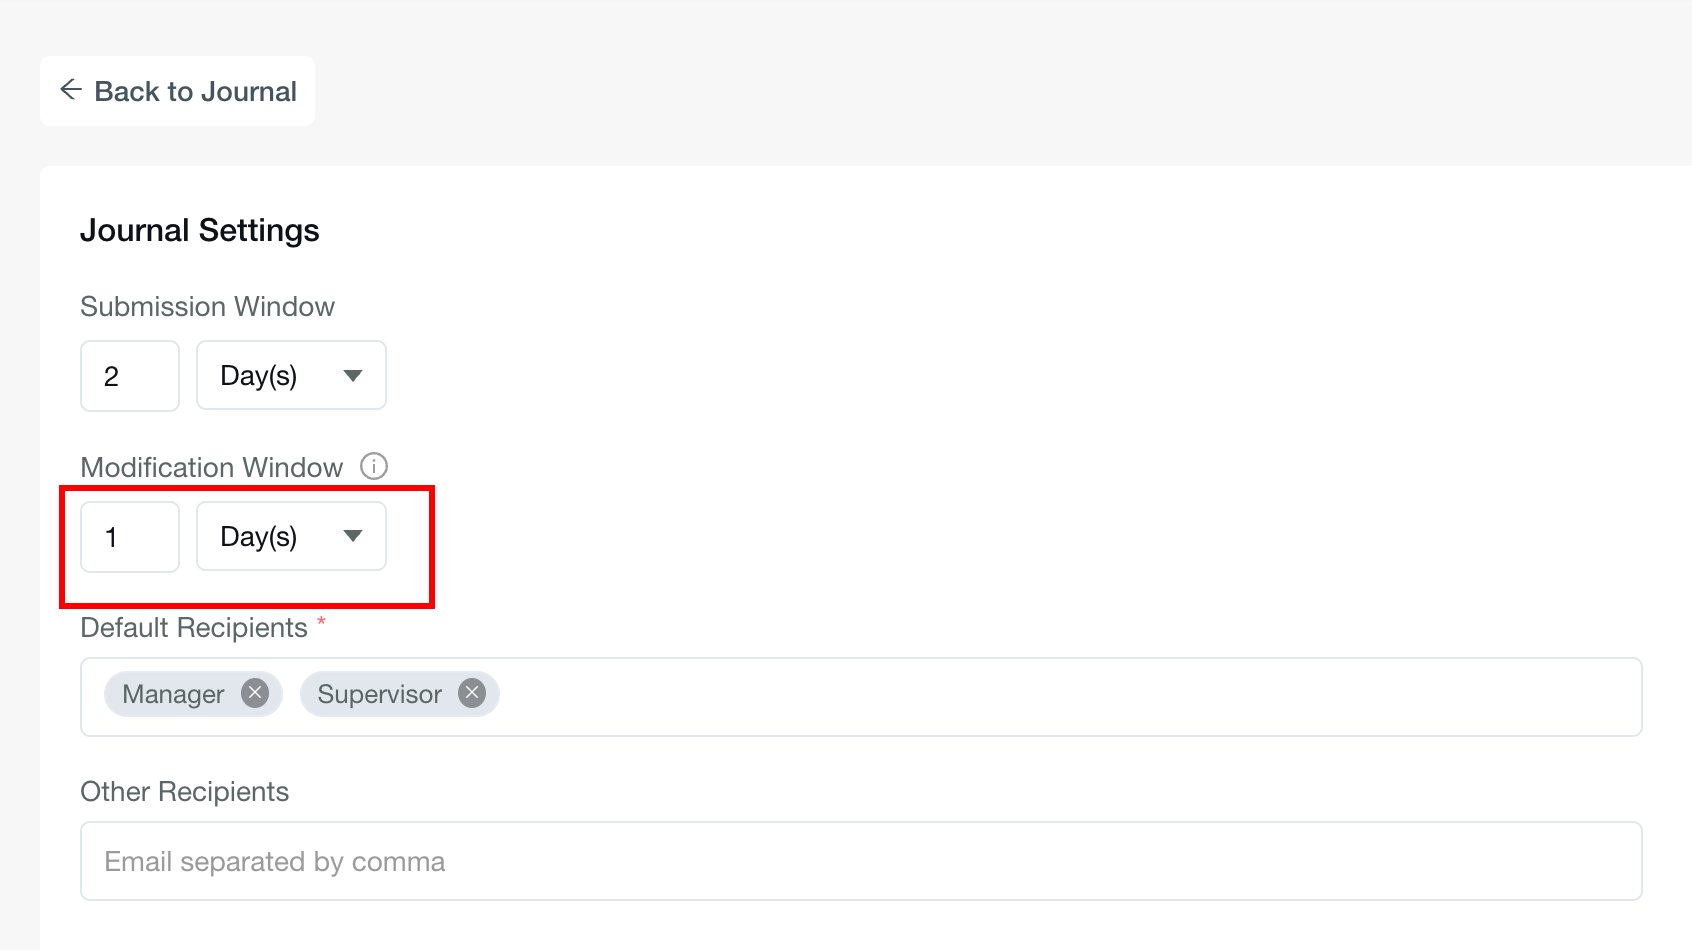
Important: The Submission Window (the period allowed to submit an entry after a deadline) is distinct from the Modification Window (the period allowed to edit and resubmit an already-submitted entry). After the Modification Window expires, entries become read-only.
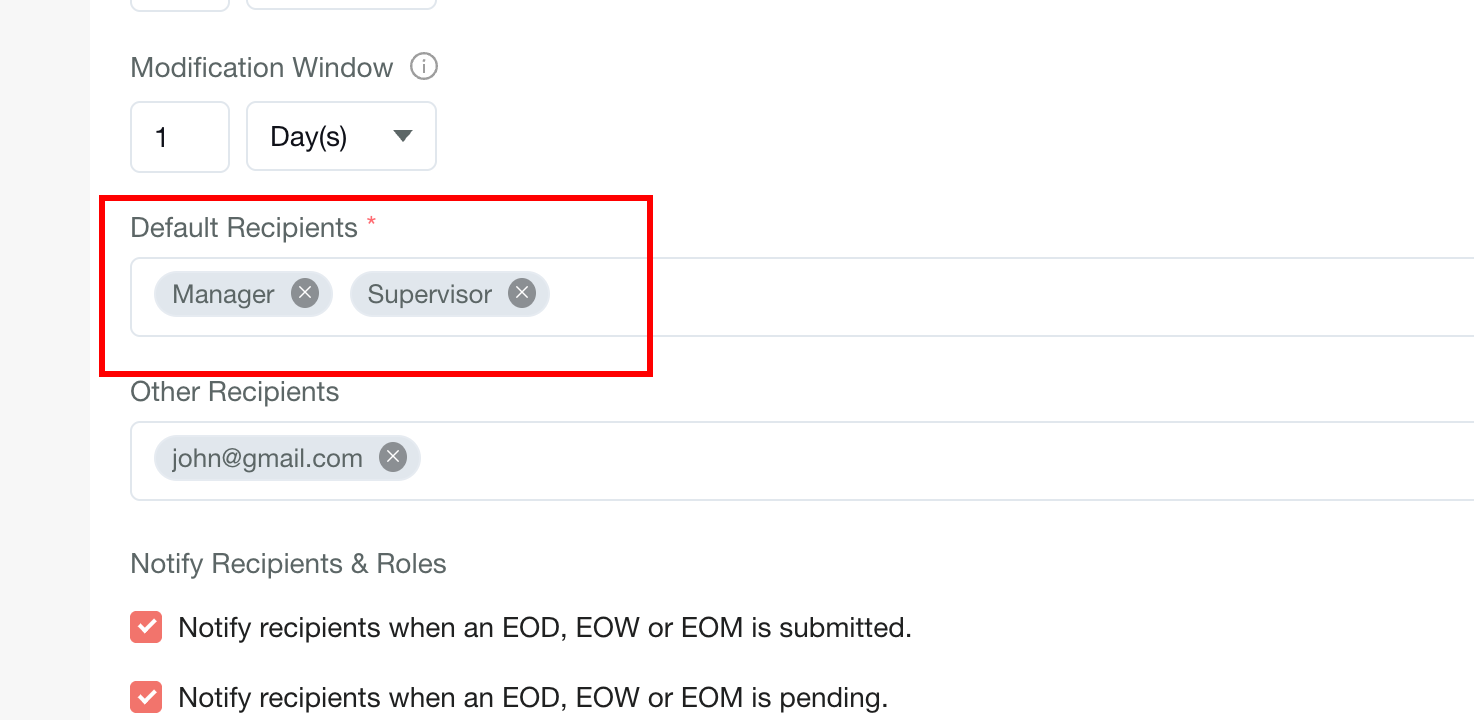
Configure Default Recipients
Select recipient roles that automatically receive Work Journal notifications:
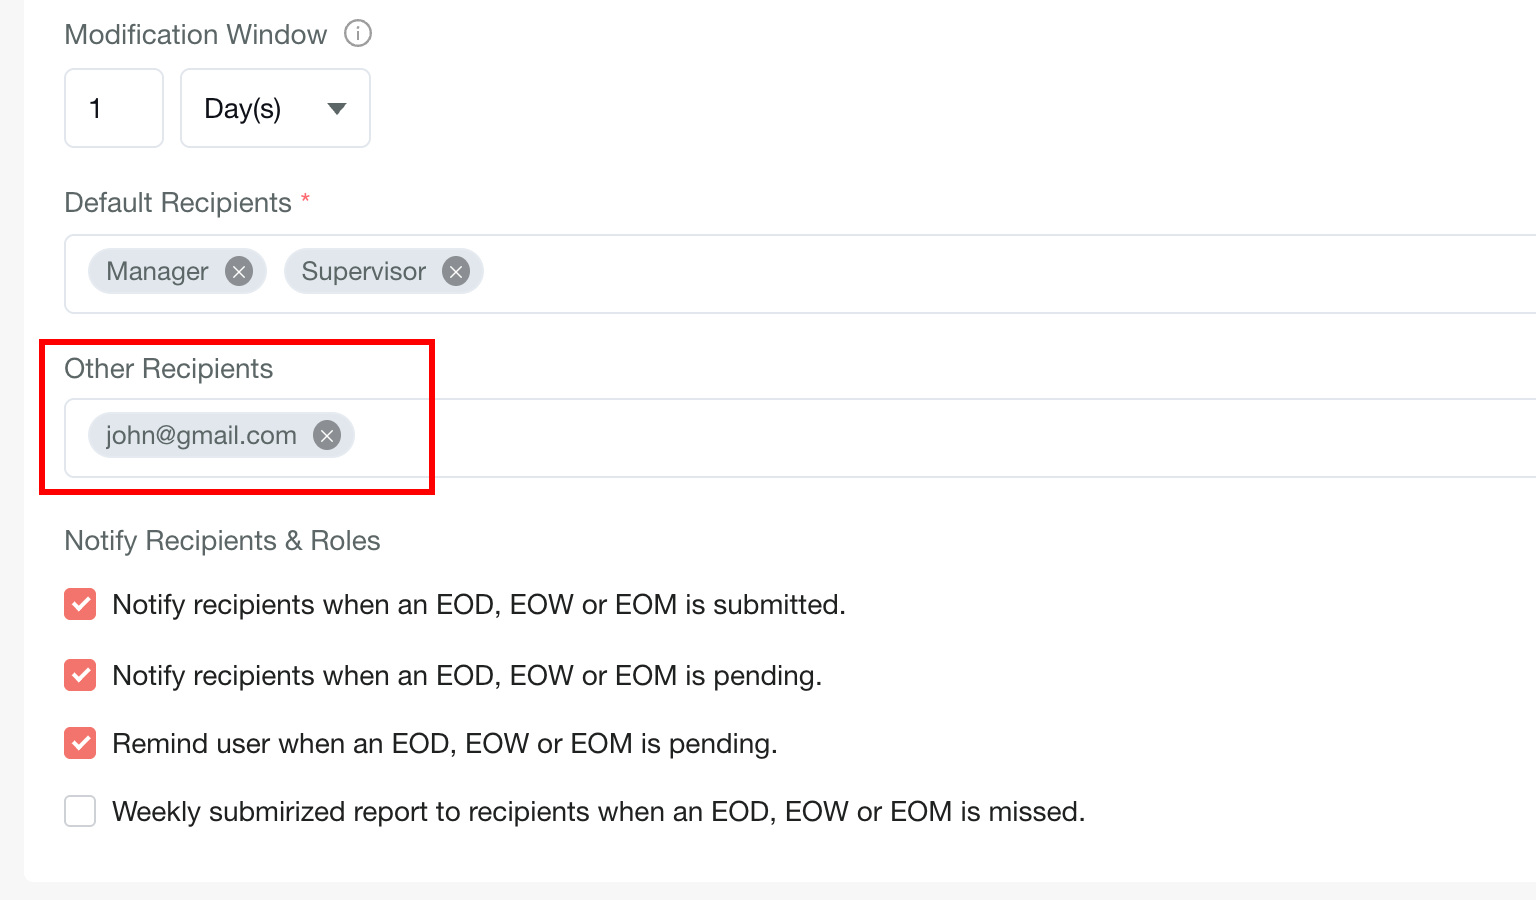
Configure Other Recipients
Add specific email addresses that should receive notifications. These emails will:
Configure Submission Notifications
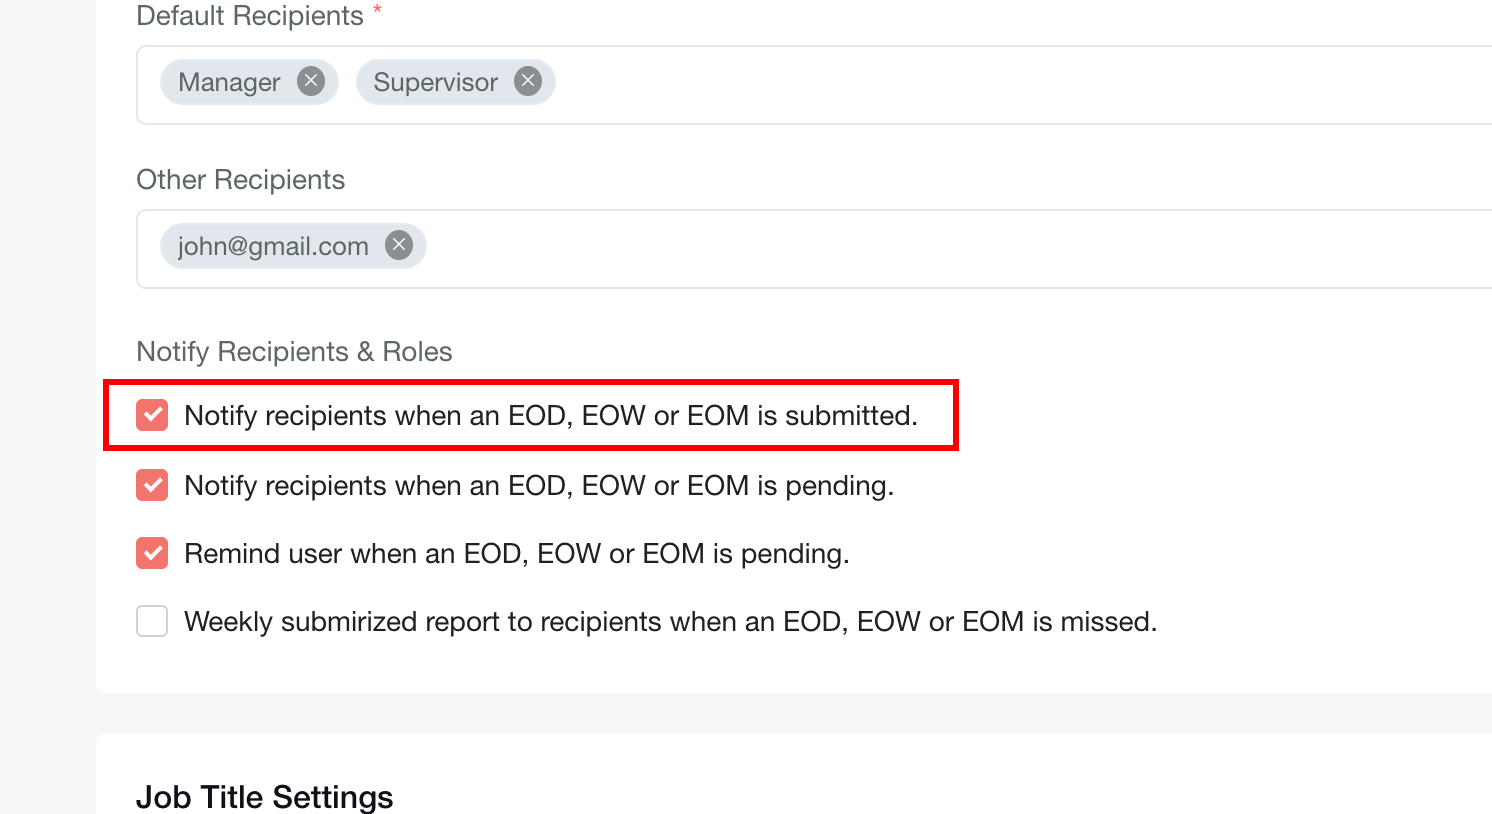
"Notify recipients when an EOD, EOW or EOM is submitted": Sends notifications to configured recipients when employees submit their Work Journal.
Configure Pending Notifications
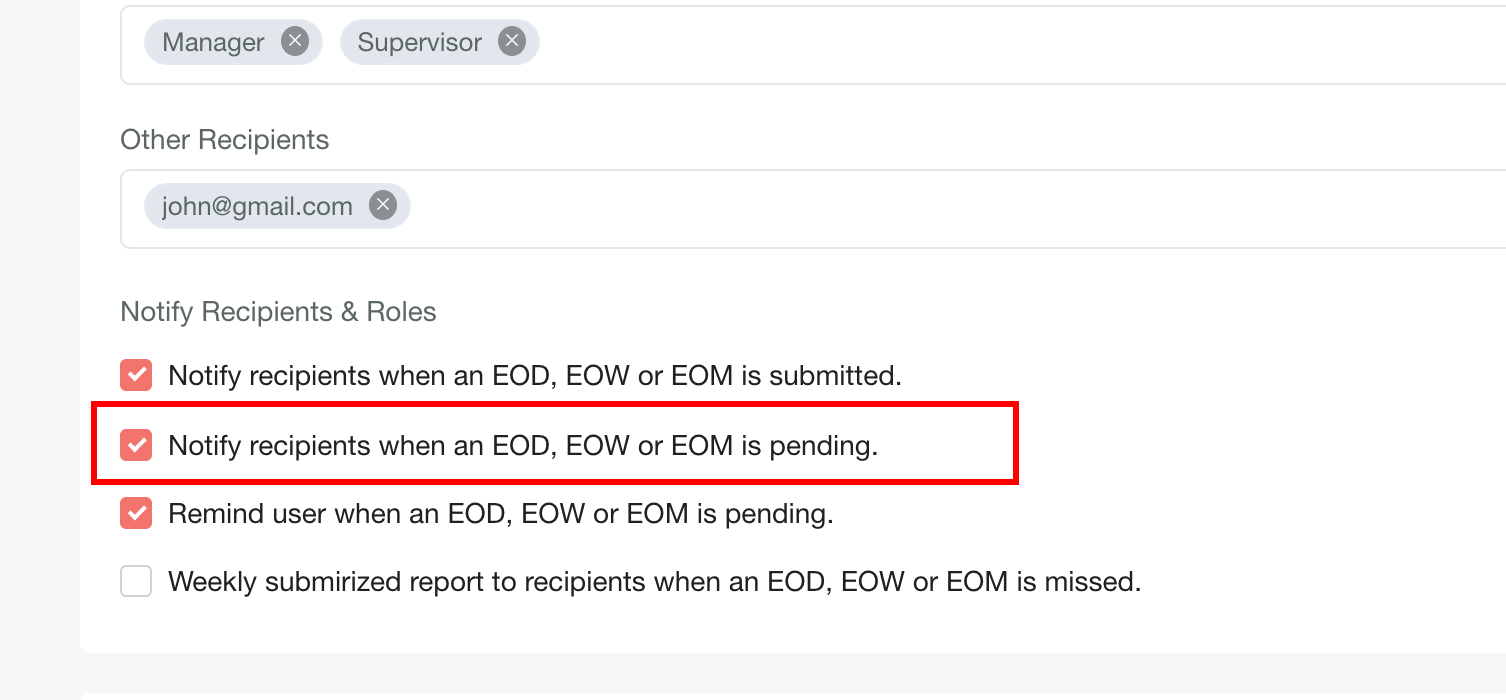
"Notify recipients when an EOD, EOW or EOM is pending": Sends notifications to recipients when journal entries are overdue.
Configure Employee Pending Reminders
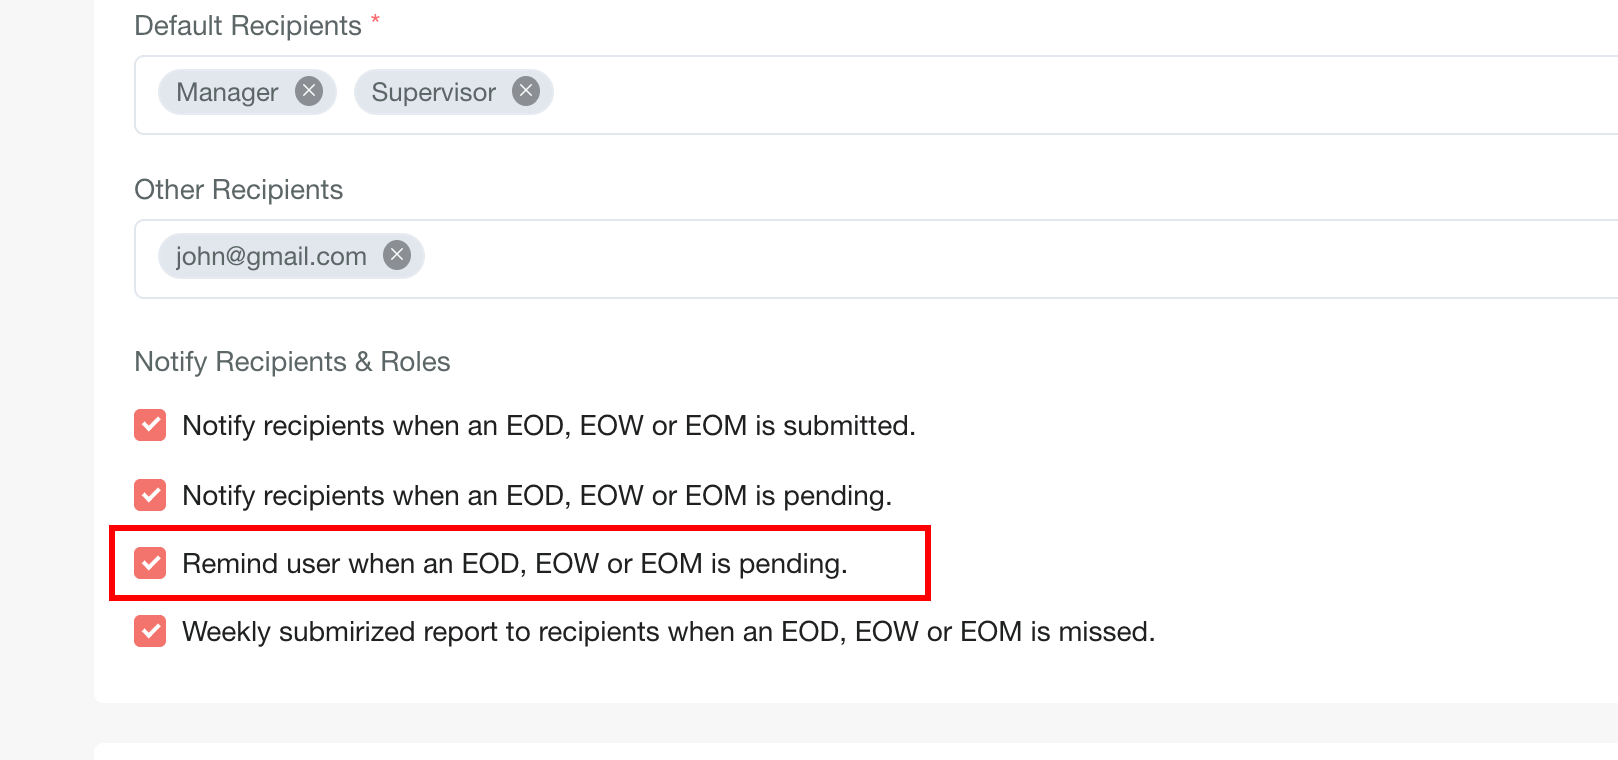
"Remind user when an EOD, EOW or EOM is pending": Sends reminder notifications directly to employees with pending entries.
Configure Missed Journal Summary
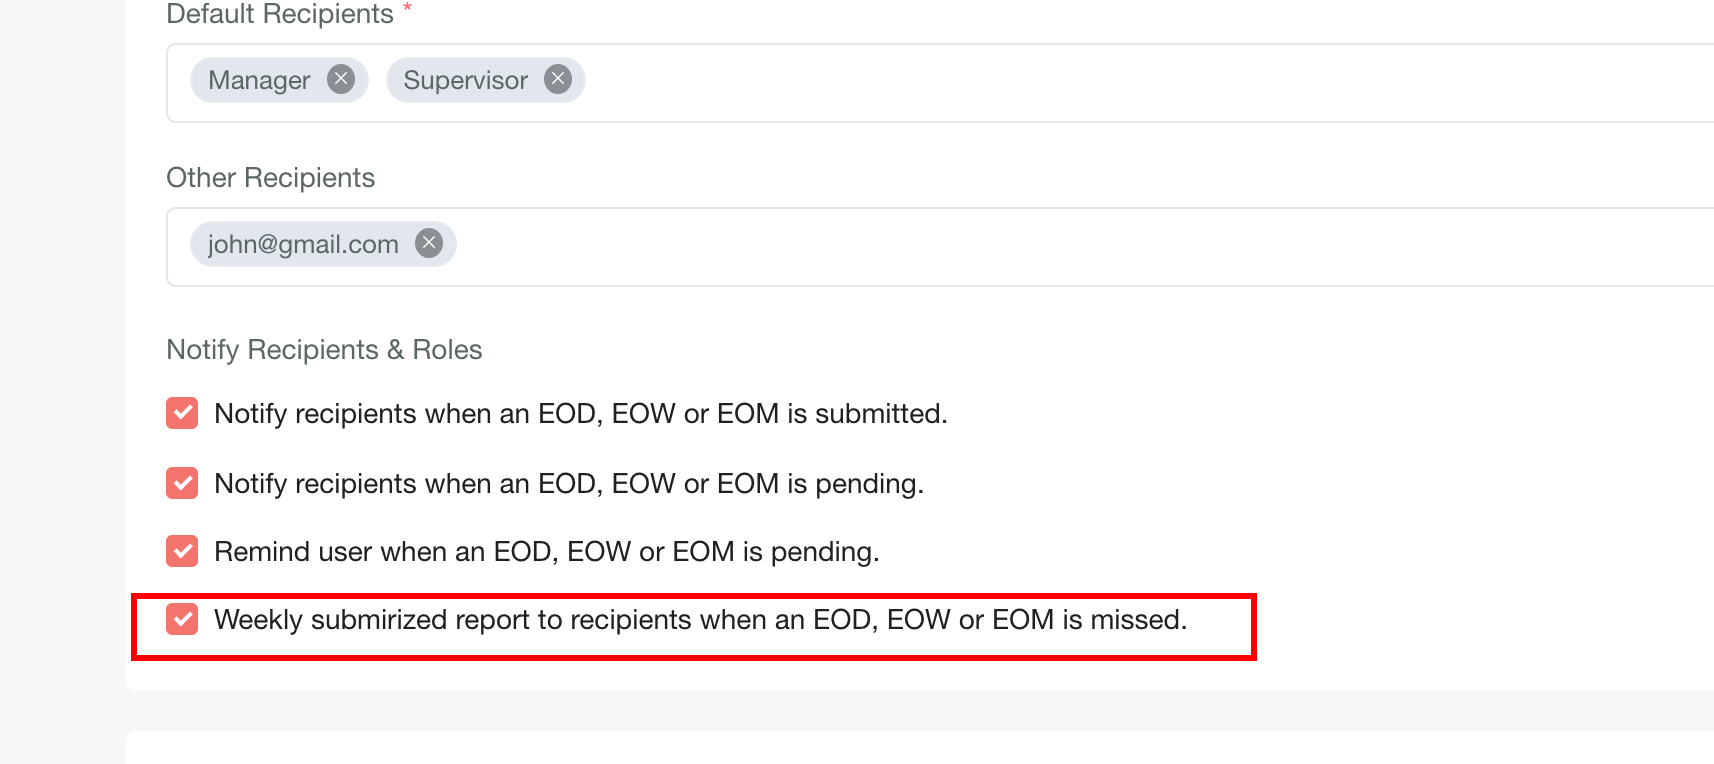
"Weekly summarised report to recipients when an EOD, EOW or EOM is missed": Sends weekly summaries to recipients listing employees who missed journal submissions.
Configure Job Title Requirements
Configure Work Journal requirements based on employee job titles. This determines which types of journals (EOD, EOW, EOM) are required for each role.
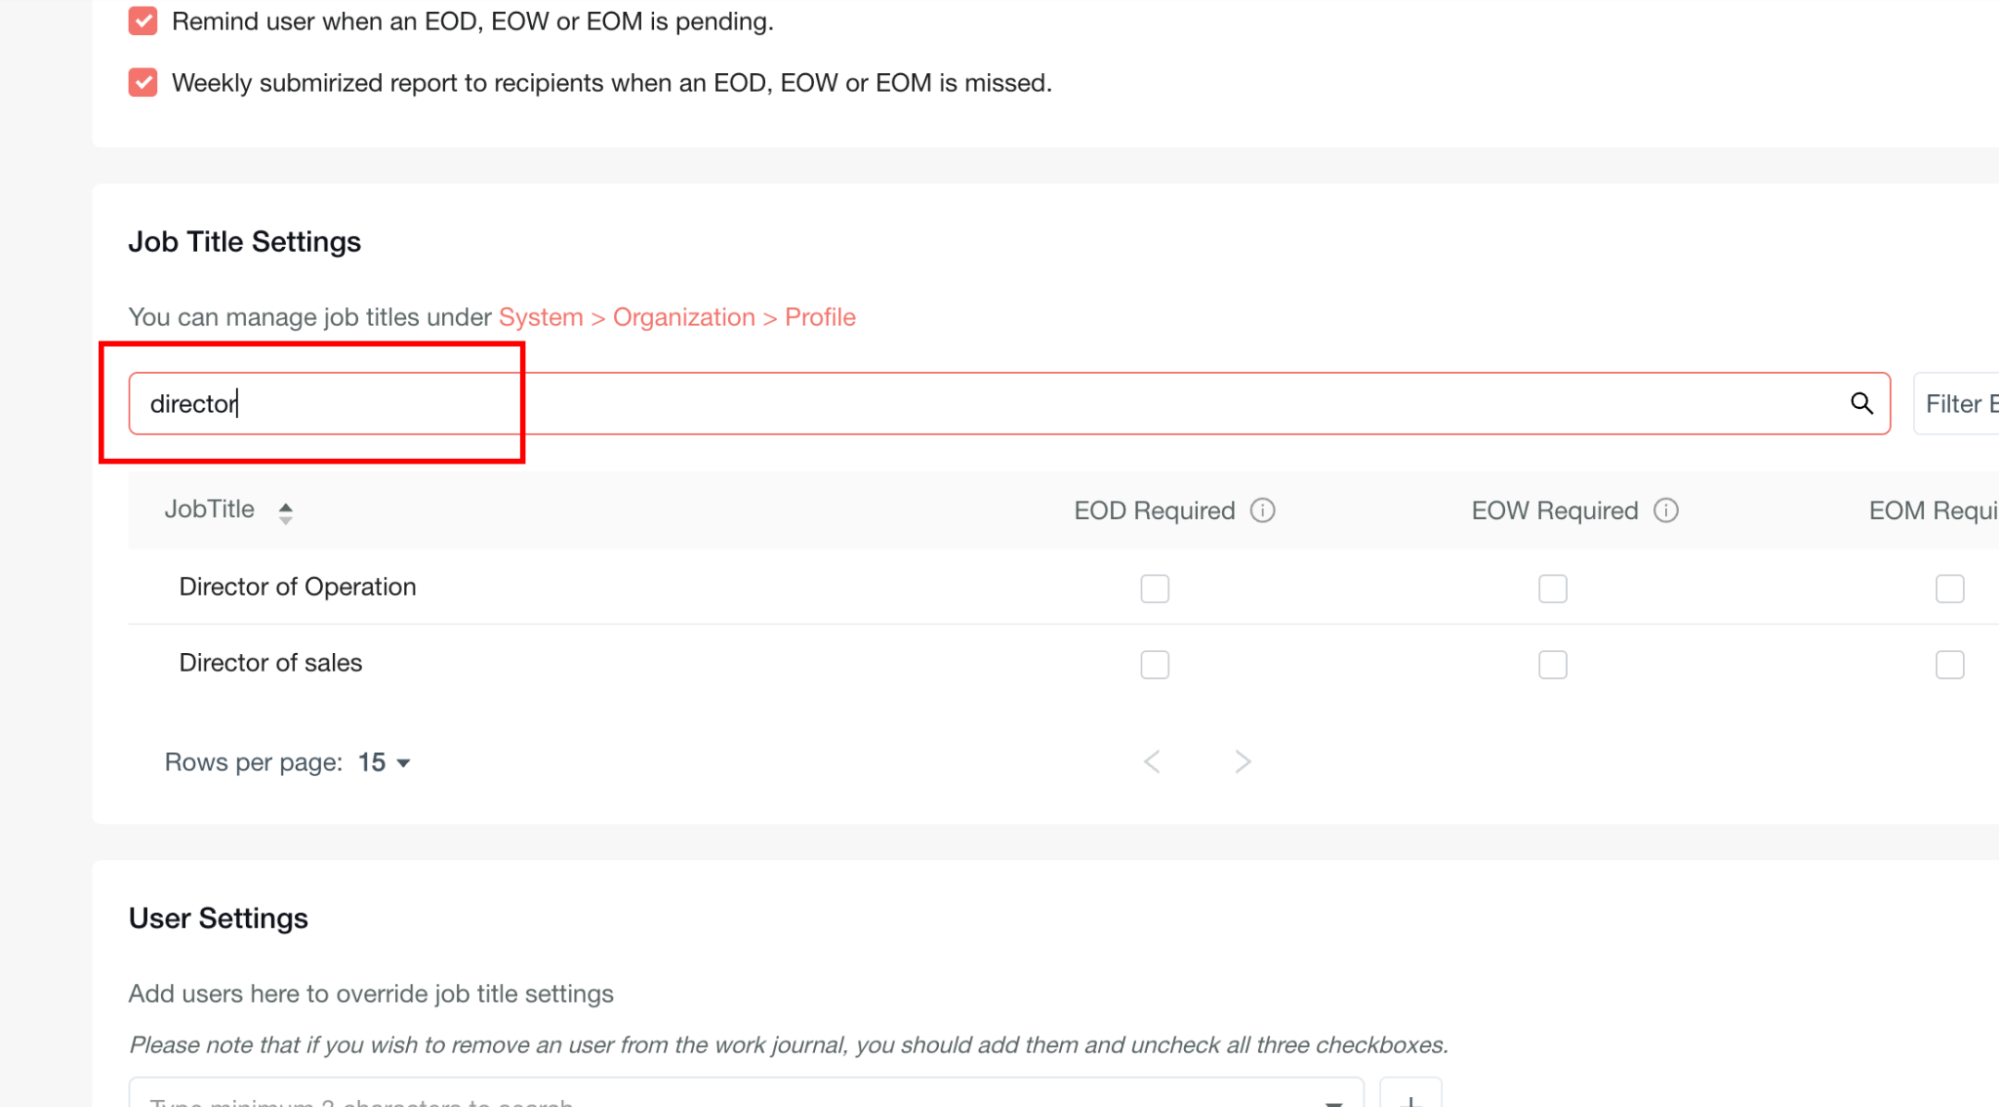
Set EOD Requirement by Job Title
-
Use the search field to quickly find specific job titles.
-
Check the EOD Required box.
Set EOW Requirement by Job Title
-
Use the search field to quickly find specific job titles.
-
Check the EOW Required box.
Set EOM Requirement by Job Title
-
Use the search field to quickly find specific job titles.
-
Check the EOM Required box.
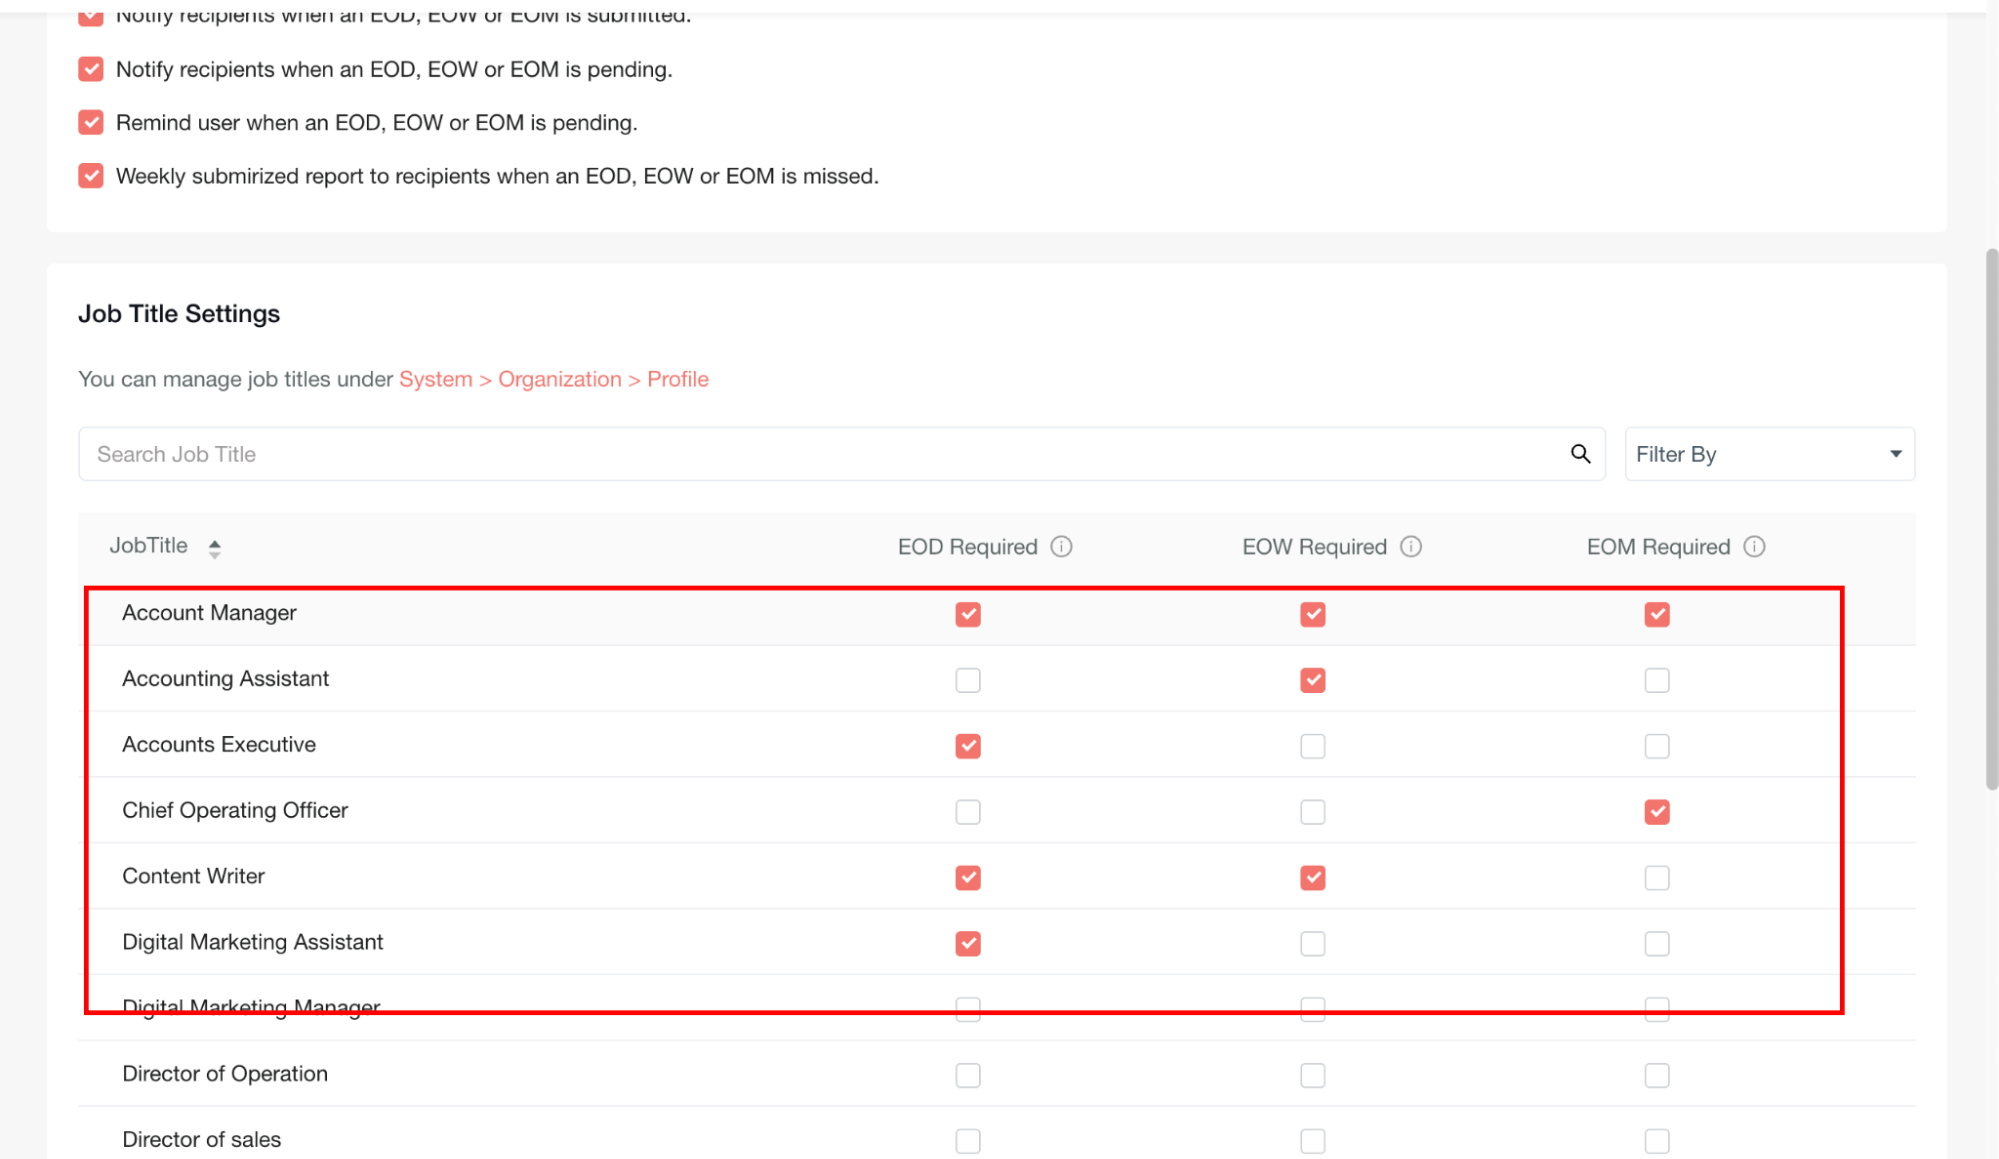
Filter Job Titles by Journal Requirement
Use filters to view job titles with specific journal requirements.
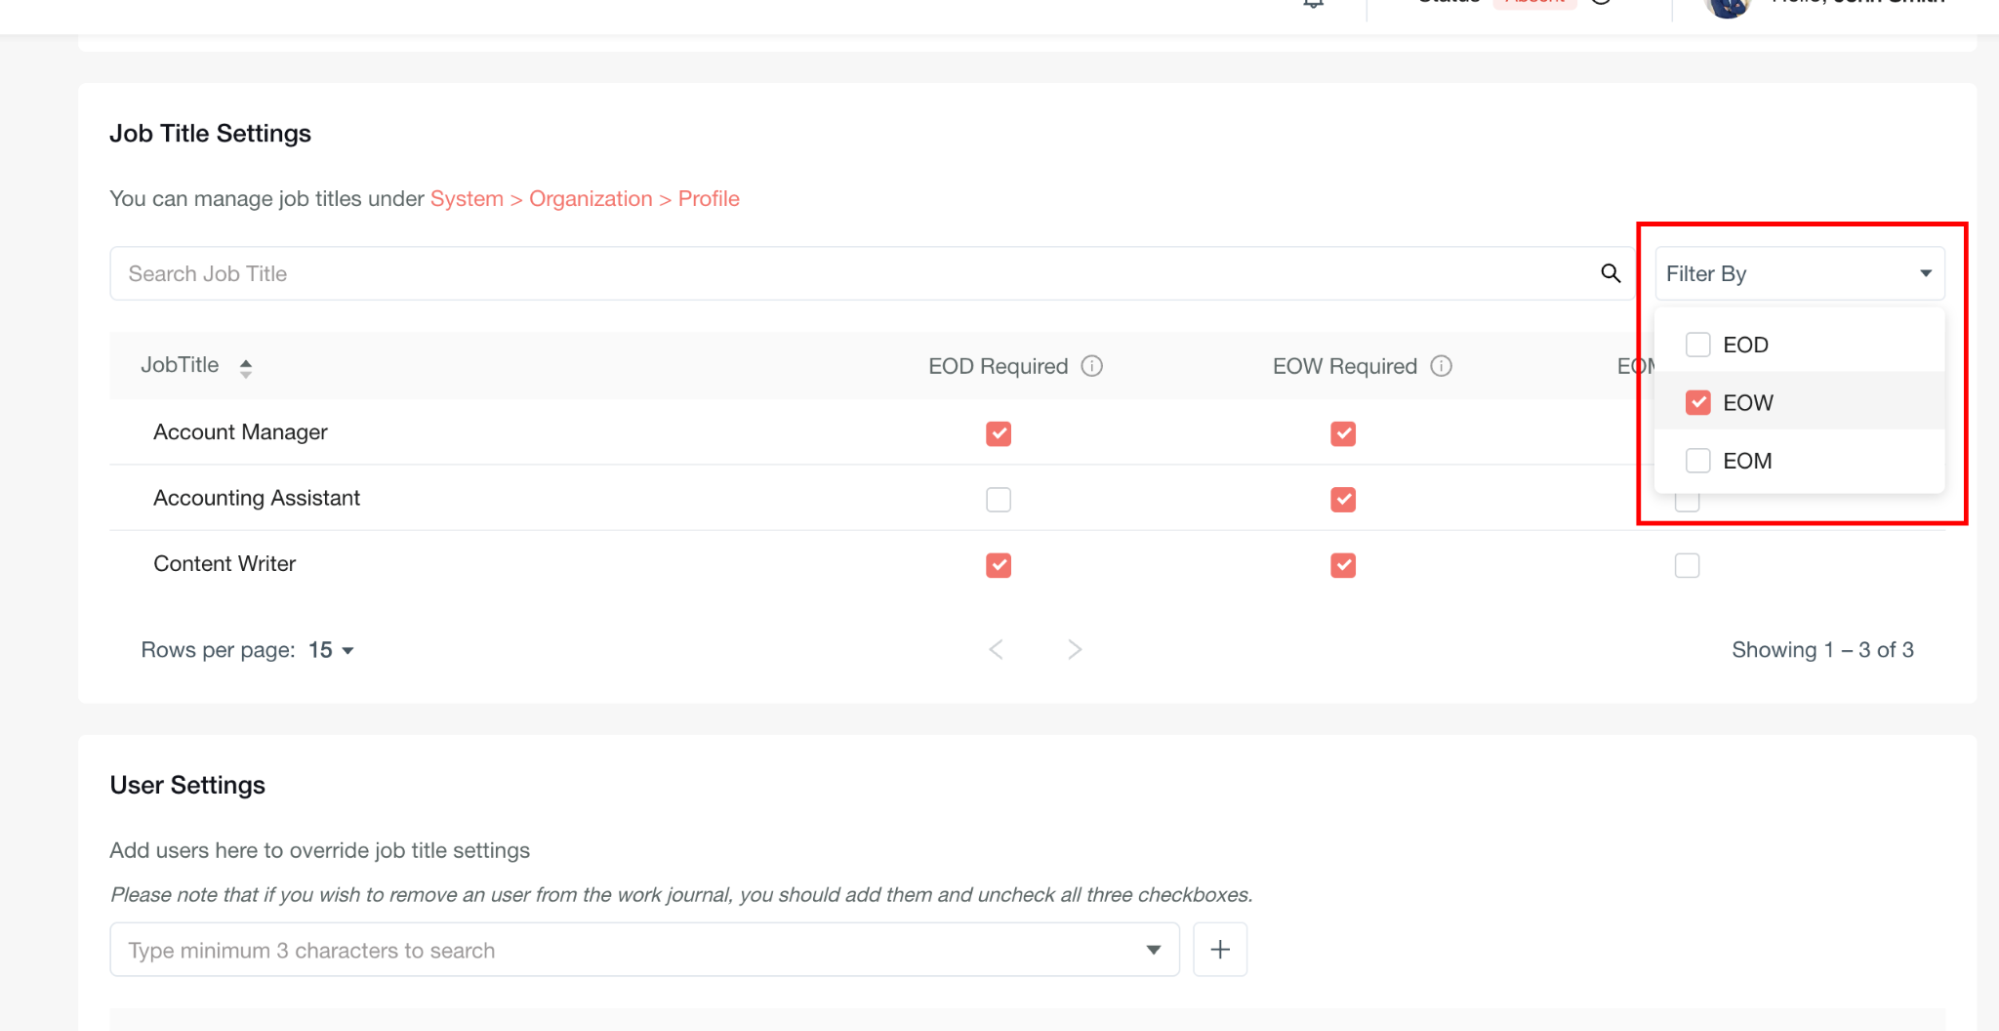
Manage Job Titles
Important: Each employee must have a valid job title assigned in their profile for these settings to take effect. Manage job titles by navigating to System > Organization > Profile.
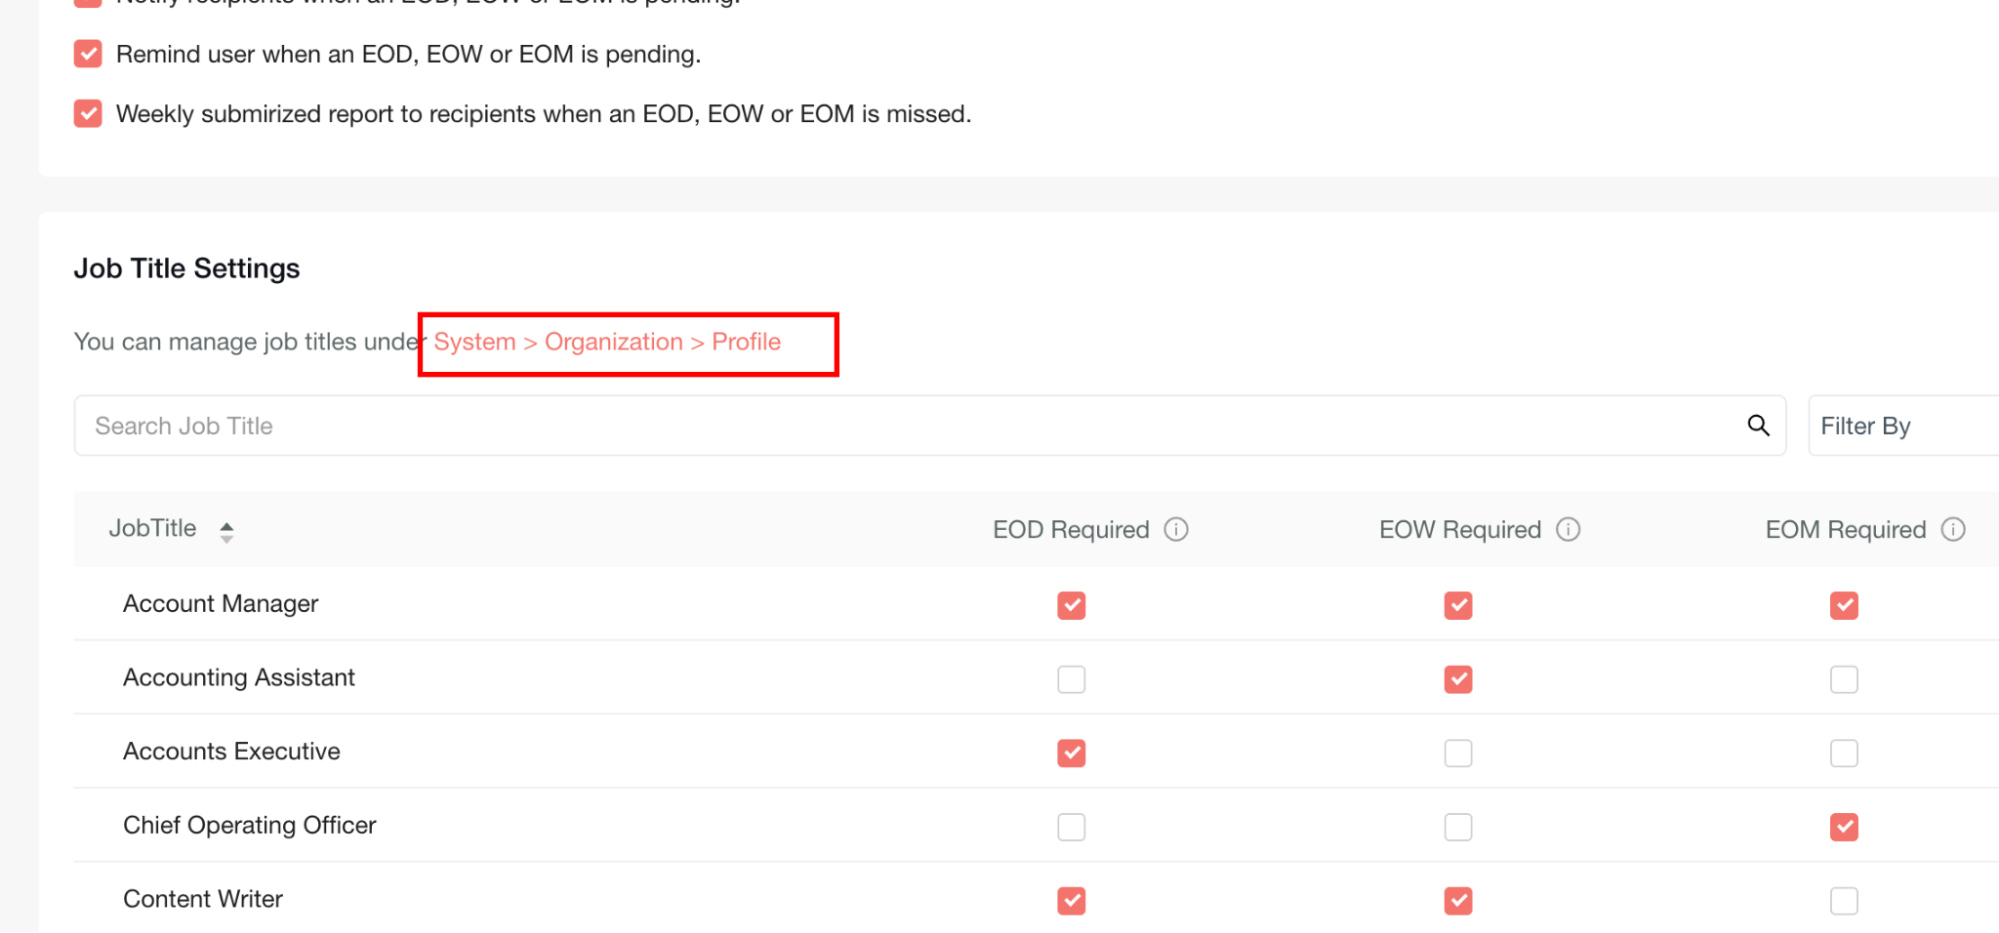
Configure User-Specific Requirements
Override job title settings for individual users to provide more granular control over Work Journal requirements. User Settings override Job Title Settings.
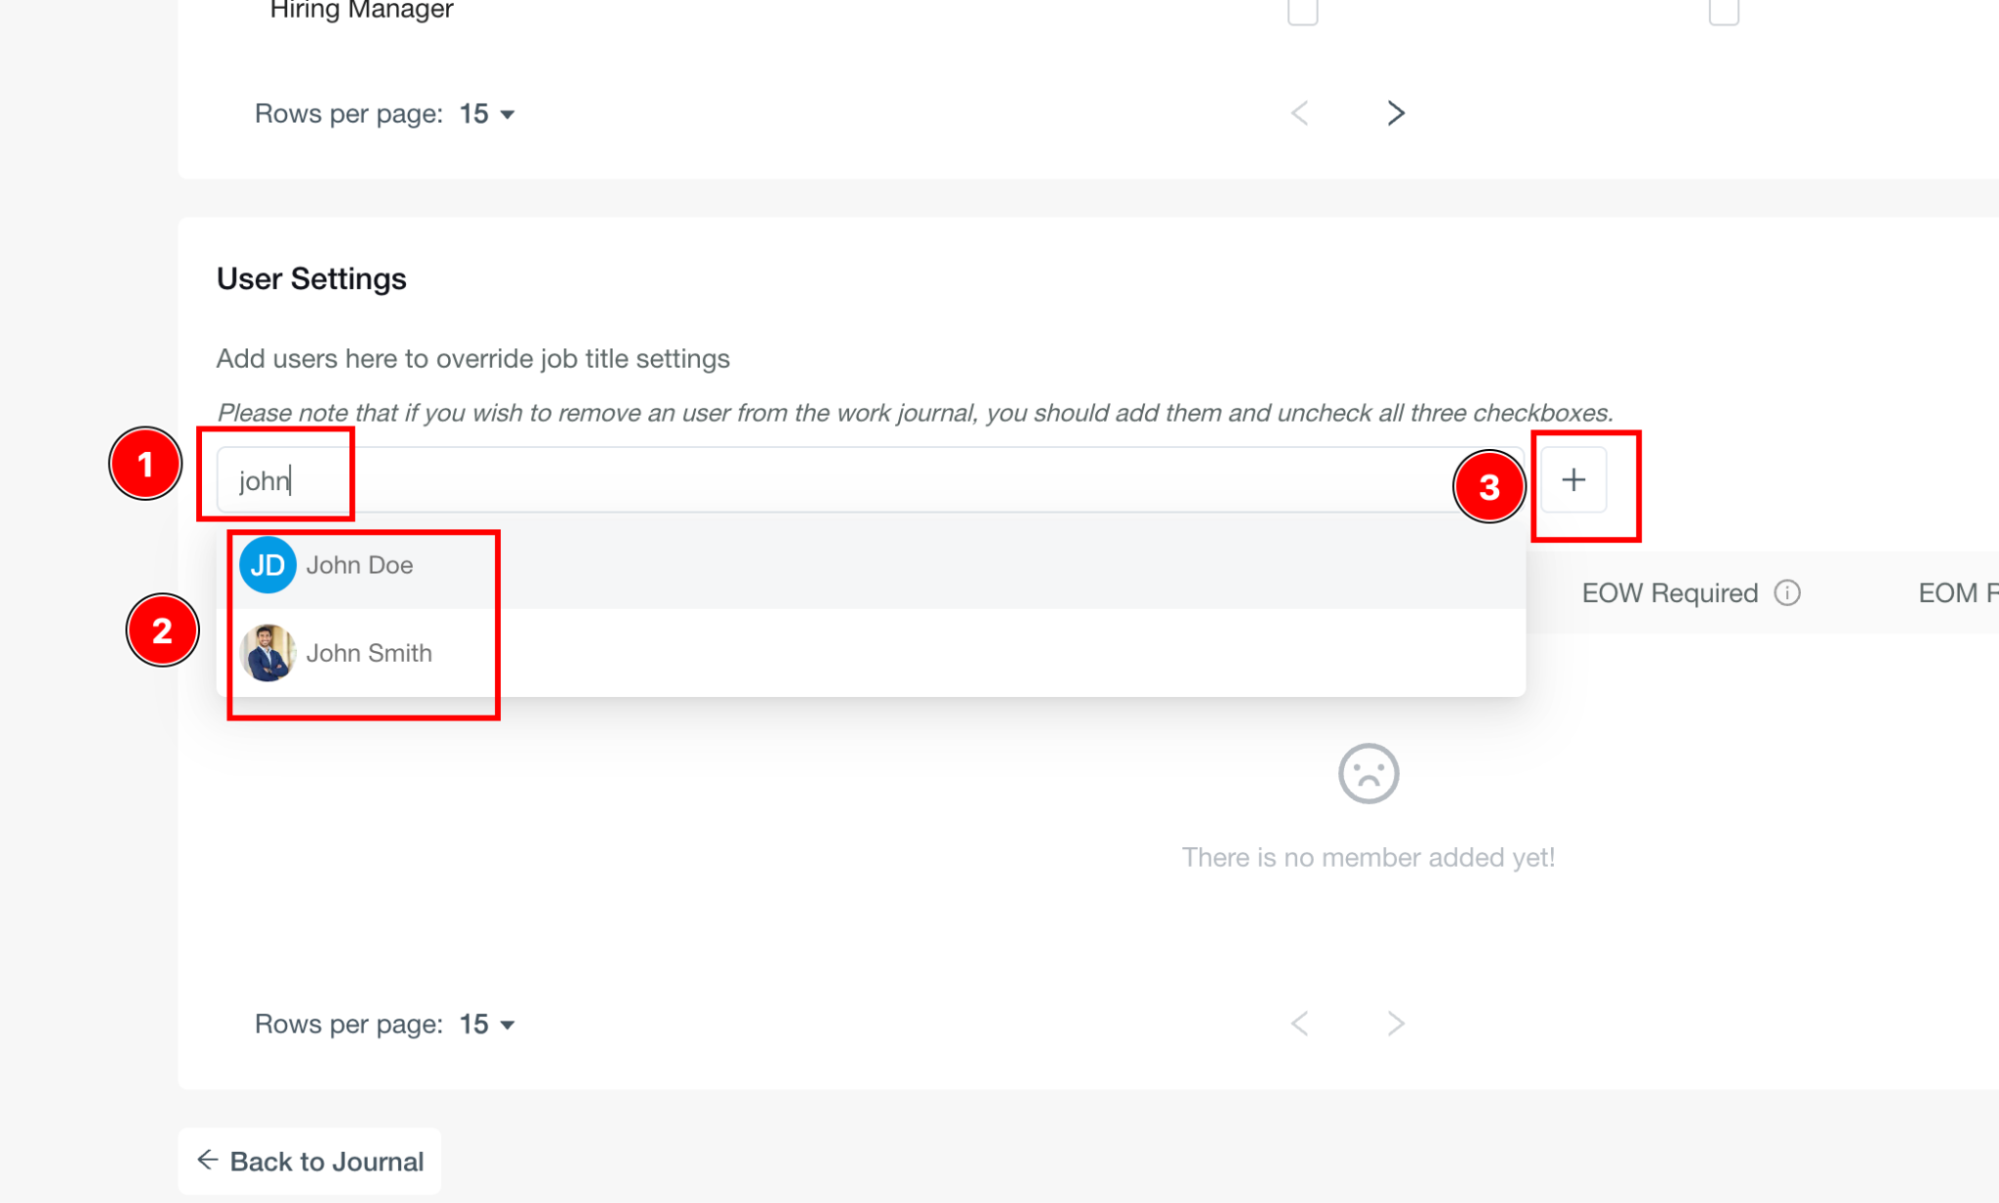
Add User to Work Journal Settings
-
Use the search field to find users by name (minimum 3 characters).
-
Click on the user's name from the dropdown.
-
Click the + (plus) button to add them to the configuration list.
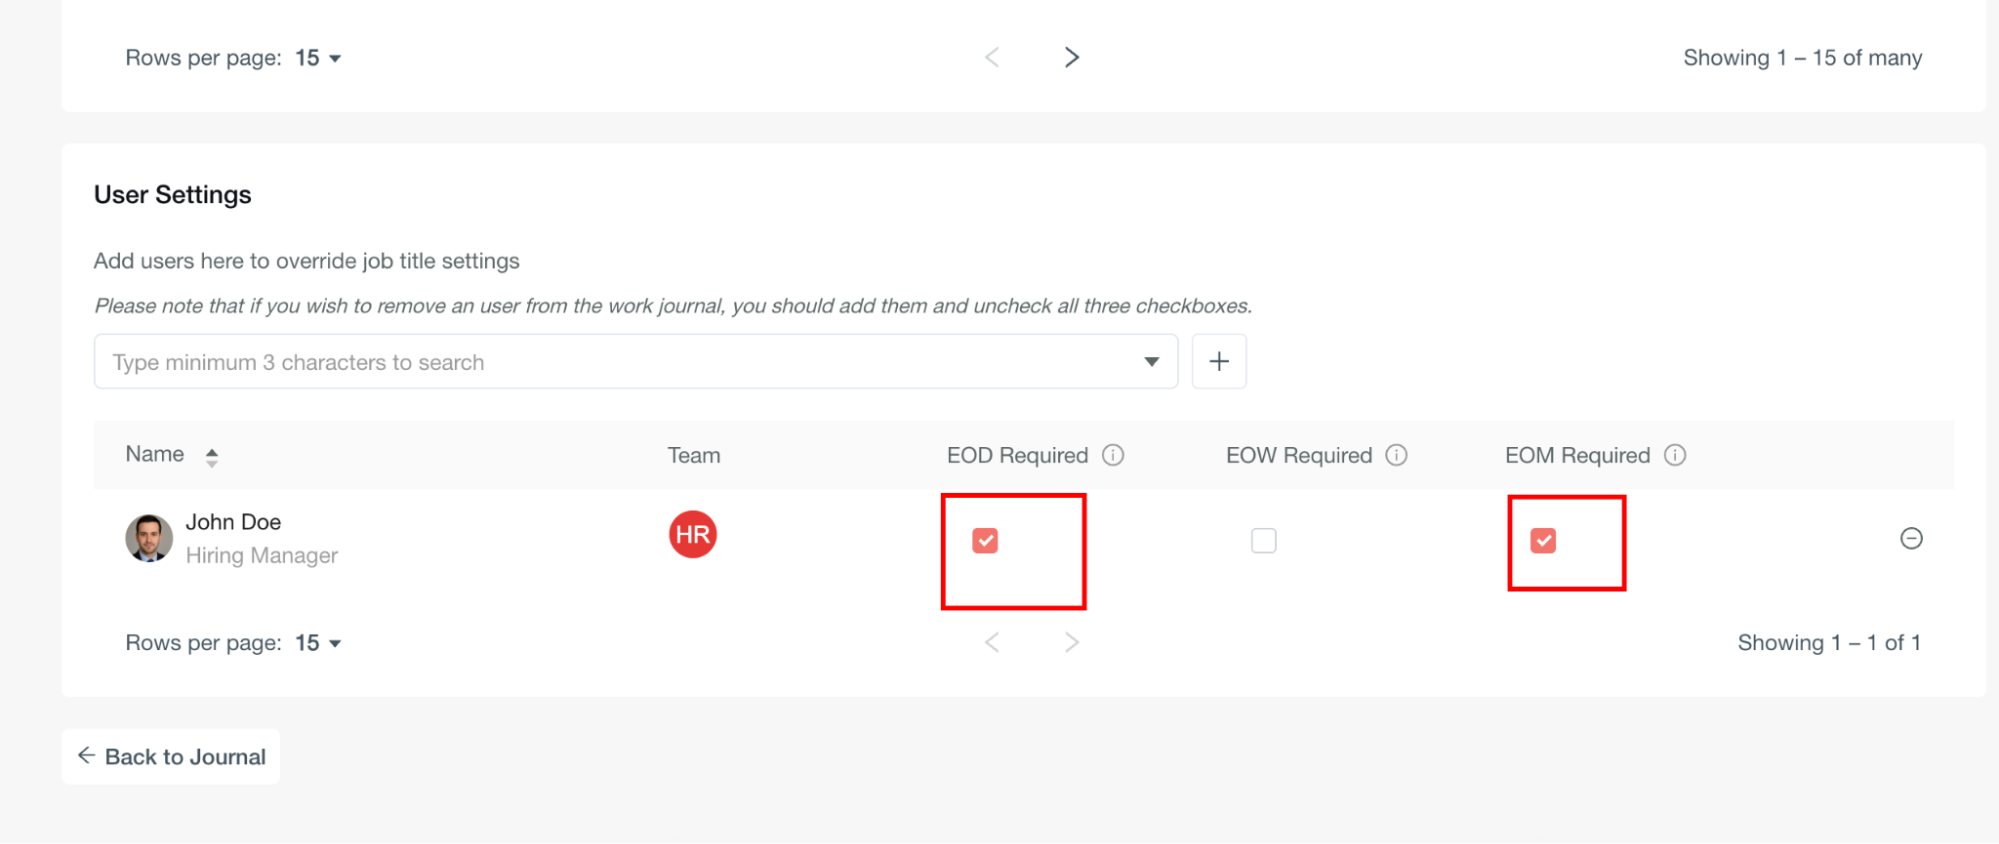
Configure Individual EOD EOW EOM Requirements
Once a user is added to User Settings, configure their specific EOD, EOW, and EOM requirements.
Remove User from Work Journal Submissions
To exclude a user from Work Journal submissions entirely:
-
Add them to the User Settings list.
-
Uncheck all three options: EOD Required, EOW Required, and EOM Required.
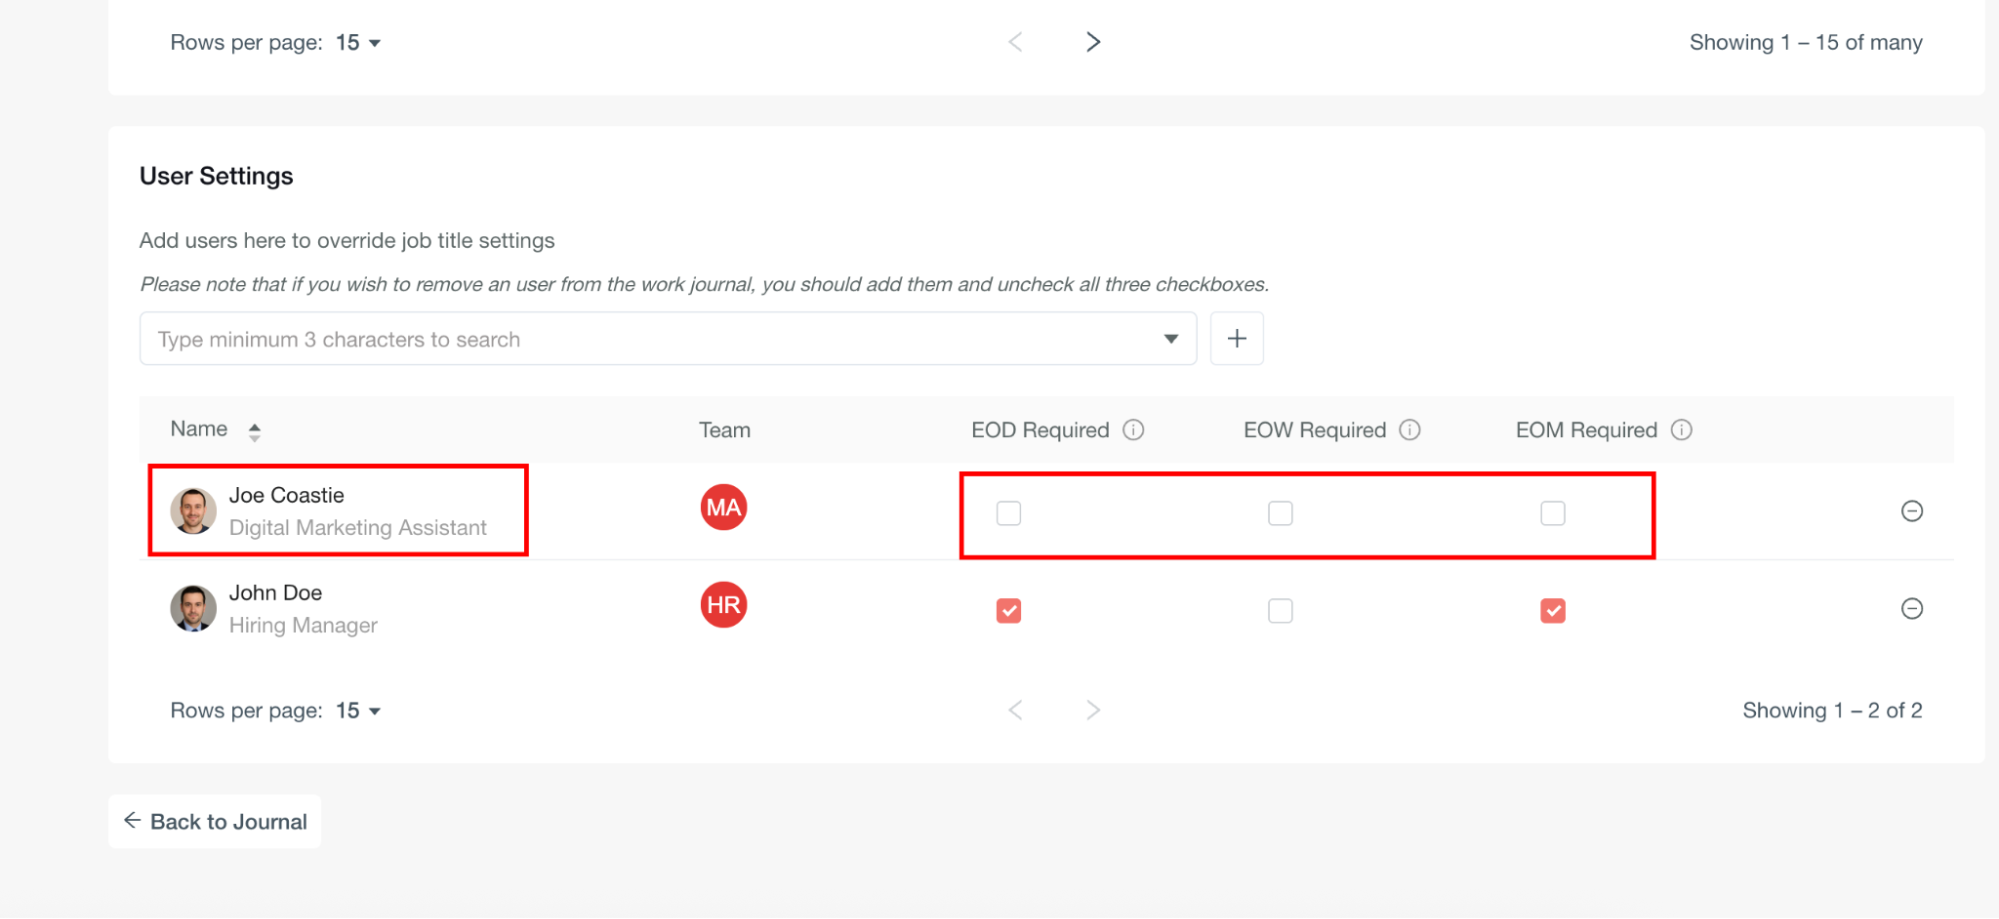
This allows users to save entries privately without submitting them to recipients.
Access Work Journal Reports
Work Journal Report is available only to users with appropriate permissions through Roles and Permissions. Users without the required permissions will not see the report section.
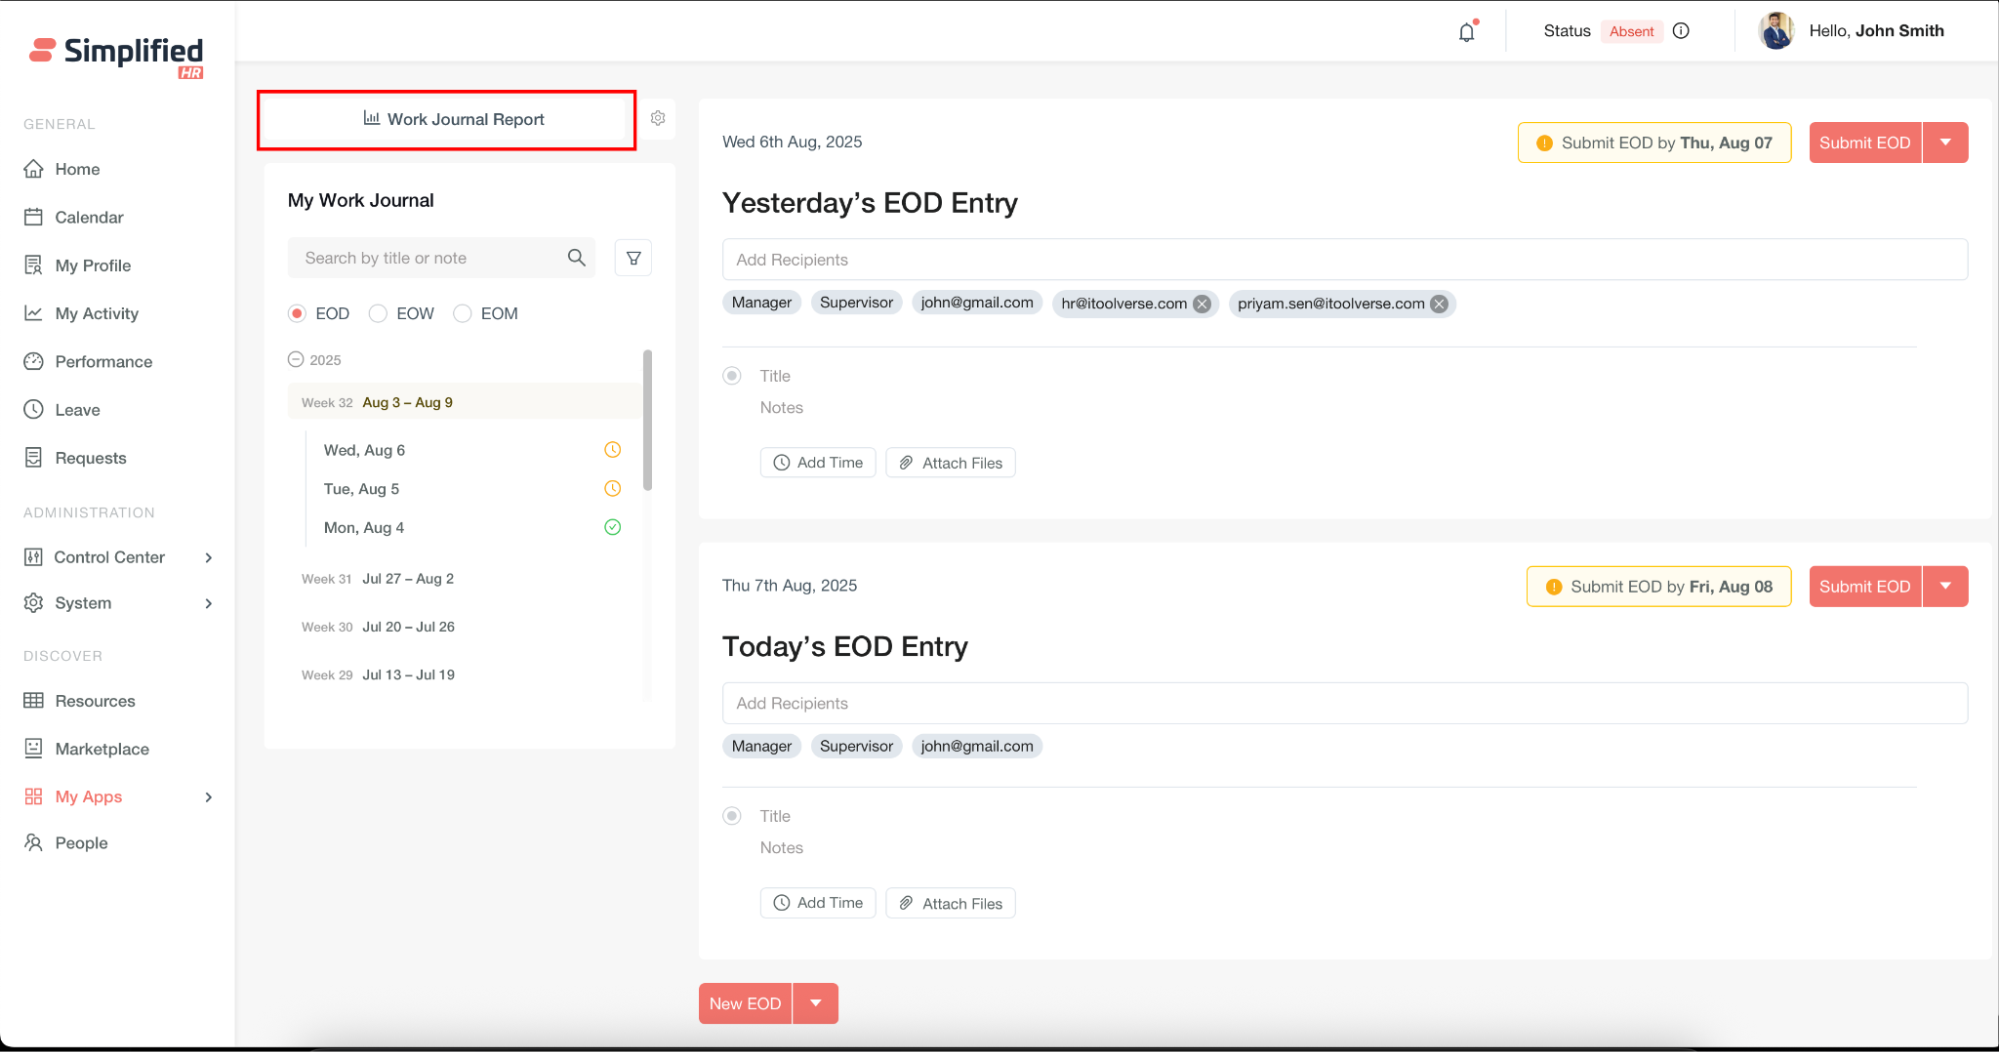
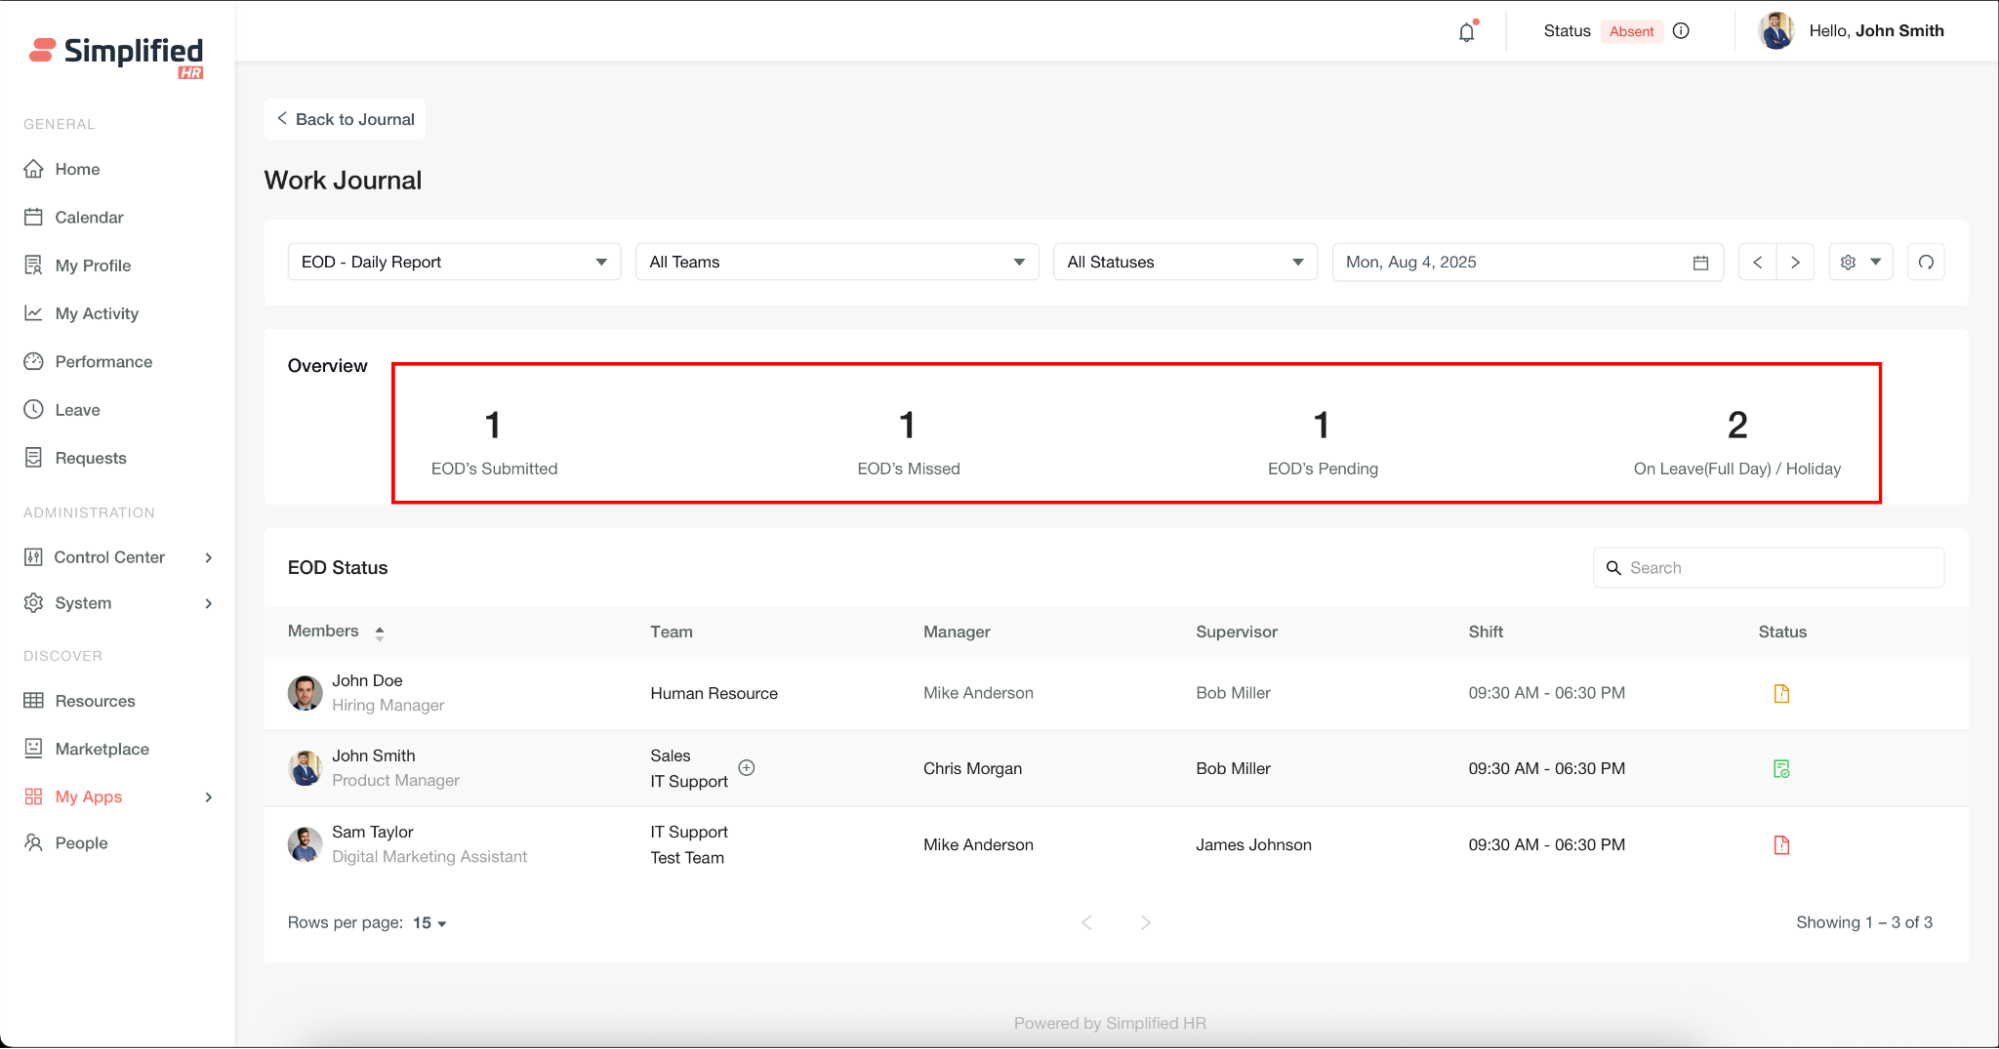
View Work Journal Report Overview
The reporting dashboard provides metrics for:
-
Daily submissions: Number of submitted, pending, and missed EODs.
-
Weekly submissions: EOW submission statistics.
-
Monthly submissions: EOM submission statistics.
-
Leave tracking: Days taken as leave within the EOD section.
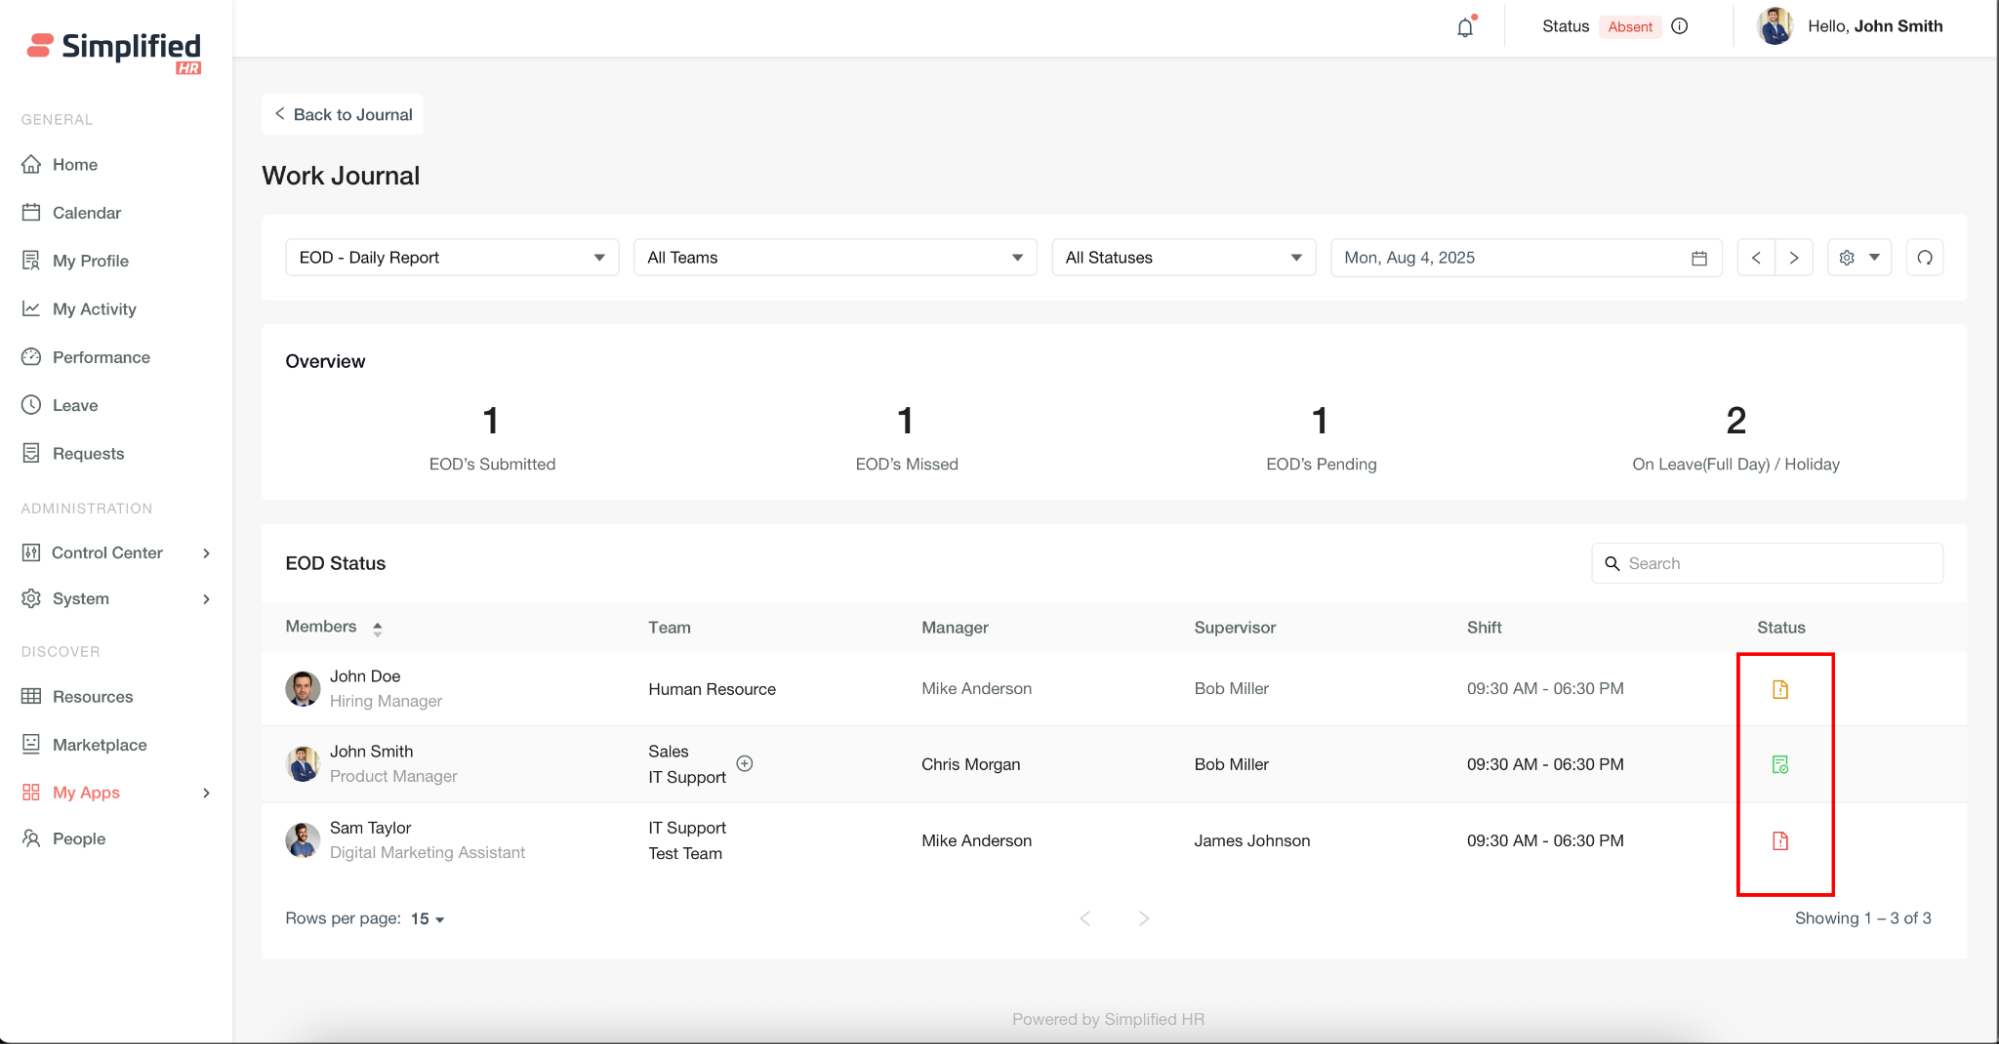
View Team Member Details
Each record includes:
-
Member name
-
Team assignment
-
Manager name
-
Supervisor name
-
Shift schedule
-
Current status
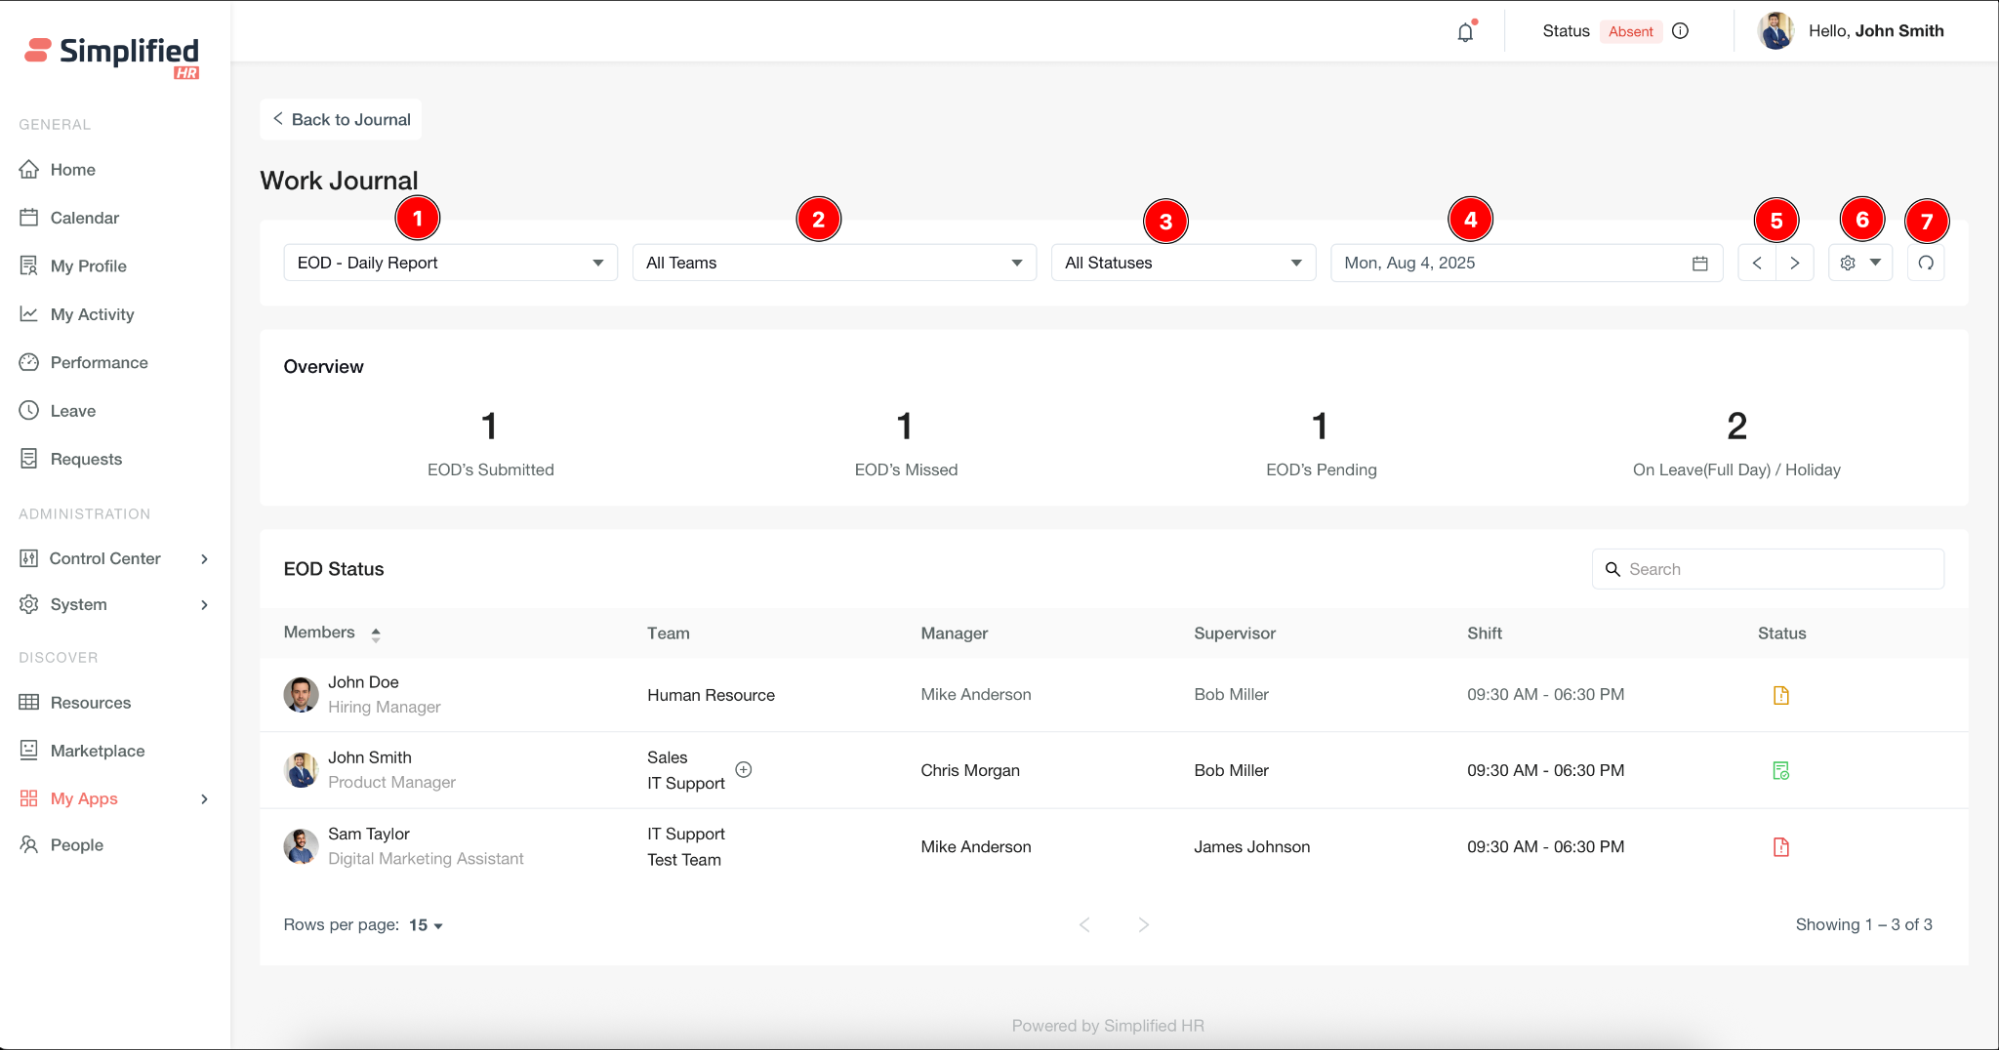
Filter Work Journal Reports by Type
Report type: Select EOD, EOW, or EOM views.
Filter Reports by Team
Teams dropdown: Filter by specific teams.
Filter Reports by Status
Status dropdown: Filter by Submitted, Pending, or Missed status.
Filter Reports by Date
Date picker: View reports for specific dates. Navigation buttons: Move between dates.
Reset Work Journal Report Filters
Refresh button: Reset filters and reload data.
View Individual Journal Details
Click any green Submitted icon to open a modal with complete Work Journal details for that user.
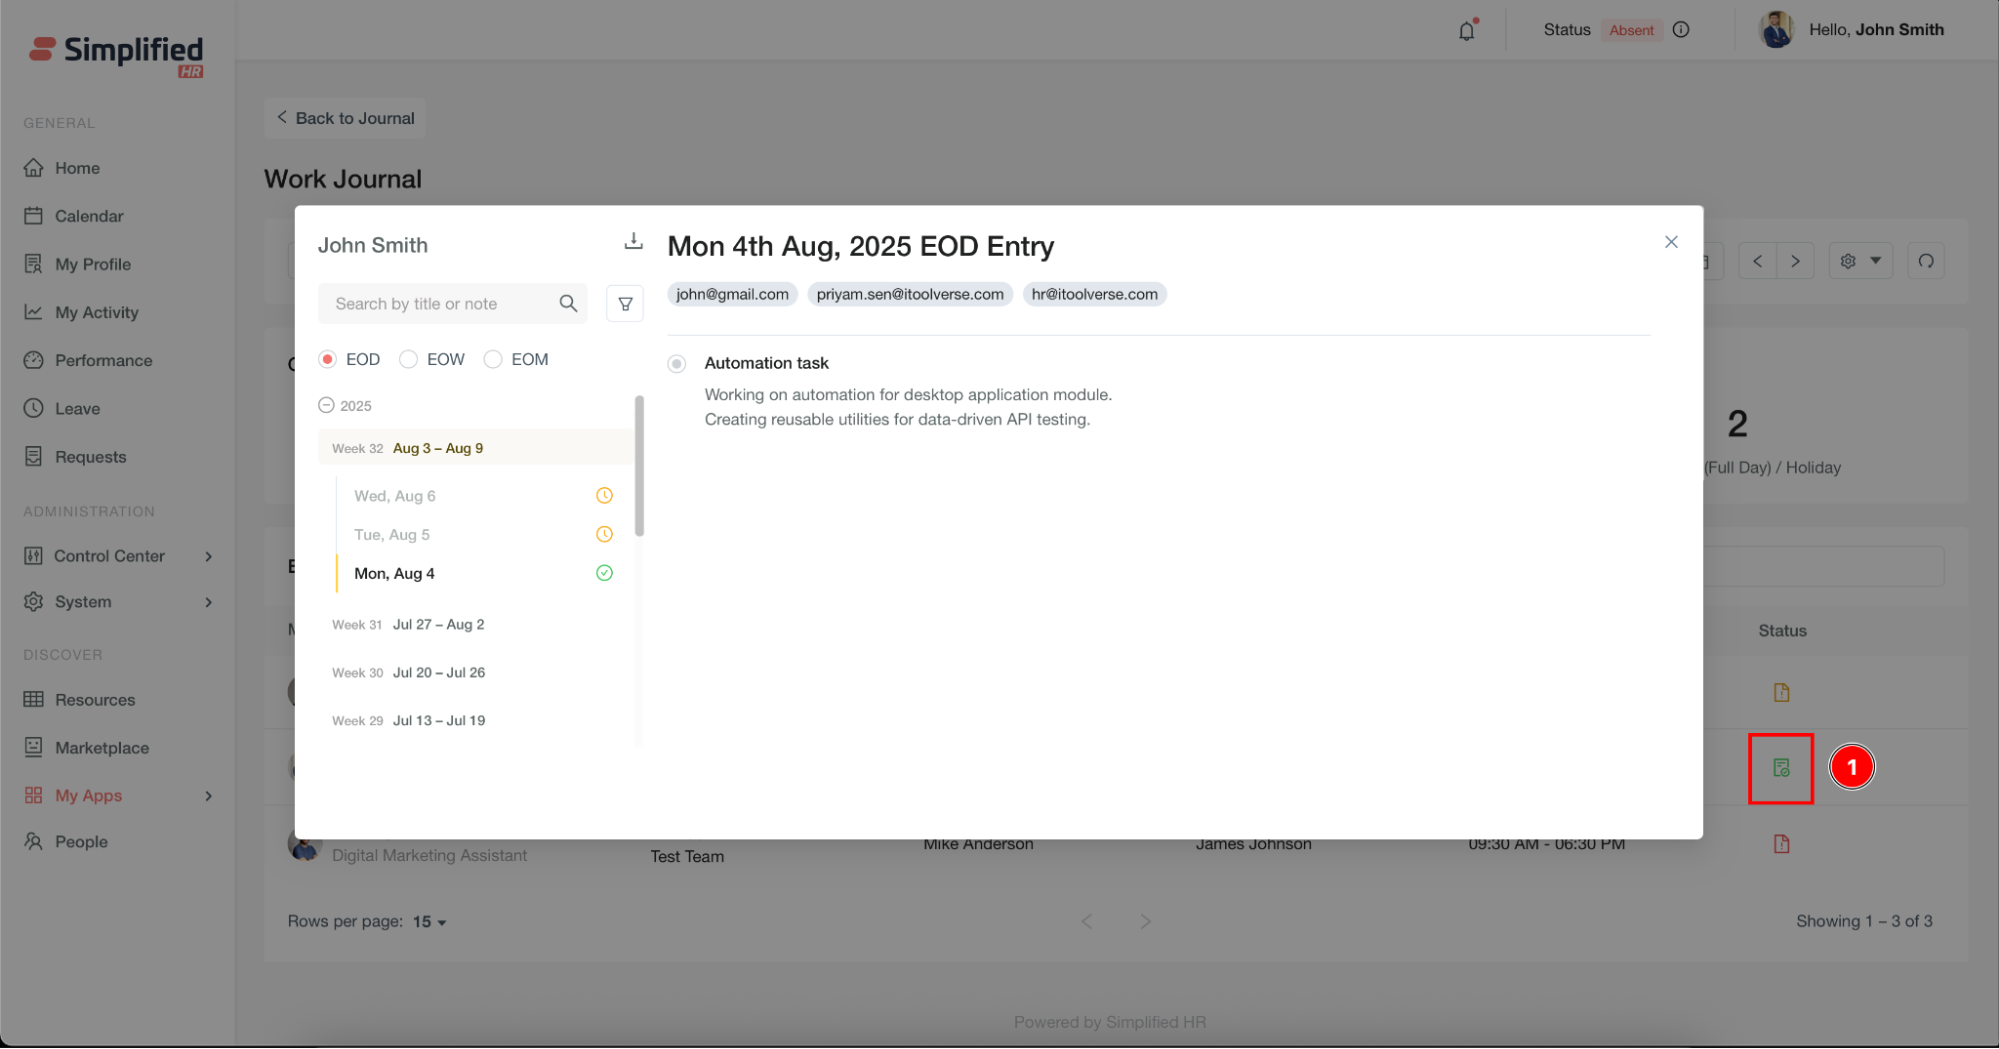
Important: Only submitted work journals are visible in the detailed view modal.
Export Work Journal Report
Settings icon: Export report data.
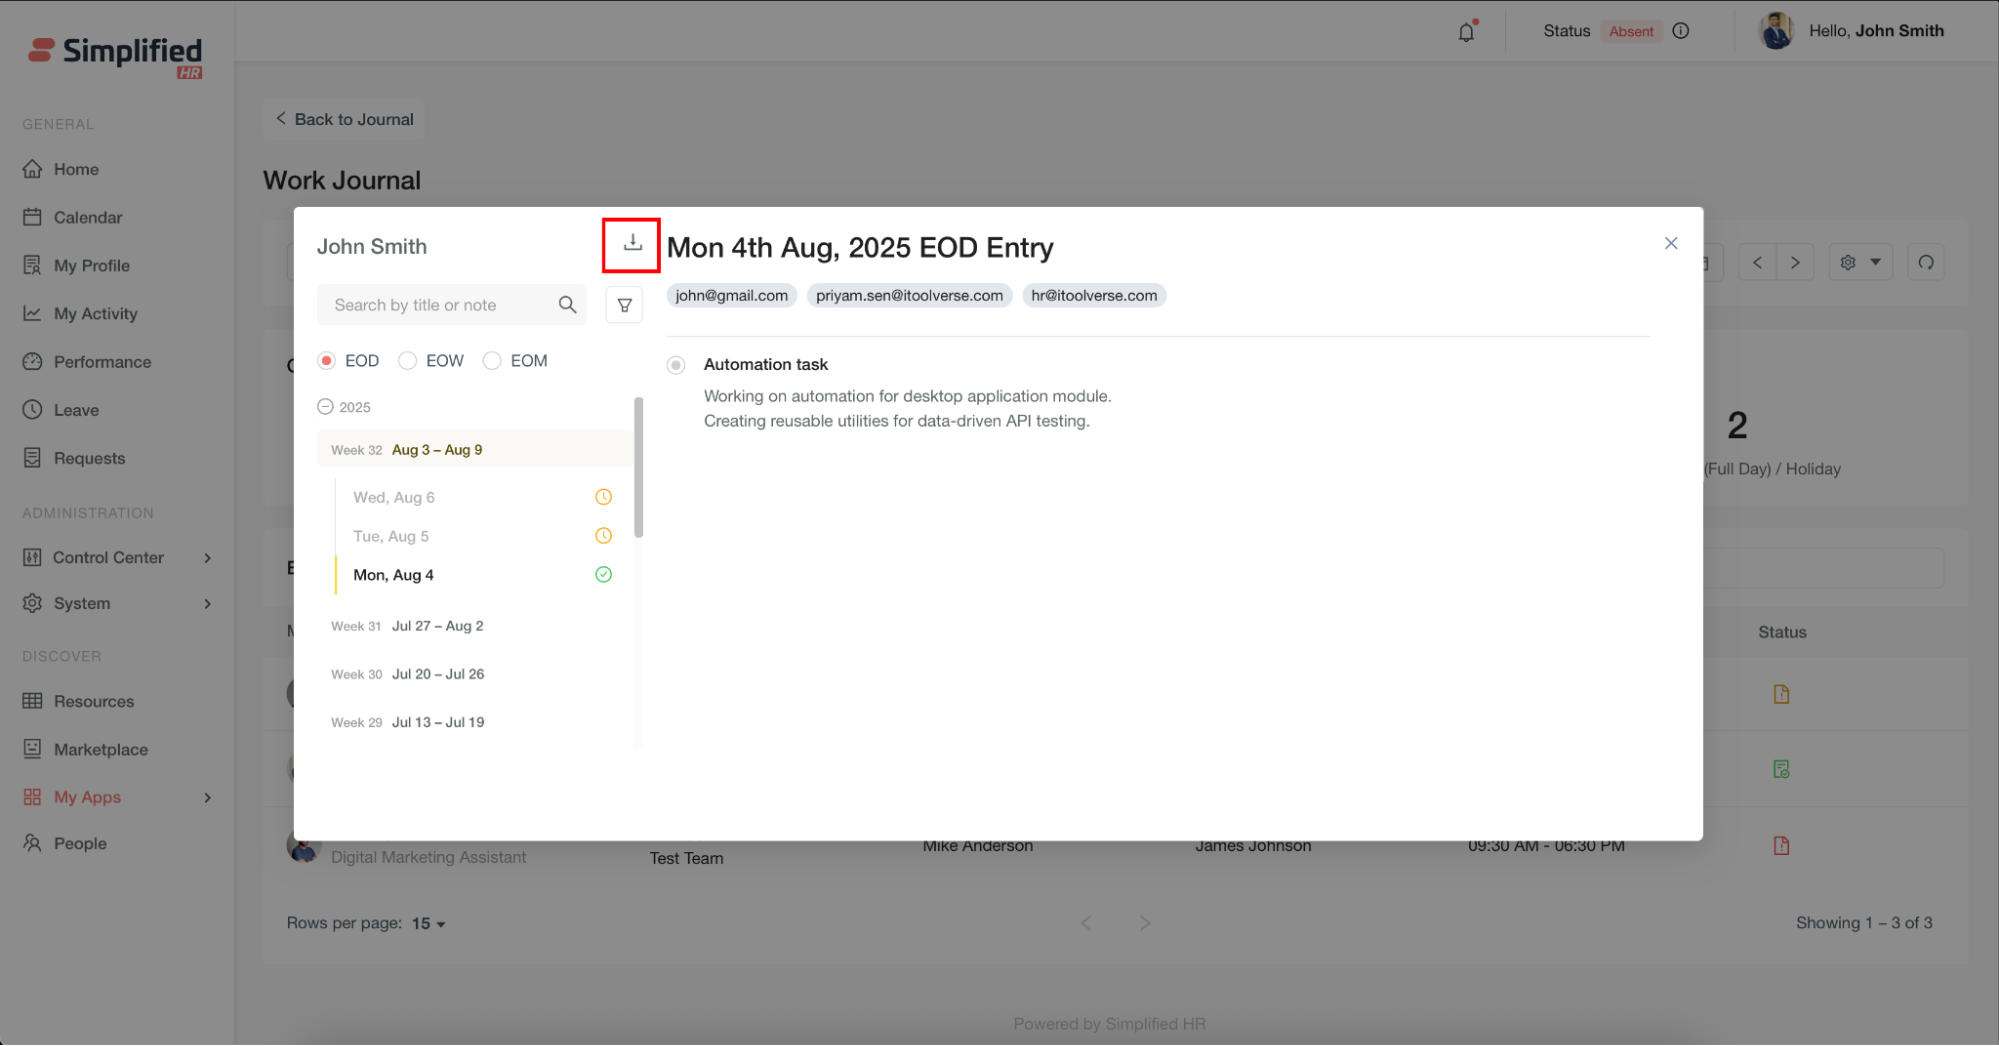
Download Individual Work Journal Report
Download specific member work journal reports using the Download icon within the detail modal.
Troubleshoot Work Journal Visibility
Work Journal module not visible: Verify Pro subscription status and proper module installation.
Troubleshoot Permission Errors
Permission errors: Check user permissions through Roles and Permissions settings.
Troubleshoot Missing Submission Options
Missing submission buttons: Verify EOD, EOW, or EOM requirements are enabled in Job Title Settings or User Settings.
Troubleshoot Notification Issues
Notification issues: Review notification settings in Journal Settings configuration.
Troubleshoot Missing Time Tracking Data
Time tracking not populating: Ensure Desktop Application time tracking is active and properly configured.