Admin → Easybook
Overview
Easybook is a comprehensive seat booking system in Simplified HR that provides an interactive interface for reserving seats across your entire organization. This guide covers the complete setup process, from initial installation to advanced configuration options.
Prerequisites
-
You must have Owner, Admin, or equivalent role permissions.
-
Your organization must have active locations configured in Simplified HR.
-
The Marketplace must be accessible in your system.
-
A paid plan is required, as Easybook is a Pro feature.
-
You should understand your organization's seating and booking requirements.
Install Easybook
-
Navigate to the Marketplace in your Simplified HR system.
-
Locate the Easybook app and click Install.
-
Wait for the installation confirmation.
Important: Refer to the Marketplace Installation Guide (hello.besimplified.com/hc/docs/articles/1756358900-marketplace for detailed installation instructions.*
Configure Easybook Permissions
Ensure relevant roles have the required permissions to access and use Easybook. Configure these through your Roles and Permissions settings.
Important: Owner, Admin, or similar role members can override most restrictions set up in the configuration.
Access Easybook
For administrators and owners, you can access Easybook through multiple entry points:
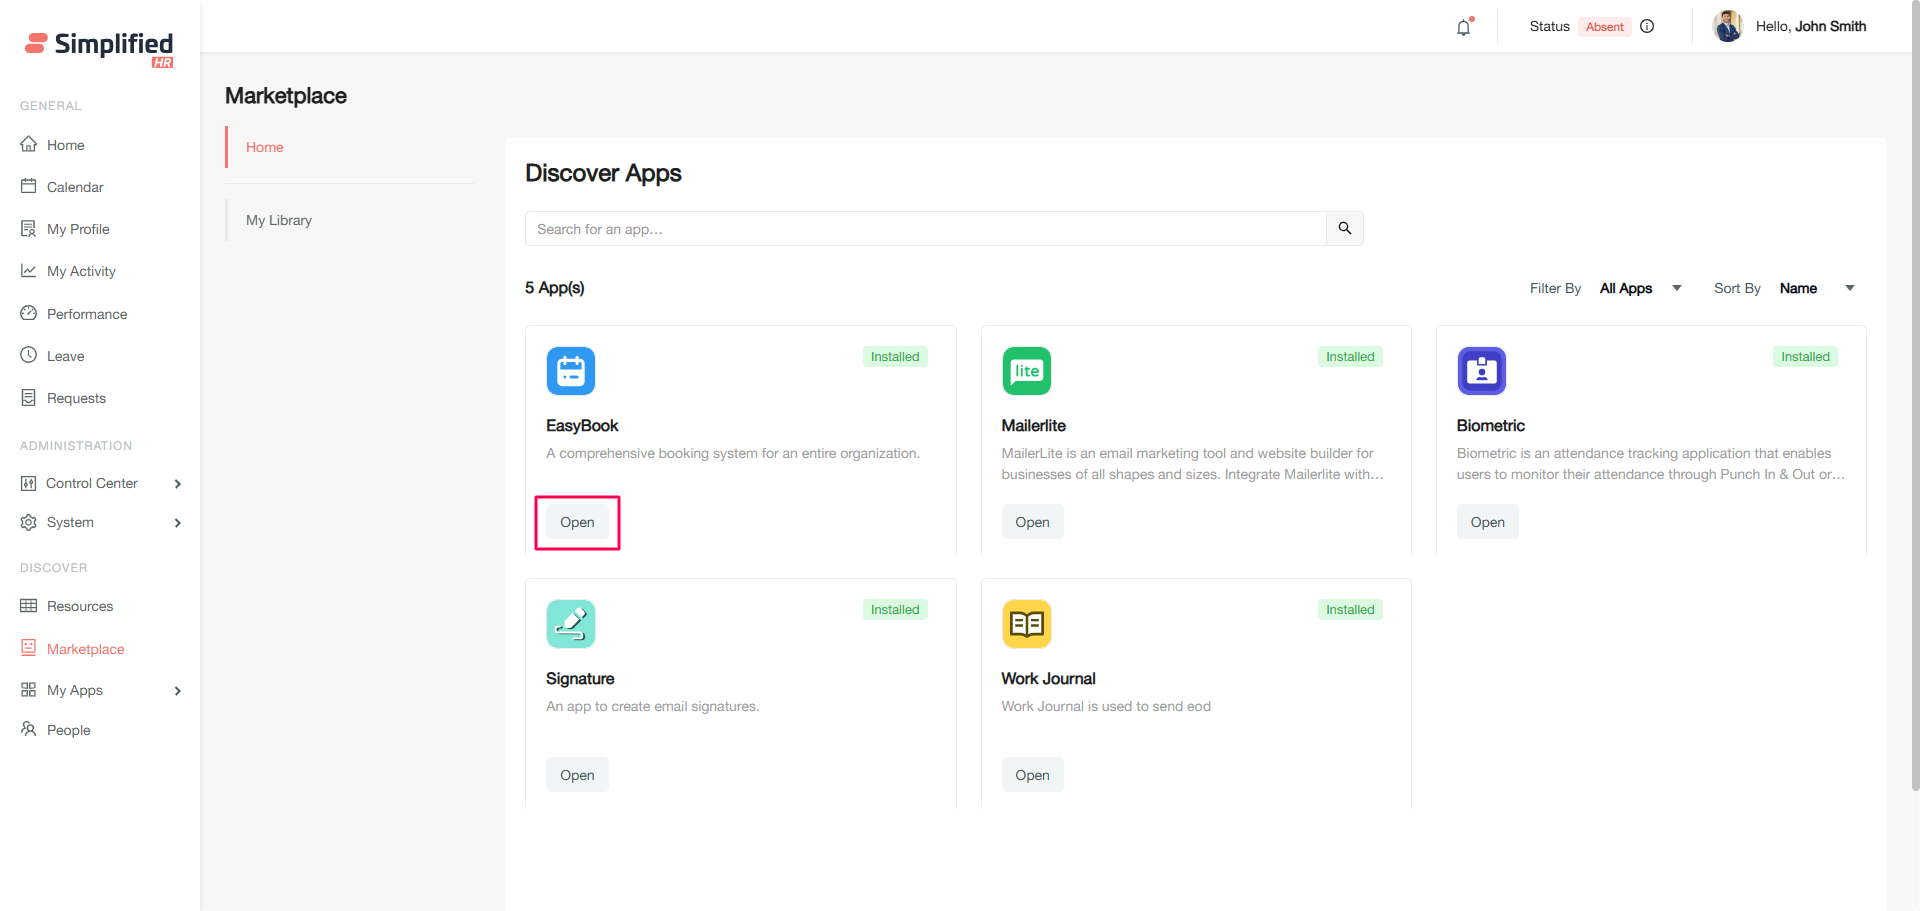
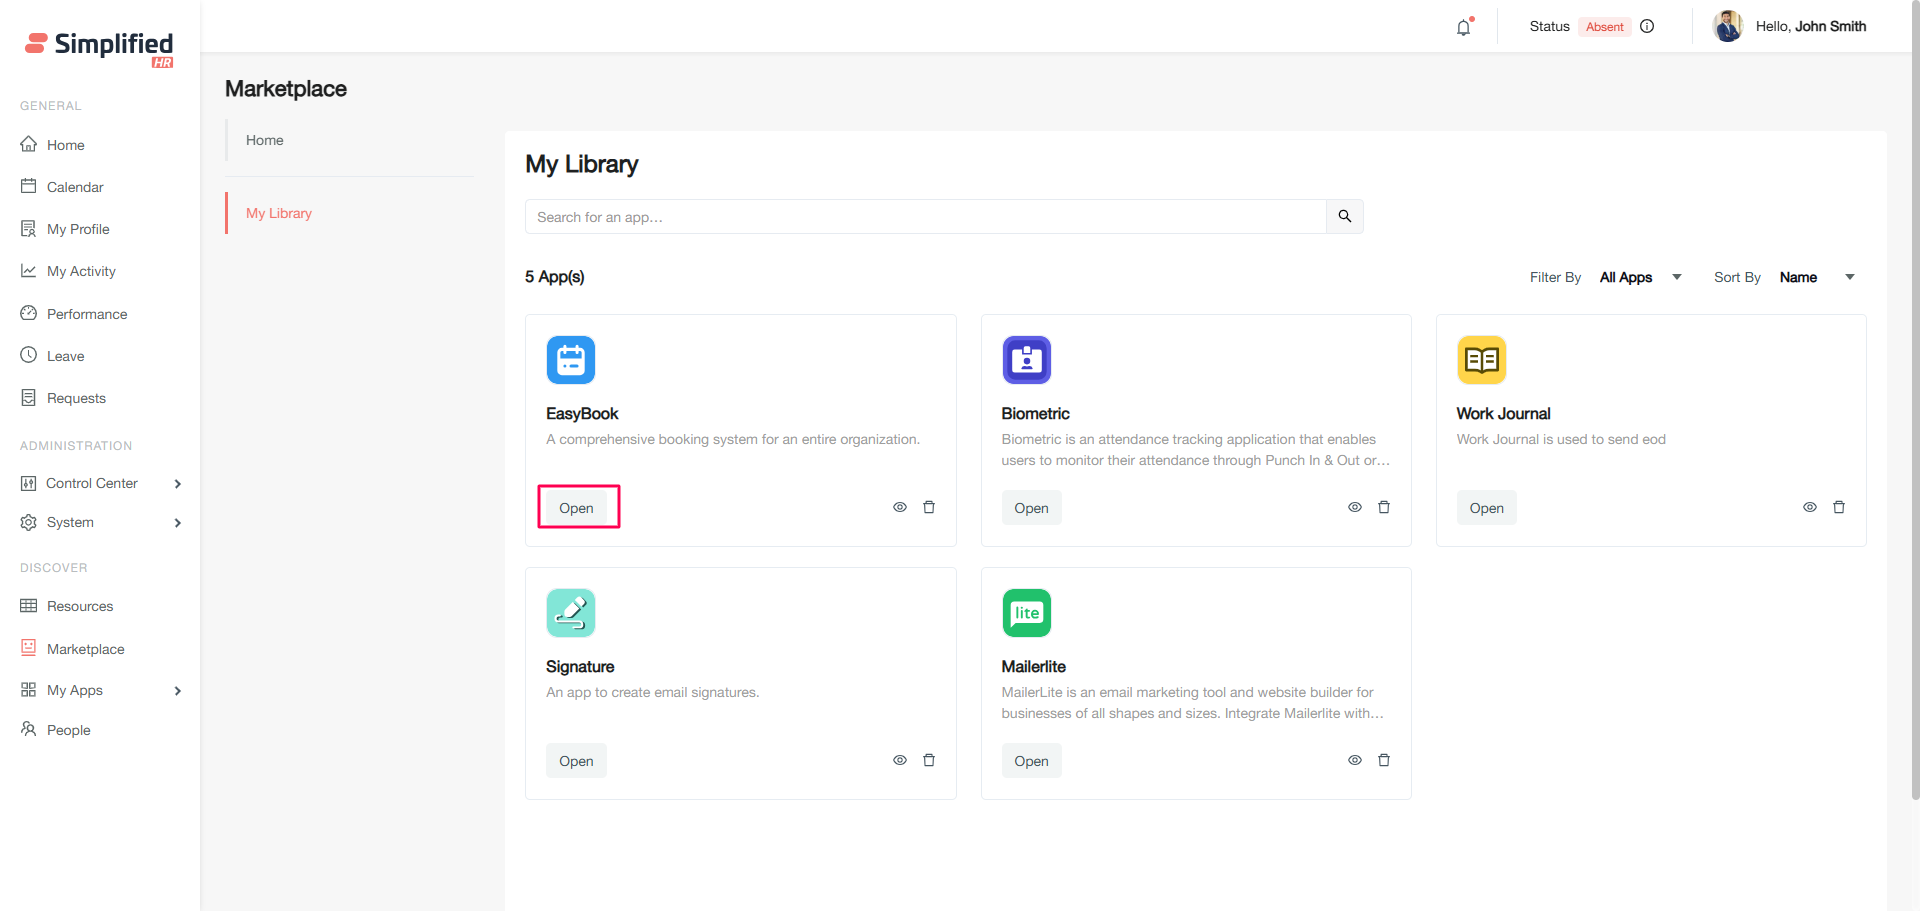
- Marketplace > Home or Marketplace > My Library (click Open).
 .
.
 .
.
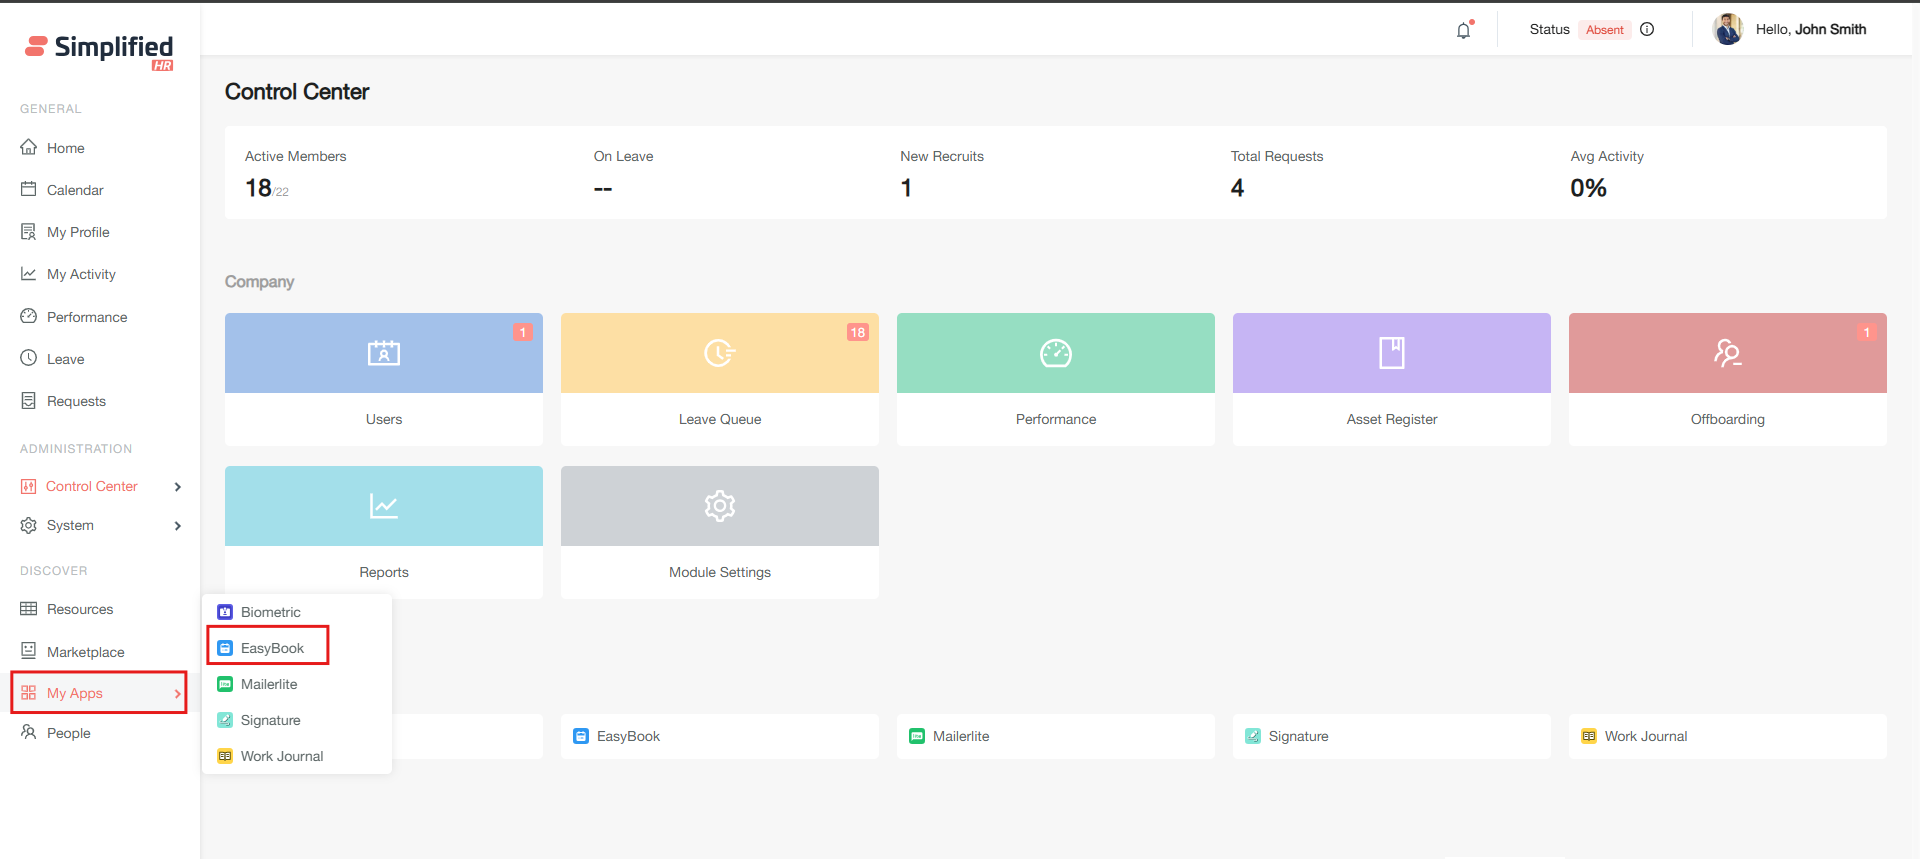
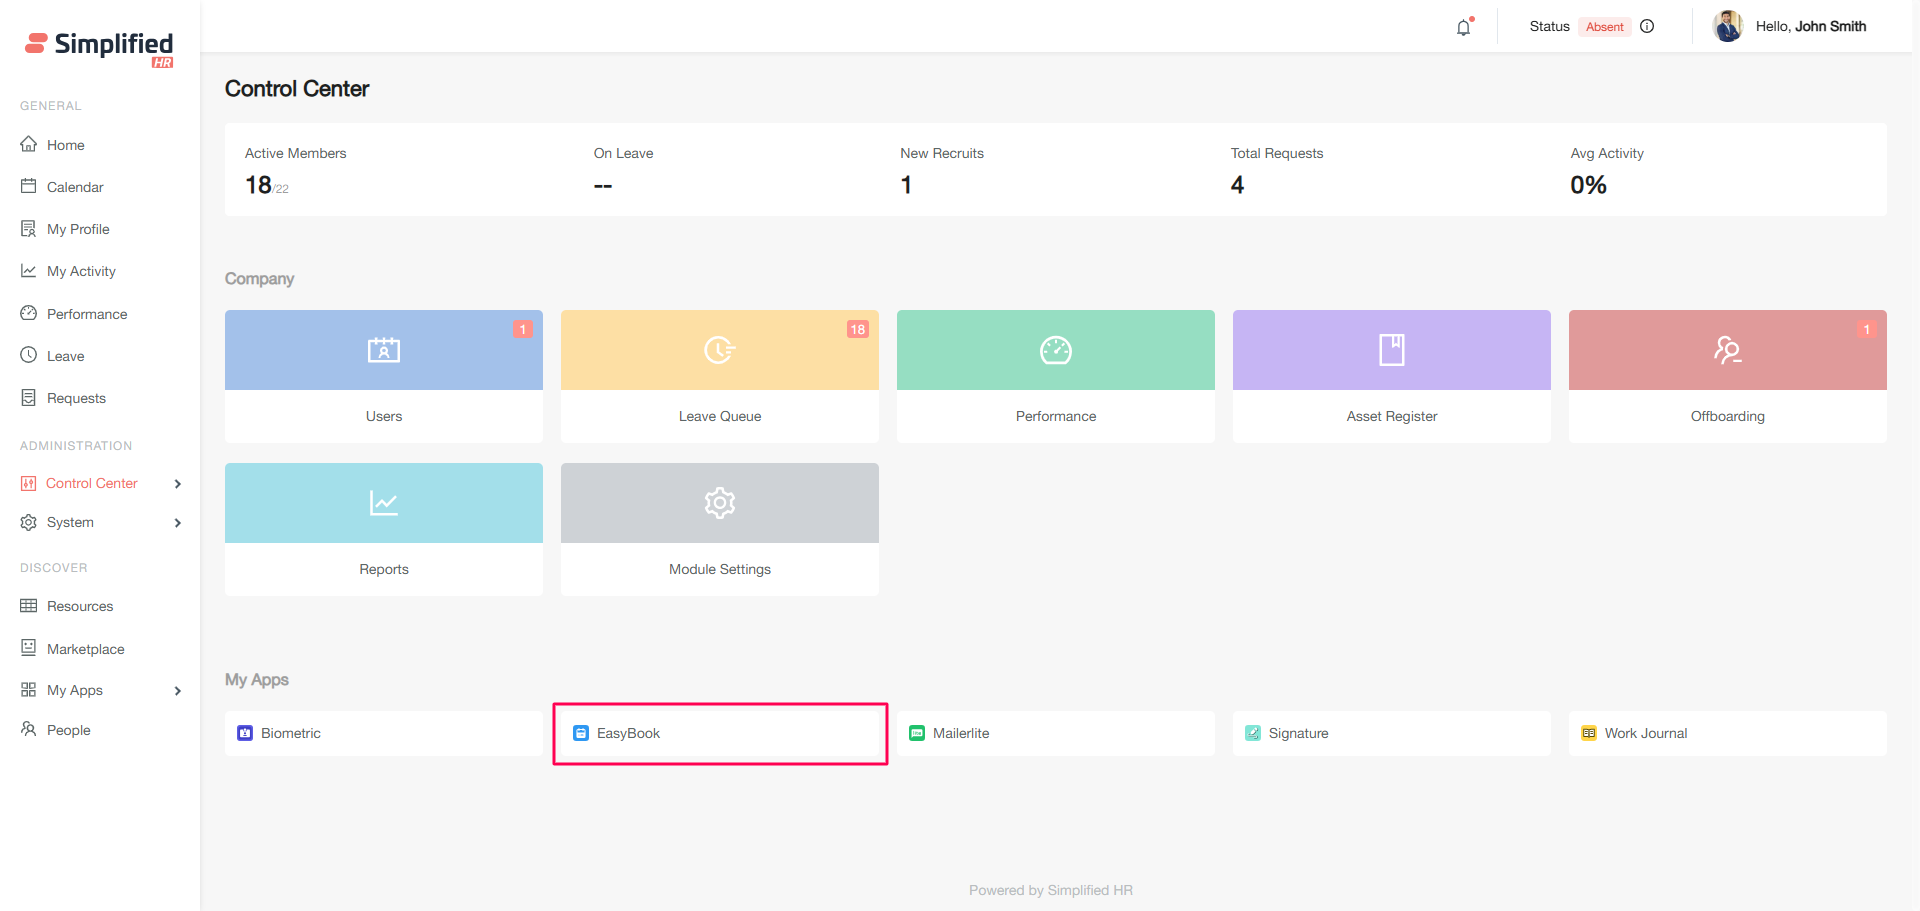
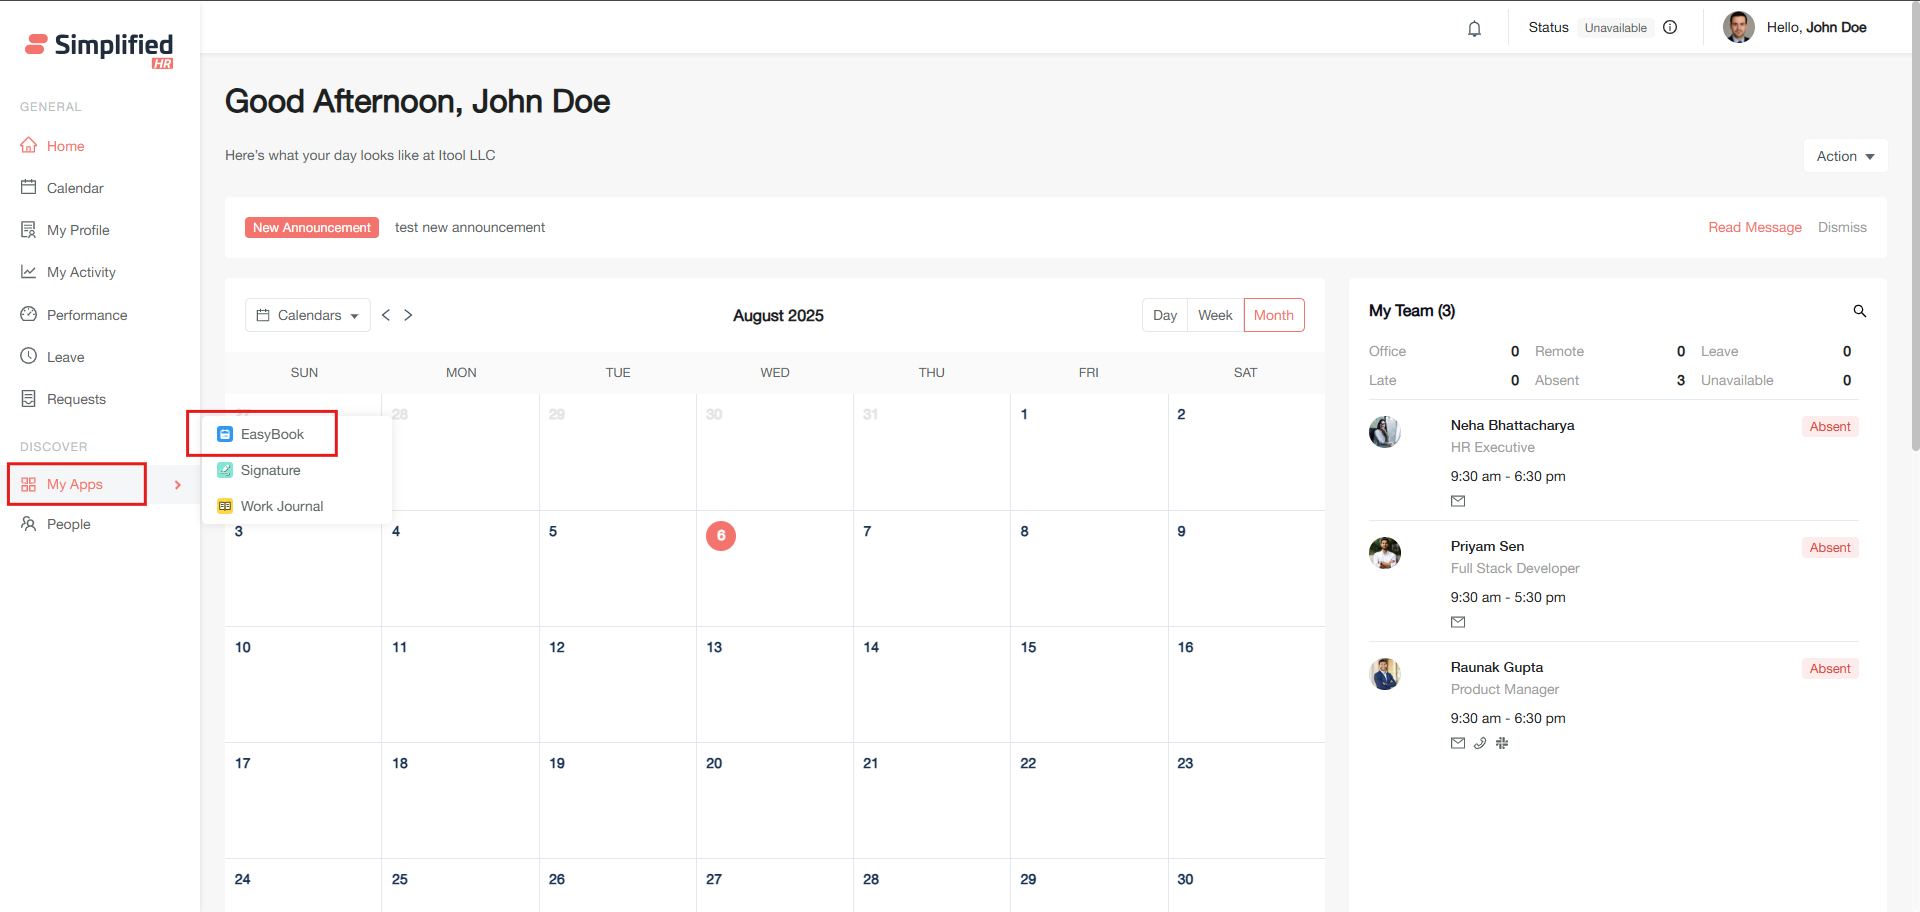
- My Apps in the navigation menu.
 .
.
 .
.
Important: General users access Easybook through My Apps in the navigation menu only.
 .
.
Access Easybook Settings
-
Navigate to Easybook through any of the access methods above.
-
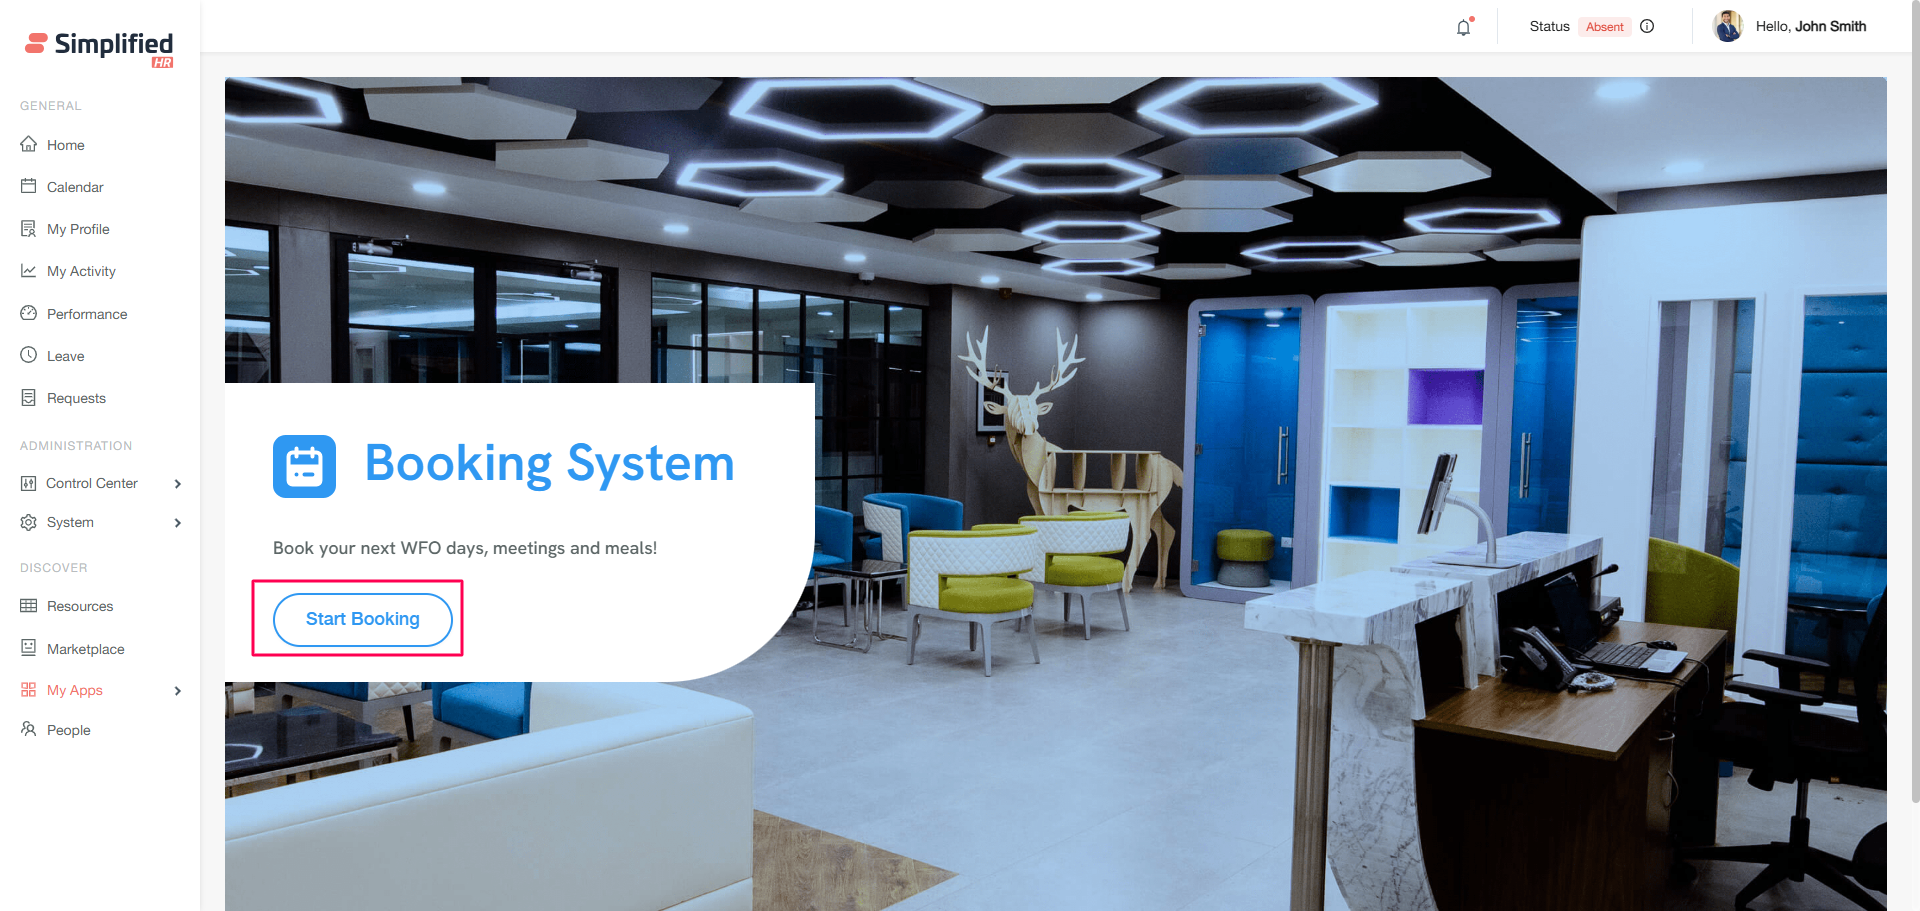
Click the Start Booking button (if this is your first time).
 .
.
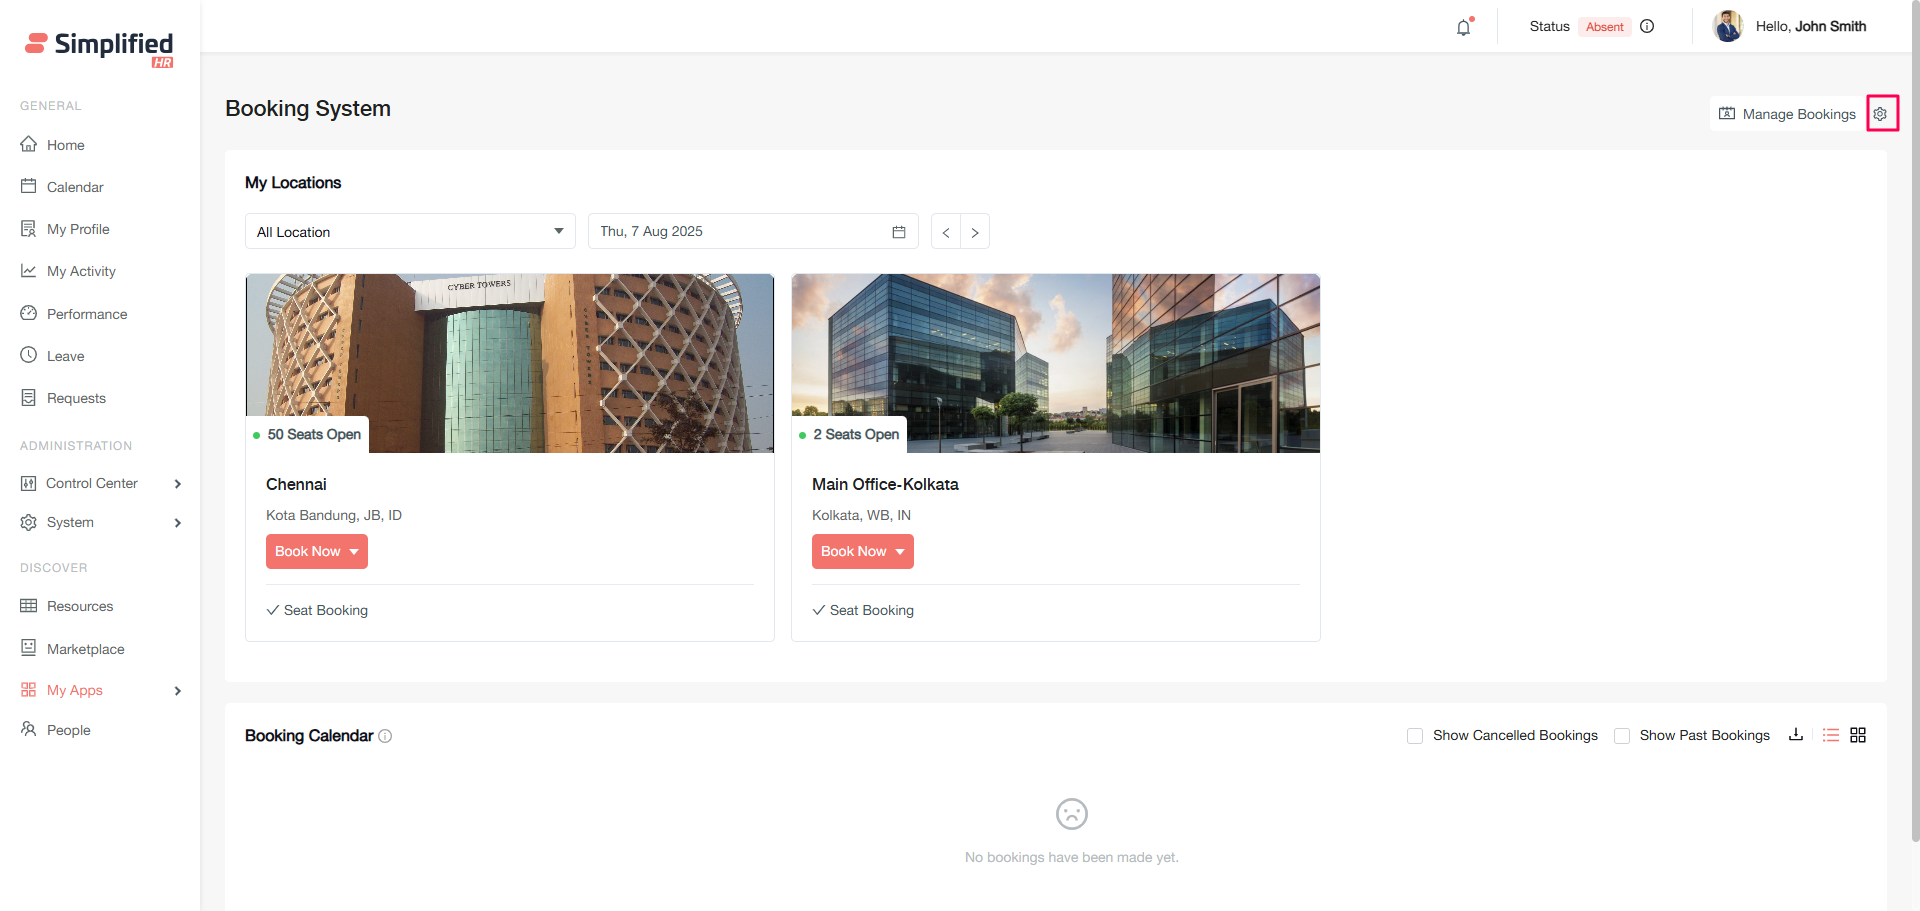
- On the Booking System page, click the Settings icon.
 .
.
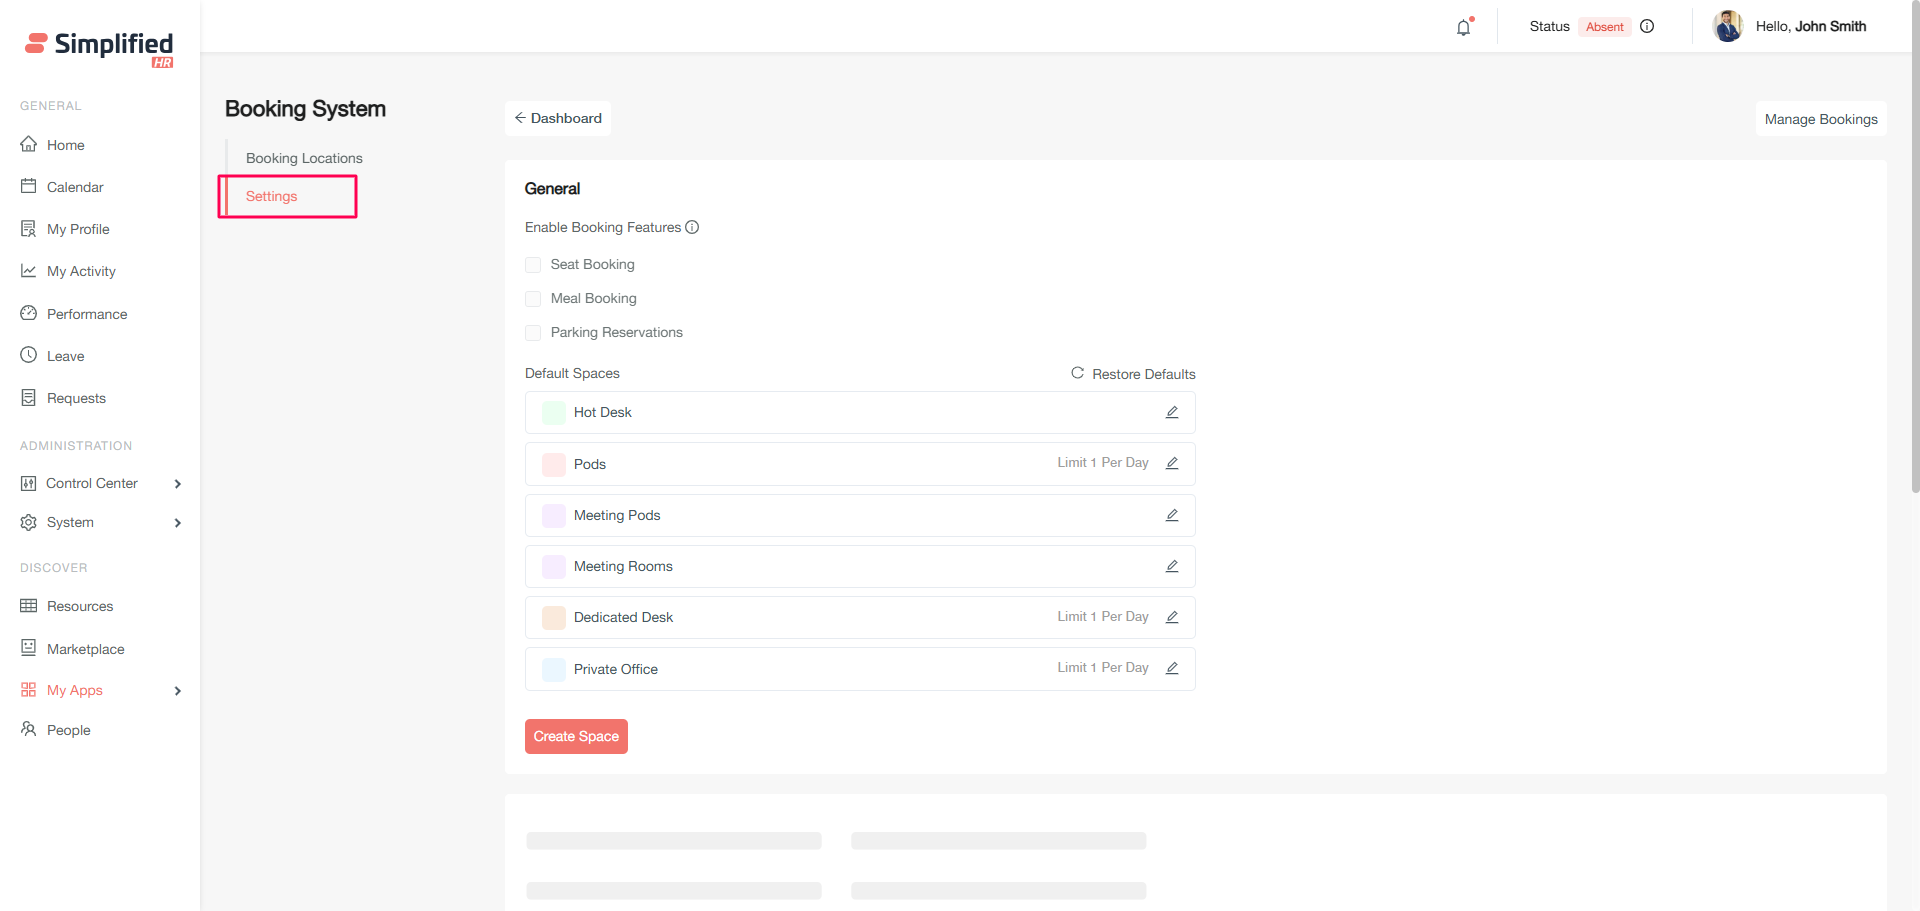
- Click the Settings tab on the configuration page.
 .
.
Configure Seat Booking
By default, Seat Booking is enabled and cannot be disabled. This is the primary feature of Easybook.
Understand Spaces
Spaces are different seating area types in your organization that define which areas members can access and book.
Easybook comes with these pre-configured default spaces:
Create Custom Space
-
Click Create Space.
-
Add a custom space name.
-
Select a color from the palette or enter a hex code.
-
To add multiple spaces, click Add Another and repeat the name/color steps.
-
Click Create.
Configure Space Limits
Space limits restrict how often users can book specific space types:
-
No limit: Allows unlimited bookings in the space.
-
Limited: Set restrictions using per day, per week, or per month.
Important: Example: "1 per day for Pods" means a member can book only one Pods seat per day, regardless of location.
Modify Space
-
Click the edit button next to any existing space.
-
Update the name, color, or limit as needed.
-
Click Update.
A confirmation message validates the changes.
Important: Changes affect future bookings and visual displays immediately.
Restore Default Spaces
Click Restore defaults to reset space names, colors, and limits to original values.
Important: This only affects default spaces, not custom ones.
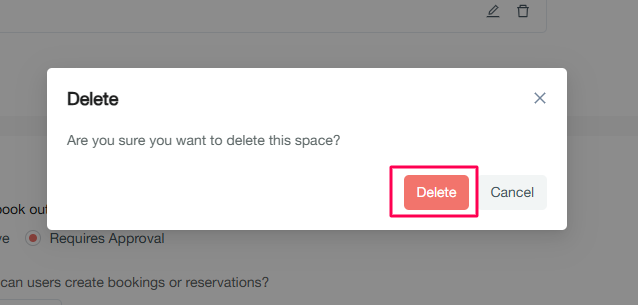
Delete Custom Space
-
Click the Delete button next to a custom space.
-
Confirm deletion in the modal.
A success message confirms removal.
Important: Only custom spaces can be deleted; default spaces cannot be deleted.
 .
.
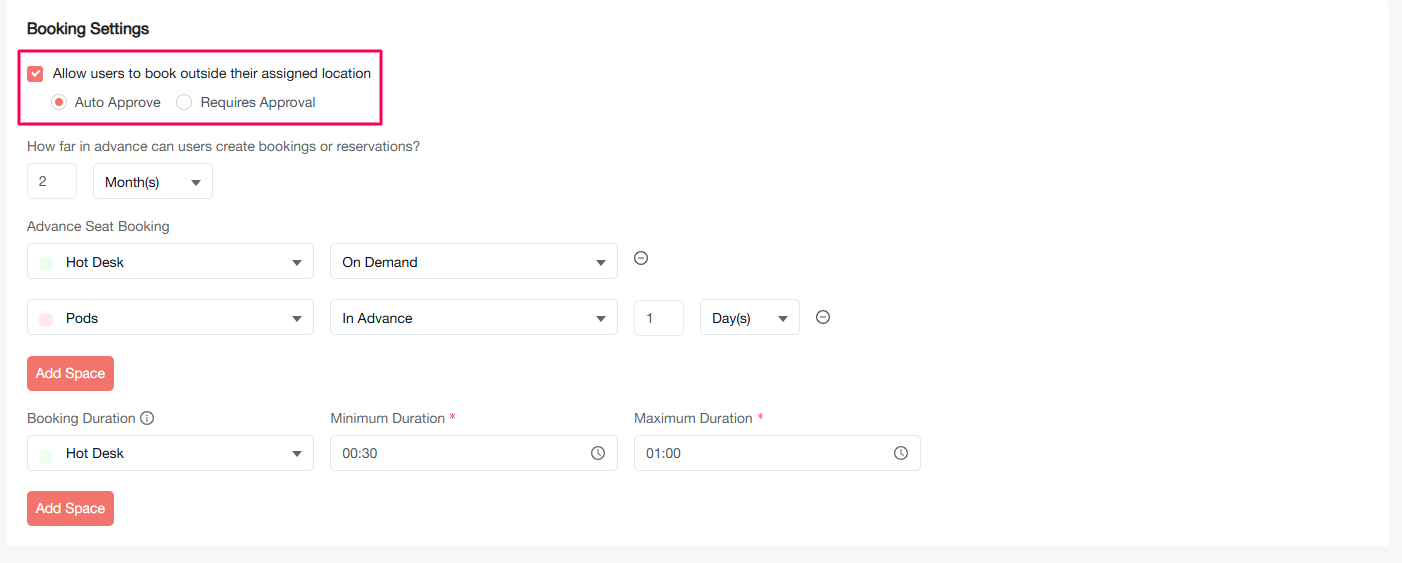
Configure Booking Outside Assigned Location
This configuration streamlines the flow when an employee wants to book their seats outside their assigned work location. Choose between two approval workflows:
 .
.
Important: Bookings within assigned locations are always auto-approved for any user.
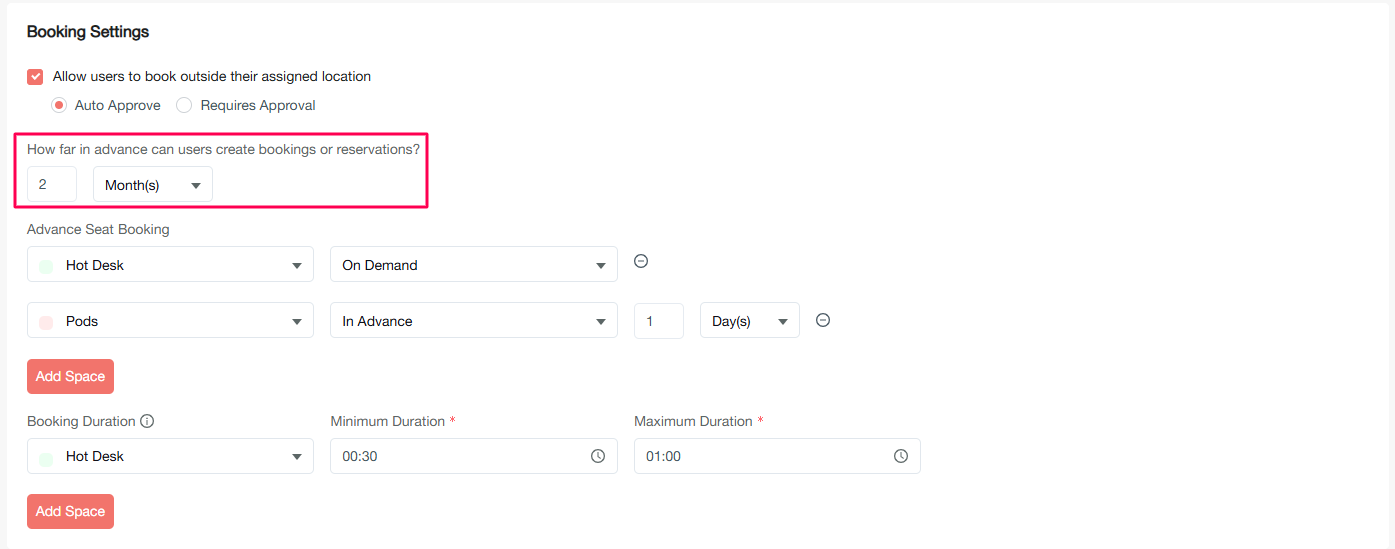
Configure Future Booking Restrictions
Set how far in advance users can create bookings:
-
Enter a numeric value.
-
Select the time period: Day, Week, or Month.
-
Scroll down and click Save.
 .
.
Important: Example: "30 days" means users can book up to 30 days in advance.
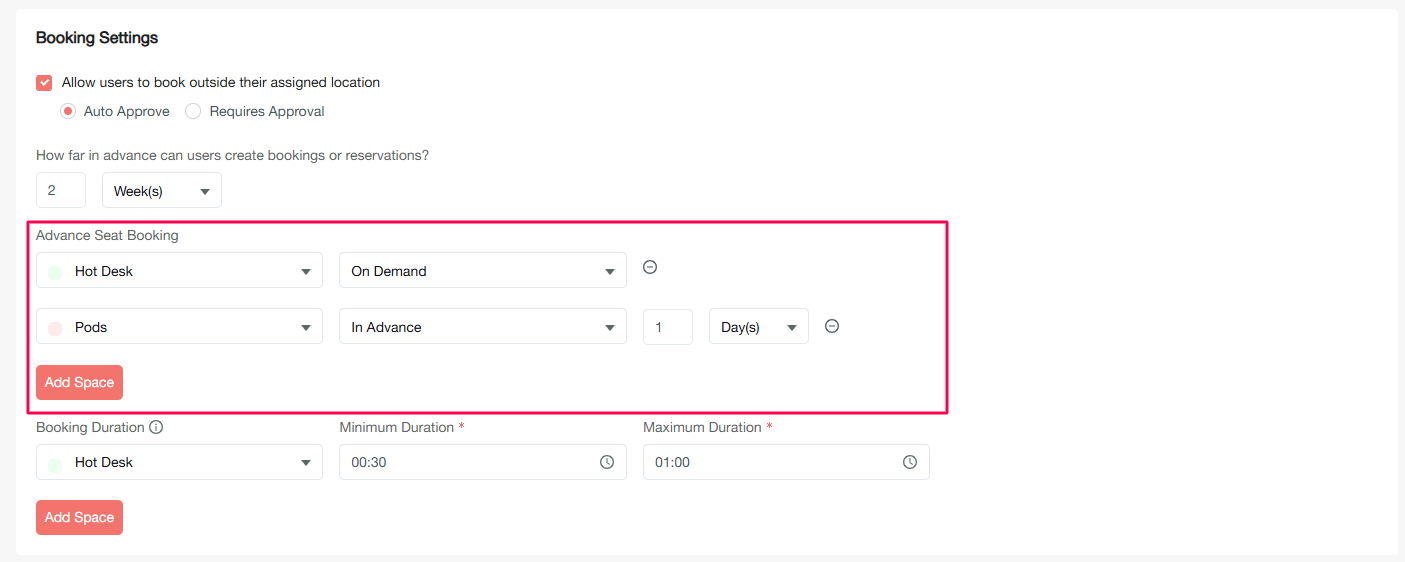
Configure Space Booking Availability
Configure when specific spaces can be booked: Space on Demand or Space in Advance.
 .
.
Configure On-Demand Space
Members can book seats in these spaces at any time.
-
Click Add Space and select a space.
-
Choose On Demand.
-
Click Save.
Configure Advance Booking Space
Members must book a specified time before their intended use.
-
Click Add Space and select a space.
-
Choose In Advance.
-
Enter the advance time requirement.
-
Select: Hour(s), Day(s), or Week(s).
-
Click Save.
Examples:
-
"1 hour for Pods": Book 1 hour before the intended slot time.
-
"1 day for Pods": Book 1 day before the intended date.
-
"1 week for Pods": Book 1 week before the intended date.
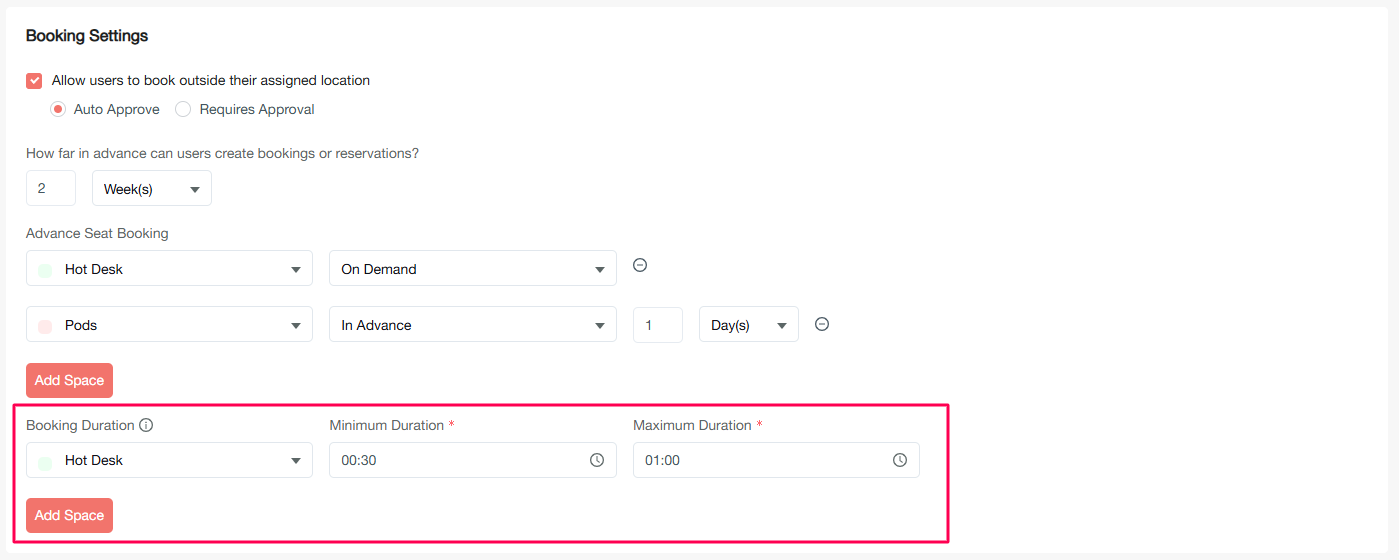
Configure Booking Duration
Set minimum and maximum duration limits for time-slot bookings. Configure specific spaces to require time-slot selections rather than all-day bookings.
 .
.
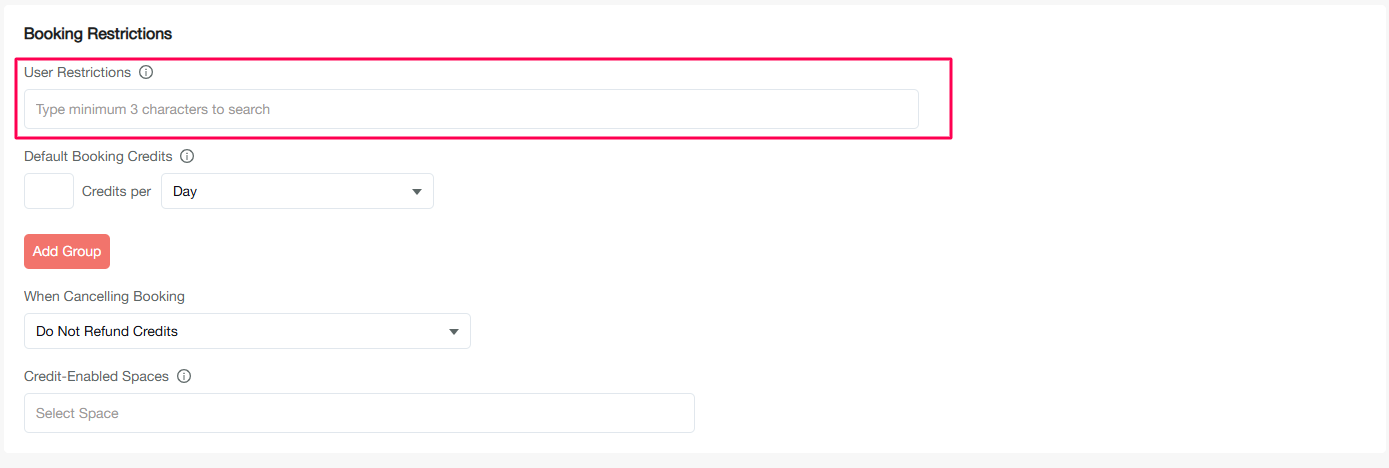
Restrict User Booking
Blacklist specific members from making any bookings:
-
Type the first 3 letters of a member's name.
-
Select the member from the search results.
-
Add multiple members if needed.
-
Click Save.
 .
.
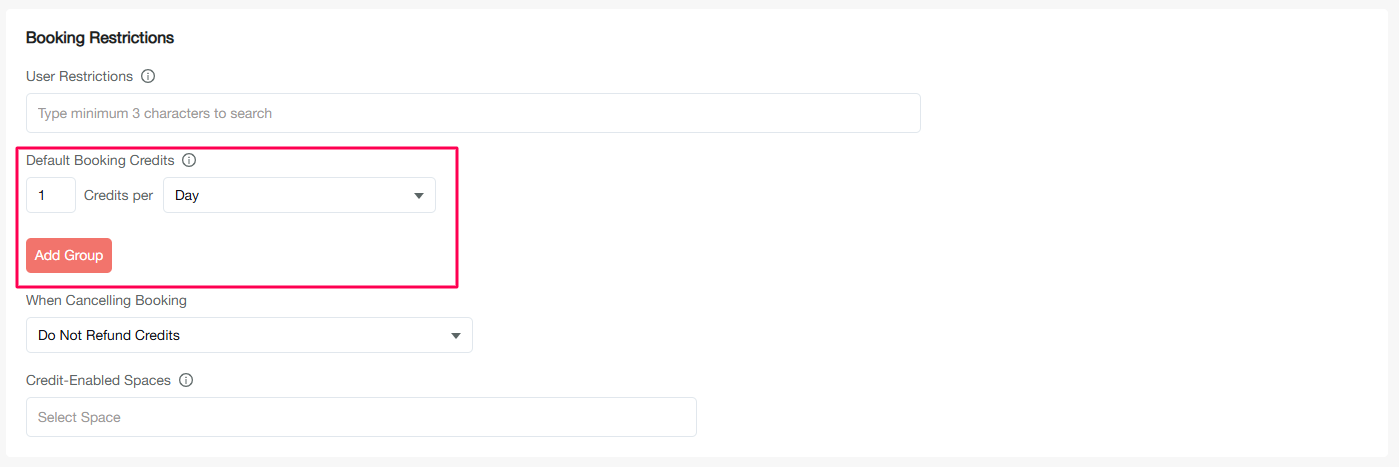
Configure Booking Credits
Set organization-wide booking limits — organizations can define daily and/or monthly booking credit limits per member.
 .
.
Configure Daily Booking Credits
Set Credits per Day to limit daily bookings per member.
Configure Monthly Booking Credits
Set Credits per Month to limit monthly bookings per member.
Create Custom Credit Group
-
Click Add Group.
-
Set credit amount (daily or monthly).
-
Select specific members for custom limits.
-
Click Save.
Understand Booking Credit Consumption
-
Each booking consumes 1 credit.
-
Modifying booking dates also consumes credits.
-
Modifying spaces, floor, and room in an existing booking does not consume credits.
-
Empty fields mean unlimited credits.
-
Admin roles bypass credit restrictions.
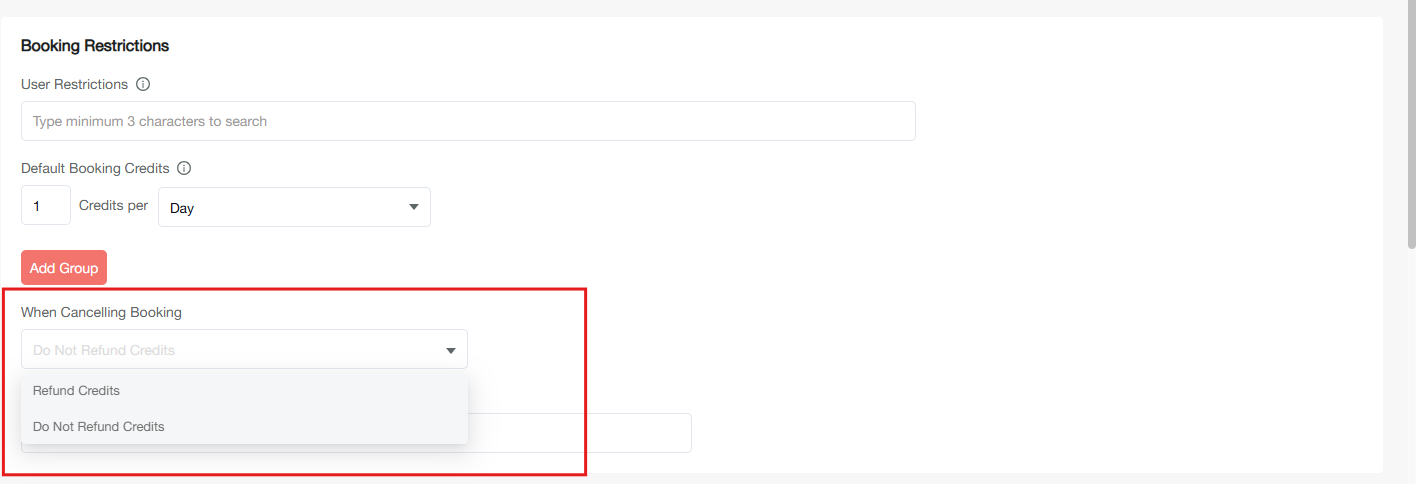
Configure Credit Refunds
Set conditions for credit refunds:
 .
.
Disable Credit Refunds
Select "Do not Refund Credits" to never return consumed credits.
Configure Credit-Enabled Spaces
Specify which spaces consume and refund credits.
-
Select one or more spaces for the credit system.
-
Click Save.
Important: If no space is selected, then booking in active spaces will consume credit.
 .
.
Configure Booking Reminders
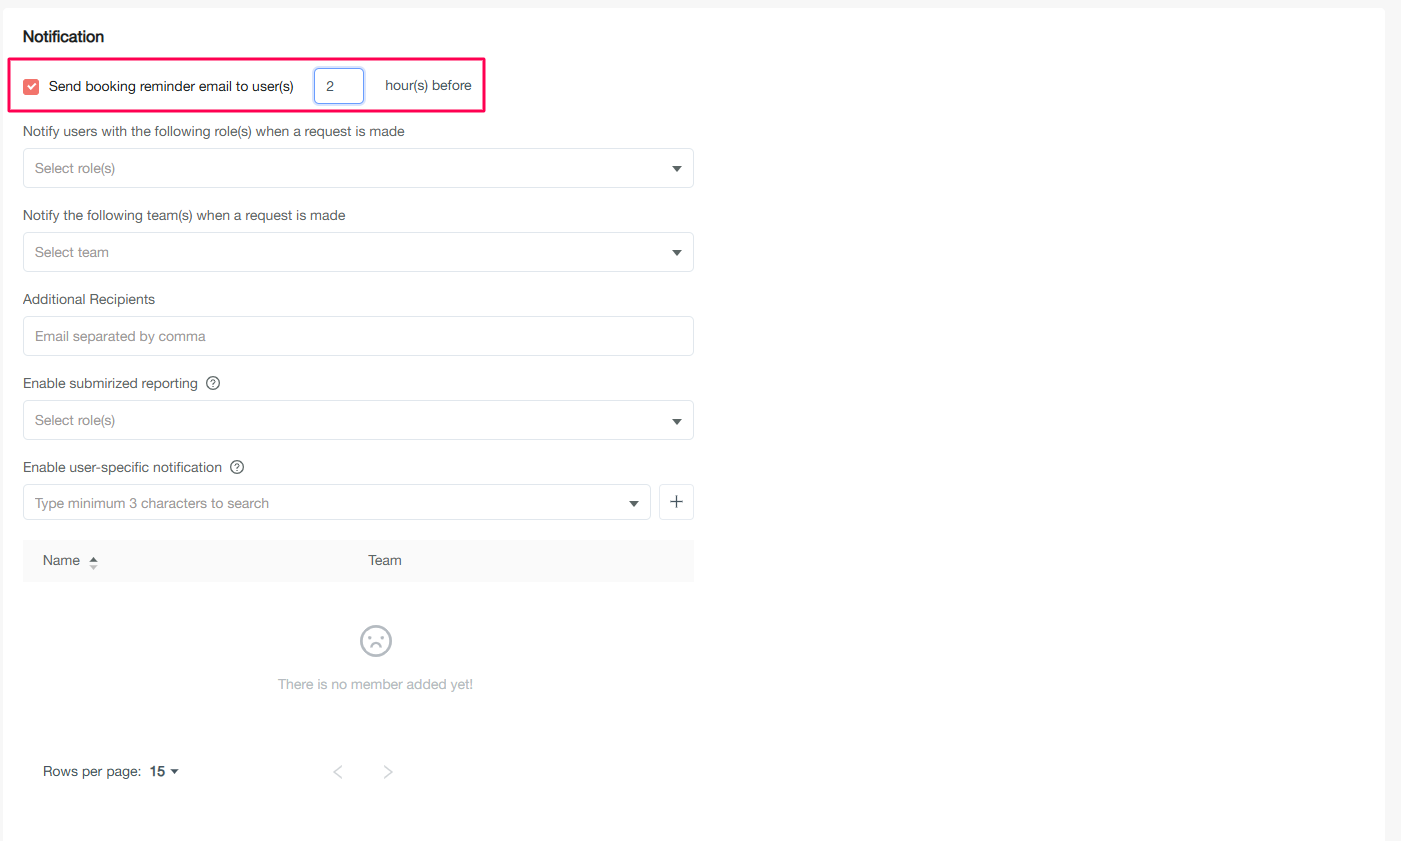
Set reminder timing for users with upcoming bookings: enter hours before shift time to send reminder emails. These reminders include check-in and cancellation options for Easybook.
 .
.
Important: Before setting this configuration, the administrative team must confirm that all members in the organization have updated and approved shift time in My Profile > Work Profile > Availability.
Configure Role-Based Notifications
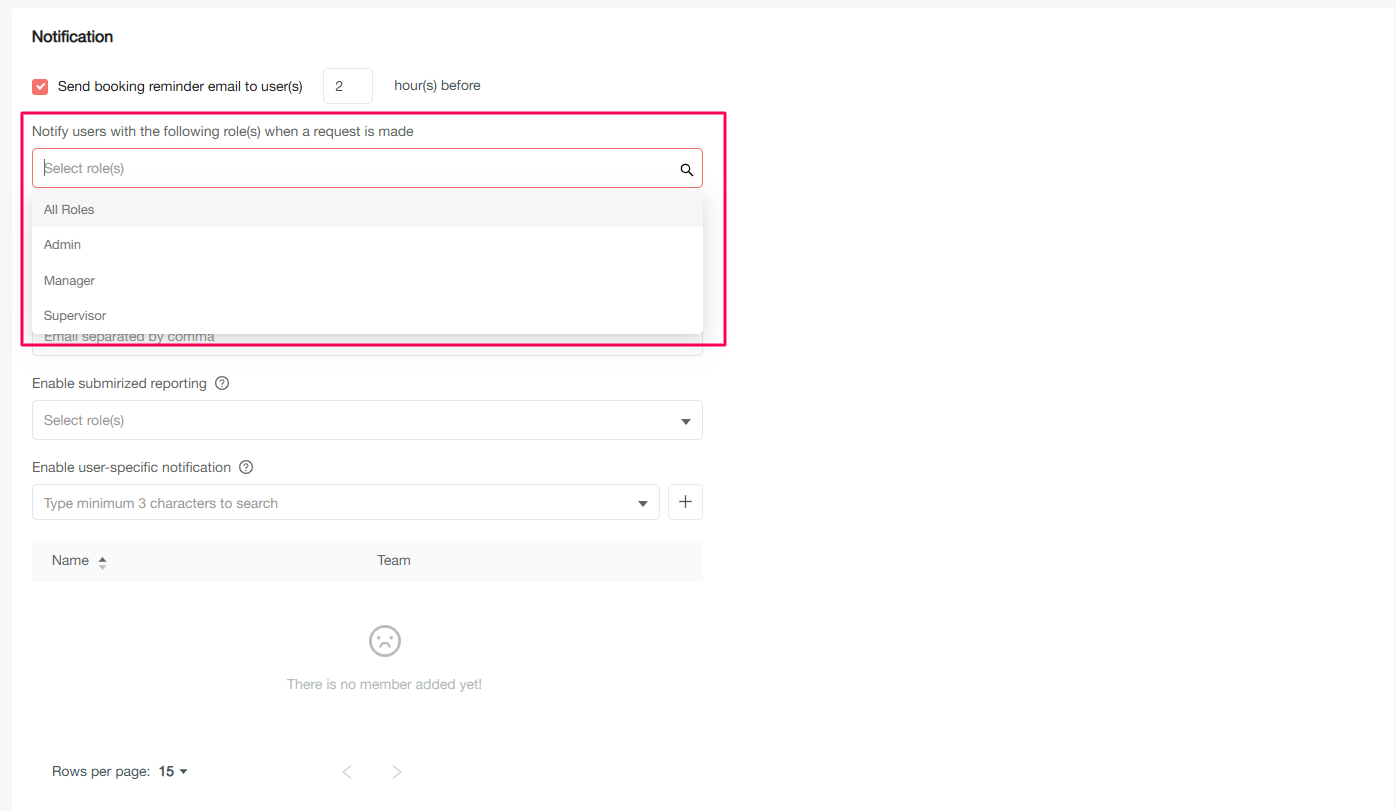
Choose which roles receive booking notifications:
-
All Roles: Admins, managers, and supervisors receive all booking notifications.
-
Admin: Only administrators receive notifications.
-
Manager: Managers receive notifications for their subordinates' bookings.
-
Supervisor: Supervisors receive notifications for their subordinates' bookings.
 .
.
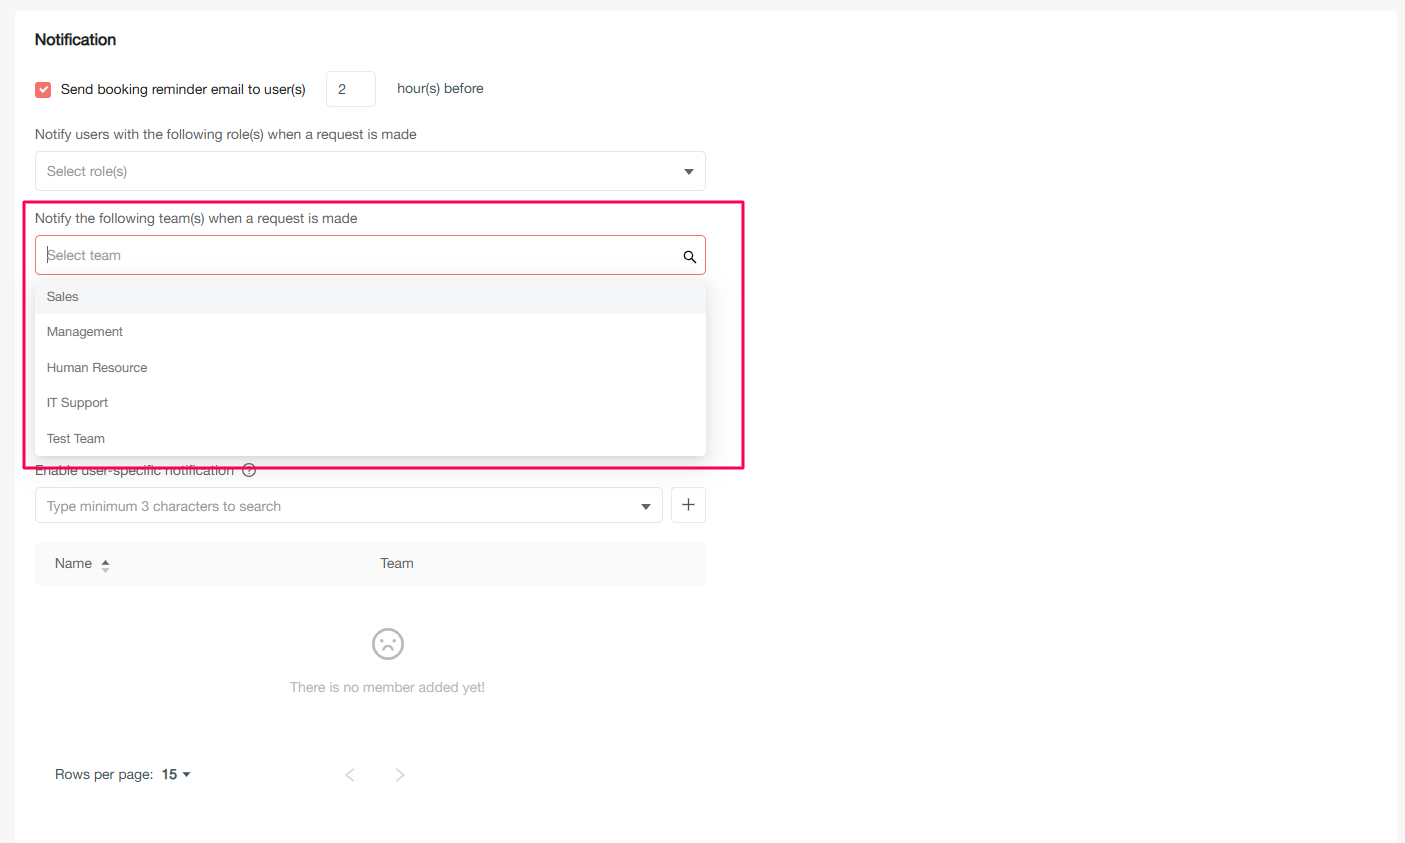
Configure Team Notifications
Select specific teams to receive booking notifications. Choose from default and custom teams in your organization.
 .
.
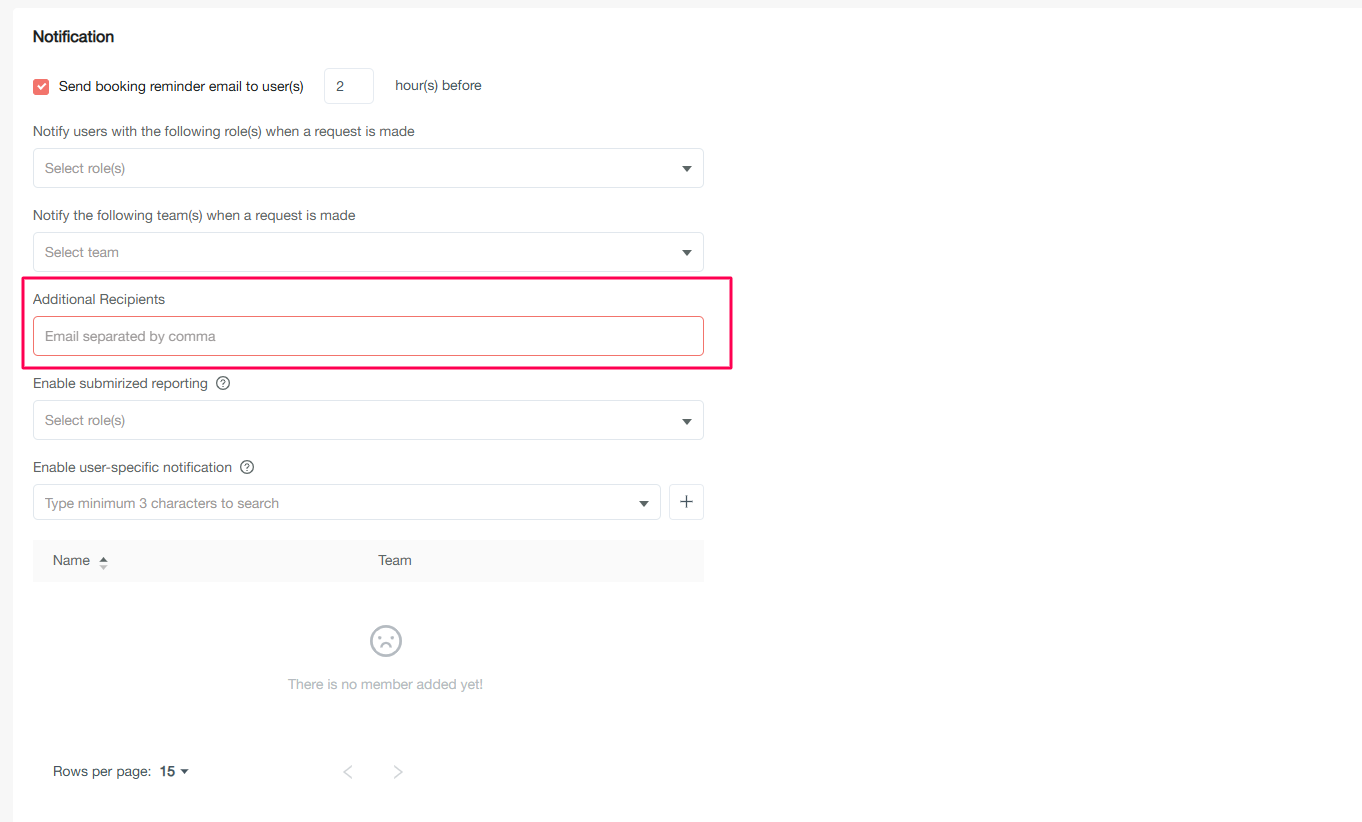
Configure Additional Recipients
Add external email addresses for booking notifications: enter one or more external email addresses to receive booking updates.
 .
.
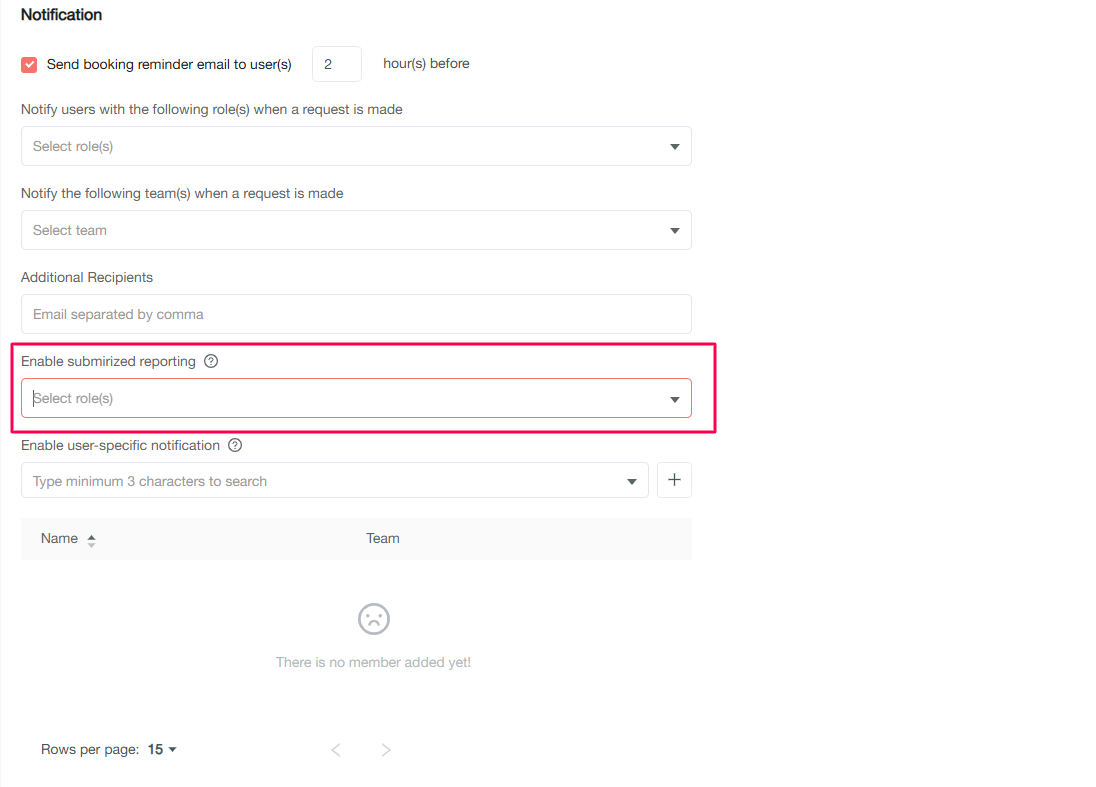
Configure Summary Reporting
Enable automated booking summaries for managers and supervisors. Reports are sent:
-
1 hour before shift starts (if availability data exists), with respect to timezone.
-
At 9:00 AM static time according to the timezone of the assigned work location (if no availability data exists).
 .
.
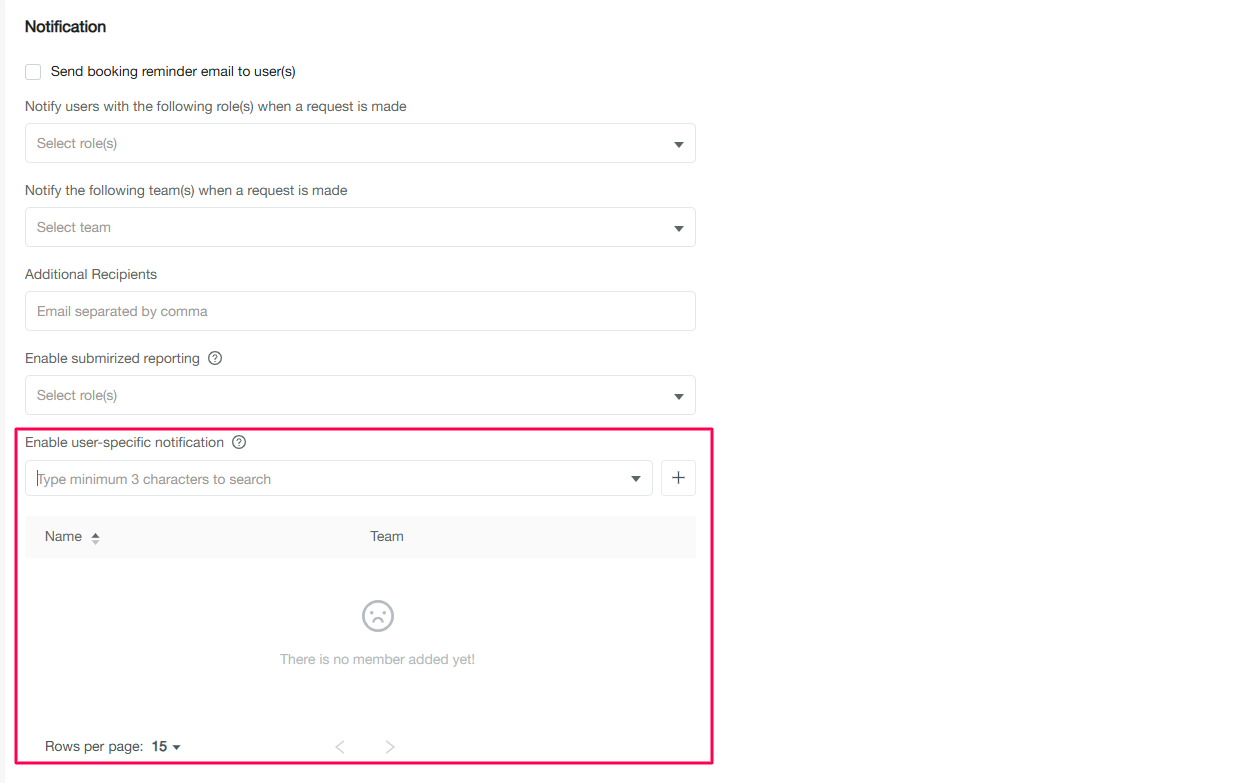
Configure User-Specific Notifications
Configure specific users to receive all organizational booking notifications. This overcomes restrictions on sending notifications to all administrators.
 .
.
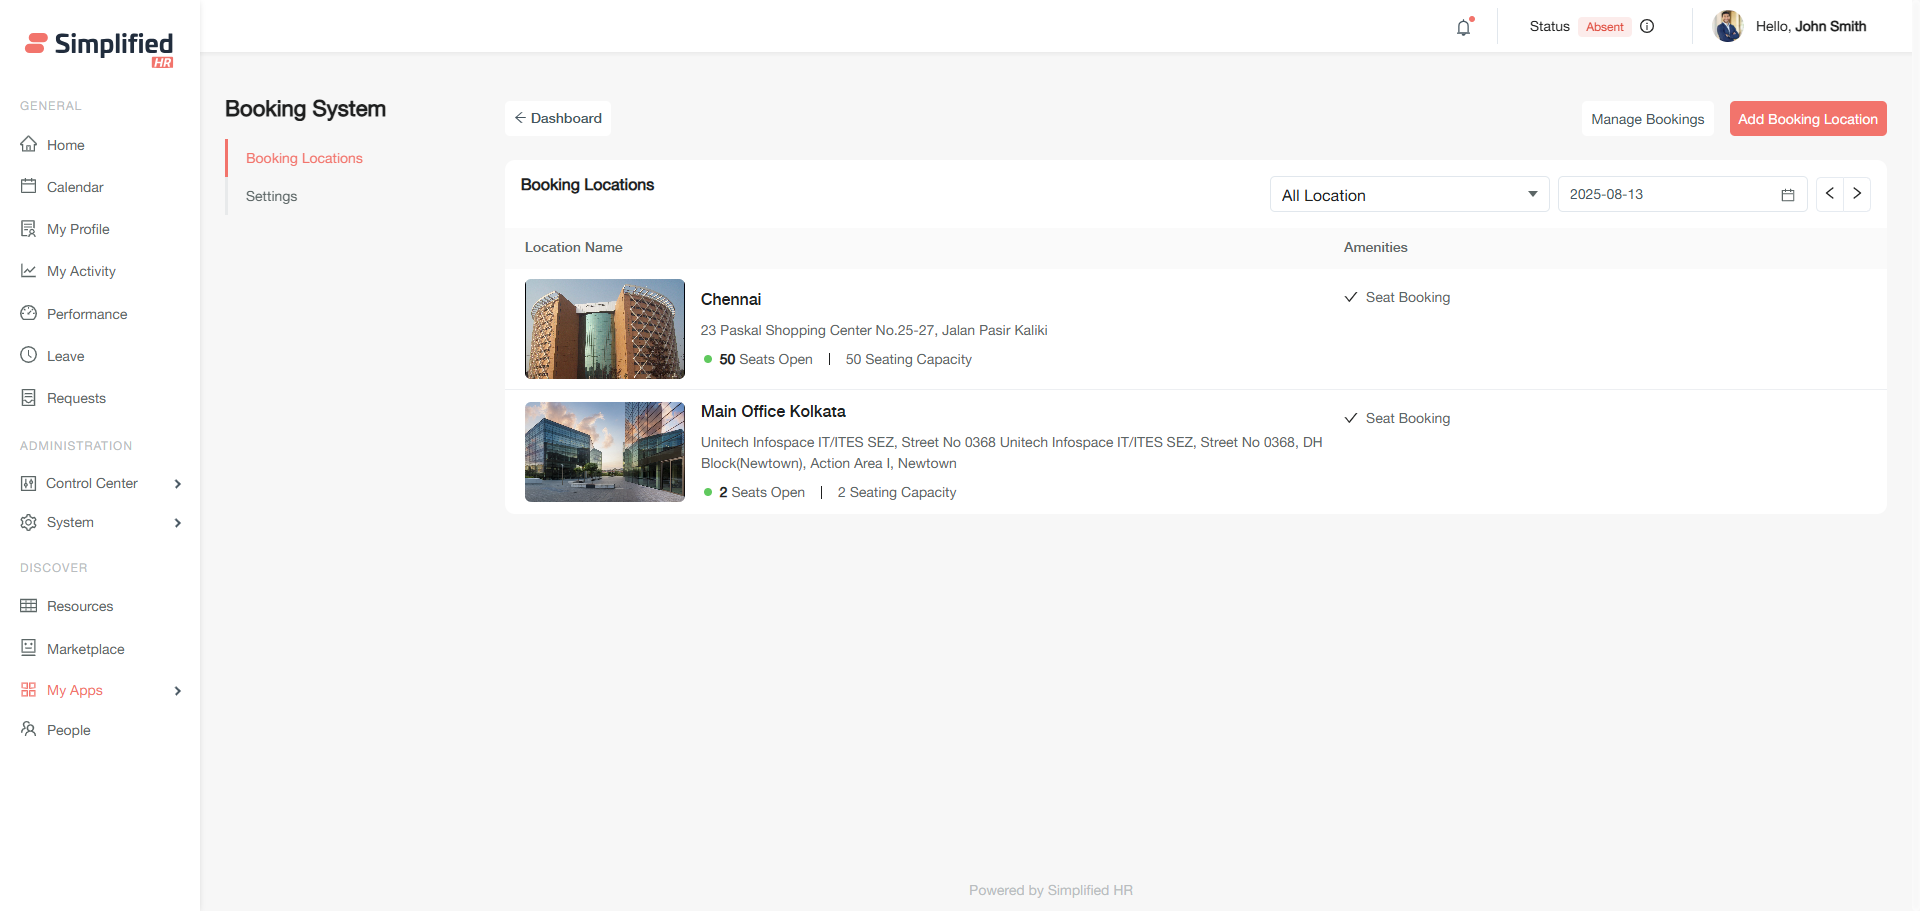
Manage Booking Locations
Configure physical locations where seat booking is available.
 .
.
-
Follow the Easybook access steps above.
-
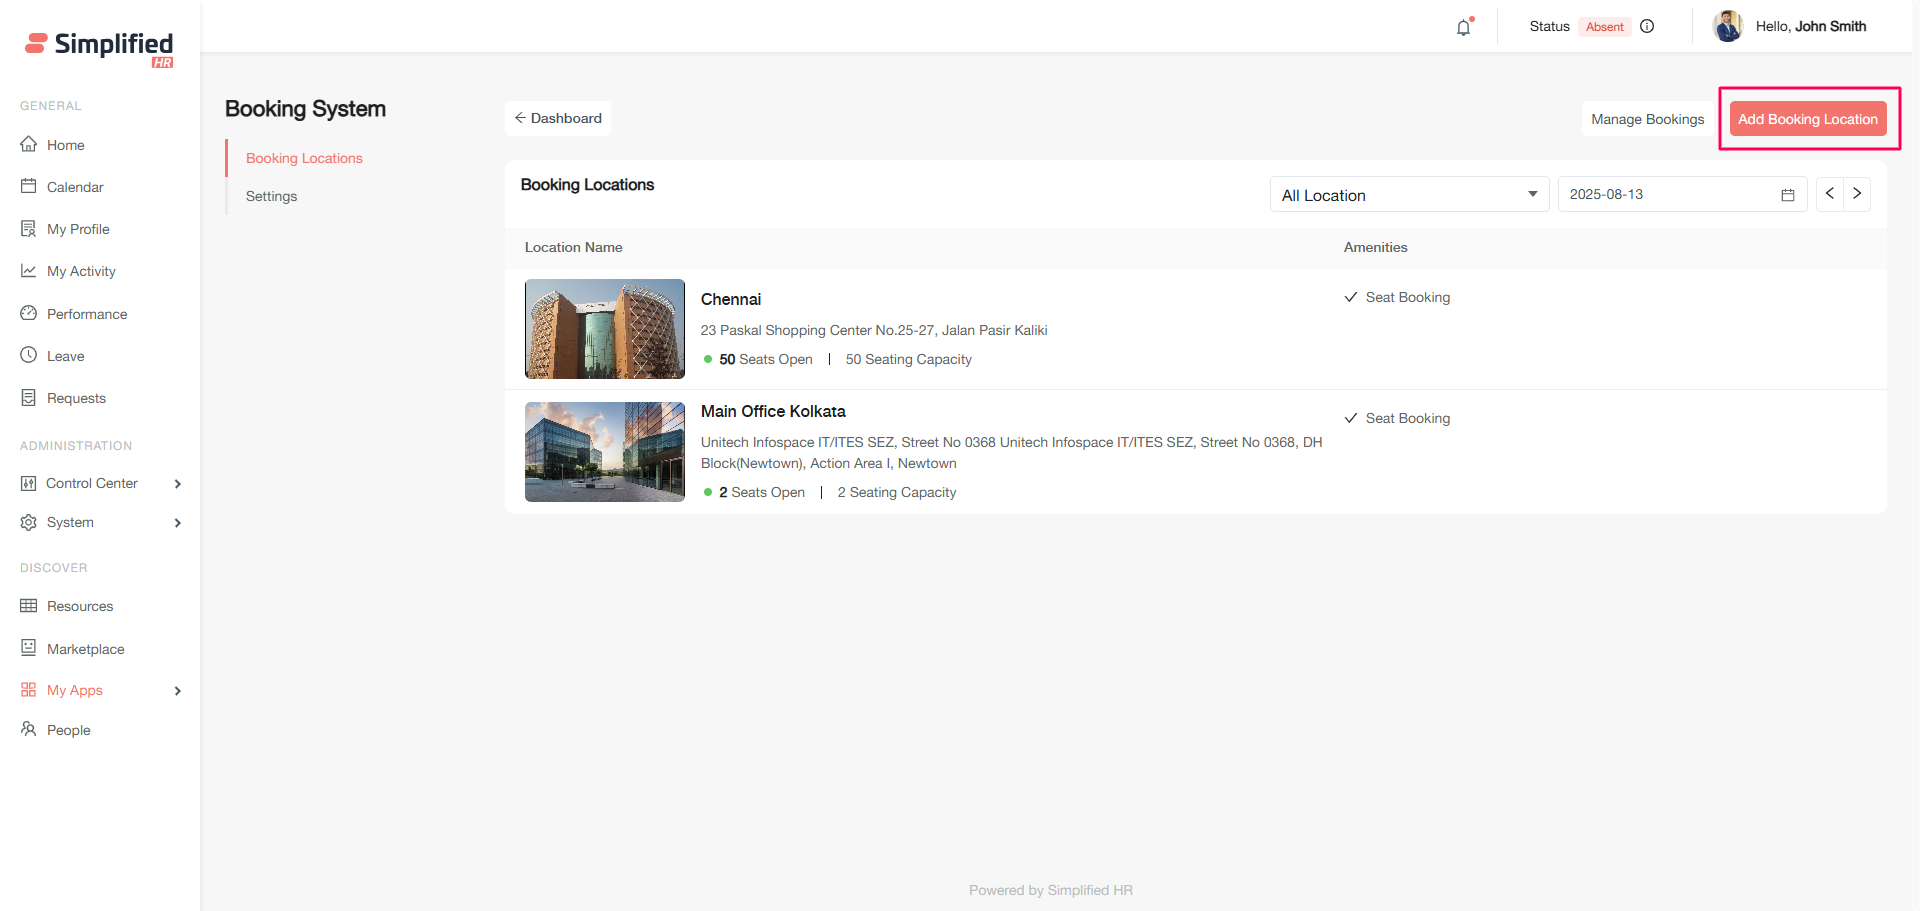
Click the Settings icon.
-
Click Add Booking Location on the locations page.
 .
.
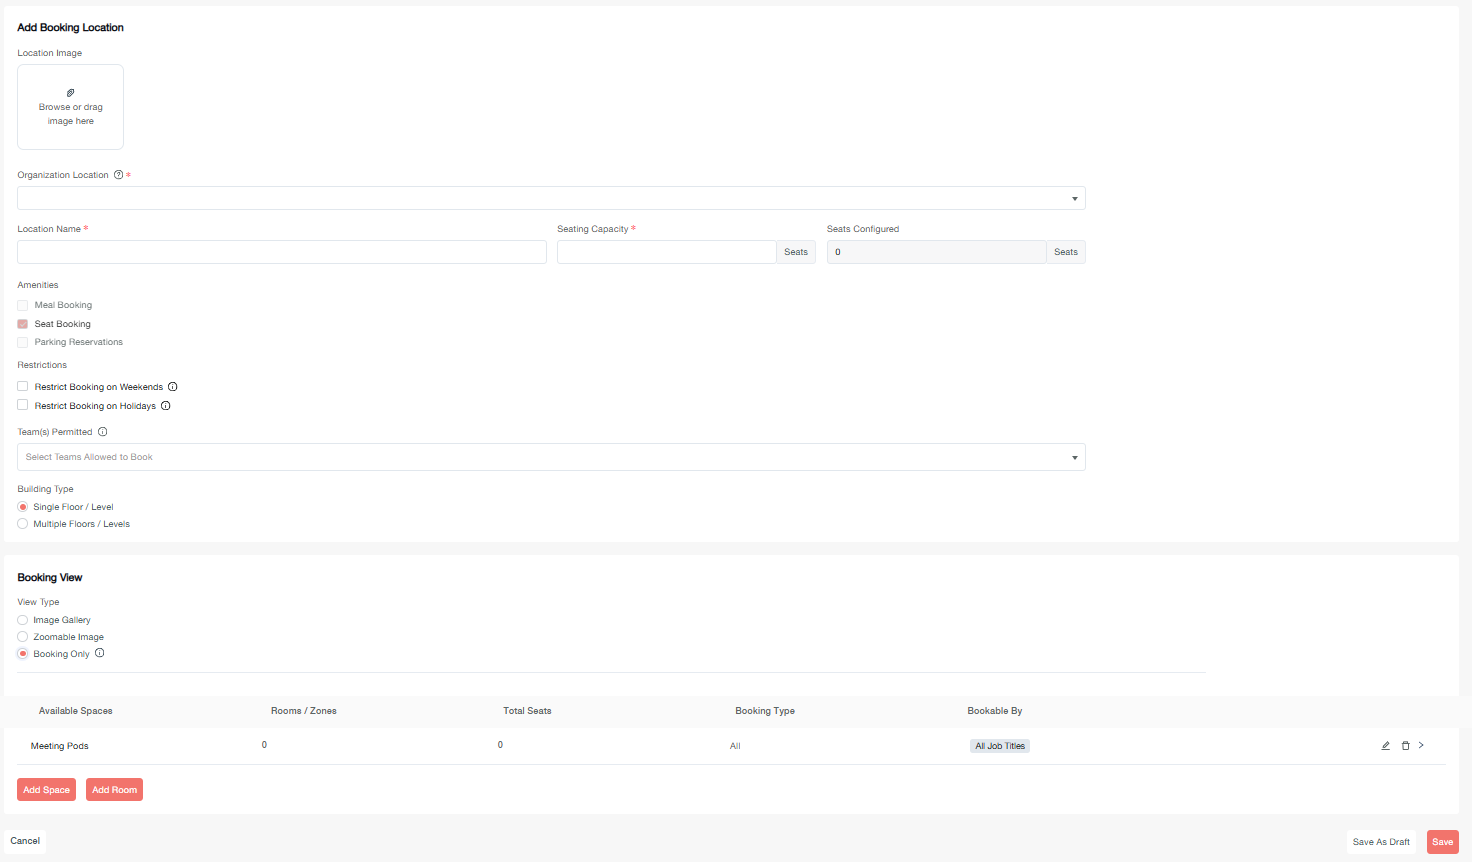
Add Booking Location
Prerequisites:
 .
.
Configuration steps:
-
Upload location image: add jpeg, jpg, png, or similar format.
-
Select organization location: choose from available locations.
-
Set location name: auto-populated but can be customized.
-
Define seat capacity: must match configured seat count.
-
Configure restrictions: enable Restrict booking on Weekends to block weekend reservations; enable Restrict booking on Holidays to block holiday bookings.
-
Set team permissions: choose "All Teams" or select specific teams.
-
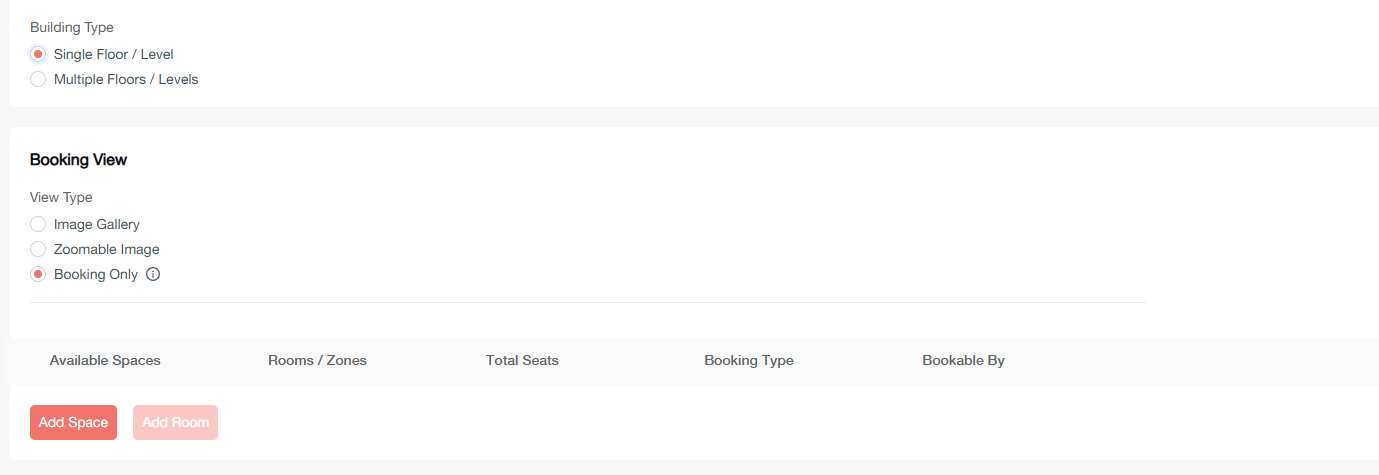
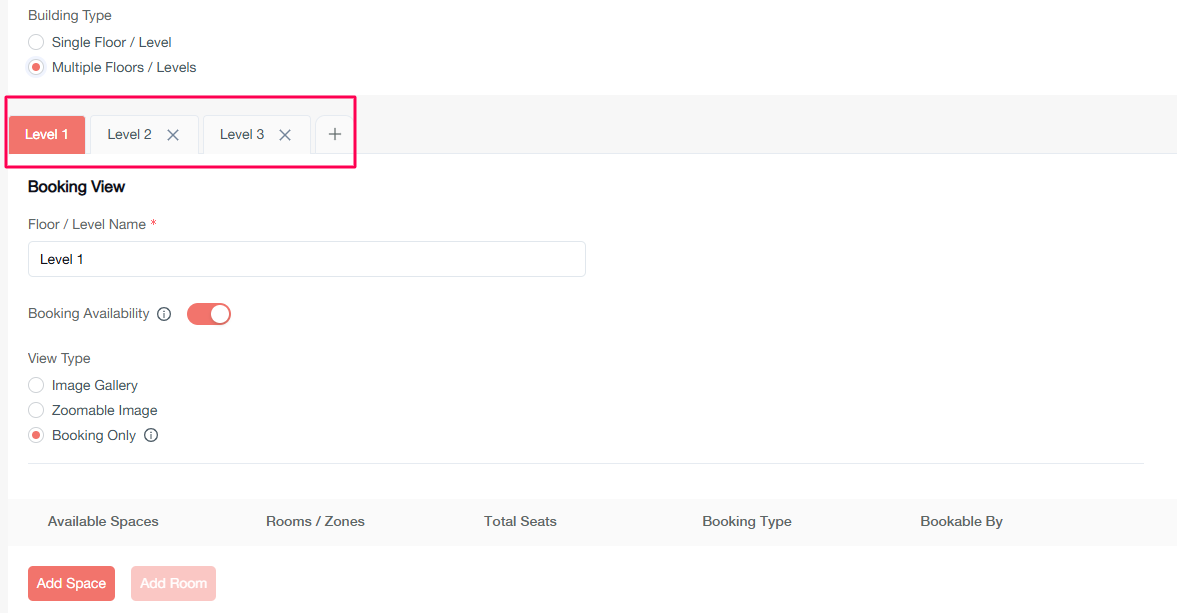
Configure building type: single floor or multiple floors.
Configure Location Image
Upload location image in jpeg, jpg, png, or similar format.
Configure Location Seat Capacity
Define seat capacity — this must match the configured seat count.
Restrict Weekend Bookings
Enable Restrict booking on Weekends to block weekend reservations.
Restrict Holiday Bookings
Enable Restrict booking on Holidays to block holiday bookings.
Configure Location Team Permissions
Set team permissions by choosing "All Teams" or selecting specific teams.
Configure Building Type
Configure building type as single floor or multiple floors.
Configure Single-Floor Location
 .
.
Configure Multiple-Floor Location
 .
.
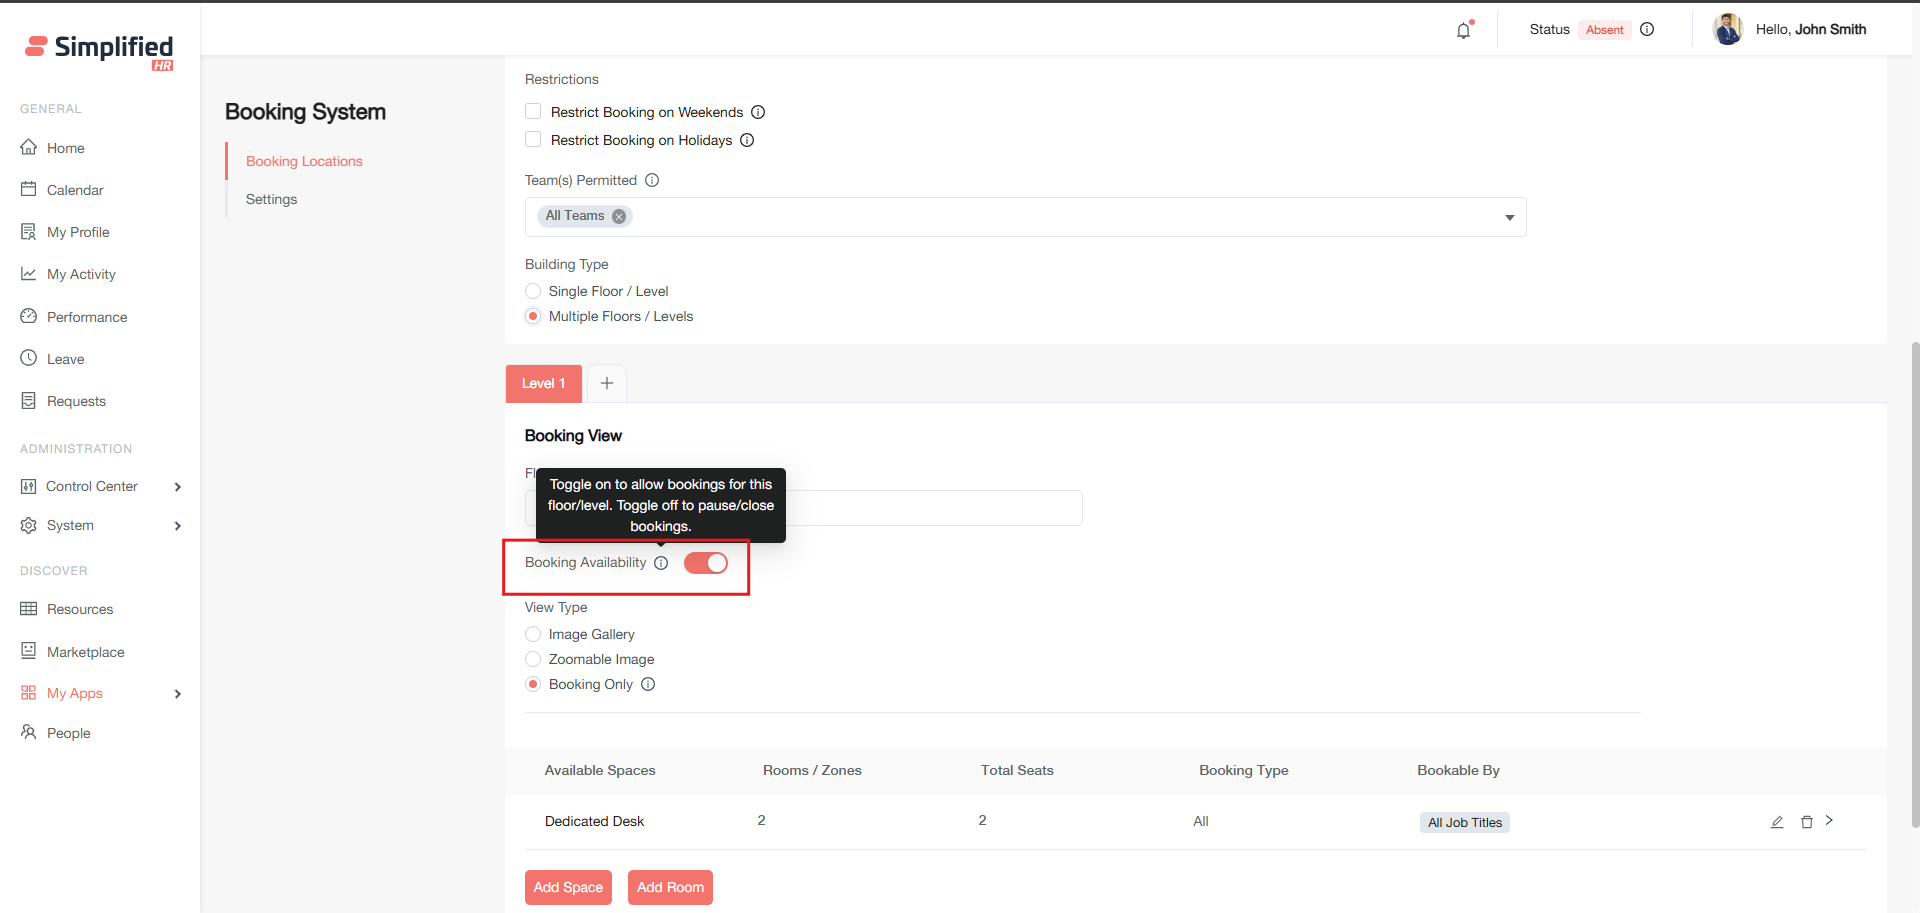
Manage Floor Availability
Disable specific floors when needed:
 .
.
-
Edit the location.
-
Navigate to the specific floor.
-
Toggle off Booking Availability.
Important: Disabled floor spaces and rooms won't appear in booking options.
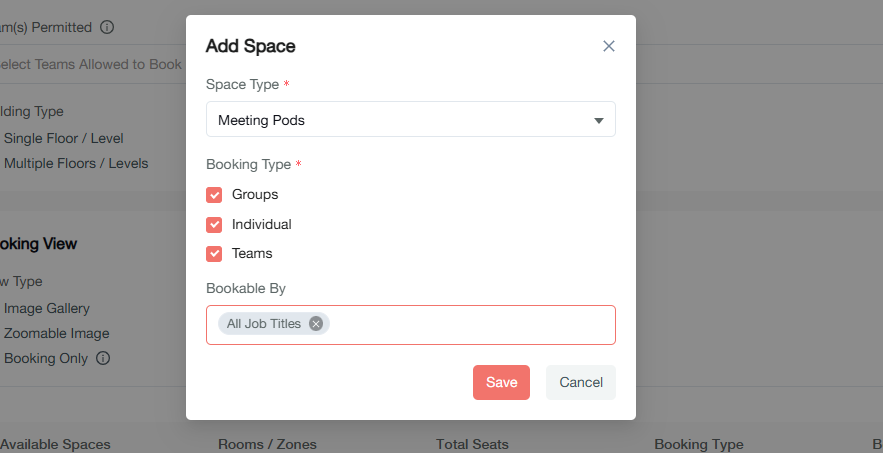
Add Space to Booking Location
-
Click Add Space.
-
Select space type from active spaces.
-
Choose booking types (see below).
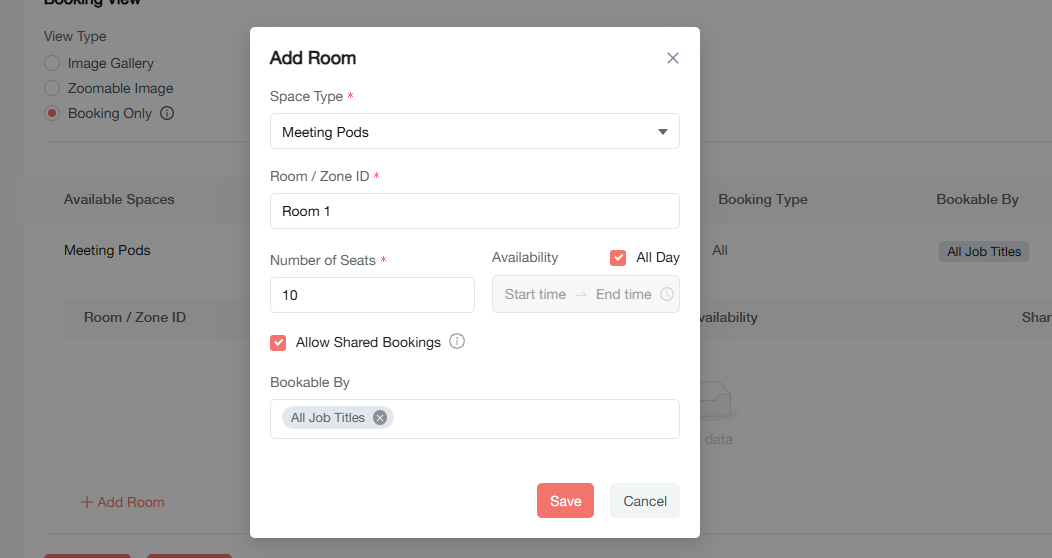
-
Set job title restrictions (see below).
 .
.
Configure Space Booking Type
-
Groups: Allow organization-wide member inclusion.
-
Teams: Allow team member inclusion only.
-
Individual: Allow booking owner only.
Configure Space Job Title Restrictions
 .
.
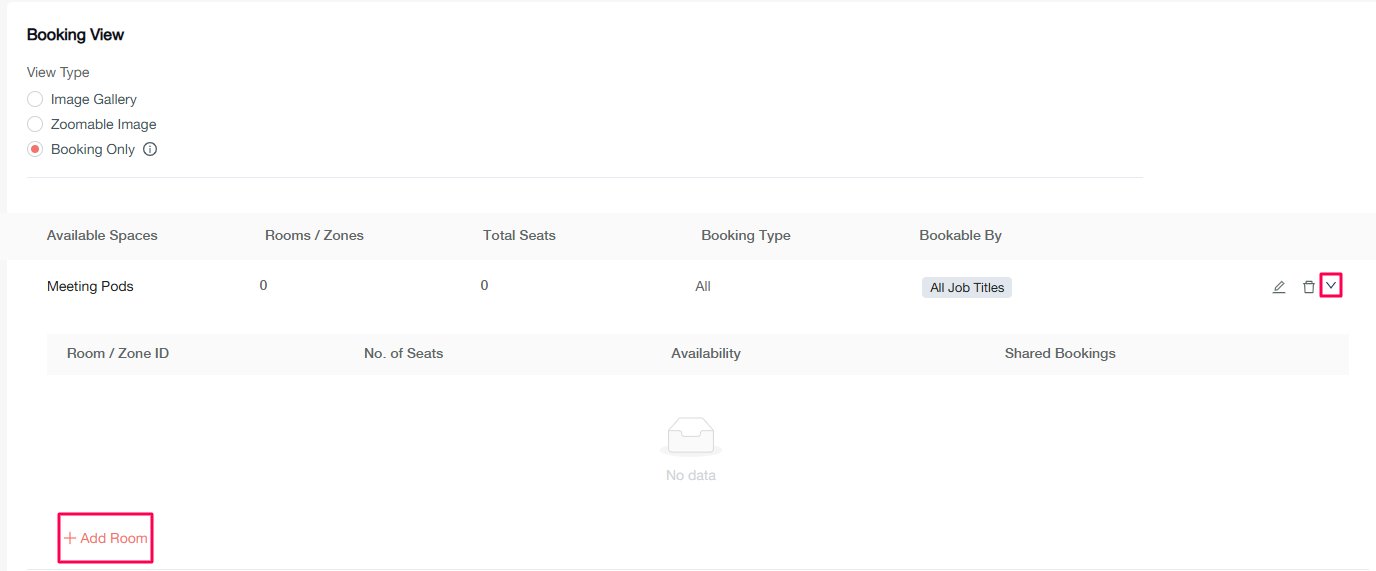
Add Room to Space
Method 1: Expand existing space.
-
Click the expand button on an added space.
-
Click Add room.
-
Configure room settings: Room name or Zone ID, Number of seats, Availability type (Slot or All day), Shared booking settings, Job title restrictions.
 .
.
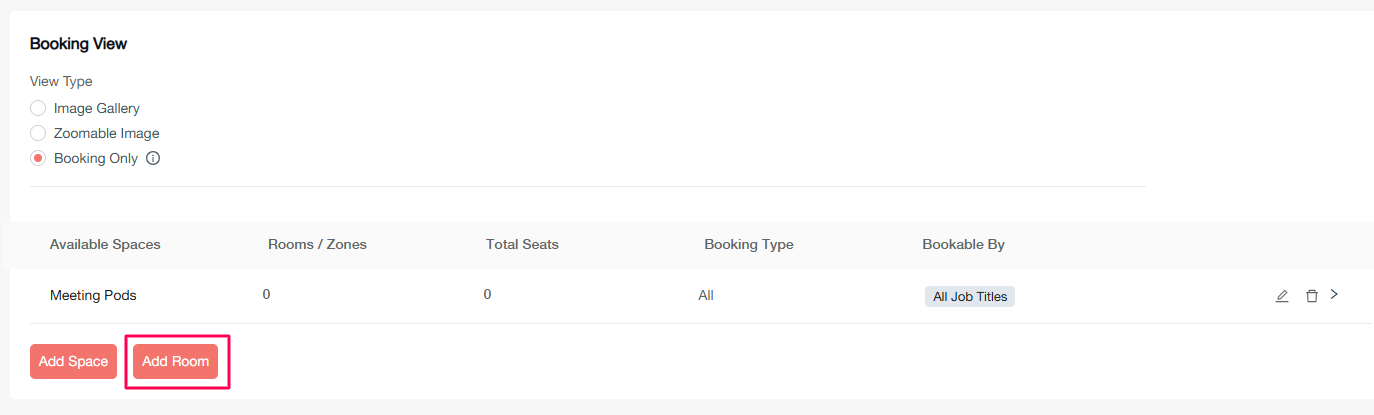
Add Room Directly
Method 2: Direct room addition.
-
Click Add Rooms.
-
Select the target space.
-
Configure room details using the same process as Method 1.
 .
.
Configure Room Availability
Availability type is configured as Slot or All day.
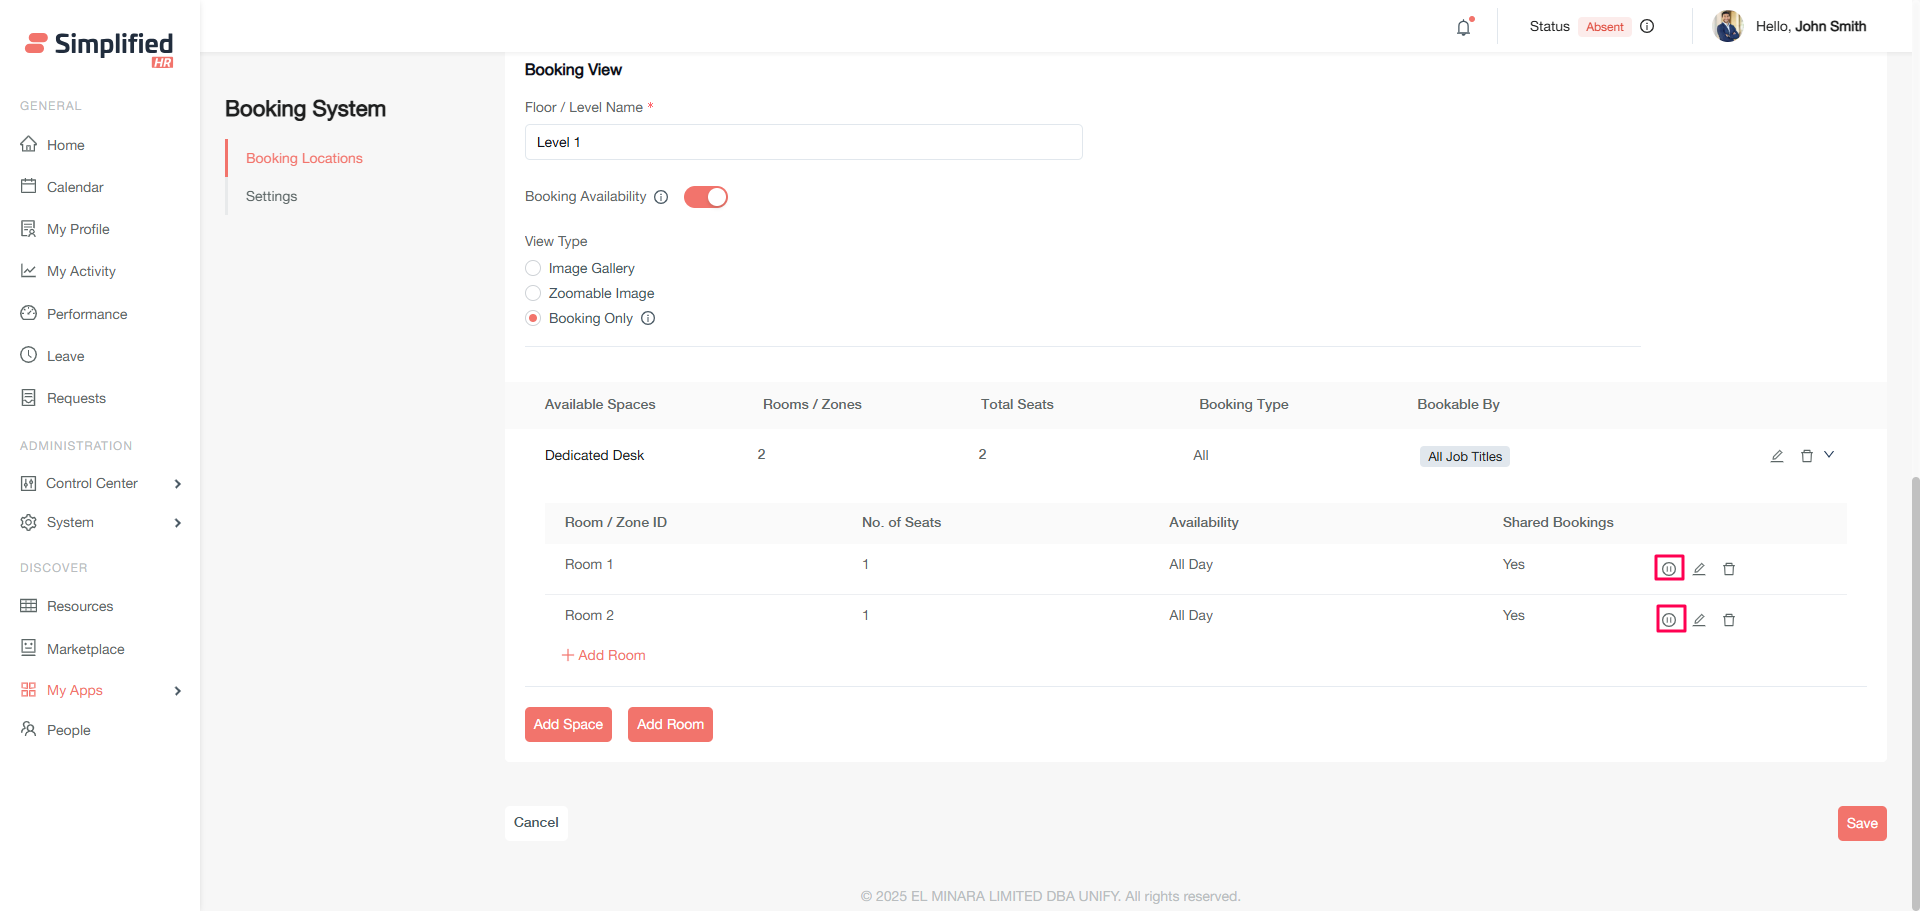
Pause Room
Temporarily disable rooms from booking:
-
Edit the location.
-
Navigate to the specific room.
-
Click the pause button.
 .
.
Important: Paused rooms display as unavailable.
 .
.
Delete Room
Permanently remove rooms:
-
Edit the location.
-
Navigate to the specific room.
-
Click the delete button.
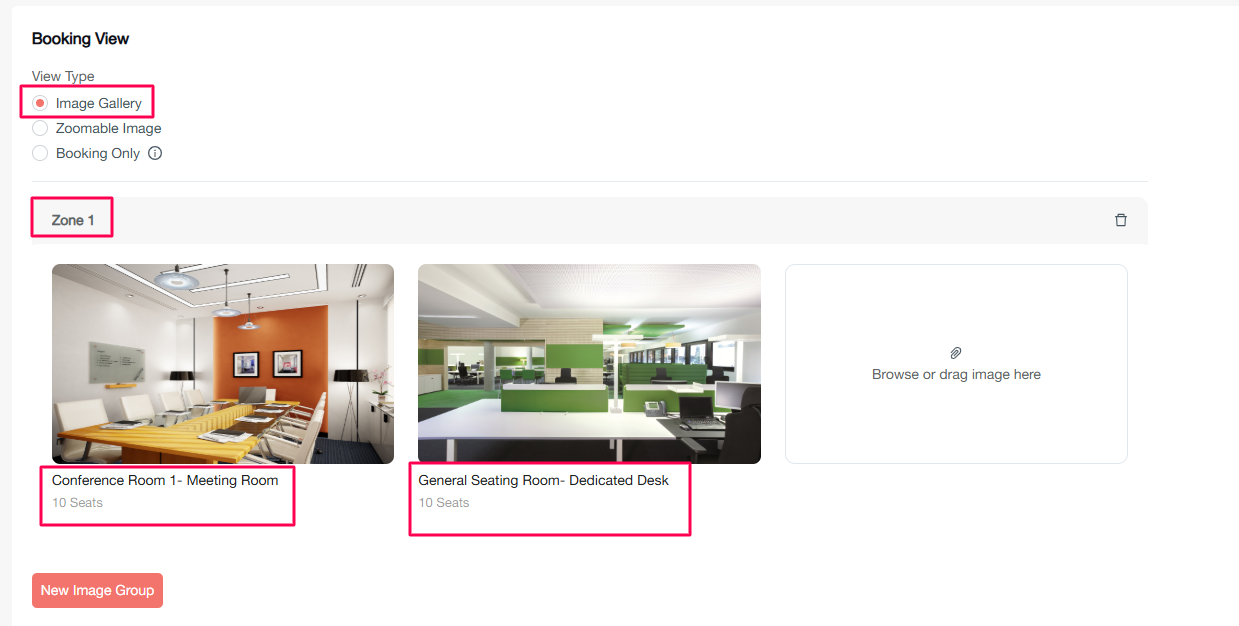
Configure Image Gallery View
-
Add images for each room, grouped by space.
-
Include room information and descriptions.
-
Display space, room name, and seat count.
 .
.
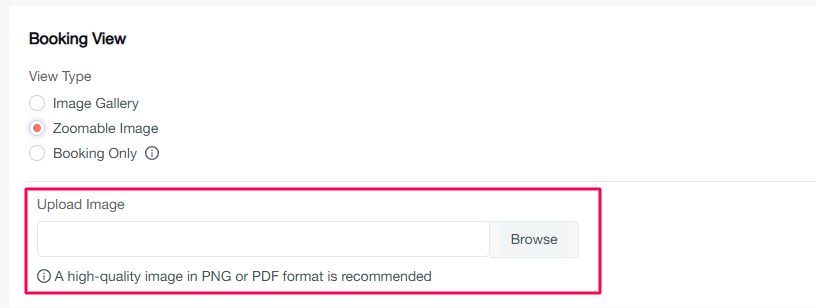
Configure Zoomable Image View
 .
.
Configure Booking-Only View
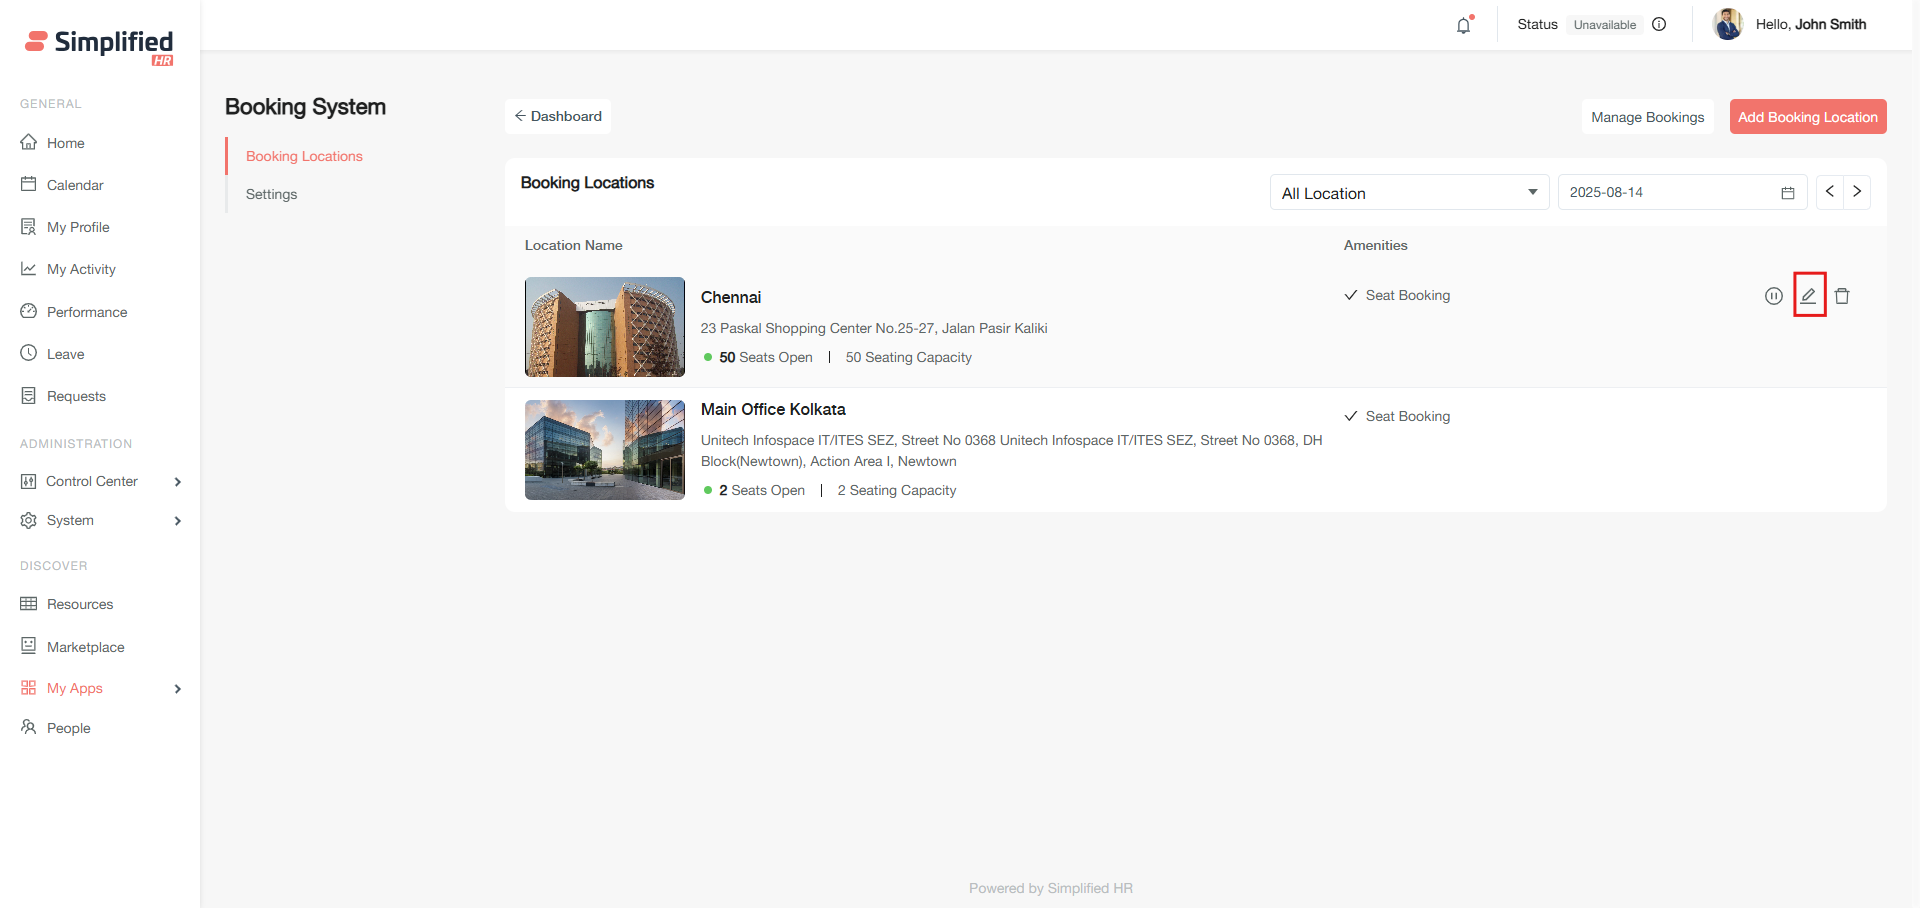
Modify Booking Location
-
Hover over the target location.
-
Click the modify icon.
 .
.
-
Update settings as needed.
-
Click Save.
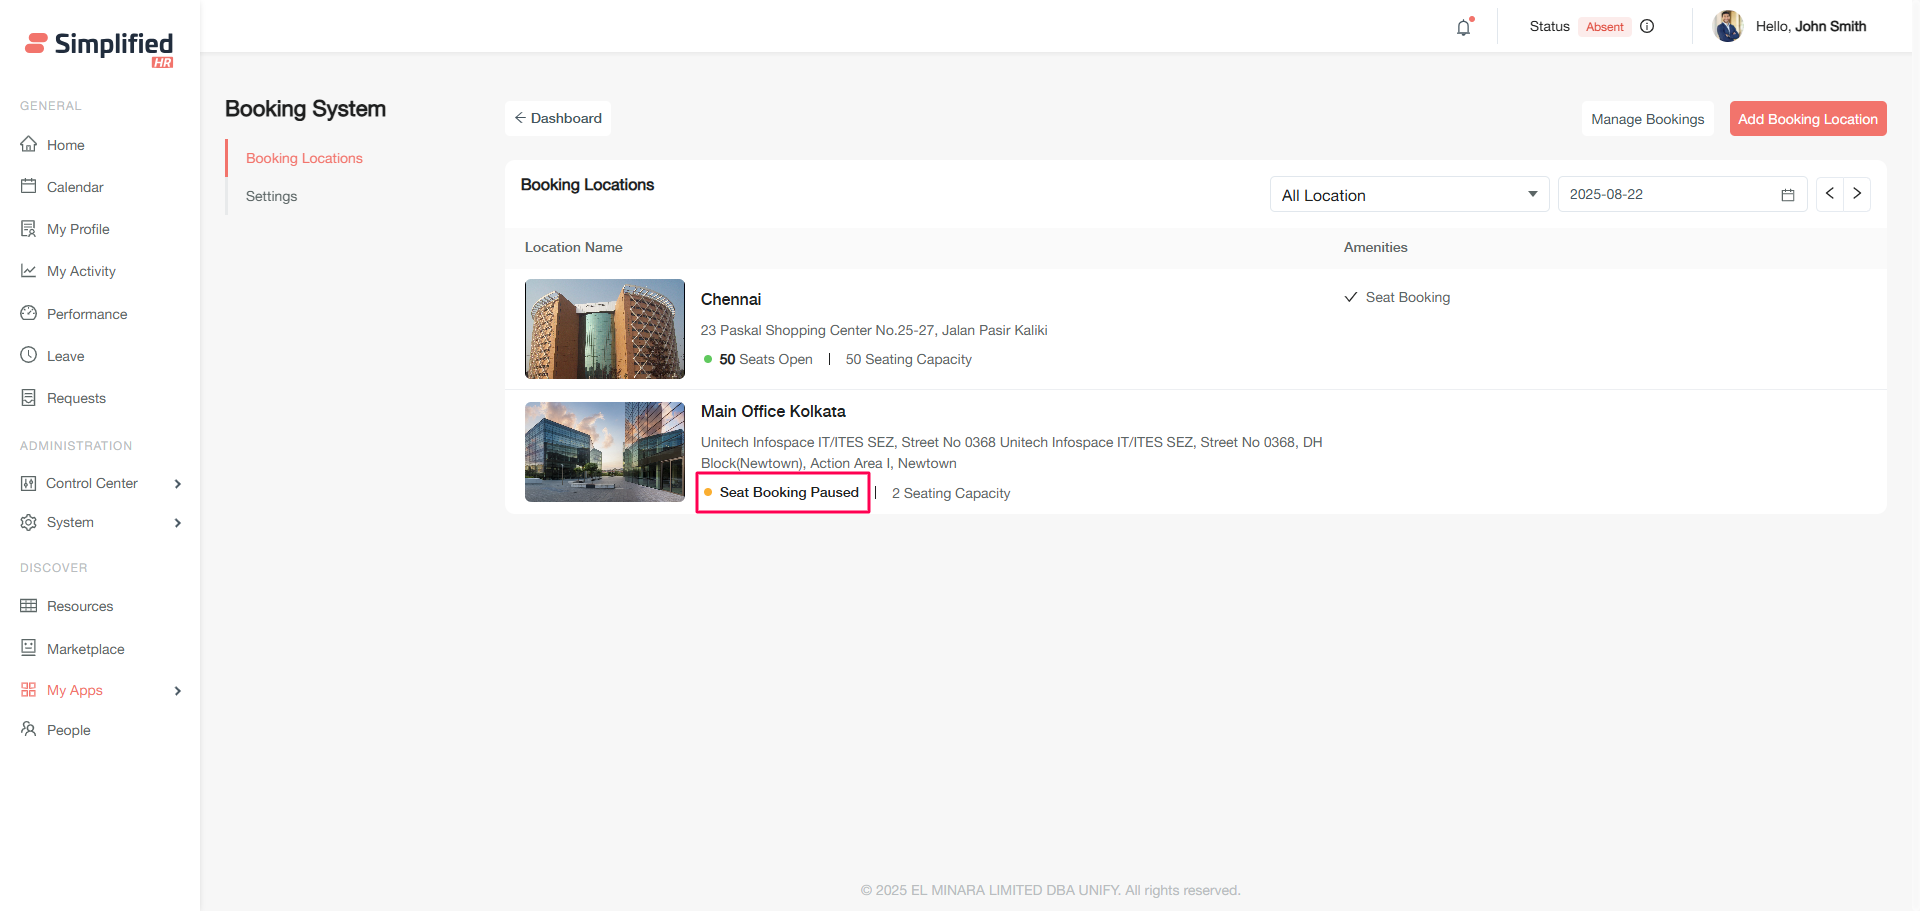
Pause Booking Location
-
Hover over the target location.
-
Click the pause icon.
 .
.
- Confirm the action.
Effects of pausing:
-
Past bookings remain unchanged.
-
Current date bookings remain but can't be modified.
-
Future bookings are automatically cancelled.
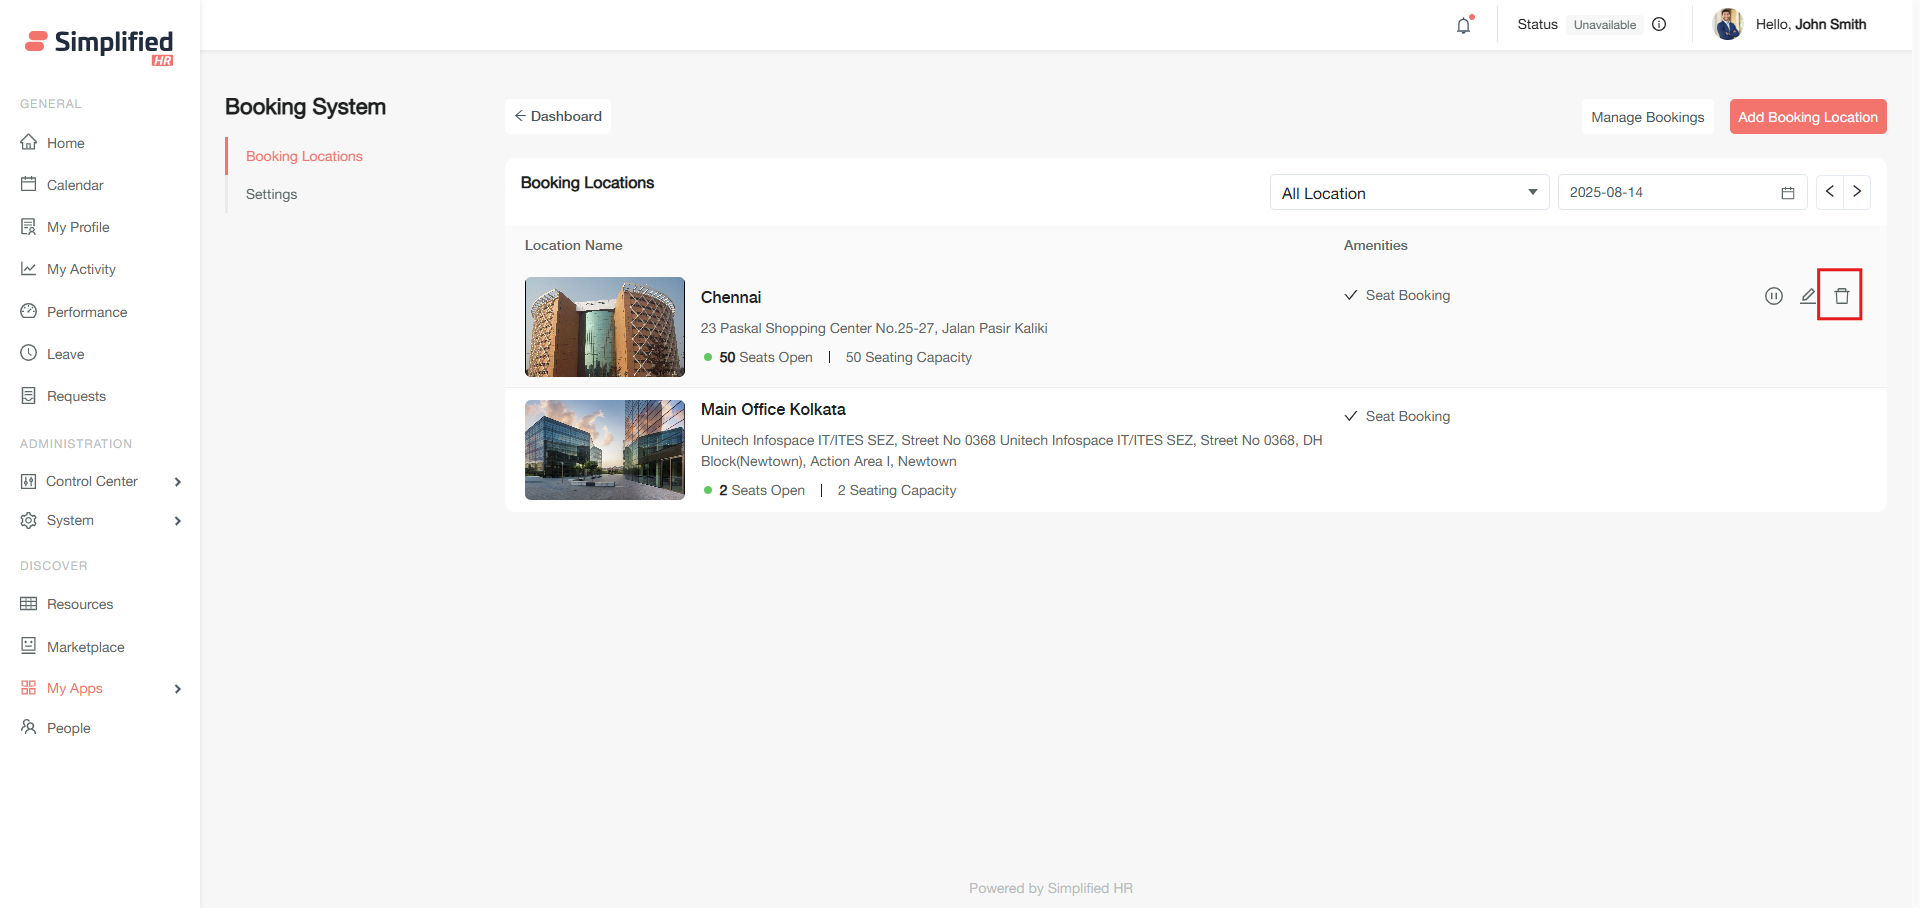
Delete Booking Location
-
Hover over the target location.
-
Click the delete icon.
-
Confirm deletion in the modal.
 .
.
Troubleshoot Missing Spaces
Ensure spaces are properly saved and active.
Troubleshoot Room Configuration
Verify seat counts match capacity settings.
Troubleshoot Booking Credits
Check credit-enabled spaces configuration.
Troubleshoot Booking Notifications
Verify email settings and recipient configurations.
Troubleshoot Location Access
Review team permissions and job title restrictions.
Troubleshoot Missing Bookings
Verify your role permissions and ensure the correct week/location is selected.
Troubleshoot Approval Options
Check that "Requires Approval" is enabled in booking settings.
Getting help
If you encounter issues not covered in this guide:
-
Review your organization's specific requirements
-
Check user permissions and role assignments
-
Contact system support for advanced configuration needs
Next steps
-
Set up your first booking location using the configuration steps above
-
Configure notification preferences for your organization
-
Train users on the booking process and available features
-
Monitor booking patterns and adjust restrictions as needed
-
Explore advanced reporting and analytics features