Access Manage Bookings
The Manage Bookings feature allows administrators to oversee all organizational bookings and create new bookings on behalf of team members.
Prerequisites: Owner/Admin/equivalent role permissions; Easybook must be installed; booking locations and spaces must be configured; organization members must be active in the system.
-
Navigate to Easybook through My Apps > Easybook, Marketplace > My Library > Easybook, or Control Centre > Easybook.
-
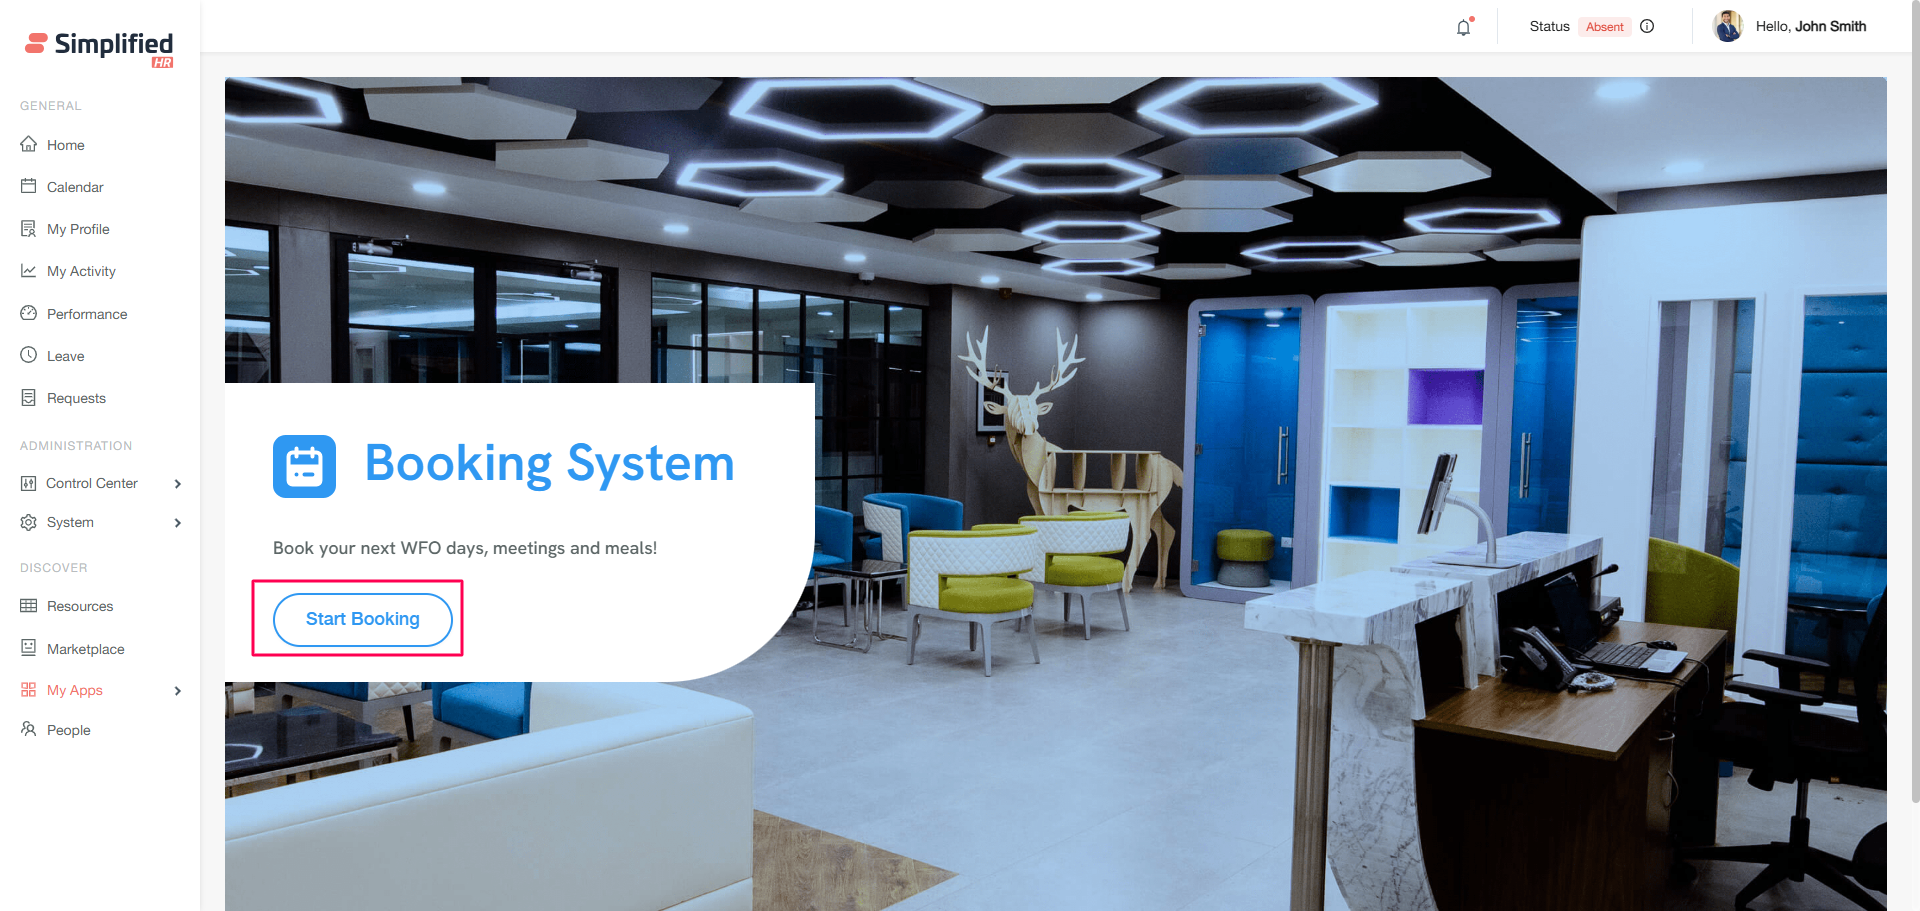
If accessing for the first time, click Start Booking.
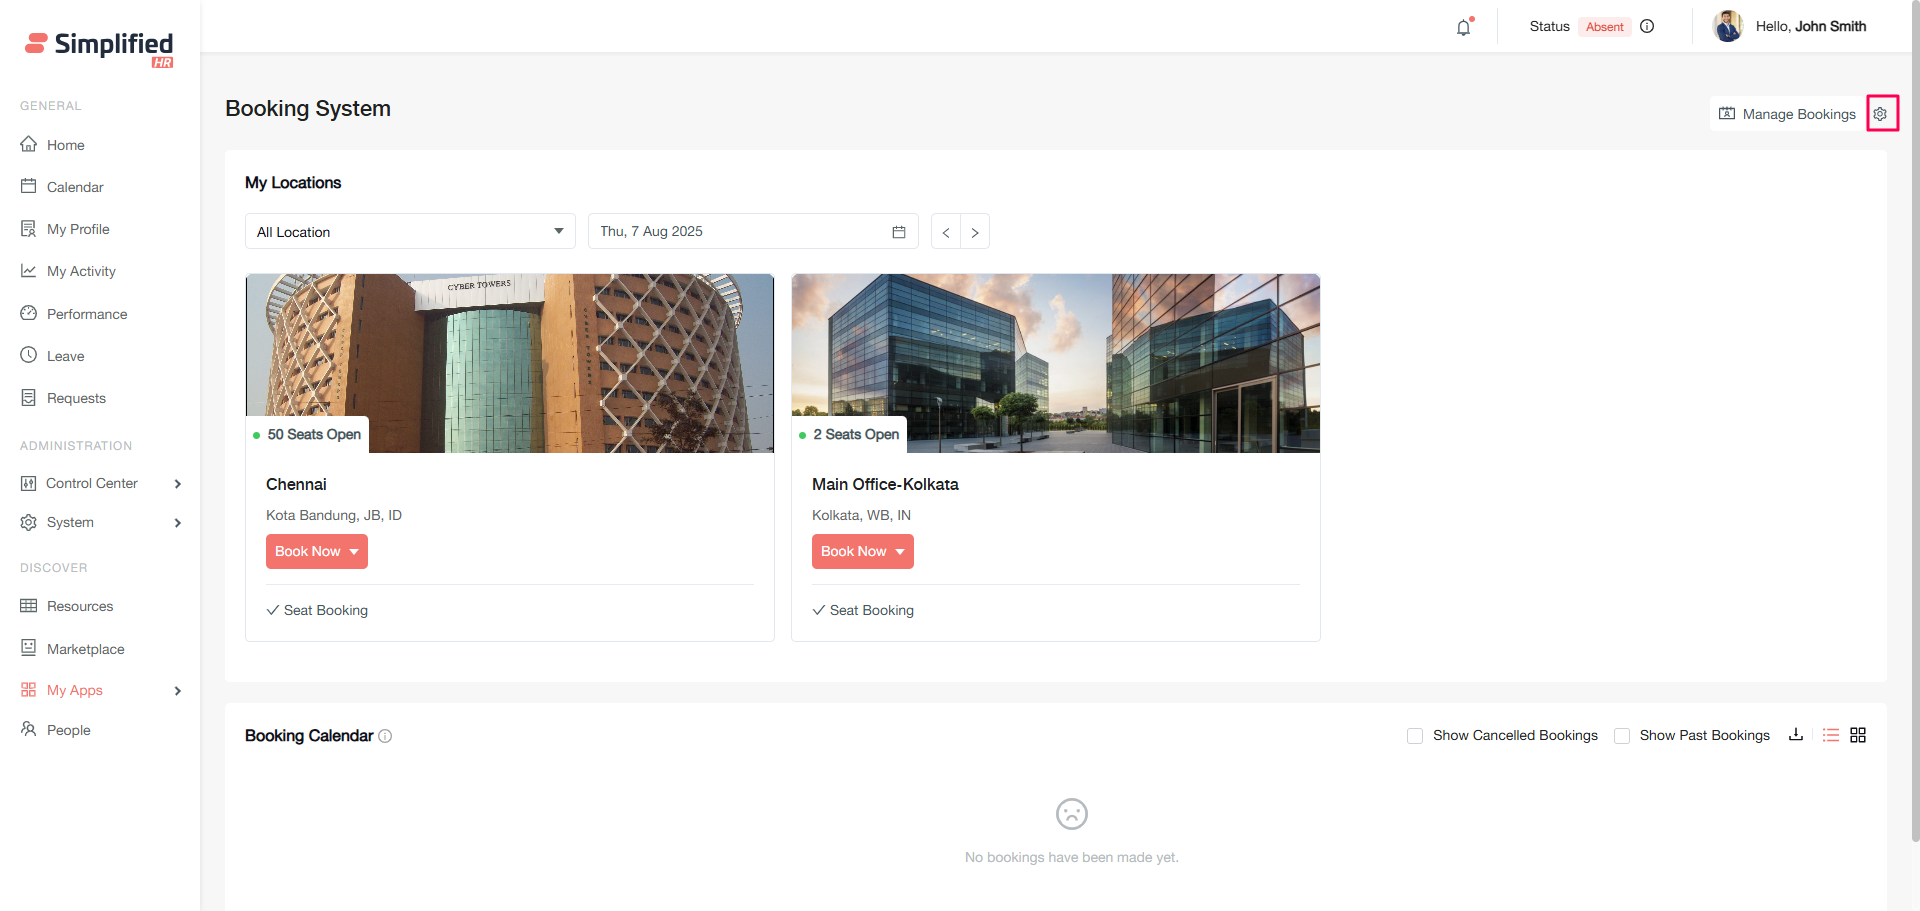
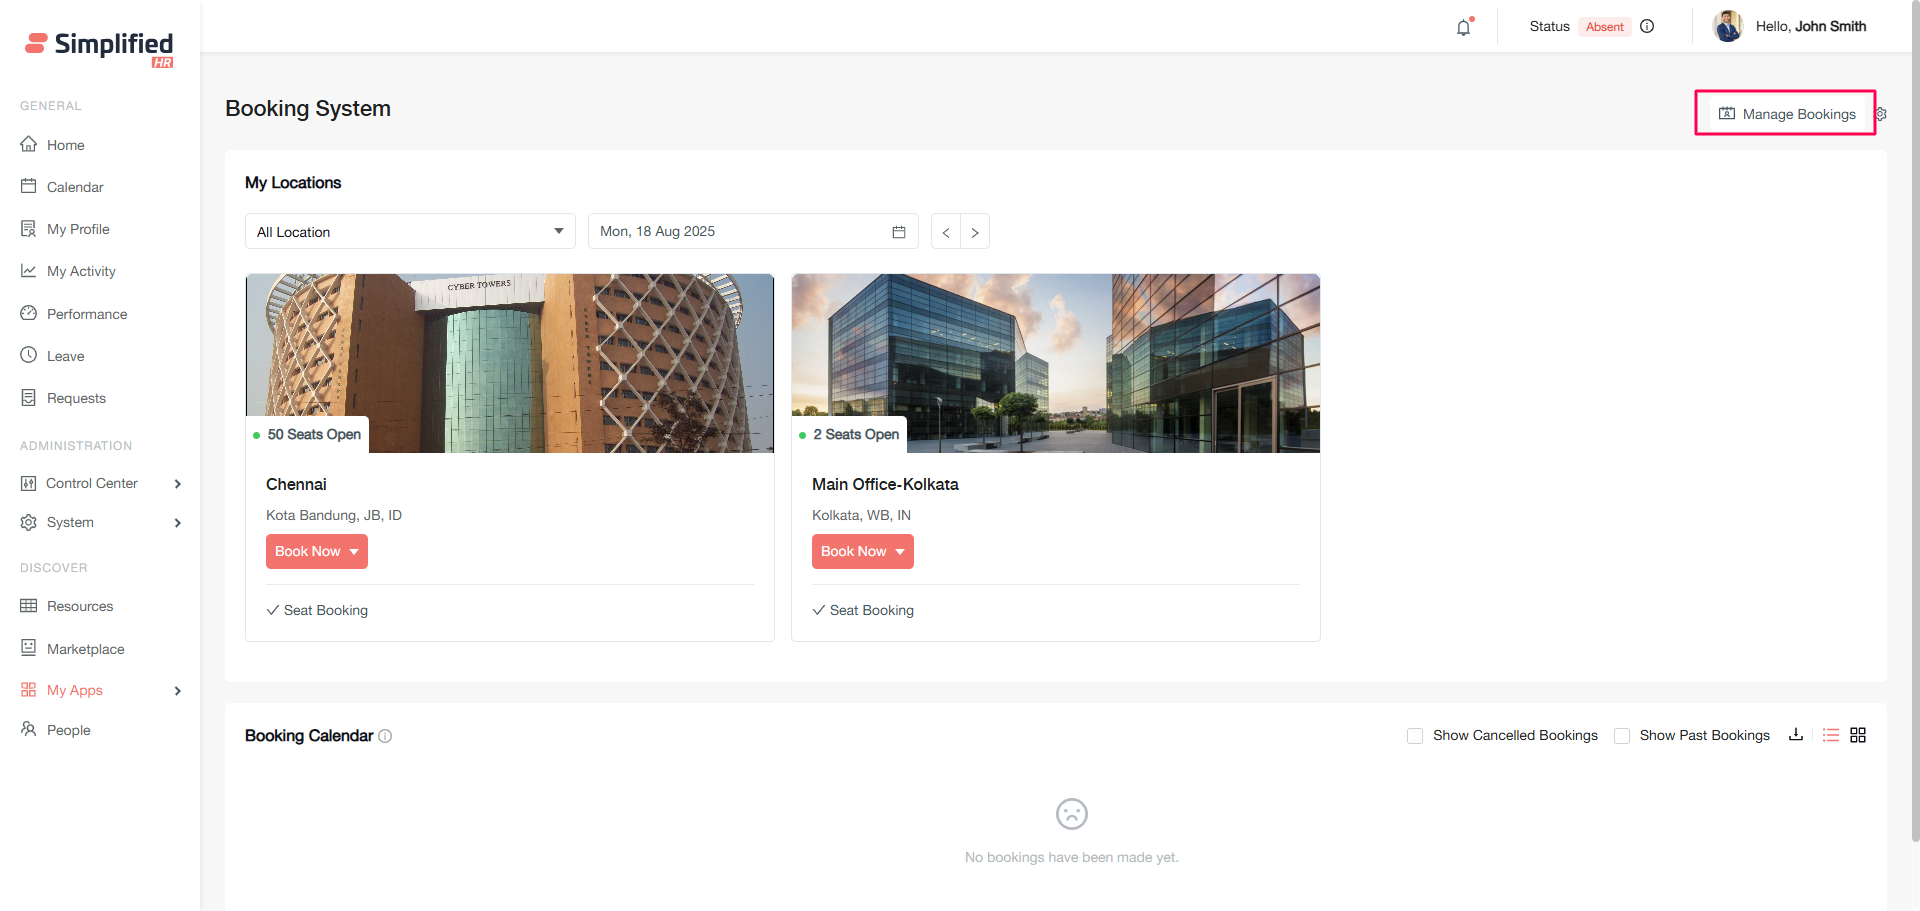
- On the Booking System page, click the Settings icon, or from the Booking Dashboard, click Manage Booking.
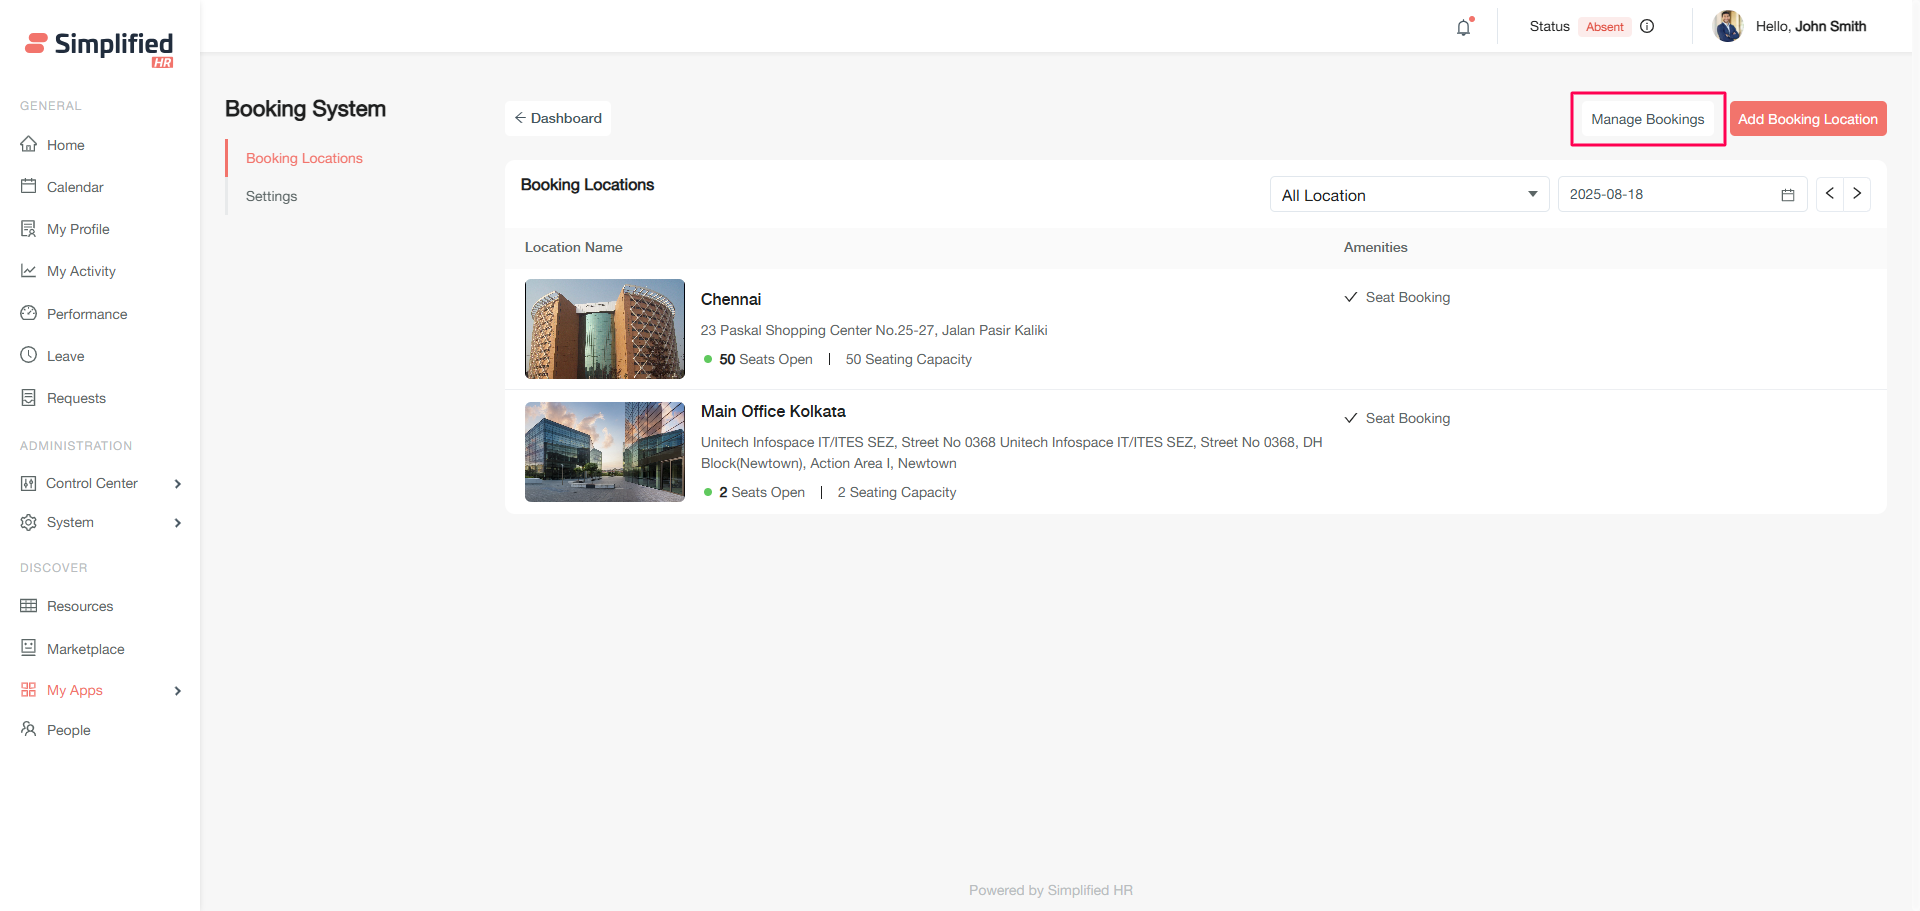
- On the Booking locations page, click Manage Booking.
View Organizational Bookings
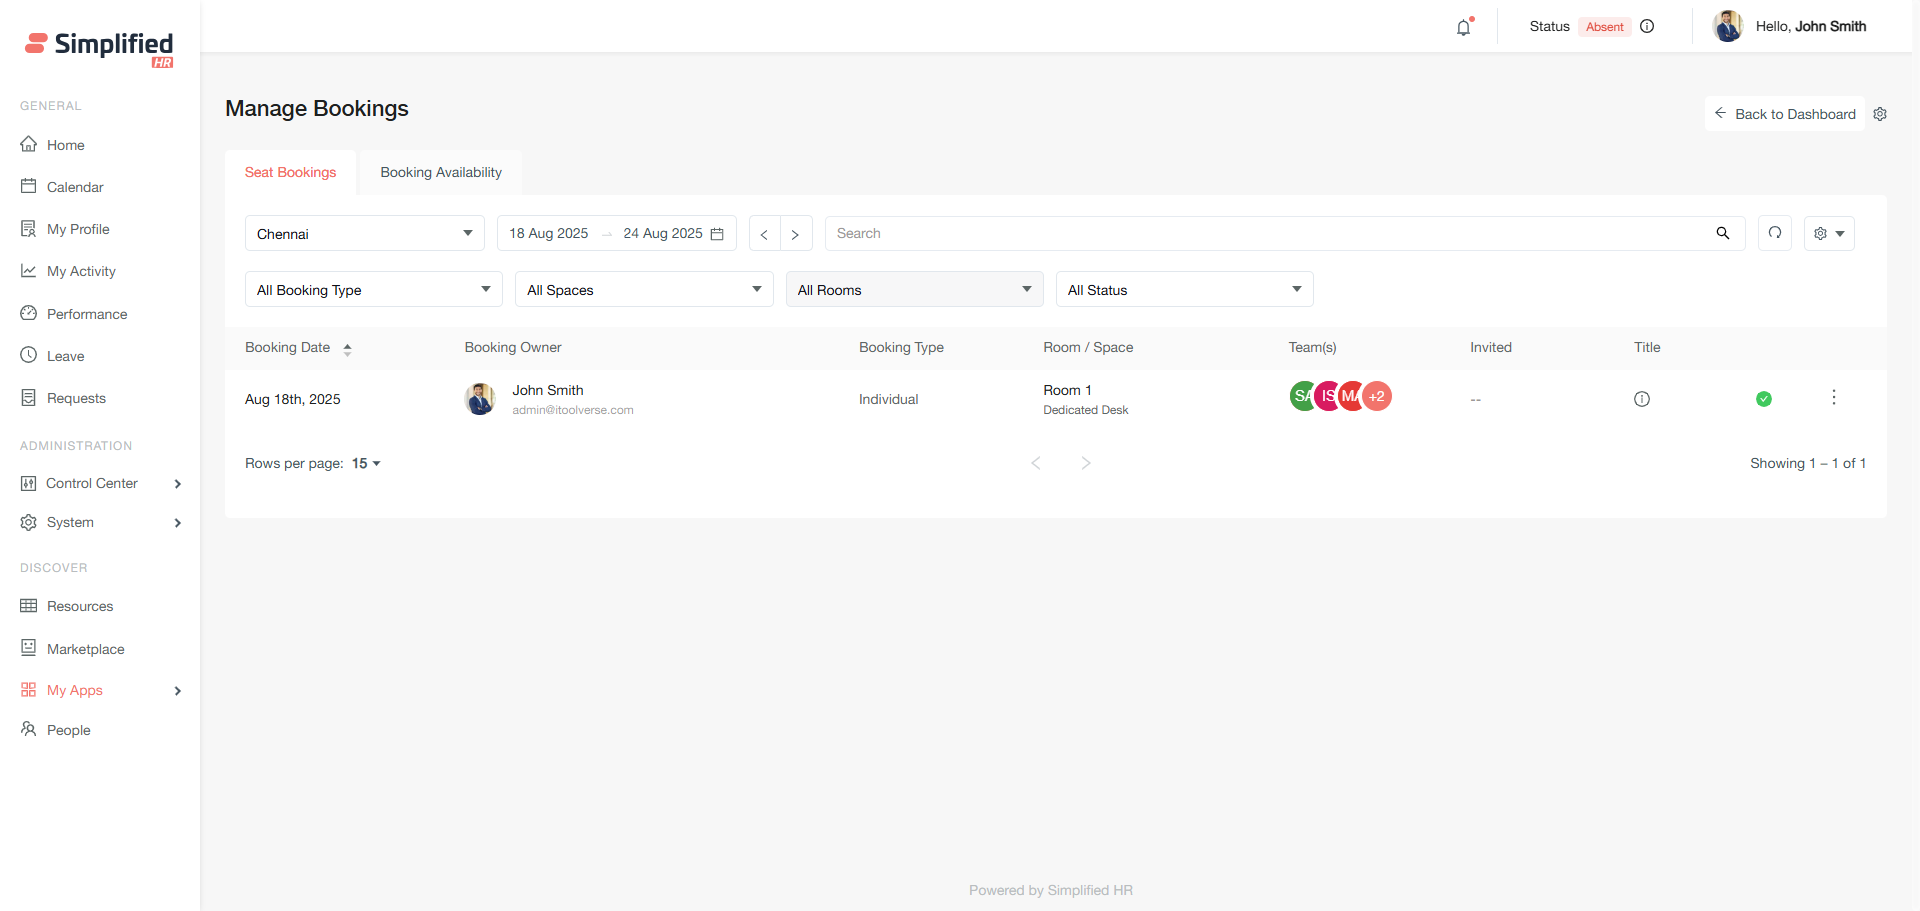
The Seat Booking section displays all organizational bookings in a comprehensive table format, allowing you to manage existing reservations.
Understand Booking Information
Each booking entry displays the following details:
-
Booking Date: The date for which the booking was made.
-
Booking Owner: The person who created or applied for the booking.
-
Booking Type: Individual, Team, and Group booking.
-
Room/Space: The specific location reserved.
-
Teams: Associated team members included in the booking.
-
Invited: Additional invitees, if applicable.
-
Title: Custom booking title (if added).
-
Booking Status: Current status (Approved, Rejected, or Cancelled).
-
Actions: Available management options for the booking.
Navigate Booking Weeks
Default view: Current week bookings for the first alphabetical location. Use forward and backward buttons to view different weeks.
Search Organizational Bookings
Find bookings by member name or work email.
Filter Organizational Bookings
Sort by booking type, spaces, rooms, or booking status.
Reset Booking Filters
Reset clears all applied filters and search terms.
Export Booking Data
Export downloads booking data for organizational purposes.
Approve Booking
When Requires Approval is enabled in booking settings, non-admin bookings outside assigned work locations need approval.
- Click the green tick button next to the booking requiring approval.
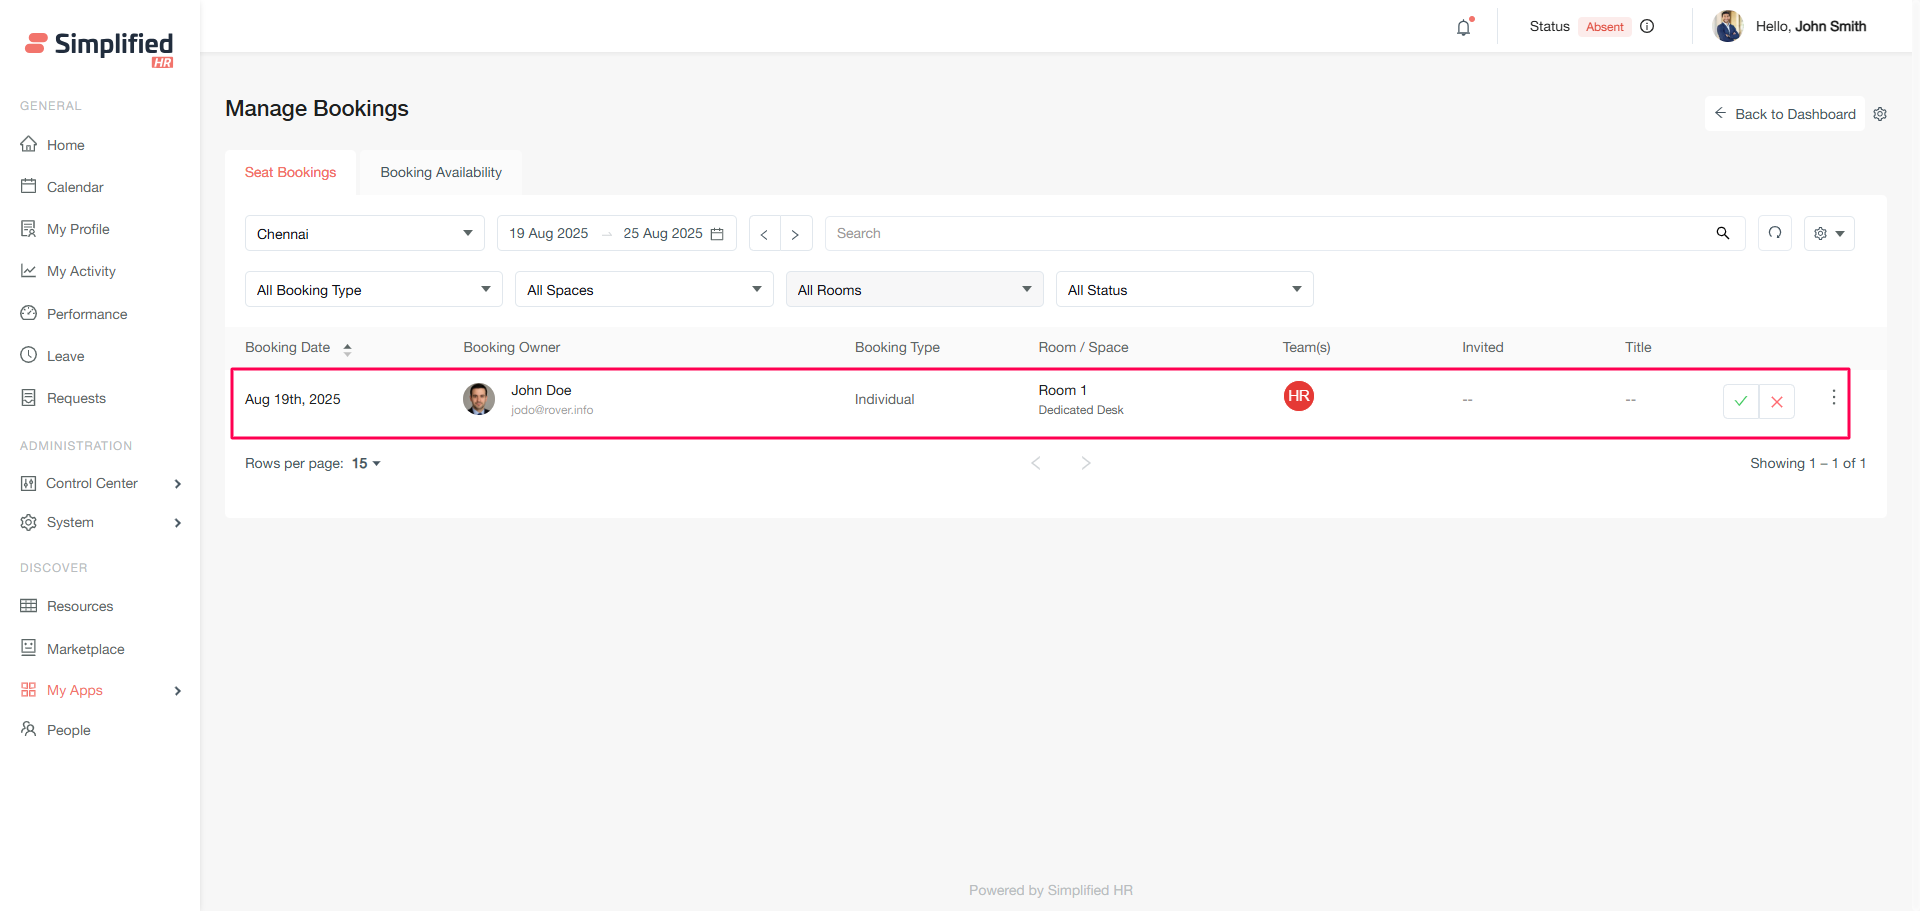
- The booking status updates to Approved.
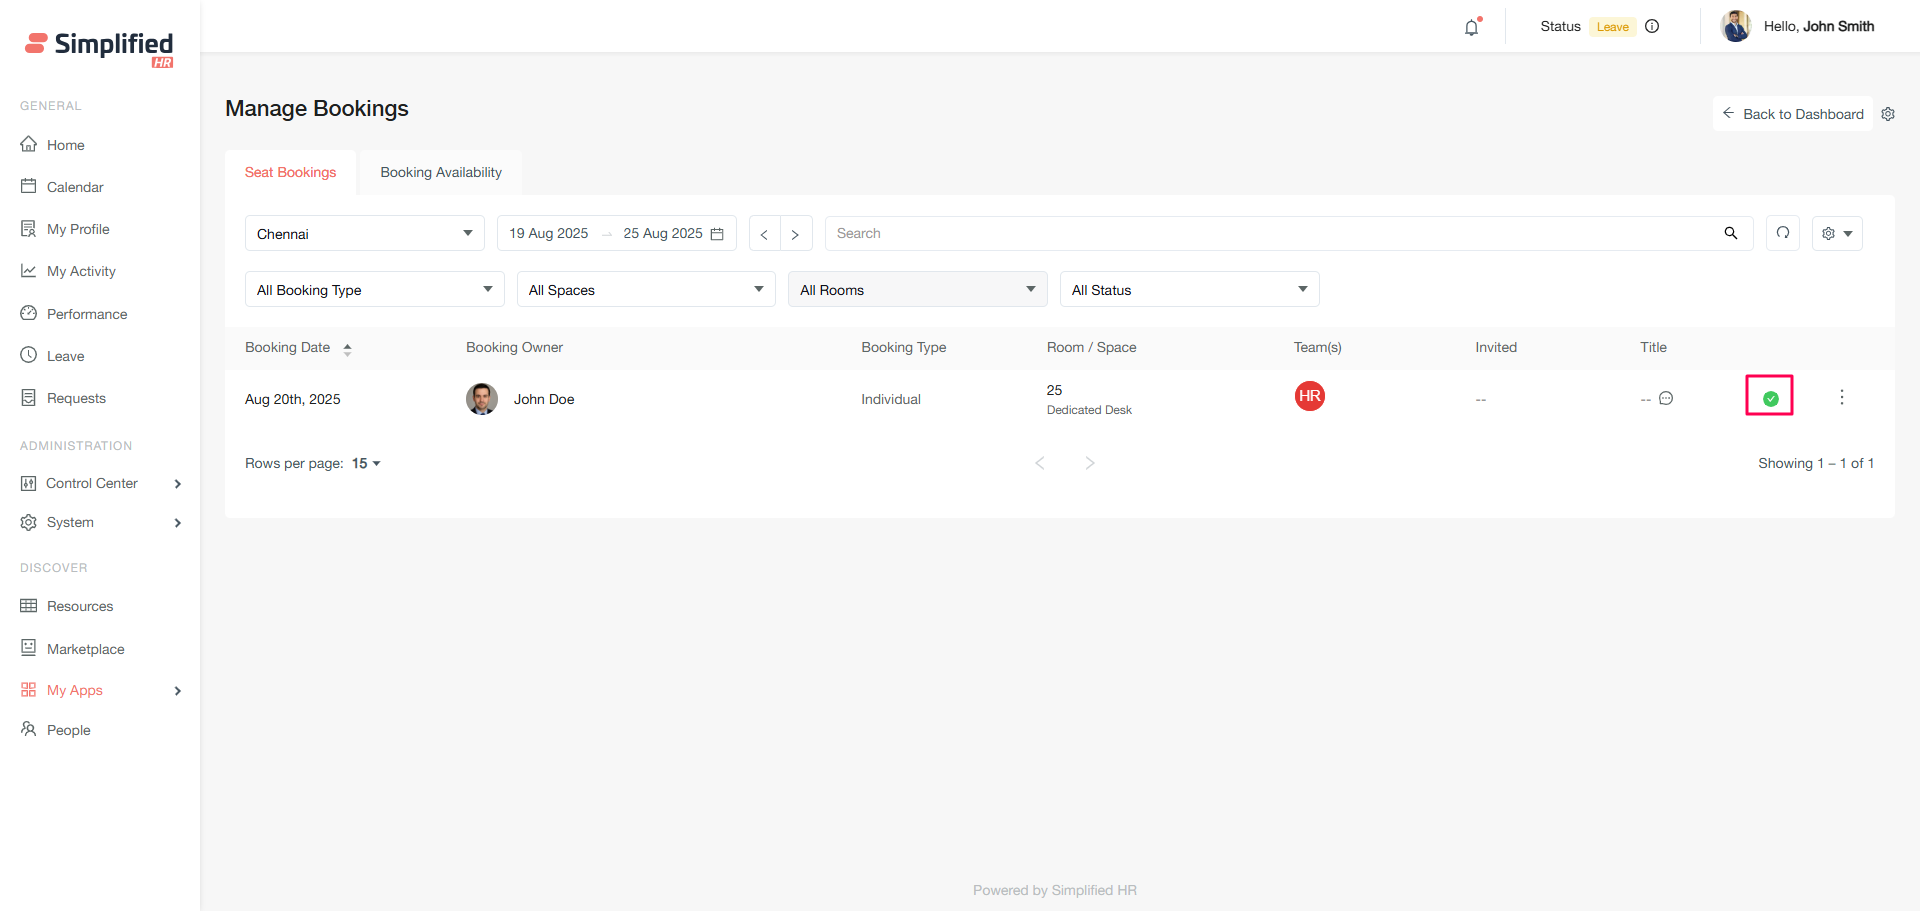
- Notification and email confirmations are sent automatically.
Reject Booking
-
Click the red cross button next to the booking.
-
Enter the rejection reason in the modal dialog.
- Click Reject to confirm.
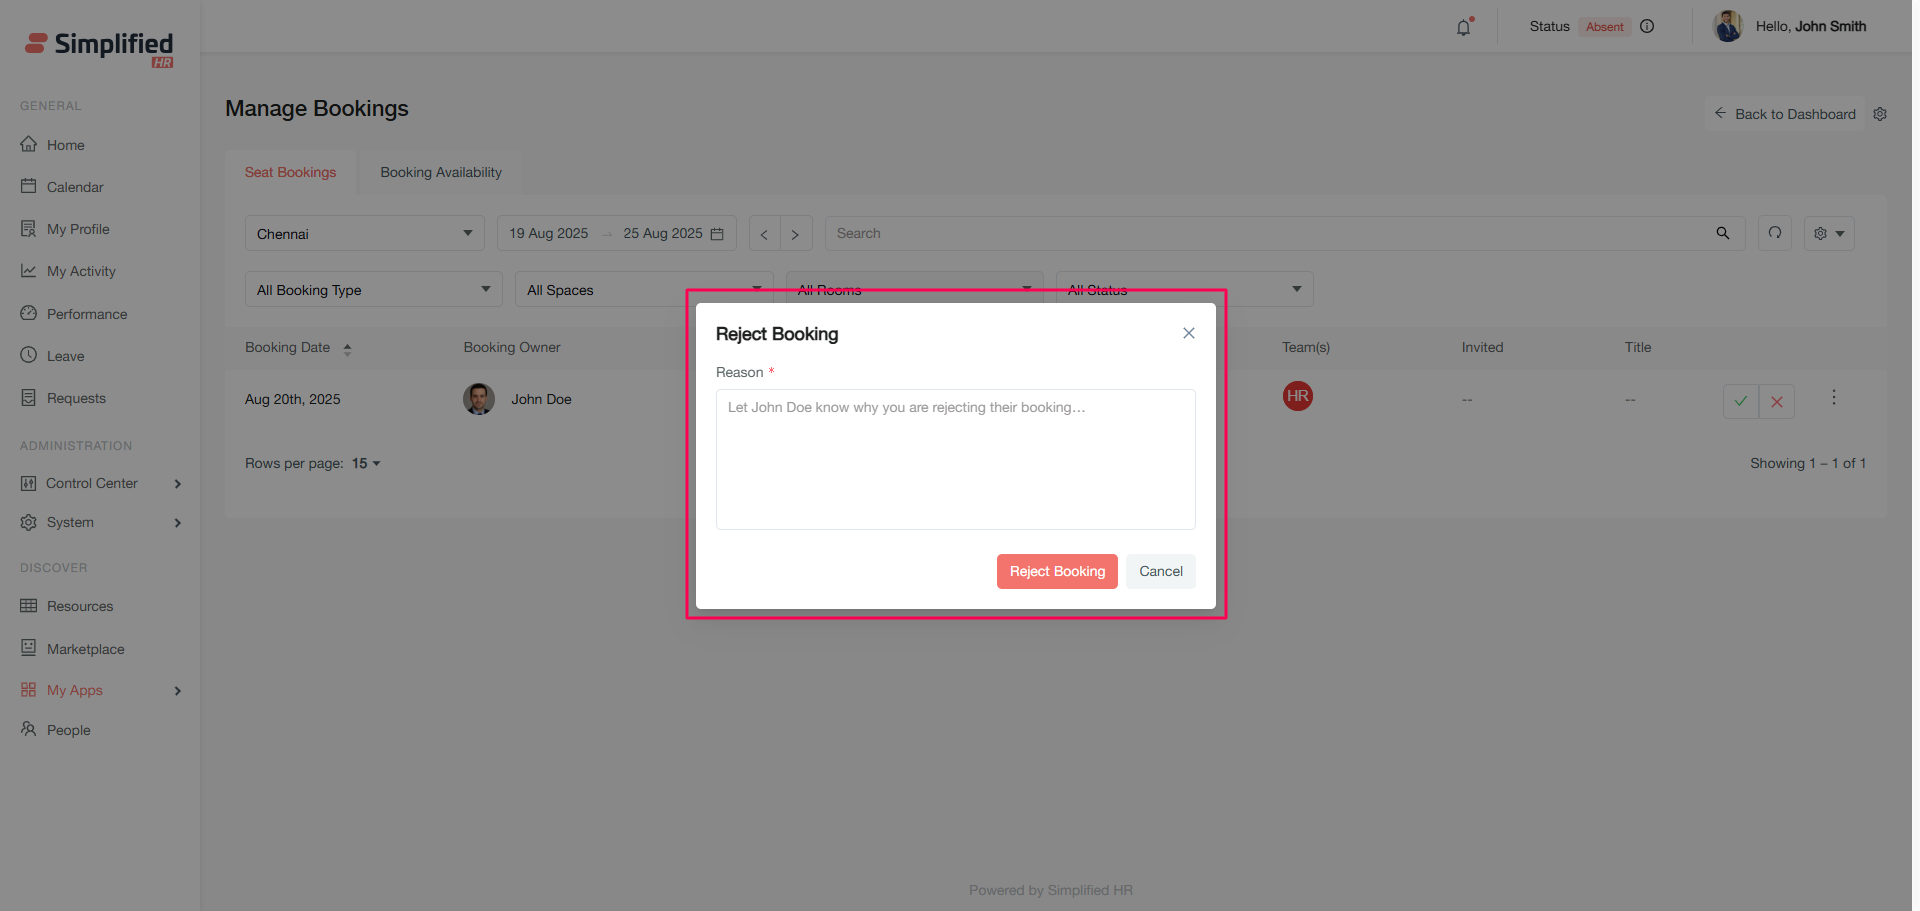
- The booking status updates to Rejected.
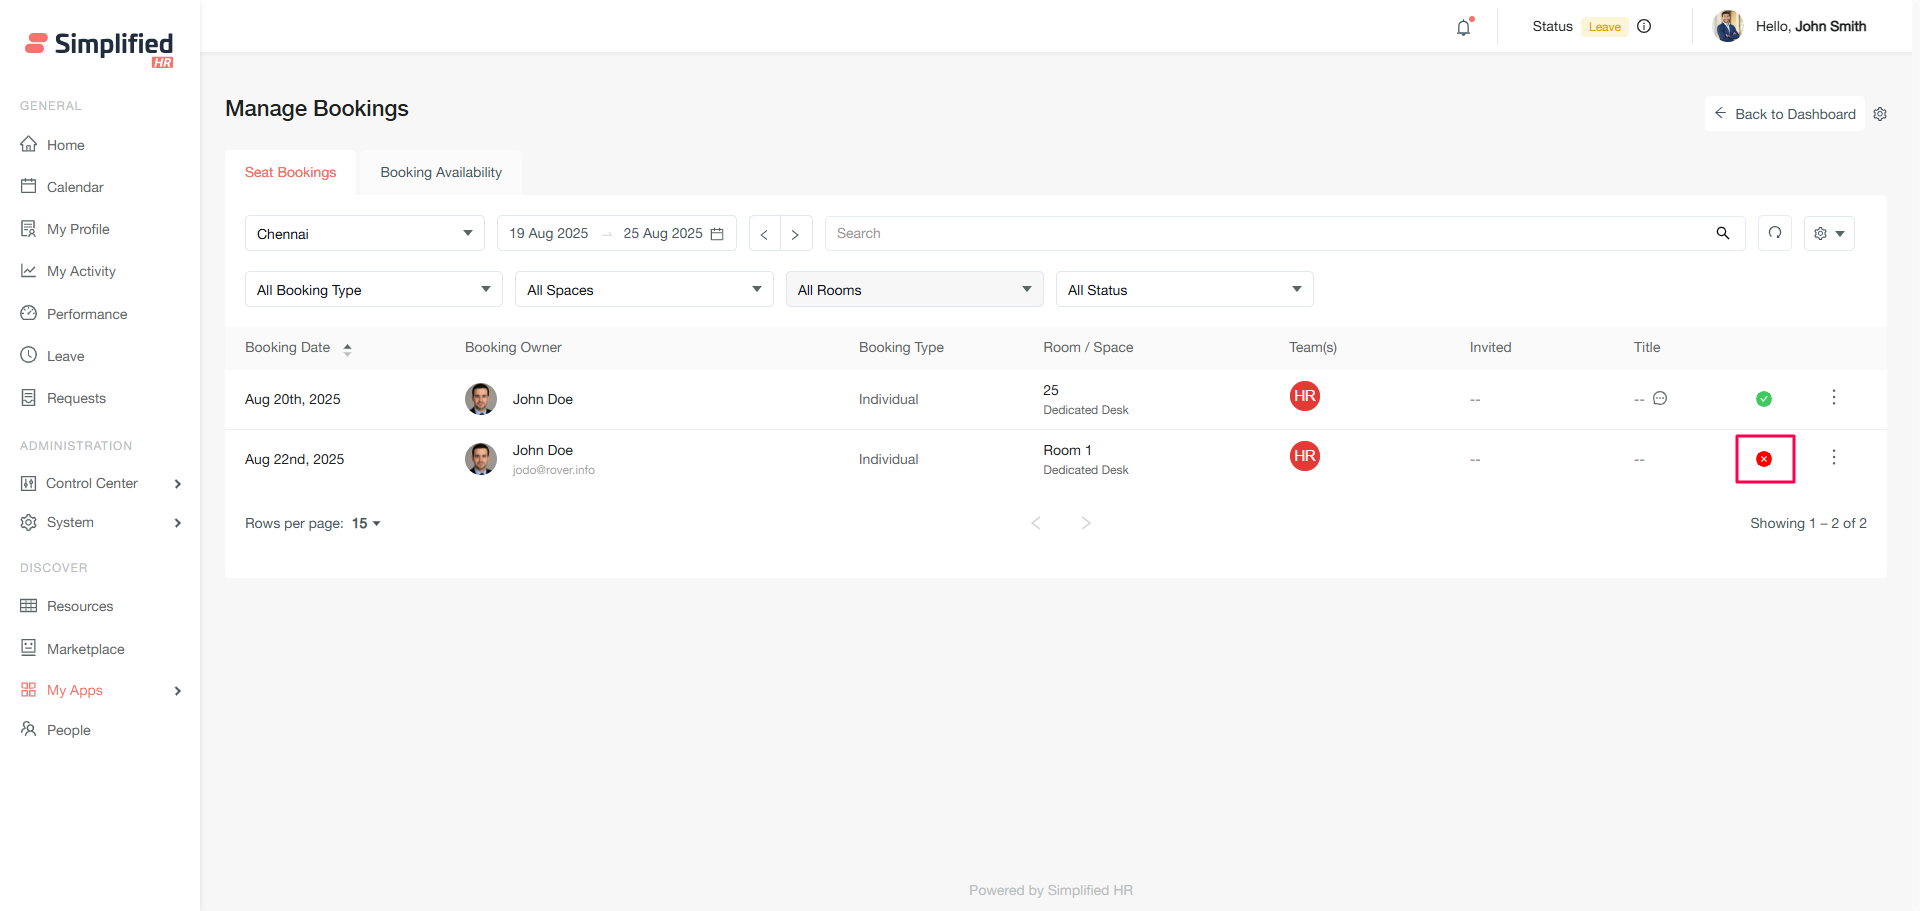
- Notification and email with rejection reasons are sent automatically.
Understand Approval Impact
-
Seat availability count updates after approval or rejection.
-
Modified approved bookings require re-approval if booking date, space, or room changes.
-
Pending bookings appear in the Pending Approval card on member dashboards.
-
Approved bookings display in the member's booking calendar.
Create Booking for a Member
Create bookings for any organizational member with administrative override capabilities.
- Click Create Booking in the Booking Availability section.
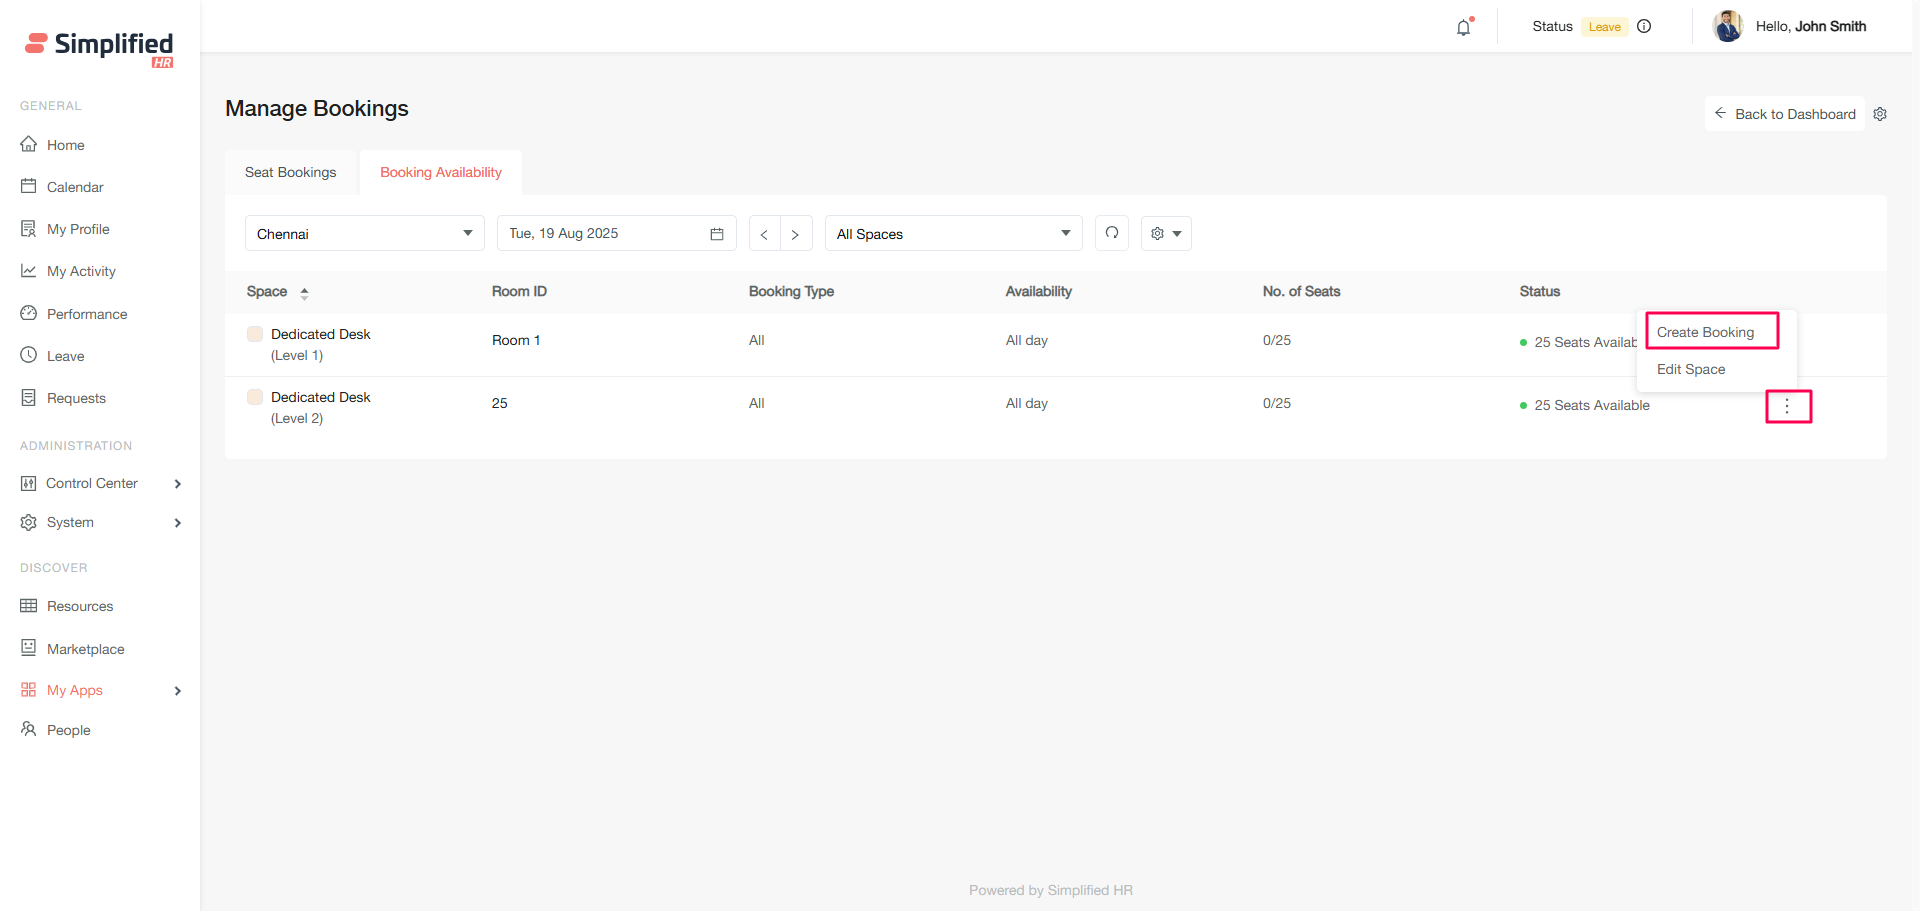
- Select the booking type (Individual, Team, or Group).
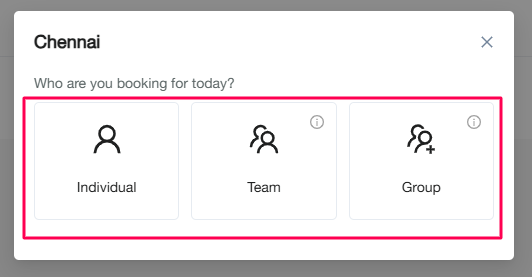
-
Add a booking title (optional).
-
Select the booking owner from active organizational members.
-
Choose the required date (defaults to current or last navigated date).
-
Select spaces and rooms.
-
Click Confirm Booking.
A success modal confirms the booking creation.
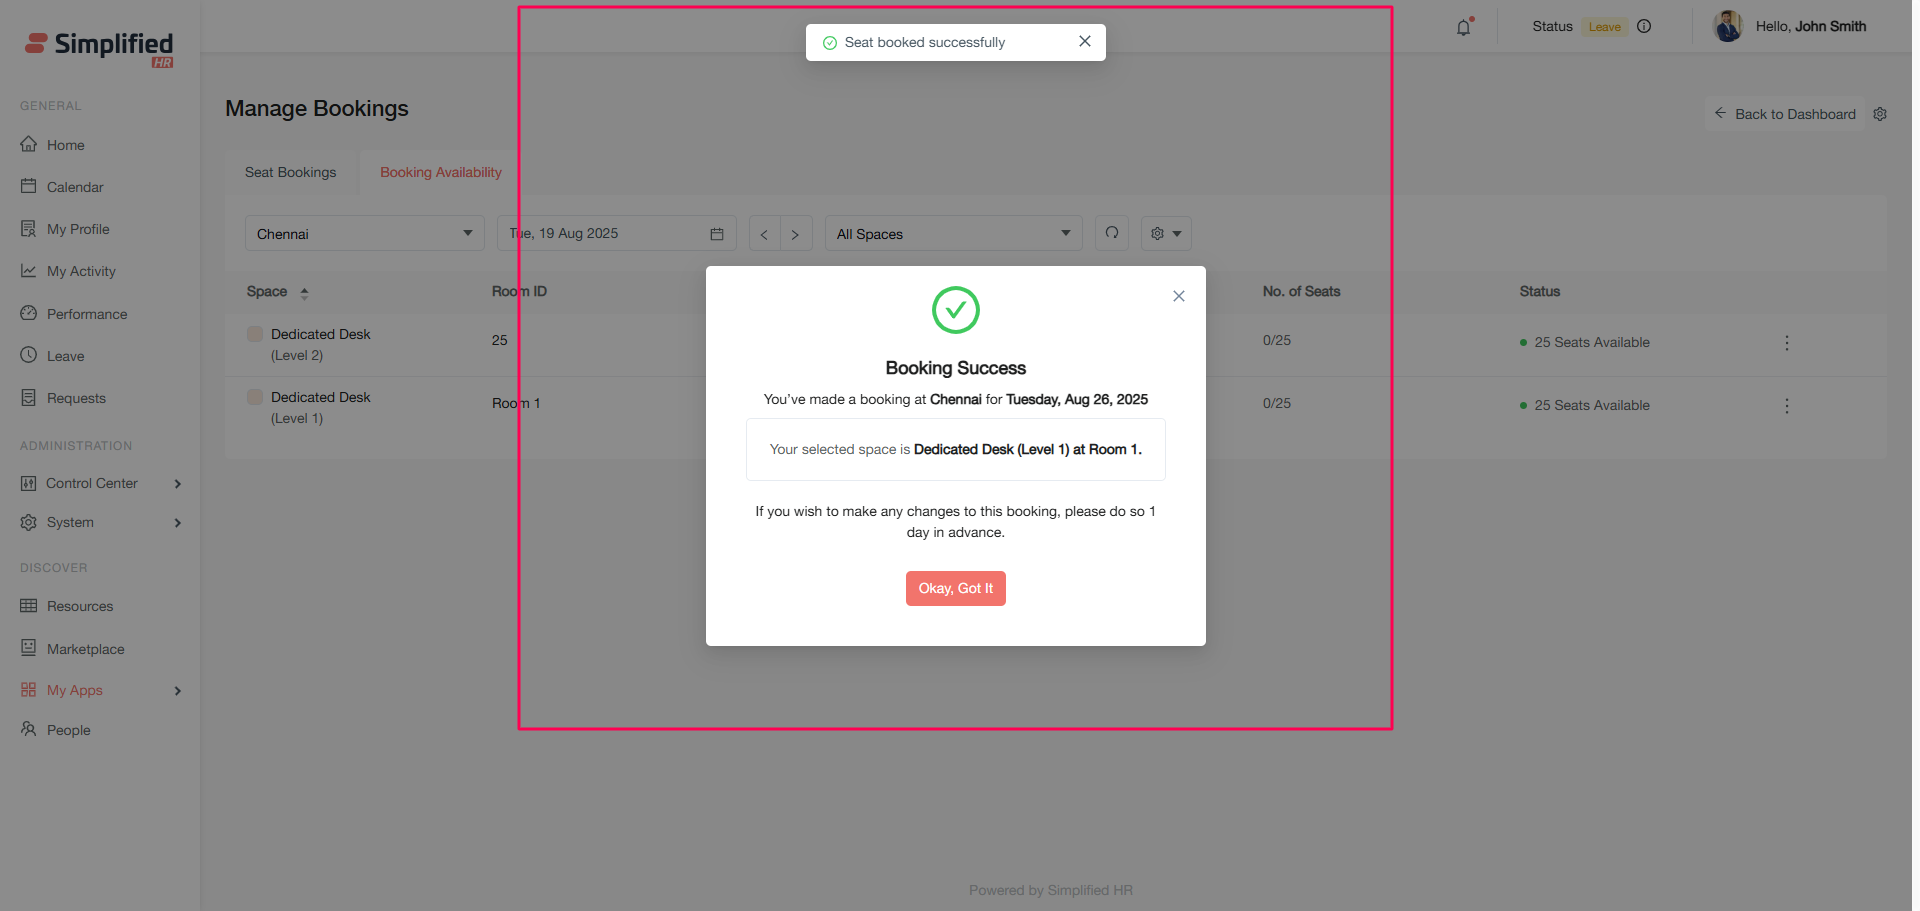
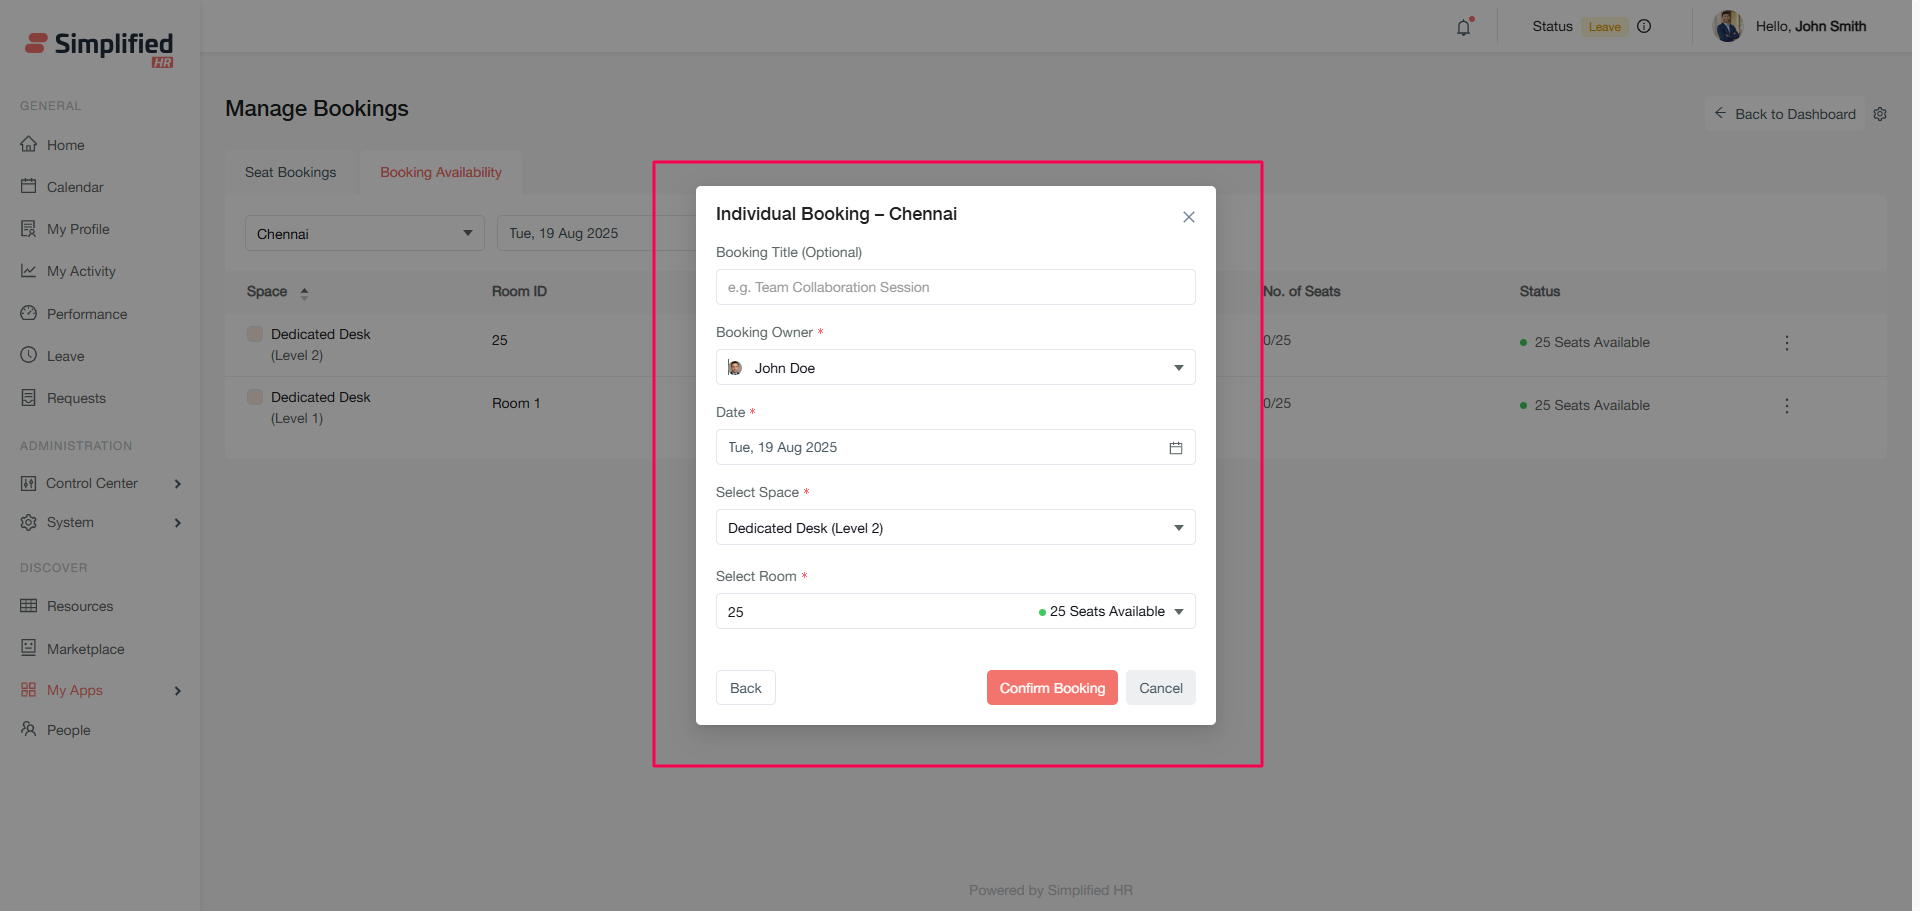
Create Individual Booking for a Member
For Individual bookings: select one space and one room only.
Create Team Booking for Members
For Team bookings: select multiple spaces and rooms with invitee assignments.
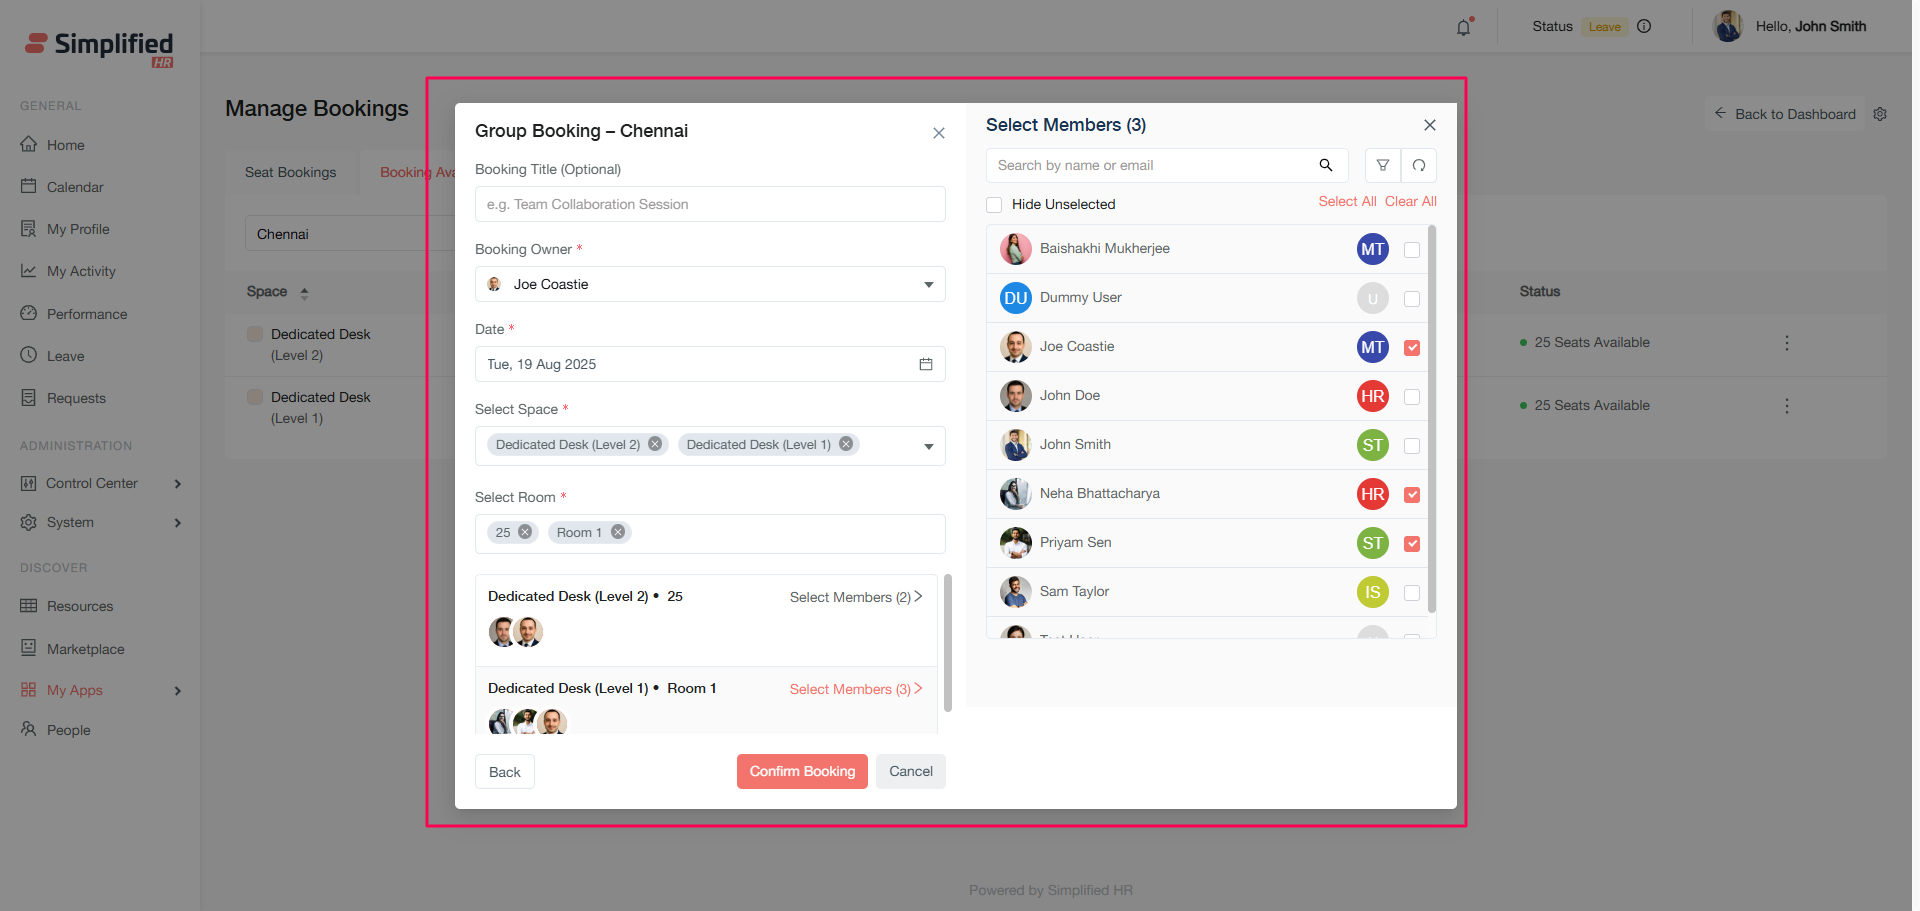
Create Group Booking for Members
For Group bookings: select multiple spaces and rooms with invitee assignments.
Understand Administrative Booking Override
Important: All location restrictions and settings are overridden for administrative bookings, and the booking is considered active without any manual confirmation. This override applies only to administrator-created bookings, not to ordinary user bookings.
Modify Organizational Booking
You can modify any booking, whether pending approval or already approved. Admin modifications are automatically approved.
-
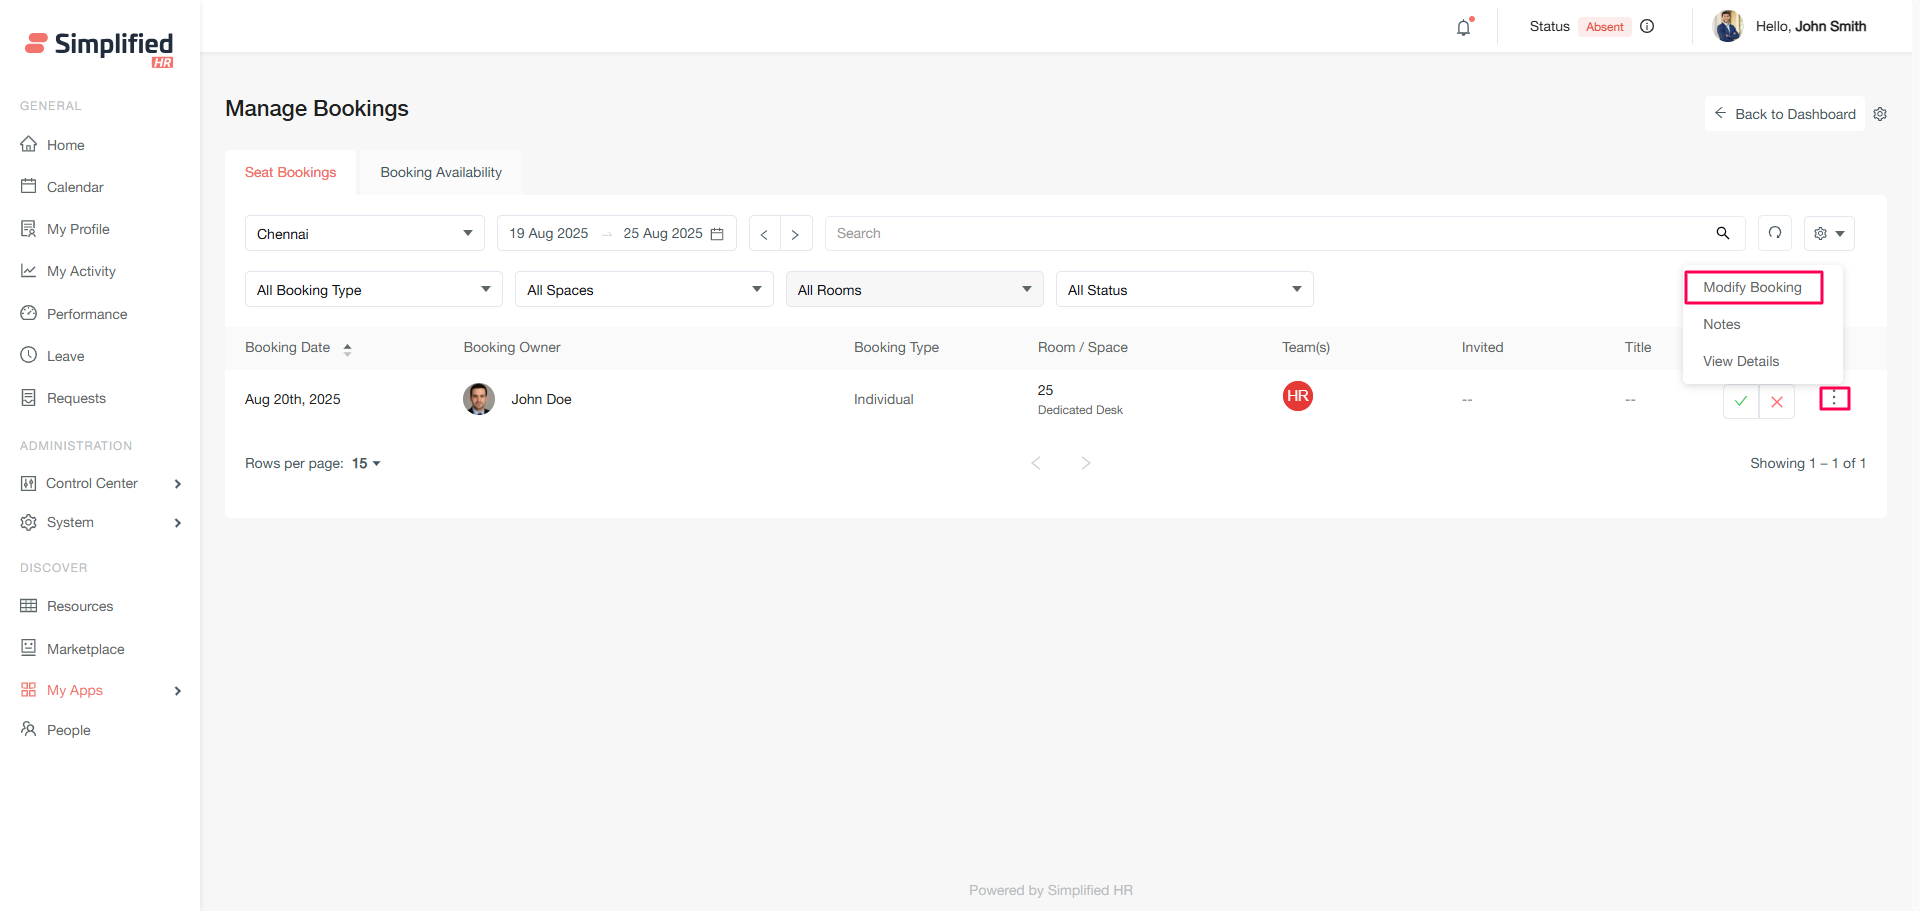
Click the three-dot menu next to the booking.
-
Select Modify.
-
Make the necessary changes in the booking form.
-
Click Modify booking.
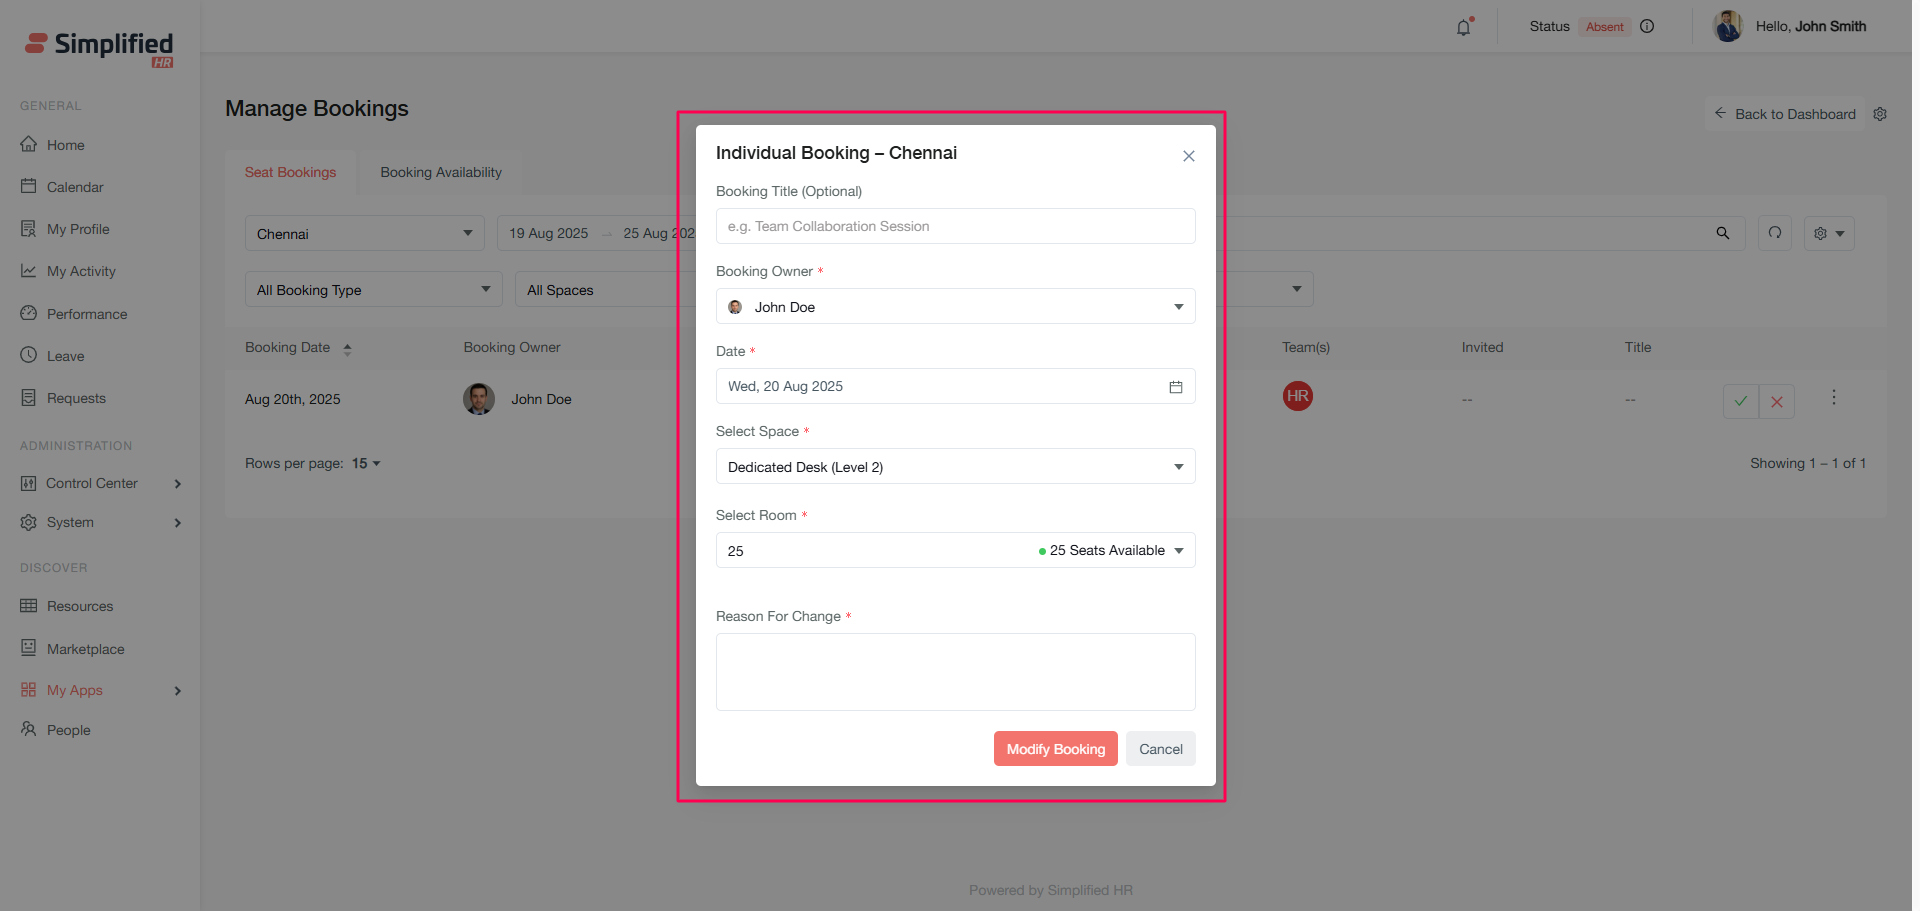
A success message confirms the modification.
Add Administrative Notes to Booking
Add administrative notes to specific bookings for internal reference.
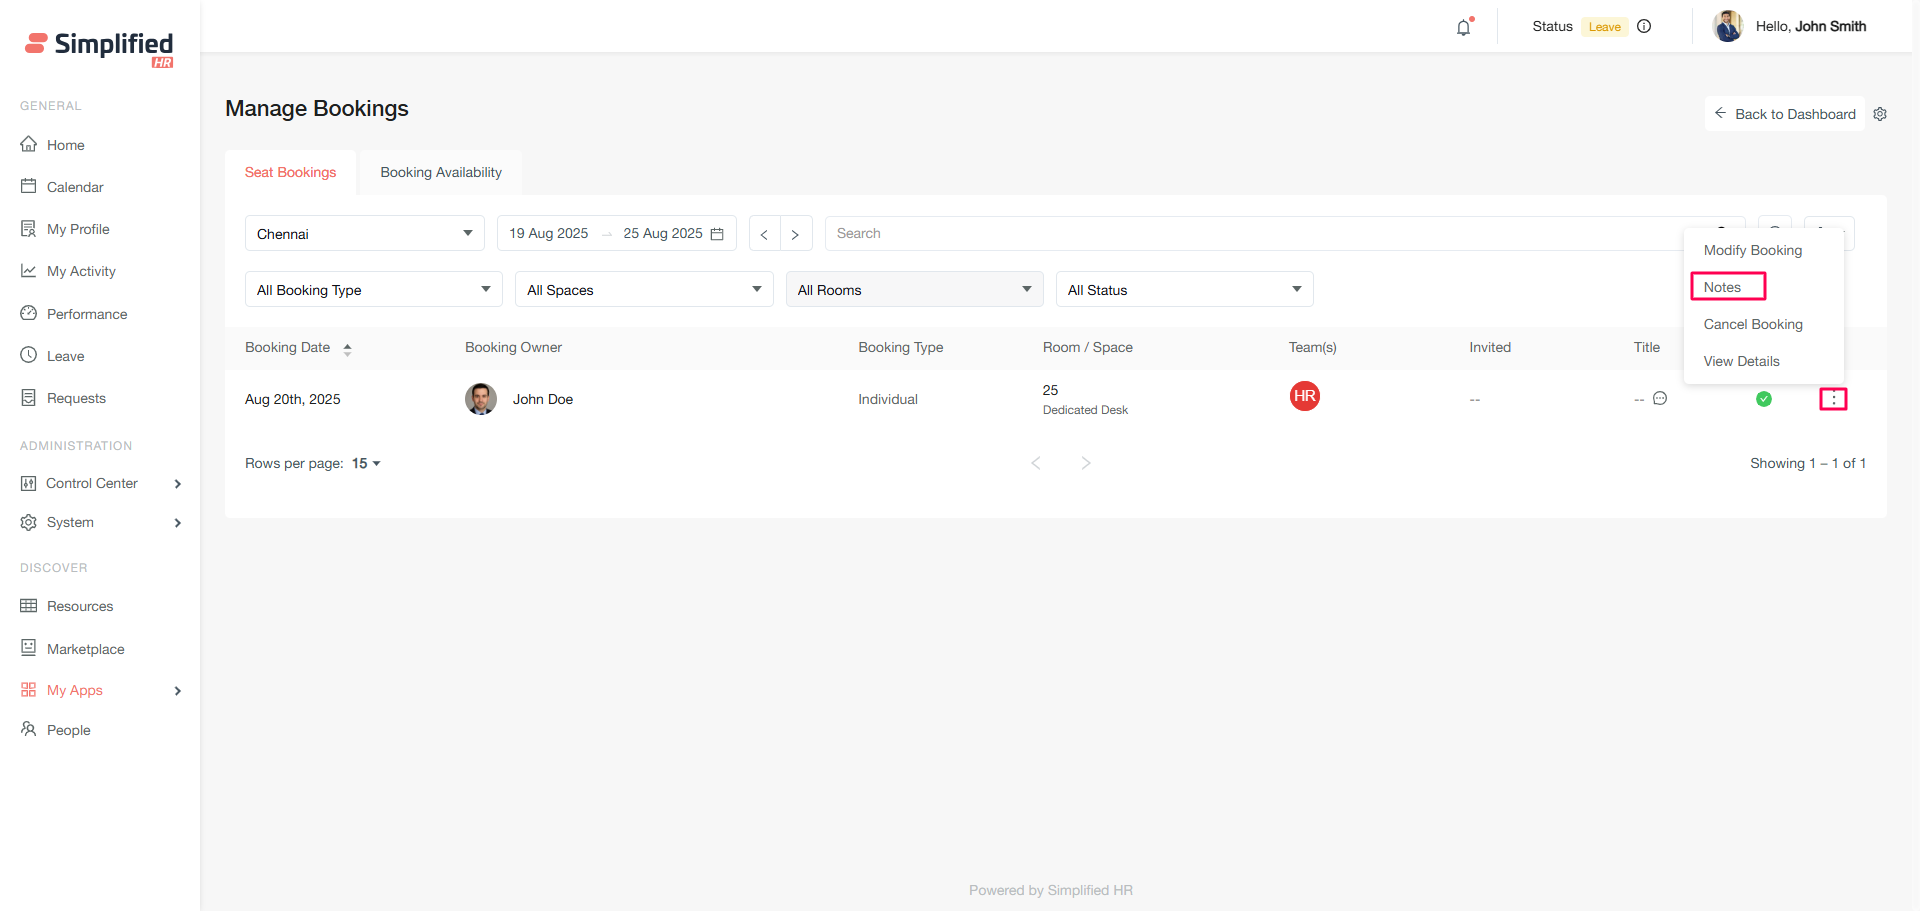
-
Click the three-dot menu next to the booking.
-
Select Notes.
-
Enter your note information.
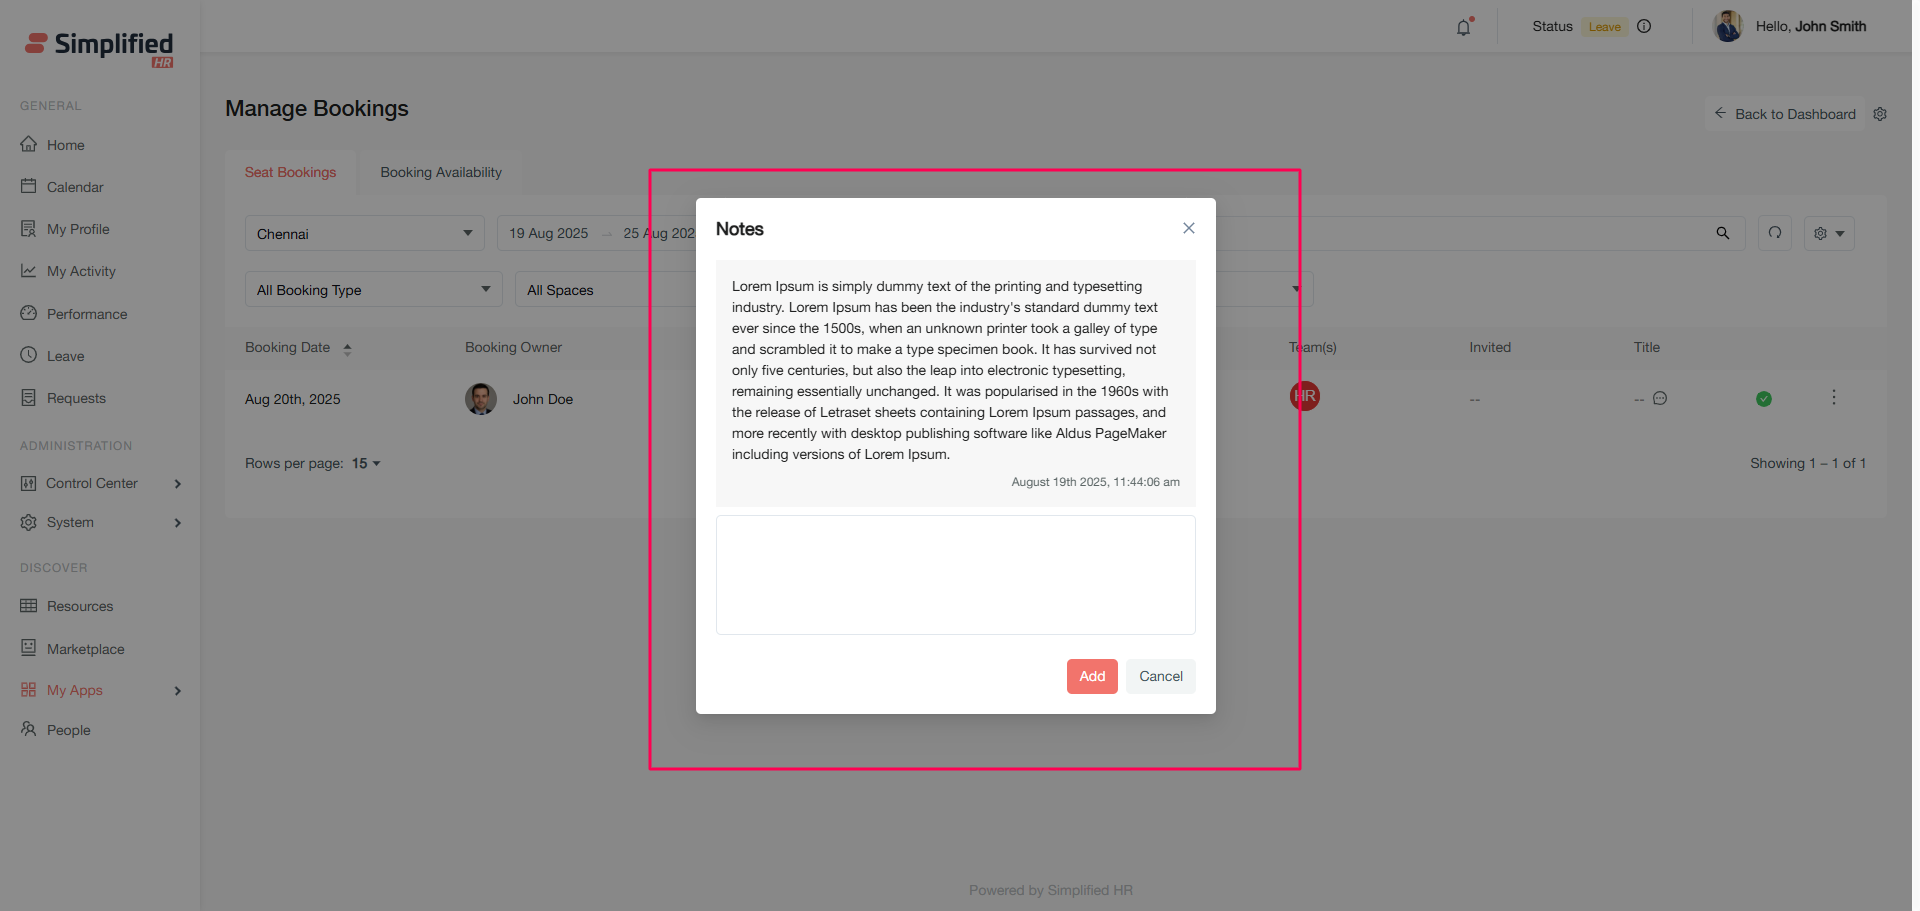
- Click Add.
Important: Multiple notes can be added to a single booking.
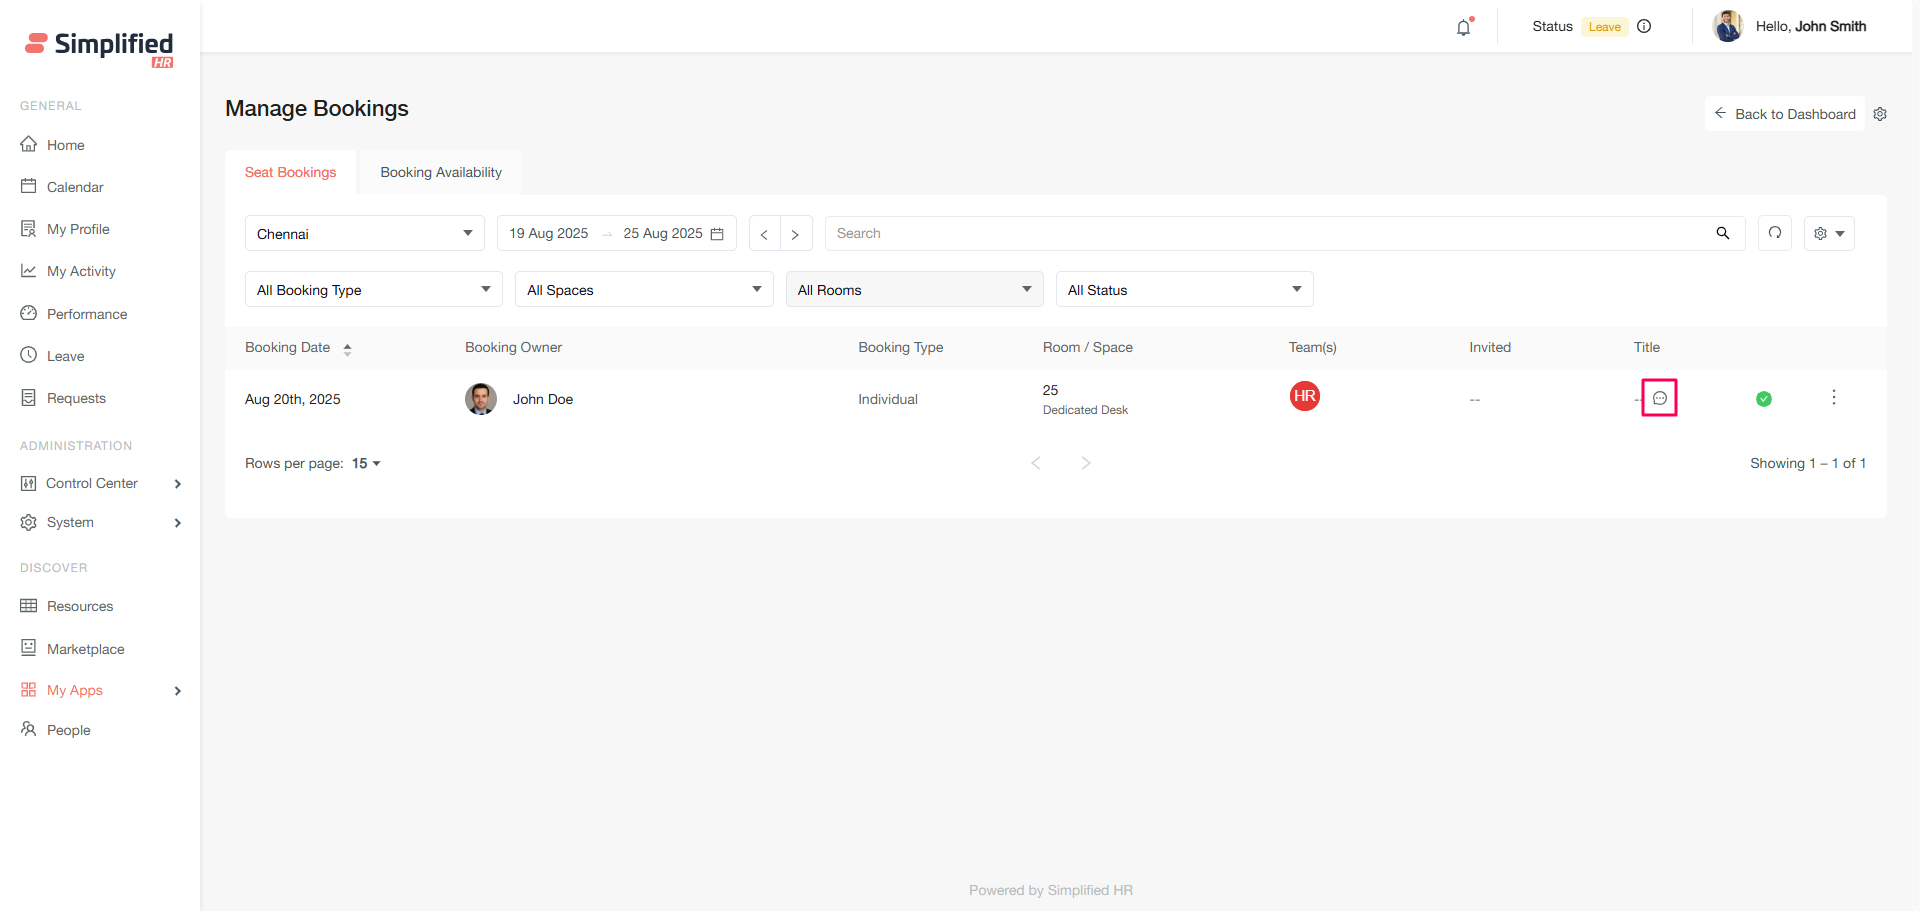
View Booking Notes
Cancel Organizational Booking
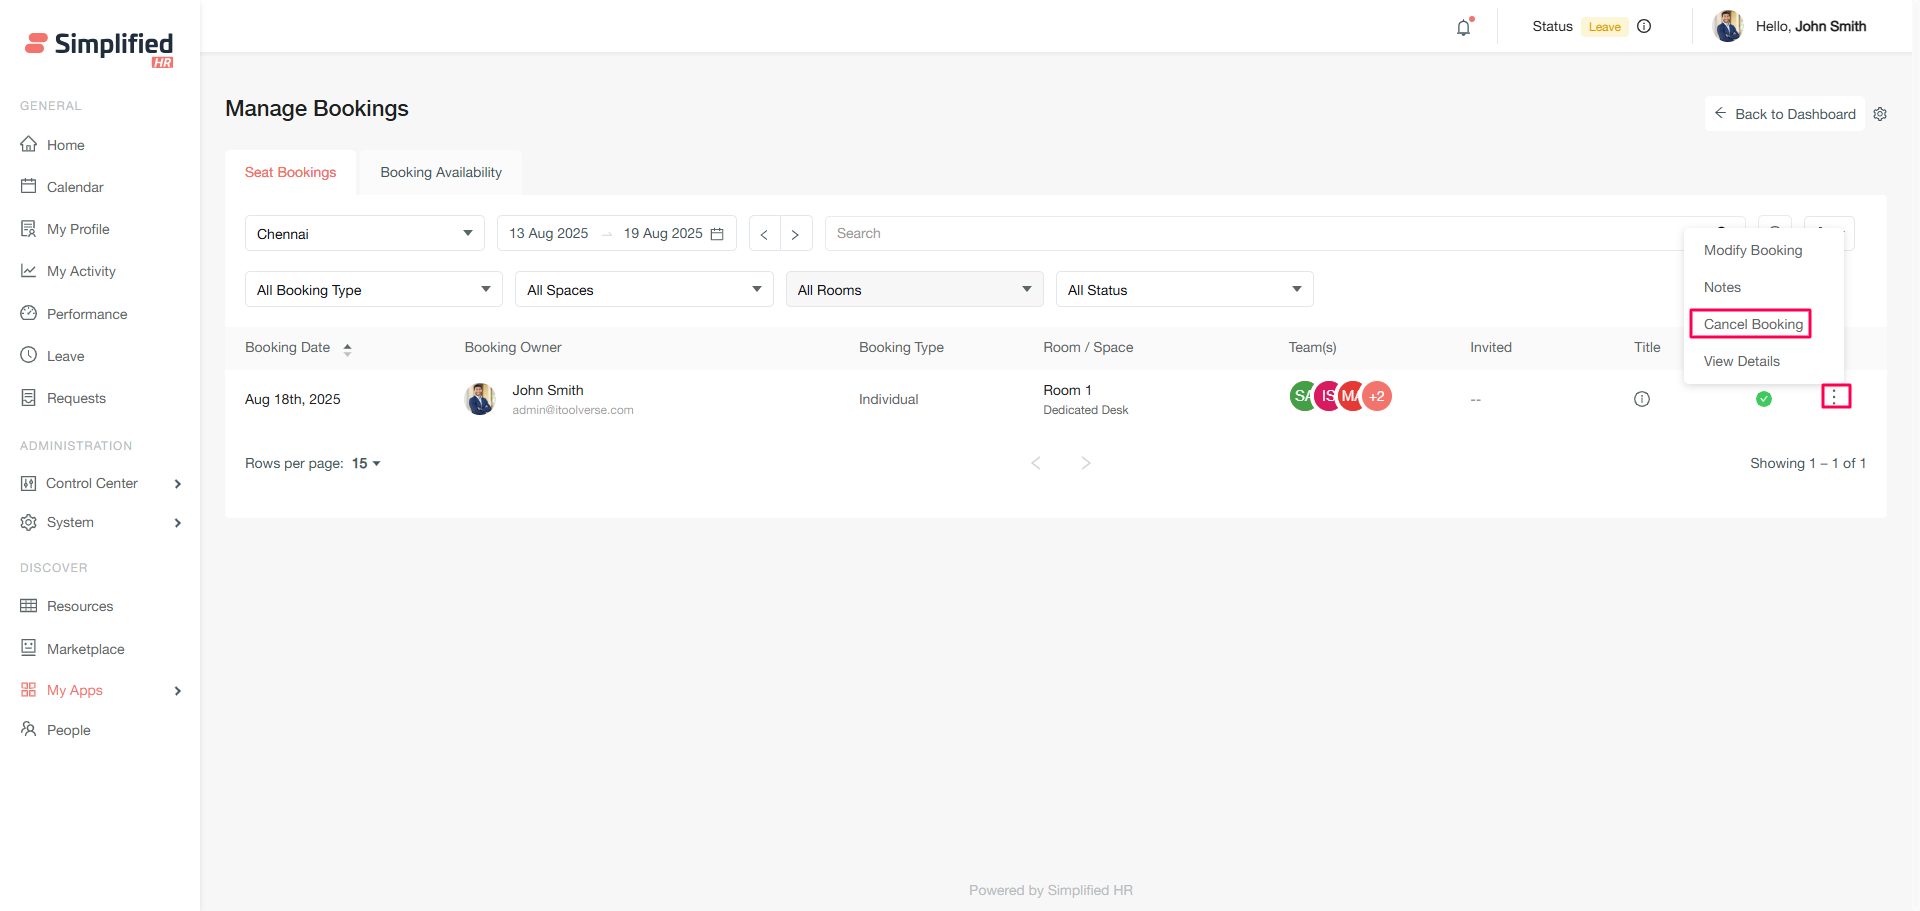
-
Click the three-dot menu next to the booking.
-
Select Cancel.
- Provide a cancellation reason.
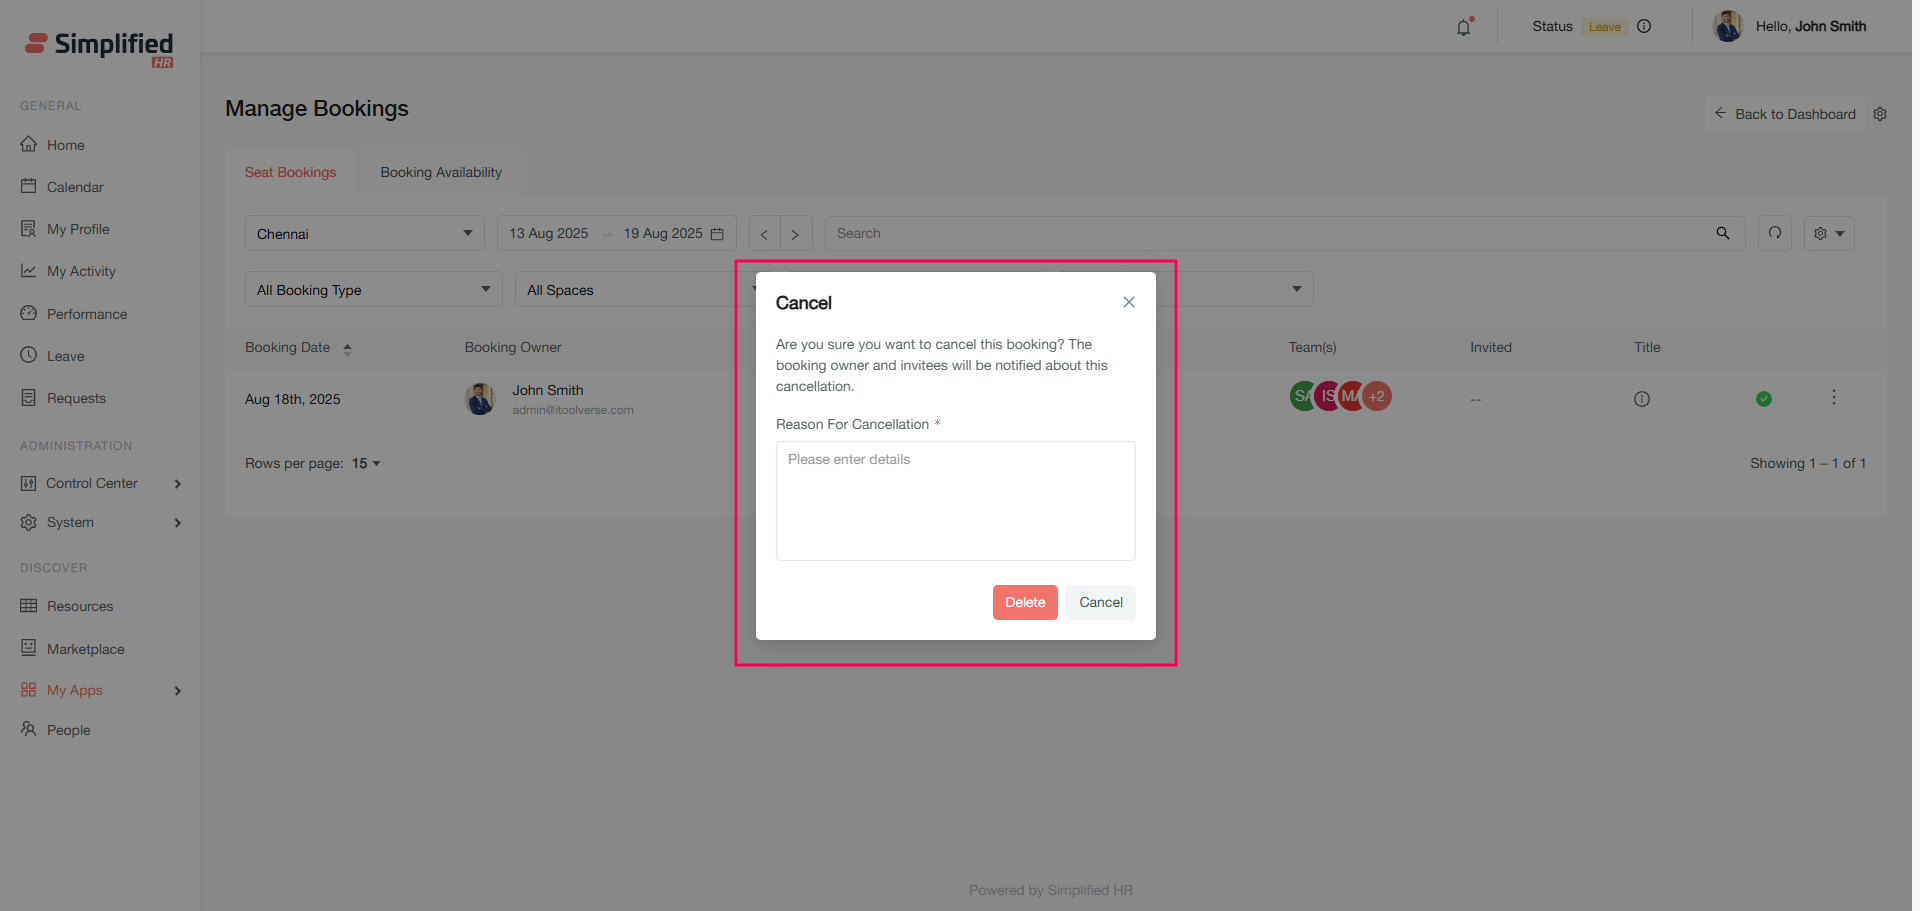
- Click Delete.
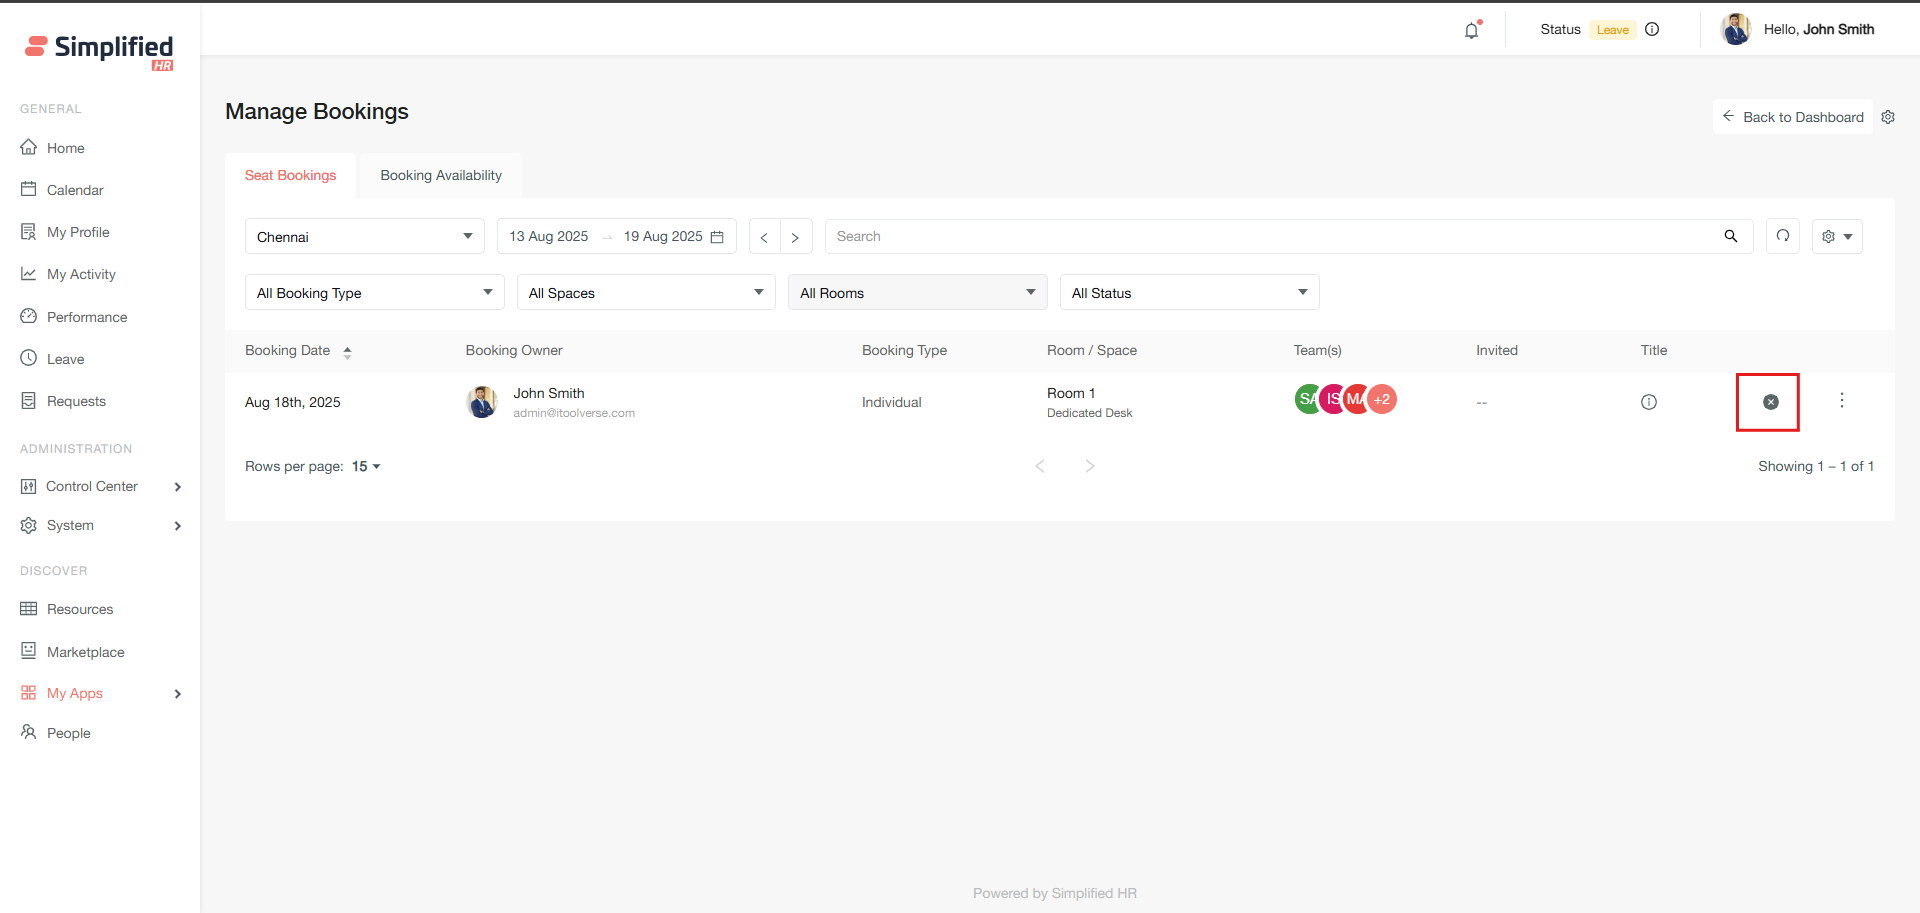
The booking status updates to Cancelled. Notifications are sent automatically to affected members.
View Booking Details
-
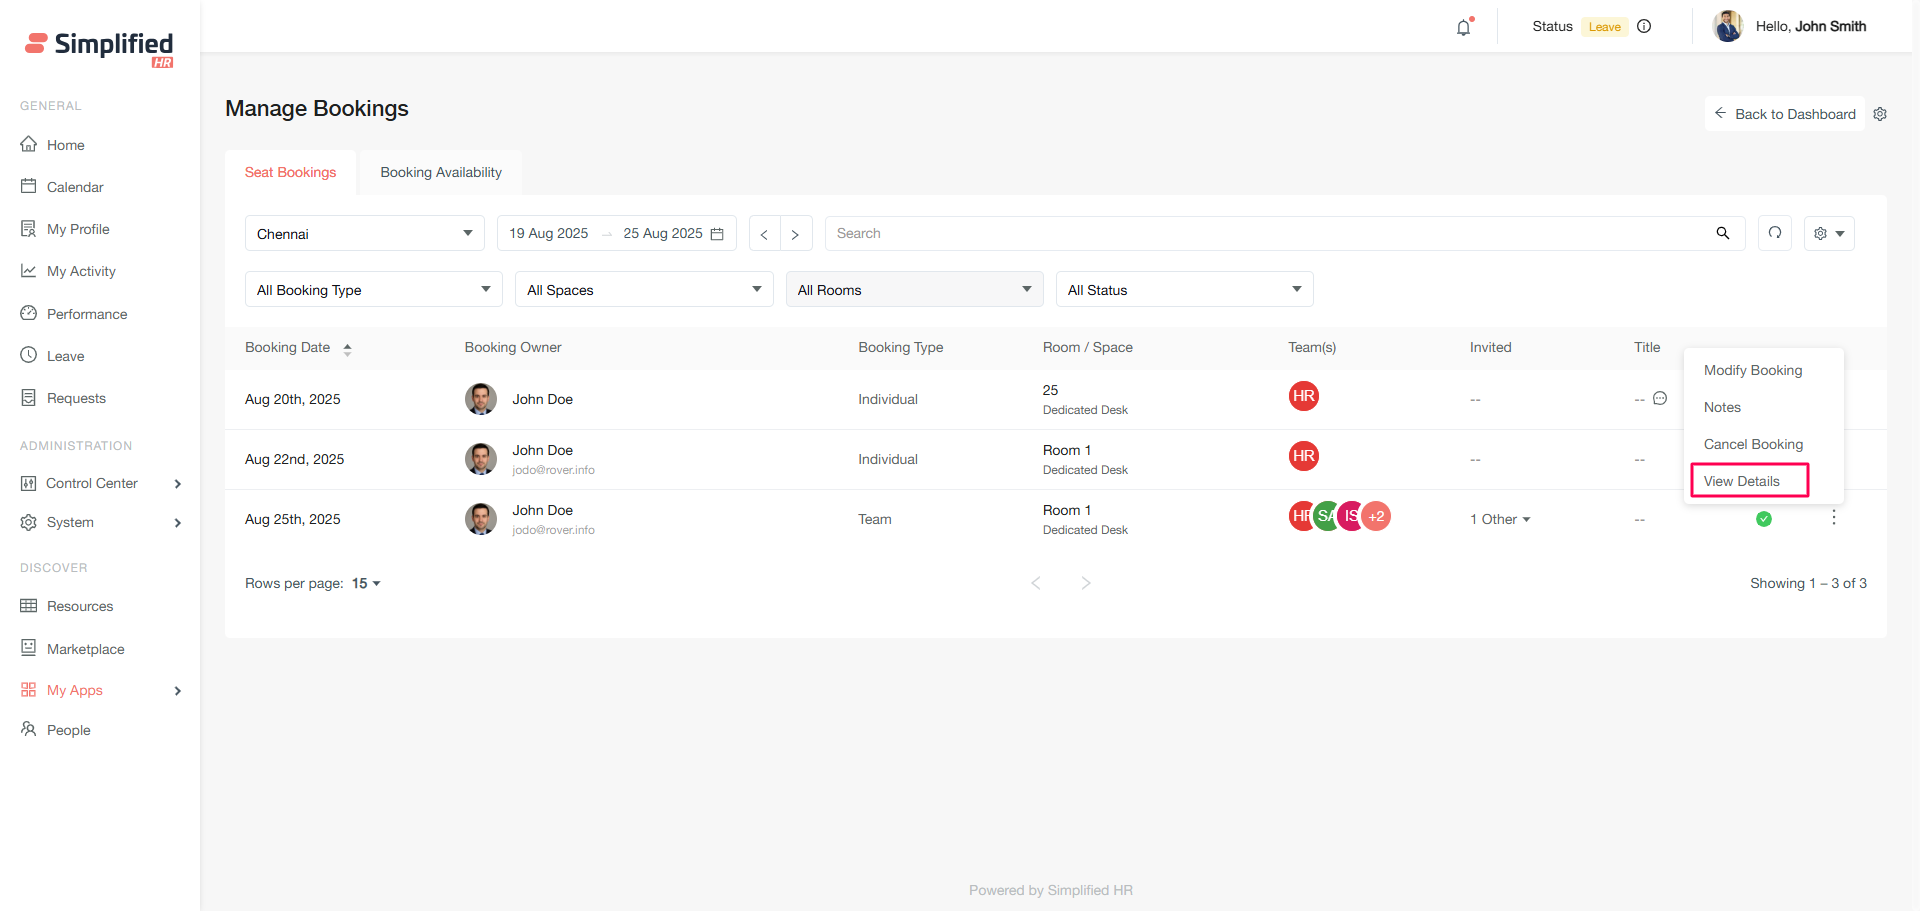
Click the three-dot menu next to the booking.
-
Select View details.
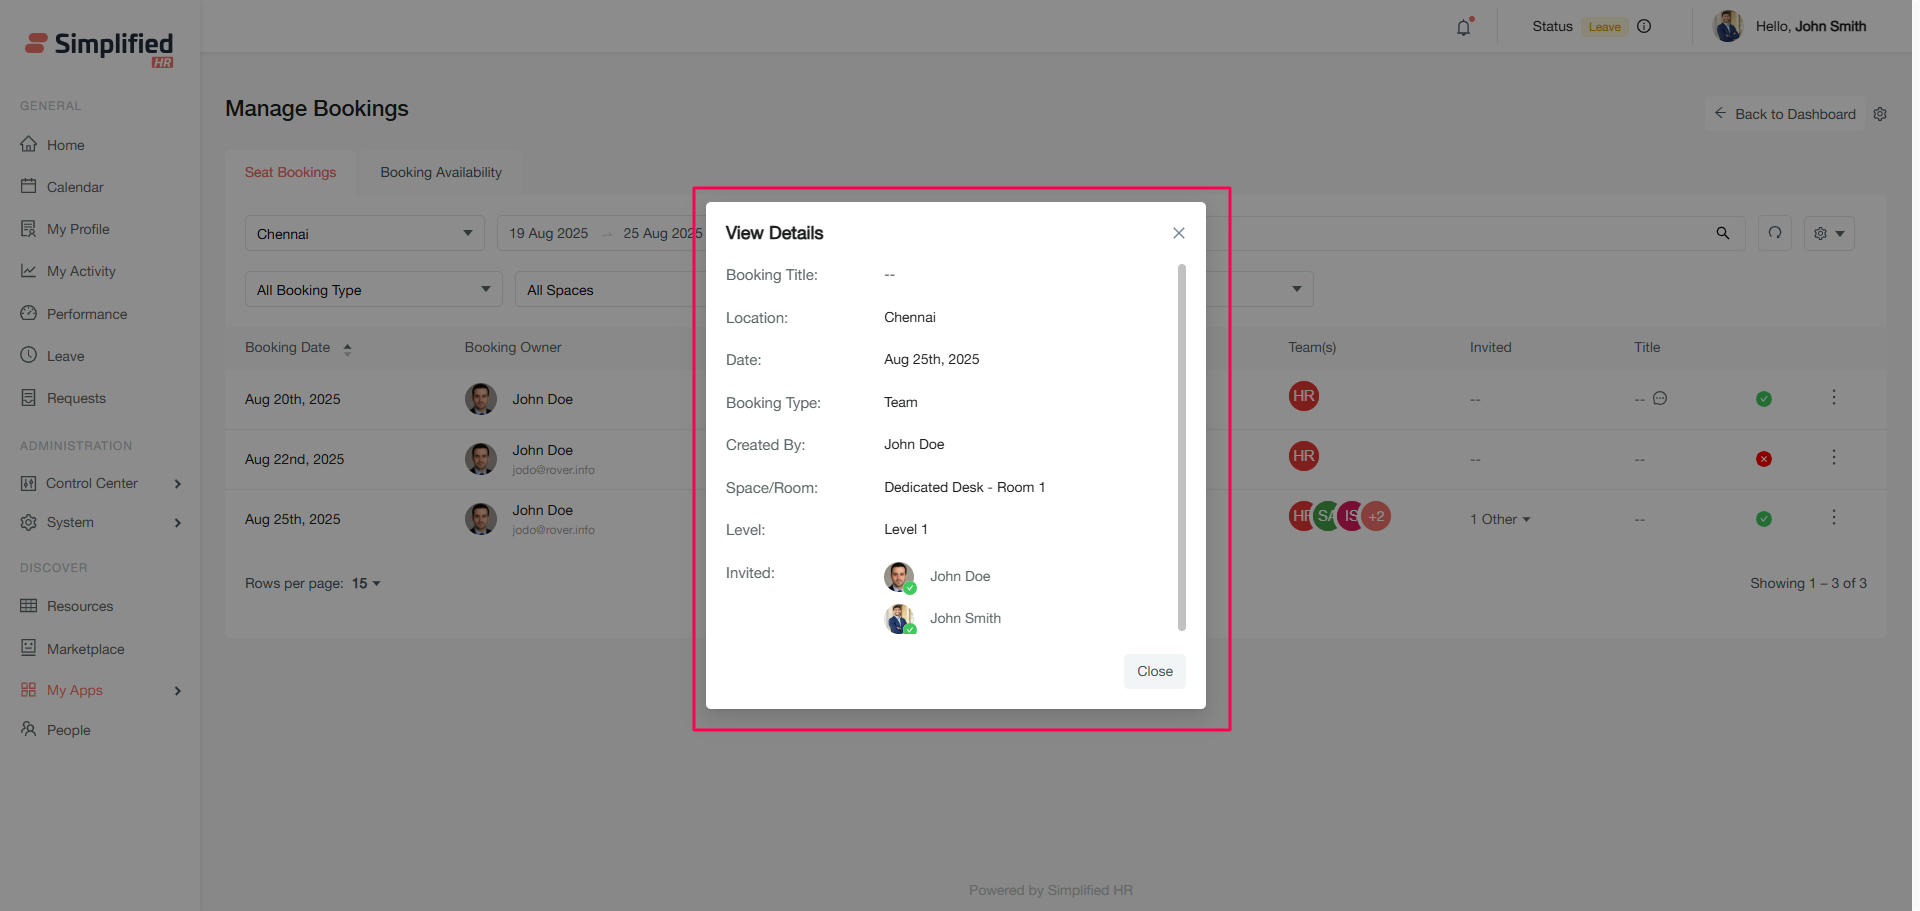
Access comprehensive booking information including all associated members and spaces.
View Booking Availability
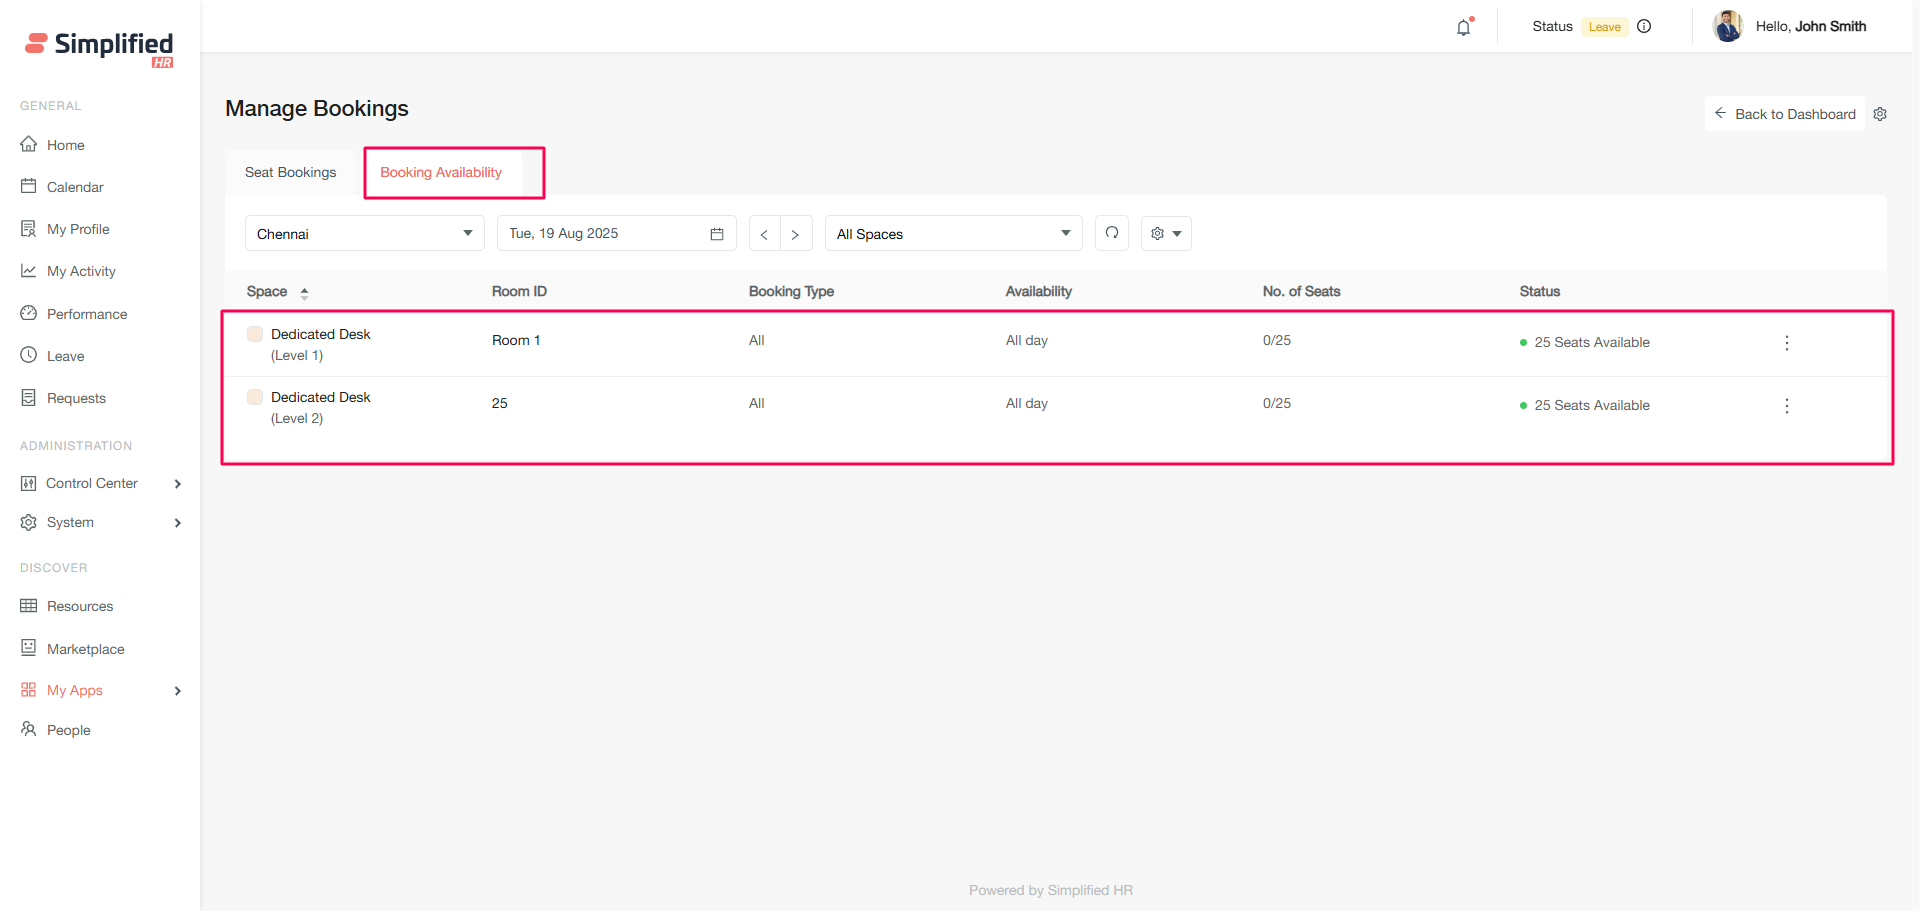
The Booking Availability section allows you to create new bookings for organizational members and view real-time space availability.
Understand Availability Information
The availability table displays:
-
Space name: All configured spaces for the selected location.
-
Room ID: Room identifiers or names.
-
Booking Type: Allowed booking types (Individual, Teams, Groups).
-
Seat availability: Dynamic count of available seats.
-
Status: Current availability status.
-
Availability: All-day or slot-based booking options.
Understand Availability Status
- All seats available (All day).
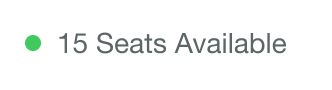
- All seats available (Slot type).

- Partially available/booked (Slot type).


Navigate Availability Dates
Default location: first alphabetical location with current date view. Date navigation allows viewing past and future availability.
Filter Booking Availability
Filter availability by location and spaces.
Export Availability Data
Download availability data via the export option.
Use Administrative Availability Overrides
Administrators have special permissions to book:
-
Paused rooms
-
Paused locations
-
Holiday slots
-
Weekend slots
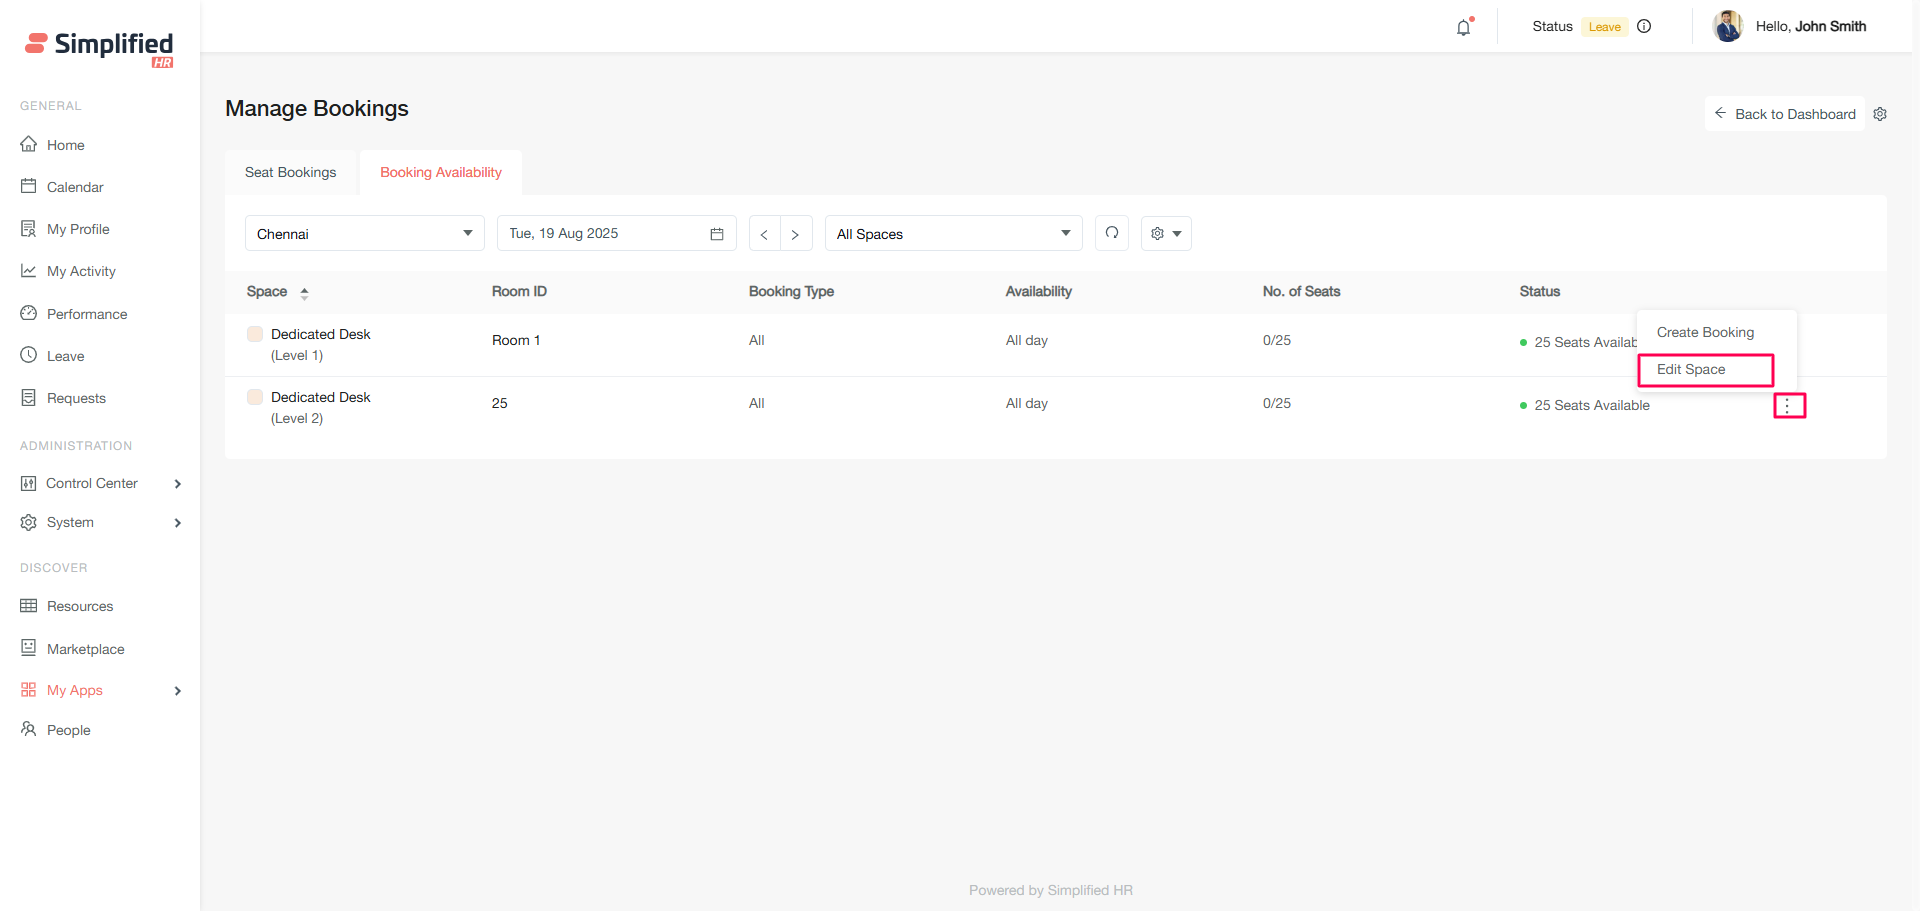
Edit Spaces from Availability View
Modify space and room configurations directly from the availability interface.
- Click Edit space next to the desired space.
-
The system navigates to the booking location configuration page.
-
Make necessary changes to the location settings.
-
Save the configuration.
A confirmation message validates the updates.
Troubleshooting
-
Cannot see bookings: Verify your role permissions and ensure the correct week/location is selected
-
Approval options missing: Check that "Requires Approval" is enabled in booking settings
-
Export not working: Ensure you have appropriate permissions and try refreshing the page
-
Space modifications not saving: Verify you have location configuration permissions
Next steps
-
Learn about configuring booking locations and spaces
-
Set up booking approval workflows
-
Explore automated notification settings
-
Review booking analytics and reporting features