Overview
The Location Dashboard is a dedicated workspace for managing a single location, opened by clicking Location Dashboard on any location card from the main Locations page.
-
Entry point: Locations list → click a location’s Location Dashboard button → lands on that location’s Bookings tab by default.
-
Layout: Header shows the location’s image and name. Left side shows a dedicated sidenav (replaces the normal app menu) with a Back to Overview link and a tab for each sub-area. Main panel shows the selected tab’s content.
-
Tabs available: Bookings, Clients, Visitors, Spaces, Tickets, and Assets (not yet built).
-
Everything shown is scoped to this one location — no cross-location data appears in any tab.
-
Ticket count badge: The Tickets tab in the sidenav shows a live count of open tickets for the location.
-
Purpose of each tab:
-
Bookings — manage workspace bookings on a calendar (create, approve/decline, cancel).
-
Clients — manage the companies/tenants tied to this location (add, edit, deactivate, delete).
-
Visitors — log and manage visitor check-ins, including bulk import.
-
Spaces — manage the physical workspaces/desks/rooms available at this location (add, edit, pricing, availability status).
-
Tickets — raise and track support tickets for this location.
-
Navigating back: Click Back to Overview in the sidenav to return to the main Locations list.
1. Bookings
View
- Calendar-style grid showing all workspace bookings for this location, with a header to navigate dates/view.
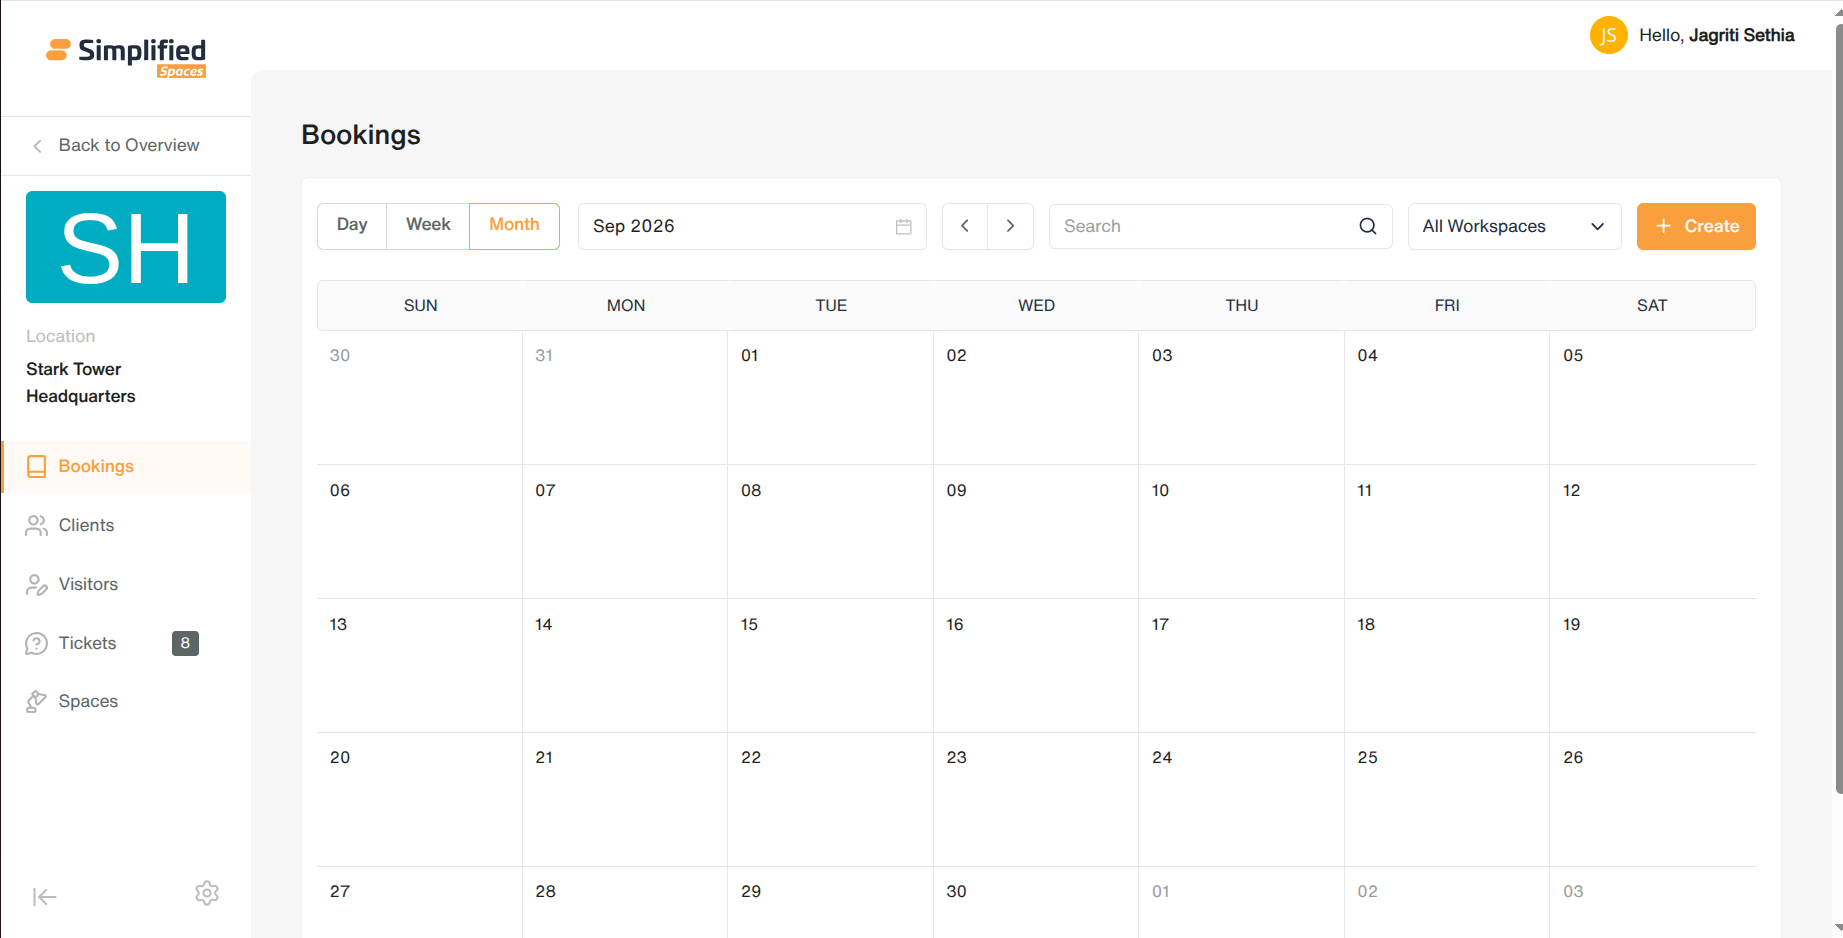
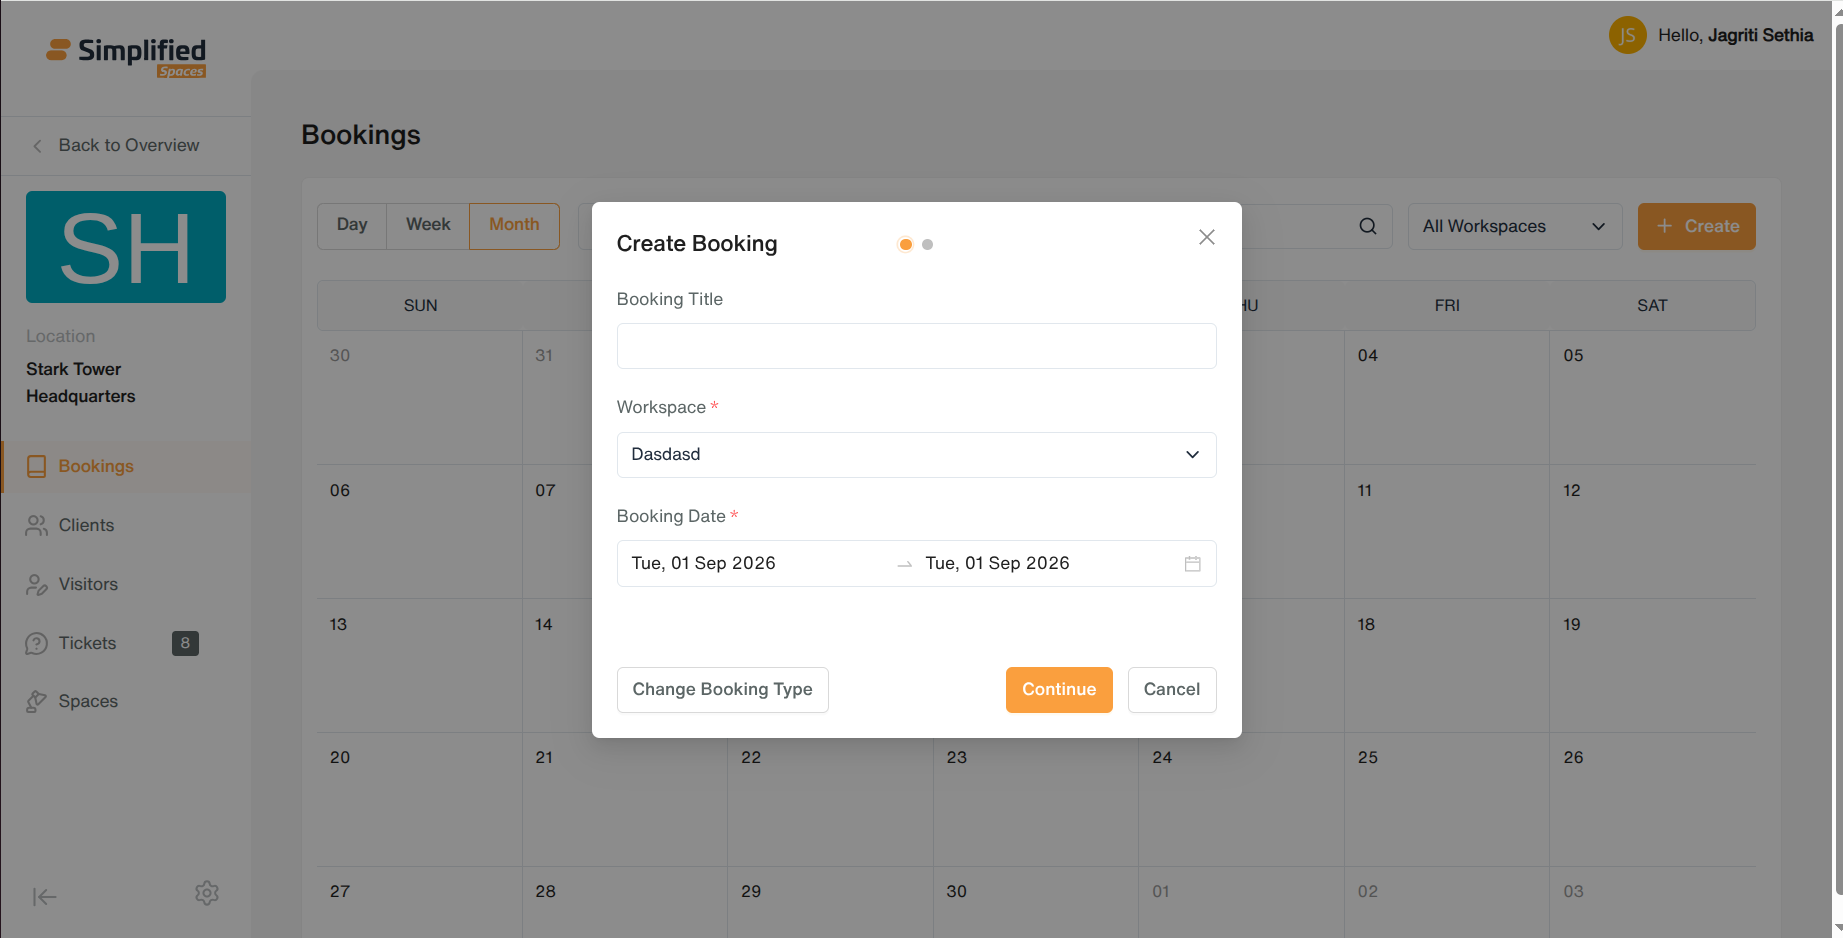
Create a Booking
-
Click New Booking.
-
Write booking title.
-
Select a workspace, and pick a date range (start/end date, optional start/end time).
-
Add a booking title (optional).
-
Select the client, add invitees (at least one required), and set number of guests (optional, defaults to 0).
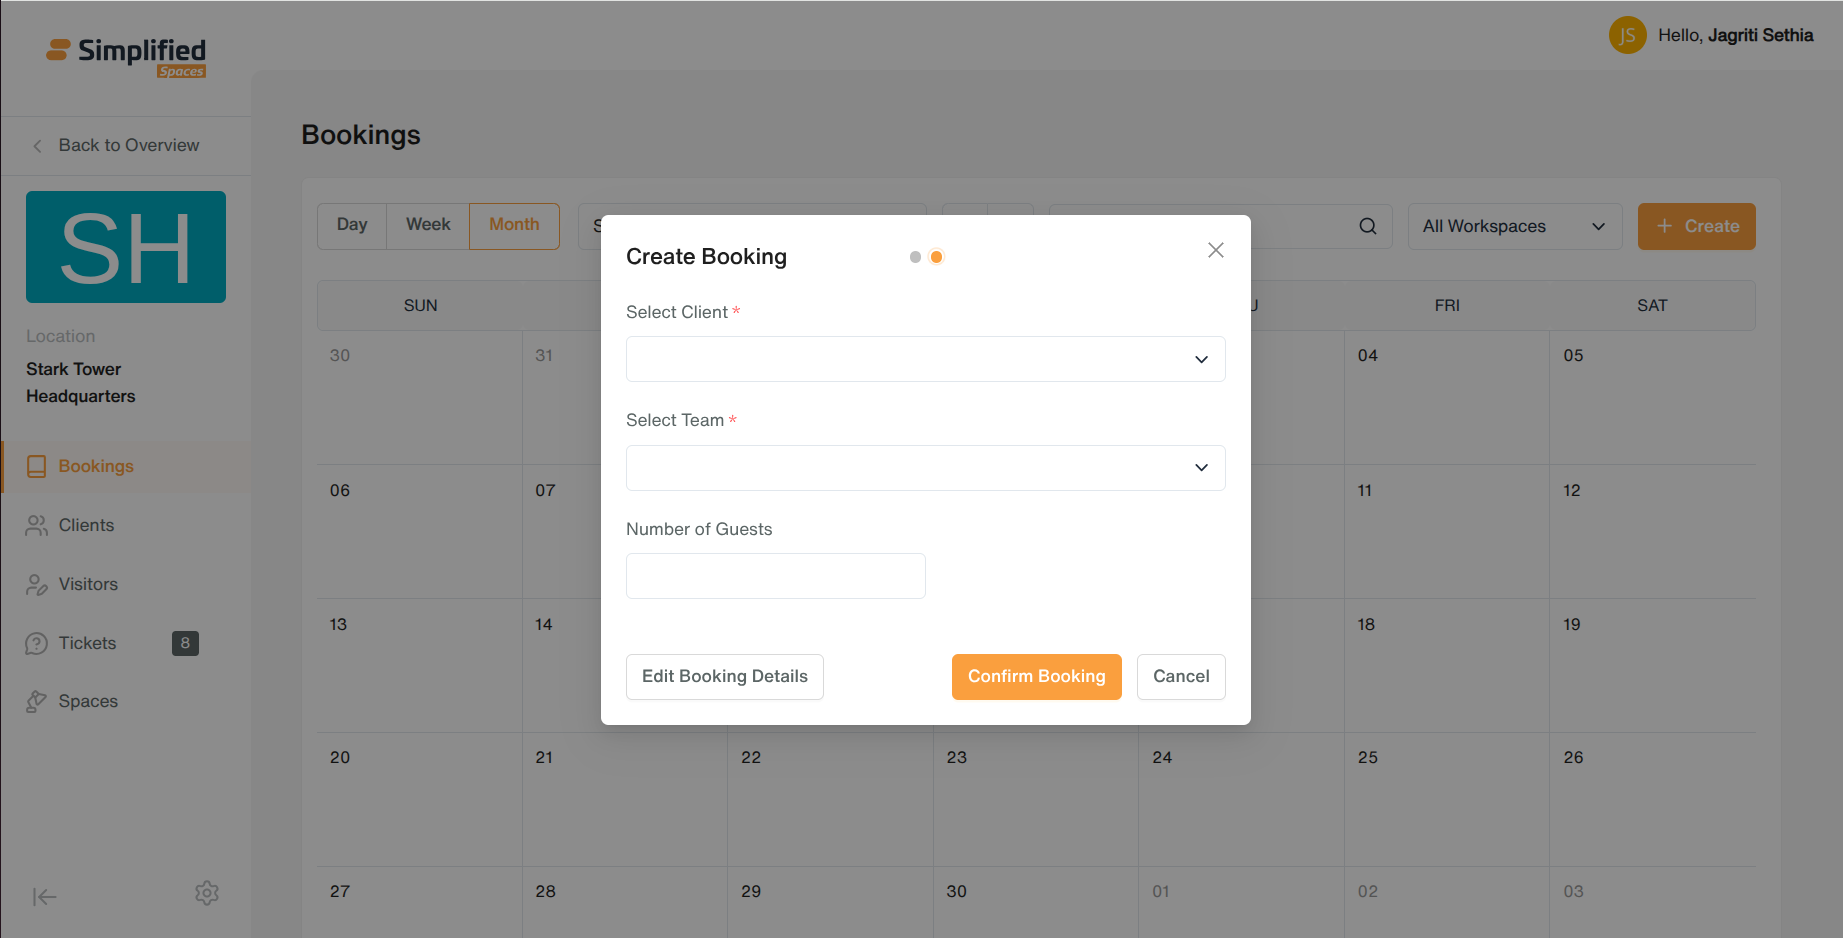
- Click Submit — booking appears on the calendar as Pending.
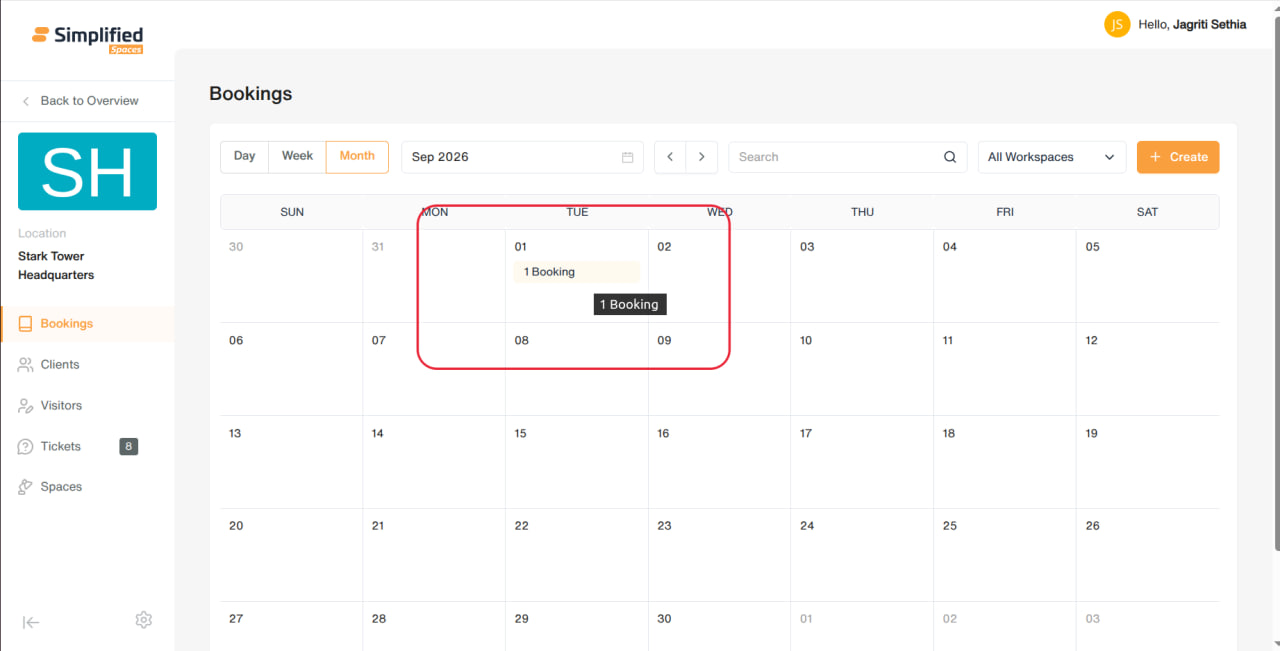
View / Edit a Booking
- Click a booking on the calendar to open its details.
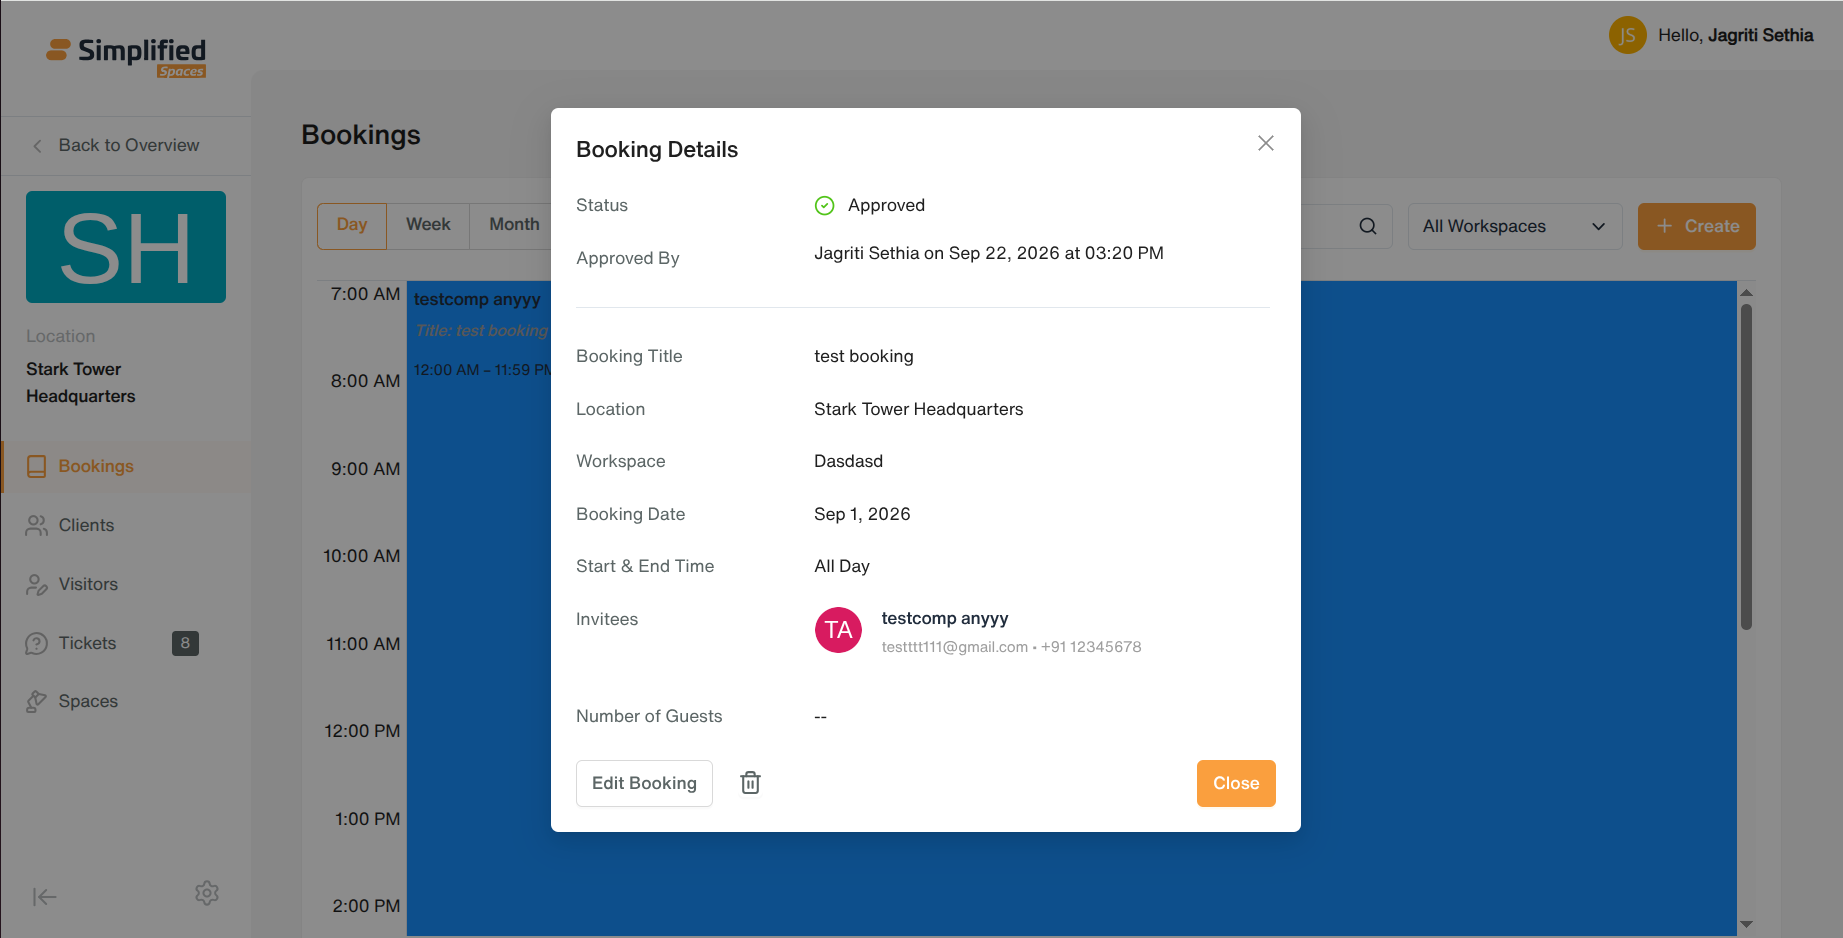
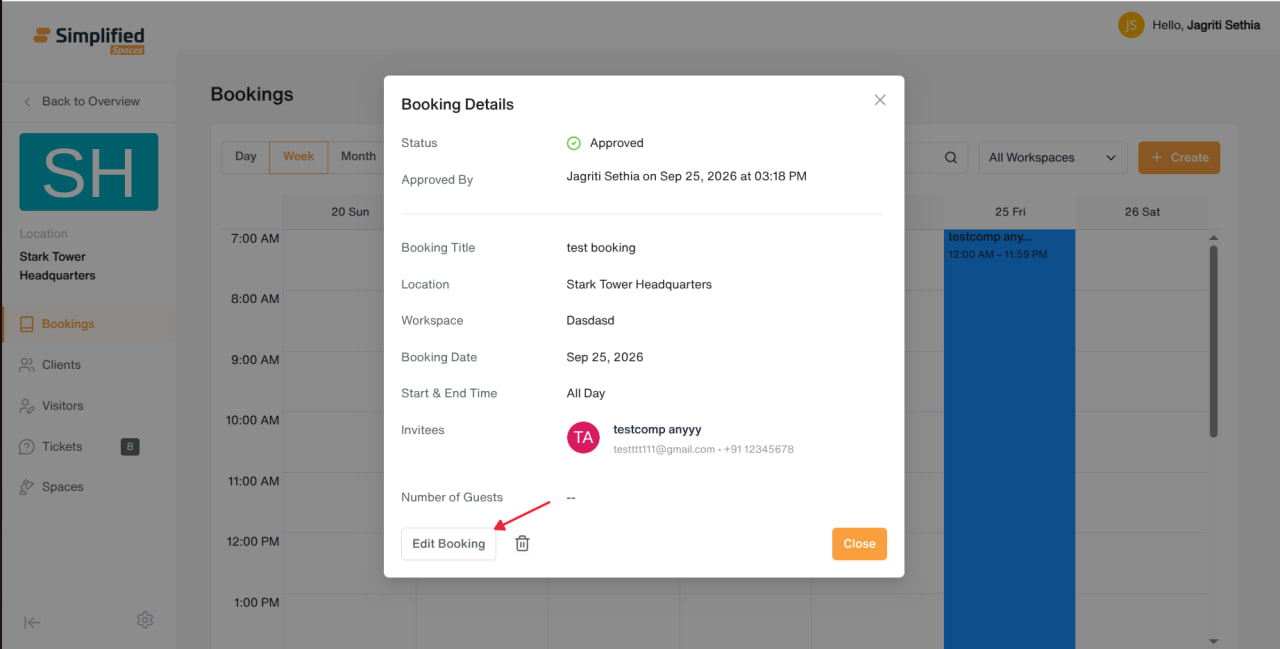
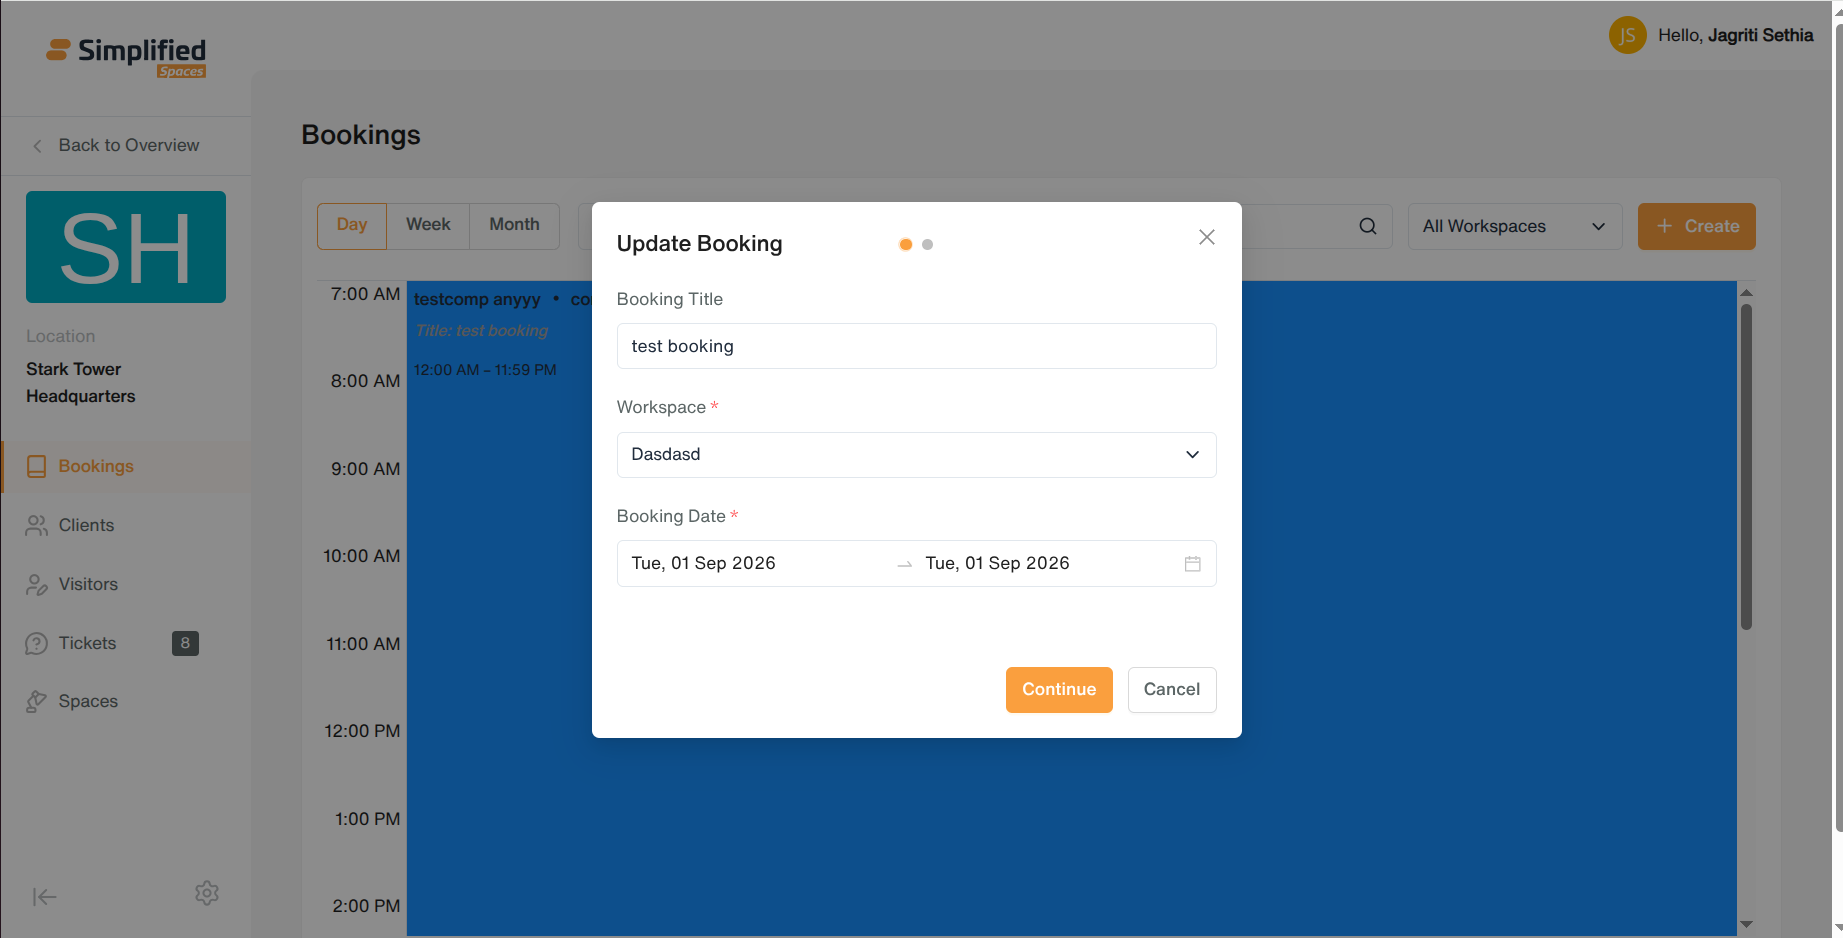
- Click Edit to change workspace, date/time, invitees, or guest count, then save.
Approve / Decline
-
From the booking details, click Approve to confirm the booking.
-
Click Decline to open a reason prompt — a decline reason is required before submitting.
Cancel (Delete)
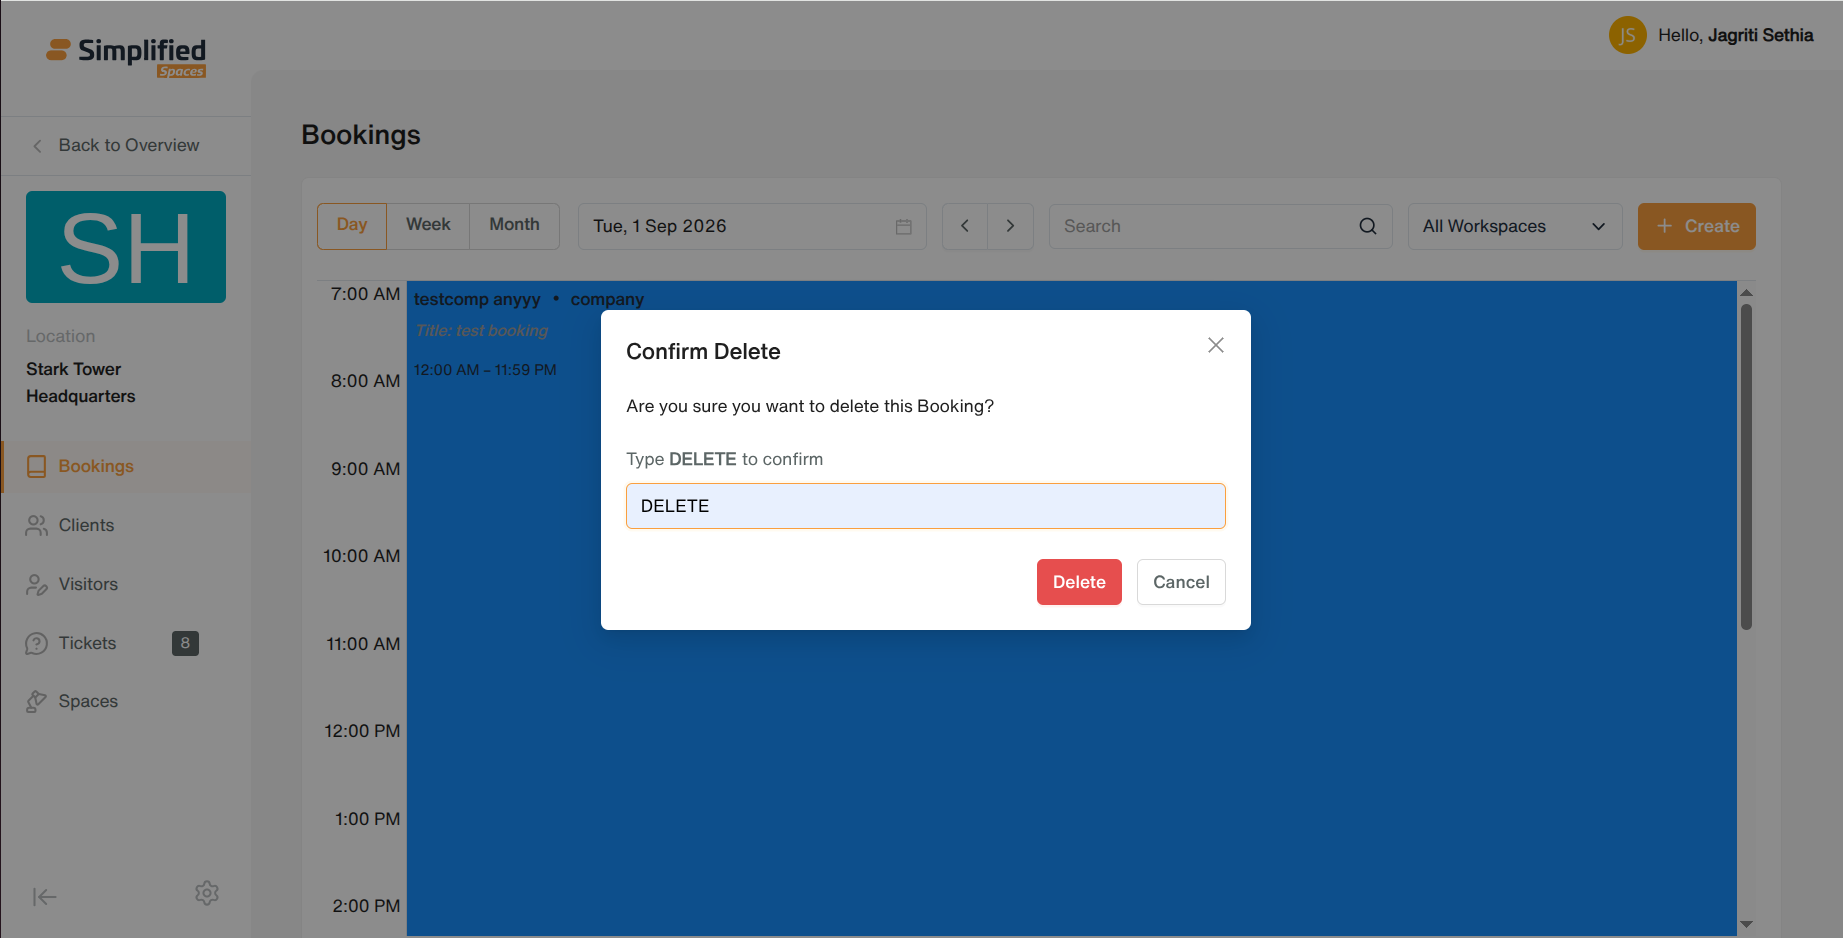
- From booking details, click the delete/cancel icon → confirm in the popup → booking is removed.
2. Clients
View
-
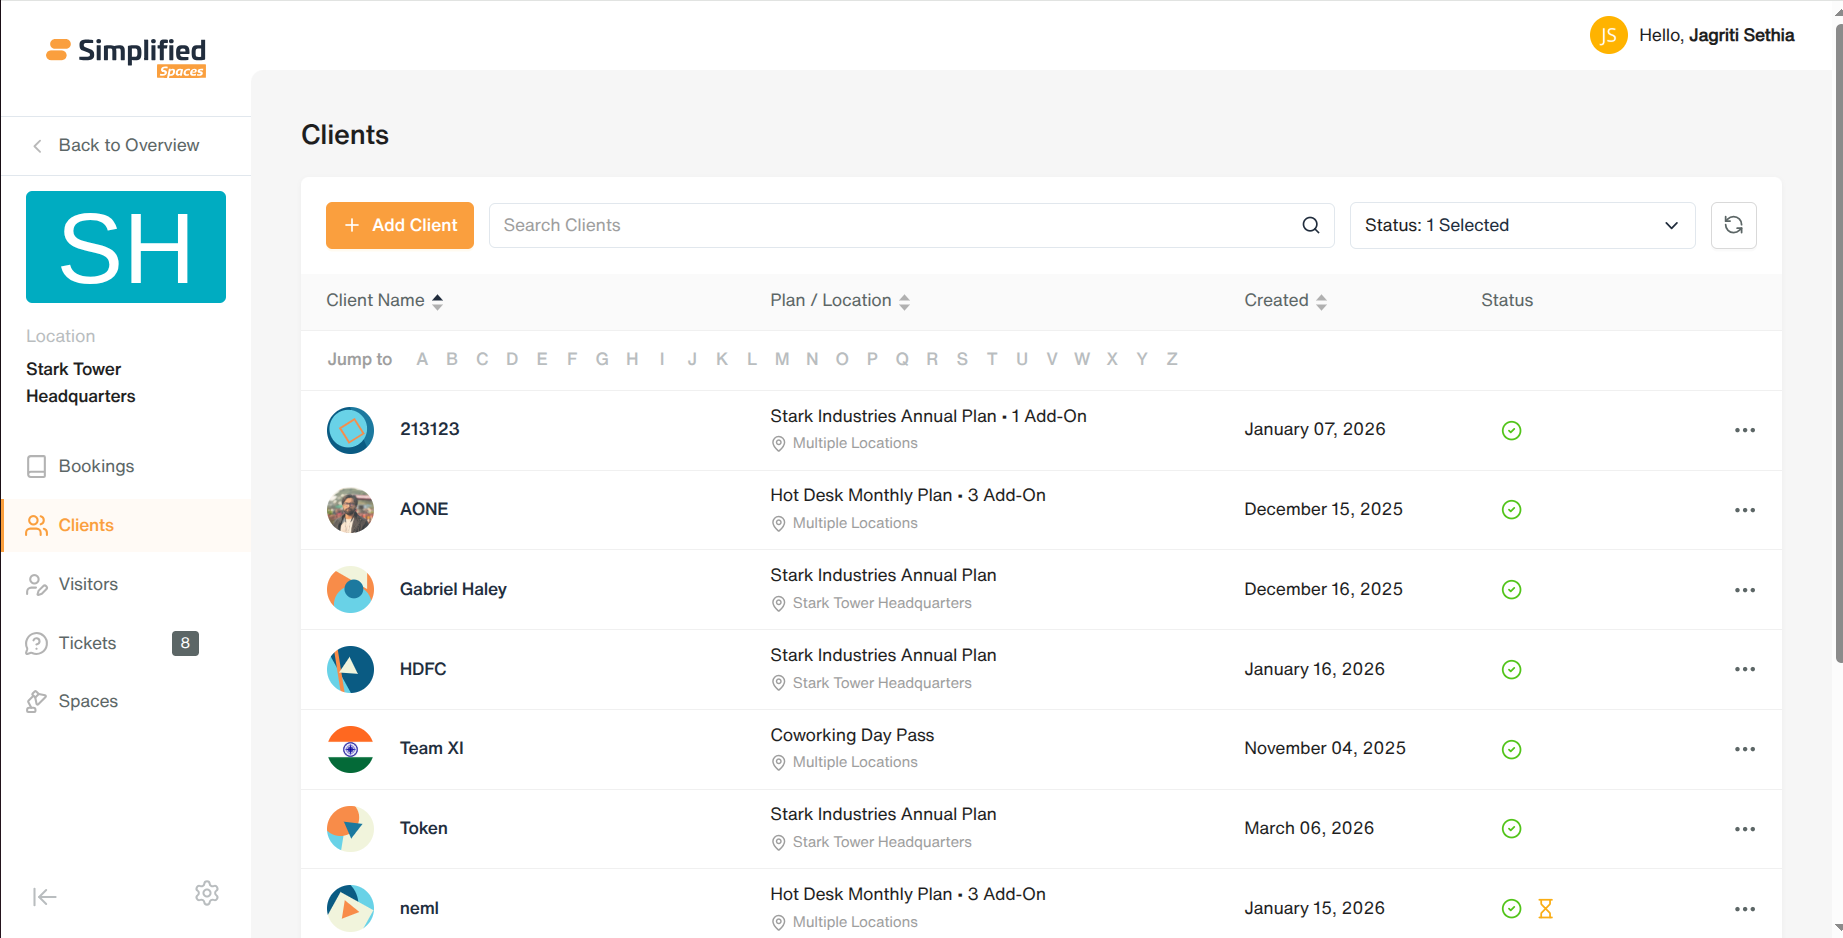
Table of clients associated with this location. Supports:
-
Search by name
-
A–Z jump filter
-
Status filter (Active / Deactivated / Deleted — Active shown by default)
-
Sort by name, location, or date added
Add a Client
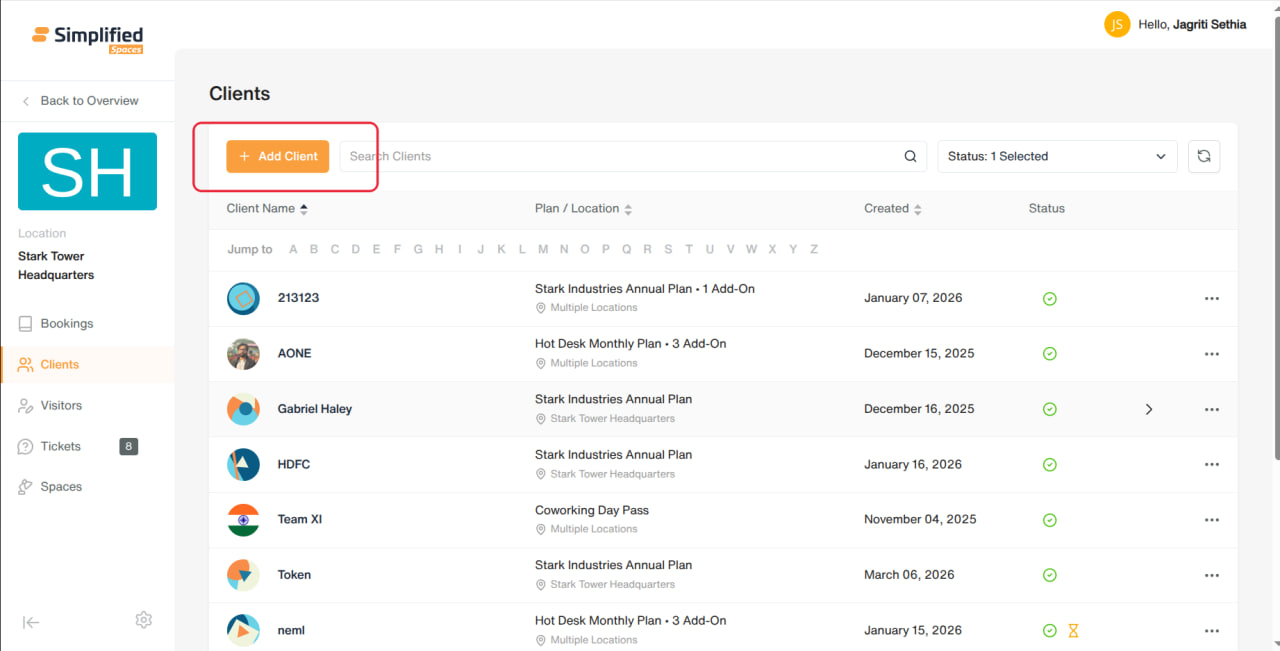
- Click Add Client.
-
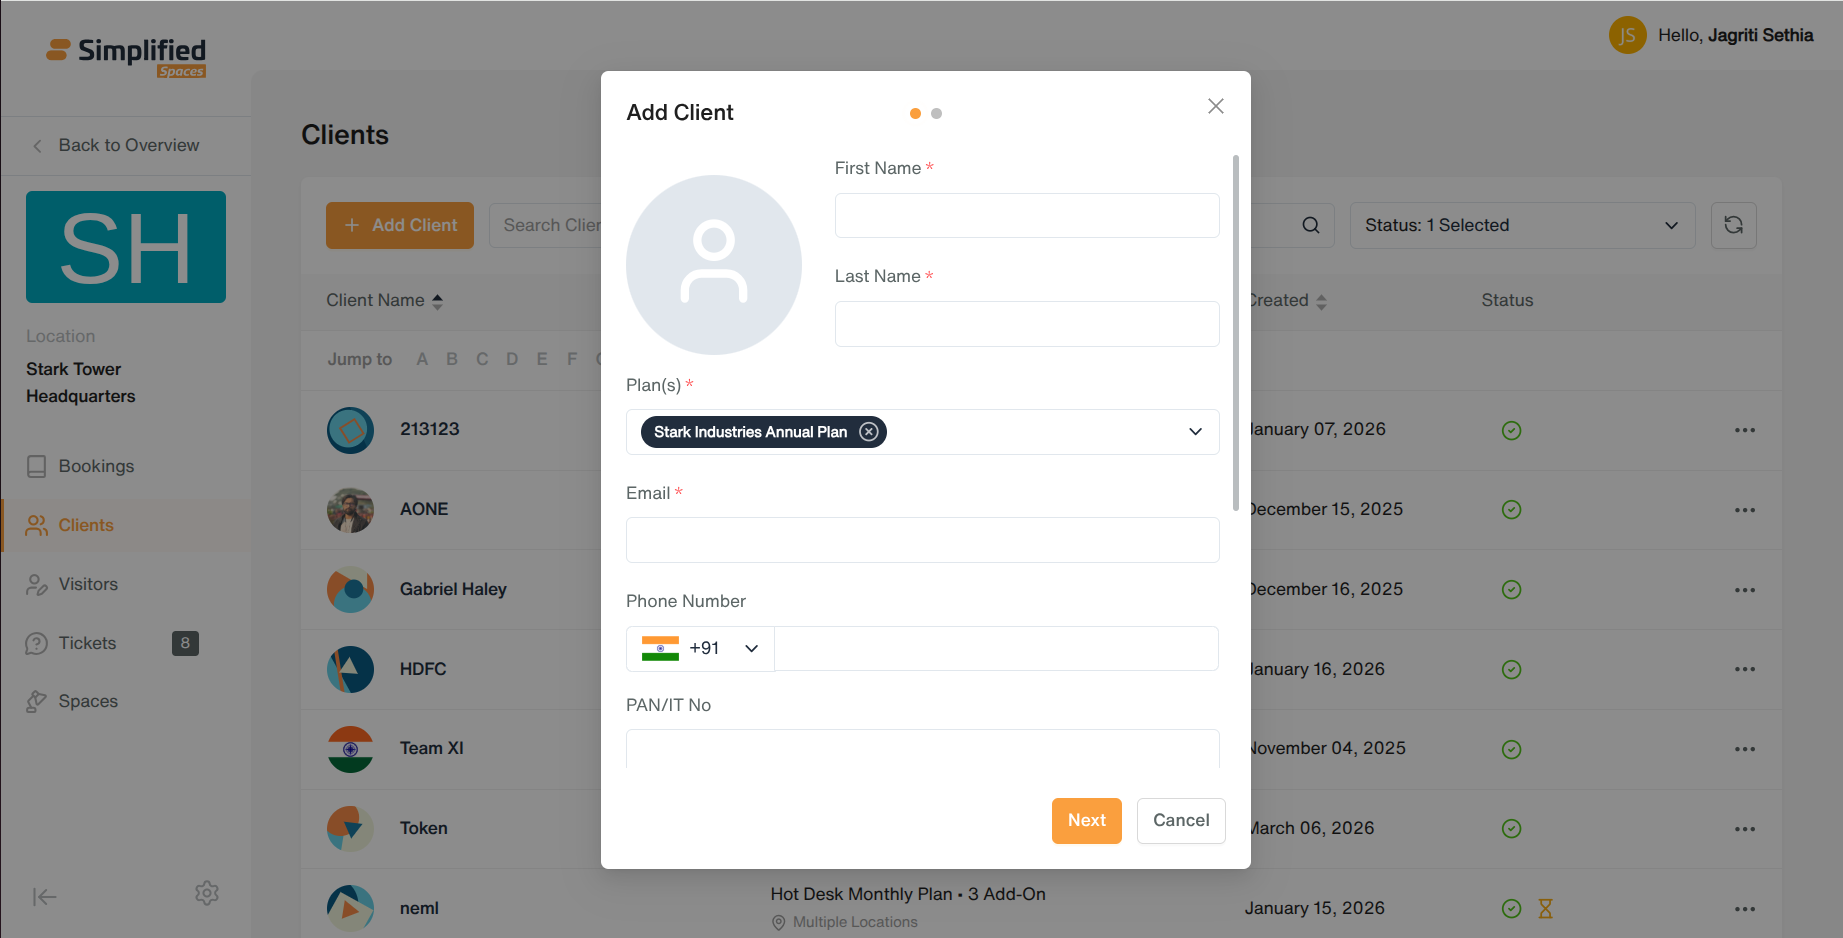
Fill in contact details (first name, last name, email required), company details (legal company name, brand name required), phone (optional), and plan selection (required).
-
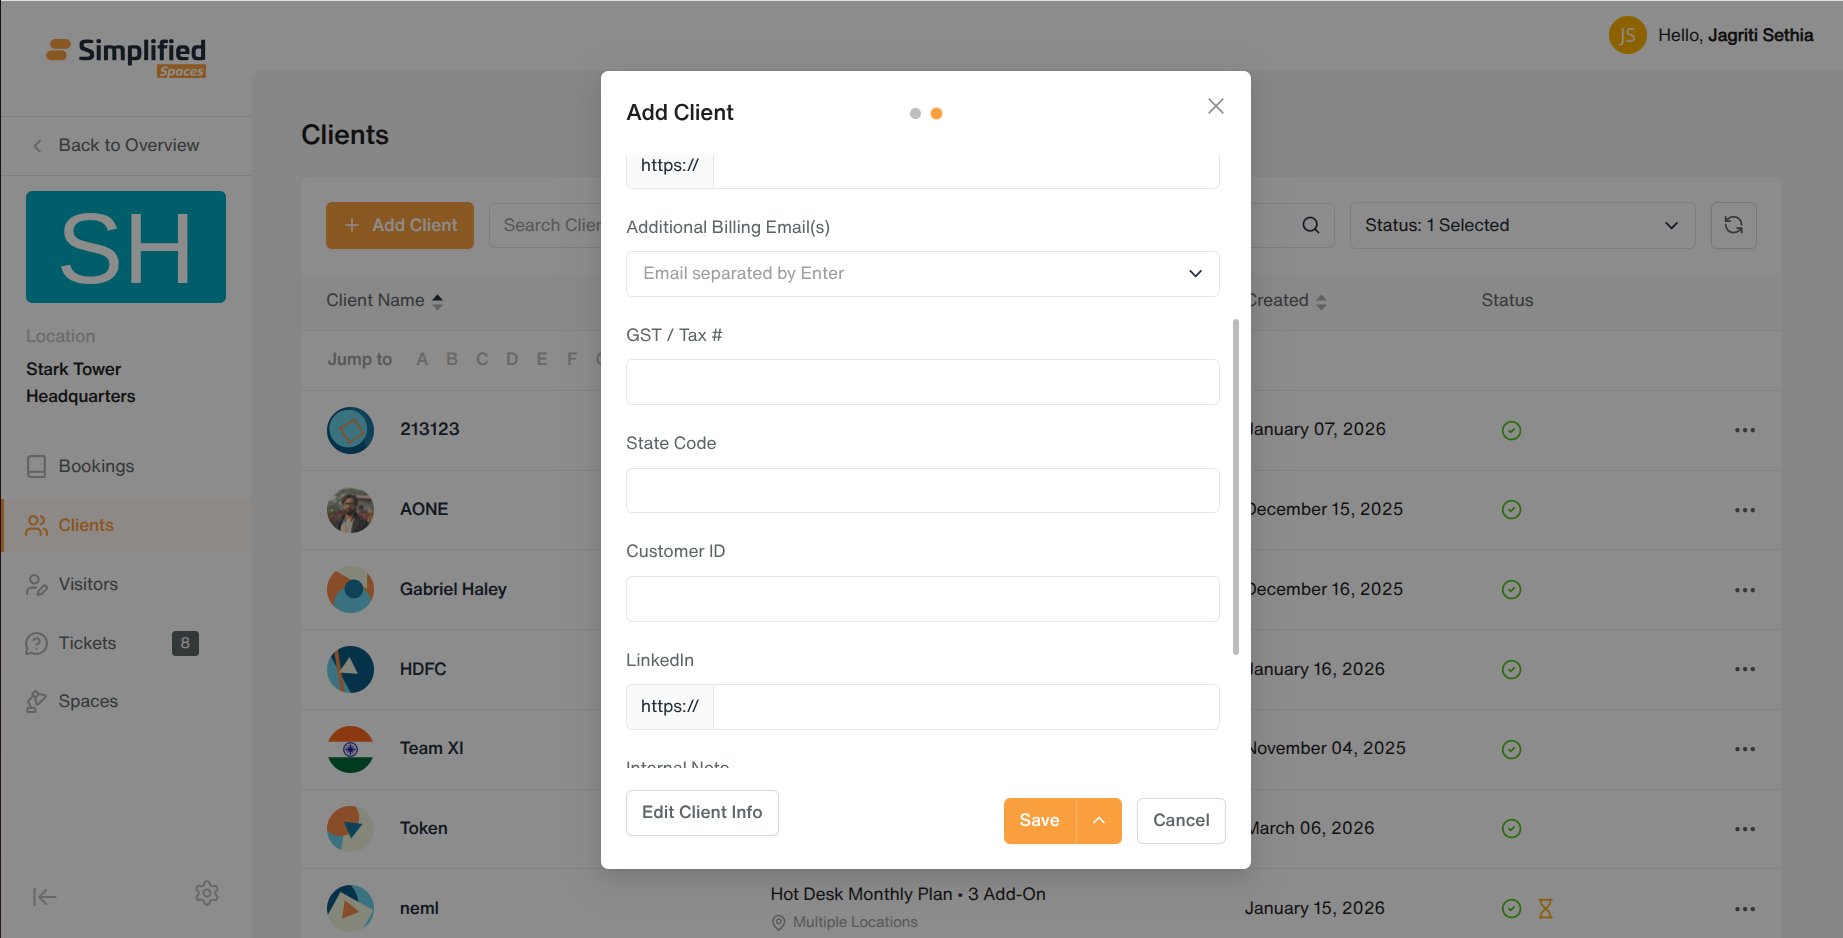
Optional: billing address, company website, GST number, extra emails, social links, notes, preferred payment method.
-
Choose whether to send an invite.
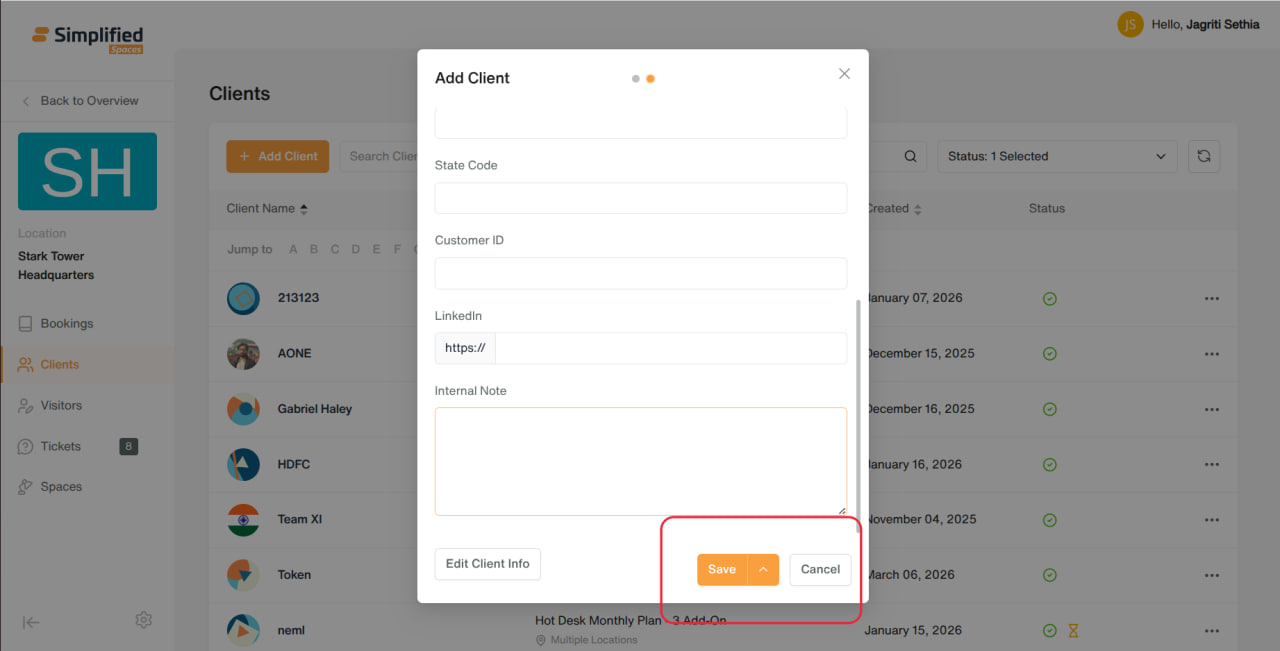
- Submit — client is added to the list.
Edit a Client
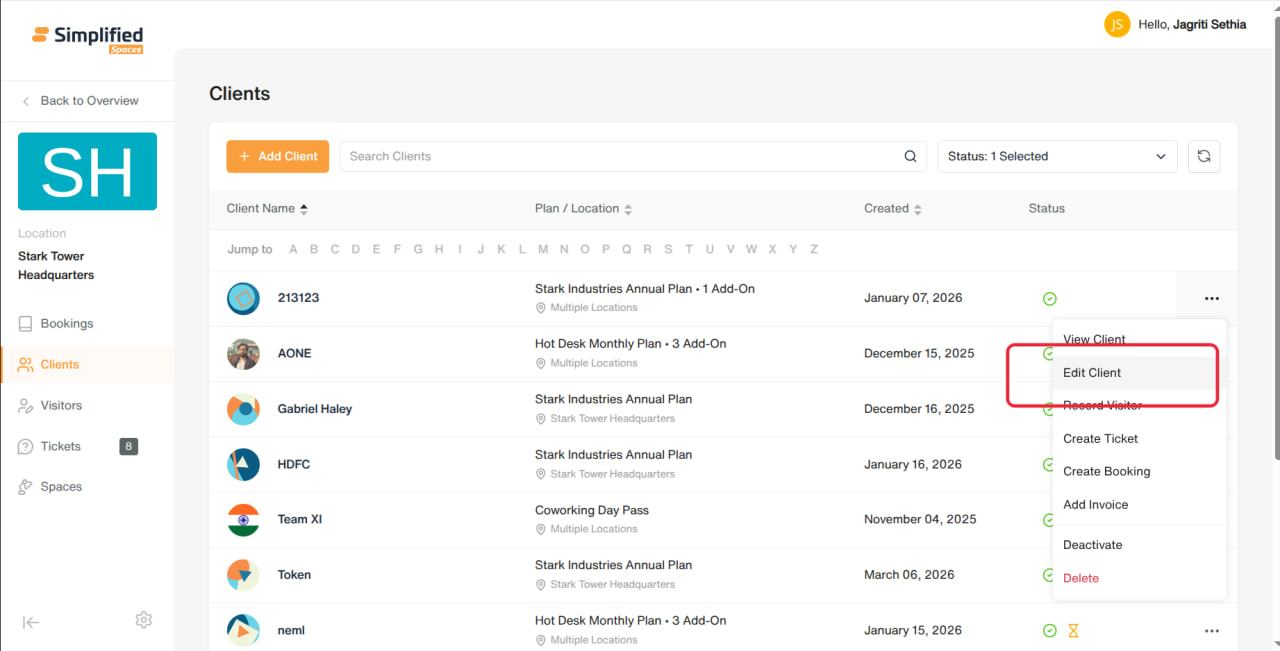
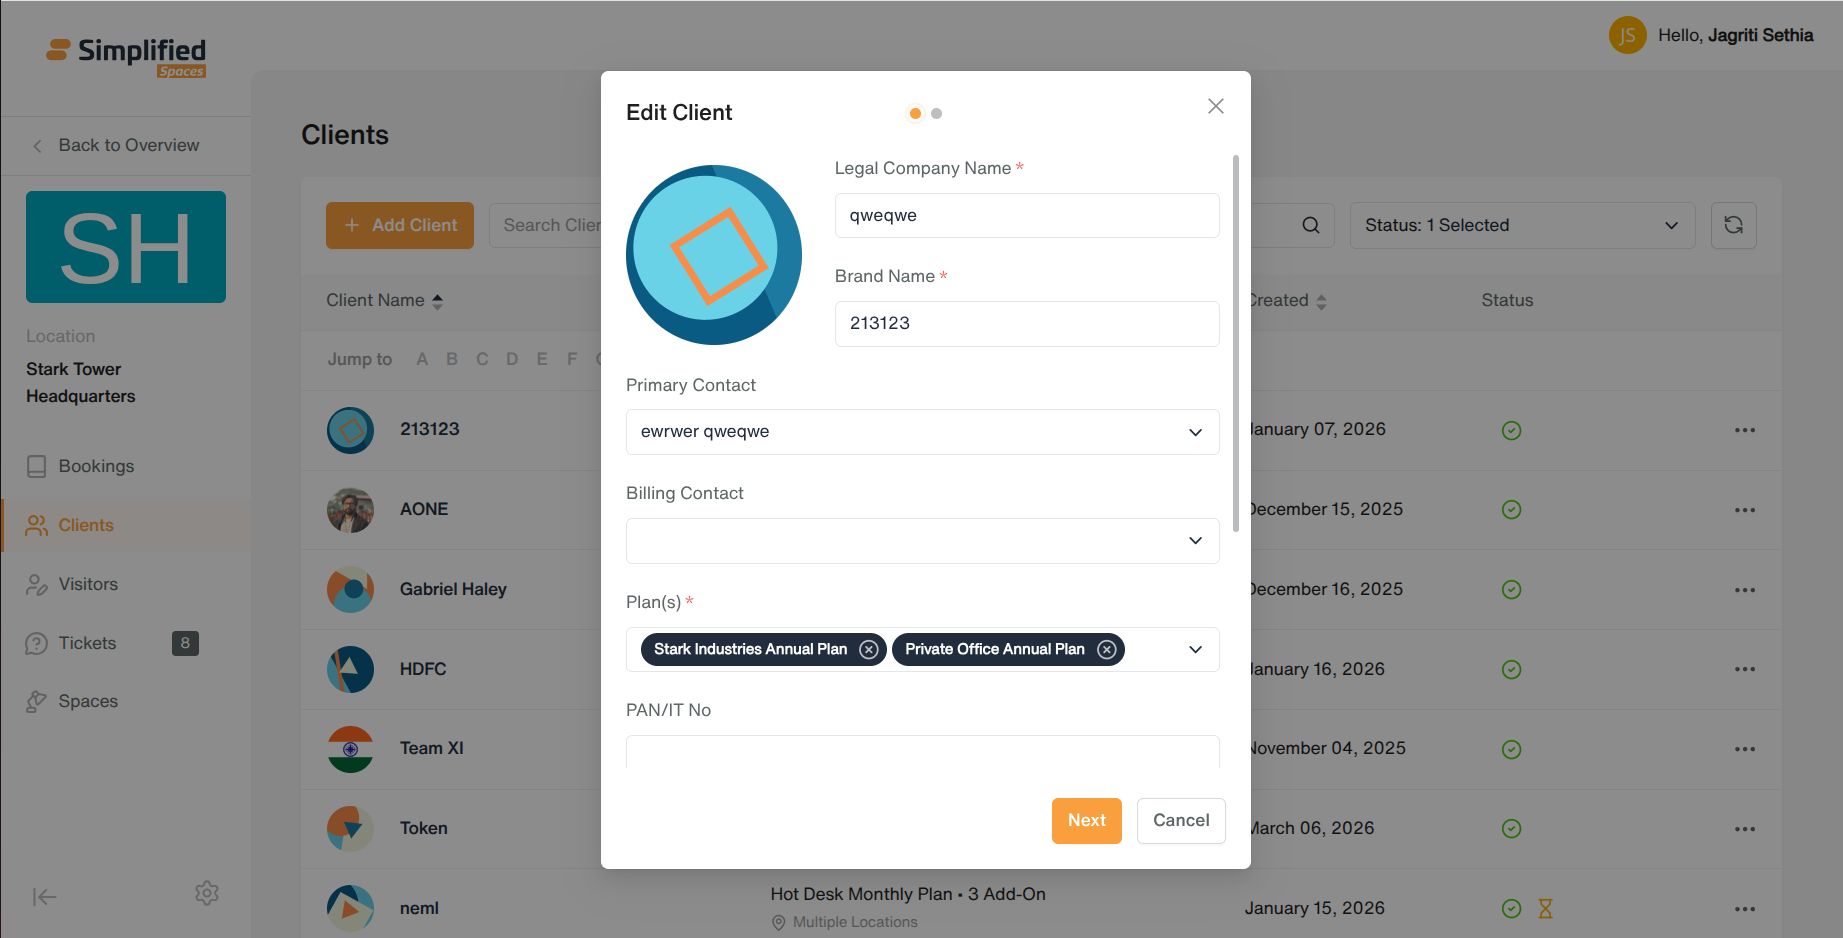
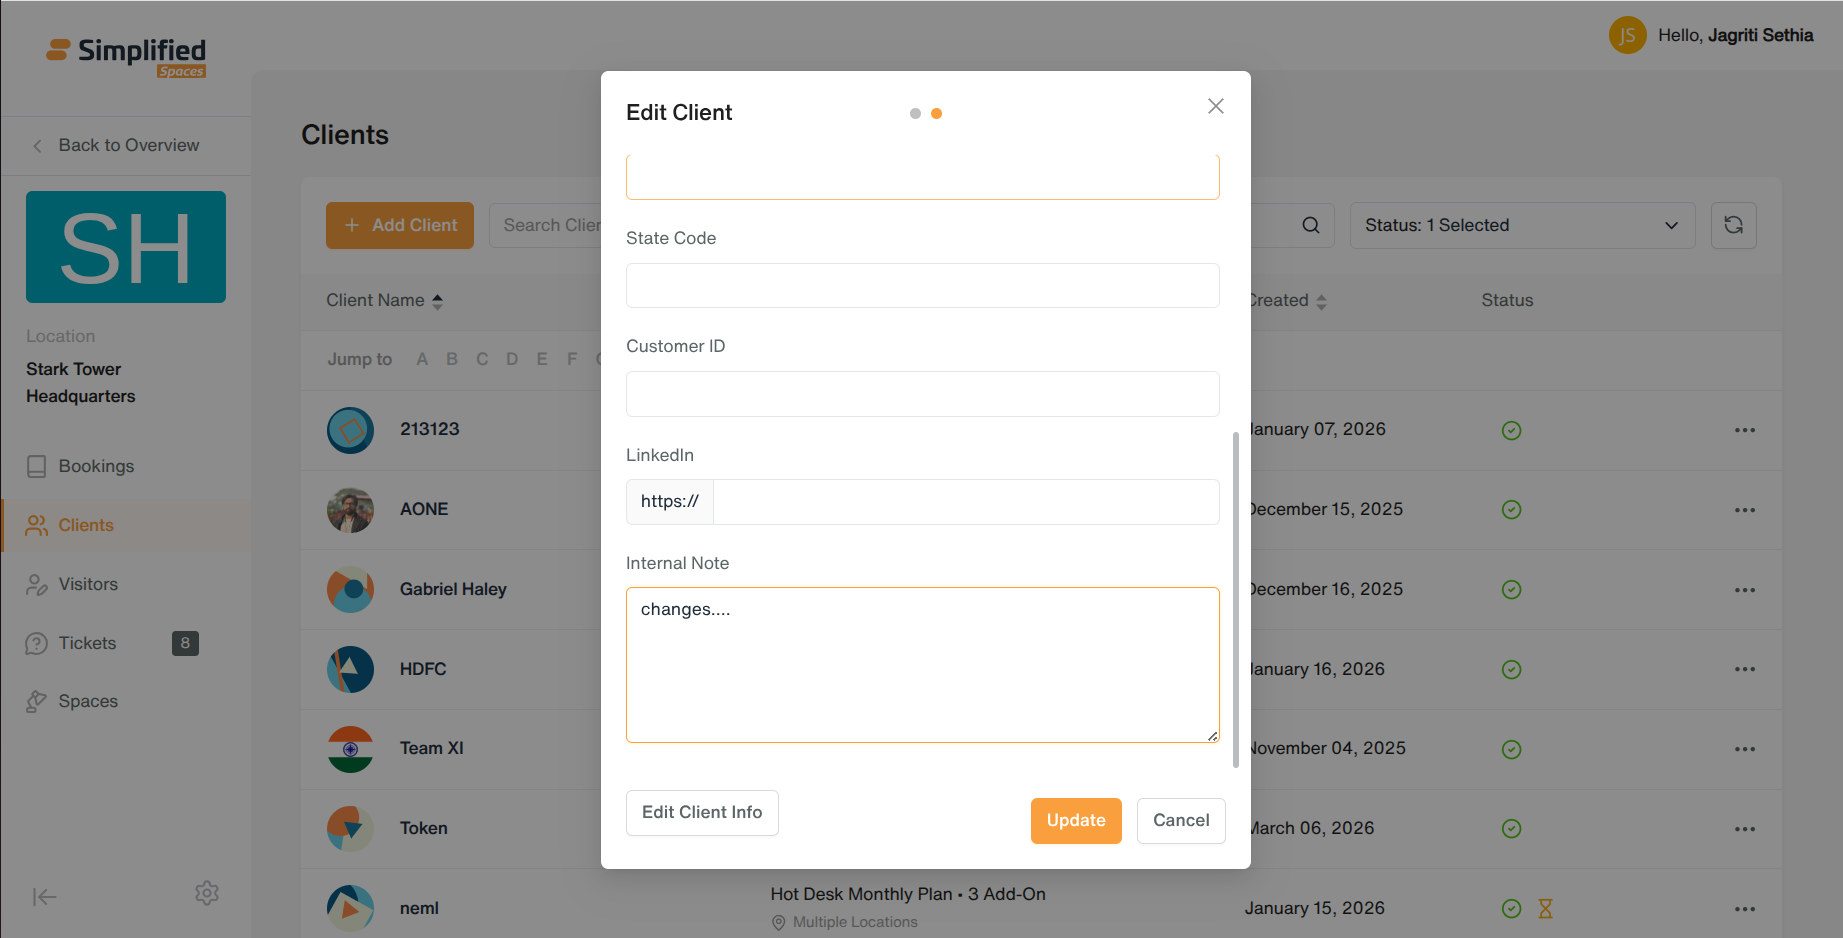
- Open row menu → Edit Client → same form as Add, pre-filled → save changes.
Delete a Client
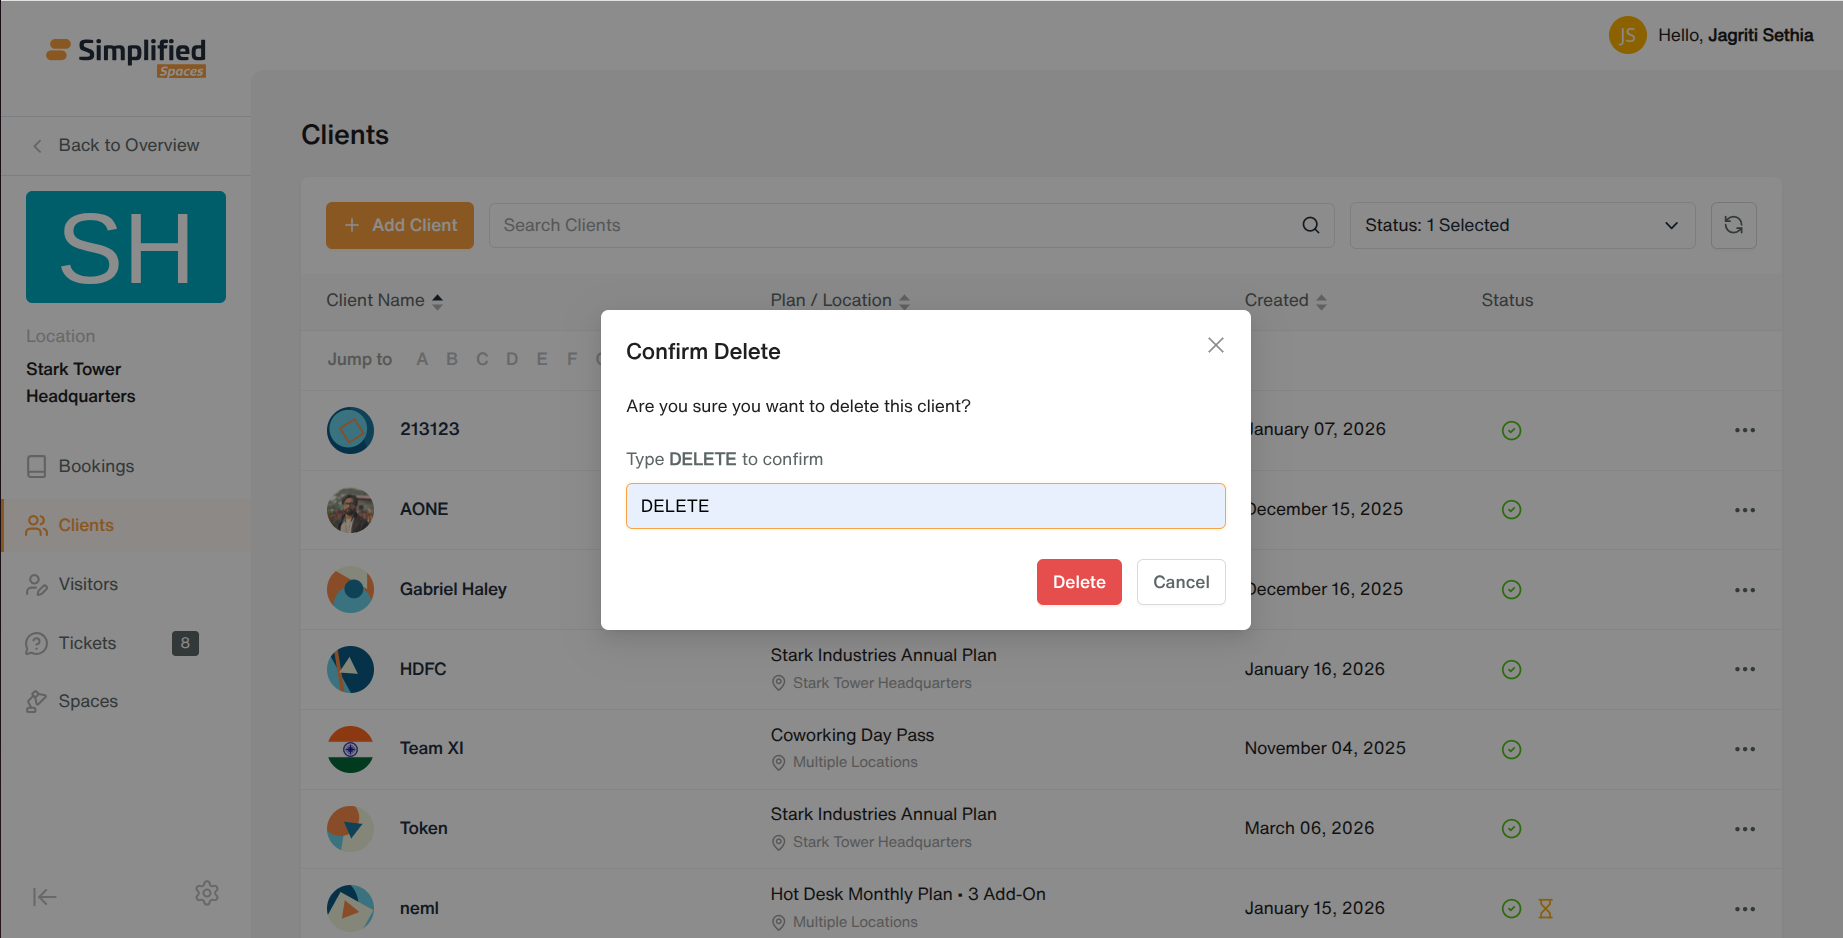
- Row menu → Delete → confirm in popup → client removed.
Deactivate a Client
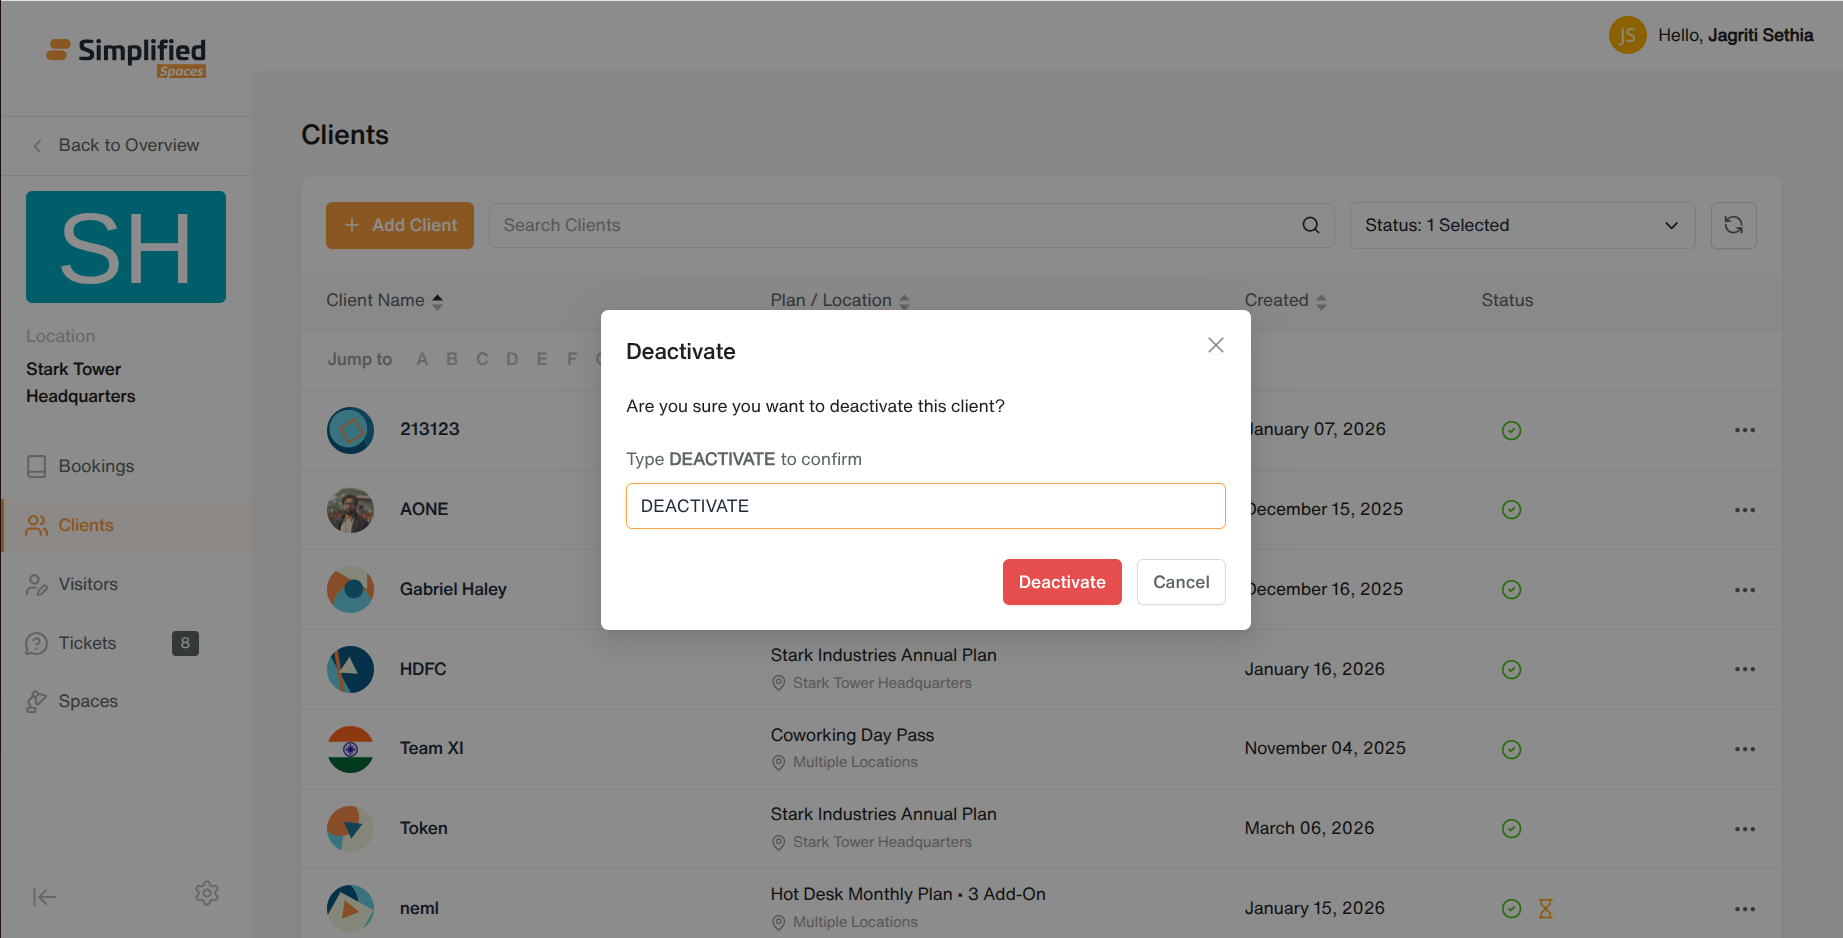
- Row menu → Deactivate → confirm → client marked inactive (kept in records, hidden from active views).
Other row actions (shortcuts to the client's own detail page, not part of this list):
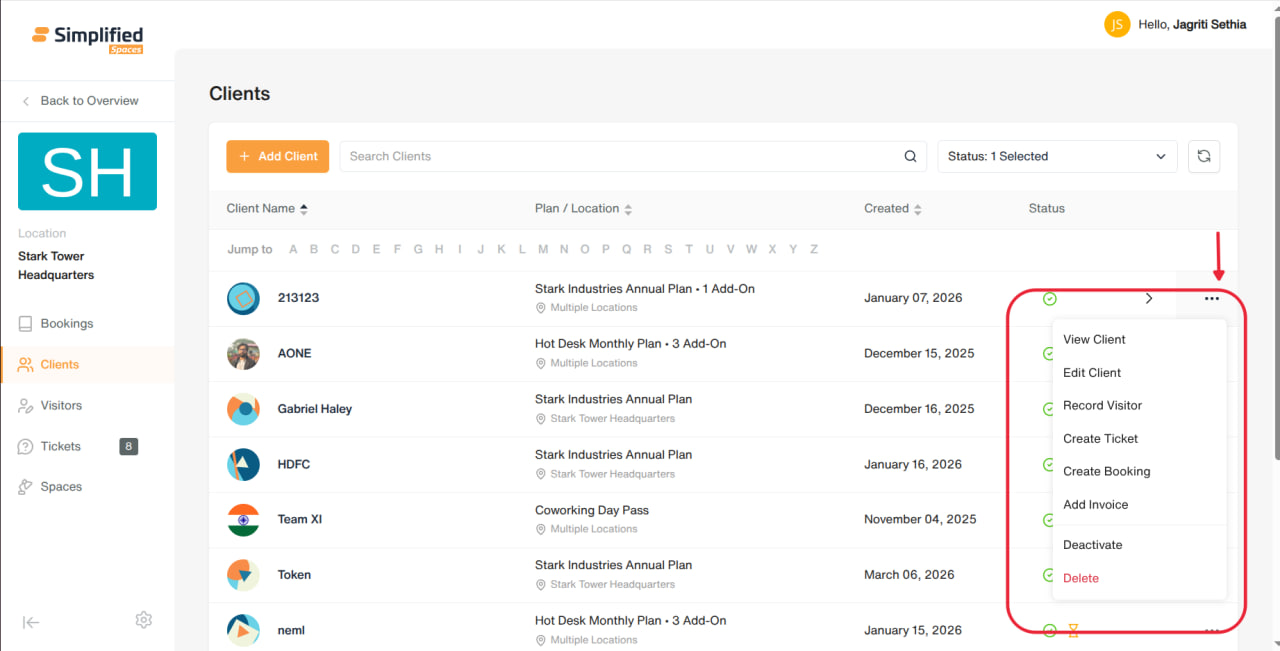
- View Client, Record Visitor, Create Ticket, Create Booking, Add Invoice.
3. Visitors
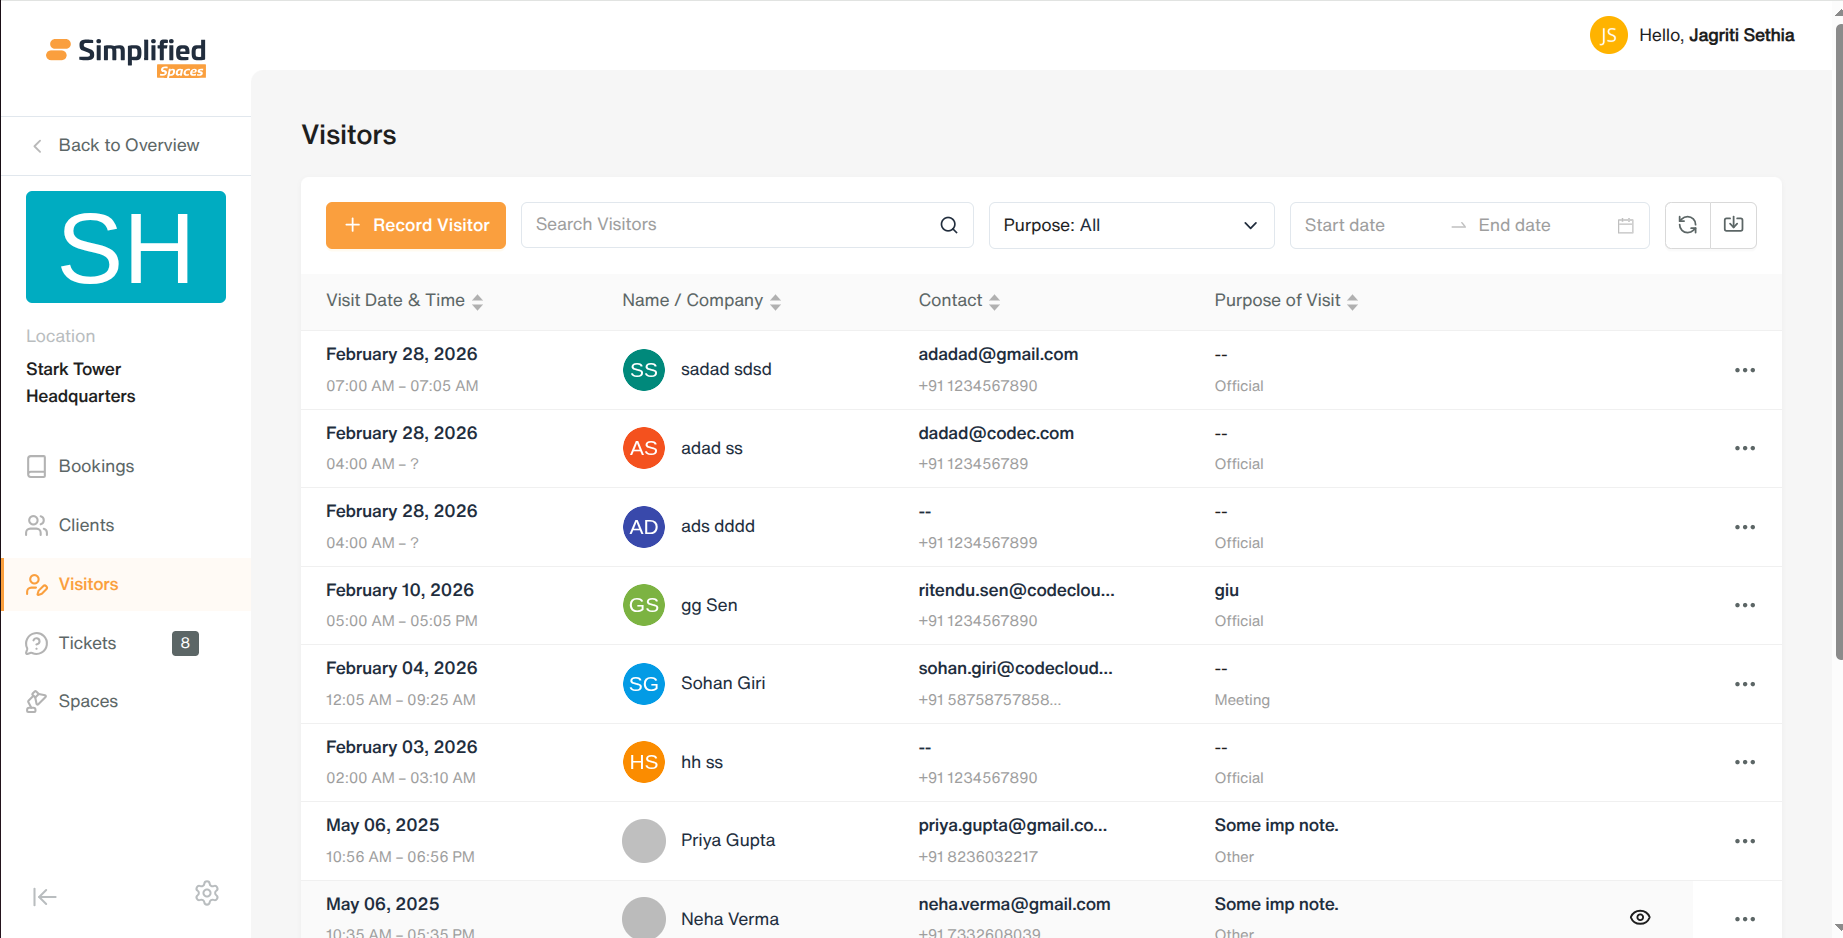
View
-
Table of visitor check-ins/records for this location. Supports:
-
Search
-
Filter by purpose of visit
-
Filter by date range (checked-in / checked-out)
-
Reset filters
-
Pagination
Record a Visitor
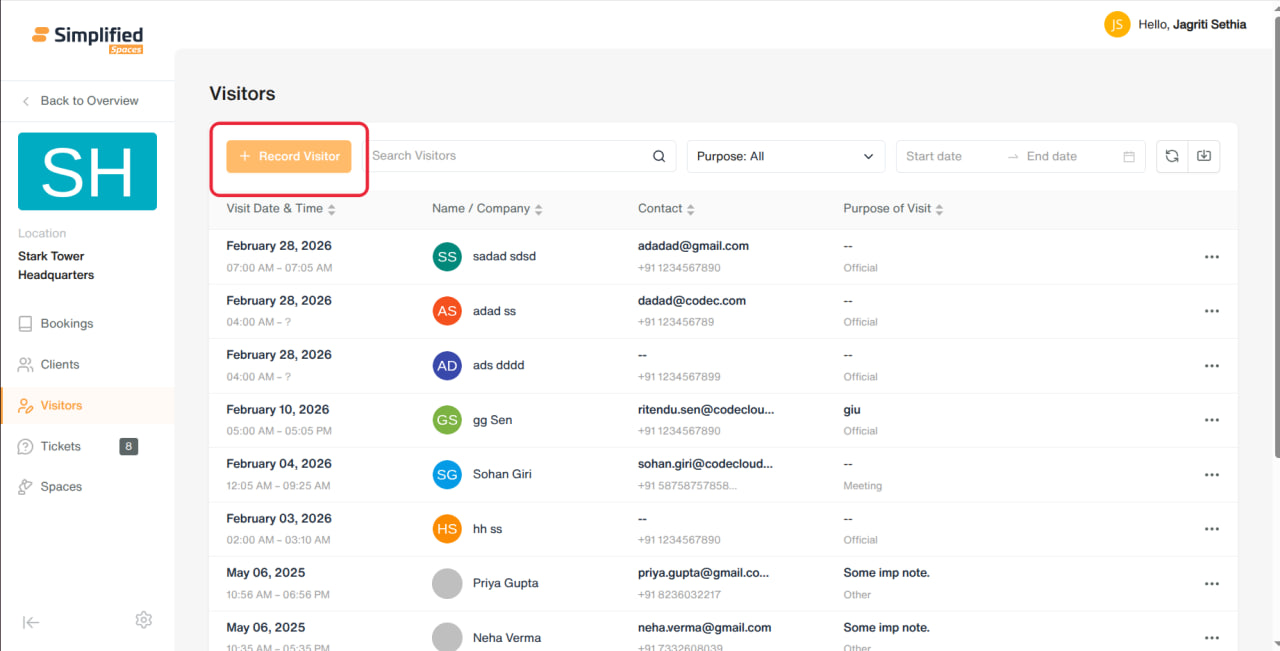
- Click Record Visitor.
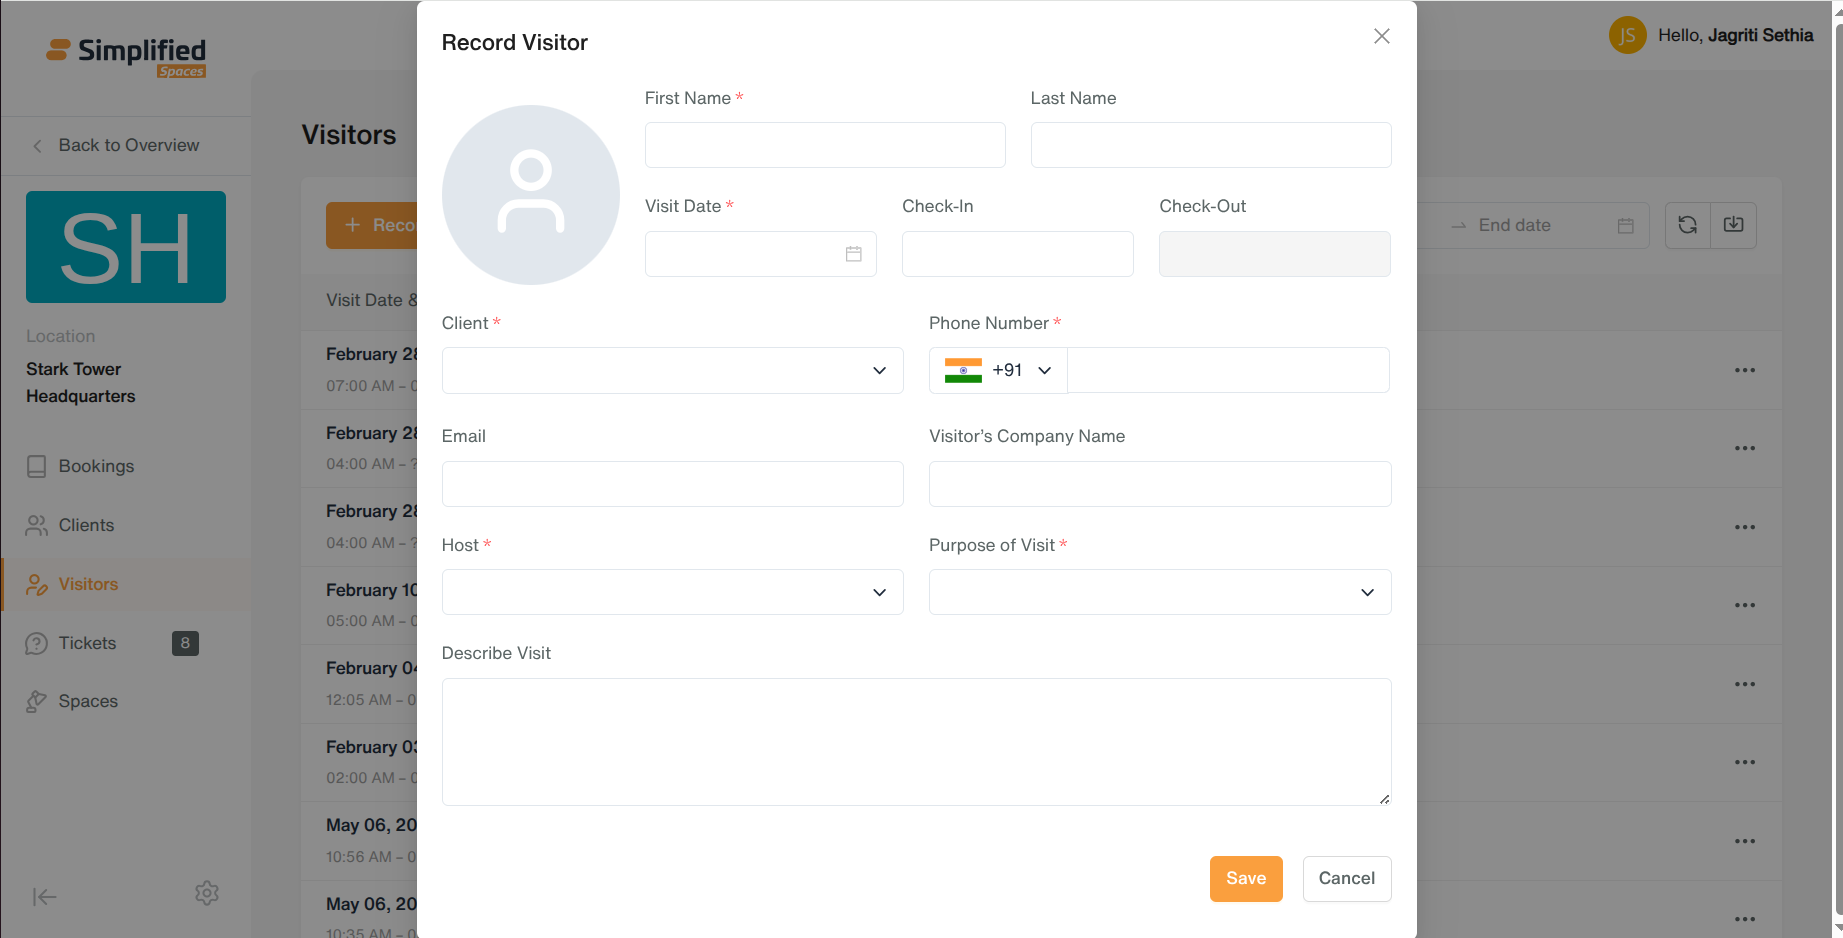
-
Fill in: photo (optional), first name (required), last name, visit date (required), check-in time, check-out time.
-
Select client (required), enter phone number (required), email (optional).
-
Enter visitor's company name (optional).
-
Select host (required) and purpose of visit (required: meeting, interview, vendor, walk-in, official, other).
-
Add notes (optional).
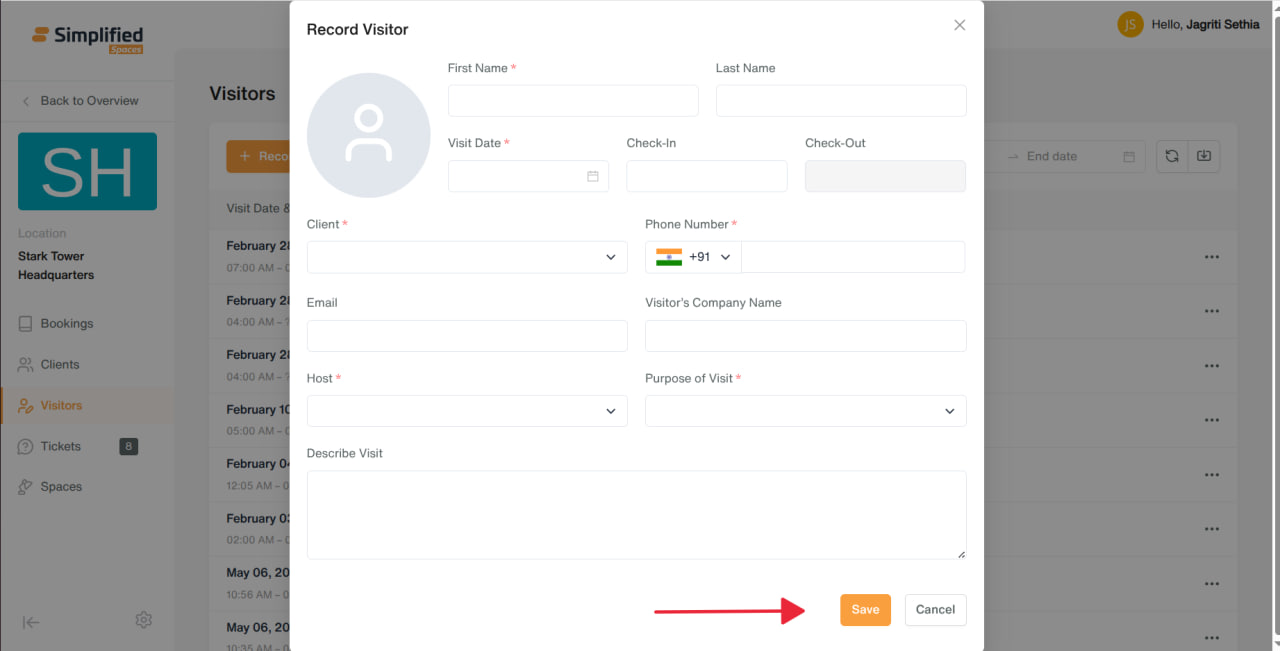
- Submit — visitor appears in the list.
Edit a Visitor Record
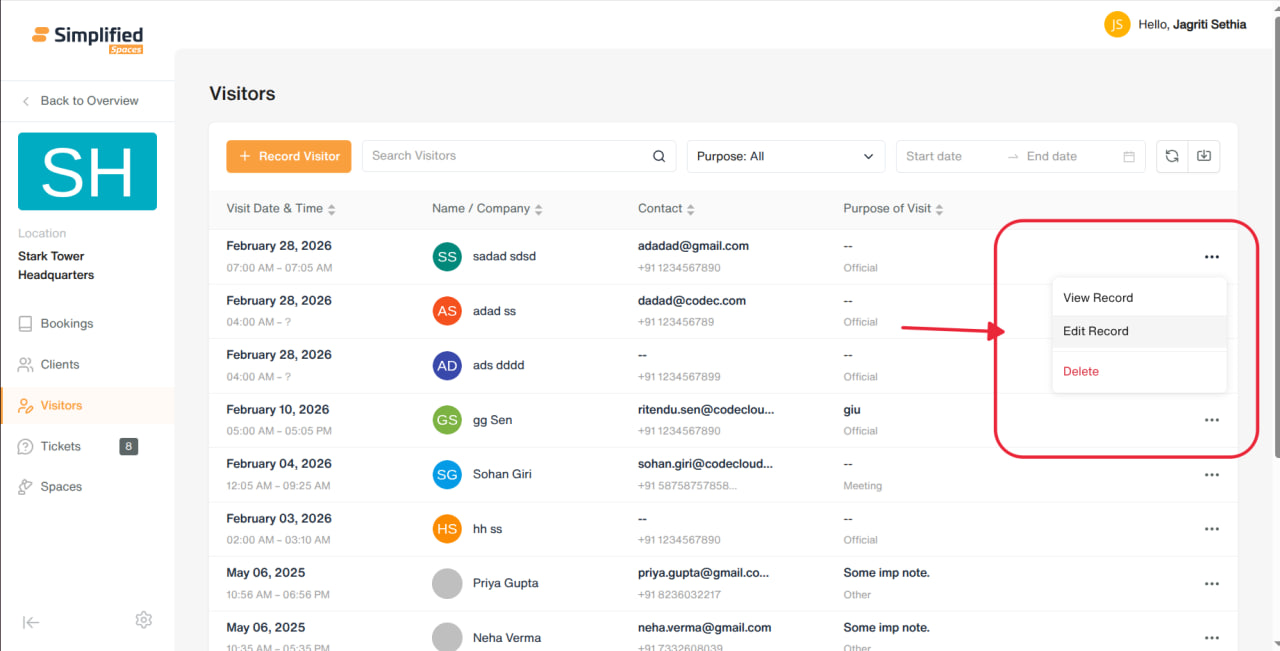
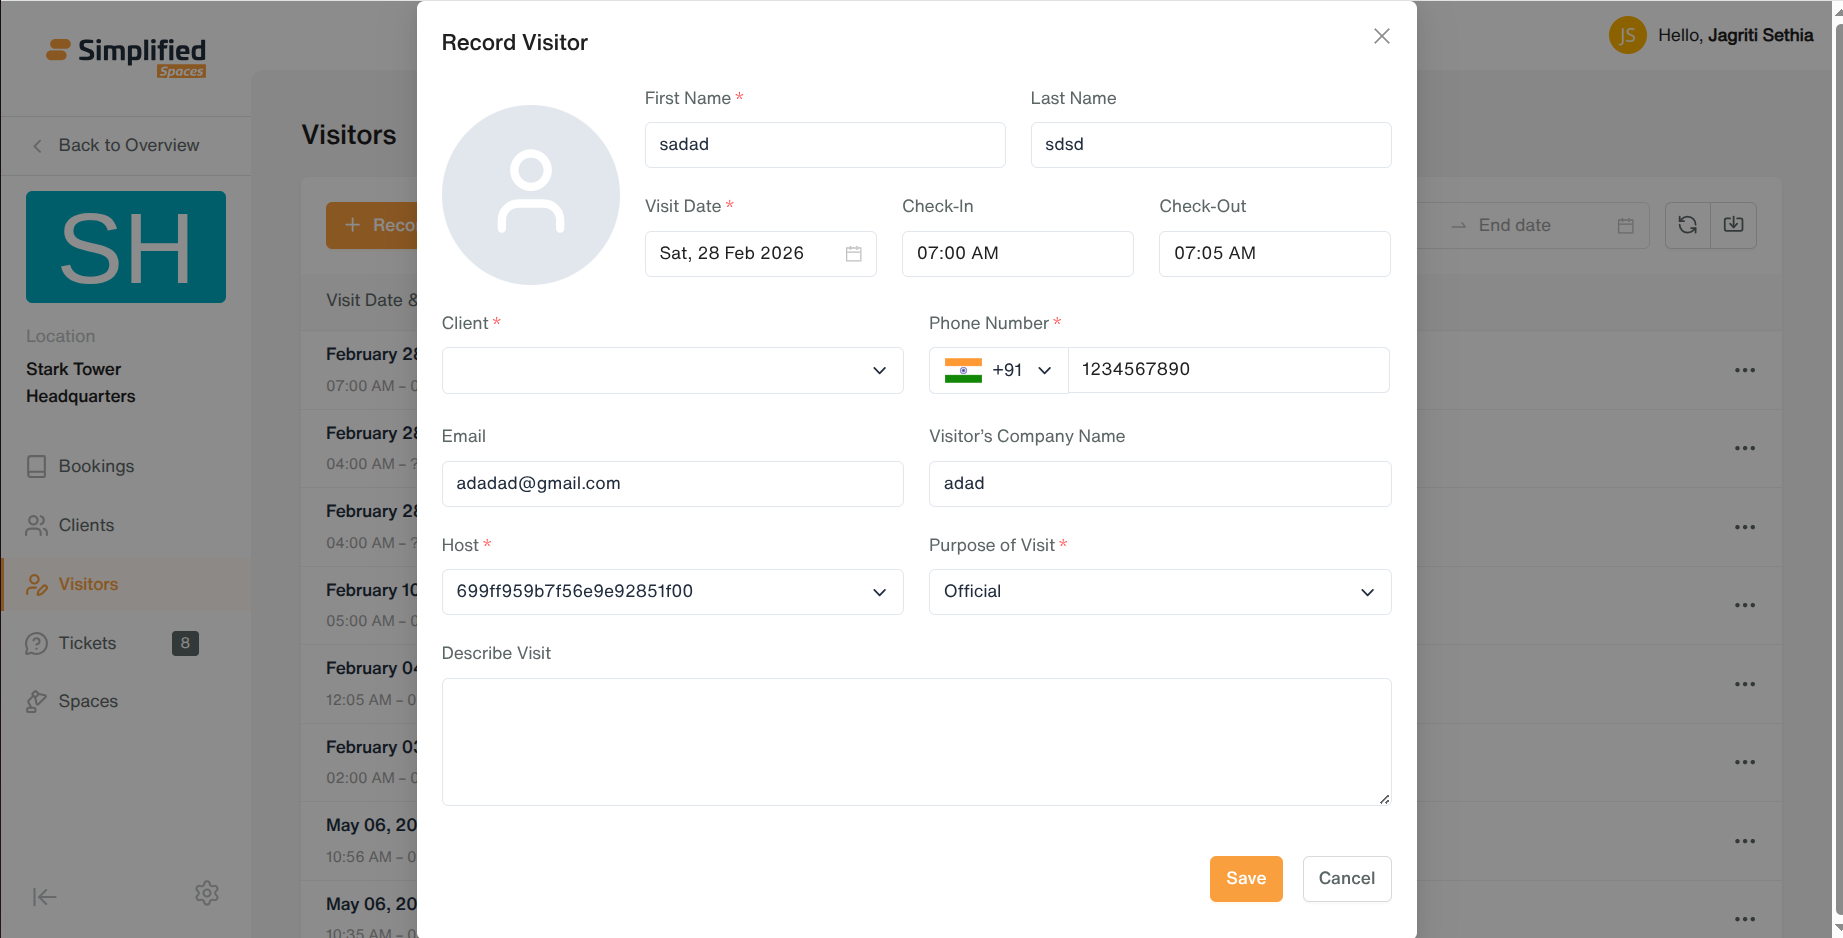
- Row menu → Edit Record → same form, pre-filled → save.
View a Visitor Record
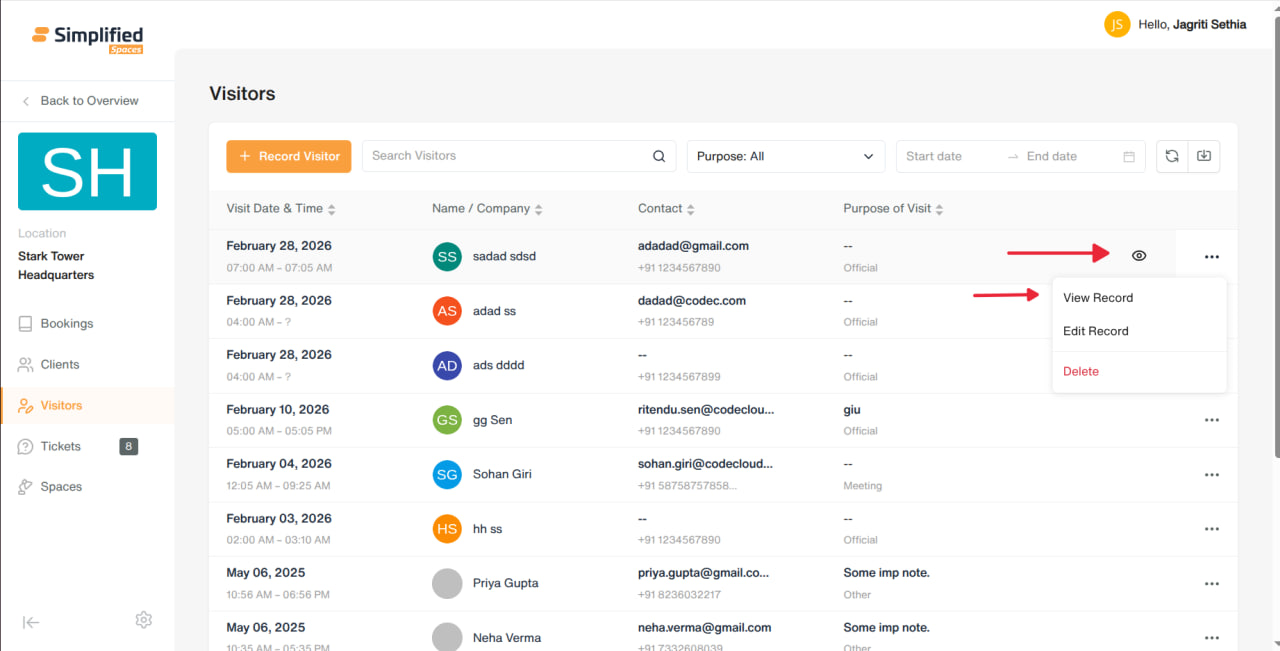
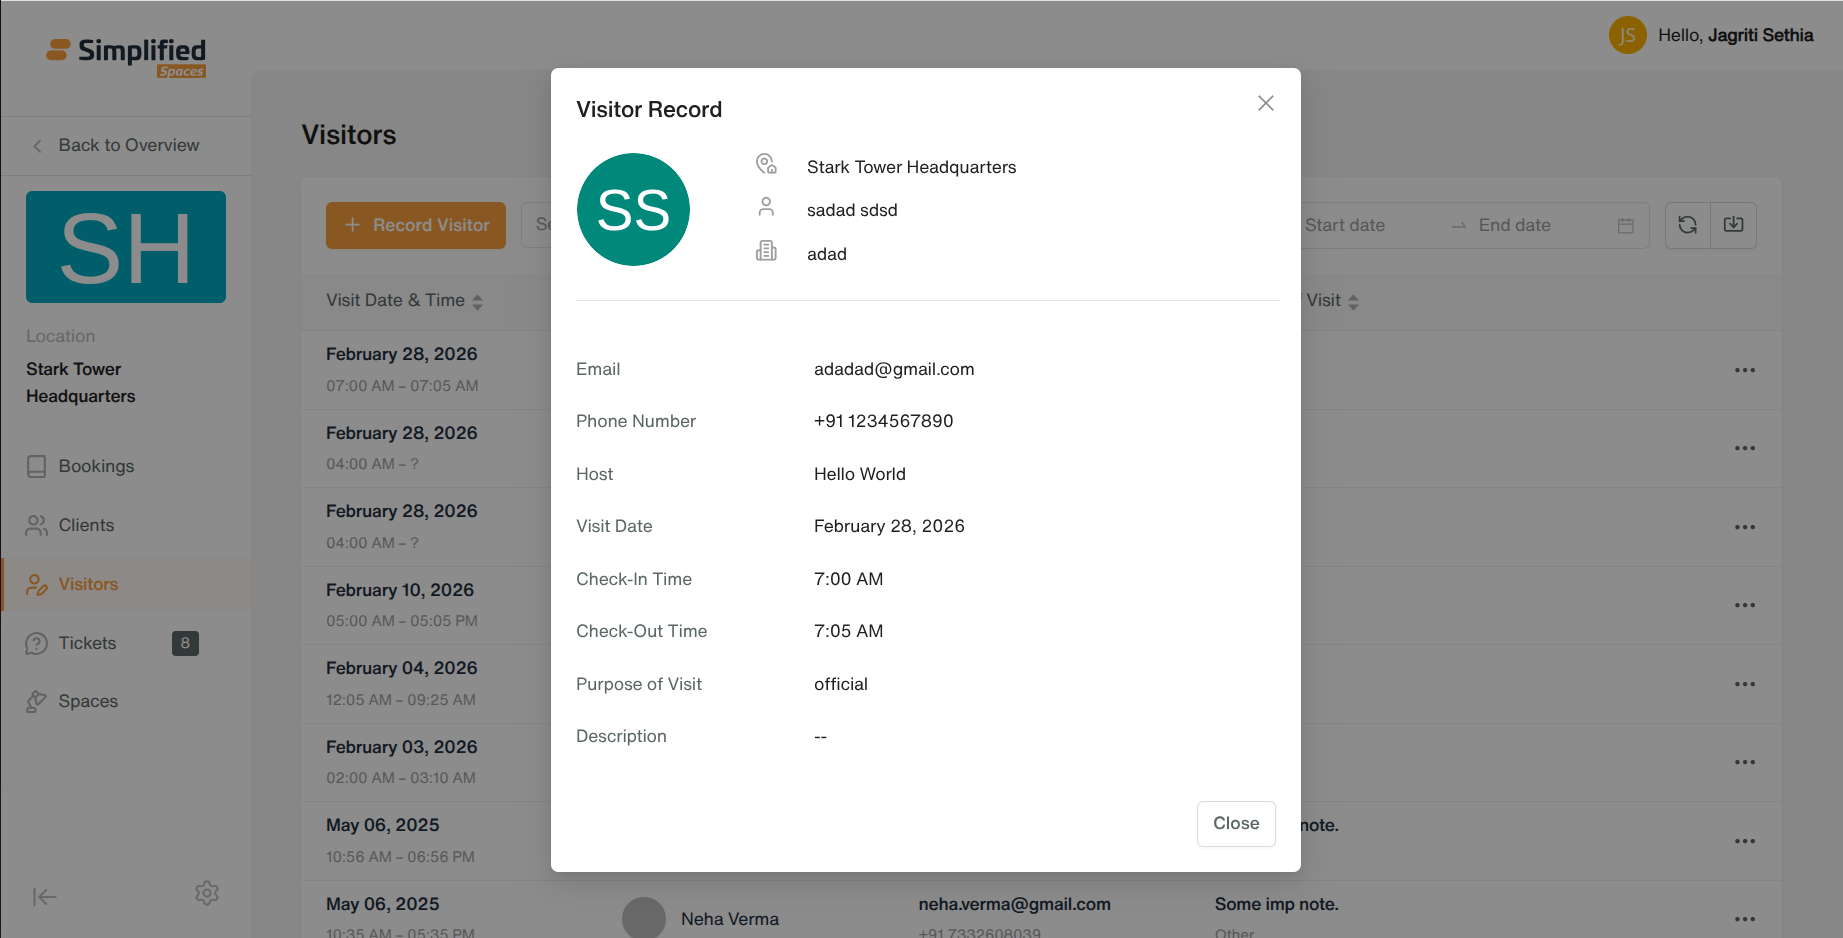
- Click the eye icon / View Record → read-only detail popup.
Delete a Visitor Record
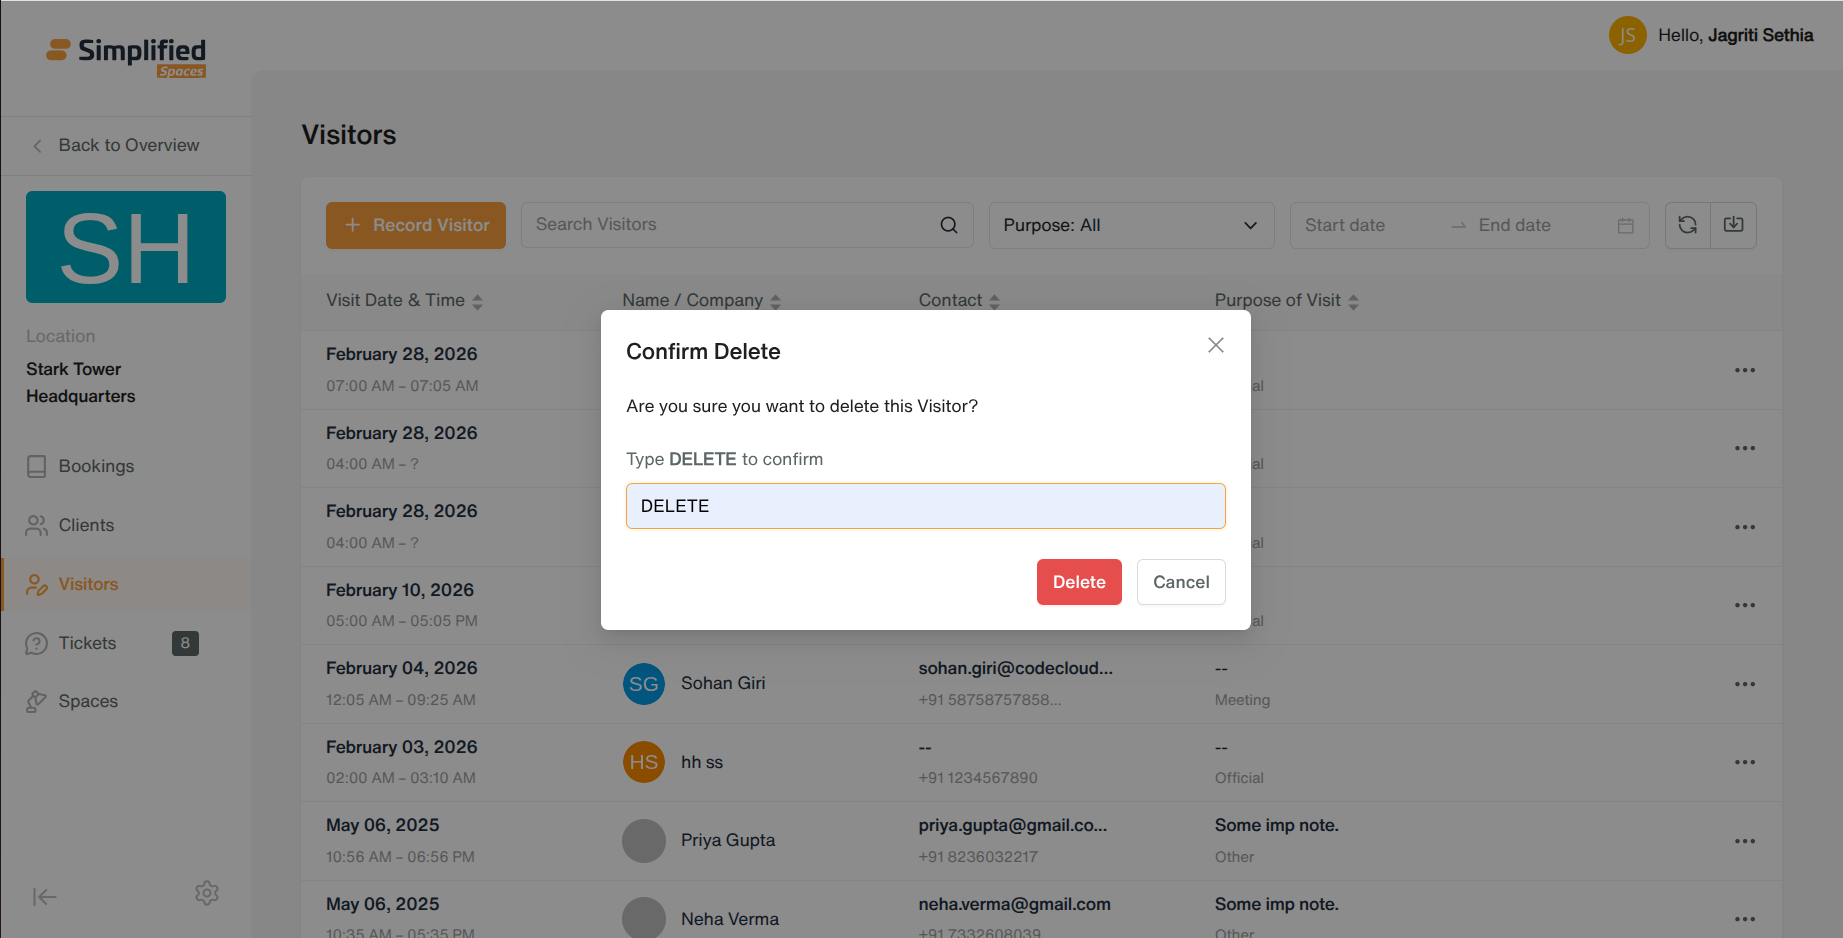
- Row menu → Delete → confirm → record removed.
Bulk Import Visitors
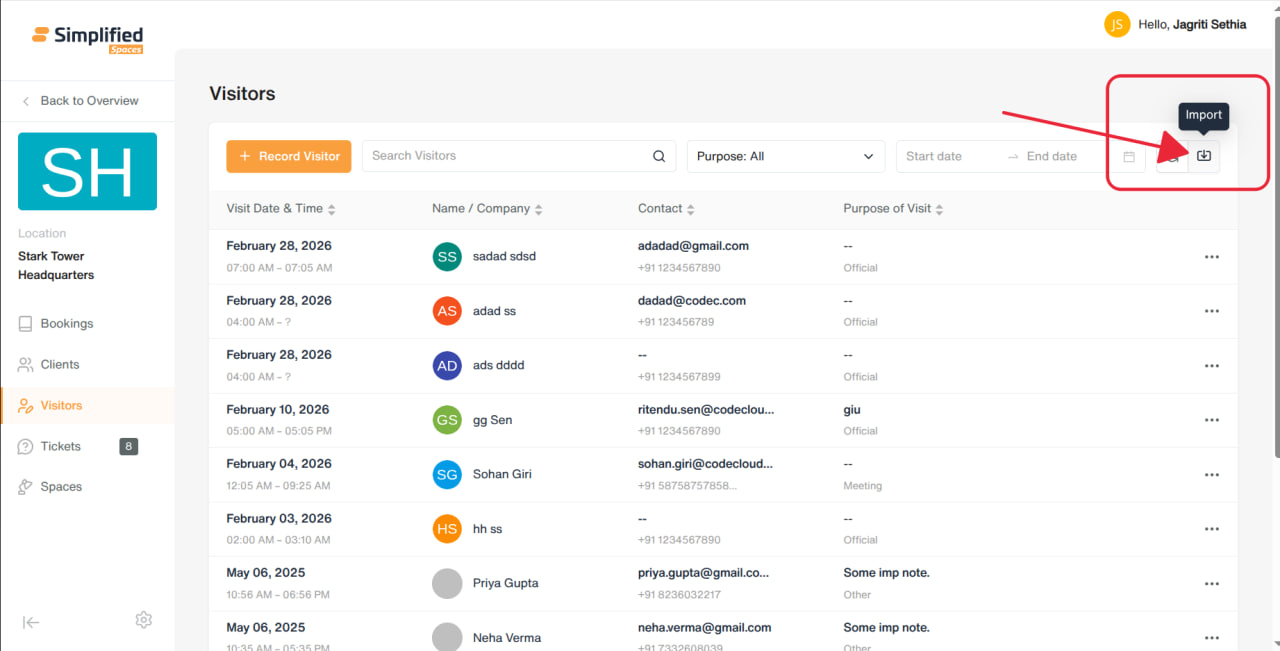
-
Click Import in the toolbar.
-
Upload a file (e.g. CSV).
-
Preview the data and map columns to fields; assign a client for the batch.
-
Confirm import.
-
See a results summary: how many succeeded, partially succeeded, or failed.
4. Spaces (Workspaces)
View
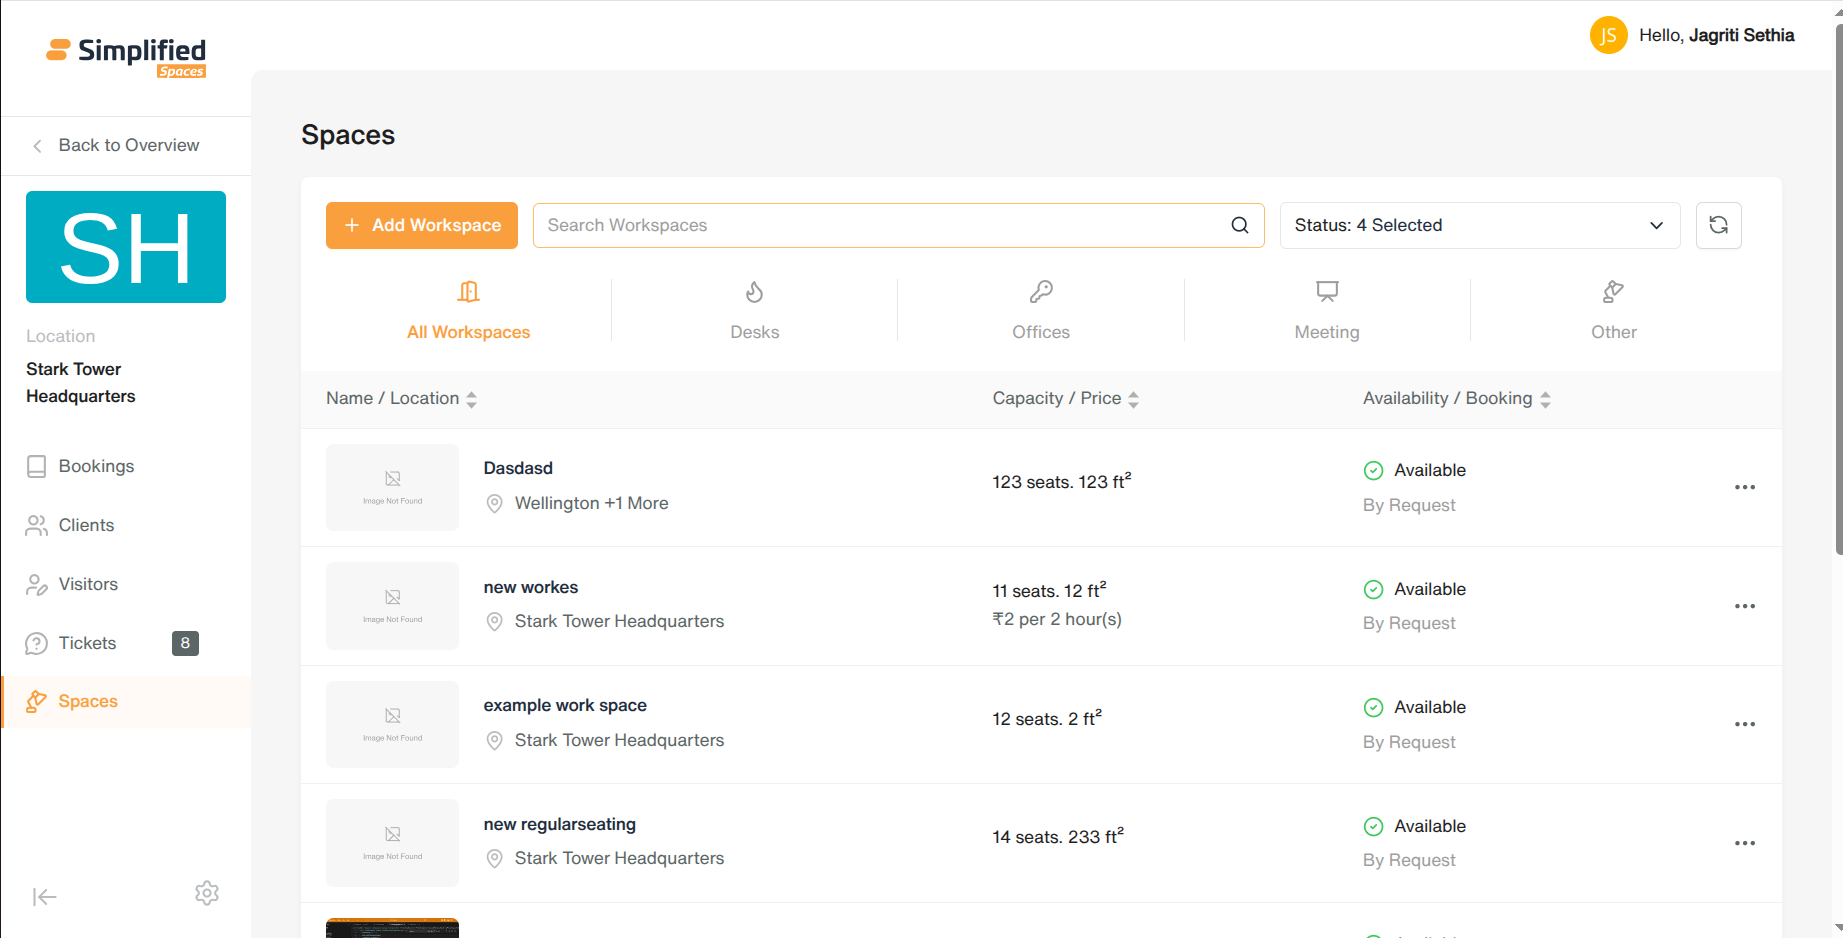
-
List of workspaces/spaces at this location, grouped by category (pills/tabs).
-
Supports:
-
Search (auto-searches as you type)
-
Filter by status (Available / No Availability / Booked / Leased / Deactivated)
-
Advanced filters: date added, seat count range, visibility, availability, booking permission — filters can be saved for reuse
-
Sort by name or capacity
Add a Space
- Click Add Workspace.
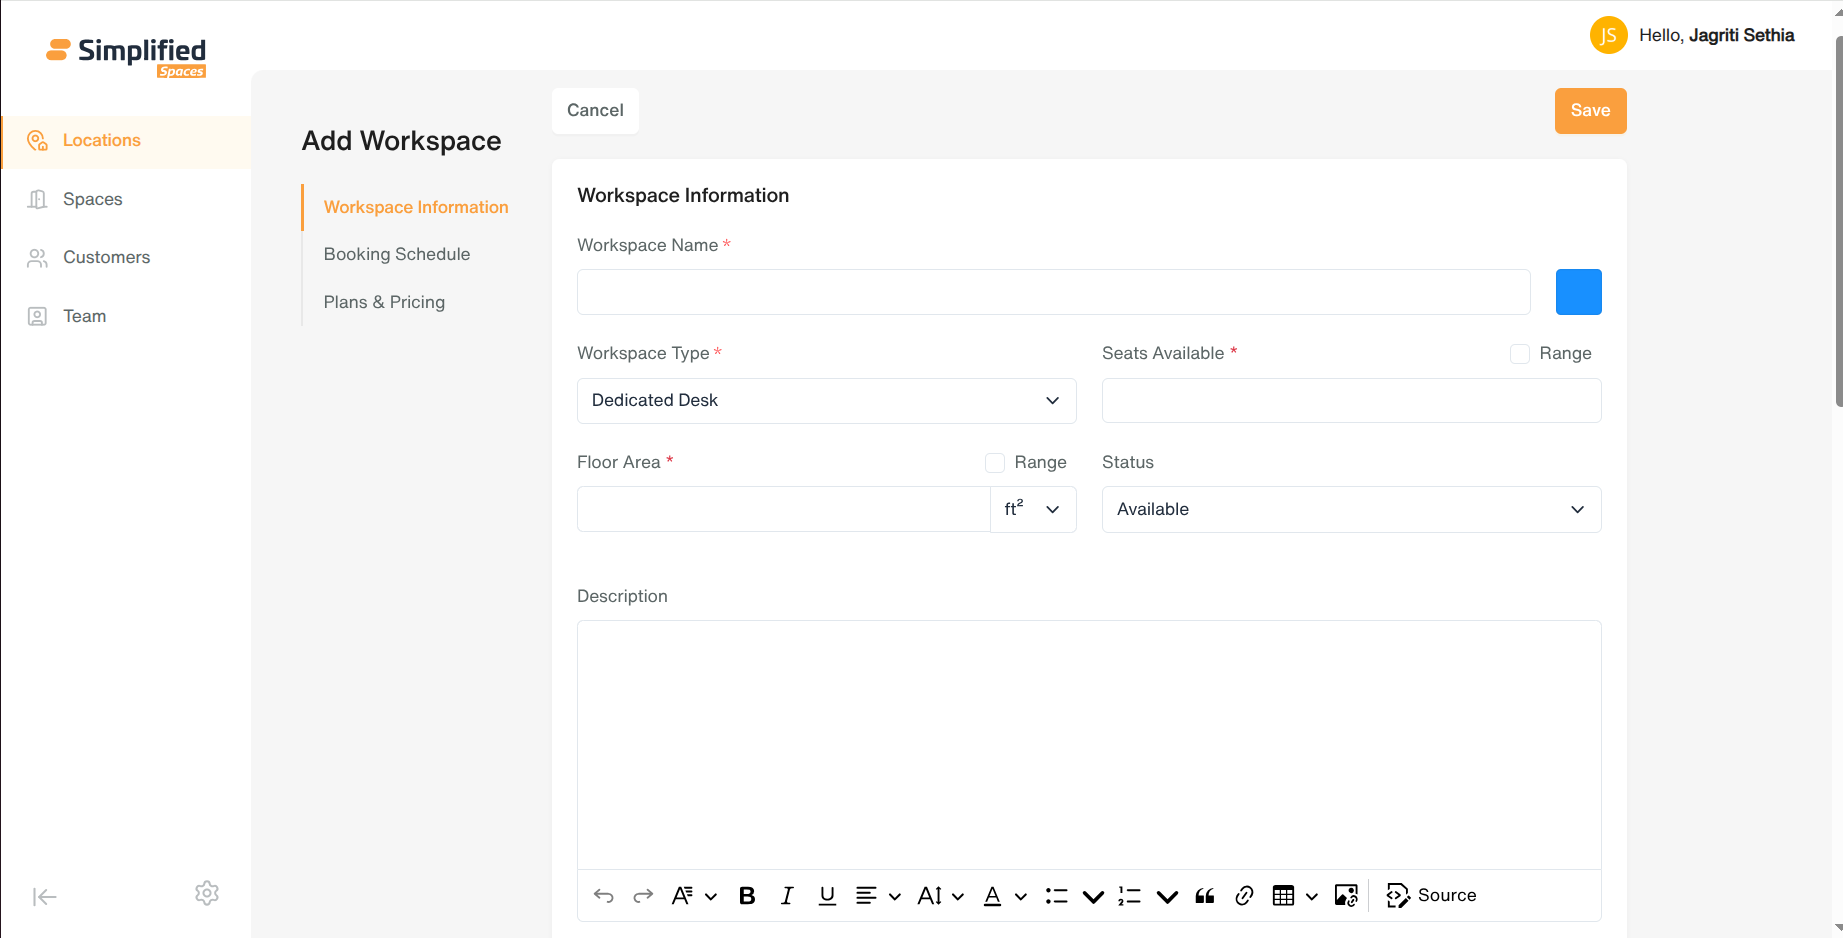
-
Fill in workspace info: name, description, color tag, images, feature/thumbnail image.
-
Set capacity: number of seats (single value or range).
-
Set floor area (value or range, with unit).
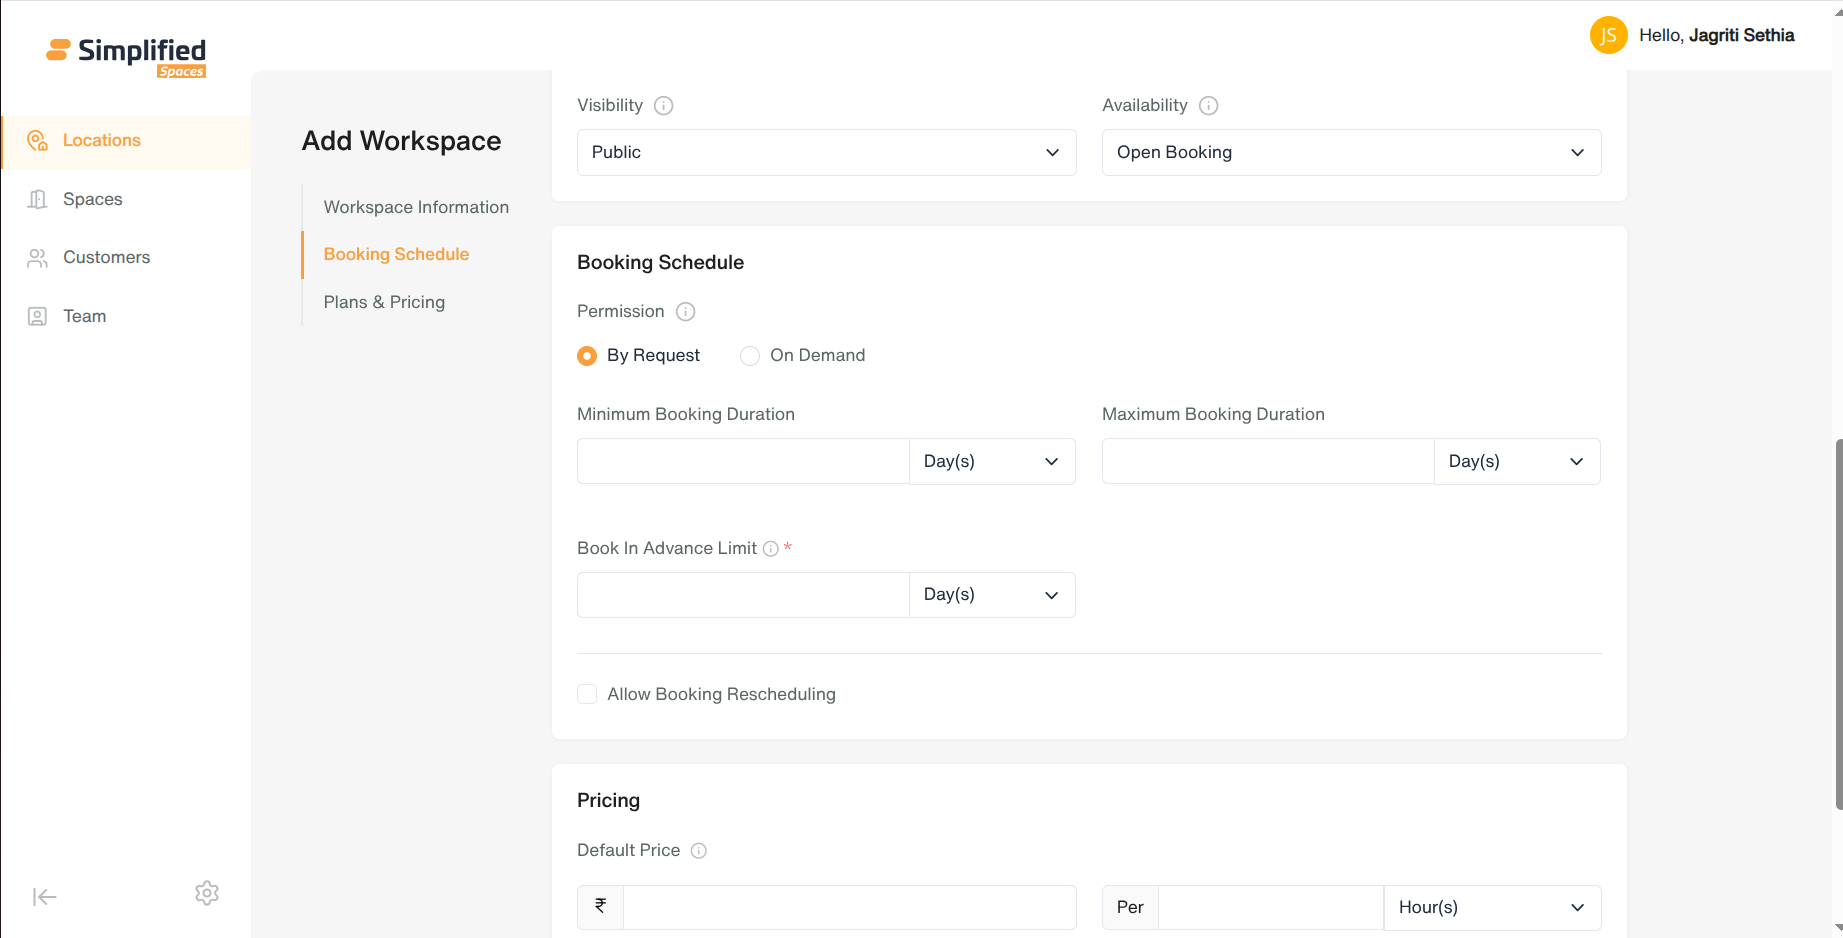
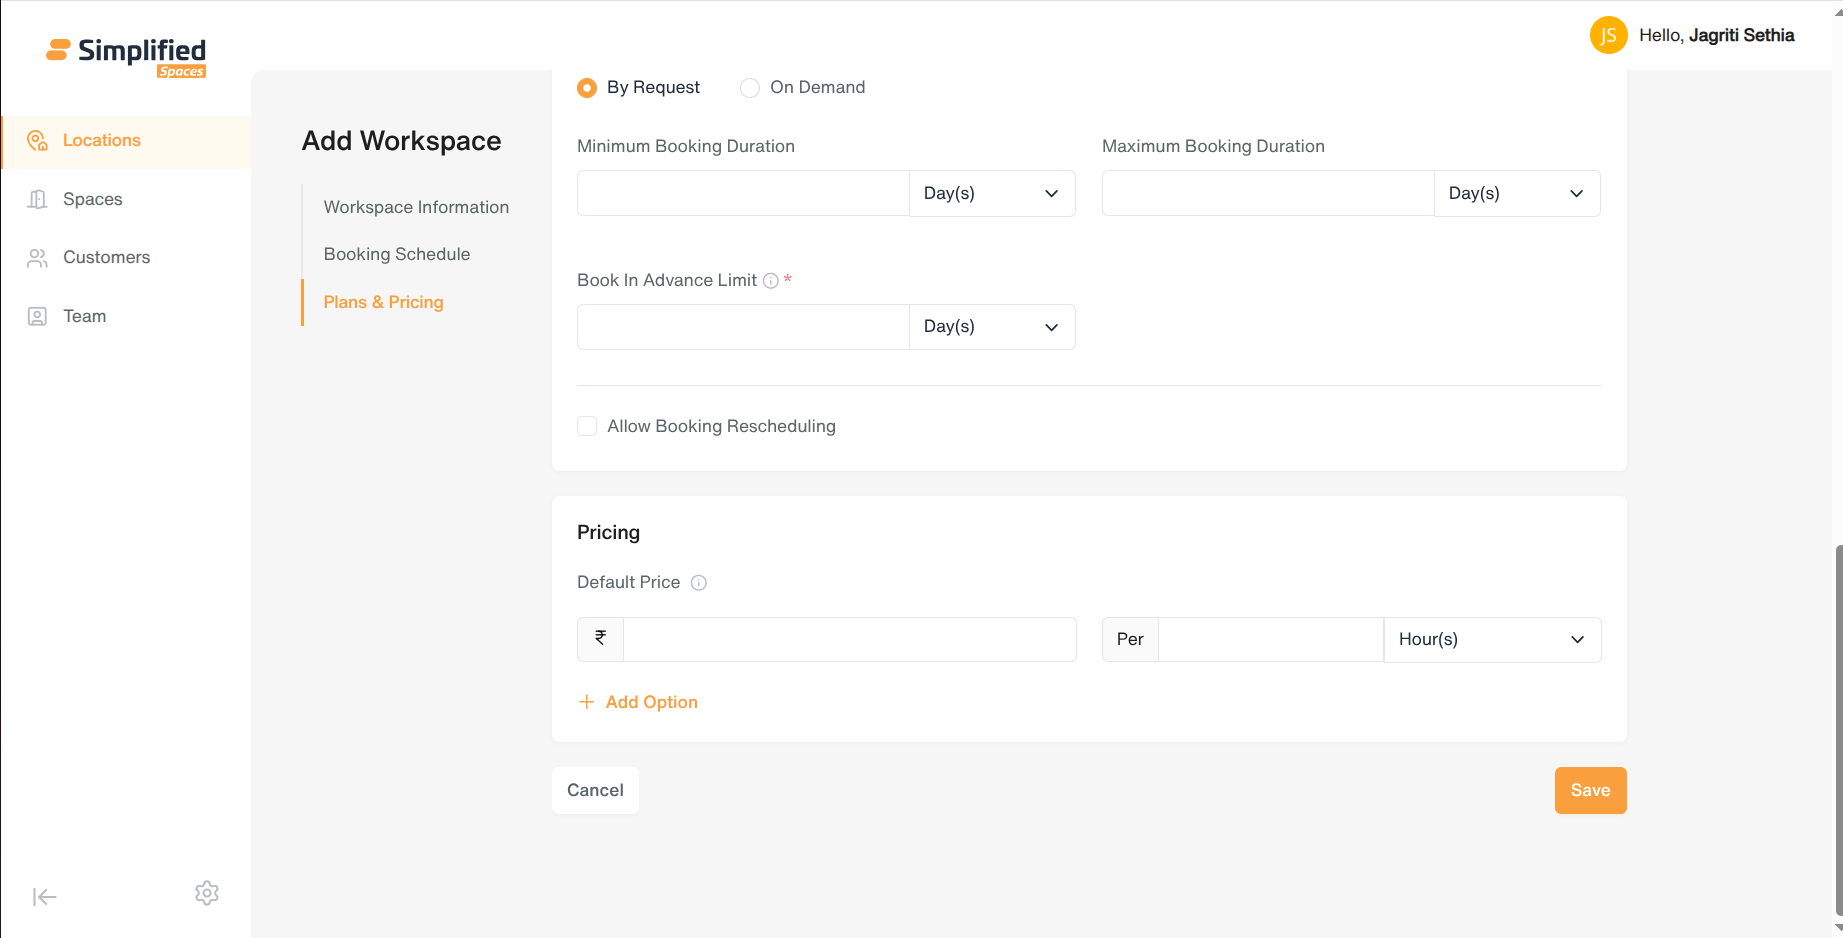
- Set booking permissions/schedule (who can book, when).
-
Set pricing (supports multiple pricing tiers).
-
Submit — new space appears in the list.
Edit a Space
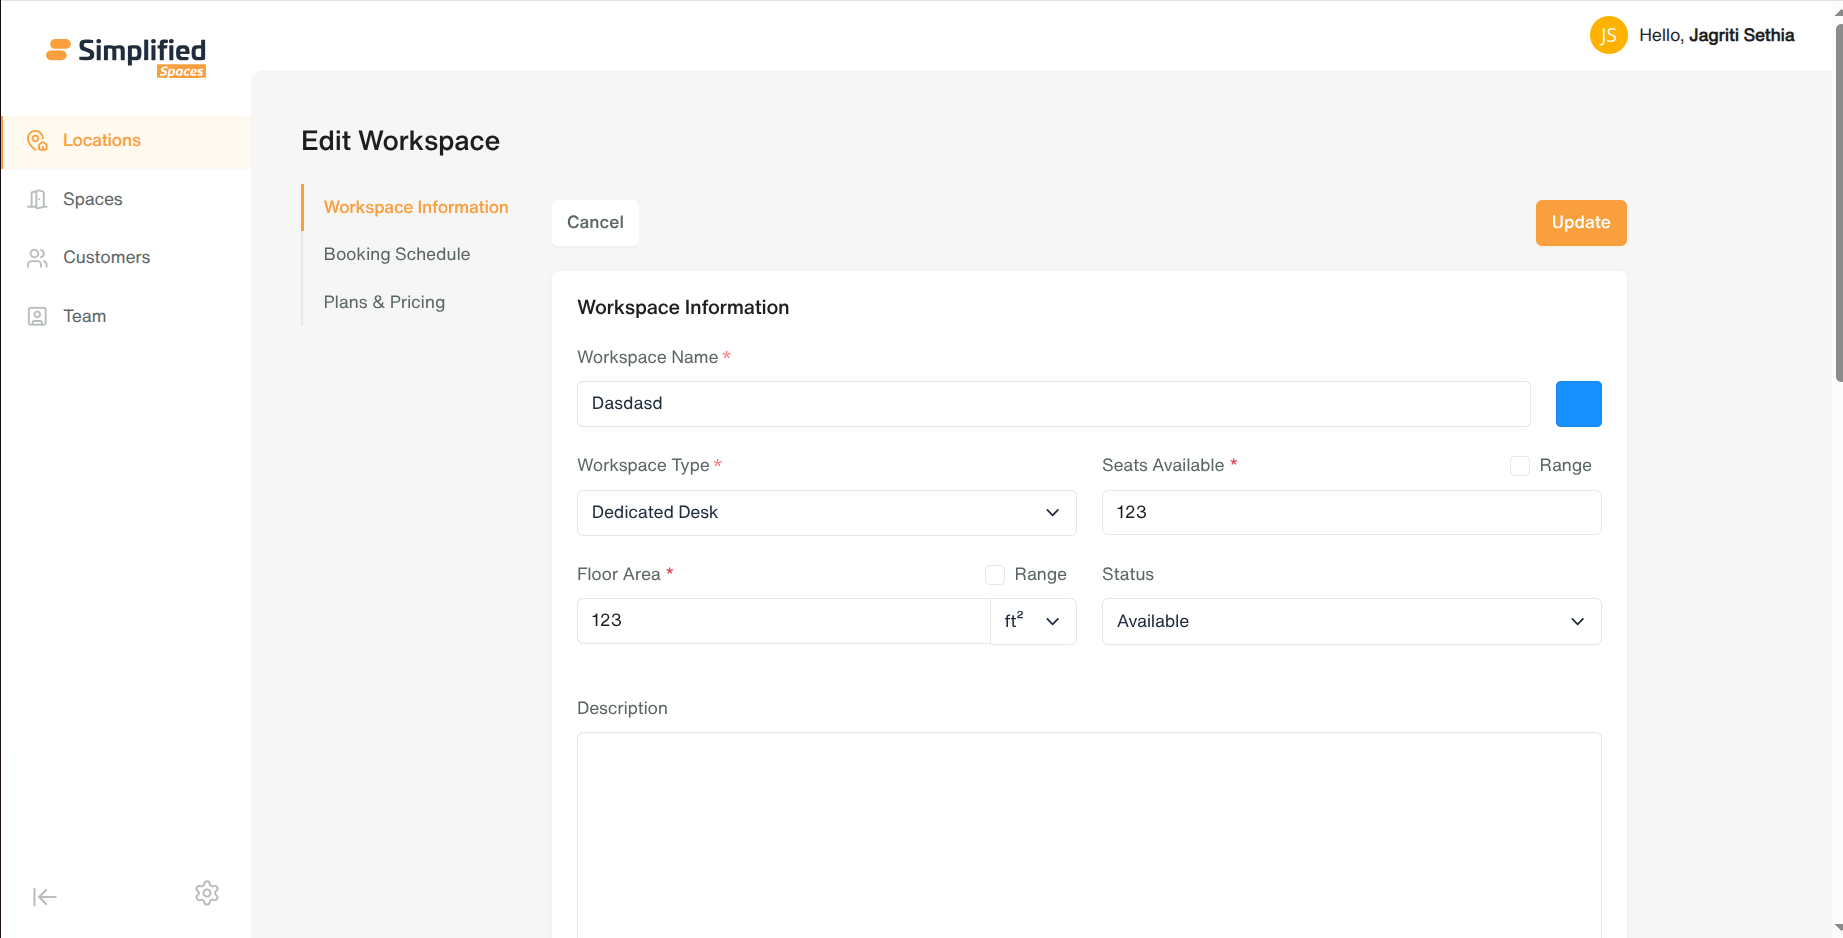
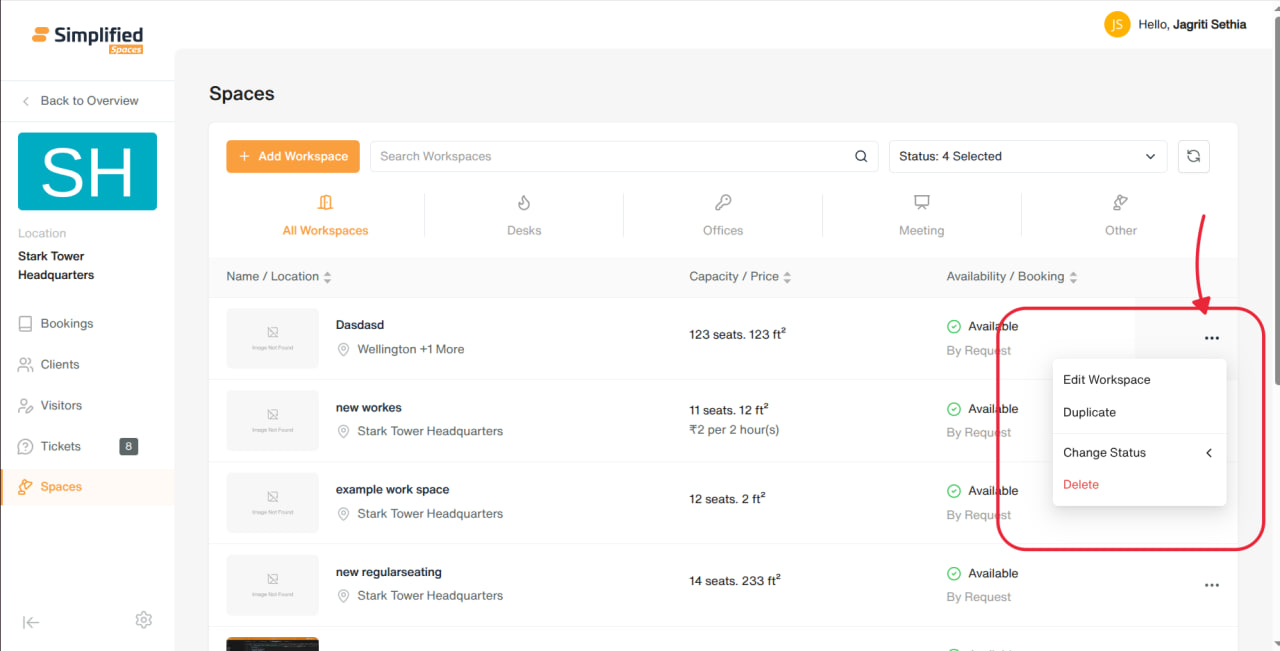
- Open the space → same form as Add, pre-filled → save changes.
Change Space Status
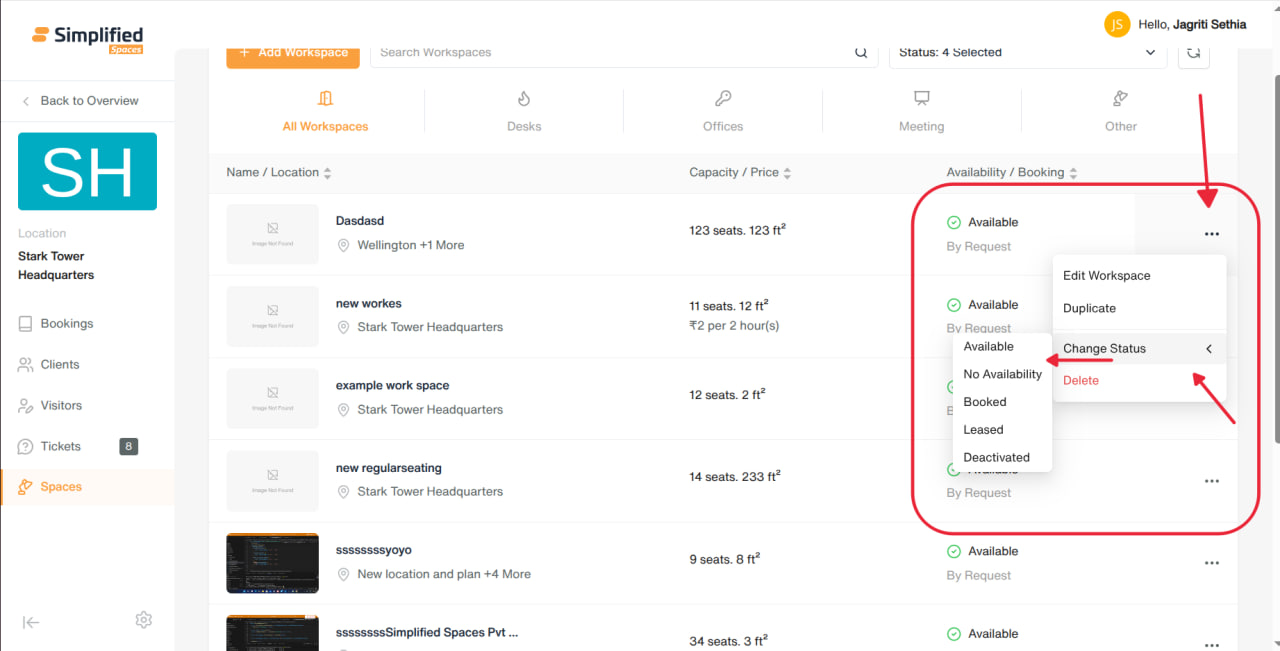
- Row menu → Change Status → pick one: Available, No Availability, Booked, Leased, Deactivated.
Duplicate a Space
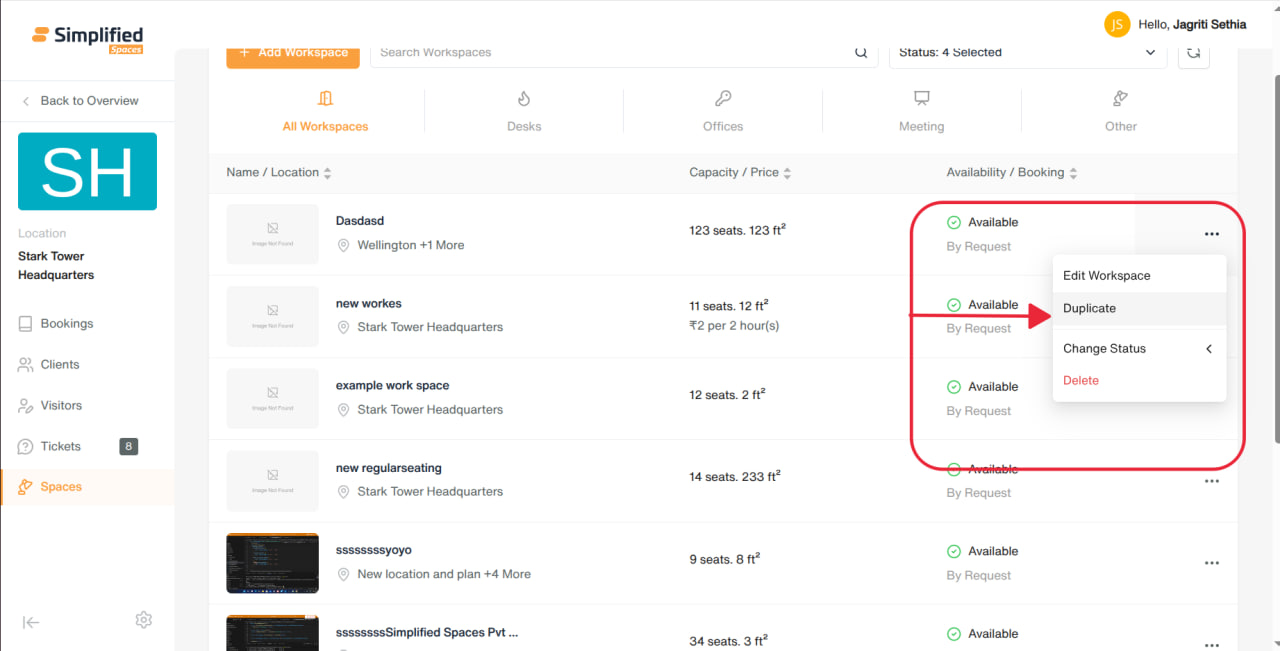
- Row menu → Duplicate → creates a copy of the space with the same settings.
Delete a Space
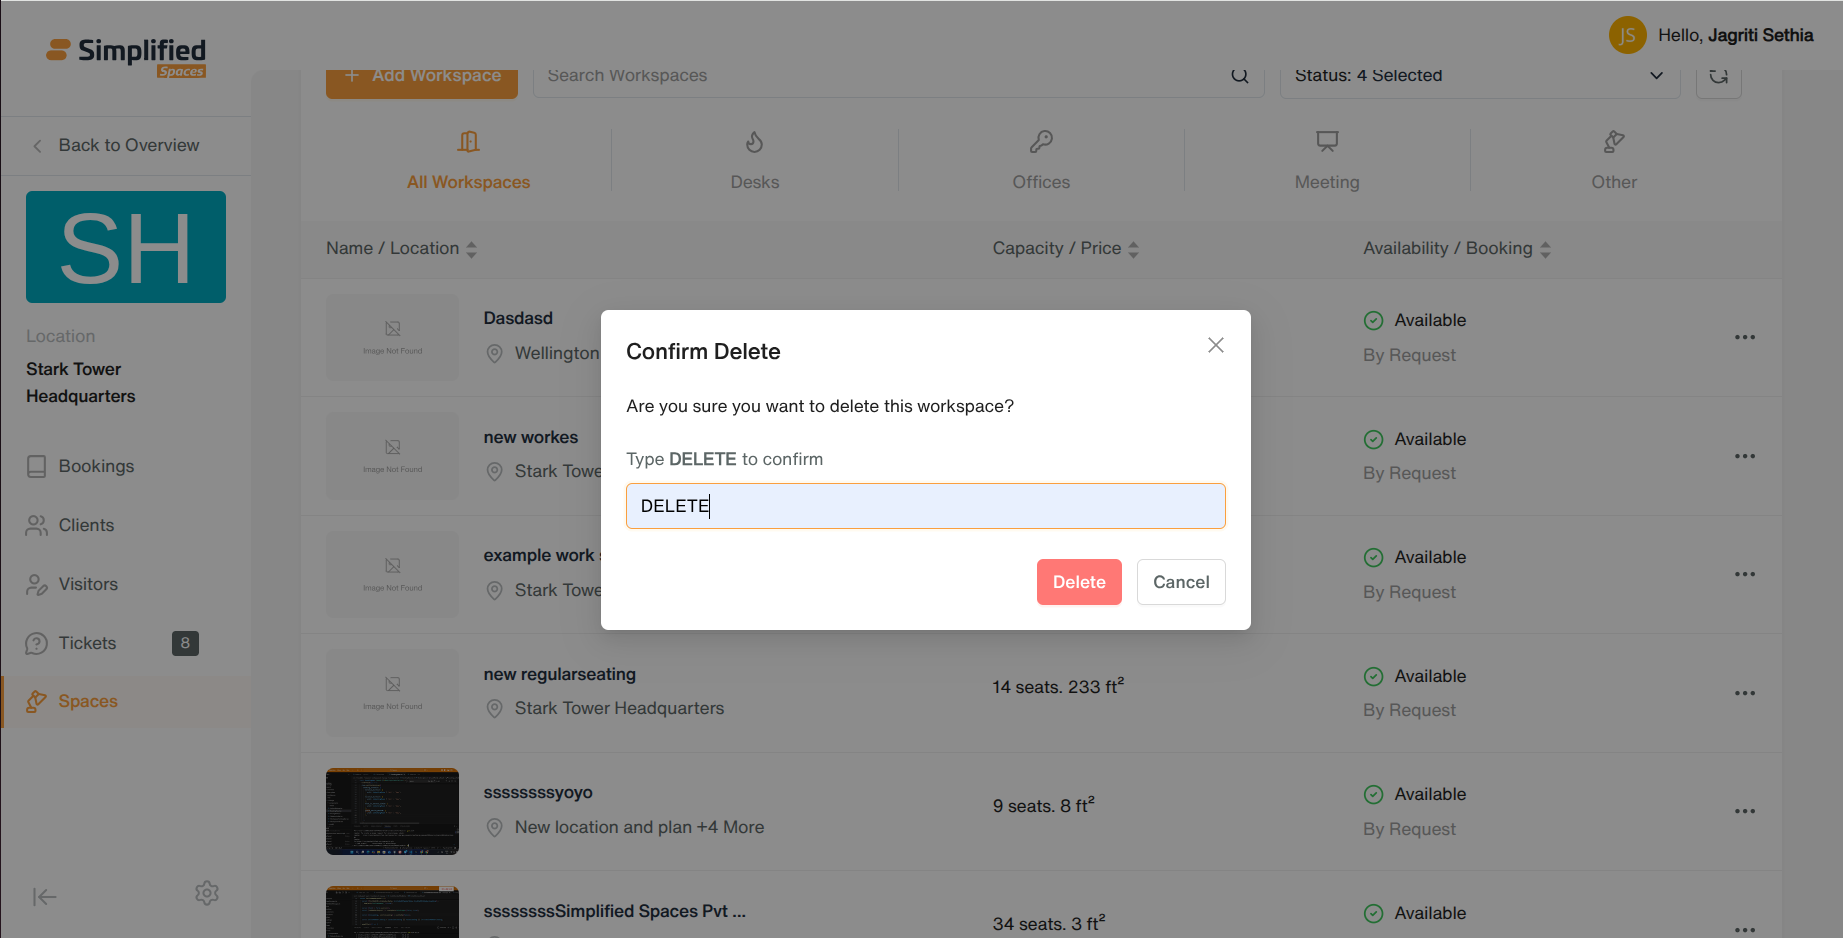
- Row menu → Delete → confirm → space removed.
5. Tickets
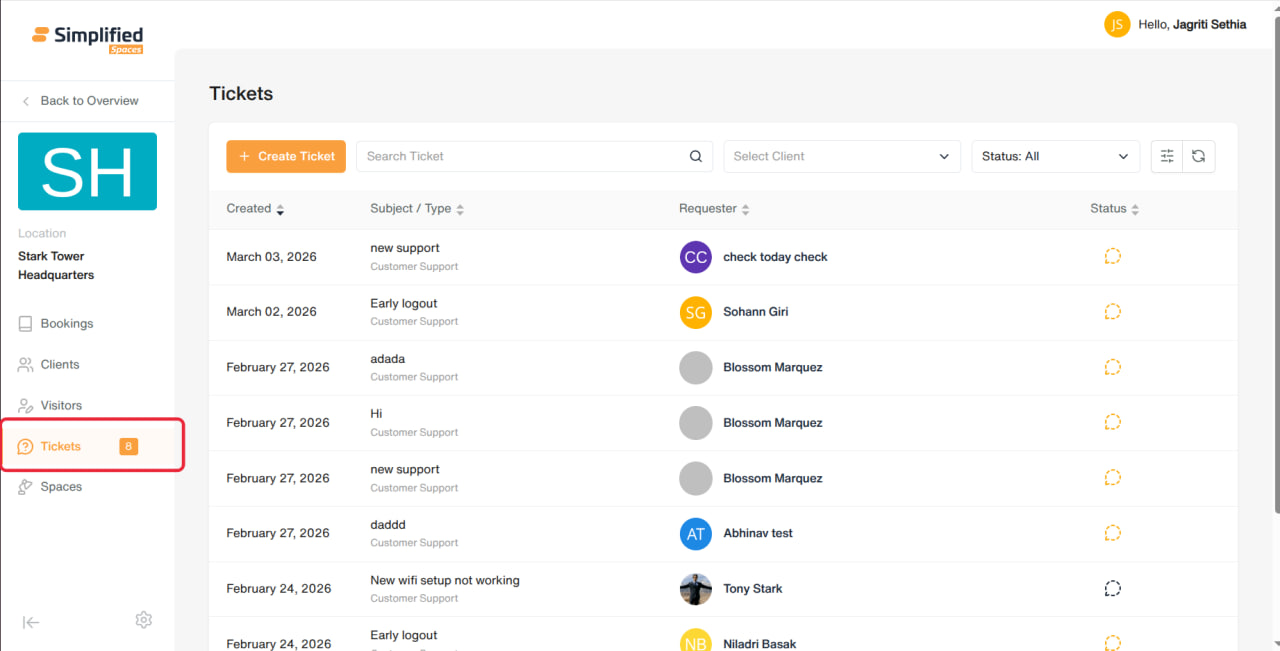
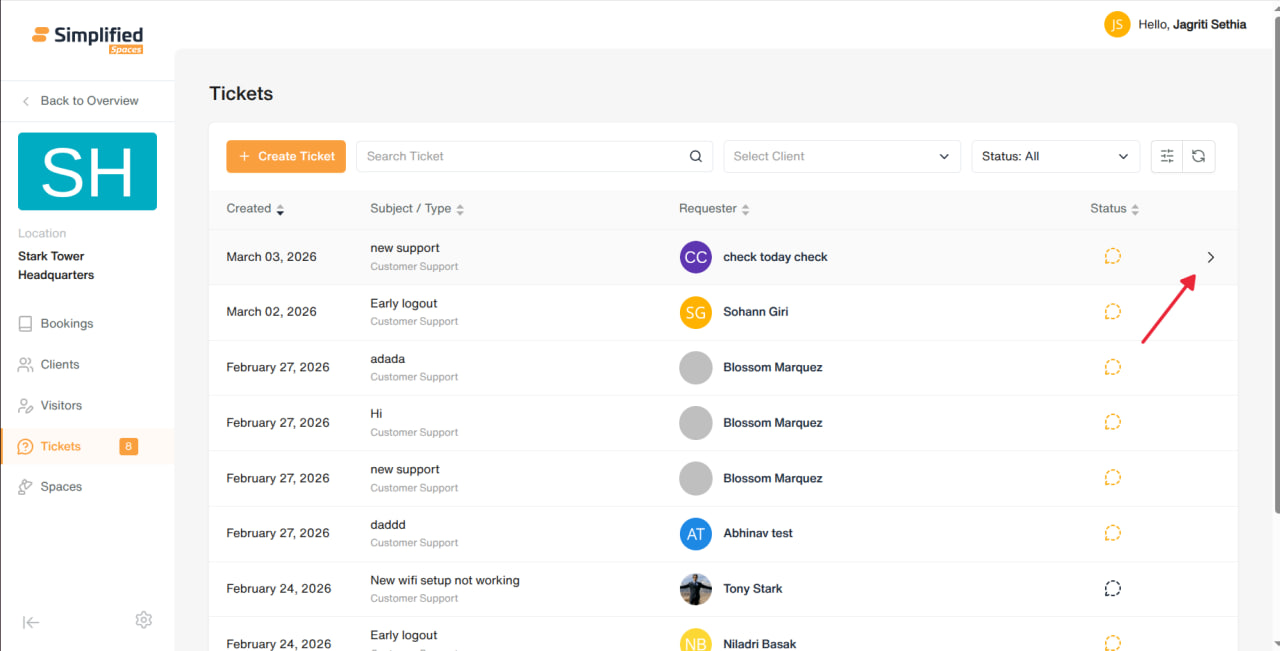
View
-
Table of support tickets raised for this location. Supports:
-
Search
-
Filter by createdBy, status (multi-select), date created, requester
-
Click a ticket row to open its full detail page
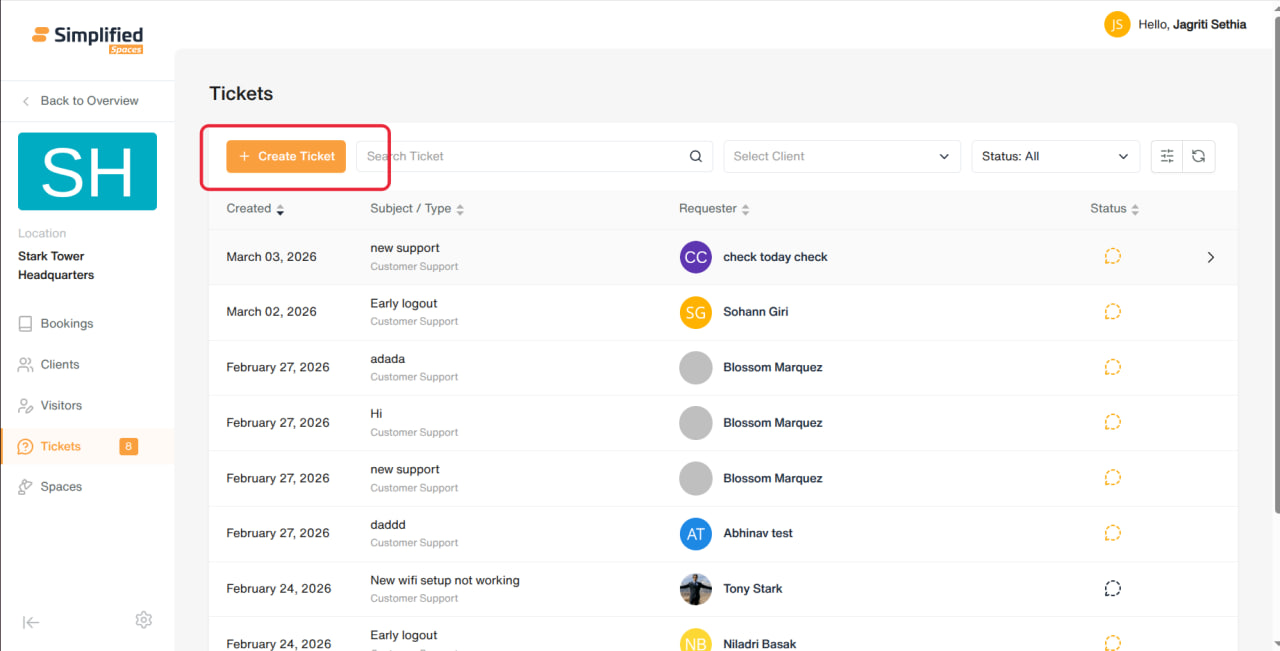
Create a Ticket
-
Click Create Ticket.
-
Select client (required) and requester (required).
-
Select the issue category — "What is the issue about?" (required).
-
Choose who the ticket is shared with (specific members or all company members).
-
Enter subject (required, up to 500 characters) and message (required).
-
Attach files if needed.
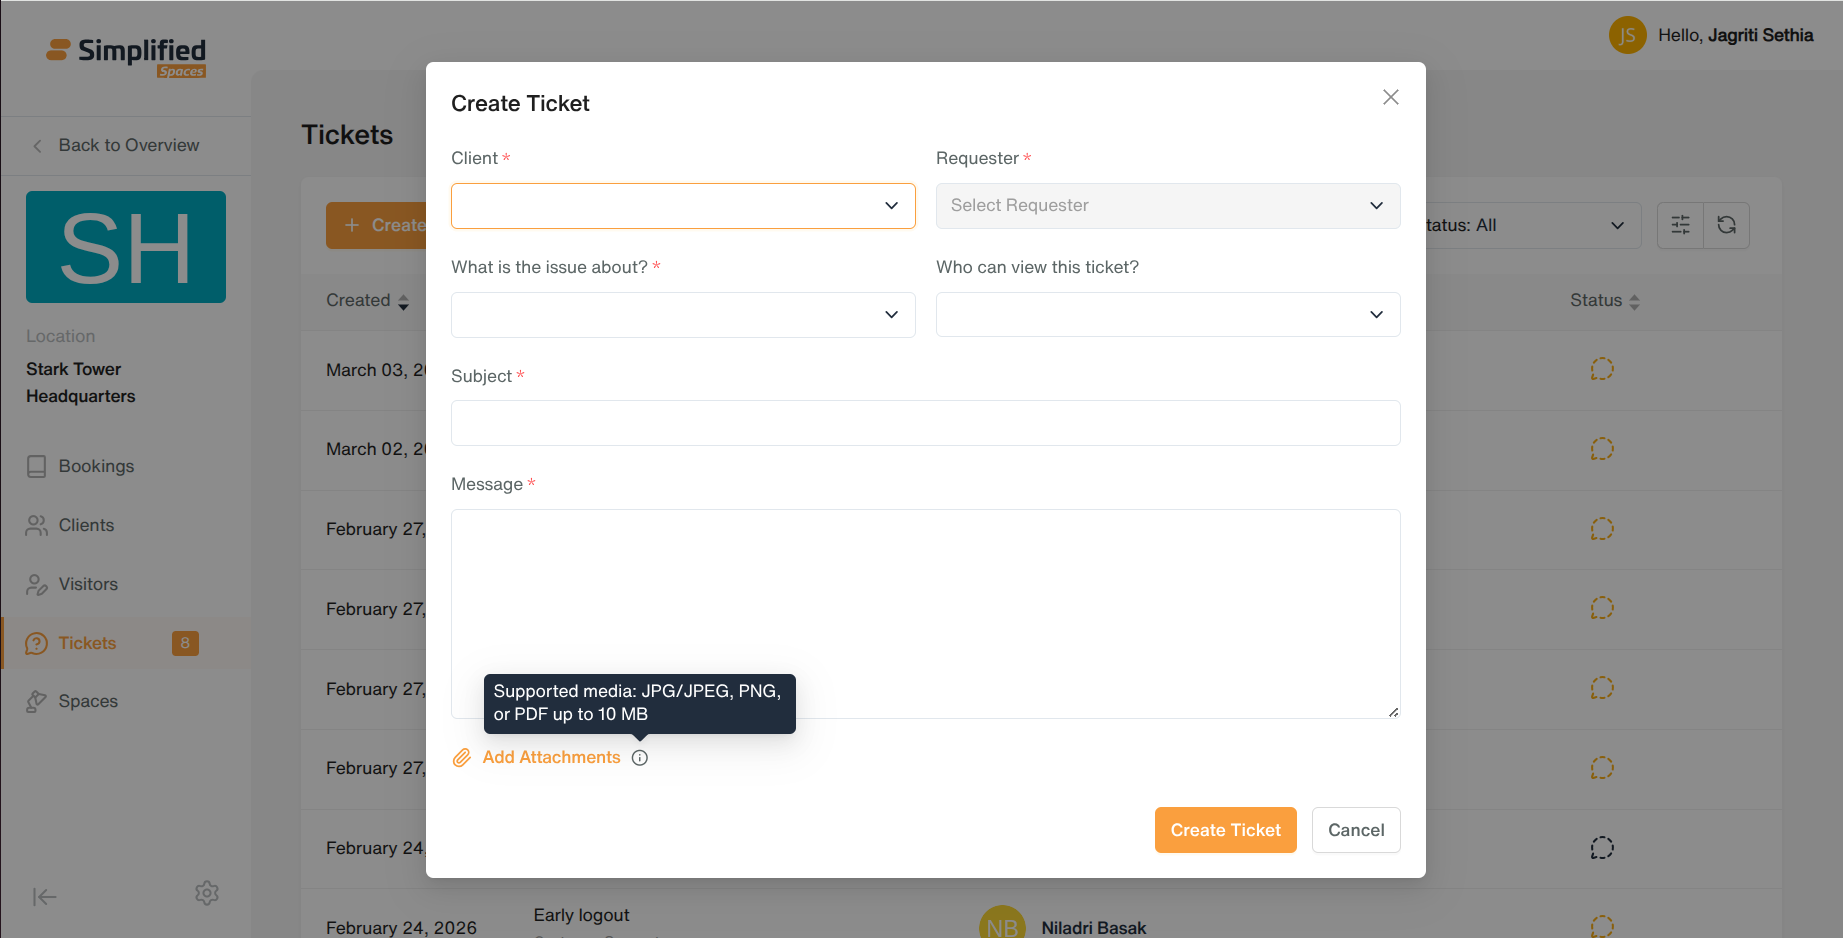
- Submit — ticket appears in the list, and the ticket-count badge in the sidenav updates.
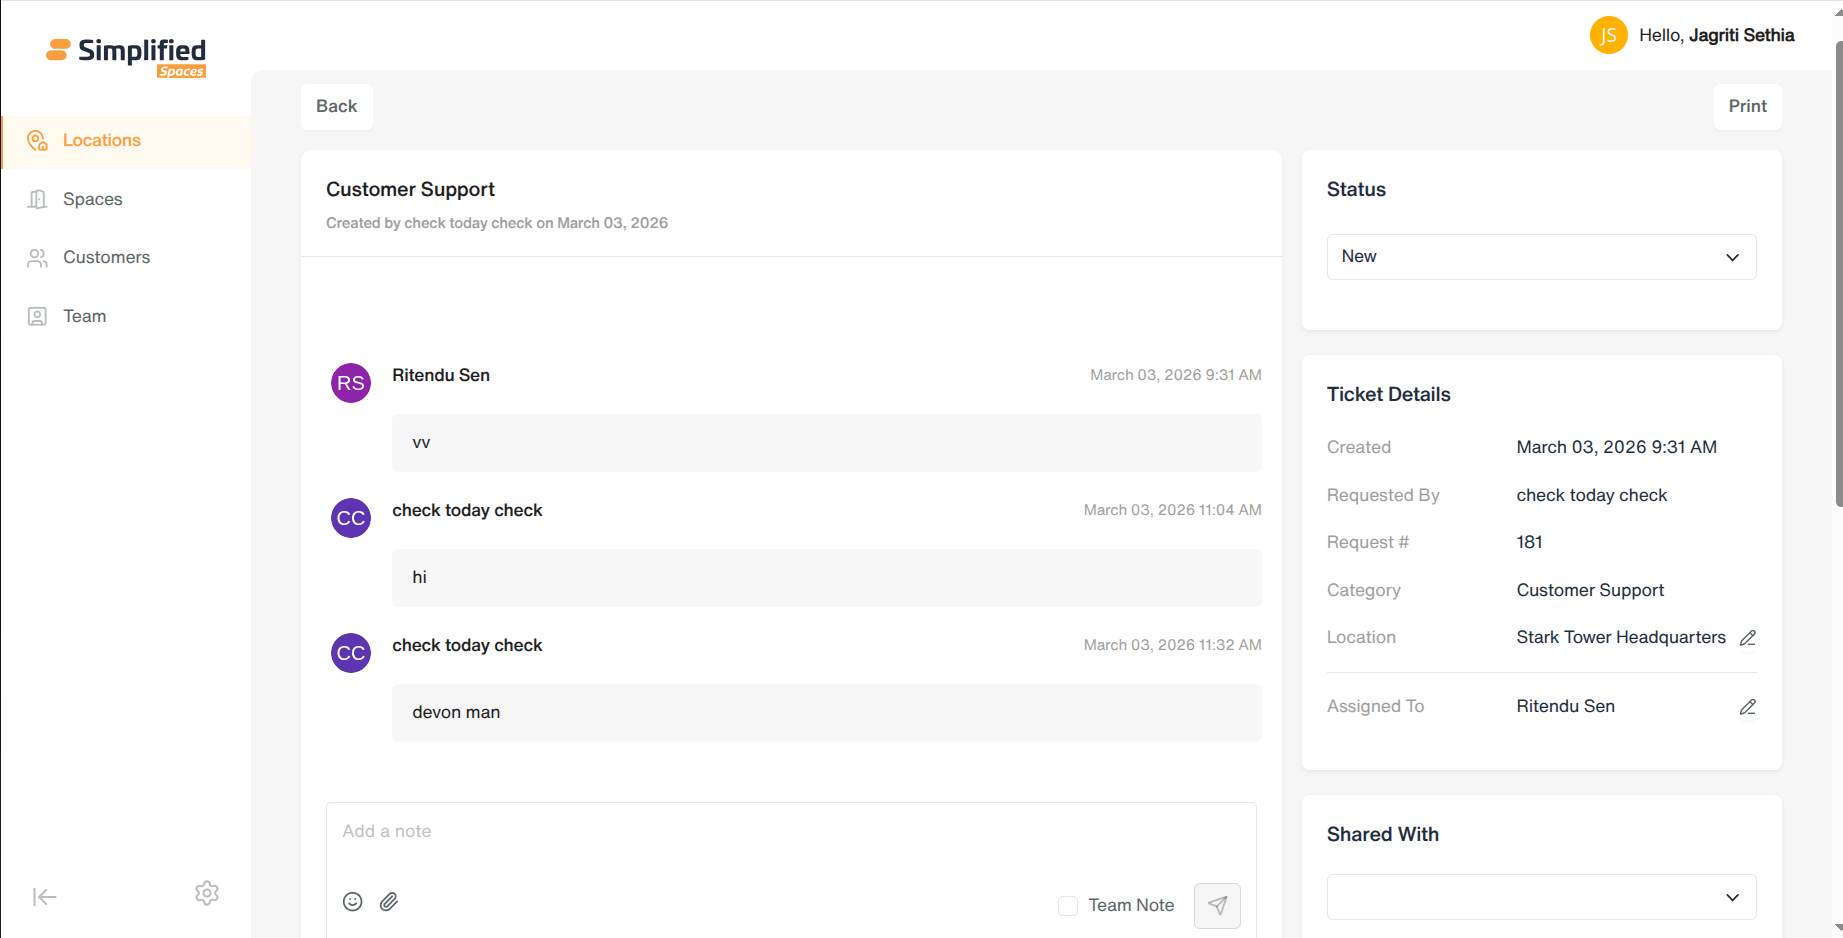
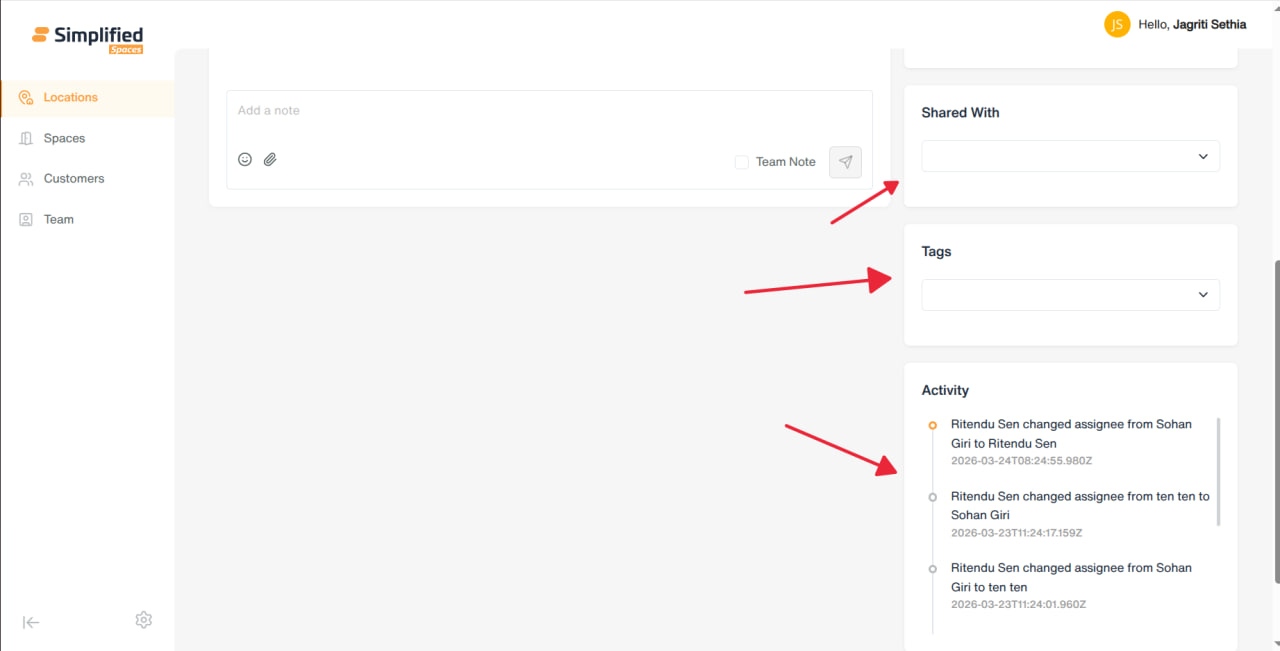
Ticket Detail Page (opened by clicking a row)
-
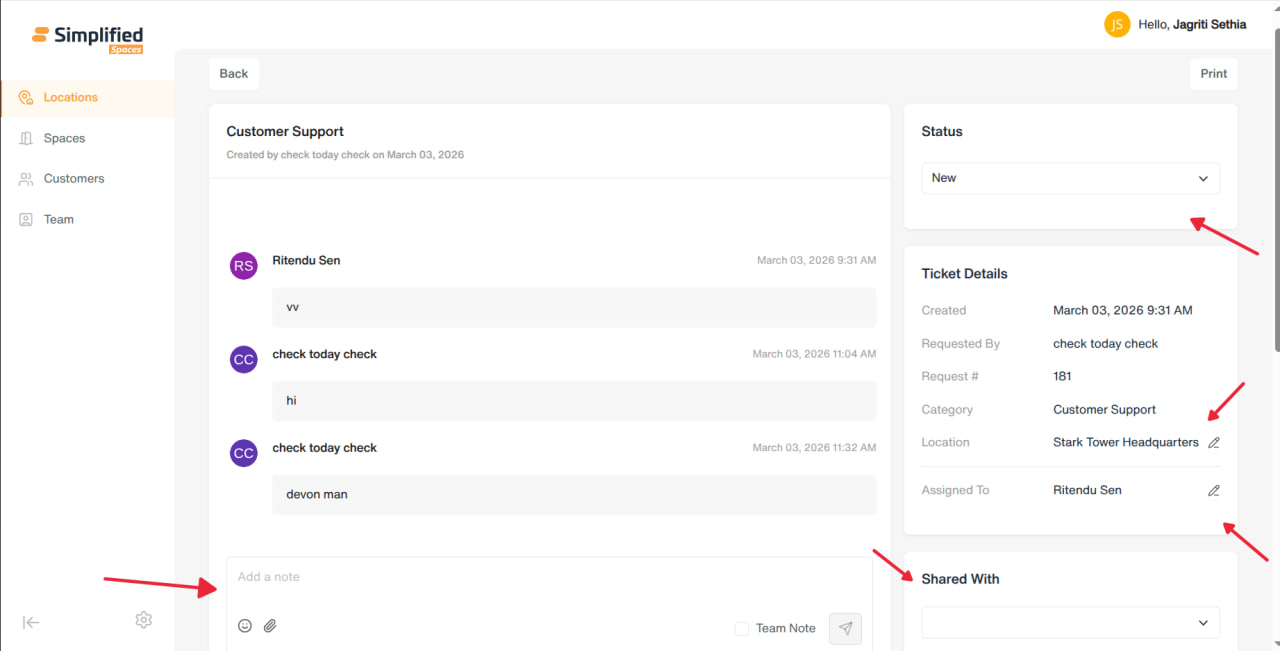
Change status: New → Open → In Progress → On Hold → Resolved → Closed (Re-open also available)
-
Reassign to a different team member
-
Update sharing (who can see the ticket)
-
Add/remove tags
-
Change linked location/category
-
Archive the ticket
-
Add comments (chat-style thread)
-
View activity/audit history of the ticket
General Notes (apply across all tabs)
-
Every tab only shows data for the current location you're viewing.
-
Every Delete action requires confirmation in a popup before it takes effect.
-
Creating/updating a Booking or Ticket refreshes the location's summary counts (e.g. ticket badge in the sidenav).
-
Some actions may be hidden or blocked depending on the logged-in user's assigned role/permissions — a user might see a button but still get blocked from completing the action if they lack permission.