Describes the Settings section of the admin: General, Billing, Branding, Notifications, Import Profiles, Portal Configuration.
Overview
-
Entry point: Main menu → Settings.
-
Sub-sections: General, Billing, Branding, Notifications, Import Profiles, Portal Configuration.
-
Most pages here are organization-wide settings (not tied to a single location) — they shape how the whole platform looks, behaves, and communicates.
-
Most forms only show a Save Changes button once you've actually changed something (it stays hidden otherwise). Branding is the exception — most of its fields save immediately as you change them (see below).
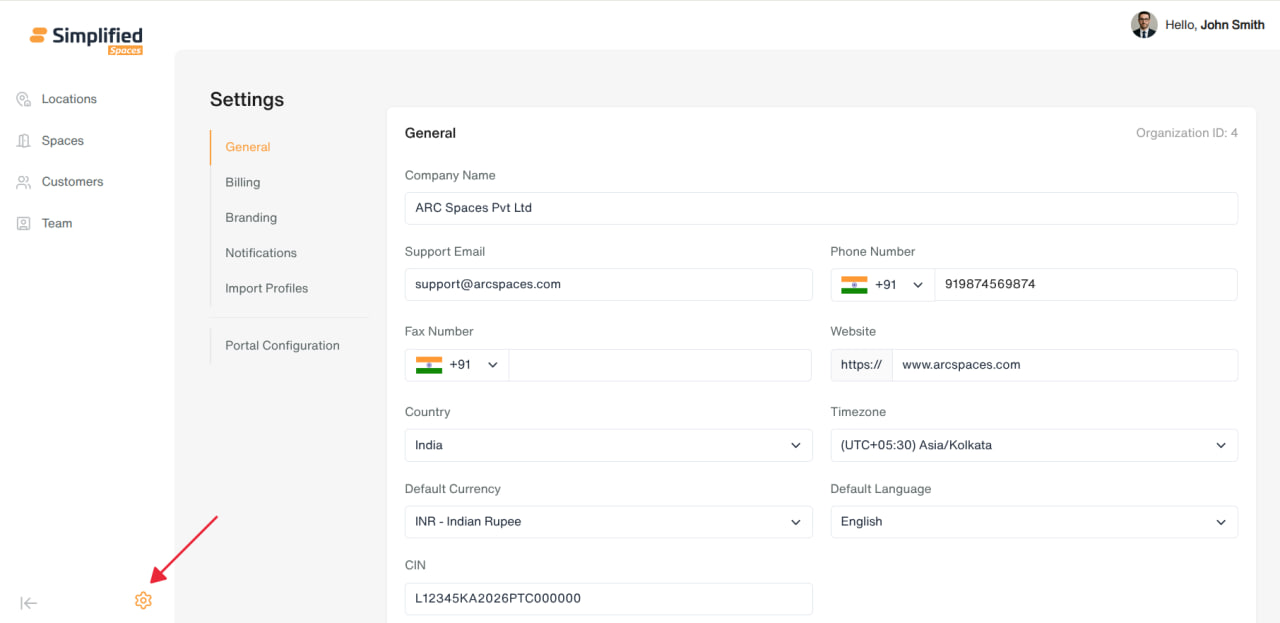
1. General
Organization-level profile settings, shown as a single form. Header displays your Organization ID (read-only, system-assigned).
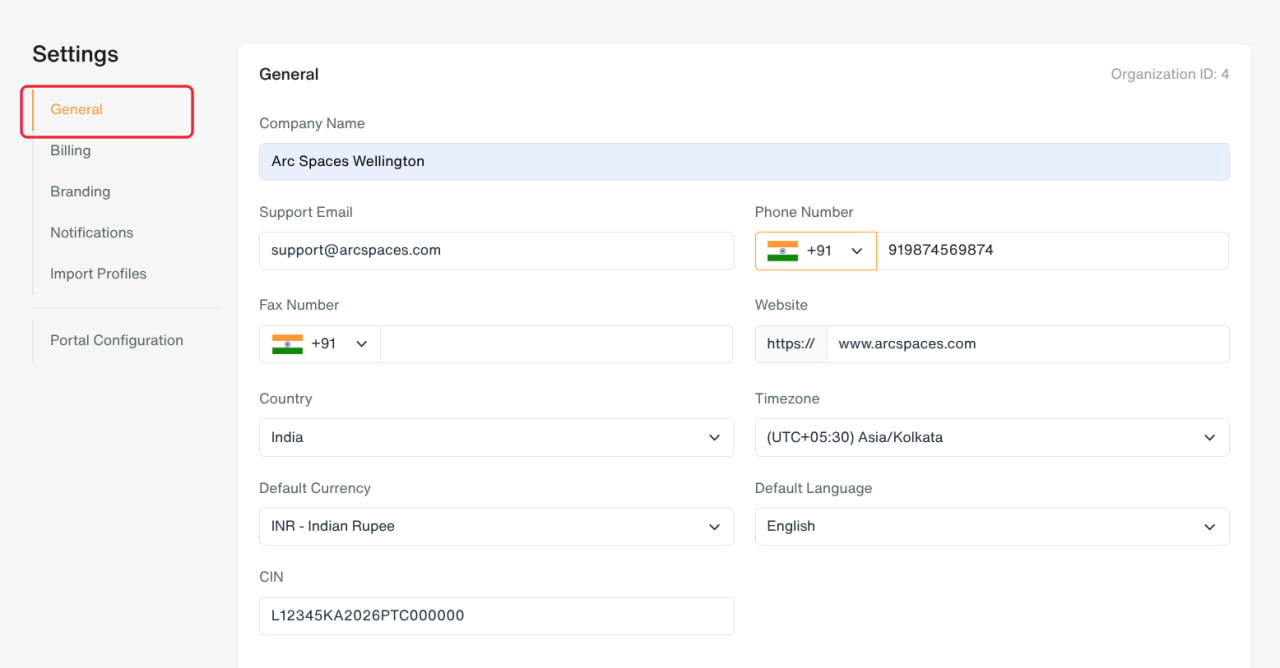
Fields:
-
Company Name
-
Support Email (must be a valid email)
-
Phone Number (country code + number)
-
Fax Number (country code + number)
-
Website (enter just the domain — "https://" is added automatically)
-
Country (dropdown)
-
Timezone (searchable dropdown, e.g. "(UTC+05:30) India/Kolkata")
-
Default Currency (dropdown, e.g. "USD - US Dollar")
-
Default Language (English or Spanish)
-
CIN — 21-character company identification number (auto-uppercased, validated format)
Click Save Changes to apply.
2. Billing
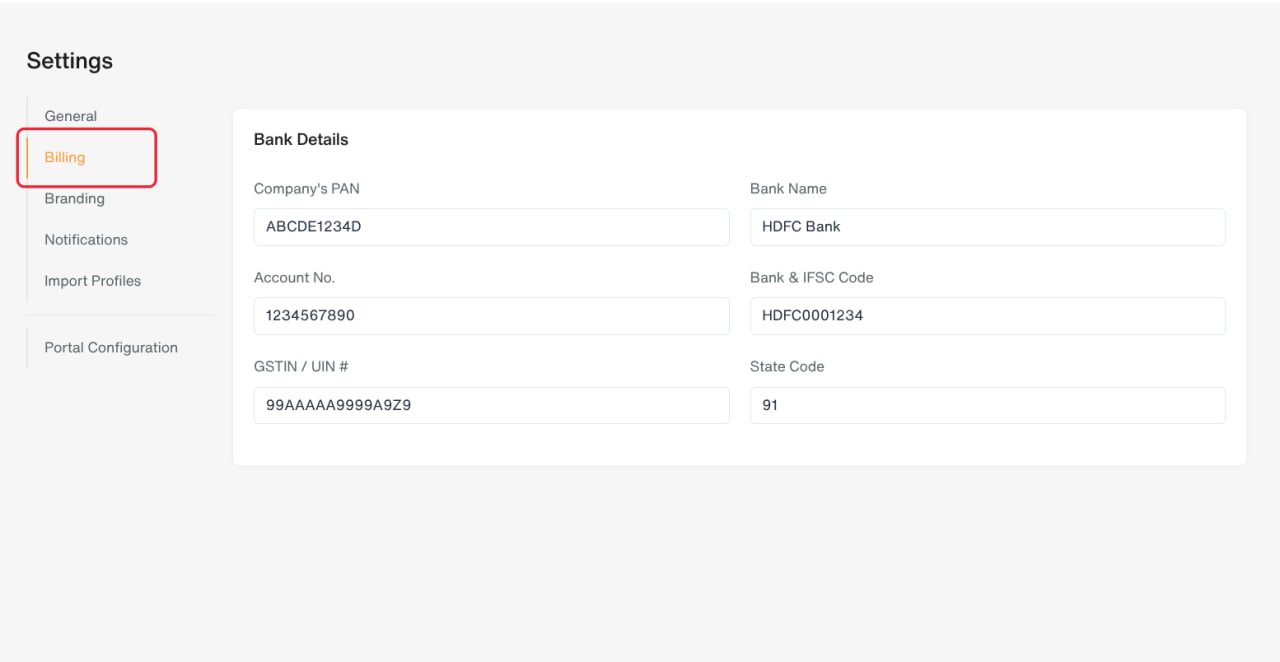
Note: despite the menu label "Billing", this page is currently your organization's Bank Details, not a plan/subscription or invoice-history screen.
Fields:
Click Save Changes to apply.
3. Branding
Controls how your portal looks to clients. Three sections — most fields here save immediately when changed, not on a single Save button.
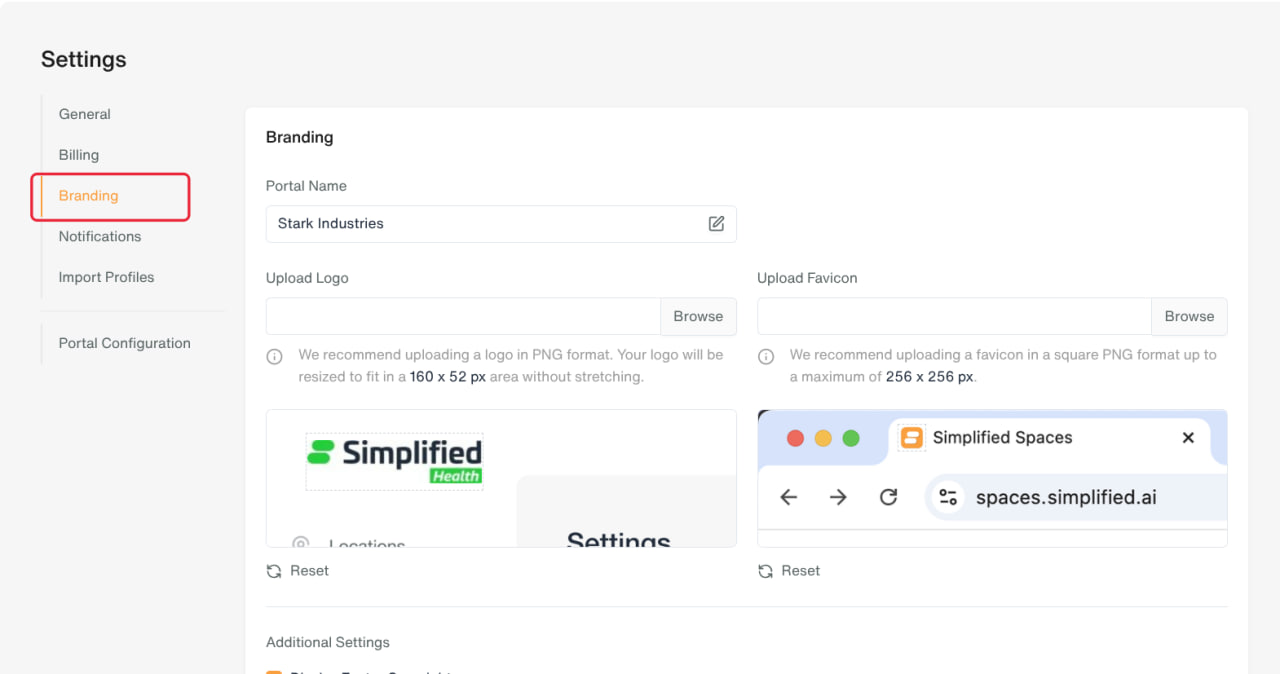
Branding
-
Portal Name — click the pencil icon to edit inline, then confirm (✓) or cancel (✗). Saves immediately.
-
Upload Logo — browse and select an image (PNG recommended; auto-resized to fit); preview shown against a sample layout. Reset clears it back to none. Saves immediately on upload.
-
Upload Favicon — same pattern (square PNG up to 256×256px recommended), own Reset control.
-
Display Footer Copyright — on/off toggle, saves immediately.
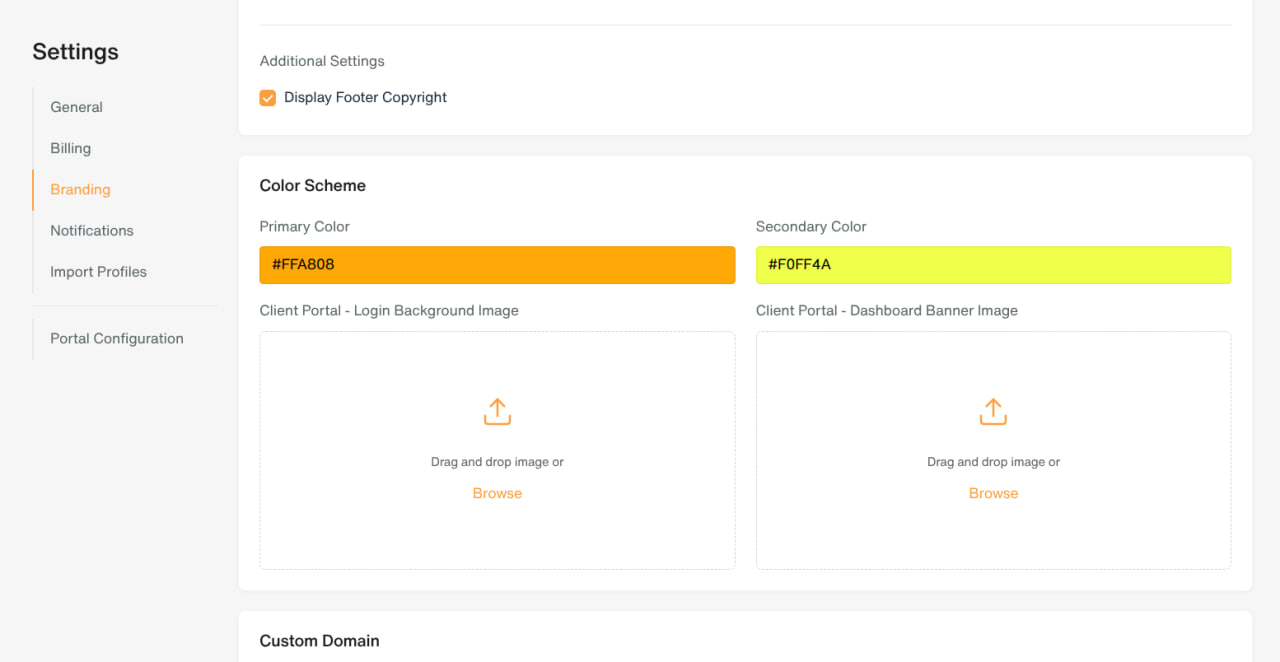
Color Scheme
-
Primary Color / Secondary Color — click the swatch to open a color picker; closing the picker saves the color immediately.
-
Client Portal – Login Background Image — drag-and-drop upload, with Reset.
-
Client Portal – Dashboard Banner Image — drag-and-drop upload, with Reset. All save immediately on change.
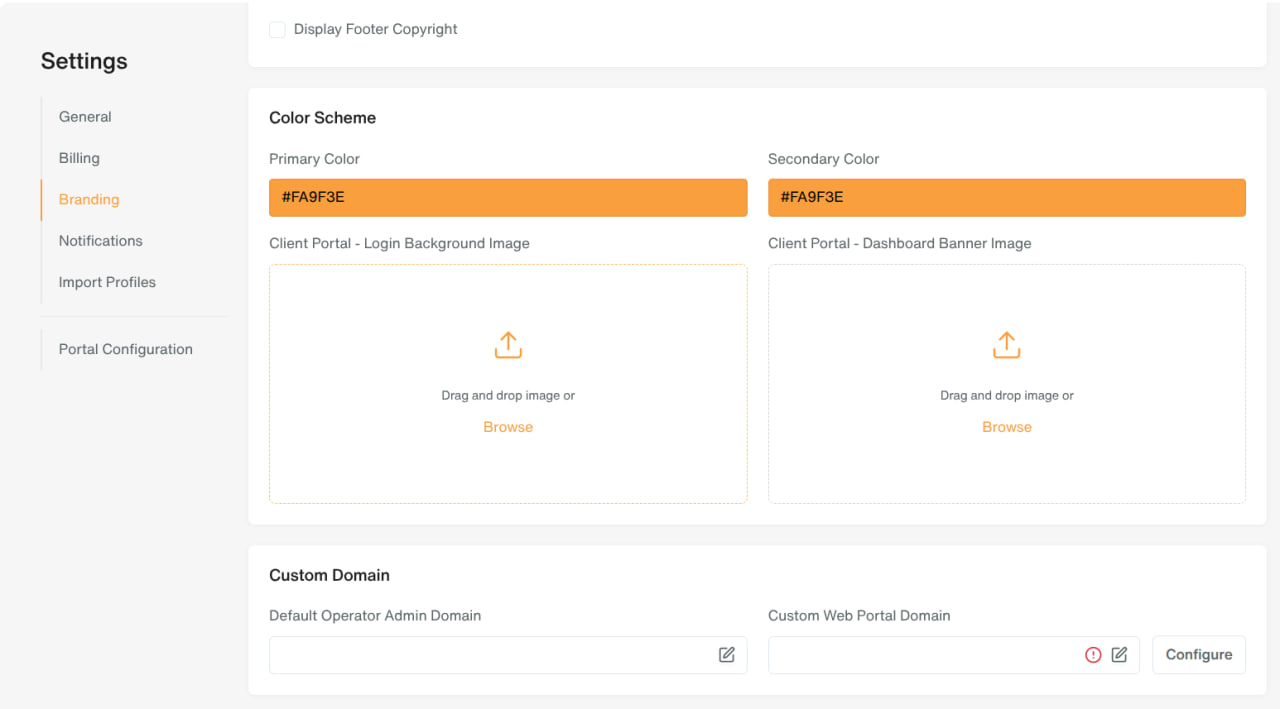
Custom Domain
-
Default Operator Admin Domain — inline-editable (pencil → confirm/cancel). Checks availability before saving; shows an error if the name is already taken.
-
Custom Web Portal Domain — inline-editable the same way. Shows a verification badge: green check = "Domain Verified", red/orange alert = "Domain not verified".
-
Configure button (next to Custom Domain) opens a popup with:
-
The CNAME record name and target value to add at your domain registrar (each with a copy-to-clipboard button)
-
A reminder to enable your domain's "Proxy Status" setting for it to work
-
Verify button to check the setup, or Cancel
4. Notifications
Manage automated email notifications sent to admins, clients, and portal users.
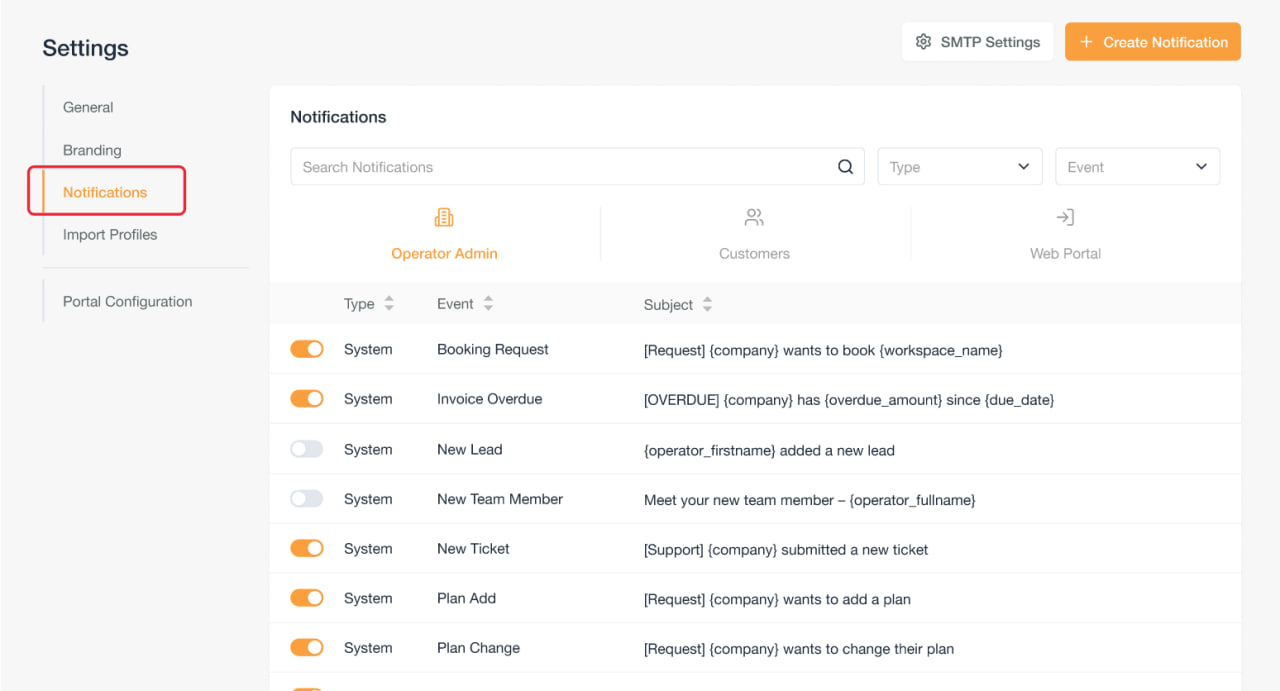
Viewing the list
-
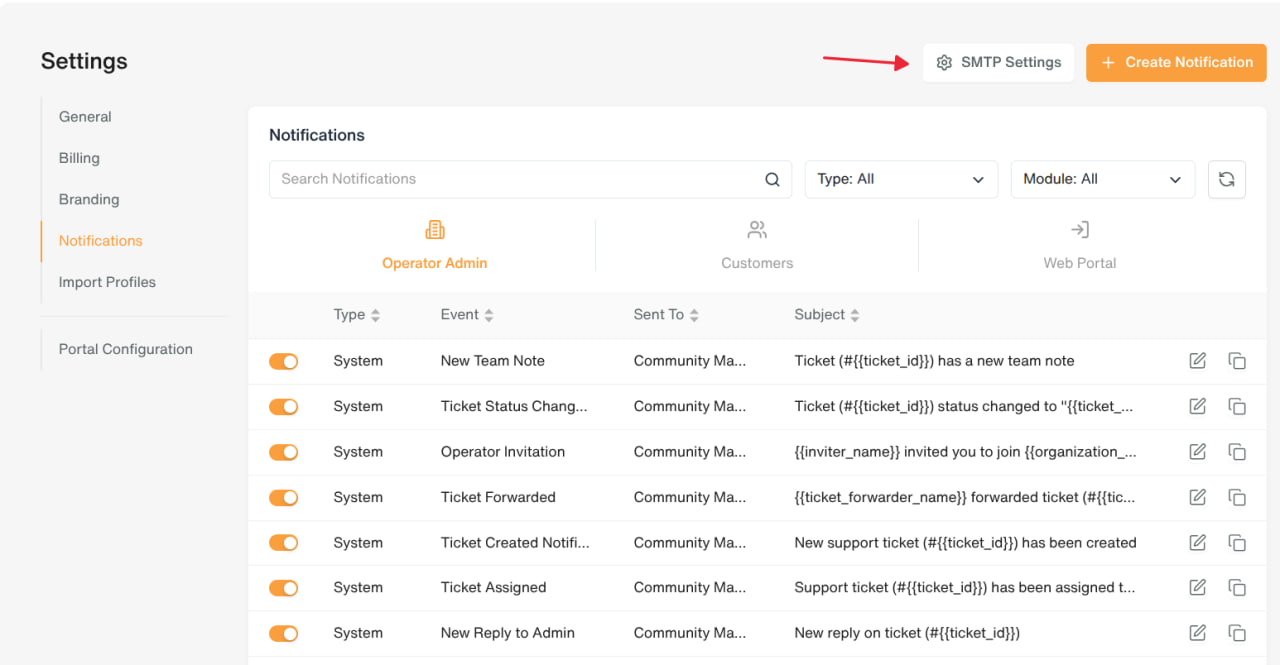
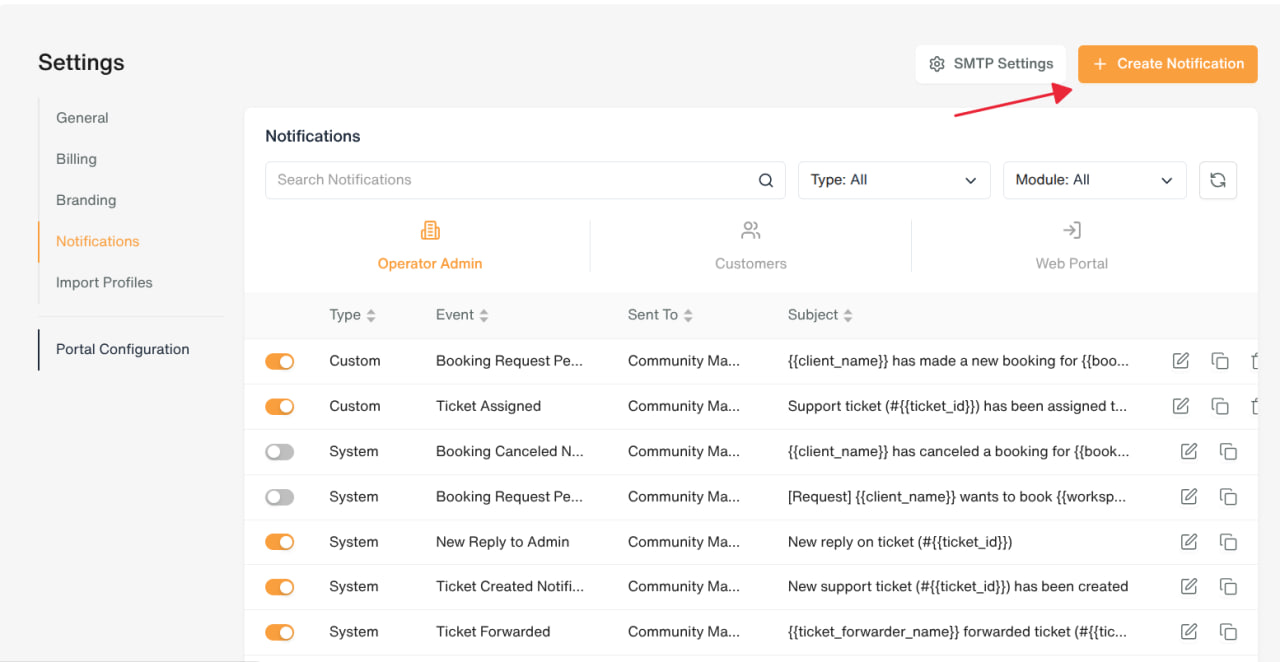
Buttons: SMTP Settings (configure your own outgoing mail server) and Create Notification
-
Category filter tabs: Operator Admin, Customers, Web Portal
-
Filters: search, Type (System / Custom), Module (dynamic list, e.g. Bookings, Tickets, Leads)
-
Columns: Active/Inactive toggle switch, Type (System/Custom), Event name, Sent To (Member / Owner / Community Manager / Custom Email), Subject
-
Row actions: Edit, Copy (duplicate as a new template), Delete (only available on Custom notifications — System/default ones can't be deleted)
SMTP Settings
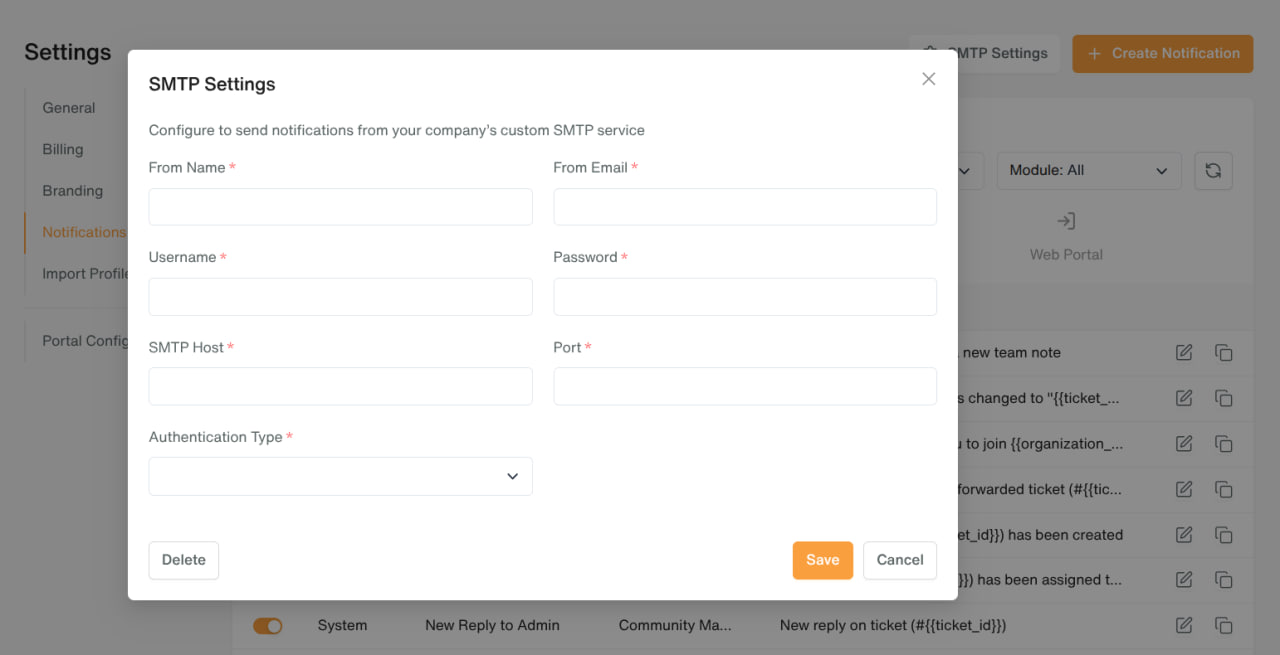
Popup to connect your own outgoing mail server:
-
From Name*, From Email*, Username*, Password*, SMTP Host*, Port*, Authentication Type* (SSL or TLS)
-
Save, Delete (remove the configured SMTP server), or Cancel
Creating / Editing a Notification
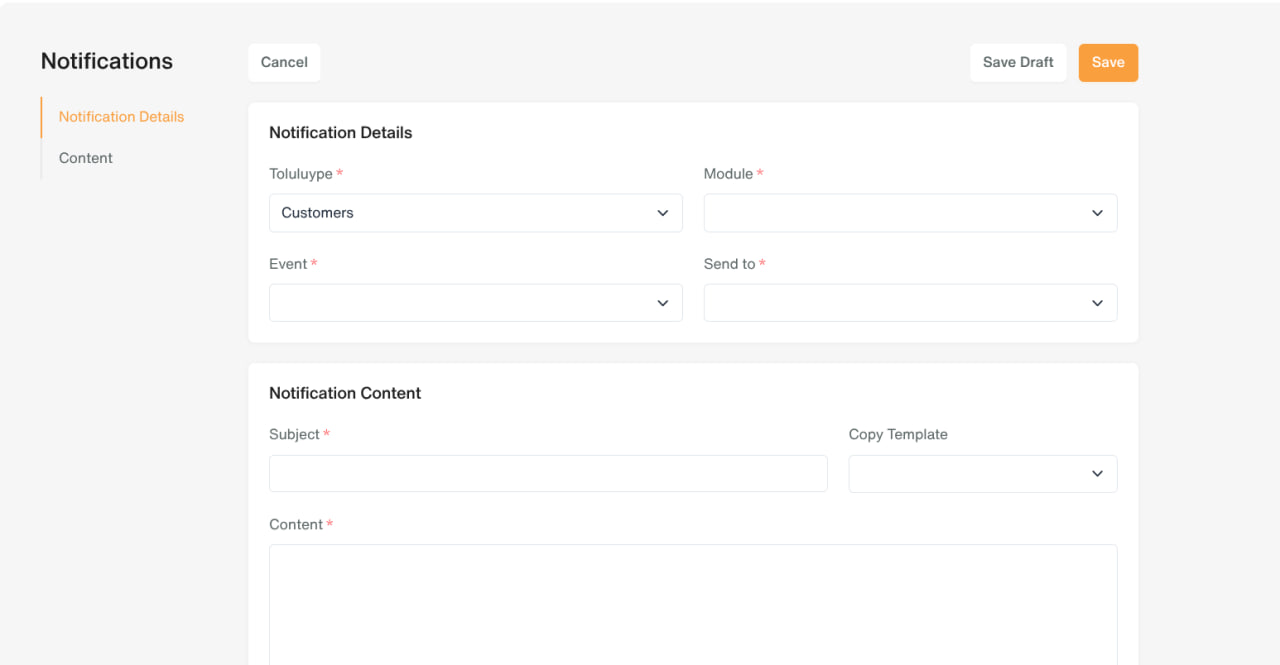
Opens a page with two sections:
Notification Details
-
Type* — Web Portal, Operator Admin, or Customers
-
Module* — dropdown, options depend on the Type chosen
-
Event* — dropdown, options depend on the Module chosen
-
Send To* — depends on Type (Web Portal → Member; Customers → Owner; Operator Admin → Community Manager or Custom Email)
-
Custom Email(s) — only shown if Send To = Custom Email; add one or more email addresses
Notification Content
-
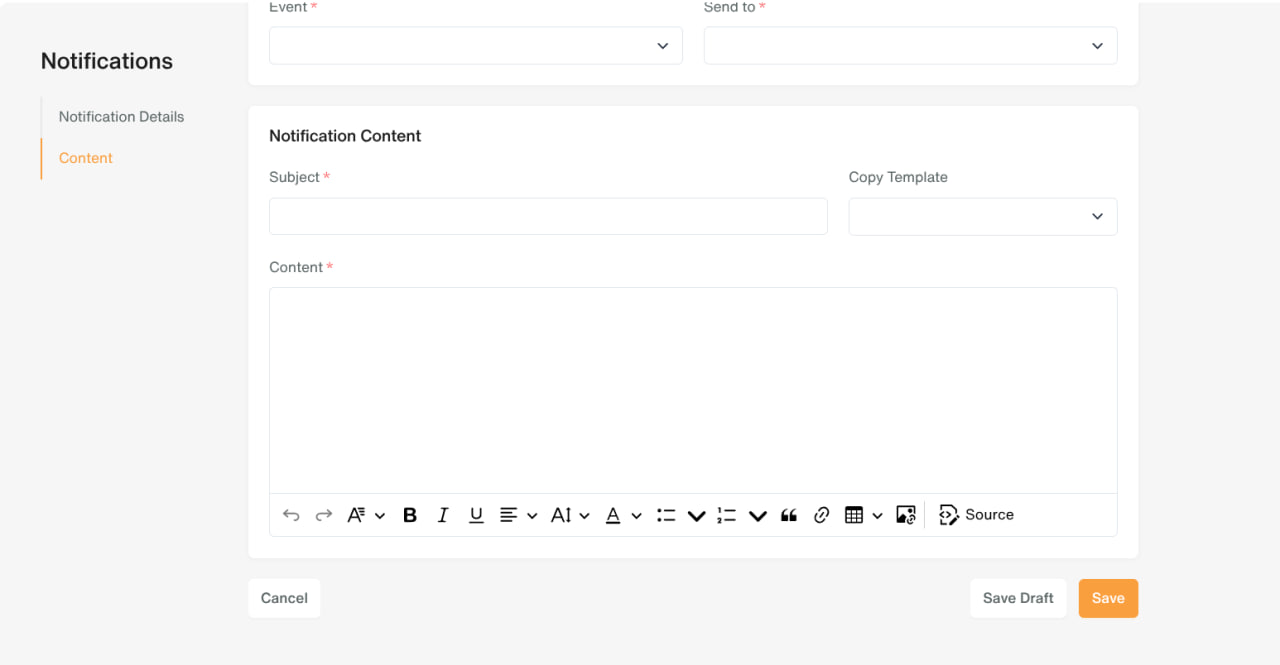
Subject*
-
Copy Template — pick an existing template to pre-fill the subject and content
-
Content* — rich text editor for the email body; click any of the listed merge tags (e.g. client name, booking date) to insert them into the text at the cursor
Buttons: Save Draft, Save, Cancel.
5. Import Profiles
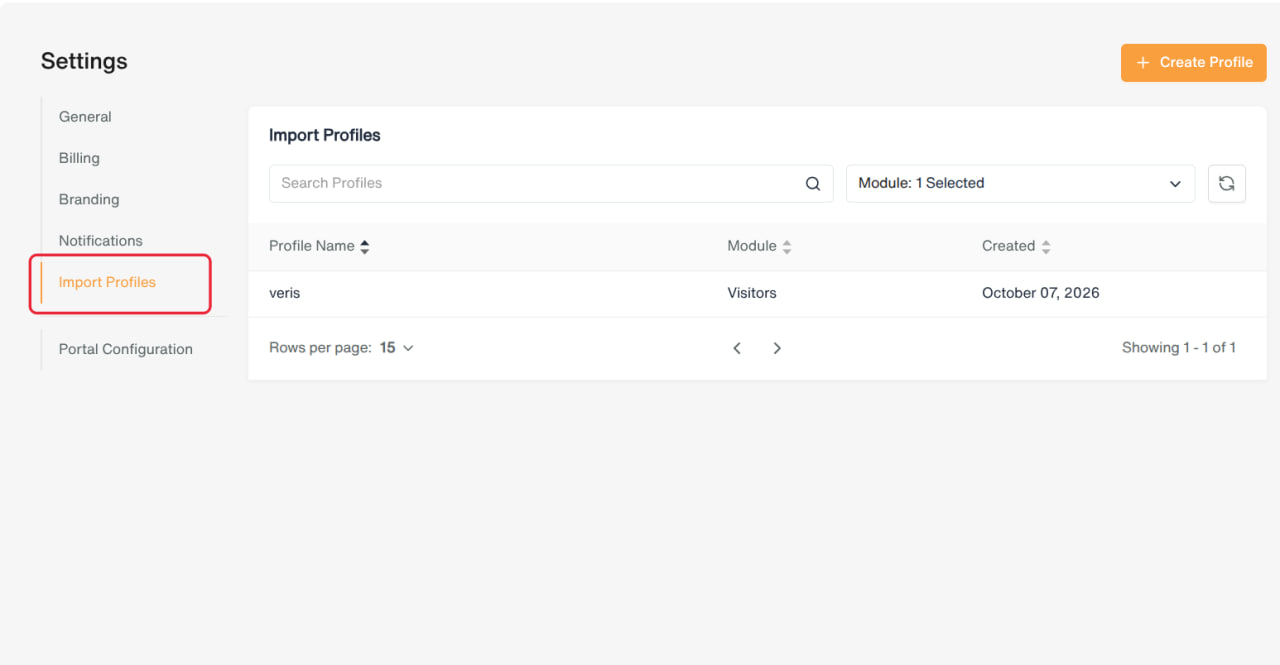
An Import Profile is a reusable mapping preset that tells the system how to match column names from your import file (e.g. a CSV) to the system's own fields — so you don't have to remap columns every time you bulk-import the same type of data.
Currently only the Visitors module is supported for creating profiles, even though Leads and Tickets appear as filter options.
Viewing the list
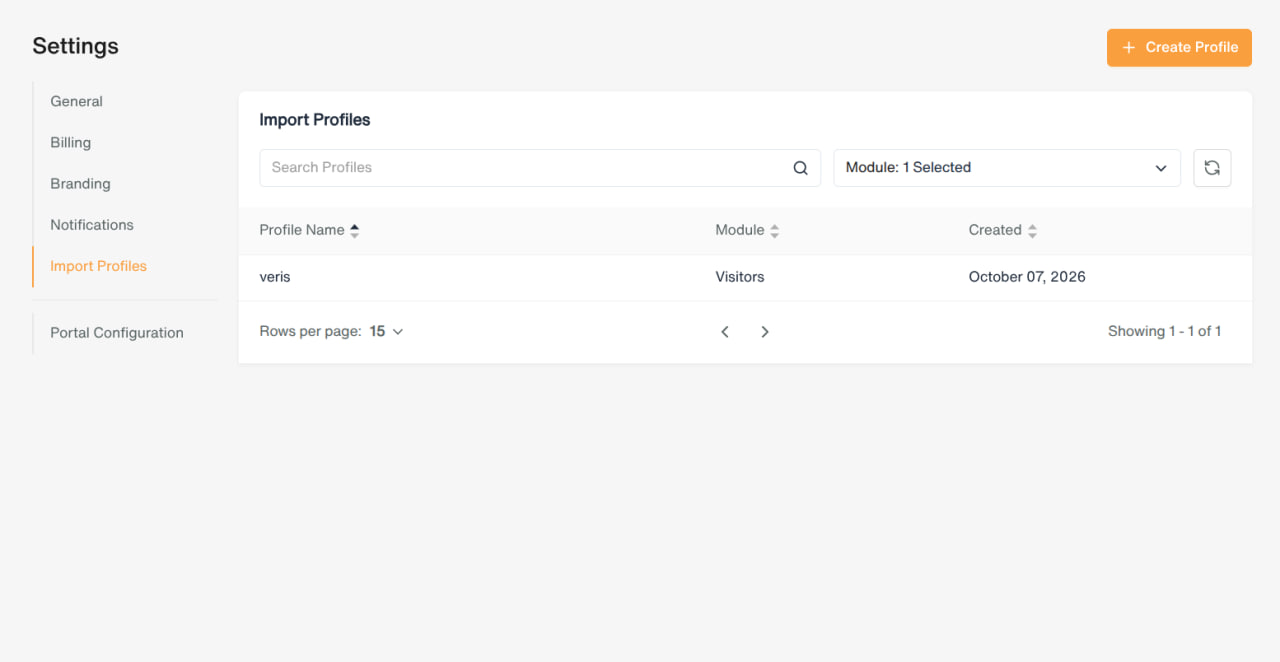
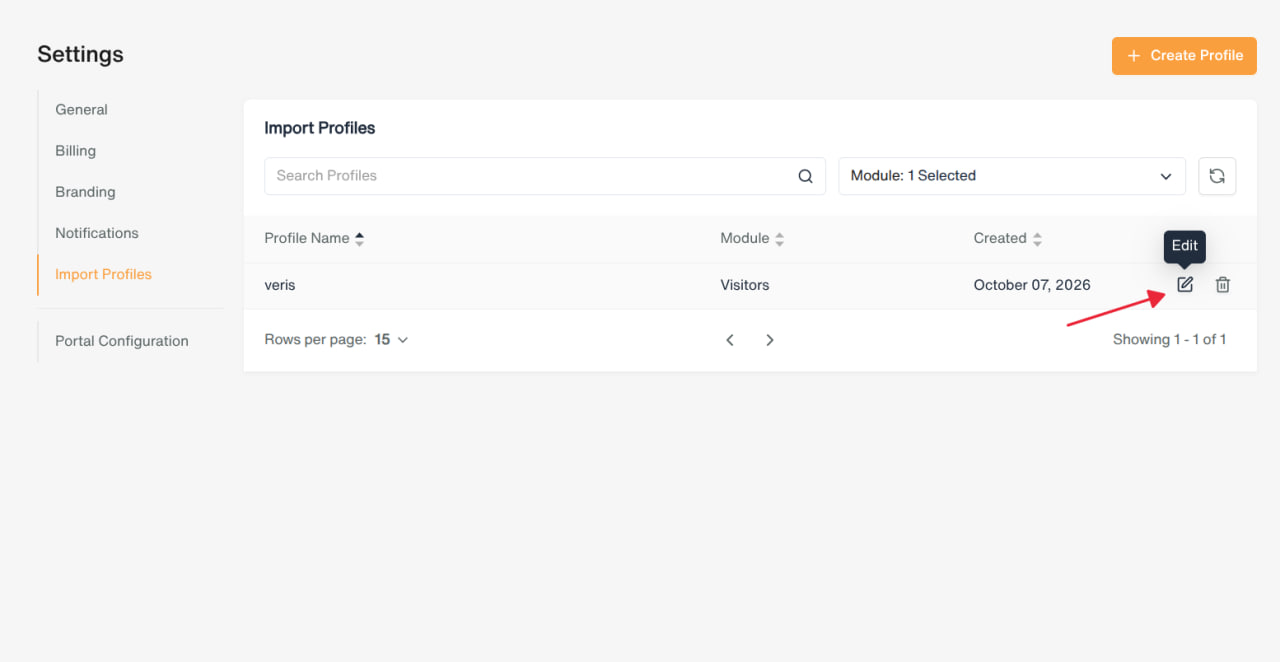
-
Search box, Module filter (Leads/Tickets/Visitors — defaults to Visitors)
-
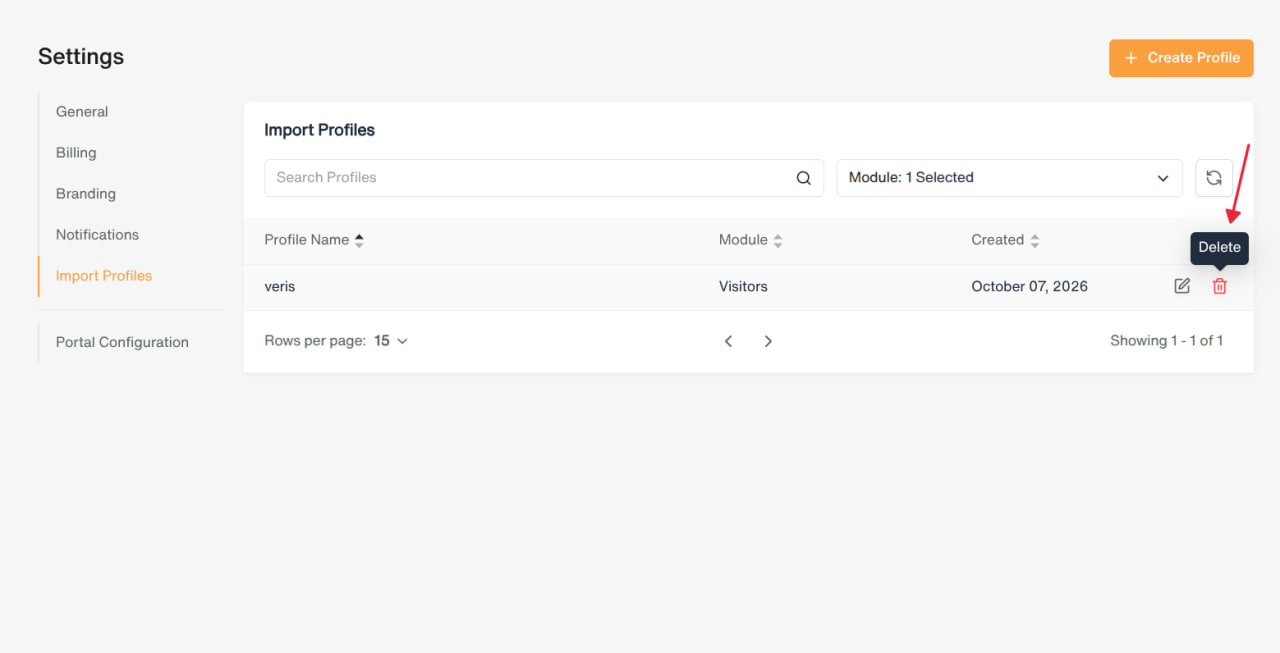
Columns: Profile Name, Module, Created date
-
Row actions: Edit, Delete
Creating / Editing a Profile
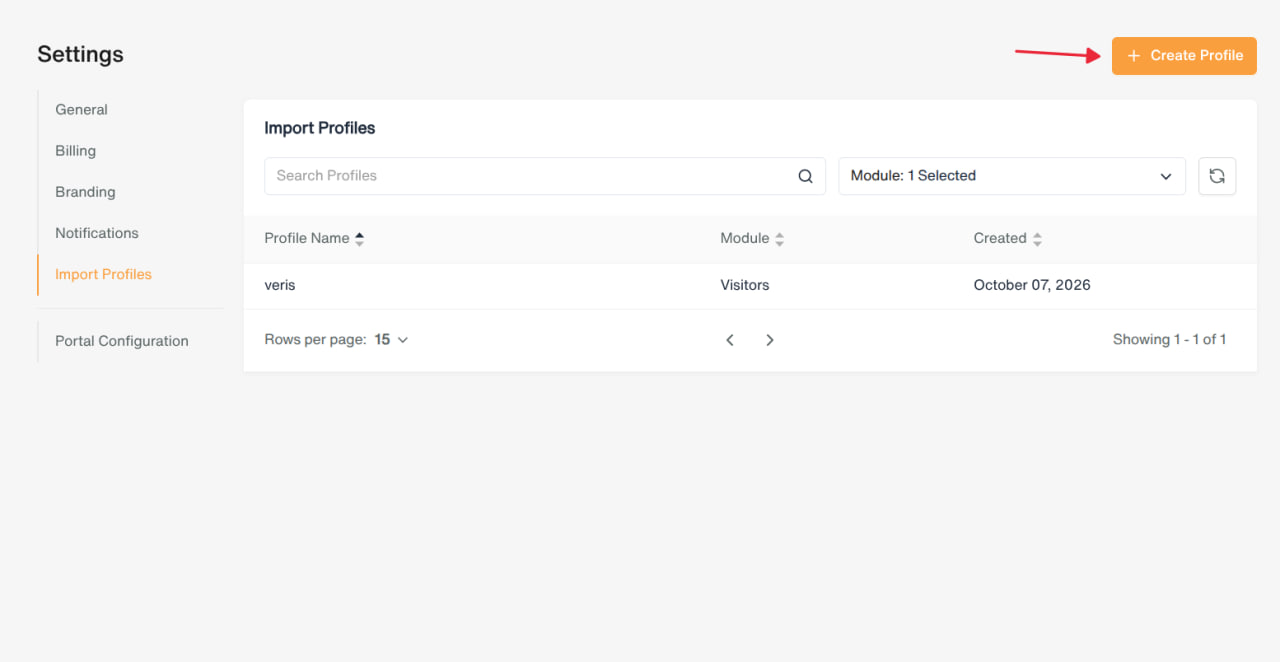
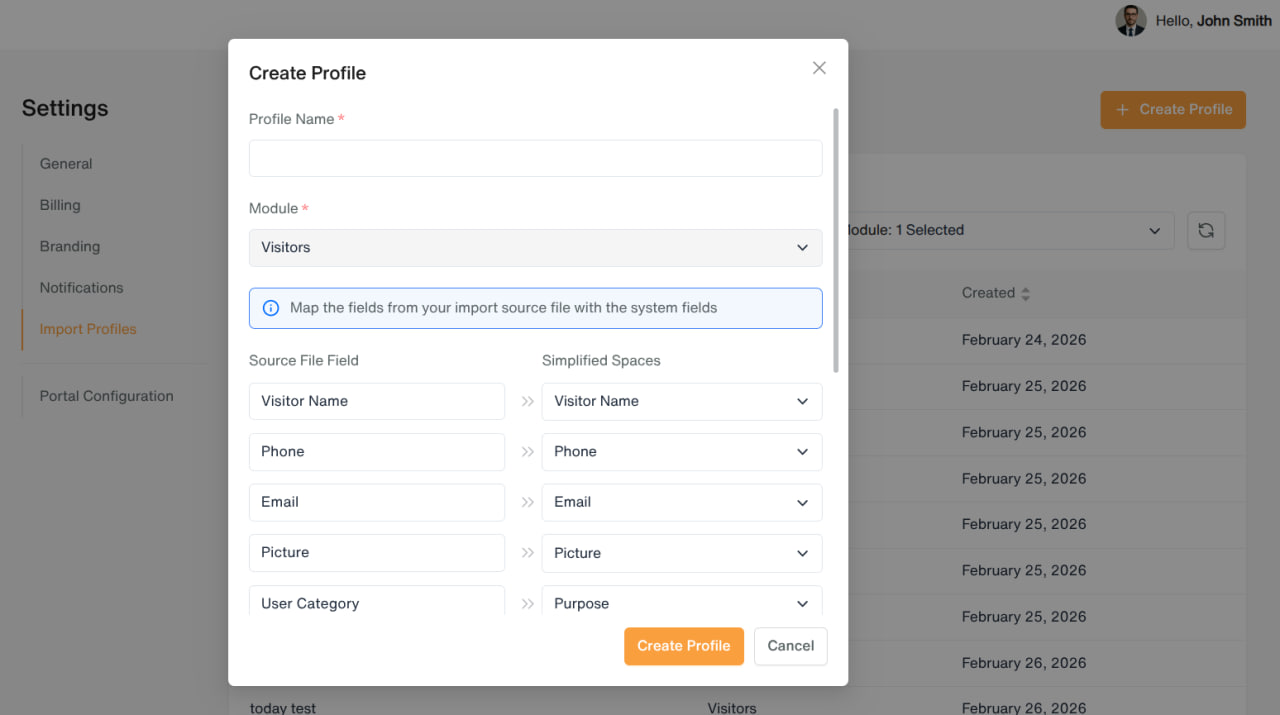
-
Click Create Profile.
-
Enter a Profile Name*.
-
Module is set to Visitors (locked).
-
A mapping table appears with two columns: Source File Field (the column name from your import file — editable) and Simplified Spaces (pick the matching system field from a dropdown) for each field.
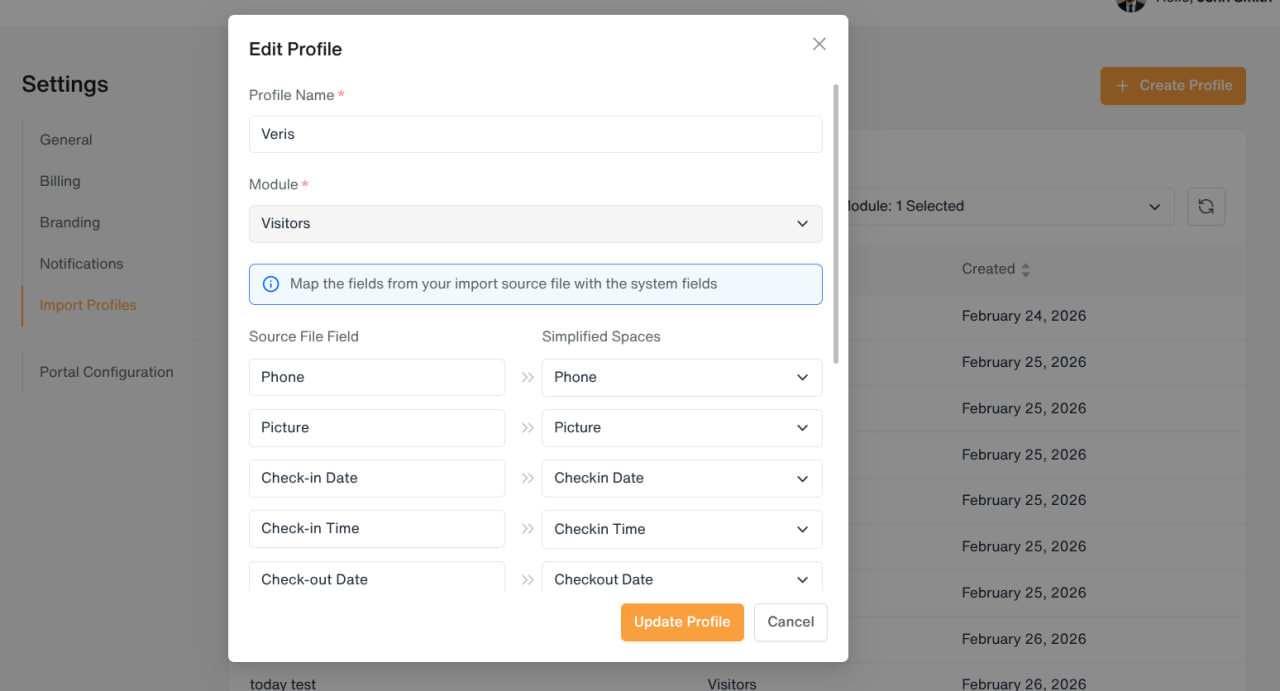
- Click Create Profile / Update Profile to save.
6. Portal Configuration
Controls login behavior and which self-service features are available to clients in their own portal.
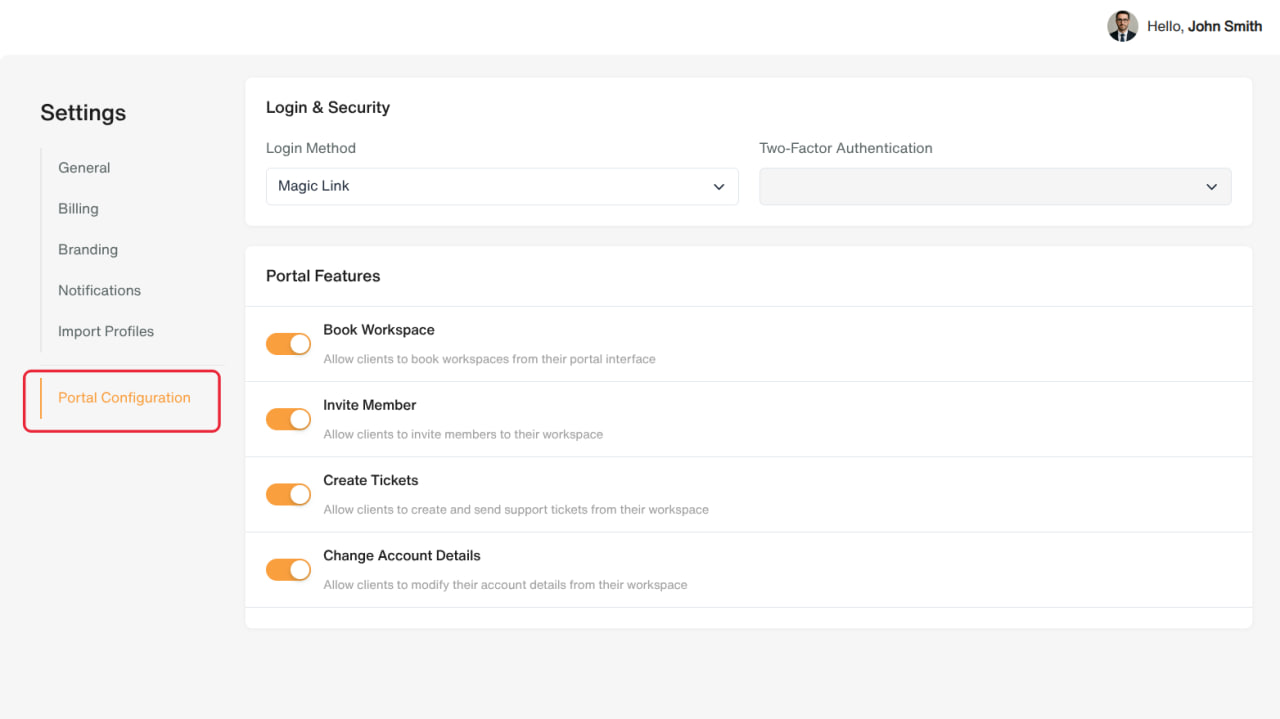
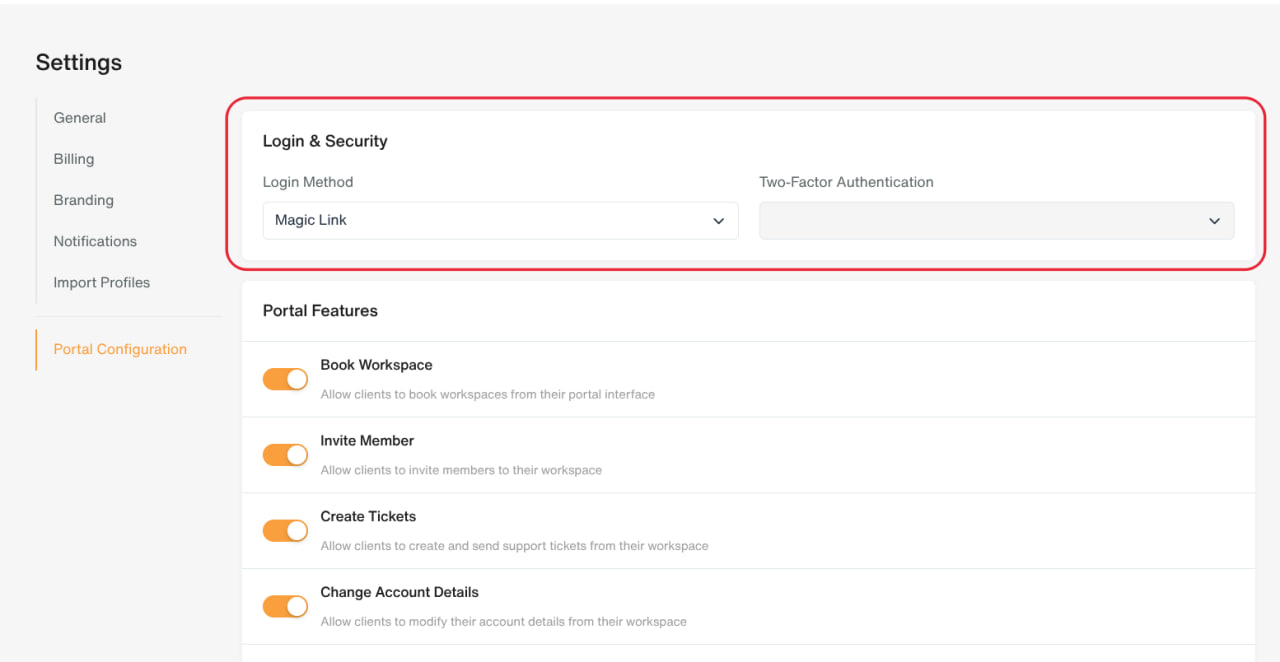
Login & Security
-
Login Method — Email & OTP, Email & Password, or Magic Link
-
Two-Factor Authentication — shown but not yet selectable (coming soon)
Portal Features
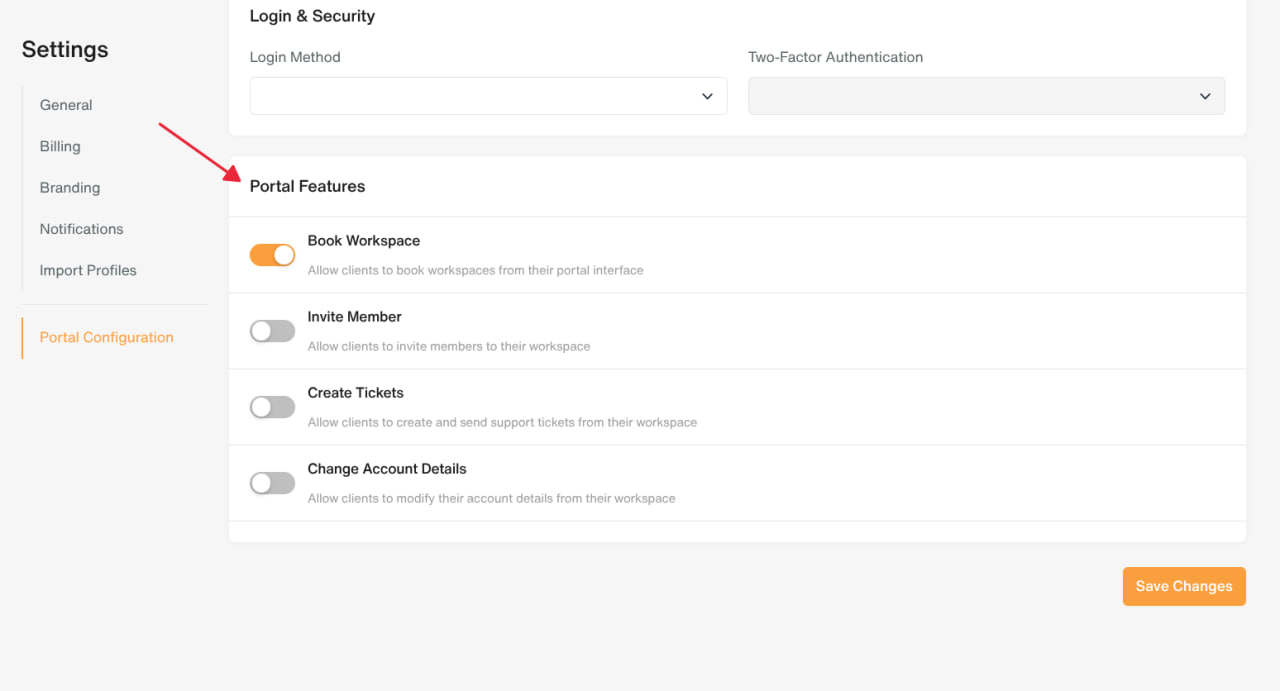
Each is an on/off toggle for what clients can do in their own portal:
-
Book Workspace — allow clients to book workspaces themselves
-
Invite Member — allow clients to invite their own team members
-
Create Tickets — allow clients to raise support tickets
-
Change Account Details — allow clients to edit their own account info
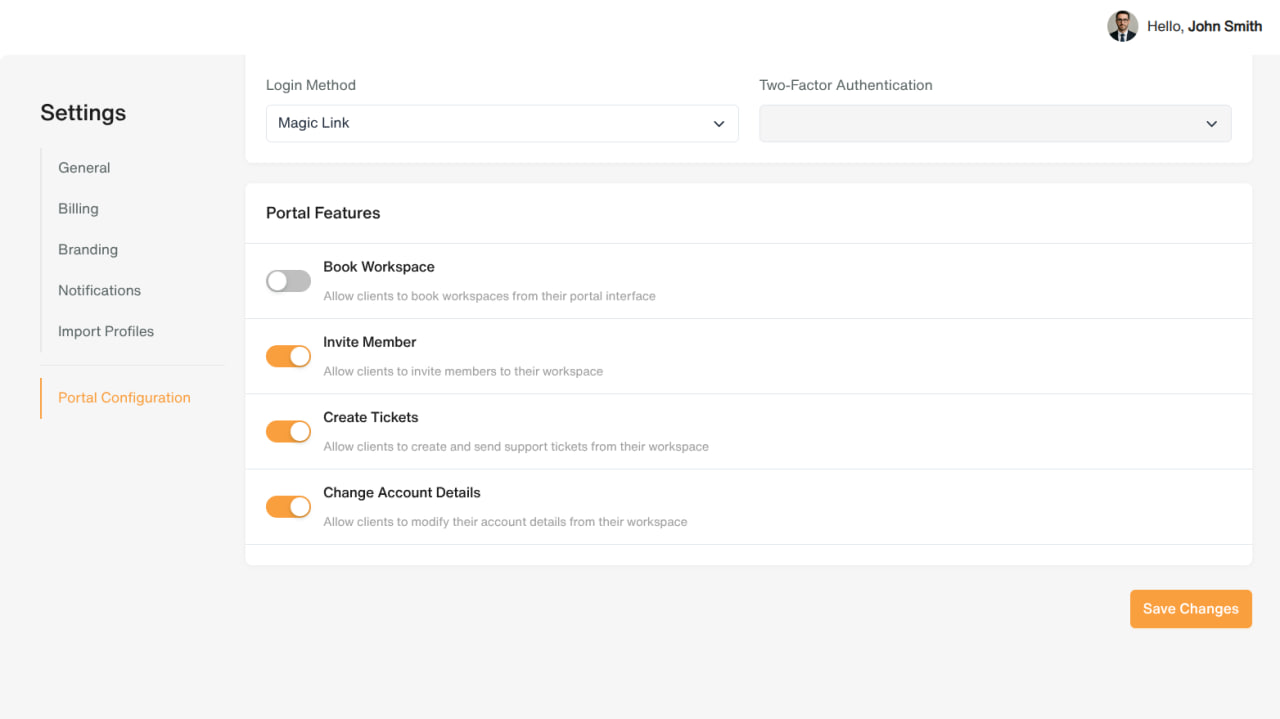
Click Save Changes to apply.
General Notes
-
Most Settings pages only show Save Changes after you've made an edit; Branding is the exception — it mostly auto-saves per field.
-
These settings apply organization-wide, not per location.
-
What a specific admin can see or change here may still be limited by their assigned role/permissions.